17 Cleaning Shower Grout Tips for Mold and Stains Fast
Shower grout is a magnet for mold and stains, but you don't need harsh chemicals or a pro to fix it. A few pantry staples and the right technique can make those grout lines look new again.
This list covers 17 practical methods that work fast, from simple pastes to deep-cleaning tools. Each tip targets a specific problem, so you can pick what fits your grout and schedule.
Ready to scrub smarter, not harder? Let's get into the details.
1. Start with a Baking Soda Paste
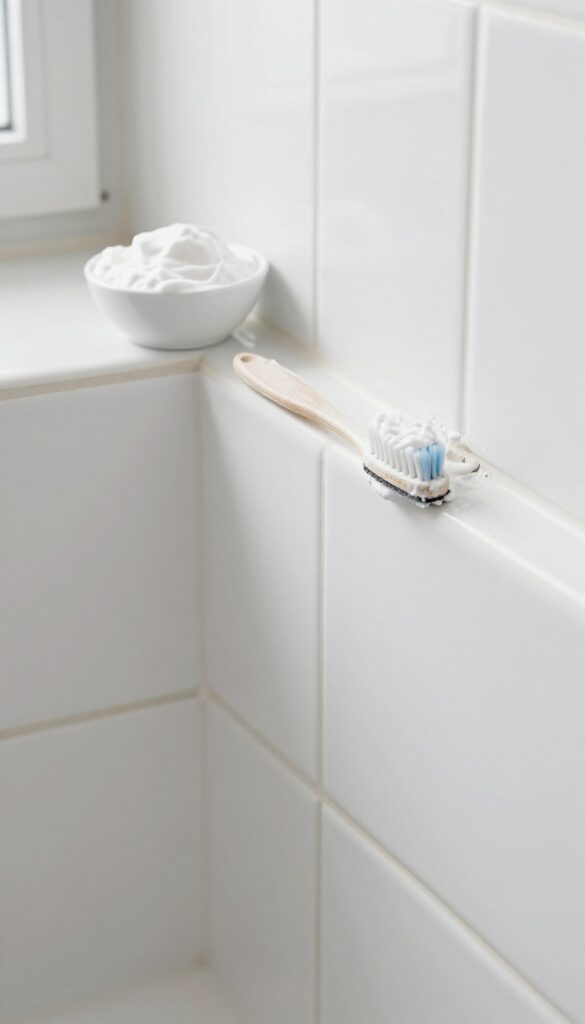
Baking soda is a gentle abrasive that lifts grime without scratching tile. When mixed into a paste, it clings to vertical grout lines and breaks down surface stains. This method is perfect for light discoloration or as a first step before stronger treatments.
Mix three parts baking soda to one part water until it forms a thick, spreadable paste. Use an old toothbrush or a small grout brush to work it into the grout lines. Let it sit for 10 minutes so the baking soda can start loosening the dirt.
Scrub in small circles, then rinse with warm water. For extra cleaning power, add a splash of white vinegar after the paste has sat—just don't let it fizz too long, or you'll lose the scrubbing action. This paste is safe for all tile types and won't release harsh fumes.
Why Baking Soda Works So Well
Baking soda is mildly alkaline, which helps dissolve acidic soils and organic stains. Its fine crystalline structure provides gentle friction that polishes grout without damaging the surface. Unlike bleach-based cleaners, it doesn't weaken grout over time.
How To Apply It Right
Make sure the grout is dry before applying the paste so it sticks. Use a stiff-bristled brush for deeper penetration. Focus on one small section at a time to keep the paste from drying out.
Rinse thoroughly with water to avoid any white residue.
When To Upgrade To A Stronger Mix
If stains remain after scrubbing, try adding a few drops of dish soap to the paste for extra grease-cutting power. For stubborn mold spots, follow up with a diluted hydrogen peroxide spray. Baking soda is a great first line of defense, but it's not a miracle worker for deep-set stains.
2. Use White Vinegar for Mold
White vinegar is a powerhouse when it comes to killing mold on grout. Its acidity breaks down the mold's cell structure and loosens the grime that holds it in place. Best of all, it's cheap, non-toxic, and already sitting in your pantry.
Spray undiluted white vinegar directly onto the moldy grout lines. Let it sit for 30 minutes—don't rush this step. The longer it dwells, the more effectively it kills mold spores and lifts stains.
After the wait, scrub gently with a stiff brush, then rinse thoroughly with warm water. The smell fades quickly once dry.
Why Vinegar Works So Well
Vinegar contains acetic acid, typically around 5%. This acid disrupts the mold's cell membrane and stops it from reproducing. It's also mildly abrasive on a microscopic level, helping to dislodge dirt and soap scum that feed mold.
Unlike bleach, vinegar penetrates porous grout rather than just bleaching the surface.
When To Use It—and When Not To
Vinegar is ideal for ceramic, porcelain, or stone tiles with cement-based grout. Avoid it on natural stone like marble or limestone—the acid can etch the surface. Also, never mix vinegar with bleach or hydrogen peroxide; it creates toxic fumes.
Stick to one cleaner per session.
Pro Tip For Stubborn Mold
For thick mold growth, apply vinegar, cover the area with plastic wrap to keep it moist, and let it sit for an hour. The trapped moisture enhances penetration. Then scrub and rinse.
Repeat weekly to prevent regrowth.
3. Try Hydrogen Peroxide for Stubborn Stains
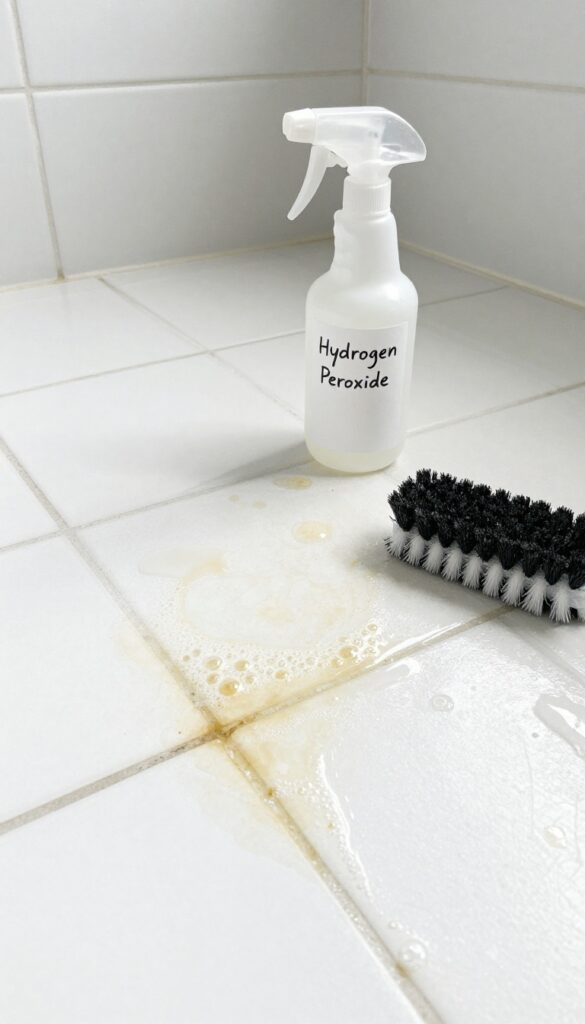
Sometimes grout stains just won't budge, no matter how much you scrub. That's when hydrogen peroxide steps in as a gentle but effective whitener. It's a natural alternative to bleach that kills mold and lifts discoloration without the strong fumes.
Why Hydrogen Peroxide Works
Hydrogen peroxide is a mild antiseptic that breaks down into water and oxygen. When applied to grout, it releases oxygen bubbles that help lift dirt and kill mold spores. The 3% solution you find at the drugstore is strong enough for cleaning but safe for most tile surfaces.
How To Apply It
Pour a small amount of 3% hydrogen peroxide directly onto the stained grout lines. Let it sit for about 15 minutes—you'll see it start to fizz as it works. After the wait, scrub with a stiff brush (an old toothbrush works great) and rinse with water.
For extra whitening, mix hydrogen peroxide with baking soda into a paste and apply it the same way.
When To Use This Method
Hydrogen peroxide is ideal for light-colored grout that has yellowed or developed dark spots. It's also a good choice if you prefer avoiding bleach fumes or have a sensitive nose. For extremely stubborn stains, you can repeat the process or let it sit longer, but don't exceed 30 minutes to avoid any potential lightening of colored grout.
4. Make a Lemon Juice and Salt Scrub
If your grout is looking dull but not deeply stained, a lemon juice and salt scrub can bring back some brightness. The citric acid in lemon helps dissolve soap scum and mineral deposits, while the salt works as a gentle abrasive. This combo is especially good for light cleaning and freshening up grout between deep scrubs.
This simple scrub is easy to whip up and safe for most tile types. Just mix equal parts lemon juice and salt to form a paste. Apply it to the grout with an old toothbrush or a small scrub brush, let it sit for about 10 minutes, then scrub in circular motions.
Rinse with water and wipe dry. The lemon leaves a fresh scent, and the salt won't scratch glazed tiles. Avoid using this on natural stone grout, as the acid can etch the surface.
Why It Works
Lemon juice contains citric acid, which breaks down alkaline residues like soap scum and hard water stains. Salt provides physical scrubbing power without being too harsh. Together, they create a paste that clings to vertical surfaces, giving the acid time to work.
Best Uses And Precautions
Use this scrub for routine maintenance or on light stains. It's not strong enough for black mold or deep-set grime. Always test on a small hidden area first.
Avoid using on unsealed or porous grout if you plan to seal it afterward, as the acid can interfere with sealant adhesion.
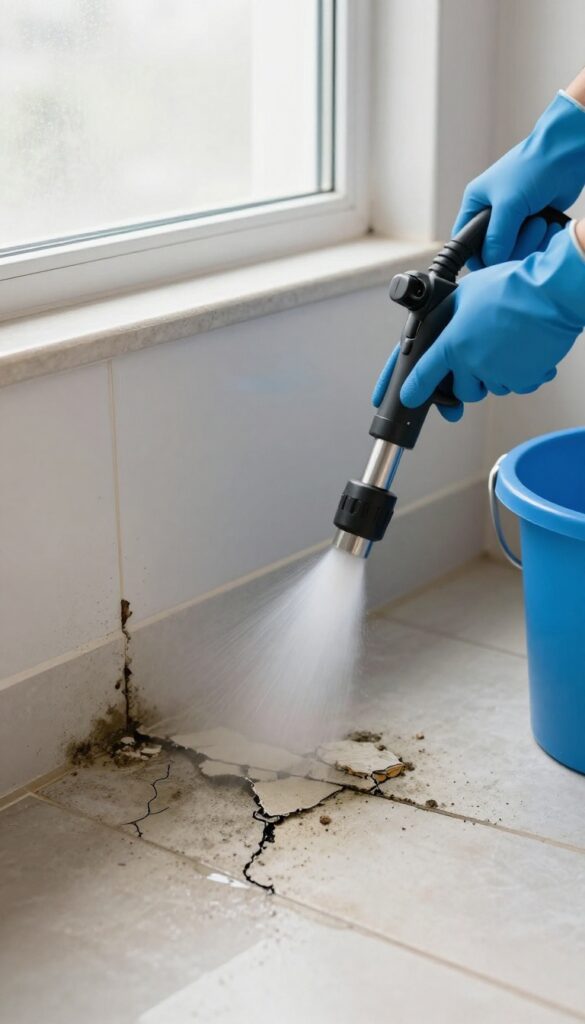
5. Use a Steam Cleaner for Deep Cleaning
When scrubbing by hand isn't cutting it, a steam cleaner can save you time and effort. The high heat penetrates porous grout, loosening dirt and killing mold without any chemicals. It's one of the fastest ways to get deep into those tiny grooves.
Why Steam Works So Well On Grout
Grout is porous, so dirt and mold settle deep inside. Steam's high temperature—usually over 200°F—breaks down grime and kills mold spores on contact. The pressure also blasts out debris that scrubbing alone can't reach.
Choosing The Right Steam Cleaner
A handheld steam cleaner with a brush attachment is ideal for shower grout. Look for one that heats up quickly and has a small nozzle for precision. Avoid large floor steam mops—they're too bulky for grout lines.
How To Steam Clean Shower Grout
Start by wiping away loose dirt. Then, fill the steamer with water, attach the brush, and run it along the grout lines. Move slowly so the steam has time to penetrate.
Afterward, wipe away the loosened grime with a cloth.
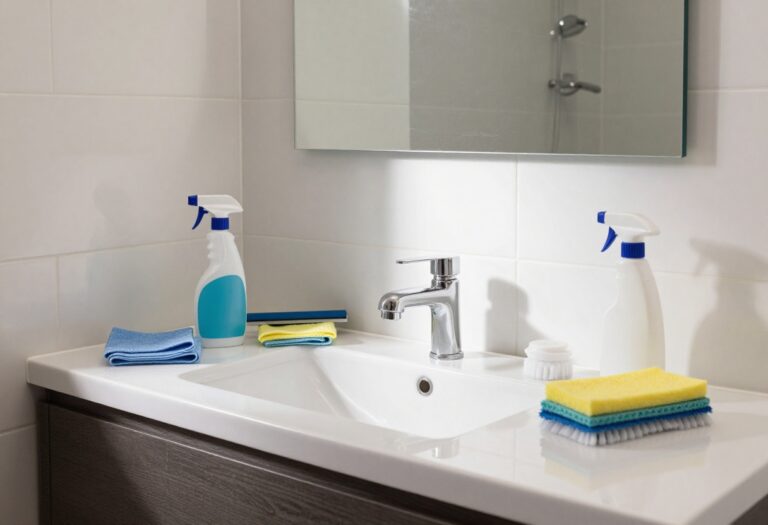
6. Apply a Commercial Grout Cleaner
When DIY mixes aren't cutting it, a dedicated commercial grout cleaner can be a game-changer. These products are formulated to tackle tough mold and deep-set stains that household ingredients might leave behind. They come in gels, sprays, or foams, each designed to cling to vertical surfaces and penetrate porous grout.
Commercial grout cleaners are powerful, so always follow the label instructions. Most require you to spray or apply the product, let it sit for a few minutes to break down grime, then scrub with a stiff brush. Rinse thoroughly afterward to avoid residue that can attract more dirt.
For heavy mold, look for a cleaner with bleach or oxygen bleach. Always test in an inconspicuous spot first, especially on colored grout.
Choosing The Right Product
Not all grout cleaners are the same. Gels and thick foams work best on vertical shower walls because they won't drip off. Sprays are convenient for quick touch-ups but may require more scrubbing.
Check the label for mold-specific claims and ensure it's safe for your tile type—some acidic cleaners can damage natural stone.
Application Tips For Best Results
For maximum effectiveness, apply the cleaner to dry grout and let it dwell for the recommended time—usually 5 to 15 minutes. Use a grout brush or an old toothbrush to work the product into the lines. If stains persist, a second application may help.
Always ventilate the bathroom and wear gloves to protect your skin.
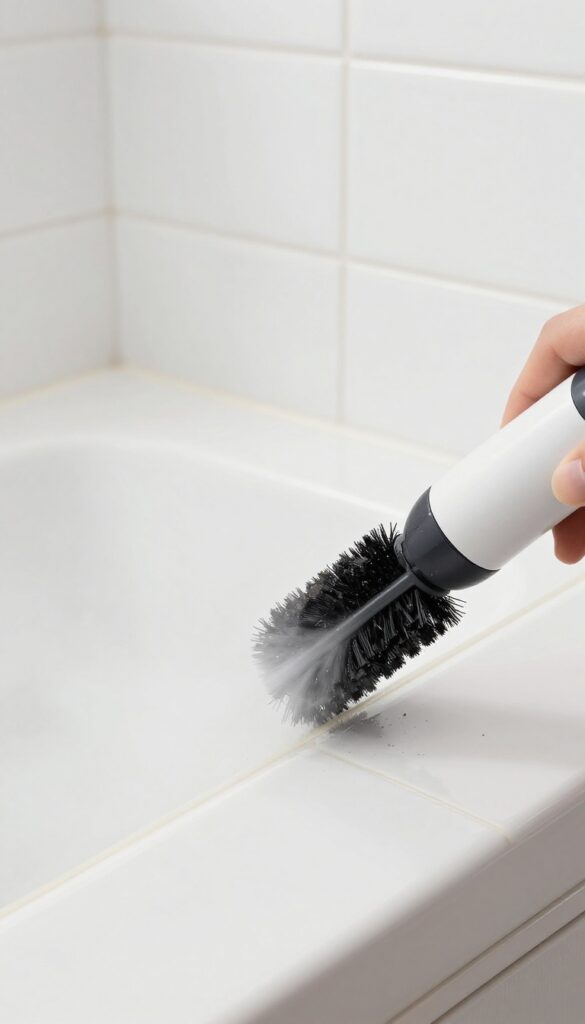
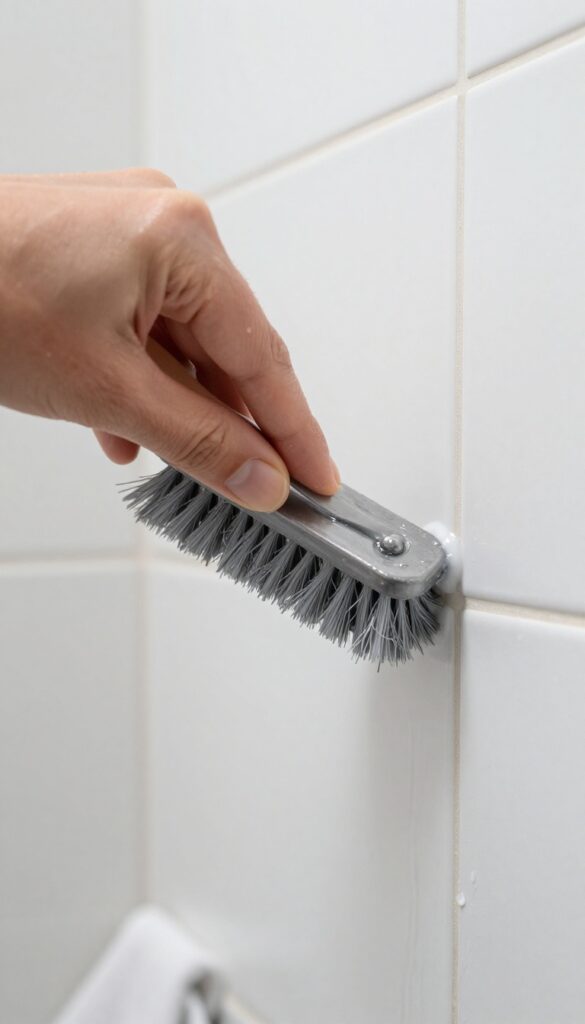
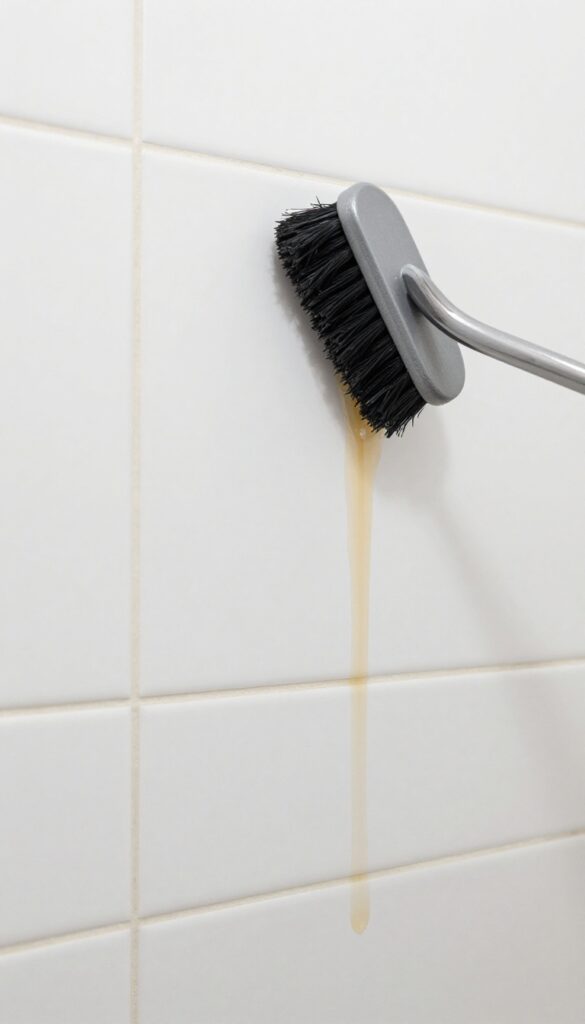
7. Scrub with a Grout Brush or Old Toothbrush
A stiff-bristled brush is your best friend for cleaning grout lines. Unlike sponges that just smear dirt around, a grout brush or an old toothbrush gets deep into the narrow grooves. The key is using circular motions to loosen grime without damaging the grout itself.
Start by wetting the grout lines with warm water or a cleaning solution. Dip your brush into the cleaner—whether it's a DIY mix or a commercial product—and scrub in small circles. Focus on one section at a time, working the bristles into every crack.
Rinse with water and wipe away the loosened dirt with a damp cloth. For tough spots, let the cleaner sit for a few minutes before scrubbing again. This method is gentle enough for daily use but effective enough to tackle months of buildup.
Choose The Right Brush
Not all brushes are created equal. A grout brush has stiff, angled bristles that fit perfectly into grout lines. If you don't have one, an old toothbrush works just as well—just make sure it's firm, not soft.
Avoid wire brushes or anything abrasive that could scratch tile or erode grout.
Use The Right Technique
Scrub in small, circular motions rather than back and forth. This helps dislodge dirt from all sides of the groove. Apply steady pressure but don't bear down too hard—let the bristles do the work.
Rinse frequently to see your progress and avoid redepositing grime.
Pair With A Cleaning Solution
A brush alone can remove surface dirt, but pairing it with a cleaner makes a huge difference. Baking soda paste, vinegar solution, or a dedicated grout cleaner all work well. Apply the solution first, let it sit for a few minutes, then scrub.
The combination of chemical action and mechanical scrubbing is hard to beat.
8. Try a Magic Eraser for Quick Touch-Ups
Sometimes you just need a fast fix for a small spot. A melamine foam eraser—often sold as a Magic Eraser—can handle surface stains on grout without any extra chemicals. It's a great option when you don't want to mix a paste or break out the heavy-duty tools.
Dampen the eraser and gently rub the stained grout. The foam acts like fine sandpaper, lifting dirt and mild mold from the surface. It works best on light to moderate stains and is perfect for spot cleaning between deeper cleans.
Just be careful not to scrub too hard, as it can wear down the grout over time.
How To Use It Right
Cut the eraser into smaller pieces to make it last longer. Wet it slightly—don't soak it—and squeeze out excess water. Rub the stained area with light pressure, using short back-and-forth motions.
Rinse the eraser frequently to avoid spreading dirt.
When To Skip This Method
Avoid using a Magic Eraser on unsealed or very old grout, as it can be too abrasive. If your grout is crumbling or has deep cracks, stick to gentler methods. Also, test on a hidden spot first to make sure it doesn't dull the finish.
9. Use Bleach for White Grout Only
Bleach is a powerful weapon against mold and stains, but it comes with a major warning: it's only safe for white grout. Colored grout will fade or discolor if you apply bleach, so always test a hidden spot first. When used correctly, bleach can whiten and sanitize grout lines quickly.
Bleach is a go-to for many homeowners, but it's not a one-size-fits-all solution. For white grout, it's effective at killing mold and removing deep stains. However, it can damage colored grout or even cause it to turn yellow or orange.
Always dilute bleach with water (1: 3 ratio) and apply carefully with a small brush. Work in a well-ventilated area and avoid mixing with other cleaners. Rinse thoroughly after a few minutes to prevent residue.
Why Bleach Works On White Grout
Bleach contains sodium hypochlorite, which breaks down mold spores and organic stains. It's a strong oxidizer that can lighten even stubborn discoloration. For white grout, this means a brighter, cleaner look without the risk of color fading.
How To Apply Bleach Safely
Mix one part bleach with three parts water in a spray bottle or bowl. Dip a small brush (like an old toothbrush) into the solution and scrub the grout lines gently. Let it sit for 5–10 minutes, but don't let it dry completely.
Rinse with warm water and wipe away any residue. Wear gloves and open a window for ventilation.
Testing For Colored Grout
If you're unsure whether your grout is dyed, test an inconspicuous area first. Apply a small amount of diluted bleach and wait 10 minutes. If the color changes or fades, do not use bleach.
Instead, opt for a gentler cleaner like hydrogen peroxide or a baking soda paste.
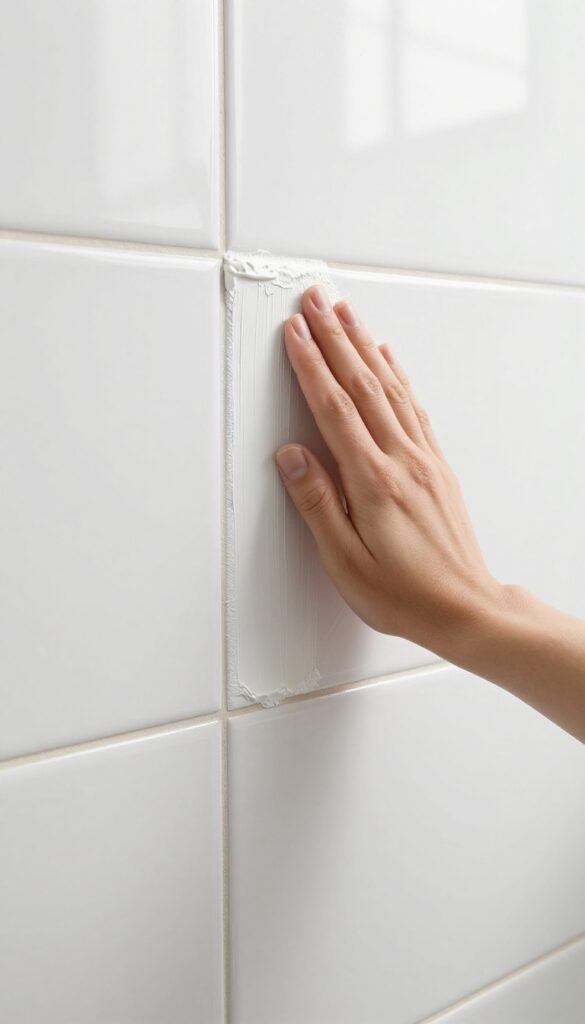
10. Seal Grout After Cleaning
You've scrubbed, rinsed, and dried your grout until it looks like new. Don't let that hard work go to waste. Sealing your grout locks in that clean look and makes future maintenance a breeze.
A good sealer won't just protect against new stains and mold—it'll also make your next cleaning session much faster. Here's how to do it right.
Choose The Right Sealer
Not all sealers are created equal. For shower grout, you want a penetrating sealer that soaks into the porous material. Avoid film-forming sealers that can peel or yellow over time.
Look for one labeled "penetrating" or "impregnating. "
Apply Evenly
Use a small brush or a foam applicator to work the sealer into the grout lines. Wipe away any excess from the tile surface immediately with a clean cloth. Let it cure for the time recommended on the bottle—usually 24 to 48 hours.
Reapply As Needed
Sealer isn't permanent. Check your grout every six months by sprinkling a few drops of water on it. If the water beads up, the seal is still good.
If it soaks in, it's time to reseal.
11. Prevent Mold with Daily Ventilation
Mold thrives in damp, stagnant air. After a hot shower, your bathroom becomes a perfect breeding ground. The simplest way to stop mold before it starts is to remove that moisture fast.
You don't need a fancy system—just the fan you already have. A few small habits can make a huge difference in keeping your grout dry and mold-free.
Ventilation is your first line of defense against mold on grout. By reducing humidity, you starve mold of the moisture it needs to grow. It's an easy, no-scrub solution that works 24/7.
Run The Fan During And After Showers
Turn on the exhaust fan before you step in. Leave it running for at least 20 minutes after you're done. This pulls out steam and moisture that would otherwise settle on grout and walls.
Keep The Bathroom Door Open
After showering, prop the door open to let air circulate. If your bathroom has a window, crack it open too. Cross-ventilation speeds up drying and discourages mold spores from taking hold.
Wipe Down Wet Surfaces
Use a squeegee or a microfiber cloth on tiles and grout after each shower. It takes seconds but removes the water film where mold likes to grow. Focus on corners and grout lines.
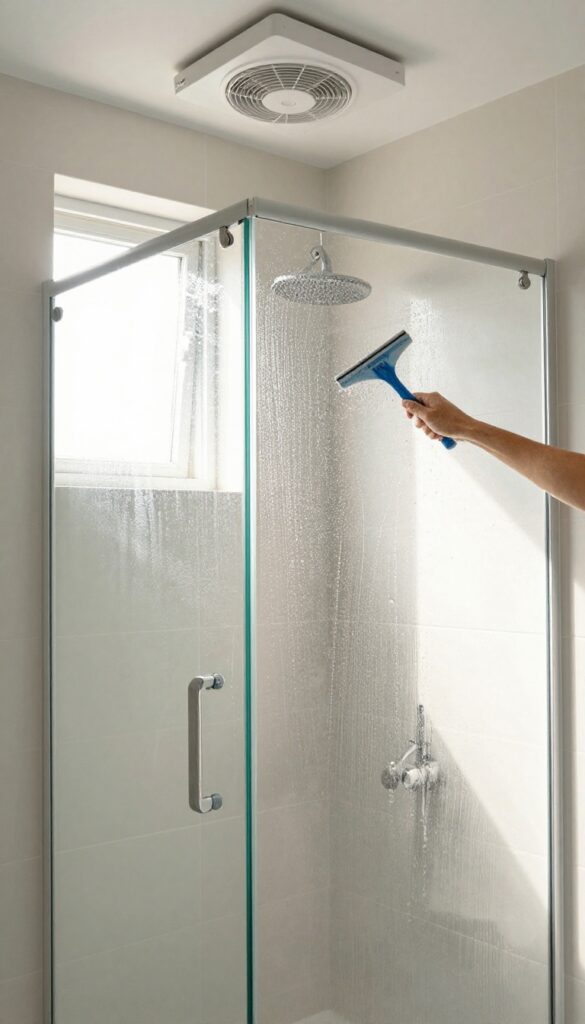
12. Wipe Down Grout After Each Shower
The easiest way to keep grout clean is to stop dirt and moisture from settling in the first place. A quick post-shower wipe-down takes less than a minute but can dramatically reduce mold and soap scum buildup. It's a simple habit that pays off big time.
After every shower, grab a squeegee or a microfiber cloth and wipe down the tile and grout. Focus on removing standing water from the grout lines and corners. This prevents mineral deposits, soap residue, and mold spores from taking hold.
For best results, keep a squeegee in the shower and a microfiber cloth nearby. Make it part of your routine, and you'll notice less scrubbing needed over time.
Why It Works
Mold and mildew need moisture to grow. By removing excess water immediately, you break the cycle before it starts. Soap scum also needs water to harden and stick.
A quick wipe keeps grout drier and cleaner between deep cleans.
Best Tools For The Job
A rubber squeegee works great on flat tile but may not reach deep into grout lines. A microfiber cloth is more versatile—it absorbs moisture and can be pressed into crevices. Keep a dedicated cloth in the shower and swap it out weekly.
Quick Routine Tips
Hang the squeegee or cloth where it can air dry to prevent bacterial growth. If you have a glass shower door, squeegee that too to avoid hard water spots. For extra mold prevention, spray a daily shower cleaner after wiping.
13. Use a Toothpaste and Baking Soda Mix
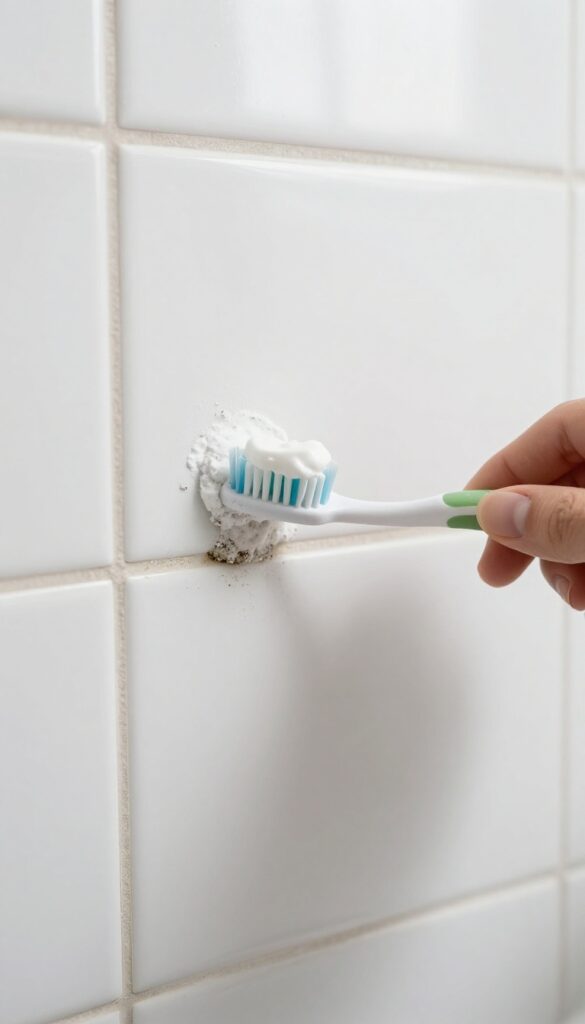
White toothpaste isn't just for your teeth. When you pair it with baking soda, you get a mild abrasive paste that polishes grout without scratching the tile. This trick works great for small, stubborn stains or light mold spots that need a gentle touch.
To use this method, grab a soft-bristled brush (an old toothbrush works perfectly). Squeeze a pea-sized amount of white toothpaste onto the brush, then dip it into a small dish of baking soda. Scrub the grout lines using small circular motions.
The toothpaste acts as a gentle cleaner while the baking soda boosts the abrasiveness just enough to lift stains. Rinse with water and wipe away residue. For tougher spots, let the paste sit for 5 minutes before scrubbing.
Why This Combo Works So Well
Toothpaste contains mild abrasives like calcium carbonate or silica, which are designed to clean enamel without damage. Baking soda is also a gentle abrasive and a natural deodorizer. Together, they create a paste that's strong enough to break down grime and mold spores but soft enough to avoid scratching ceramic or porcelain tile.
Best Grout Types For This Method
This mix is ideal for standard sanded or unsanded grout that's in decent shape. Avoid using it on unsealed natural stone grout or very porous surfaces, as the abrasives could cause wear. If your grout is already crumbling or cracked, skip this method and consider regrouting instead.
Tips For Best Results
Use only white toothpaste—gel or colored varieties can leave stains. Apply firm but not aggressive pressure, and rinse thoroughly to remove all paste residue. For extra cleaning power, add a drop of hydrogen peroxide to the mix.
This is a spot-treatment trick, so don't expect it to whiten heavily stained grout on the first try.
14. Try Oxygen Bleach for Colored Grout
If you have colored grout, regular bleach is off the table—it'll strip the color and leave blotchy patches. That's where oxygen bleach steps in. Products like OxiClean are color-safe and surprisingly effective at lifting mold and stains without fading your grout.
All you need is a simple paste and a little patience.
Mix oxygen bleach powder with warm water until it forms a thick paste—think toothpaste consistency. Spread it generously over the grout lines, making sure to cover all stained areas. Let it sit for at least 15 minutes (longer for stubborn spots).
The oxygen bubbles work to break down organic grime and mold. After the wait, scrub with a stiff brush, then rinse thoroughly. You'll see the difference without any color loss.
Why Oxygen Bleach Works
Oxygen bleach releases hydrogen peroxide when mixed with water. This oxidizes stain molecules and kills mold spores, but it's gentle enough for dyed grout. Unlike chlorine bleach, it won't react with pigments, so your grout stays true to its original color.
Best Application Tips
For best results, apply the paste to dry grout. Let it sit undisturbed—don't scrub right away. If the paste dries out, spritz a little water to keep it active.
For vertical surfaces, use a thicker paste so it doesn't drip. Rinse with clean water and dry with a microfiber cloth.
15. Use a Grout Pen for Cosmetic Fixes
Sometimes scrubbing just isn't enough to bring back the original color of your grout. If you're dealing with stubborn discoloration that won't budge, a grout pen offers a quick cosmetic solution.
Grout pens work like markers, depositing a thin layer of color over the grout line. They're great for small areas or touch-ups, but they won't fix structural issues or deep mold. For best results, clean the grout thoroughly first, then apply the pen in steady strokes.
Choosing The Right Shade
Match the pen color to your original grout as closely as possible. If you can't find an exact match, go a shade lighter—darker pens can look obvious. Test on an inconspicuous spot first.
Application Tips
Apply the pen with a steady hand, following the grout line. Wipe off any excess immediately with a damp cloth. Let it dry completely before exposing it to moisture.
When To Skip The Pen
Grout pens are temporary fixes. They may wear off over time, especially in high-moisture areas. If your grout is cracked or crumbling, repair or replace it instead of covering it up.
16. Make a DIY Spray with Tea Tree Oil
Tea tree oil is a natural antifungal and antibacterial powerhouse. It kills mold spores on contact and leaves a fresh, herbal scent behind. This simple spray is perfect for daily maintenance between deep cleans.
Why Tea Tree Oil Works So Well
Tea tree oil contains terpinen-4-ol, a compound that disrupts mold cell membranes and prevents regrowth. Unlike bleach, it won't damage grout or release toxic fumes. It's safe for colored grout too.
How To Make And Use The Spray
Fill a spray bottle with 1 cup of water and add 1 teaspoon of tea tree oil. Shake well before each use. Spray directly onto grout lines after your shower, let sit for 5 minutes, then rinse or leave it on for ongoing protection.
Tips For Best Results
Use a high-quality, pure tea tree oil for maximum potency. Test on a small hidden area first if you have painted or sealed grout. For heavy mold, spray generously and scrub with a soft brush before rinsing.
17. Call a Professional for Extreme Cases
Sometimes no amount of scrubbing, baking soda, or bleach can revive grout that's been neglected for years. If you're dealing with crumbling joints, deep-set mold that keeps returning, or stains that won't budge after multiple attempts, it might be time to bring in the pros. A professional cleaning or regrouting can restore your shower faster and more thoroughly than any DIY method.
When grout is crumbling or deeply stained, a professional cleaning or regrouting might be needed. Sometimes it's the fastest way to a fresh start.
Signs You Need A Pro
Look for cracked or missing grout, mold that reappears within days, or stains that have penetrated deep into the porous material. If water pools behind tiles or the grout feels soft and crumbly, DIY fixes won't cut it. A professional can assess whether cleaning, sealing, or full regrouting is the right solution.
What Professionals Do Differently
Pros use industrial-grade steam cleaners, high-pressure washers, and specialized antimicrobial treatments that penetrate deep into grout lines. They can also grind out old grout and replace it with a fresh, mold-resistant product. This approach is thorough and often takes just a few hours, saving you days of trial and error.
Cost Vs. Value
Professional grout cleaning typically costs $200–$500, while regrouting runs $500–$1, 000 depending on the shower size. It's an investment, but it can extend the life of your shower by years and prevent costly water damage. If your DIY efforts have failed repeatedly, paying a pro is often the most efficient and economical choice.
FAQ
How often should I clean shower grout?
For maintenance, clean grout every 2-4 weeks. Deep clean every 3-6 months to prevent mold and stains from setting in.
Can I use bleach on colored grout?
Bleach can discolor or fade colored grout. Use oxygen bleach or a color-safe cleaner instead.
What's the best natural cleaner for grout?
A baking soda and vinegar paste is effective for most stains. For mold, hydrogen peroxide works well.
How do I prevent mold from coming back?
Keep the bathroom ventilated, wipe down surfaces after showers, and apply a grout sealer annually.
Is steam cleaning safe for all grout?
Yes, steam cleaning is safe for sealed and unsealed grout. Avoid using on cracked or loose grout as it may worsen damage.
Conclusion
Grout cleaning doesn't need to be a weekend project. Pick a few tips that match your current grime level and give them a try—you'll see results fast.
A quick squeegee after each shower and a monthly sealant refresh are the easiest ways to keep mold and stains at bay. Stick with a simple routine, and your shower grout will stay bright and clean with minimal effort.