20 Shower Cleaning Hacks for Glass, Grout, and Tile
You step into the shower expecting a fresh start, but instead you're greeted by soap scum on the glass and grout that's seen better days. It doesn't have to be that way. With the right tricks, you can keep every surface looking like new without spending hours scrubbing.
These 20 hacks are designed to tackle the three trouble zones: glass doors, grout lines, and tile walls. They're simple, effective, and use items you probably already have at home. No harsh chemicals or expensive products required.
Whether you're dealing with hard water stains, moldy grout, or dull tile, there's a solution here for you. Let's turn that shower into the cleanest spot in your bathroom.
1. The Vinegar and Dish Soap Magic for Glass Doors
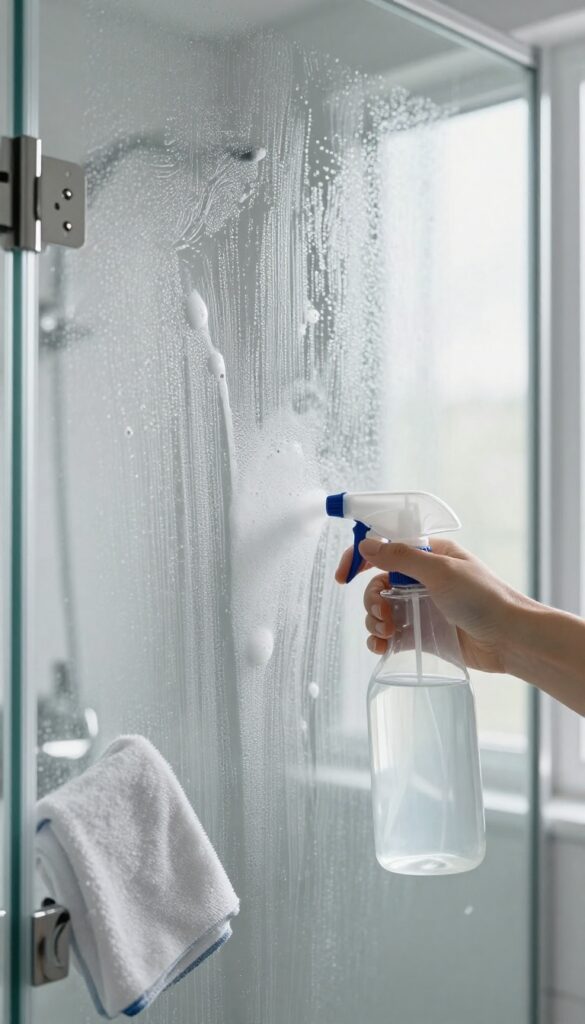
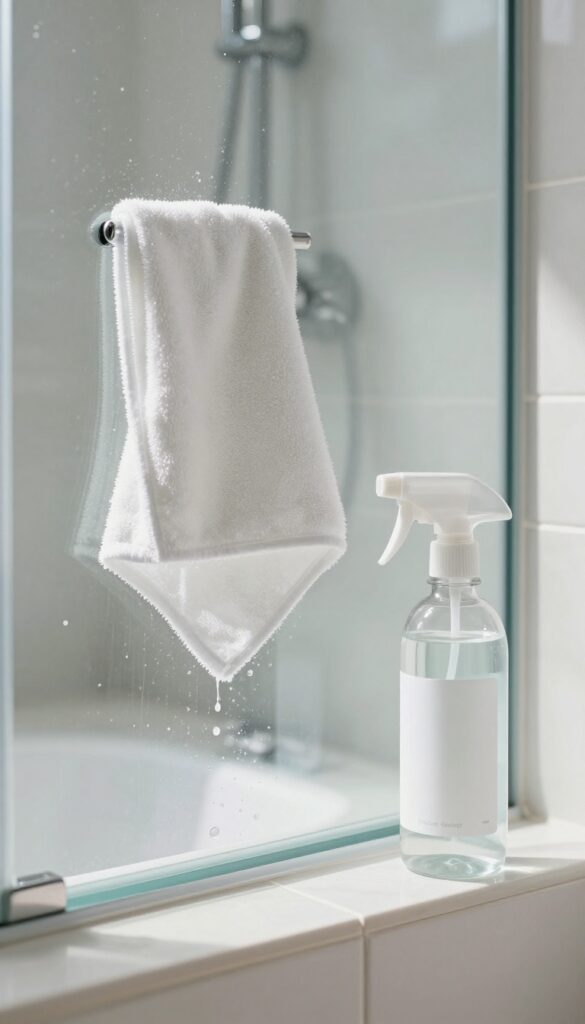
Glass shower doors look beautiful when they're clean, but soap scum and hard water stains can make them look foggy and neglected. The good news is that you don't need a fancy commercial cleaner to restore that crystal-clear shine. A simple homemade solution of white vinegar and dish soap works wonders, cutting through grime without harsh chemicals.
This two-ingredient spray is surprisingly effective because vinegar breaks down mineral deposits while dish soap tackles grease and soap scum. Together, they create a cleaning powerhouse that leaves glass streak-free. Best of all, it's safe for your family and the environment, and costs pennies per use.
Why This Combo Works So Well
Vinegar is acidic, which dissolves hard water minerals and soap residue. Dish soap contains surfactants that lift dirt and grease. When mixed, they create a solution that cuts through buildup without the need for scrubbing.
The vinegar smell disappears as it dries, leaving behind only clean glass.
How To Mix And Apply
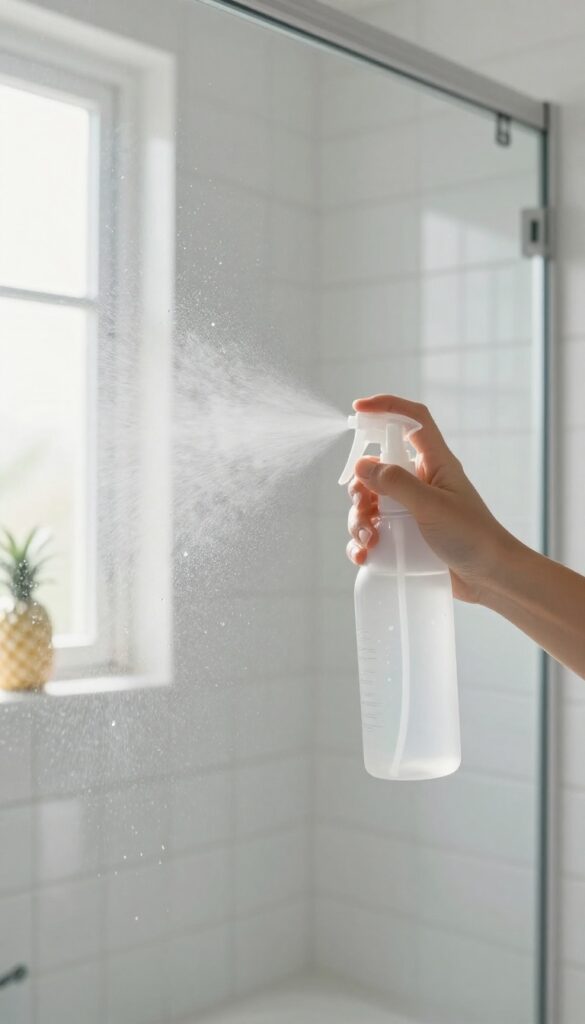
Fill a spray bottle with equal parts white vinegar and dish soap. Shake gently to combine. Spray the mixture generously onto your glass doors, making sure to cover all areas.
Let it sit for 10 minutes to break down grime. Then, wipe with a damp microfiber cloth, rinsing the cloth frequently. For best results, dry with a clean microfiber cloth to prevent water spots.
Pro Tips For Streak-free Results
Use a squeegee after every shower to minimize buildup, making this deep clean last longer. If your water is very hard, you may need to let the solution sit for 15 minutes. Avoid using paper towels, as they can leave lint.
Microfiber is your best friend here.
2. Use a Squeegee After Every Shower
A squeegee might seem like a small tool, but it's the single most effective way to keep your glass doors crystal clear. Spending just 30 seconds after each shower can save you from scrubbing off stubborn water spots and soap scum later. It's a habit that pays off big time with minimal effort.
The key is to make it part of your routine. Keep the squeegee hanging right inside the shower or on a hook nearby so it's always within reach. After you turn off the water, quickly run the squeegee over the glass in a few smooth strokes.
Start at the top and work your way down, overlapping each pass slightly to avoid streaks. Don't forget the corners and edges where water tends to pool. This simple action removes most of the water before it dries, which is what causes those cloudy deposits.
If you have hard water, this step is even more critical because mineral buildup becomes much harder to remove over time.
Choose The Right Squeegee
Not all squeegees are created equal. Look for one with a rubber blade that's flexible but firm, and a handle that's comfortable to grip. A squeegee with a stainless steel or plastic frame will last longer and resist rust in the humid shower environment.
The blade width should match your door size—around 10 to 12 inches works well for standard glass doors. Replace the blade every few months if it starts to leave streaks or skip.
Quick Drying Tips
After squeegeeing, give the glass a quick wipe with a microfiber cloth to catch any remaining moisture. This also helps prevent water spots from forming on the metal frame or handles. If you notice streaks, it might be time to clean the squeegee blade with a little vinegar or rubbing alcohol to remove any soap residue buildup.
Don't Forget The Tiles And Grout
While you're at it, use the squeegee on the tile walls too. A few quick passes over the tiles and along the grout lines will push water toward the drain, reducing the amount that sits on the surface. This helps prevent mold and mildew from taking hold in the grout.
It's a small extra step that keeps the whole shower looking cleaner for longer.
3. Baking Soda Paste for Stubborn Grout Stains
Grout lines are notorious for trapping dirt and mildew, turning a clean shower into a patchwork of gray and black. A simple baking soda paste can lift those stains without the harsh fumes of bleach. It's gentle enough for regular use but tough on grime.
Mix three parts baking soda with one part water to form a thick paste. Apply it directly to the grout lines using an old toothbrush or a small brush. Let it sit for 10–15 minutes to break down the stains.
Scrub in a circular motion, then rinse thoroughly with warm water. For extra whitening power, substitute the water with hydrogen peroxide—just be careful on colored grout, as it may lighten the dye.
Why It Works
Baking soda is mildly abrasive, so it scrubs away grime without scratching tile. Its alkaline nature helps dissolve acidic dirt and soap scum. Hydrogen peroxide adds a bleaching effect that kills mold spores.
Pro Tips For Best Results
Use a grout brush or an old electric toothbrush for deeper cleaning. If stains are set in, let the paste sit for 30 minutes. Rinse with a spray bottle to avoid pushing dirt back into the grout.
When To Avoid This Method
Skip hydrogen peroxide on dark or colored grout—it can cause fading. Also, avoid on unsealed grout if you plan to seal it afterward, as residue may interfere with adhesion.
4. The Lemon and Salt Scrub for Tile
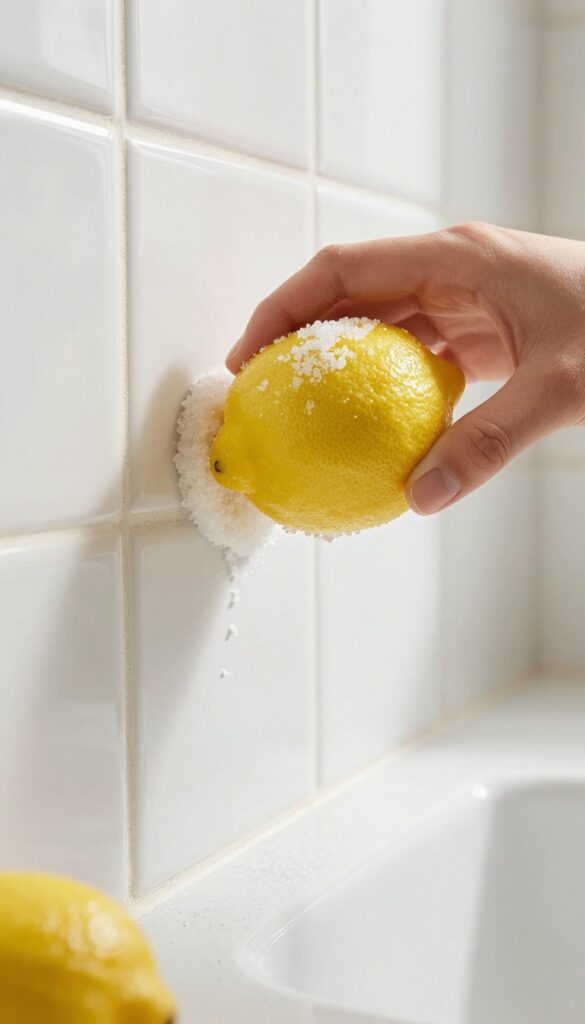
When your tile walls start looking dull or have a thin layer of soap scum, a simple citrus scrub can bring back the shine. Lemons are nature's degreaser, and salt adds just enough grit to lift buildup without scratching. This combo is especially good for ceramic or porcelain tile that's not too delicate.
Cut a lemon in half and dip the cut side into a small dish of coarse salt. Scrub the tile directly, applying gentle pressure in circular motions. The citric acid breaks down soap scum and mineral deposits, while the salt acts as a mild abrasive.
Rinse thoroughly with warm water and wipe dry with a microfiber cloth. For best results, use this method weekly to prevent heavy buildup.
Why It Works
Lemon juice contains citric acid, which dissolves alkaline soap scum and hard water stains. Salt provides texture to physically lift grime without scratching most tile finishes. Together, they create a non-toxic cleaner that's safe for you and the environment.
Best Tile Types To Use This On
This scrub works great on glazed ceramic, porcelain, and most natural stone tiles that are properly sealed. Avoid using it on unsealed marble, limestone, or travertine, as the acid can etch the surface. Always test on a small hidden area first.
Pro Tips For Maximum Shine
Use coarse sea salt or kosher salt for better abrasion. If the tile is very dirty, let the lemon juice sit for a minute before scrubbing. Rinse with a vinegar-water solution (1: 4) to neutralize any leftover acid and boost shine.
Finish by buffing with a dry cloth.
5. Hydrogen Peroxide and Baking Soda for Moldy Grout
Moldy grout is one of the most frustrating shower problems. It seems like no matter how much you scrub, those dark spots keep coming back. But there's a simple, natural solution that works wonders: hydrogen peroxide and baking soda.
This powerful duo creates a fizzing paste that lifts mold and mildew right out of the grout. Hydrogen peroxide is a natural disinfectant and whitener, while baking soda provides gentle abrasion. Together, they kill mold at the root without harsh chemicals.
How To Make The Paste
In a small bowl, mix 1/2 cup of baking soda with about 3 tablespoons of hydrogen peroxide. Stir until it forms a thick, spreadable paste. If it's too runny, add more baking soda.
Too thick? A splash more peroxide.
Application And Wait Time
Apply the paste directly onto the moldy grout lines using an old toothbrush or a small brush. Let it sit for 15 minutes. You'll see it start to bubble and lift the grime.
Don't let it dry completely—if it does, spritz a little water on it.
Scrubbing And Rinsing
After 15 minutes, scrub the grout with the toothbrush. The mold should come off easily. Rinse thoroughly with warm water and wipe dry.
Repeat on stubborn spots if needed. Your grout will look noticeably brighter and cleaner.
6. Use a Magic Eraser on Glass and Tile
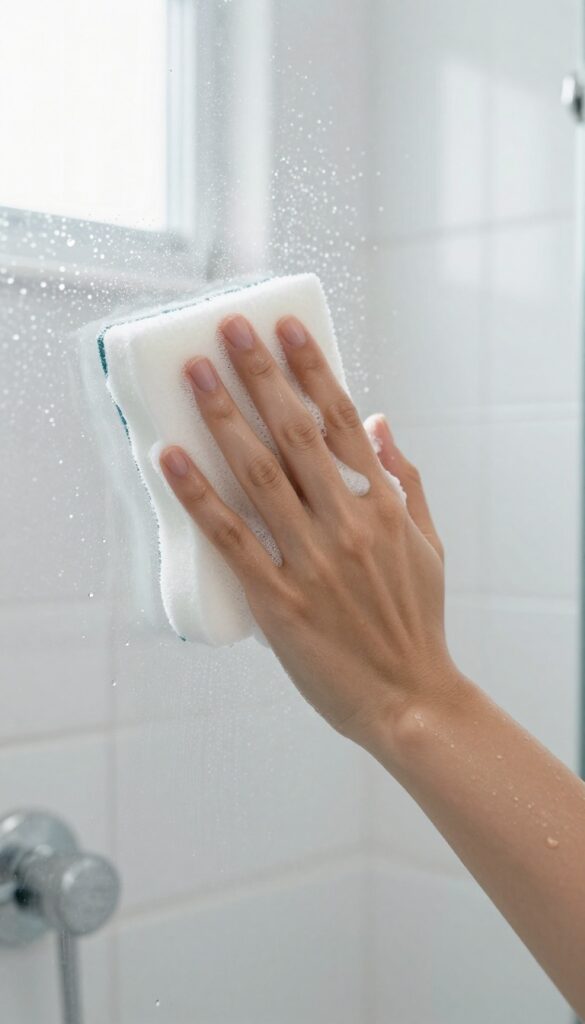
Melamine sponges, often sold as Magic Erasers, are surprisingly effective at cutting through stubborn grime on glass and tile. They work like a very fine sandpaper, gently abrading away mineral deposits and soap residue without scratching the surface. Just a little water is all you need to activate the cleaning power.
Dampen the sponge until it's wet but not dripping, then squeeze out excess water. Gently rub the glass door or tile in circular motions. The sponge will start to break down as you clean, lifting away hard water stains and soap scum.
Rinse the area thoroughly afterward to remove any residue. For best results, use a fresh sponge for each cleaning session.
Why It Works So Well
The magic lies in the sponge's microporous structure. When wet, it creates a mild abrasive action that is tough on dirt but gentle on surfaces. Unlike harsh chemical cleaners, it doesn't produce fumes or leave behind a sticky film.
This makes it ideal for glass doors where you want a streak-free shine.
Where To Use It (and Where To Avoid)
Use it on glass shower doors, ceramic tile, porcelain, and even fiberglass. Avoid using it on glossy or painted surfaces, as it can dull the finish. Also, skip it on natural stone like marble or granite—the abrasiveness can etch the surface.
Test in an inconspicuous spot first if you're unsure.
Pro Tips For Best Results
Cut the sponge into smaller pieces to get more use out of it. Work in small sections and rinse the sponge frequently to avoid redistributing dirt. For extra tough stains, let the damp sponge sit on the spot for a minute before scrubbing.
Always rinse the cleaned area with water to remove any sponge particles.
7. The Dishwasher Rinse Aid Trick for Glass
You might not think to look in your dishwasher for shower cleaning supplies, but rinse aid is a game changer for glass doors. It contains surfactants that break the surface tension of water, causing it to sheet off instead of beading up and leaving mineral deposits. A quick wipe with rinse aid creates a protective layer that repels water and prevents future spots, keeping your glass clearer for longer.
This hack is incredibly easy: just dampen a soft cloth with a small amount of dishwasher rinse aid and wipe it over your clean glass doors. No need to rinse—let it air dry. The rinse aid leaves a microscopic film that makes water slide right off, so soap scum and hard water stains have a harder time sticking.
It's a low-effort way to extend the time between deep cleans.
Why Rinse Aid Works On Glass
Rinse aid is designed to prevent water spots on dishes, and the same chemistry applies to shower glass. The active ingredients reduce water's surface tension, causing it to form a thin, even sheet that dries without leaving droplets. Those droplets are what evaporate and leave behind mineral rings.
By eliminating them, you stop spots before they form.
How To Apply It Properly
Start with clean, dry glass. Apply a few drops of rinse aid to a microfiber cloth—don't soak it. Wipe the entire glass surface in a thin, even layer.
Let it dry completely before using the shower. One application can last a week or more, depending on how often you shower. Avoid using too much, as excess can leave a slightly sticky residue.
Safety And Compatibility Tips
Rinse aid is generally safe for glass, but test it on a small hidden area first, especially if your doors have a coating or tint. It's not recommended for acrylic or plastic shower panels as it may cause cloudiness. Also, ensure good ventilation when applying, as some rinse aids have a mild scent.
Keep it away from grout lines—it can break down sealant over time.
8. Steam Clean for Deep Grout Cleaning
Grout lines are porous by nature, which means they soak up soap scum, body oils, and mildew over time. Scrubbing with a brush only gets the surface, leaving the deeper grime untouched. That's where a handheld steam cleaner comes in.
It uses high heat to break down stubborn buildup and kill bacteria without a single chemical.
Why Steam Works On Grout
Steam penetrates the tiny pores in grout, loosening dirt that has been embedded for months. The heat also kills mold spores and bacteria on contact. Unlike bleach, steam won't damage the grout or discolor it over time.
It's a one-and-done solution that leaves the surface sanitized and ready to seal.
How To Steam Clean Shower Grout
Start by vacuuming loose debris from the grout lines. Fill your steam cleaner with water and let it heat up. Use the small brush attachment and work in sections, holding the nozzle against the grout for a few seconds.
Wipe away the loosened grime with a microfiber cloth. For extra-stubborn spots, go over them twice.
Safety Tips For Steam Cleaning
Always test the steam cleaner on an inconspicuous area first, especially if your grout is old or cracked. Avoid using steam on loose or crumbling grout, as it could worsen the damage. Wear gloves to protect your hands from the heat, and never point the steam nozzle at your skin.
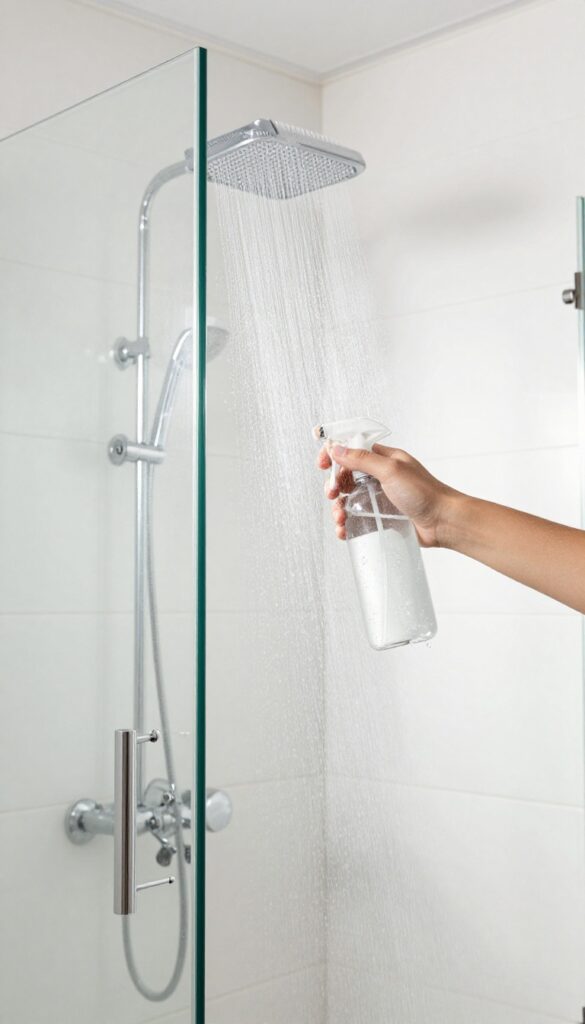
9. White Vinegar Soak for Showerheads
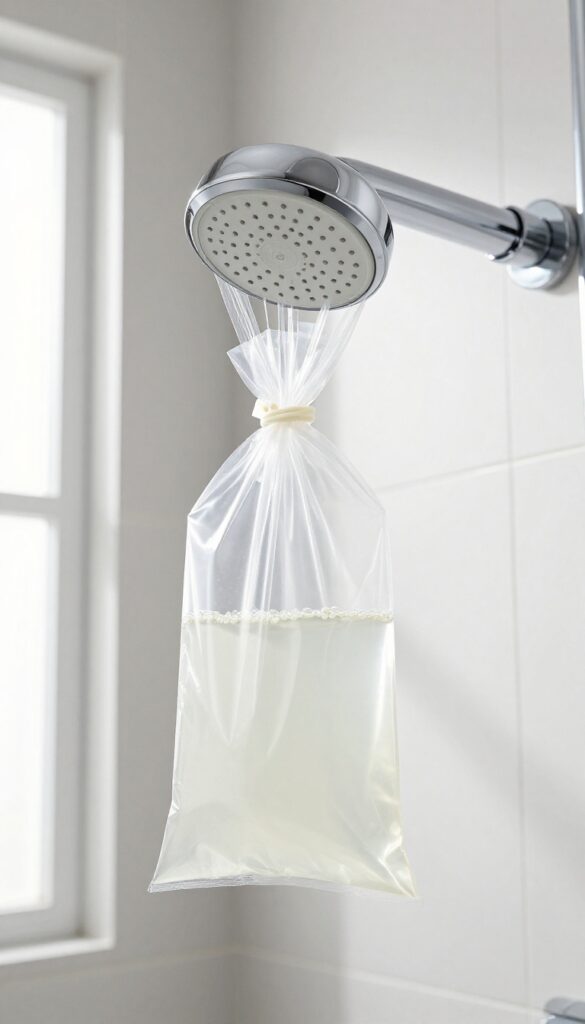
A clogged showerhead isn't just annoying—it can also reduce water pressure and harbor bacteria. Fortunately, you don't need to replace it or call a plumber. A simple overnight soak with white vinegar dissolves mineral deposits and leaves the nozzles flowing freely again.
Mineral buildup from hard water is the main culprit behind a weak spray. White vinegar's mild acidity breaks down calcium and lime scale without damaging the finish. This hack works on most metal and plastic showerheads, but avoid it on brass or gold-plated fixtures unless you check the manufacturer's care instructions first.
What You'll Need
Grab a quart-size plastic bag, white vinegar, a rubber band or zip tie, and a towel. That's it. No special tools required.
Step-by-step Soak
Fill the bag about halfway with vinegar. Carefully place it over the showerhead so the nozzles are submerged. Secure the bag with a rubber band or zip tie around the neck of the showerhead.
Let it soak overnight—at least 6 to 8 hours. In the morning, remove the bag and run the shower for a few minutes to flush out any loosened debris.
Tips For Stubborn Buildup
If the flow is still weak after one soak, repeat the process or gently scrub the nozzles with an old toothbrush. For extremely clogged heads, you can also remove the showerhead and soak it in a bowl of vinegar for a few hours.
10. Use a Grout Pen for a Fresh Look
Grout lines are the unsung heroes of your shower—until they start looking dingy and stained. A grout pen is a quick fix that recolors and seals those lines, making them look brand new. It's a simple step that pays off in both appearance and easier cleaning down the road.
After deep cleaning your grout, grab a grout pen in a color that matches your existing grout. Apply it carefully along the lines, filling in any discolored areas. The pen's sealant creates a protective barrier that repels moisture and dirt, so future cleanings are a breeze.
Let it dry completely before using the shower again. This hack is especially effective for high-traffic showers where grout gets dirty fast.
Why Grout Pens Work So Well
Grout pens contain a water-resistant sealant that bonds to the porous grout surface. This seals the grout, preventing moisture and soap scum from penetrating. The color restores the original look, making the whole shower feel fresher.
Plus, the sealant means you'll spend less time scrubbing grout in the future.
How To Apply A Grout Pen Like A Pro
Start with clean, dry grout. Shake the pen well, then press the tip into the grout line and squeeze gently. Draw the pen along the line, applying even pressure.
Wipe away any excess immediately with a damp cloth. Work in small sections to avoid smudging. Let it dry for at least 24 hours before exposing it to water.
When To Replace Or Touch Up
Grout pen coatings can wear off over time, especially in high-moisture areas. Check your grout every few months. If you see fading or the sealant peeling, simply reapply.
Most pens last for several applications, making them a cost-effective solution for maintaining fresh grout.
11. The Toothbrush and Baking Soda Combo for Corners
Corners and edges in the shower are prime real estate for grime. They're hard to reach with a sponge, so gunk builds up over time. An old toothbrush paired with baking soda is the perfect tool to get into those tight spots and scrub away the dirt.
Baking soda is a mild abrasive that cuts through soap scum and mildew without scratching surfaces. When you dip a damp toothbrush into the powder, it clings to the bristles and gives you targeted cleaning power. Work the brush into corners, along grout lines, and around fixtures where grime hides.
Rinse thoroughly with water afterward to reveal clean, bright surfaces.
Why This Combo Works So Well
Baking soda's fine grit gently scrubs away buildup without damaging tile or grout. The toothbrush's small head and stiff bristles reach into crevices that sponges and cloths miss. Together, they tackle the stubborn grime that accumulates in the shower's nooks and crannies.
Step-by-step: How To Do It Right
Start by wetting the toothbrush slightly, then dip it into a small dish of baking soda. Scrub the target area in small circular motions, applying a bit of pressure. Focus on corners, edges, and grout lines.
Rinse the area with warm water and wipe away any residue. For extra tough spots, let the baking soda paste sit for a few minutes before scrubbing.
Pro Tips For Best Results
Use a dedicated toothbrush just for cleaning, and replace it when the bristles wear out. For deeper cleaning, mix baking soda with a little hydrogen peroxide to form a paste—this helps whiten grout. Always rinse thoroughly after scrubbing to prevent any baking soda residue from drying on surfaces.
12. Rubbing Alcohol for Streak-Free Glass
Glass shower doors look amazing when they're crystal clear, but streaks and water spots can ruin the effect fast. Commercial glass cleaners work, but they often leave behind a residue or require a lot of buffing. Rubbing alcohol is a simple alternative that dries quickly and leaves no streaks at all.
Rubbing alcohol is a powerful degreaser and disinfectant that evaporates almost instantly. When you spray it on glass doors, it cuts through soap scum and hard water deposits without leaving any film behind. The key is to use a lint-free cloth—microfiber works great—so you don't end up with tiny fibers stuck to the glass.
Just spray, wipe in one direction, and you're done.
Why It Works So Well
Rubbing alcohol has a low surface tension, which means it spreads evenly across the glass and doesn't bead up. It also dissolves oils and residues that cause streaks, and because it evaporates fast, there's no time for new spots to form. Plus, it's inexpensive and safe to use on most glass surfaces.
How To Use It
Mix equal parts rubbing alcohol and water in a spray bottle for a gentle cleaner, or use it full strength for tough buildup. Spray the glass generously, then wipe with a dry microfiber cloth using horizontal or vertical strokes. For extra shine, follow up with a second dry cloth to buff.
Pro Tips For Best Results
Always test on a small area first, especially if your glass has a coating. Avoid using paper towels—they can leave lint. For large doors, work in sections so the alcohol doesn't dry before you wipe.
And if you have hard water stains, let the alcohol sit for 30 seconds before wiping.
13. Use a Pumice Stone on Hard Water Rings
Hard water rings on tile and glass can feel impossible to remove. Scrubbing with regular cleaners often does nothing, and harsh chemicals might damage the surface. A pumice stone offers a simple, scratch-free solution that works like magic.
Why A Pumice Stone Works
Pumice is a porous volcanic rock that's abrasive enough to grind away mineral deposits but soft enough not to scratch glazed tile or glass. When wet, it becomes slightly softer, allowing you to target the hard water ring without damaging the underlying surface.
How To Use It Safely
Start by soaking the pumice stone in water for a few minutes. Gently rub the stain using light pressure—let the stone do the work. Keep the surface and stone wet throughout.
Rinse frequently to check your progress and avoid over-scrubbing.
Where Not To Use It
Avoid pumice stones on unglazed tile, natural stone like marble or granite, acrylic, fiberglass, or any surface with a polished finish. It's best reserved for ceramic, porcelain tile, and glass. Always test in an inconspicuous spot first.
14. The Dawn and Vinegar Spray for Soap Scum
Soap scum builds up fast on glass and tile, turning your shower into a foggy mess. A simple homemade spray cuts through that grime without harsh chemicals. All you need is two kitchen staples: Dawn dish soap and white vinegar.
Heat equal parts Dawn and white vinegar in the microwave for about 30 seconds, then pour the mixture into a spray bottle. Shake gently to combine. Spray it generously on soap scum, let it sit for 10–15 minutes, then wipe away with a damp cloth or sponge.
Rinse thoroughly to avoid any residue.
Why This Combo Works So Well
Dawn is a powerful degreaser that breaks down the oils in soap scum, while vinegar's acidity dissolves mineral deposits. Together, they tackle both the organic and inorganic components of that stubborn film. Heating the mixture helps it penetrate faster.
Best Surfaces And Application Tips
This spray is safe for glass, ceramic tile, and most metal fixtures—but avoid it on natural stone like marble or granite, as the acid can etch the surface. Use a microfiber cloth for streak-free results on glass. For heavy buildup, let the spray sit longer or scrub gently with a soft brush.
Storage And Safety Notes
Store the spray in a labeled bottle away from direct sunlight. It stays effective for about a week. Keep it out of reach of children and pets.
If you have sensitive skin, wear gloves when using it.
15. Use a Microfiber Cloth for Drying Surfaces

Drying your shower after every use is the single most effective habit for preventing water spots and mineral buildup. And the best tool for the job? A microfiber cloth.
It's not just about wiping down—microfiber's unique structure traps moisture and particles without leaving lint or streaks, making it perfect for glass, tile, and grout.
Microfiber cloths are engineered with split fibers that create a static charge, attracting dust and water like a magnet. This means you can dry surfaces quickly and thoroughly, leaving them spotless. Unlike regular towels, microfiber won't shed fibers or leave behind residue, so your glass doors stay crystal clear and your tiles remain streak-free.
Why Microfiber Beats Regular Towels
Standard bath towels might seem convenient, but they often leave lint and can even smear soap residue around. Microfiber, on the other hand, absorbs up to seven times its weight in water and wipes away minerals before they have a chance to dry into spots. Plus, it's reusable—just toss it in the wash after a few uses.
The Best Way To Dry Your Shower
Keep a dedicated microfiber cloth hanging in your shower or nearby. After your last rinse, start with the glass doors—wipe from top to bottom in a single direction to avoid streaks. Then move to tile walls and finally the grout lines.
For hard-to-reach corners, fold the cloth into a small pad. This routine takes less than a minute and can dramatically extend the time between deep cleans.
Caring For Your Microfiber Cloths
To keep them effective, wash microfiber cloths separately from cotton items to prevent lint transfer. Use a mild detergent without fabric softener, which can clog the fibers. Air dry or tumble dry on low heat.
With proper care, a good microfiber cloth can last for hundreds of uses.
16. The Baking Soda and Vinegar Fizz for Drains
Shower drains take a beating. Hair, soap scum, and grime build up over time, leading to slow drainage and funky odors. Before you reach for a harsh chemical drain cleaner, try this simple, natural fizz treatment that breaks down buildup without damaging your pipes.
Pour about ½ cup of baking soda directly down the drain. Follow it with 1 cup of white vinegar. The mixture will bubble and fizz vigorously, helping to dislodge gunk and deodorize the drain.
Let it work for 10 minutes, then flush with a kettle of boiling water (or very hot tap water if your pipes are PVC). Repeat monthly to keep drains flowing freely and smelling fresh.
Why This Works
Baking soda is a mild abrasive that scrubs away residue, while vinegar’s acidity dissolves soap scum and mineral deposits. The fizzy reaction creates pressure that pushes debris loose, making it easier to flush away. Together, they’re a powerful, non-toxic team.
Pro Tips For Best Results
Use a funnel to direct baking soda straight down the drain. For extra stubborn clogs, follow the fizz with a plunger to force the mixture deeper. Never use this method after a chemical drain cleaner—mixing can create toxic fumes.
Stick to natural maintenance once a month.
17. Use a Shower Cleaner Spray Daily
A daily spritz is the easiest way to stay ahead of grime. You don't need a fancy store-bought cleaner—just mix up your own and make it a post-shower habit. It takes seconds but saves you from scrubbing later.
The Perfect Diy Mix
Combine equal parts water and white vinegar in a spray bottle, then add a single drop of dish soap. The vinegar cuts through soap scum and hard water minerals, while the soap helps the solution cling to vertical surfaces. Shake gently to mix.
When And How To Spray
Right after your last rinse, while the shower is still warm, give all glass, tile, and grout a light mist. The warmth helps the solution work faster. Let it sit for a minute, then rinse with cool water.
No wiping needed—just let it air dry.
Why It Works Long-term
This daily spray prevents minerals and soap residue from bonding to surfaces. Over time, you'll notice less buildup, fewer water spots, and grout that stays lighter. It's the kind of small effort that delivers big results.
18. The Toothpaste Trick for Silver Hardware
Shower fixtures like faucets, handles, and showerheads can lose their shine fast. Hard water spots and grime make them look dull, but you don't need a specialty cleaner. A simple tube of white toothpaste can bring back the sparkle.
Toothpaste contains mild abrasives that polish metal without scratching. It's perfect for silver-toned hardware, including chrome and stainless steel. Just apply a small amount to a soft cloth and rub gently.
Rinse thoroughly with water and buff dry with a clean towel. The result is a brilliant, streak-free shine.
Why Toothpaste Works
The fine abrasives in toothpaste are gentle enough for metal but effective at removing tarnish and water spots. It also contains mild cleaning agents that cut through soap scum. This makes it a versatile hack for all your shiny fixtures.
Best Practices For Best Results
Use plain white toothpaste, not gel or whitening kinds with crystals. Apply a pea-sized amount to a microfiber cloth. Work in small circles, then let it sit for a minute before rinsing.
Always test on an inconspicuous spot first, especially on antique or coated hardware.
When To Skip This Hack
Avoid toothpaste on brass, copper, or any fixture with a clear protective coating. The abrasives can wear down the finish over time. For those materials, stick to a gentle soap-and-water wipe down.
19. Use a Grout Brush for Deep Scrubbing
Grout lines are the hardest part of any shower cleaning routine. They're narrow, porous, and trap grime like crazy. A regular sponge just won't cut it.
That's where a dedicated grout brush comes in.
A grout brush has stiff, angled bristles that dig deep into the grooves without damaging the tile. It reaches far better than a toothbrush and saves you from scrubbing yourself sore. Pair it with a baking soda paste or a vinegar solution for maximum effect.
Work the brush in small circles along each grout line, then rinse thoroughly. You'll see the dirt lift away almost instantly.
Why A Grout Brush Beats A Toothbrush
Toothbrushes are too small and flexible for serious grout work. A grout brush has a larger head and firmer bristles that cover more area and apply more pressure. You'll finish faster and with less effort.
Best Cleaning Solutions To Pair
For light grime, use a 50/50 vinegar and water mix. For tougher stains, make a paste of baking soda and water. Apply the solution, let it sit for 5 minutes, then scrub with the grout brush.
Rinse well afterward.
Where To Buy And What To Look For
Look for a grout brush with a comfortable handle and stiff nylon bristles. Hardware stores and online retailers carry them for under $10. Some come with a scraper on the opposite end for extra stubborn spots.
20. The Final Rinse with Cold Water
You've scrubbed every surface, applied your favorite cleaner, and wiped down the glass. But there's one last step that makes all the difference: a final rinse with cold water. It might sound too simple, but this trick seals the deal for a spotless finish.
Hot water might feel more satisfying, but it actually encourages soap residue to cling to surfaces. Cold water, on the other hand, helps prevent that sticky film from forming. Plus, it's free and takes just an extra minute.
After you've cleaned and rinsed your shower as usual, grab a spray bottle filled with cold water. Give every surface—glass, tile, grout, and fixtures—a thorough misting. Then, use a squeegee or a microfiber cloth to dry everything off.
You'll notice fewer water spots and less soap scum buildup over time. This hack works because cold water doesn't dissolve leftover soap as readily, so it simply rinses away without leaving residue. It also helps hard water minerals stay suspended instead of depositing on surfaces.
Make it the final step in your routine, and your shower will stay cleaner longer.
Why Cold Water Works
Cold water is less effective at dissolving soap, which sounds counterintuitive for cleaning. But that's exactly why it's great for the final rinse. Any remaining soap particles are less likely to stick to cold surfaces, so they slide off more easily.
Plus, cold water reduces the chances of mineral deposits forming, leaving your glass and tile streak-free.
How To Do It Right
Fill a clean spray bottle with cold tap water. After your regular cleaning and rinsing, spray all surfaces generously. Then, immediately squeegee the glass and wipe down tile and grout with a dry microfiber cloth.
For best results, do this after every cleaning session, and you'll notice a significant reduction in water spots.
Bonus: Save Energy
Using cold water for the final rinse also saves a bit of energy since you're not heating water unnecessarily. It's a small change, but if you clean your shower weekly, it adds up. And it's one less thing to feel guilty about when you're trying to be eco-friendly.
FAQ
How often should I clean my shower to prevent buildup?
For best results, do a quick wipe-down after each use and a deep clean once a week. This prevents soap scum and mold from taking hold.
Can I use bleach on grout?
Yes, but use it sparingly. Bleach can whiten grout but may damage it over time. For regular cleaning, try gentler options like baking soda and hydrogen peroxide.
What's the best way to remove hard water stains from glass?
White vinegar is very effective. Spray it on, let it sit for 10 minutes, then scrub with a non-abrasive pad. For tough stains, use a pumice stone carefully.
How do I prevent mold from growing in the shower?
Keep the shower well-ventilated, use a squeegee on glass, and dry surfaces after use. A daily spray with a vinegar-water solution also helps.
Is it safe to mix vinegar and baking soda in the shower?
Yes, but they neutralize each other, so the fizzing action is mostly for cleaning. For deep cleaning, use them separately for better results.
Conclusion
A sparkling shower doesn't require a full day of scrubbing. These 20 hacks target glass, grout, and tile with minimal effort, so you can spend less time cleaning and more time enjoying your bathroom. Pick two or three that address your biggest pain points—like hard water spots or moldy grout—and make them part of your weekly routine.
Consistency is what keeps that just-cleaned look going strong. Start today, and your shower will thank you tomorrow.