15 Cleaning Toilet Tank Tips for Odor and Hidden Grime
You scrub the bowl and wipe down the seat, but the real culprit behind bathroom odors is hiding in plain sight—your toilet tank. That murky reservoir collects scale, slime, and sediment over time, silently affecting both smell and flush performance.
These 15 tips tackle every inch of the tank, from the flapper to the overflow tube, using simple household ingredients you probably already have. Each method targets a specific problem, so you can finally eliminate that funky smell and restore your toilet's efficiency without calling a plumber.
Ready to see what's lurking under that lid? Let's start with a vinegar flush.
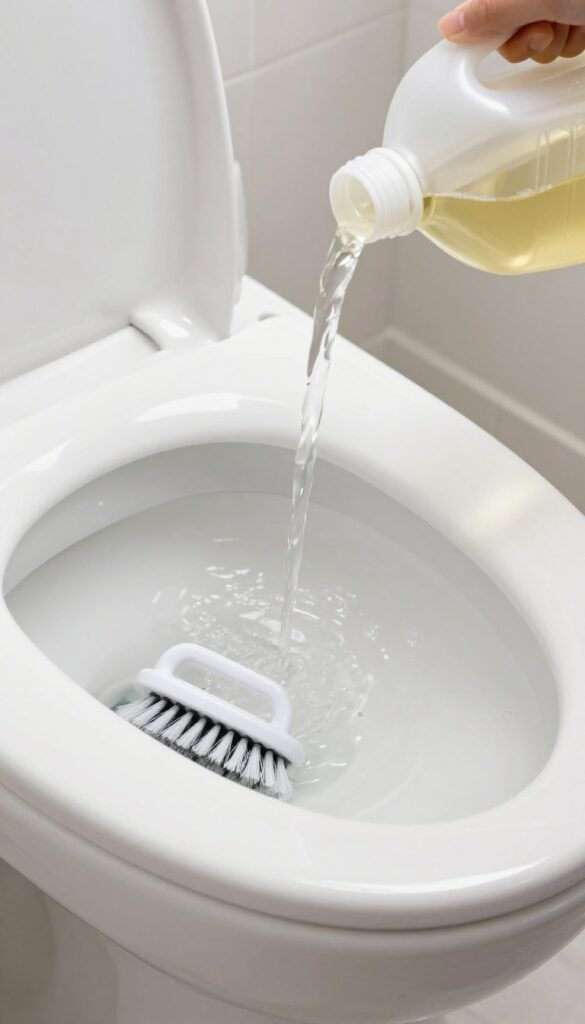
1. Start with a White Vinegar Flush
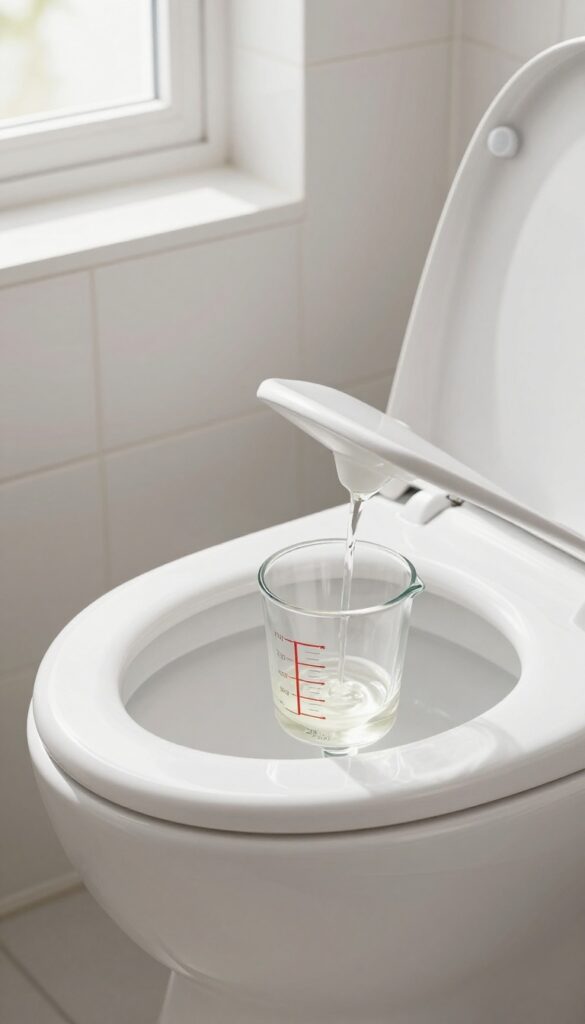
White vinegar is a powerhouse cleaner that works wonders inside your toilet tank. Its mild acidity dissolves mineral scale and kills the bacteria that cause musty odors. Best of all, it's cheap, non-toxic, and safe for all toilet components.
Pour two cups of white vinegar directly into the overflow tube—the open pipe in the middle of the tank. Let it sit for at least an hour, then flush. The vinegar will circulate through the tank and bowl, breaking down deposits and neutralizing smells.
Repeat monthly for best results.
Why The Overflow Tube?
Pouring vinegar into the overflow tube ensures it reaches the entire tank and bowl. This method avoids splashing water and targets the internal channels where grime builds up.
How Long Should You Wait?
An hour is the sweet spot—long enough for the acid to work but short enough to be convenient. For heavy buildup, let it sit overnight.
Will It Damage Rubber Parts?
White vinegar is gentle on rubber gaskets and seals when used occasionally. Frequent use is fine, but avoid soaking components in pure vinegar for extended periods.
2. Scrub with a Toilet Tank Brush
A dedicated toilet tank brush is a game-changer for reaching every nook and cranny. Unlike a regular toilet bowl brush, these have long, flexible handles and softer bristles that won't scratch the tank's interior. You'll be able to scrub away slime and sediment that builds up over time, especially in corners and under the rim where water sits.
Using a tank brush is straightforward. First, turn off the water supply and flush the toilet to empty the tank. Then, dip the brush into a mixture of warm water and vinegar or a mild cleaner.
Scrub the walls, bottom, and all around the overflow tube. Pay special attention to the corners and the area under the rim where gunk accumulates. Rinse the brush frequently and repeat until the water runs clear.
Finally, turn the water back on and flush a few times to clear out any debris.
Why A Tank Brush Works Better
A regular sponge or cloth can't reach tight spots, and abrasive scrubbers might damage the tank's surface. A tank brush is designed to be gentle yet effective, with bristles that get into crevices without scratching. It also has a long handle so you don't have to stick your arm into the murky water.
How Often To Scrub
For most households, scrubbing the tank every three to six months is enough to prevent odor and buildup. If you have hard water or notice slime forming sooner, increase the frequency. A quick monthly check can help you stay on top of it.
Choosing The Right Brush
Look for a brush with nylon or silicone bristles and a long, angled handle. Avoid metal or stiff bristles that can scratch porcelain or plastic parts. Some brushes come with a caddy for storage, which keeps things tidy.
3. Target Hard Water Stains with Baking Soda Paste
Hard water stains are those stubborn white or brownish deposits that cling to the sides of your toilet tank. They're caused by calcium and magnesium in your water, and they can make your tank look grimy even after a good scrub. The good news is you don't need harsh chemicals to remove them—baking soda paste works like a charm.
Baking soda is a mild abrasive that gently lifts mineral deposits without scratching the porcelain or plastic components inside your tank. When mixed with water, it forms a paste that clings to vertical surfaces, giving it time to break down the buildup. This method is safe for all tank parts, including the flapper and fill valve.
How To Make The Paste
Mix three parts baking soda with one part water in a small bowl. Stir until you get a thick, spreadable consistency—like toothpaste. If it's too runny, add more baking soda; too thick, add a drop more water.
You want it to stay put on the stains without dripping off.
Application And Wait Time
Turn off the water supply and flush the toilet to empty the tank. Use a sponge or an old toothbrush to apply the paste directly onto the hard water stains. Let it sit for 15 minutes—this gives the baking soda time to work on the calcium deposits.
For thick buildup, you can leave it on for up to 30 minutes.
Scrubbing And Rinsing
After the wait, scrub the stains with a soft brush or sponge. The paste will have softened the deposits, so they should come off easily. Rinse the tank thoroughly by turning the water back on and flushing a few times.
Repeat if necessary for stubborn spots.
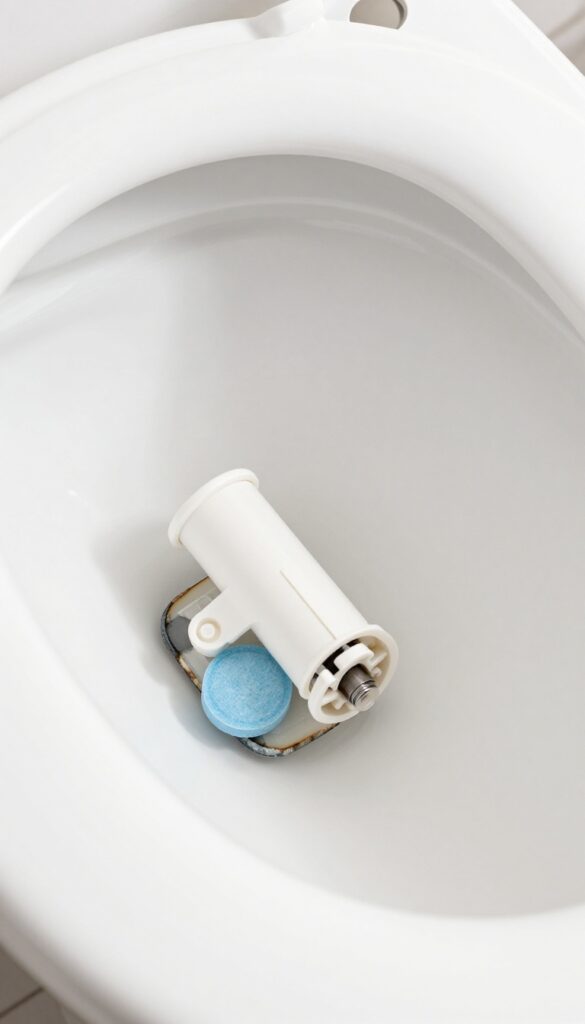
4. Clean the Flapper and Fill Valve
The flapper and fill valve are two of the most overlooked components when it comes to tank odors. Over time, mineral deposits, algae, and bacteria build up on these rubber and plastic parts, creating a musty smell and even causing your toilet to run constantly. Cleaning them is straightforward and can make a huge difference.
Remove And Soak
Start by turning off the water supply and flushing the toilet to empty the tank. Disconnect the flapper from the flush lever and unclip the fill valve cap. Place both parts in a bowl of white vinegar and let them soak for 20 minutes.
The vinegar dissolves mineral scale and kills odor-causing bacteria.
Scrub Gently
After soaking, use a soft brush or an old toothbrush to scrub away any remaining buildup. Pay special attention to the seal edges of the flapper and the small openings on the fill valve. Rinse thoroughly with clean water before reinstalling.
Check For Wear
While the parts are out, inspect them for cracks, warping, or stiffness. A worn flapper won't seal properly, leading to a running toilet and increased odors. If the rubber feels brittle or the valve doesn't move smoothly, replace them.
It's cheap insurance against future problems.
5. Use a Pumice Stone on Tough Rings
Mineral rings at the waterline can look like permanent damage, but they don't have to be. A pumice stone is a gentle abrasive that lifts those stubborn deposits without scratching the porcelain. It's a simple tool that works better than harsh chemicals for built-up rings.
Wet the pumice stone thoroughly before use—dry stone can scratch. Gently rub the mineral ring in a circular motion. The stone wears down as you use it, so you're always working with fresh abrasive.
Rinse the area and check progress; repeat if needed. This method is safe for regular use and won't harm the tank's finish.
Why A Pumice Stone Works
Pumice is a volcanic rock with a porous texture that acts like fine sandpaper. When wet, it's soft enough to avoid scratching porcelain but abrasive enough to remove calcium and lime deposits. It's also chemical-free, making it a safe choice for tanks with rubber seals.
Step-by-step Technique
First, lower the water level in the tank by flushing and holding the handle. Then, wet the pumice stone and gently rub the ring. Use light pressure and keep the stone wet to prevent scratches.
Rinse the area frequently to see your progress. Once the ring is gone, flush the tank to clear any residue.
When Not To Use A Pumice Stone
Avoid using a pumice stone on colored or painted porcelain, as it can remove the finish. Also, don't use it on plastic components like the flush valve or flapper. Stick to the porcelain surfaces only, and always test on an inconspicuous spot first.
6. Disinfect with Hydrogen Peroxide
Hydrogen peroxide is a gentle but effective disinfectant that breaks down into water and oxygen, leaving no harsh chemical smell behind. It's perfect for tackling bacteria and mold in your toilet tank without the strong fumes of bleach.
Pour one cup of 3% hydrogen peroxide directly into the tank. Let it sit for 30 minutes—you might see some fizzing as it works on organic buildup. After the wait, flush the toilet to rinse everything away.
For extra cleaning power, scrub the tank walls with a dedicated brush before flushing. Repeat monthly to keep odors at bay.
Why Hydrogen Peroxide Works
Hydrogen peroxide is a natural oxidizer that kills bacteria, viruses, and mold on contact. Unlike bleach, it doesn't produce toxic fumes or damage rubber seals inside the tank. It's also safe for septic systems and the environment.
How To Apply For Best Results
Start with a clean tank—remove any loose debris first. Pour one cup of 3% hydrogen peroxide into the overflow tube or directly into the tank water. Let it sit for 30 minutes to allow the solution to reach all surfaces.
Flush twice to ensure no residue remains.
When To Avoid This Method
Avoid using hydrogen peroxide if your toilet has a metal flush valve or metal components, as it can cause corrosion over time. Also, don't mix it with vinegar or bleach, as this can create harmful gases. Stick to plain 3% peroxide for safety.
7. Replace the Tank Bolts and Gaskets
Those metal bolts and rubber gaskets connecting your tank to the bowl might not get much attention, but they can become a hidden source of odor and grime. Over time, bolts corrode and gaskets degrade, allowing tiny leaks that create a musty smell. Swapping them out every few years is a simple fix that makes a big difference.
Replacing tank bolts and gaskets is a straightforward DIY job that prevents leaks and eliminates odors. You'll need a new bolt and gasket kit (available at any hardware store), a wrench, and a screwdriver. Drain the tank, disconnect the water supply, and remove the old bolts.
Clean the area thoroughly before installing the new hardware. Tighten evenly to avoid cracking the porcelain.
Signs It's Time To Replace
Look for rust streaks around the bolt heads, water on the floor near the toilet base, or a persistent musty smell even after cleaning. If the rubber gaskets feel brittle or cracked, they're no longer sealing properly. Replacing them at the first sign of trouble saves you from bigger repairs later.
Choosing The Right Kit
Most kits include bolts, washers, and gaskets. Opt for brass or stainless steel bolts to avoid future corrosion. Make sure the gaskets match your toilet model—universal kits usually work, but check the shape of the tank-to-bowl gasket.
A tight fit is essential for preventing leaks.
Step-by-step Replacement
Turn off the water supply and flush to empty the tank. Disconnect the water line and remove the tank lid. Unscrew the old bolts from inside the tank, then lift the tank off the bowl.
Clean both surfaces, place the new gasket, and lower the tank back into position. Insert new bolts from inside, add washers and nuts, and tighten evenly. Reconnect the water and check for leaks.
8. Drop in a DIY Cleaning Tablet
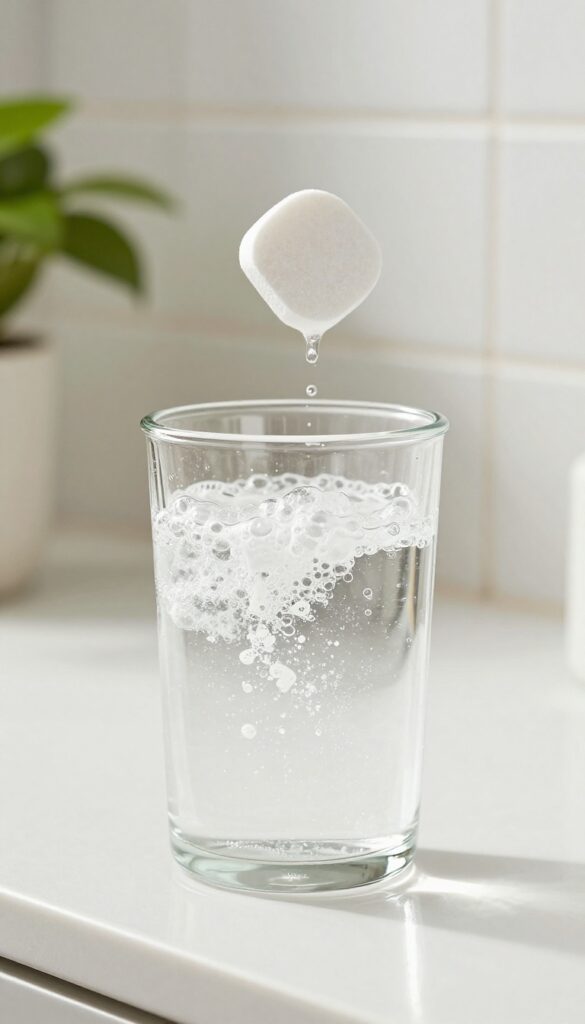
Store-bought tank tablets can be pricey and often contain harsh chemicals that may damage rubber parts. A homemade alternative is just as effective, costs pennies, and lets you control the ingredients. All you need are three common items: baking soda, citric acid, and a few drops of your favorite essential oil.
These fizzing tablets slowly dissolve in the tank, releasing cleaning agents that break down mineral deposits and keep odors at bay. They're gentle on toilet components and safe for septic systems. Plus, you can customize the scent with oils like lemon, tea tree, or lavender.
How To Make Them
Mix 1 cup of baking soda with 1/4 cup of citric acid in a bowl. Add 10–15 drops of essential oil and stir well. Spritz with a little water from a spray bottle until the mixture holds together when pressed.
Pack the mixture firmly into an ice cube tray or silicone mold and let it dry for 24 hours. Pop out the tablets and store them in an airtight jar.
How To Use Them
Drop one tablet into the toilet tank once a week. Let it fizz and dissolve completely before flushing. For best results, avoid using them in tanks with old or worn flappers—the citric acid can accelerate rubber degradation.
If you notice any leaks, switch to a less frequent schedule or reduce the citric acid amount.
Why They Work
Baking soda is a mild abrasive that helps scrub away grime, while citric acid dissolves limescale and mineral buildup. Essential oils add a pleasant fragrance and have mild antibacterial properties. Together, they keep the tank fresh between deep cleans without the harsh chemicals found in commercial tablets.
9. Flush with Lemon Juice for a Fresh Scent
If you want a natural way to deodorize your toilet tank without harsh chemicals, lemon juice is a fantastic option. The citric acid cuts through grime and mineral deposits while leaving behind a bright, clean scent. Plus, it's cheap and probably already in your kitchen.
Pour half a cup of lemon juice directly into the overflow tube or the tank itself. Let it sit for at least an hour—overnight is even better for tough buildup. Then flush a few times to rinse.
The acid helps break down scale and kills odor-causing bacteria. Just avoid using it too often, as the acidity can wear down rubber seals over time. Once a month is plenty.
Why Lemon Juice Works
Lemon juice contains citric acid, which dissolves calcium and lime deposits that trap odors. It also has antibacterial properties that help reduce the bacteria responsible for musty smells. Unlike bleach, it won't damage your septic system or create toxic fumes.
How To Apply It Right
Start by flushing the toilet to lower the water level. Pour the lemon juice into the overflow tube—the small pipe in the middle of the tank—so it reaches the bowl and the tank. Let it sit for an hour, then scrub the inside of the tank with a soft brush if needed.
Finish with a couple of flushes.
A Few Precautions
Lemon juice is acidic, so don't use it more than once a month to avoid damaging rubber gaskets or the flapper. If you have a newer toilet with sensitive parts, test a small area first. Also, avoid mixing lemon juice with bleach or other cleaners—it can create harmful gases.
10. Check for Hidden Mold in the Overflow Tube
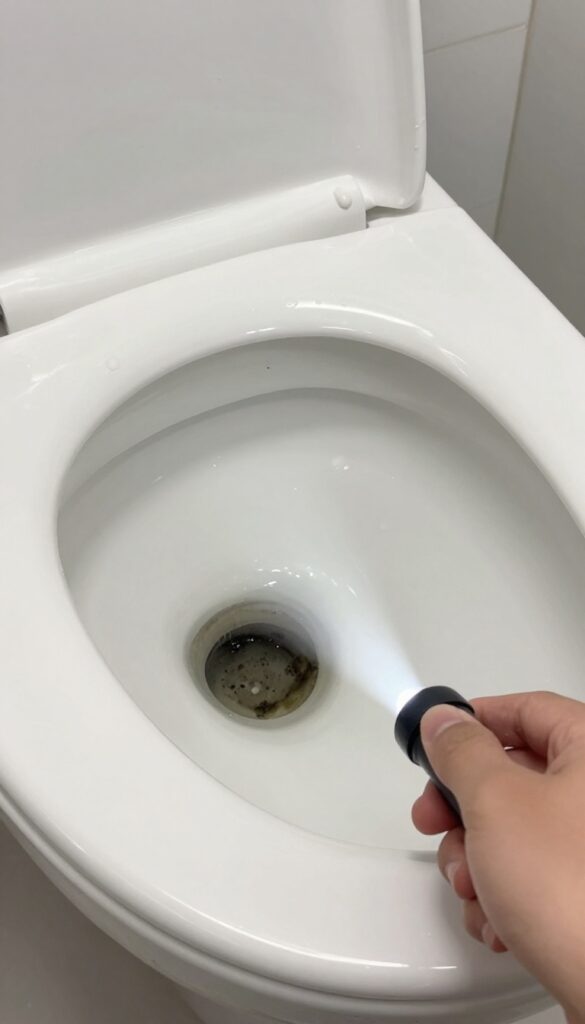
The overflow tube is that vertical pipe in the middle of your tank, and it's a prime spot for mold to grow out of sight. When you flush, water flows through it, so any black gunk inside gets dispersed into the bowl, causing that musty smell you can't seem to shake. A quick flashlight check can reveal if this is your hidden culprit.
Shine a bright flashlight directly into the overflow tube. If you see dark slime or black spots, pour in one cup of bleach (or white vinegar if you prefer a gentler option). Let it sit for 10 minutes to kill the mold, then flush the toilet.
Repeat if necessary. This simple step often eliminates odors that other cleaning methods miss.
Why Mold Loves The Overflow Tube
The overflow tube is constantly moist and rarely sees direct light, creating an ideal environment for mold and bacteria. Over time, biofilm builds up, and each flush sends a fresh dose of odor-causing particles into the bowl. It's a hidden reservoir that can make your bathroom smell even after a thorough cleaning.
How To Prevent Regrowth
After cleaning, add a splash of hydrogen peroxide or a few drops of tea tree oil to the overflow tube once a month. These natural disinfectants inhibit mold without damaging tank components. Also, keep the tank lid slightly ajar after cleaning to promote air circulation and reduce moisture.
11. Wipe Down the Tank Interior Monthly
Most people never look inside their toilet tank, let alone wipe it down. But that dark, damp environment is a breeding ground for biofilm, mineral deposits, and slimy buildup that can contribute to odors. A quick monthly wipe keeps things fresh and prevents grime from hardening into stubborn crust.
After flushing, the water level drops low enough to expose the upper walls of the tank. Grab a microfiber cloth—it grabs particles better than a sponge—and reach in to wipe the interior surfaces. Focus on corners and around the fill valve where gunk tends to collect.
This simple habit takes less than two minutes and stops buildup before it becomes a problem.
Why Microfiber Works Best
Microfiber cloths are designed to trap dust, grime, and bacteria without scratching the porcelain. They also dry quickly, which reduces the chance of mildew on the cloth itself. Avoid using abrasive scrubbers or steel wool—they can scratch the tank's surface and create rough spots where bacteria cling.
When To Wipe Vs. Scrub
If you're consistent with monthly wipes, you'll rarely need a heavy scrub. But if you notice a ring of scum or mineral crust, use a soft-bristled brush with a little baking soda paste. For routine maintenance, a dry or slightly damp microfiber cloth is all you need.
Don't Forget The Lid And Rim
While you're at it, wipe the underside of the lid and the rim where the tank meets the bowl. These areas collect condensation and dust, and they're often overlooked. A quick pass with the same cloth keeps the whole tank area clean.
12. Avoid Bleach Tablets That Damage Parts
Those blue bleach tablets might seem like an easy fix for toilet odors, but they're actually a fast track to expensive repairs. The chlorine eats away at rubber seals, gaskets, and even the plastic fill valve, causing leaks and breakdowns down the road. Instead of dropping a tablet in, try these safer methods that keep your tank clean without destroying it.
Bleach tablets are convenient, but the damage they cause often outweighs the benefits. The constant exposure to chlorine weakens the flapper, leading to phantom flushes and wasted water. It also corrodes metal parts like the fill valve's retaining clip, which can snap and flood your bathroom.
Once those parts fail, you're looking at a repair bill that's way more than the cost of a tablet pack.
What Bleach Does To Your Tank
The rubber flapper is the first casualty. Bleach makes it brittle and warped, so it no longer seals properly. That means water trickles into the bowl 24/7, causing a constant hissing sound and higher water bills.
The same goes for the fill valve's rubber washer and the tank-to-bowl gasket. Over time, the corrosion can even pit the metal screws and bolts, making them rust and leak.
Natural Alternatives That Work
Skip the bleach and use white vinegar or hydrogen peroxide instead. Pour a cup of vinegar into the overflow tube once a month, let it sit for an hour, then flush. It kills odor-causing bacteria without harming rubber or metal.
For a DIY cleaning tablet, mix baking soda with a little lemon juice, form into small balls, and let them dry. Drop one in the tank every few weeks for a gentle, effective clean.
How To Switch From Bleach Tablets
If you've been using bleach tablets, first remove any remaining ones and flush the tank a few times to clear the water. Then inspect the flapper and fill valve for signs of wear—cracks, softness, or discoloration. Replace any damaged parts before switching to natural cleaners.
Going forward, stick to vinegar soaks or DIY tablets to keep your tank fresh without the hidden costs.
13. Deep Clean with a Vinegar and Borax Soak
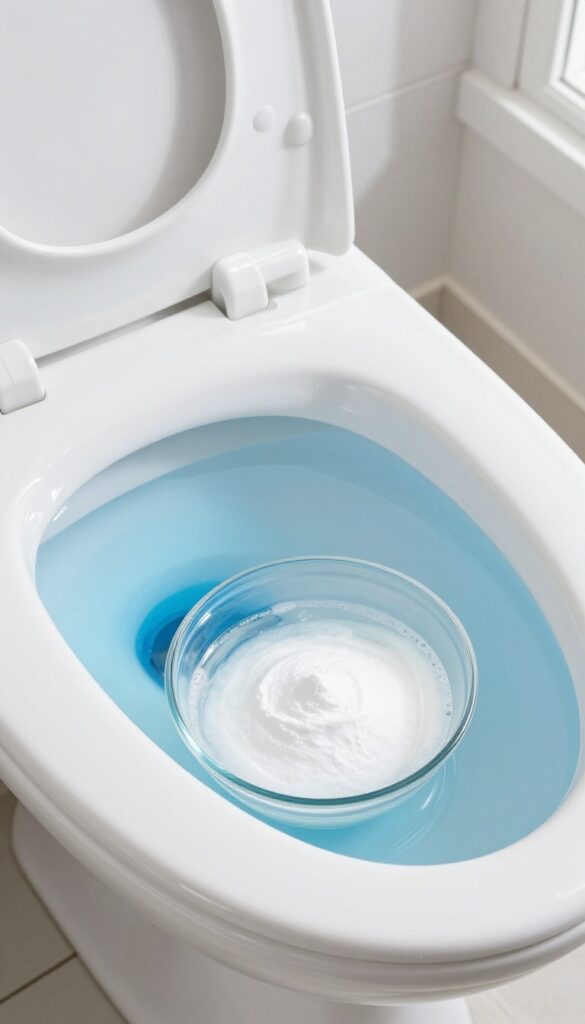
Sometimes a quick flush just isn't enough. When your toilet tank has years of buildup, a heavy-duty soak can break down stubborn grime and lingering odors. This method uses two pantry staples to create a powerful cleaning solution that works while you sleep.
Mix one cup of borax with two cups of white vinegar in a bowl, then pour the mixture directly into the overflow tube or the tank itself. The fizzing action helps loosen mineral deposits and biofilm. Let it sit overnight—at least 8 hours—so the solution can penetrate every nook.
In the morning, flush a few times to rinse. You'll notice fresher water and fewer odors.
Why This Combo Works
Vinegar's acidity dissolves calcium and lime scale, while borax acts as a mild abrasive and deodorizer. Together, they tackle the grime that regular cleaning misses. This soak is especially effective if you have hard water or if the tank hasn't been cleaned in months.
Step-by-step Instructions
Start by turning off the water supply and flushing to lower the water level. Pour the vinegar-borax mixture into the overflow tube until it's full, then add the rest to the tank. Let it sit overnight.
The next morning, turn the water back on, flush a couple of times, and wipe down any residue with a soft cloth.
Safety And Precautions
Never mix borax with bleach or other harsh chemicals—it can produce toxic fumes. Wear gloves if you have sensitive skin, and avoid letting the solution sit on rubber seals for prolonged periods. Rinse thoroughly after the soak to protect tank components.
14. Inspect and Clean the Water Supply Line
The water supply line is an often-overlooked component that can harbor sediment and bacteria. A clogged or dirty line restricts water flow and can introduce foul odors into the tank. Cleaning it is straightforward and can make a noticeable difference in both smell and performance.
Why The Supply Line Matters
Over time, minerals and debris from your water supply can accumulate inside the flexible hose. This buildup not only reduces water pressure but also creates a breeding ground for odor-causing bacteria. A clean line ensures fresh water enters the tank, preventing stale smells from developing.
How To Clean It Safely
Start by turning off the water valve behind the toilet and flushing to empty the tank. Disconnect the supply line from the fill valve and the shutoff valve. Submerge the line in a bucket of white vinegar and let it soak for at least 30 minutes.
Use a small brush or pipe cleaner to dislodge any stubborn sediment inside. Rinse thoroughly with water before reconnecting.
When To Replace Instead
If the line is old, corroded, or has visible cracks, replacement is the safer option. Supply lines are inexpensive and easy to swap out. A new line ensures no hidden leaks or contamination, giving you peace of mind and better water quality.
15. Schedule a Seasonal Tank Flush
If you only clean your toilet tank when something goes wrong, you're already behind. A seasonal flush every three months stops grime before it builds up, keeping odors and deposits in check without much effort.
Mark your calendar for the first day of each season—spring, summer, fall, winter—and make it a quick tank flush ritual. This simple habit prevents the scale and slime that cause lingering smells and ensures your toilet runs smoothly year-round.
What You'll Need
Grab a gallon of white vinegar, a soft brush or sponge, and a bucket. That's it. No harsh chemicals required—vinegar's acidity dissolves mineral deposits and kills bacteria naturally.
Step-by-step Flush
Turn off the water supply at the valve behind the toilet. Flush to empty the tank, then pour in one gallon of white vinegar. Let it sit for 30 minutes to an hour.
Scrub the sides and bottom with your brush, then turn the water back on and flush twice. Done.
Why Consistency Matters
Waiting until you notice a smell means buildup is already there. A seasonal schedule keeps the tank fresh and prevents hard-water stains from setting in. It also extends the life of internal parts like the flapper and fill valve.
FAQ
How often should I clean my toilet tank?
Aim for a deep clean every three months, with a quick wipe-down monthly to prevent buildup.
Can I use bleach in my toilet tank?
Occasional bleach use is okay, but avoid bleach tablets as they can damage rubber parts over time.
Why does my toilet tank smell even after cleaning?
Odors often come from mold in the overflow tube or mineral deposits on internal parts. Check those areas specifically.
Is it safe to put vinegar in the toilet tank?
Yes, white vinegar is safe for most toilet components and effectively removes mineral deposits and bacteria.
What is the best natural cleaner for toilet tanks?
A combination of white vinegar and baking soda works well for most tanks, with hydrogen peroxide for disinfection.
Conclusion
A clean toilet tank isn't just about banishing odors—it's about protecting your entire toilet from hidden buildup that can cause costly repairs. Start with the easiest fix, like checking the flapper or adding a vinegar soak, then work your way through the rest as needed.
A few minutes of maintenance every few months will keep your bathroom smelling fresh and your toilet running smoothly for years.