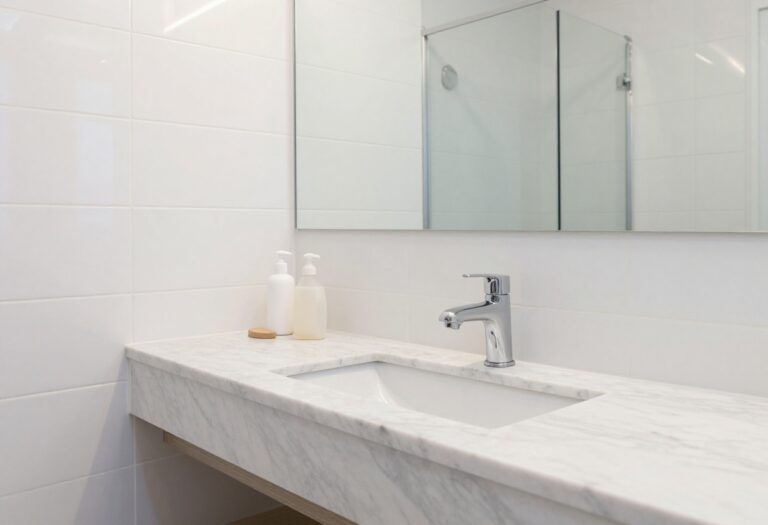
17 Grout Cleaning DIY Ideas for Brighter Tile Lines
Dull, dirty grout lines can make even the cleanest tile look worn and neglected. But you don't need harsh chemicals or expensive services to bring them back to life.
These 17 DIY ideas rely on common household staples and a bit of elbow grease to tackle everything from light discoloration to stubborn mold. Whether you prefer natural pastes, oxygen-based soaks, or simple tools like a toothbrush, each method targets grime without damaging your tile.
Get ready to see your floors, walls, and countertops transform with brighter, cleaner lines.
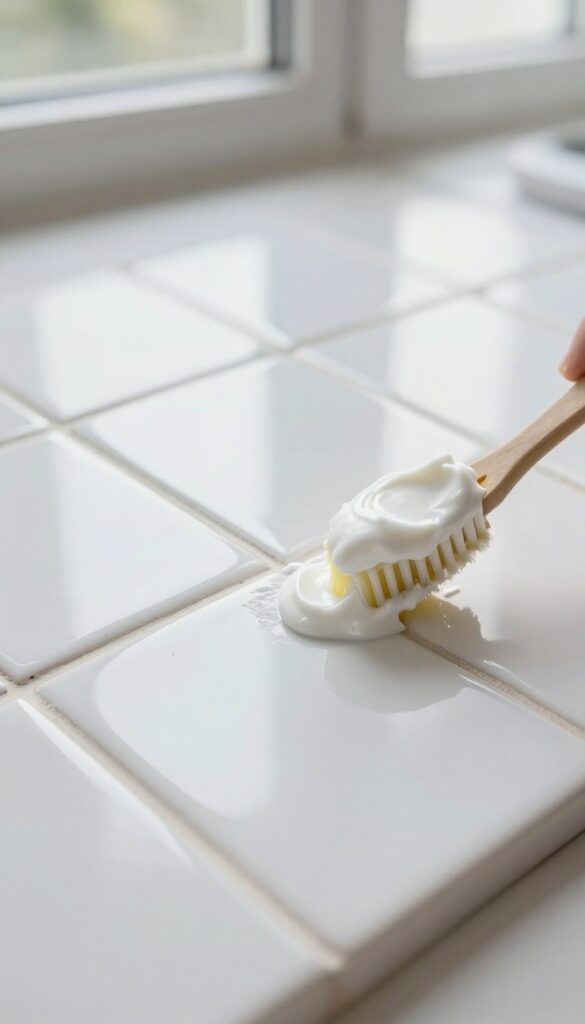
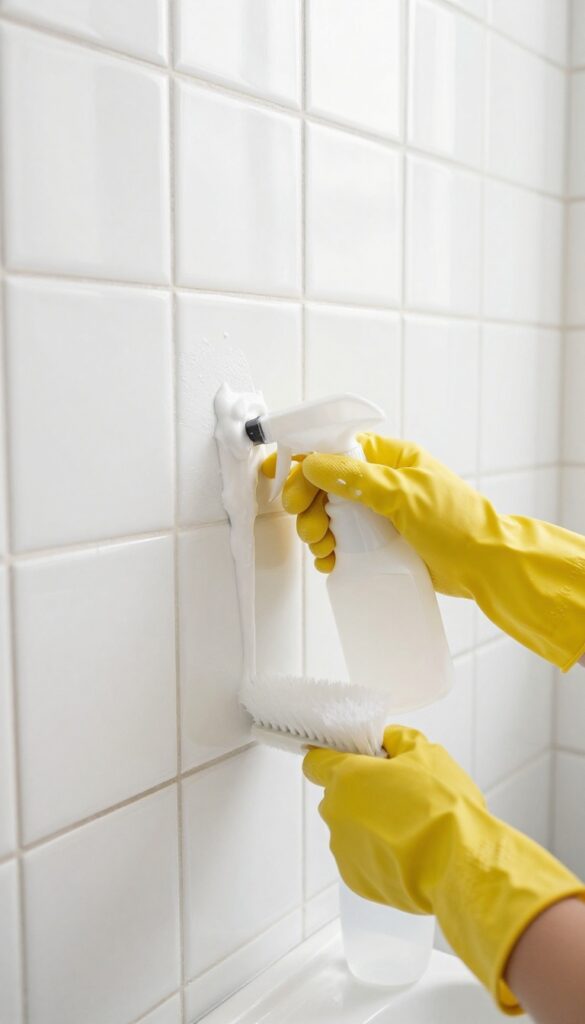
1. Baking Soda and Vinegar Paste
This classic combo uses natural ingredients to cut through grime without harsh fumes. The fizzing action helps lift dirt from porous grout, while the abrasiveness of baking soda scrubs away stains. It's safe for most tile types and costs pennies per use.
Mix equal parts baking soda and white vinegar to form a thick paste. Apply the paste directly onto grout lines using an old toothbrush or your finger. Let it sit for 10 minutes to allow the fizzing reaction to work.
Scrub vigorously with a stiff brush, then rinse with water. For extra stubborn stains, add a few drops of dish soap to the paste.
Why It Works
Vinegar's acidity dissolves mineral deposits and soap scum, while baking soda provides gentle abrasion. The carbon dioxide bubbles help dislodge dirt from deep within the grout pores.
Best For
Light to moderate grout discoloration on ceramic, porcelain, or glazed tile. Avoid on natural stone like marble or travertine, as vinegar can etch the surface.
Pro Tip
If the paste dries too quickly, mist it with a little water to keep it active. Work in small sections for best results.
2. Hydrogen Peroxide and Baking Soda
If you want a whitening boost without the pungent smell of vinegar, reach for hydrogen peroxide and baking soda. This duo creates a gentle but effective paste that lifts stains from grout while being safe for most tile types. It's especially handy for kitchen backsplashes and bathroom walls where odors linger.
Mix baking soda with enough hydrogen peroxide to form a thick paste. Apply it to the grout lines, let it sit for about 15 minutes, then scrub with a stiff brush. The peroxide acts as a mild bleach, while the baking soda provides gentle abrasion.
Rinse thoroughly with water. For extra stubborn spots, add a few drops of dish soap.
Why It Works
Hydrogen peroxide is a natural disinfectant and whitener that breaks down organic stains without harsh fumes. Baking soda is mildly abrasive, helping to physically scrub away grime without scratching tile. Together, they create a chemical reaction that lifts dirt from porous grout.
Best Surfaces And Safety Tips
This paste works well on ceramic, porcelain, and natural stone tiles, but always test on an inconspicuous area first. Avoid using it on unsealed grout if you're concerned about lightening. Wear gloves to protect your skin, and keep the area ventilated.
Pro Application Tips
For vertical surfaces, make the paste a bit thicker so it doesn't drip. Use an old toothbrush or a grout brush to work the paste into the lines. Let it sit longer (up to 30 minutes) for heavily stained areas.
Rinse with a damp sponge and wipe dry.
3. Lemon Juice and Cream of Tartar
Lemon juice and cream of tartar are a dynamic duo for grout cleaning. The citric acid in lemon juice cuts through grease and soap scum, while cream of tartar provides gentle abrasion to lift dirt without scratching tile. Together they form a natural paste that brightens grout lines effectively.
This method is perfect for light to moderate grout discoloration, especially in kitchens where grease buildup is common. The paste works well on ceramic, porcelain, and stone tiles, but avoid using it on unsealed natural stone as the acid may etch the surface.
How To Make The Paste
Mix equal parts lemon juice and cream of tartar in a small bowl until it forms a thick paste. For a typical area, start with 2 tablespoons of each. Adjust the ratio if needed—add more cream of tartar for a thicker paste or more lemon juice for a runnier consistency.
Application And Wait Time
Apply the paste directly onto the grout lines using an old toothbrush or a small spatula. Press it into the grooves to ensure contact. Let it sit for 10 to 15 minutes—longer for stubborn stains, but not more than 20 minutes to prevent drying out.
Scrubbing And Rinsing
Scrub the grout lines with a stiff-bristled brush or toothbrush using circular motions. For larger areas, a grout brush or scrub brush works well. Rinse thoroughly with warm water and wipe away residue with a damp cloth.
Repeat if necessary.
Tips For Best Results
For extra stubborn stains, add a tablespoon of baking soda to the paste for more abrasion. Always test on an inconspicuous area first. After cleaning, seal the grout to protect it from future stains and make next cleaning easier.
4. Oxygen Bleach Soak
Oxygen bleach is a powerhouse for lifting deep stains without the harshness of chlorine bleach. It’s safe for colored grout and tile, and it works by releasing oxygen bubbles that penetrate porous surfaces. This method is ideal for grout that’s been neglected for a while, as the soak time allows the solution to break down grime that scrubbing alone can’t reach.
Oxygen bleach powder is widely available and easy to use. Mix it with warm water according to the package directions—usually about 1 scoop per gallon. Apply the solution generously to your grout lines using a spray bottle or sponge, making sure the grout is saturated.
Let it sit for 30 minutes without letting it dry out. The oxygen bubbles will lift stains and loosen dirt. After the soak, scrub gently with a soft brush and rinse with clean water.
You’ll notice a visible difference, especially on white or light-colored grout.
Why Oxygen Bleach Works
Unlike chlorine bleach, oxygen bleach is non-toxic and won’t emit harsh fumes. It’s also less likely to yellow or damage grout over time. The active ingredient, sodium percarbonate, releases hydrogen peroxide when mixed with water, creating a fizzing action that dislodges dirt from deep within the grout pores.
This makes it effective for organic stains like mold, mildew, and food spills.
Best Practices For A Deep Soak
For best results, apply the solution to dry grout so it can absorb fully. If the grout is heavily soiled, you can cover the area with plastic wrap after applying the solution to keep it moist during the soak. This prevents the solution from evaporating too quickly and gives it more time to work.
After soaking, use a stiff-bristled brush or an old toothbrush to agitate the grout lines before rinsing.
Safety And Compatibility
Oxygen bleach is generally safe for all types of tile and grout, including natural stone, but it’s always smart to test a small hidden area first. Avoid using it on unsealed grout that’s in poor condition, as the soaking process can weaken it further. Always wear gloves to protect your hands, and ensure good ventilation if you’re working in a small space.
5. Steam Cleaning
If you want a deep clean without mixing pastes or sprays, a handheld steam cleaner is your best friend. It uses high-temperature steam to blast away grime and kill mold in the grout lines. No chemicals needed—just a microfiber cloth to wipe up the loosened dirt.
Steam cleaning is a powerful, chemical-free method that sanitizes as it cleans. The heat loosens embedded dirt and kills mold spores, leaving grout lines noticeably brighter. It's especially effective on kitchen backsplashes and bathroom floors where grease and soap scum build up.
How It Works
A handheld steam cleaner heats water to around 200°F and releases it as pressurized steam. The steam penetrates porous grout, softening dirt and killing bacteria. You simply direct the nozzle along the grout lines, then wipe away the residue with a microfiber cloth.
Best Uses
Steam cleaning excels on large tile areas like bathroom floors, shower walls, and kitchen backsplashes. It's also great for removing mold in damp corners. Avoid using steam on loose or cracked tiles, as moisture can seep underneath and cause damage.
Tips For Success
Work in small sections and wipe immediately while the grout is still wet. For stubborn stains, hold the steamer on the spot for a few extra seconds. Always test on an inconspicuous area first, especially with older or painted grout.
6. Toothbrush and Dish Soap
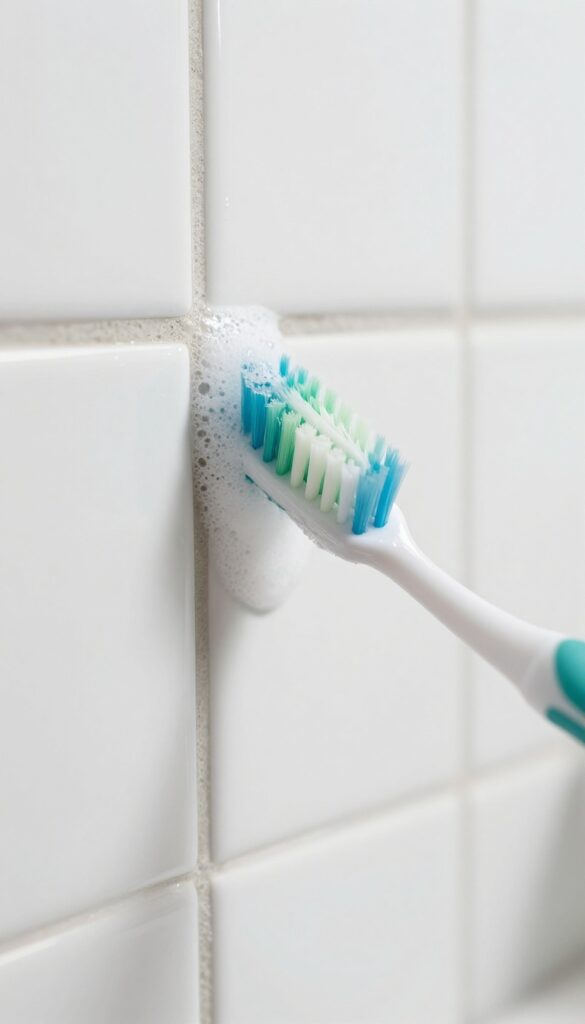
Sometimes the simplest tools do the best job. A toothbrush and dish soap is the go-to method for light daily grime that hasn't had time to set in. It's gentle enough to use every week without worrying about damaging your tile or grout.
This method works best for maintenance cleaning rather than deep stain removal. The soft bristles of a toothbrush reach into the porous grout lines without scratching the tile surface. Dish soap cuts through grease and everyday dirt without harsh chemicals.
Why This Combo Works
Dish soap is designed to break down grease and food residue, which are common culprits in kitchen and bathroom grout. The toothbrush's small head lets you target individual grout lines precisely. Together, they provide a safe, non-toxic clean that won't discolor grout or leave a sticky residue.
How To Do It Right
Mix a few drops of dish soap into a bowl of warm water. Dip the toothbrush and scrub along the grout lines in a circular motion. Rinse with a damp cloth or sponge.
For tougher spots, let the soapy water sit for a few minutes before scrubbing. No need to rinse with a hose—just wipe away the suds.
When To Use This Method
This is perfect for weekly or biweekly upkeep. Use it after cooking or showering to prevent grime from building up. It's also great for spot-cleaning a single dirty area without pulling out heavy-duty cleaners.
If your grout is already heavily stained, you'll want a stronger method first, then maintain with this one.
7. Magic Eraser
A melamine sponge, commonly known as a Magic Eraser, is surprisingly effective at scrubbing grout lines clean. When dampened, it acts like ultra-fine sandpaper, lifting embedded dirt and stains without scratching tile surfaces. It's a quick fix for spots that resist regular cleaning.
Dampen the sponge until it's wet but not dripping, then gently rub it along the grout lines. You'll see the grime transfer onto the sponge as it wears away. Work in small sections and rinse the sponge frequently to avoid redepositing dirt.
Be careful not to press too hard or stay too long on one spot, as the abrasive action can eventually wear down the grout's surface. Always test on an inconspicuous area first, especially with colored or delicate grout.
Why It Works
Melamine foam has a micro‑structure that creates friction on a microscopic level. This makes it excellent at grabbing and removing dirt particles that are stuck in porous grout. It's a physical cleaner, not a chemical one, so it's safe to use around food prep areas and kids.
Best Uses
This method shines on light to moderate surface stains, like daily grime in kitchen backsplashes or bathroom walls. It's less effective on deep mold or mildew that has penetrated the grout. For those tougher spots, pair the Magic Eraser with a bleach-based cleaner or hydrogen peroxide.
Pro Tips
Cut the sponge into smaller pieces to make it last longer and reach tight corners. Use a fresh piece for each cleaning session. Don't use it on unsealed natural stone tiles, as the abrasion can cause etching.
And remember: the sponge disintegrates as you use it, so keep a few extras handy.
8. Bleach Pen
A bleach pen is a surprisingly handy tool for grout cleaning. It lets you apply a concentrated gel bleach directly onto the grout lines with precision, so you don't accidentally bleach your tiles. This method is especially useful for spot-treating stubborn stains or small areas that need extra attention.
How It Works
The bleach pen contains a thick gel that clings to grout lines without running. You simply draw along the grout lines, let the gel sit for about 10 minutes, then scrub with a small brush and rinse with water. The bleach breaks down organic stains and mold effectively.
Best Uses
This method is ideal for small, targeted areas like bathroom corners, kitchen backsplashes, or around sinks. It's not the best choice for large floor areas because the gel can be time-consuming to apply and the bleach fumes may be strong in enclosed spaces.
Safety Tips
Always wear gloves and work in a well-ventilated area. Avoid getting the gel on your tile surface, especially if it's porous or natural stone, as bleach can cause etching or discoloration. Rinse thoroughly after scrubbing.
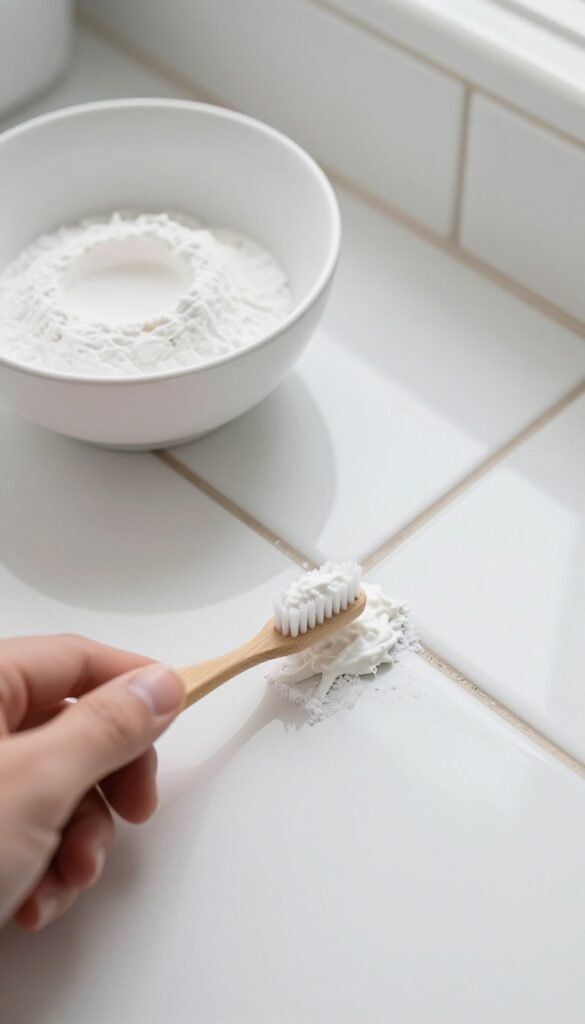
9. Borax and Water
Borax is a natural mineral that’s been used for cleaning for generations. When mixed with water, it forms a gentle paste that lifts dirt and brightens grout without harsh fumes. This method is especially good for light-colored grout that needs a whitening boost.
To use borax, mix it with enough water to create a thick paste. Apply the paste directly onto the grout lines using an old toothbrush or a small brush. Let it sit until it dries completely—usually about 15–20 minutes.
Once dry, scrub the residue off with a damp brush or cloth. Rinse with water and wipe away any leftover powder. The borax works as a mild abrasive and a natural deodorizer, leaving grout looking cleaner and smelling fresher.
Why Borax Works So Well
Borax has a high pH, which helps break down grease and organic stains. It also has mild bleaching properties that can lighten discolored grout. Unlike chlorine bleach, it won’t produce strong fumes or damage your tile’s finish.
Step-by-step Application
Start by sweeping or vacuuming the area to remove loose dirt. Mix 1 part borax with 2 parts water to form a paste. Spread the paste over the grout lines, making sure to work it into the grooves.
Let it dry completely—this allows the borax to penetrate and lift stains. Then scrub with a stiff brush and rinse thoroughly.
Tips For Best Results
For stubborn spots, let the paste sit for up to 30 minutes. You can also add a few drops of lemon juice to boost whitening power. Always test on an inconspicuous area first, especially if your grout is colored or sealed.
10. White Vinegar Spray
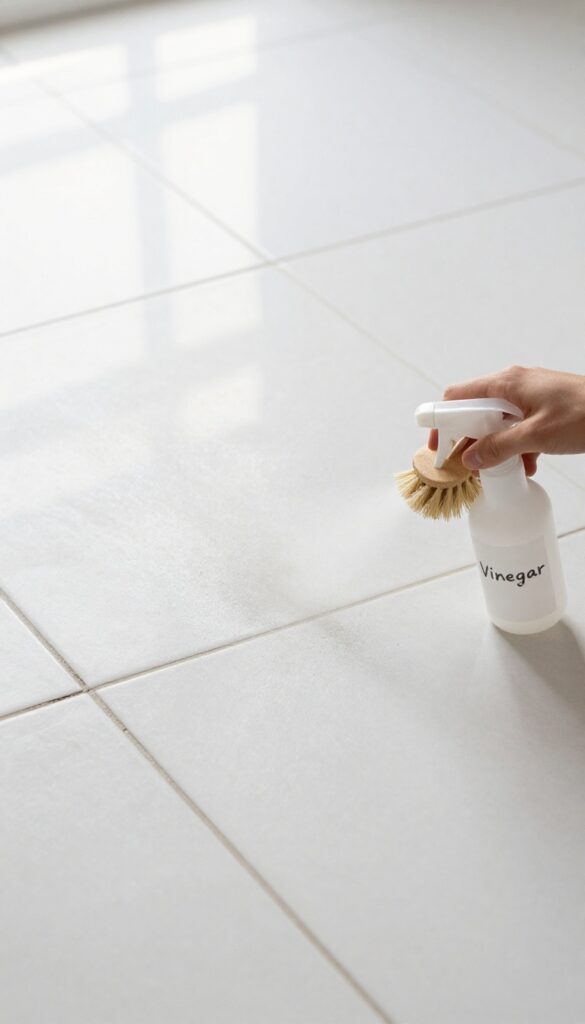
White vinegar is a powerhouse cleaner that cuts through grime without harsh chemicals. Its mild acidity breaks down mineral deposits, soap scum, and everyday dirt that darken grout lines. This simple spray-and-scrub method works best on light to moderate discoloration and is safe for most tile types.
For best results, use undiluted white vinegar in a spray bottle. Mist the grout lines generously, let it sit for five minutes, then scrub with a stiff brush. The vinegar will fizz slightly as it dissolves buildup.
Rinse thoroughly with water afterward to prevent any lingering smell.
Why Vinegar Works
Vinegar contains acetic acid, which dissolves alkaline residues like hard water stains and soap scum. It also has mild antibacterial properties, making it effective against surface mold. Unlike bleach, it won't yellow grout over time.
Best Tiles For This Method
Vinegar is safe for ceramic, porcelain, and most natural stone tiles, but avoid it on unsealed marble or limestone. The acid can etch these softer stones. Always test in an inconspicuous area first.
Pro Tips For Better Results
Heat the vinegar slightly in the microwave for extra cleaning power. Use an old toothbrush or grout brush to work the solution into crevices. For stubborn spots, sprinkle baking soda on the grout before spraying to create a gentle abrasive paste.
11. Toothpaste
Non-gel white toothpaste isn't just for your teeth—it's a surprisingly effective grout cleaner. The mild abrasives in toothpaste can polish away surface stains and brighten grout lines without harsh chemicals. This method is ideal for small areas like backsplashes or around sinks where you want a quick, gentle touch-up.
Toothpaste works best on light discoloration and everyday grime. It's not strong enough for heavy mold or deep-set stains, but for a fast refresh, it's hard to beat. Plus, you probably already have a tube in your bathroom cabinet.
How To Use Toothpaste On Grout
Squeeze a pea-sized amount of non-gel white toothpaste onto an old toothbrush. Scrub the grout lines with small circular motions, focusing on the darkest areas. Let it sit for a minute, then wipe away with a damp cloth.
Rinse the area with water and dry with a towel.
Best Areas For This Method
Toothpaste is perfect for small, visible grout sections like kitchen backsplashes, bathroom vanity backsplashes, or shower niches. It's also great for spot-cleaning a single stained line without mixing a batch of cleaner.
Why It Works
White toothpaste contains mild abrasives like calcium carbonate or silica, which physically buff away stains. It also includes detergents that help lift dirt. Unlike some harsh cleaners, toothpaste is gentle on tile and safe for sealed grout.
12. Grout Brush with Long Handle
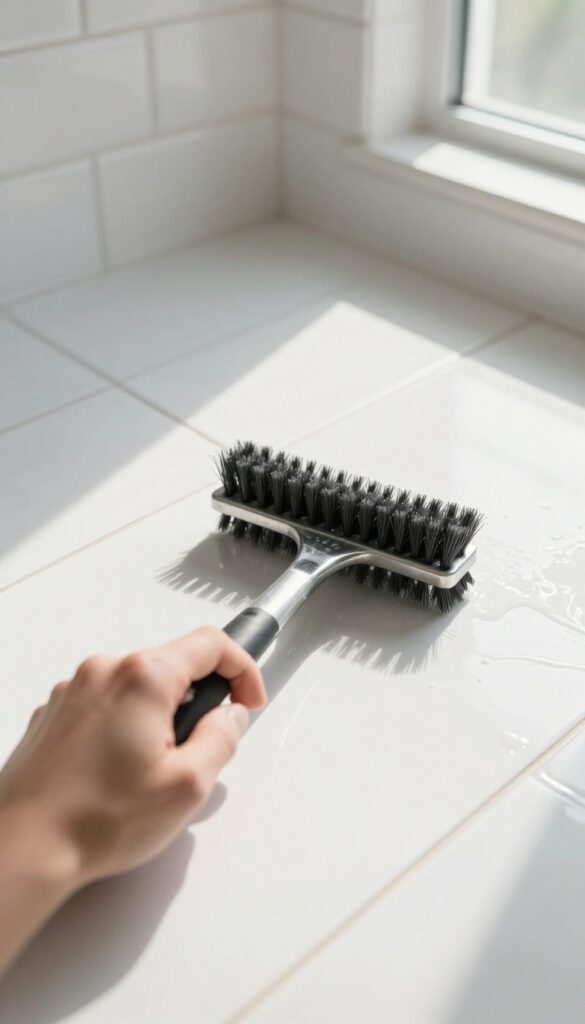
A dedicated grout brush with stiff bristles and a long handle saves your knees and back. Use it with any cleaning solution for deeper scrubbing power. This simple tool makes a big difference in how much effort you need to put in.
A long-handled grout brush is a game-changer for anyone tired of kneeling and scrubbing. The stiff bristles dig into porous grout lines, while the handle lets you apply pressure from a standing position. Pair it with your favorite homemade or store-bought cleaner for best results.
Why A Long Handle Matters
Standard scrub brushes force you to hunch over or kneel, which can be hard on your body. A long handle keeps you upright, reducing strain on your knees and lower back. You can cover more area faster and with less fatigue.
Choosing The Right Brush
Look for a brush with stiff, angled bristles that can reach deep into grout lines. A handle length of at least 30 inches is ideal for most users. Some brushes come with replaceable heads, which is a nice bonus for longevity.
Best Cleaning Solutions To Pair
This brush works well with any cleaner, but a baking soda and vinegar paste or an oxygen bleach solution really shines. Apply the cleaner, let it sit for a few minutes, then scrub with the brush. Rinse with water and enjoy the results.
13. Pressure Washer (Outdoor Tiles)
Outdoor tiles take a beating from weather, dirt, and foot traffic, and their grout lines often end up packed with grime. A pressure washer is the fastest way to blast that buildup away, but you have to use it carefully to avoid damaging the grout or the tiles themselves. This method works best on durable surfaces like concrete or stone pavers, not delicate indoor tiles.
Choose The Right Nozzle And Pressure
A narrow, high-pressure nozzle (like a 0-degree or 15-degree tip) concentrates the stream for maximum cleaning power. But don't go full blast right away—start with a wider spray and lower pressure to test a small area. If the grout starts to erode, back off.
The goal is to clean, not carve out the grout lines.
Keep The Nozzle Moving
Holding the pressure washer in one spot for too long can gouge the grout or chip the tile edges. Use a sweeping motion, moving the nozzle steadily along the grout lines. Work in small sections, and let the water carry away the debris.
You'll see the grout brighten almost instantly.
Safety And Surface Check
Pressure washers are powerful—wear closed-toe shoes and eye protection. And never use this method on glazed ceramic, porcelain, or soft stone tiles, because the pressure can crack or etch them. Stick to concrete, quarry stone, or unglazed outdoor pavers.
If you're unsure, test in an inconspicuous spot first.
14. Rubbing Alcohol and Water
Rubbing alcohol isn't just for first aid—it's a surprisingly effective grout cleaner. When mixed with water, it creates a fast-drying solution that cuts through grease and mildew without leaving residue. This method works especially well on kitchen backsplashes and bathroom walls where soap scum and moisture are common.
Why It Works
Rubbing alcohol is a solvent that dissolves grease and oils, while its quick evaporation helps prevent mold regrowth. The alcohol also disinfects, killing bacteria and mildew spores on contact. Unlike vinegar, it won't damage natural stone tiles, making it a safe choice for marble or travertine.
How To Apply
Mix equal parts rubbing alcohol (70% or higher) and water in a spray bottle. Spray the solution directly onto dirty grout lines and let it sit for 2–3 minutes. Scrub with a stiff brush or toothbrush, then wipe away residue with a damp cloth.
For stubborn spots, let the solution sit longer or apply a second coat.
Best Uses And Tips
This method is ideal for light to moderate grime, especially on kitchen and bathroom tiles. Avoid using on painted or sealed grout, as alcohol may strip the finish. Always test in an inconspicuous area first.
For extra cleaning power, add a few drops of dish soap to the mixture.
15. Pumice Stone
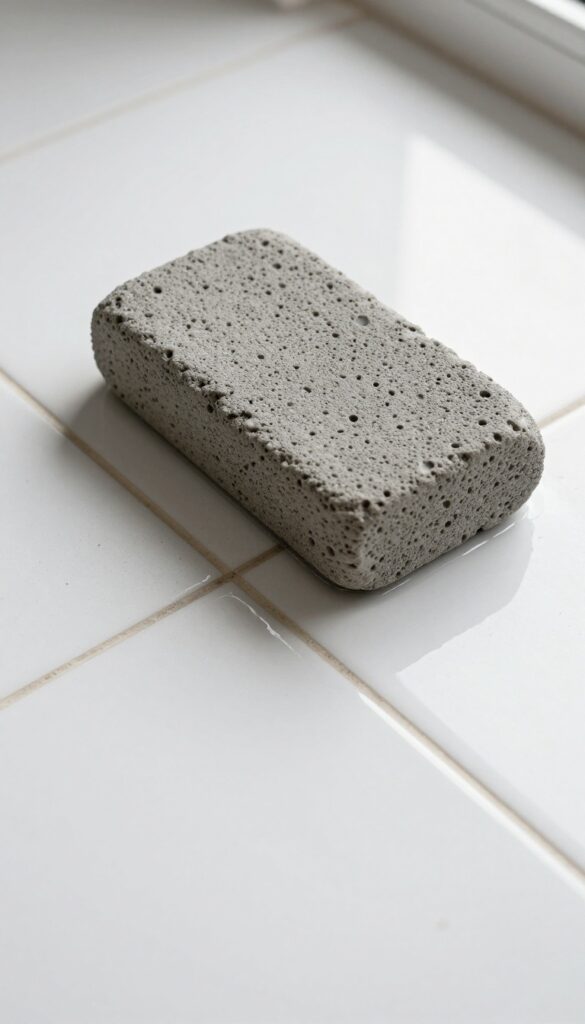
A pumice stone is one of those tools that seems too simple to work, but it's surprisingly effective on tough grout stains. The porous volcanic rock acts like a gentle sanding block, scrubbing away mineral deposits, soap scum, and even light mold without scratching glazed tile. You just need to wet it thoroughly and rub gently.
It's a low-tech, chemical-free solution that works especially well on stubborn buildup that pastes and sprays can't budge.
Using a pumice stone is straightforward, but a few tips make it safer and more effective. Always wet both the stone and the grout before you start. The water acts as a lubricant, reducing friction and preventing scratches.
Rub the stone gently back and forth over the stained grout lines. You'll feel the stone wearing down slightly—that's normal. Rinse the area frequently to check your progress and remove debris.
This method is best for glazed ceramic or porcelain tiles; avoid it on unglazed, natural stone, or porous surfaces, as it can cause damage.
Why It Works So Well
Pumice is naturally abrasive but softer than tile glaze, so it scrubs away grime without harming the tile surface. The stone's porous structure also helps lift embedded dirt as you rub. It's especially good at removing hard water stains and rust rings that other cleaners leave behind.
Where To Use It (and Where To Skip)
Stick to glazed ceramic, porcelain, or glass tiles. Avoid using it on marble, granite, travertine, or any polished stone—the abrasion will dull the finish. Test on an inconspicuous spot first if you're unsure about your tile type.
Pro Tips For Best Results
Cut the pumice stone in half or use a small one for better control. Keep a spray bottle of water handy to re-wet the area as you work. For extra tough stains, let a baking soda paste sit on the grout for 10 minutes before rubbing with the stone.
16. Commercial Grout Cleaner
Sometimes the stains are too stubborn for baking soda and vinegar. That's when a heavy-duty commercial grout cleaner earns its spot in your cleaning arsenal. Brands like Zep, Clorox, and Goo Gone offer formulas designed to lift deep-set dirt and mildew without scrubbing for hours.
When you hit a stain that won't budge, it's time to bring in the big guns. Commercial grout cleaners are formulated with stronger active ingredients than household staples, making them ideal for heavily soiled areas like entryways or shower floors. They work fast, but they also require caution.
Always read the label, wear gloves, and open windows or turn on a fan. Spray or apply the cleaner directly onto the grout lines, let it sit for the recommended time (usually 5–15 minutes), then scrub with a stiff brush and rinse thoroughly. The results can be dramatic—like having brand-new grout without the cost of regrouting.
Choosing The Right Product
Not all commercial cleaners are the same. For mold and mildew, look for a bleach-based cleaner like Clorox Tilex. For grease and general grime, an oxygenated formula like Zep Grout Cleaner works well.
If you have colored grout, test in an inconspicuous spot first to avoid bleaching.
Application Tips For Best Results
Apply the cleaner in small sections so it doesn't dry out before you scrub. Use a grout brush or an old toothbrush to work the solution into the pores. For vertical surfaces, a spray bottle helps keep the product wet.
Rinse with clean water and wipe away residue with a damp cloth.
Safety First
Commercial cleaners contain strong chemicals. Always wear rubber gloves and eye protection. Ventilate the area by opening windows and doors.
Keep children and pets away until the area is completely dry. If you have respiratory issues, consider wearing a mask.
17. Sealing After Cleaning
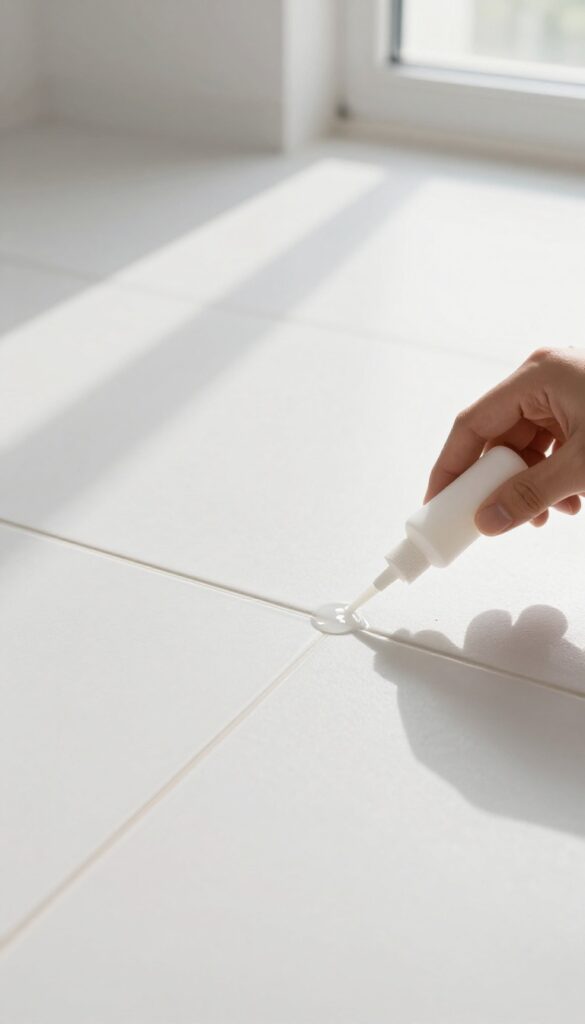
You've scrubbed, rinsed, and admired your bright grout lines. Now lock in that clean look with a grout sealer. Sealing is the final step that protects your hard work from future stains, moisture, and mold.
A good grout sealer penetrates the porous surface and creates an invisible barrier. This makes spills bead up instead of soaking in, and routine cleaning becomes a quick wipe-down rather than a deep scrub. Sealers come in two main types: penetrating sealers that absorb into the grout and membrane-forming sealers that sit on top.
For most DIY projects, a penetrating sealer is easiest to apply and lasts longer. Apply it with a small brush or applicator bottle, following the grain of the grout lines. Let it sit for the recommended time, then buff off any excess from the tile surface.
Reapply every year or as needed to keep protection strong.
Why Sealing Matters
Unsealed grout is like a sponge—it soaks up spills, dirt, and moisture. That's why grout gets discolored so quickly. A sealer fills those microscopic pores and makes the surface non-porous.
This means less scrubbing, fewer stains, and grout that stays looking fresh for months longer.
Choosing The Right Sealer
Not all sealers are the same. For ceramic or porcelain tile, a water-based penetrating sealer is a safe bet. It's low-odor and easy to clean up.
For natural stone, make sure the sealer is stone-safe and won't alter the color. Some sealers also include antimicrobial additives to fight mold and mildew in damp areas like showers.
Application Tips For Best Results
Clean and dry the grout thoroughly before sealing. Any moisture left behind can trap dirt under the sealer. Work in small sections, applying the sealer evenly along the grout lines.
Wipe away excess from the tile surface immediately to avoid hazy residue. Let it cure for at least 24 hours before exposing the area to water.
FAQ
How often should I clean my grout?
For maintenance, clean grout every 2-4 weeks with a mild solution. Deep clean every 3-6 months depending on traffic and moisture.
Can I use bleach on colored grout?
Bleach can discolor or lighten colored grout. Test in an inconspicuous spot first, or use a color-safe cleaner instead.
What is the best homemade grout cleaner?
A paste of baking soda and hydrogen peroxide is highly effective for whitening without harsh fumes. For tough stains, add a little dish soap.
How do I prevent grout from getting dirty quickly?
Seal your grout after cleaning and reapply sealer every 1-2 years. Also, wipe up spills promptly and use a squeegee in wet areas.
Is steam cleaning safe for all tile types?
Steam is safe for ceramic, porcelain, and natural stone tiles, but avoid high heat on unsealed or damaged grout. Always test a small area first.
Conclusion
Bright grout can completely transform the look of your tile floors and walls. With these 17 DIY ideas, you have plenty of options to tackle any level of grime using things you probably already have at home. Start with the gentlest method and work your way up if needed.
A little regular maintenance goes a long way, so pick a routine that fits your schedule. Your tile lines will thank you.