17 Bathroom Cleaning Supplies Every Home Should Keep
A clean bathroom doesn't happen by accident. It takes the right tools and a few smart products to cut through soap scum, hard water stains, and mildew without wasting time. Most people grab a spray bottle and a rag, but that barely scratches the surface.
The truth is, having the right supplies changes everything. You scrub less, get better results, and your bathroom actually stays clean longer. No more wondering why the grout still looks dingy or why the shower door won't dry streak-free.
This list covers the 17 bathroom cleaning supplies that make the biggest difference. Some are obvious, some are surprising, but every single one earns its spot in your cleaning caddy. Let's get into it.
1. Microfiber Cloths – The Workhorse You Didn't Know You Needed
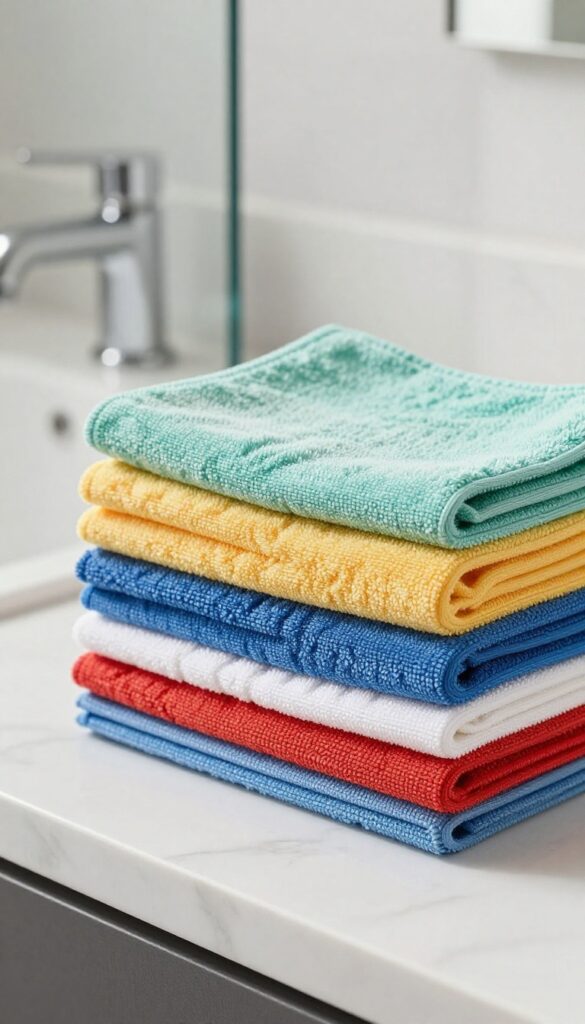
You probably already have some rags under the sink, but microfiber cloths are a different beast. They trap dust and grime like a magnet, and they won't scratch your mirrors, faucets, or shower doors. Plus, they're reusable and washable, so you save money and cut down on waste.
Microfiber cloths are made of split fibers that create a static charge, attracting dust and dirt. They can hold up to seven times their weight in water, making them perfect for wiping down wet surfaces. Unlike paper towels, they don't leave lint behind, and they work with just water or a mild cleaner.
Why Microfiber Beats Paper Towels
Paper towels push dirt around and leave streaks. Microfiber grabs particles and locks them in the fibers. You use less product and get a streak-free shine on glass and stainless steel.
Color Coding For Different Tasks
Assign a color to each area to avoid cross-contamination. For example, use blue for glass and mirrors, green for countertops, yellow for sinks, and red for toilets. This simple system keeps your cleaning routine sanitary and efficient.
How To Care For Microfiber Cloths
Wash them separately from cotton fabrics to prevent lint transfer. Use a mild detergent without fabric softener, as softener clogs the fibers. Air dry or tumble dry on low heat.
Proper care keeps them effective for hundreds of washes.
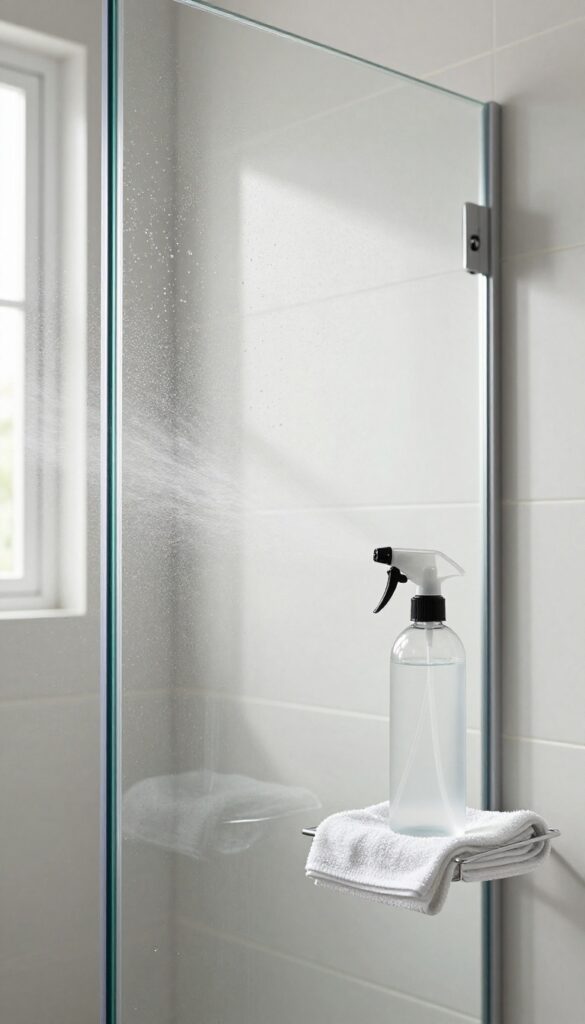
2. Squeegee – The Secret to Spotless Glass and Mirrors
You might think a rag and some glass cleaner are enough, but a squeegee is the real game-changer. It wipes away water in one smooth motion, leaving glass and mirrors completely dry and streak-free. No more scrubbing at hard water spots or fighting with lint from paper towels.
Just a quick pass and you're done.
A squeegee is a simple tool with a rubber blade that removes water from smooth surfaces. It works best on shower doors, mirrors, and even tile walls. The key is to use it right after showering while the surface is still wet.
One or two strokes from top to bottom, and the water is gone. This prevents mineral deposits from forming and keeps glass looking new. For mirrors, a quick wipe with a squeegee after steam clears eliminates fog and streaks.
Keep one hanging in the shower with a hook or suction cup so it's always handy.
Why A Squeegee Beats A Cloth
Cloths and paper towels often leave behind lint or tiny fibers, especially on glass. A squeegee's rubber blade makes full contact with the surface, pushing water off completely. It also dries faster because there's no moisture left to evaporate and leave spots.
Plus, you use less cleaner since the squeegee does most of the work.
Choosing The Right Squeegee
Look for a squeegee with a stainless steel or sturdy plastic handle and a replaceable rubber blade. The blade should be soft enough to flex but firm enough to remove water. A 6- to 10-inch blade is ideal for shower doors and mirrors.
Some models come with a built-in hook or suction cup for easy storage.
How To Use A Squeegee For Best Results
Start at the top corner of the glass and pull the squeegee straight down. Wipe the blade with a dry cloth after each pass to keep it clean. Overlap each stroke slightly to avoid streaks.
For large doors, work from one side to the other, then do a final horizontal pass along the bottom to catch drips. Rinse the blade occasionally to remove soap residue.
3. Toilet Bowl Cleaner with Bleach – Deep Cleaning Power
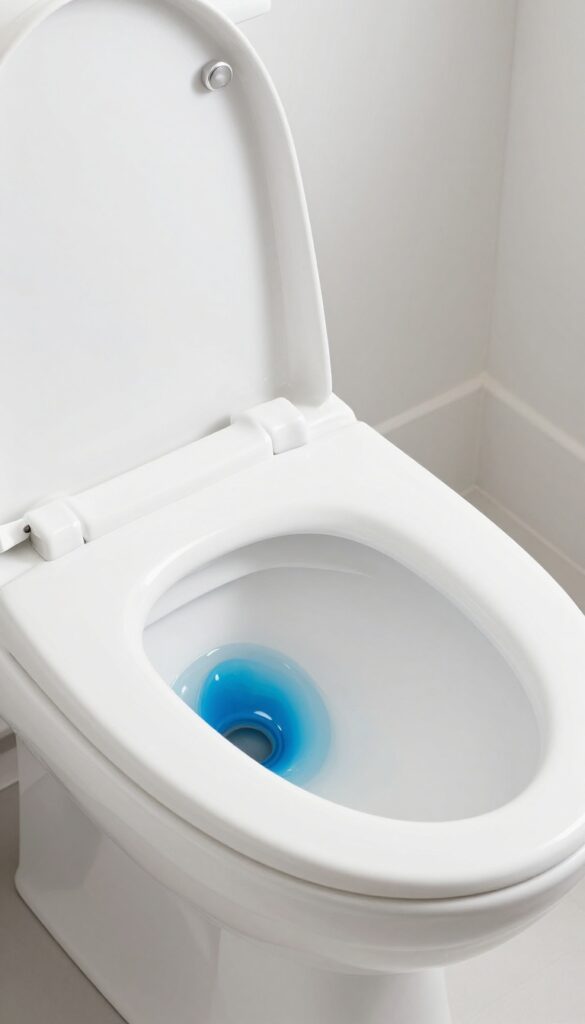
Bleach-based toilet bowl cleaners are the heavy hitters of bathroom sanitation. They combine stain removal and disinfection in one pour, saving you from scrubbing twice. The key is choosing a thick gel formula that clings to the porcelain instead of running straight into the water.
A good bleach cleaner makes quick work of rings, mineral deposits, and lingering odors. It’s especially effective for toilets that see heavy use or have stubborn hard water stains. Just apply under the rim, let it sit for a few minutes, scrub, and flush.
The bleach also kills bacteria and viruses, giving you peace of mind.
Why Bleach Works Best
Bleach oxidizes stains and disinfects simultaneously. Unlike non-bleach cleaners that rely on surfactants, bleach breaks down organic matter and whitens the bowl. It’s the only ingredient that reliably removes pink or black mold rings.
Choosing The Right Formula
Look for a thick gel that dispenses easily and sticks to the bowl. Avoid thin liquids that dilute too quickly. Brands with a curved nozzle help you reach under the rim.
Some also include a mild fragrance to mask the bleach smell.
Safety And Usage Tips
Never mix bleach with ammonia or acidic cleaners—it creates toxic fumes. Always ventilate the bathroom. Apply the gel, let it sit for 5–10 minutes, scrub with a dedicated toilet brush, then flush.
For tough rings, let it soak overnight.
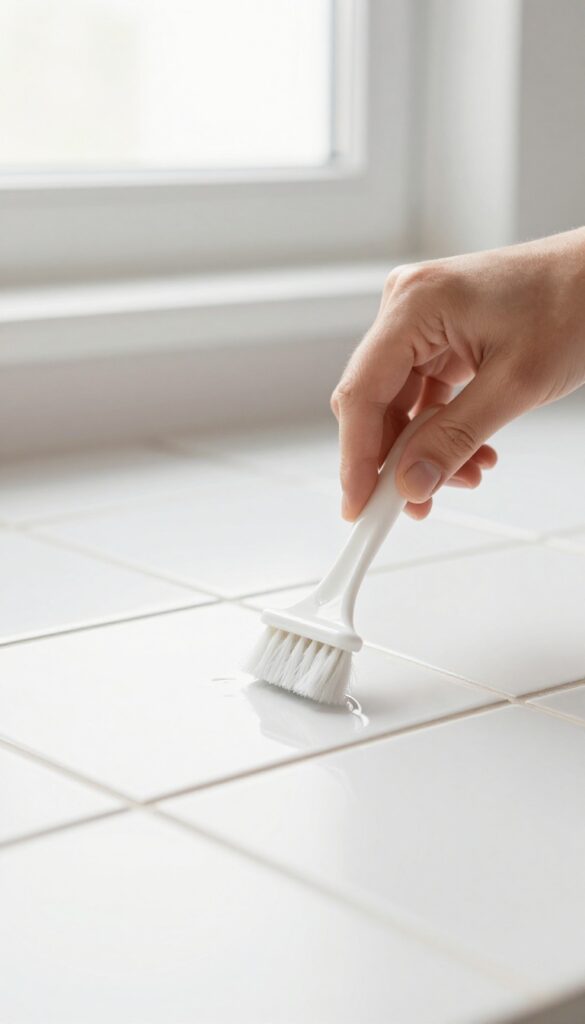
4. Grout Brush – Tiny Bristles, Big Difference
Grout lines are a magnet for grime. Sponges and cloths glide right over the surface, leaving mold and soap scum to build up in those tiny grooves. A grout brush changes that completely.
The stiff, angled bristles dig deep into tile lines, scrubbing away what other tools miss. Dedicated grout brushes are small enough to maneuver into tight corners but tough enough to break up stubborn stains. They make tile floors and walls look fresh without harsh chemicals or endless elbow grease.
Why A Dedicated Brush Works Best
A regular scrub brush can't reach into narrow grout lines. Grout brushes have compact heads and firm bristles that fit perfectly. They concentrate scrubbing power exactly where it's needed, so you use less effort and get better results.
How To Use It Effectively
Wet the brush and apply a grout cleaner or a paste of baking soda and water. Scrub in a circular motion along the grout lines. Rinse with water or wipe with a damp cloth.
For tough stains, let the cleaner sit for a few minutes before scrubbing.
Where It Makes The Biggest Difference
Shower floors, bathroom walls, and kitchen backsplashes are prime spots. Anywhere tile meets moisture is a candidate. A quick weekly scrub with a grout brush prevents buildup and keeps grout looking new.
5. Bathroom-Specific All-Purpose Cleaner – Tailored for Soap Scum
Not all all-purpose cleaners are created equal. The one you use on your kitchen counters might not cut it in the bathroom. Bathroom-specific formulas are designed to tackle soap scum, hard water stains, and mildew without damaging surfaces.
They save you time and elbow grease.
Why You Need A Dedicated Bathroom Cleaner
Standard all-purpose cleaners are great for general dirt, but they often struggle with the unique grime in bathrooms. Soap scum is a stubborn mix of soap residue, minerals, and oils. Hard water leaves chalky deposits.
Mildew thrives in damp corners. A bathroom-specific cleaner contains surfactants and acids that break down these messes more effectively.
What To Look For In A Bathroom Cleaner
Check the label for ingredients like citric acid, oxalic acid, or hydrogen peroxide—these target soap scum and hard water. Avoid harsh abrasives if you have delicate surfaces like acrylic or fiberglass. For daily use, a spray-on formula works well.
For heavy-duty jobs, a foaming gel clings to vertical surfaces longer.
Surface Safety Matters
Not all bathroom cleaners are safe for every surface. Marble and natural stone need pH-neutral cleaners to avoid etching. Chrome fixtures can be damaged by strong acids.
Always test a small area first. Many brands now offer multi-surface bathroom cleaners that are safe on tile, glass, and metal when used as directed.
6. Magic Eraser – The Quick Fix for Stubborn Marks
Some messes just don't budge with regular cleaners. Crayon on the wall, scuff marks on baseboards, or that mysterious smudge near the light switch. That's where melamine foam sponges, better known as Magic Erasers, come in.
They work with nothing but water, yet they erase marks that scrubbing alone can't touch.
How They Work
Melamine foam is a micro-abrasive material. When you wet it, the foam's structure becomes rigid enough to act like super-fine sandpaper. It lifts dirt and stains without damaging most surfaces.
No chemicals needed—just water and a little elbow grease.
Where To Use Them
Magic Erasers are perfect for walls, baseboards, doors, and sinks. They also work great on shower doors, tile grout, and even scuffed vinyl flooring. Avoid using them on glossy or delicate surfaces like stainless steel or painted trim, because they can dull the finish.
A Few Tips For Best Results
Cut the sponge into smaller pieces to make it last longer. Use light pressure and test in an inconspicuous spot first. They're disposable, but you can rinse and reuse them until they fall apart.
Keep one in your bathroom caddy for quick touch-ups.
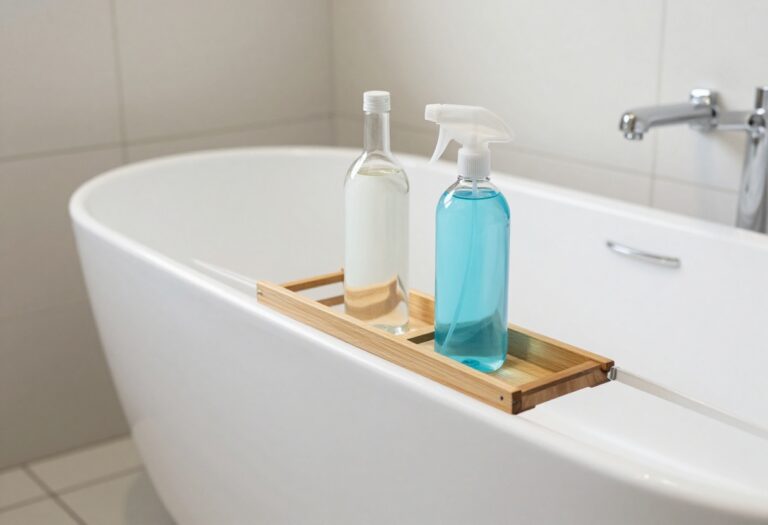
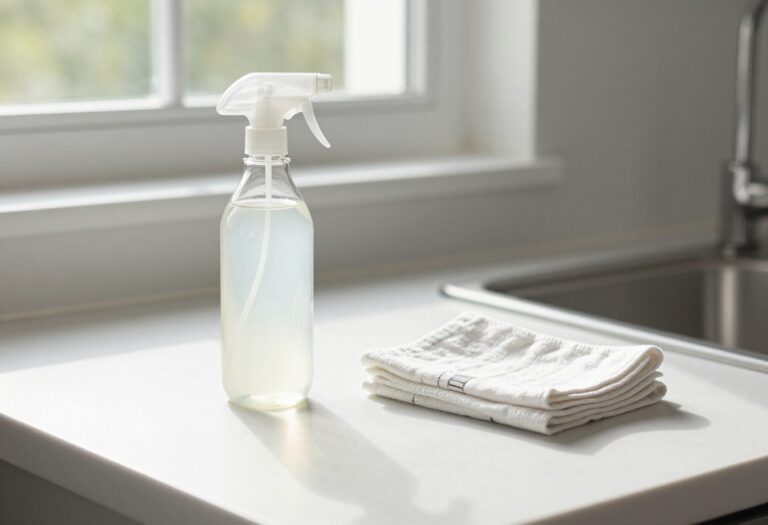
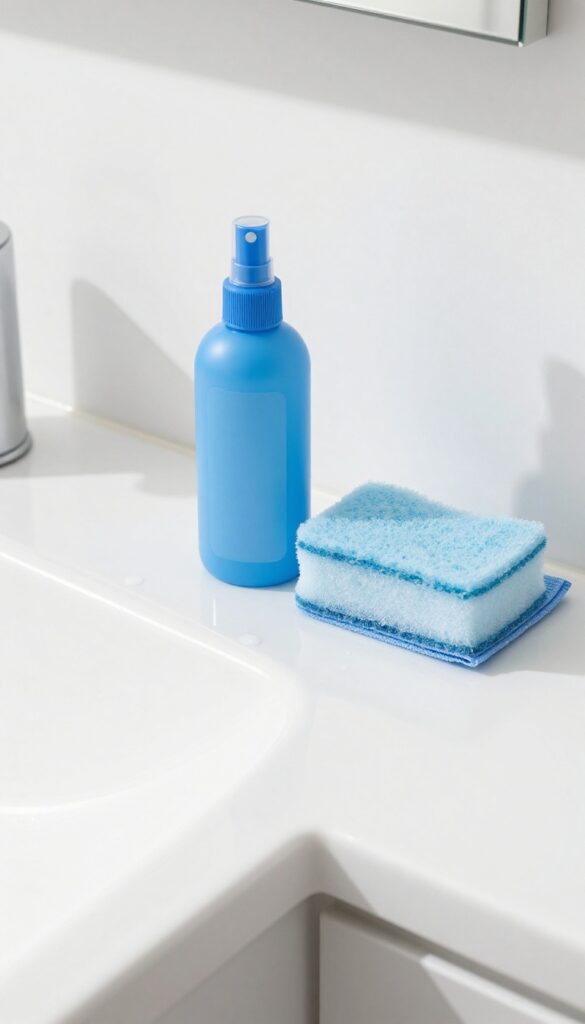
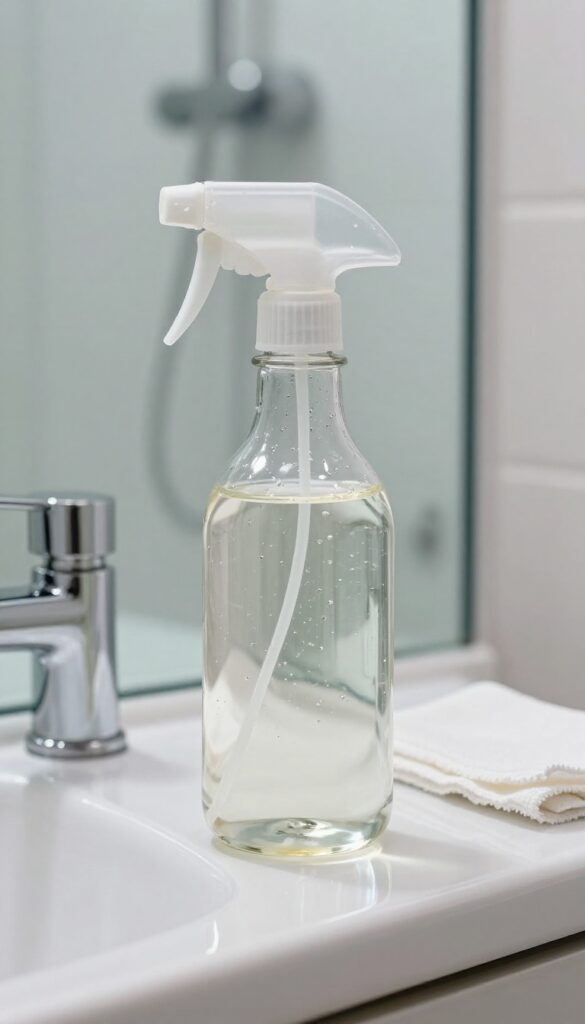
7. Shower Spray – Daily Maintenance Made Easy
Soap scum and mildew don't stand a chance when you make one simple habit part of your routine. A daily shower spray is the low-effort hack that keeps glass doors, tiles, and fixtures looking fresh without any scrubbing. Just a few seconds after your last rinse, and you're done.
The magic of a daily shower spray lies in its ingredients—usually a mix of water, surfactants, and chelating agents that break down soap residue and prevent mineral deposits. Unlike heavy-duty cleaners you use weekly, this spray is gentle enough for everyday use and safe on most surfaces. Spray it on wet walls, let it sit for a minute, then rinse or just leave it—many formulas are no-rinse.
The result? Less grime buildup, fewer deep cleans, and a bathroom that always looks tidy.
What To Look For
Choose a spray that's specifically labeled for daily use. Avoid harsh chemicals like bleach or ammonia—they're overkill and can damage surfaces over time. Look for ingredients like citric acid, hydrogen peroxide, or enzymes that tackle soap scum naturally.
A pleasant scent is a bonus, but unscented options work just as well and are better for sensitive noses.
How To Use It Right
After your shower, give the walls, glass door, and fixtures a quick spritz. If the product says no-rinse, just close the door and walk away. For best results, use a squeegee first to remove excess water, then spray.
This two-step routine takes under a minute and dramatically cuts down on hard water spots and mildew.
Diy Vs. Store-bought
You can make your own daily spray with equal parts water and white vinegar, plus a few drops of dish soap. Store-bought options often have added surfactants that work faster and smell better. Either way, the key is consistency—using it daily is what makes the difference.
8. Toilet Plunger – The Unsung Hero
Nobody wants to think about a clogged toilet until it happens. But when it does, a cheap plunger from the dollar store usually makes things worse. A good plunger is one of those tools you hope you never need, but you'll be glad you have when the moment strikes.
Every bathroom needs a dedicated plunger. Choose one with a flange for better seal and effectiveness. Keep it stored discreetly but within reach.
Why A Flange Matters
A flat-bottom plunger works fine on sinks, but toilets need a flange – that extra rubber flap that extends into the drain opening. It creates a much better seal, which means more pressure on the clog and fewer failed attempts. Look for a plunger with an integrated flange, not a removable one that can pop off.
Storage That Makes Sense
Nobody wants a plunger sitting out in plain sight. But shoving it in a cabinet behind cleaning supplies means you'll have to dig when you need it fast. Try a dedicated caddy or a small hook inside the vanity door.
Some plungers come with a simple holder that keeps the base off the floor and allows it to dry without dripping.
When To Replace
Plungers don't last forever. Over time, the rubber can crack or lose its flexibility, especially if exposed to harsh cleaners. If you notice the flange is warped or the cup doesn't form a tight seal, it's time for a new one.
A good rule is to replace it every year or two, or immediately after a particularly nasty clog.
9. Grout Sealer – Lock Out Moisture and Mold
Grout might look like solid filler, but it's actually porous and thirsty. Every time water hits your tile, that grout soaks it up like a sponge. Over time, that trapped moisture leads to discoloration, mildew, and even crumbling grout.
A good sealer creates a protective barrier that keeps water out and your grout looking fresh for much longer.
Sealing grout is one of those maintenance tasks that gets overlooked, but it makes a huge difference. It's a simple step that extends the life of your tile and keeps grout looking fresh.
Why Sealing Matters
Unsealed grout absorbs water, soap residue, and bacteria. That's why it darkens and stains so easily. A sealer fills the microscopic pores, creating a surface that repels liquids.
This stops mold from taking hold and makes future cleaning much easier.
How To Apply It Right
First, deep clean the grout and let it dry completely for 24 hours. Then apply the sealer with a small brush or applicator bottle, working it into the lines. Wipe off excess from the tile surface before it dries.
One coat is usually enough, but two coats on shower floors add extra protection.
How Often To Reseal
It depends on the type of grout and how much traffic the area gets. Shower floors may need resealing every 6 to 12 months. Wall tile can go 2 to 3 years.
A simple water test — sprinkle a few drops on the grout — tells you if it's time. If the water darkens the grout, it needs a fresh coat.
10. Enzyme Drain Cleaner – Safe for Pipes, Tough on Clogs
Harsh chemical drain cleaners might clear a clog fast, but they also eat away at pipes and harm the environment. Enzyme drain cleaners offer a smarter solution. They use natural bacteria and enzymes to digest organic buildup like hair, soap scum, and food particles without any corrosive ingredients.
Enzyme drain cleaners work by introducing live bacteria that produce enzymes to break down organic waste into water and carbon dioxide. This process is gentle on plumbing and septic systems, making it a go-to for regular maintenance. Unlike chemical cleaners that generate heat and fumes, enzyme cleaners are odorless and safe to use monthly to prevent slow drains.
Simply pour the recommended amount down the drain before bed, and let the enzymes work overnight. They're especially effective in bathroom sinks and showers where hair and soap buildup are common. For best results, avoid using chemical cleaners beforehand as they can kill the beneficial bacteria.
How Enzyme Cleaners Work
Enzyme drain cleaners contain dormant bacteria that activate when mixed with water. The bacteria feed on organic matter, producing enzymes that liquefy waste. This biological process is slow but thorough, taking several hours to fully clear a clog.
It's ideal for maintenance rather than emergency clogs, but regular use keeps drains flowing freely.
Why They Beat Chemical Cleaners
Chemical drain cleaners rely on strong acids or bases to dissolve clogs, which can damage PVC pipes and metal fixtures over time. They also release toxic fumes and are dangerous to handle. Enzyme cleaners are non-toxic, biodegradable, and safe for all pipe types.
Plus, they don't harm septic tanks—in fact, they help maintain the bacterial balance.
When To Use Enzyme Cleaners
Use enzyme drain cleaners monthly as a preventive measure, especially in bathrooms where hair and soap scum accumulate. They're also great for kitchen sinks with grease buildup. For tough clogs, combine with a plunger or snake first, then follow up with an enzyme treatment to break down residual debris.
Avoid using them in standing water—the bacteria need moisture but not submersion.
11. Scrub Brush with Handle – Save Your Back and Knees
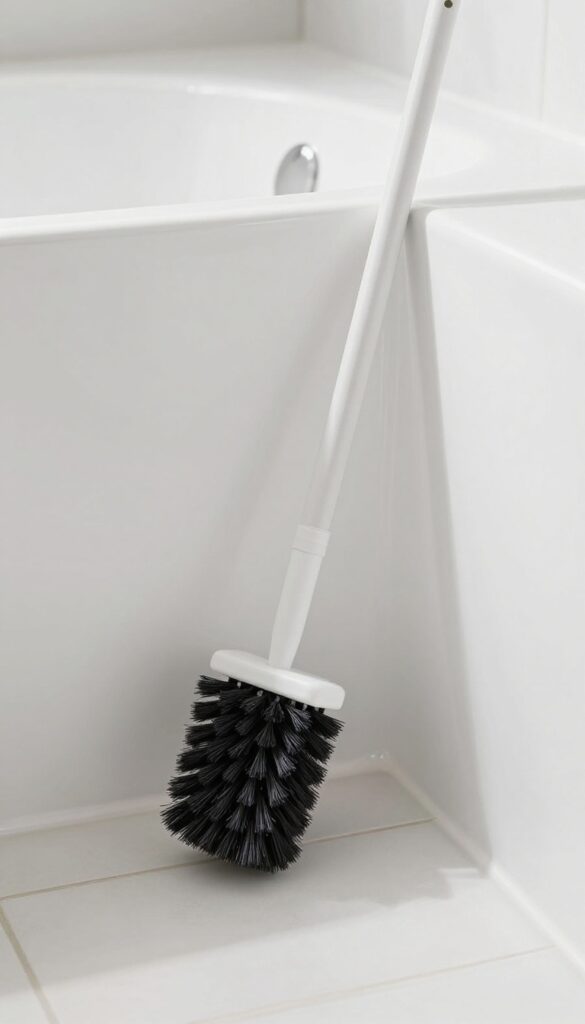
Kneeling on a hard tile floor to scrub the tub or toilet base gets old fast. A long-handled scrub brush puts you back in a standing position while still delivering serious scrubbing power. It’s one of those tools you don’t realize you need until you use it once.
A long-handled scrub brush is a game-changer for anyone who hates bending or kneeling during bathroom cleaning. The extended reach lets you clean the tub, shower floor, and toilet base without straining your back or knees. Look for one with stiff bristles that can tackle soap scum and grime, and an angled head that slides into corners and under edges.
Many models come with a built-in squeegee or a hook for easy storage. It’s a simple upgrade that makes a big difference in comfort and efficiency.
Why A Handle Matters
Bending over to scrub a bathtub puts pressure on your lower back and knees. A handle that extends 30 to 40 inches lets you stand upright while you work. That means less strain and more leverage, so you can scrub harder without hurting yourself.
It’s especially helpful for taller people or anyone with joint issues.
What To Look For
Stiff bristles are key for scrubbing away soap scum and hard water stains without wearing out quickly. An angled head reaches into corners, under the toilet rim, and along shower tracks. A comfortable grip with a non-slip handle keeps your hand from cramping during longer cleaning sessions.
Some brushes even have replaceable heads to extend their life.
How To Use It
Pair the brush with a good bathroom cleaner or a DIY vinegar solution. Wet the bristles, apply cleaner, and scrub in circular motions. Rinse the brush after each use and hang it to dry to prevent mildew.
Use it weekly on the tub, shower floor, and toilet base to keep grime from building up.
12. Glass Cleaner – Streak-Free Shine
Mirrors and glass shower doors can make or break a bathroom's clean look. Smudges, water spots, and streaks are instantly noticeable. A good glass cleaner cuts through grime and dries clear, leaving surfaces sparkling.
A dedicated glass cleaner or a simple DIY vinegar solution works wonders. The key is applying it correctly: spray onto a microfiber cloth, not directly on the glass, to avoid drips that leave streaks. Wipe in a zigzag or circular motion, then buff dry with a clean section of the cloth.
This method prevents residue and ensures a flawless finish.
Why Dedicated Glass Cleaner Works Best
All-purpose cleaners often leave a film or foam that smears on glass. Glass cleaners are formulated with surfactants that lift dirt without residue. They evaporate quickly, reducing streaks.
For a DIY option, mix equal parts white vinegar and distilled water in a spray bottle. Vinegar cuts through hard water spots and soap scum naturally.
Application Tricks For A Streak-free Finish
Always spray the cleaner onto your cloth, not the surface. This controls the amount of liquid and prevents drips that dry into streaks. Use a lint-free microfiber cloth – paper towels can leave fuzz.
Work in small sections, and buff with a dry part of the cloth. For large mirrors, clean top to bottom to catch drips.
When To Use Glass Cleaner Vs. Vinegar
Commercial glass cleaners are great for quick touch-ups and heavy grime. Vinegar solution is cheaper and eco-friendly, but it has a strong smell that fades quickly. Avoid vinegar on natural stone surfaces like marble or granite, as the acid can etch them.
For glass shower doors, a squeegee after each shower reduces buildup, making cleaning easier.
13. Toilet Brush with Holder – Obvious but Often Overlooked
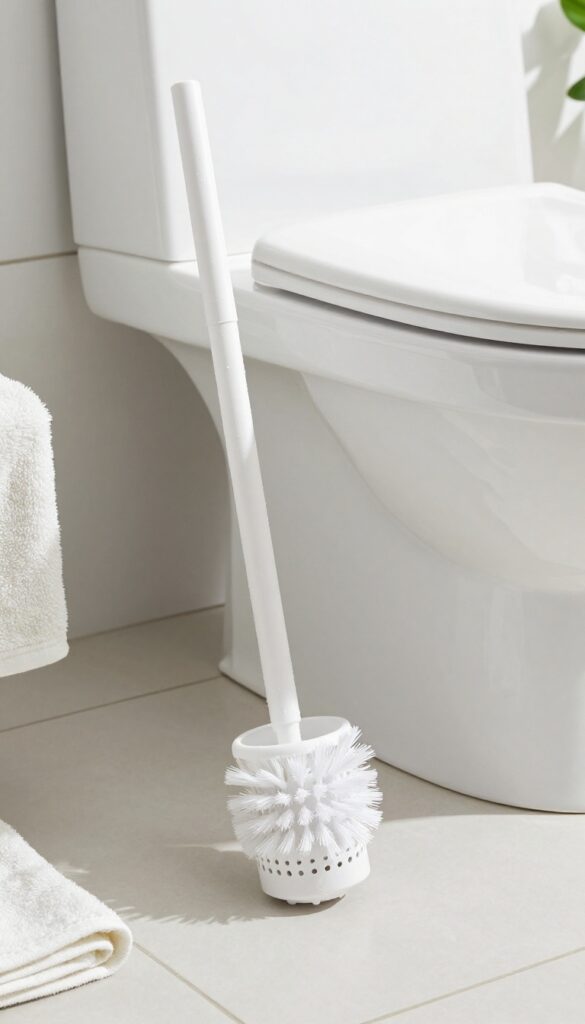
A toilet brush is one of those tools you don't think about until you need it, and by then it's too late. Most people grab whatever cheap brush is on sale, but a good one makes a real difference in how clean your toilet gets and how long it stays that way. The holder matters just as much—nobody wants a wet, drippy brush sitting on the bathroom floor.
The right toilet brush has sturdy, angled bristles that reach under the rim and into hard-to-clean spots. A silicone brush head is better than nylon because it doesn't absorb water or harbor bacteria as easily. The holder should have drainage holes or a drip tray so the brush dries completely between uses, preventing mold and odor.
Replace the brush every few months—bristles wear out and can scratch the porcelain over time.
What To Look For In A Brush
Look for a brush with a weighted base and a comfortable handle. The bristles should be firm but not scratchy. A curved or angled head helps you scrub under the rim without straining.
Silicone bristles are easier to clean and don't trap gross stuff like nylon does.
Holder Hygiene Matters
The holder should be easy to clean too. Some have a removable cup that you can rinse or toss in the dishwasher. Avoid fully enclosed holders that trap moisture—they turn into a science experiment fast.
A ventilated design lets air circulate so the brush dries quickly.
When To Replace
Replace your toilet brush every three to six months. If the bristles are frayed, bent, or discolored, it's time for a new one. A worn brush doesn't clean effectively and can scratch the bowl, making it harder to keep clean.
14. Baking Soda – The Gentle Abrasive
Baking soda is one of those household staples that pulls double duty in the bathroom. It's a mild abrasive that scrubs away stains without scratching surfaces, and it naturally neutralizes odors. You can use it on sinks, tubs, and even toilet bowls without worrying about damaging the finish.
Baking soda is a versatile cleaner that works well on a variety of bathroom surfaces. Its fine texture makes it safe for porcelain, fiberglass, and tile. It also deodorizes, so it's great for freshening up drains and grout.
How To Use It On Sinks And Tubs
Sprinkle baking soda directly onto a damp sponge or cloth and scrub the surface. For tough stains, make a paste with a little water and let it sit for a few minutes before scrubbing. Rinse thoroughly.
Toilet Bowl Cleaning Hack
Sprinkle about a cup of baking soda into the toilet bowl, then add a cup of vinegar. Let it fizz for 10-15 minutes, scrub with a toilet brush, and flush. This combination lifts stains and deodorizes without harsh chemicals.
Deodorizing Drains And Grout
Pour half a cup of baking soda down the drain, followed by hot water, to neutralize odors. For grout, make a thick paste, apply it, scrub with a toothbrush, and rinse. It brightens lines without bleach.
15. White Vinegar – The Natural Descaler
Hard water stains and soap scum are relentless. They build up on showerheads, faucets, and glass doors, making your bathroom look dingy no matter how often you wipe. Commercial descalers work, but they're often expensive and loaded with harsh chemicals.
White vinegar is the simple, cheap, and non-toxic alternative that handles the job just as well.
White vinegar's acidity breaks down mineral deposits and soap residue without scrubbing. It's safe for most surfaces, including glass, chrome, and ceramic. Just spray it on, let it sit, and rinse.
For tougher buildup, soak a cloth or baggie filled with vinegar and attach it to the affected area. The results are streak-free and shiny.
How To Use It On Showerheads
Remove the showerhead if possible, or fill a plastic bag with undiluted white vinegar. Submerge the head in the bag and secure it with a rubber band. Let it soak for at least an hour—overnight for heavy deposits.
Then scrub lightly with an old toothbrush and rinse. The water pressure will improve noticeably.
Faucets And Fixtures
Spray vinegar directly onto faucets and handles, or soak a paper towel and wrap it around the base. Let it sit for 10–15 minutes, then wipe clean. For stubborn spots, dip a toothbrush in vinegar and scrub.
Rinse with water to avoid any lingering smell.
Glass Shower Doors
Mix equal parts white vinegar and distilled water in a spray bottle. Spray onto the glass and let it sit for a few minutes. Wipe with a microfiber cloth or squeegee in a circular motion, then buff dry.
This removes water spots and prevents future buildup.
16. Disinfecting Wipes – Quick Clean for High-Touch Areas
Bathroom surfaces like faucets, handles, and light switches get touched constantly, but they rarely get the attention they deserve. A quick spray and wipe can feel like a chore, especially when you're in a hurry. That's where disinfecting wipes come in handy—they make it almost too easy to keep those high-touch spots clean and germ-free.
Disinfecting wipes are perfect for quick wipe-downs of faucets, handles, and light switches. Keep a canister under the sink for daily touch-ups. They save time and ensure you're actually killing germs, not just smearing them around.
Why They Work So Well
Wipes are pre-moistened with disinfectant, so there's no guesswork about dilution or contact time. Just pull one out, wipe the surface, and let it air dry. The textured fabric grabs grime and bacteria, leaving surfaces visibly clean and sanitized.
Where To Use Them
Focus on spots that get frequent hand contact: faucet handles, toilet flush levers, light switches, doorknobs, and cabinet pulls. You can also use them on the countertop around the sink and on the toilet lid. Avoid using them on unfinished wood or delicate surfaces.
Pro Tips For Best Results
Store the canister upside down so the wipes at the top stay moist. Pull from the center to avoid drying out the rest. For a deeper clean, follow up with a dry cloth to prevent streaks.
Replace the canister once it's empty—don't try to refill it with liquid.
17. Rubber Gloves – Protect Your Hands
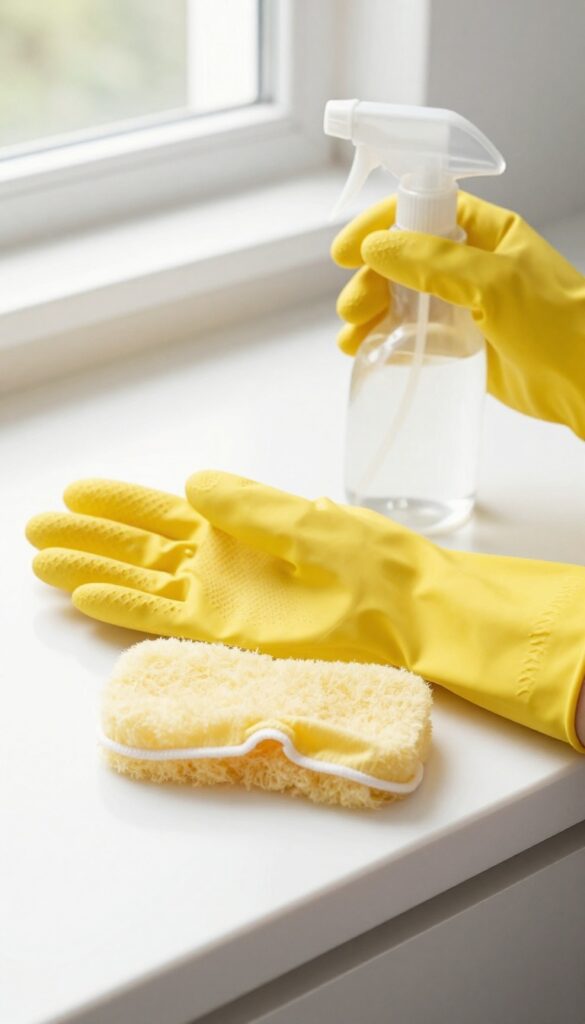
Your hands take the brunt of every bathroom cleaning session. Harsh chemicals, scalding water, and abrasive scrubs can leave skin dry, cracked, or irritated. A good pair of rubber gloves is a simple barrier that makes a huge difference.
Rubber gloves protect your skin from harsh chemicals and hot water. They also give you a better grip on slippery surfaces. Choose a pair with a comfortable lining.
Why Your Hands Need Protection
Bathroom cleaners often contain bleach, ammonia, or acids that strip natural oils from your skin. Over time, this leads to contact dermatitis or allergic reactions. Gloves prevent that entirely.
Better Grip, Less Effort
Wet surfaces get slippery fast. Rubber gloves provide traction so you can scrub with more force and control. No more dropping sponges or losing your grip on a brush.
Choosing The Right Pair
Look for gloves with a cotton or flocked lining—they're easier to put on and take off. Thicker gloves last longer, but make sure they fit snugly at the wrist to prevent water from running in.
FAQ
How often should I clean my bathroom?
For most households, a weekly deep clean is sufficient. Daily quick wipes (like using a shower spray and disinfecting wipes) help maintain cleanliness between deep cleans.
Can I use the same cloth for the toilet and sink?
No. Use separate cloths for the toilet, sink, and other surfaces to avoid spreading bacteria. Color-code your microfiber cloths to keep them straight.
What's the best way to clean grout?
Use a grout brush with a bathroom cleaner or a baking soda paste. For tough stains, let the cleaner sit for 10 minutes before scrubbing. Seal grout after cleaning to prevent future buildup.
Is vinegar safe for all bathroom surfaces?
Vinegar is safe for glass, tile, and metal, but avoid using it on natural stone (like marble or granite) as it can etch the surface. Always test a small area first.
How do I prevent mold in the shower?
Use a daily shower spray, keep the bathroom ventilated, and seal grout. Squeegee the walls after each shower to remove excess moisture.
Conclusion
Having the right bathroom cleaning supplies makes a real difference in how clean your bathroom gets and how long it stays that way. You don't need a closet full of products—just these 17 essentials will cover every surface, stain, and situation. Start with the basics like microfiber cloths and a good all-purpose cleaner, then add specialized tools like a grout brush and squeegee as you go.
Your bathroom will thank you, and so will your back. Happy cleaning!