11 Garland on Stairs Ideas for a Magical Christmas Look
Your staircase is prime real estate for Christmas magic, yet it often gets overlooked while you focus on the tree and mantel. A bare railing can make the whole entry feel unfinished, especially when guests arrive.
Garland fixes that in an afternoon. It adds warmth, frames the walk upstairs, and sets a festive tone the moment the door opens.
These 11 ideas range from simple draping to full-on winter wonderland, so you can pick what fits your space and energy level. Each one solves a specific styling problem, whether you're working with a narrow banister or a grand open staircase.
1. Classic Evergreen Swag with Warm White Lights
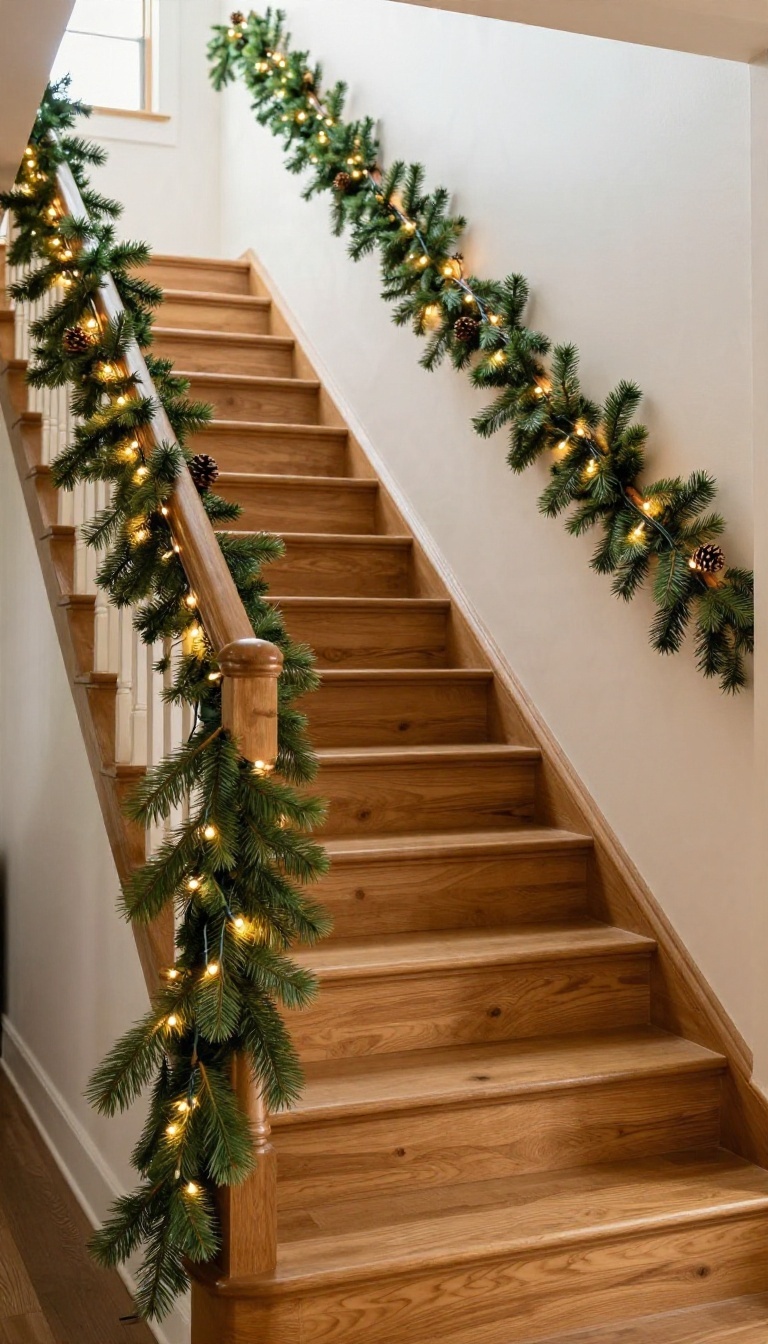
Some looks just work, year after year, and a pine swag with warm white lights sits right at the top of that list. It's the decorating equivalent of a cozy sweater: familiar, comfortable, and impossible to get wrong. The trick is in the drape.
A swag dips in gentle curves along the railing rather than hanging straight down, which gives the staircase a soft, finished look without any fuss. Warm white lights do the rest, casting that golden glow that makes a hallway feel like a holiday card. You don't need much to pull it off.
A good faux pine garland, a strand or two of lights, and a few minutes with some zip ties or floral wire will get you there.
## Why This Look Wins Every Time Evergreen and warm white light is the pairing that never dates. Cool white LEDs can read a little clinical on a staircase, especially in a narrow hallway, while warm white bulbs throw a softer, amber-toned glow that flatters wood, paint, and skin tones alike. It also plays well with whatever else you've got going on.
Whether your tree is minimalist or loaded with heirloom ornaments, a simple pine swag on the stairs ties the whole entry together without competing for attention. ## Choosing the Right Garland Faux pine has come a long way, so skip the sparse, plasticky strands and look for one labeled "real touch" or "lush. " A garland with mixed branch lengths and a few pinecones built in reads far more convincingly than a uniform strand. For a standard staircase, plan on roughly one and a half times the length of your railing so you have enough slack for the swags.
Two shorter garlands twisted together also work well if you want extra fullness on a budget. ## Getting the Swag Right Start at the top of the railing and attach the garland with zip ties or floral wire, looping it loosely so it dips between posts. Aim for a curve that hangs about a third of the way down the railing opening, then repeat the dip at even intervals. Fluff every branch as you go, fanning them outward so the garland looks full from the front and the side.
A quick spritz of artificial pine spray at the end adds that fresh-cut scent without any needles to sweep up. ## Lighting It Warm and Even Wrap warm white fairy lights around the garland rather than laying the strand on top. Weaving the wire through the branches hides the cord and spreads the glow evenly along each swag. Battery-operated strands save you from hunting for an outlet, and a timer means the lights come on each evening without you thinking about it.
Tuck the battery pack behind a post or under the bottom swag where nobody will notice.
Why This Look Wins Every Time
Evergreen and warm white light is the pairing that never dates. Cool white LEDs can read a little clinical on a staircase, especially in a narrow hallway, while warm white bulbs throw a softer, amber-toned glow that flatters wood, paint, and skin tones alike. It also plays well with whatever else you've got going on.
Whether your tree is minimalist or loaded with heirloom ornaments, a simple pine swag on the stairs ties the whole entry together without competing for attention.
Choosing The Right Garland
Faux pine has come a long way, so skip the sparse, plasticky strands and look for one labeled "real touch" or "lush. " A garland with mixed branch lengths and a few pinecones built in reads far more convincingly than a uniform strand. For a standard staircase, plan on roughly one and a half times the length of your railing so you have enough slack for the swags.
Two shorter garlands twisted together also work well if you want extra fullness on a budget.
Getting The Swag Right
Start at the top of the railing and attach the garland with zip ties or floral wire, looping it loosely so it dips between posts. Aim for a curve that hangs about a third of the way down the railing opening, then repeat the dip at even intervals. Fluff every branch as you go, fanning them outward so the garland looks full from the front and the side.
A quick spritz of artificial pine spray at the end adds that fresh-cut scent without any needles to sweep up.
Lighting It Warm And Even
Wrap warm white fairy lights around the garland rather than laying the strand on top. Weaving the wire through the branches hides the cord and spreads the glow evenly along each swag. Battery-operated strands save you from hunting for an outlet, and a timer means the lights come on each evening without you thinking about it.
Tuck the battery pack behind a post or under the bottom swag where nobody will notice.
2. Asymmetrical Garland for Modern Staircases
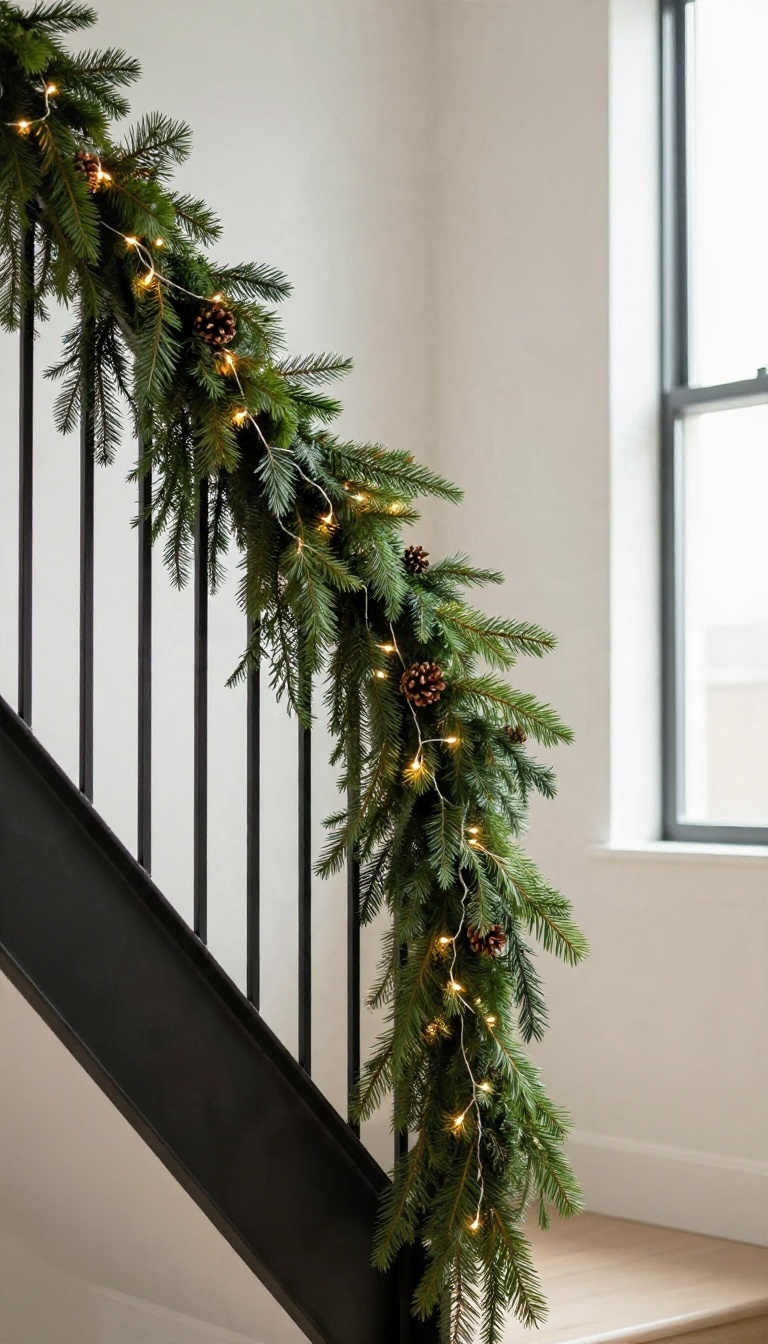
Not every staircase wants to be wrapped like a candy cane. If your railing is sleek, linear, or metal, a full swag can feel fussy. Asymmetrical garland flips the script by dressing just one side, letting the other stay clean and architectural.
It's a designer trick that works because it creates tension. The eye follows the greenery down, and the bare railing becomes part of the composition. You get festive without covering every inch.
This look suits modern homes, but it also brings a fresh edge to traditional spaces that need a break from the usual. The key is committing to the imbalance.
Asymmetrical garland isn't about doing less—it's about placing more intentionally. You're not skipping the railing; you're editing it. That shift in thinking makes all the difference.
Start by choosing which side gets the goods. On a straight run, the handrail side usually wins because it's what people see as they climb. On a switchback or L-shaped stair, pick the side that faces the room or the front door.
That's your stage. Once you've picked a side, let the garland cascade from top to bottom. It can start thick at the newel post and taper as it goes, or stay full all the way down.
Either way, avoid the temptation to add a matching swag on the other side. The whole point is the contrast.
Choosing The Right Garland
Not all garlands play well with asymmetry. You want something with enough body to hold its shape but not so stiff that it looks like a plastic snake. Real cedar or faux cedar with wired branches gives you the best control.
Skip the pre-lit garland if you want a cleaner, more modern vibe. Instead, add a string of battery-operated fairy lights with a thin wire. You can weave them in without the bulk of a cord.
If you're using real greenery, keep it fresh by misting it every few days. Faux garland is easier for long-term display, but fluff it well before hanging so it looks full and natural.
How To Attach It Without Damage
You don't need nails or hooks that leave marks. For wood railings, clear zip ties work wonders—just trim the tails. For metal, use self-adhesive cable clips or removable mounting tape.
Start at the top and work your way down, securing every few feet. Let the garland dip slightly between ties for a relaxed, organic feel. If you want a more tailored look, keep the ties closer together.
Don't forget the newel post. A small cluster of greenery at the top anchors the whole design and makes the asymmetry look intentional.
Finishing Touches That Keep It Modern
Less is more here. A few oversized ornaments in a single color—like matte black, copper, or white—can add interest without clutter. Hang them at varying heights along the garland.
Avoid tinsel, ribbon bows, or anything too sparkly. The clean lines of the railing should still be visible. If you want a touch of sparkle, use a subtle metallic spray on a few pinecones.
Finally, consider the view from below. The garland should look good from the bottom of the stairs too. Step back and check the drape from both angles before you call it done.
3. Garland and Ornament Combo for Extra Sparkle
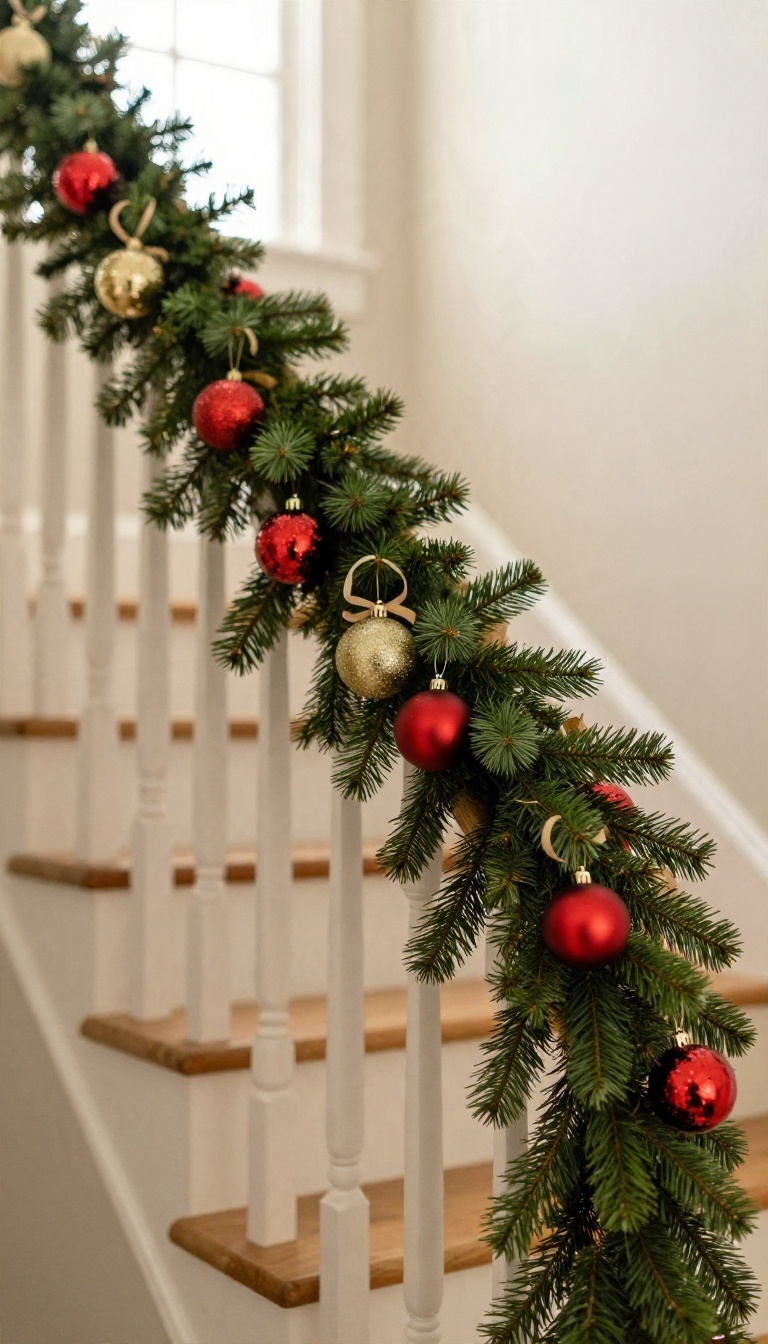
Ornaments don't have to live only on the tree. Hanging a few from your stair garland adds color and reflection that makes the greenery feel alive. The trick is to keep it balanced so the garland still looks like garland, not a jewelry display.
Shatterproof ornaments work best here. They're light enough to hang without pulling the branches down, and they won't leave you vacuuming glass if one takes a tumble down the stairs.
Start with your garland secured to the railing. Then add ornaments in clusters rather than evenly spaced singles. Groups of three or five in varying sizes create a natural, collected look.
Mix finishes—matte, shiny, and glitter—to catch light from different angles. Stick to two or three colors that tie into your other decor so it feels intentional.
Choosing The Right Ornaments
Shatterproof is non-negotiable on stairs. Look for plastic or fabric ornaments with secure caps. Avoid anything heavy or fragile, especially if kids or pets use the stairs.
Size matters too. Medium and small ornaments (2–4 inches) work best because they don't overwhelm the greenery. Save the oversized baubles for the tree.
How To Hang Them Securely
Use ribbon or twine loops instead of metal hooks. They grip the branches better and look softer. Tie each ornament to a sturdy branch, close to the stem, so it doesn't droop.
Space clusters every 12–18 inches along the garland. That gives the eye a rest and keeps the sparkle from feeling chaotic.
Balancing Sparkle With Greenery
The goal is enhancement, not takeover. Let the garland remain the star. If you can't see plenty of green between ornaments, you've added too many.
A good rule: one ornament cluster per foot of garland. That's enough to catch the light without hiding the branches.
4. Ribbon-Wrapped Garland for a Tailored Look
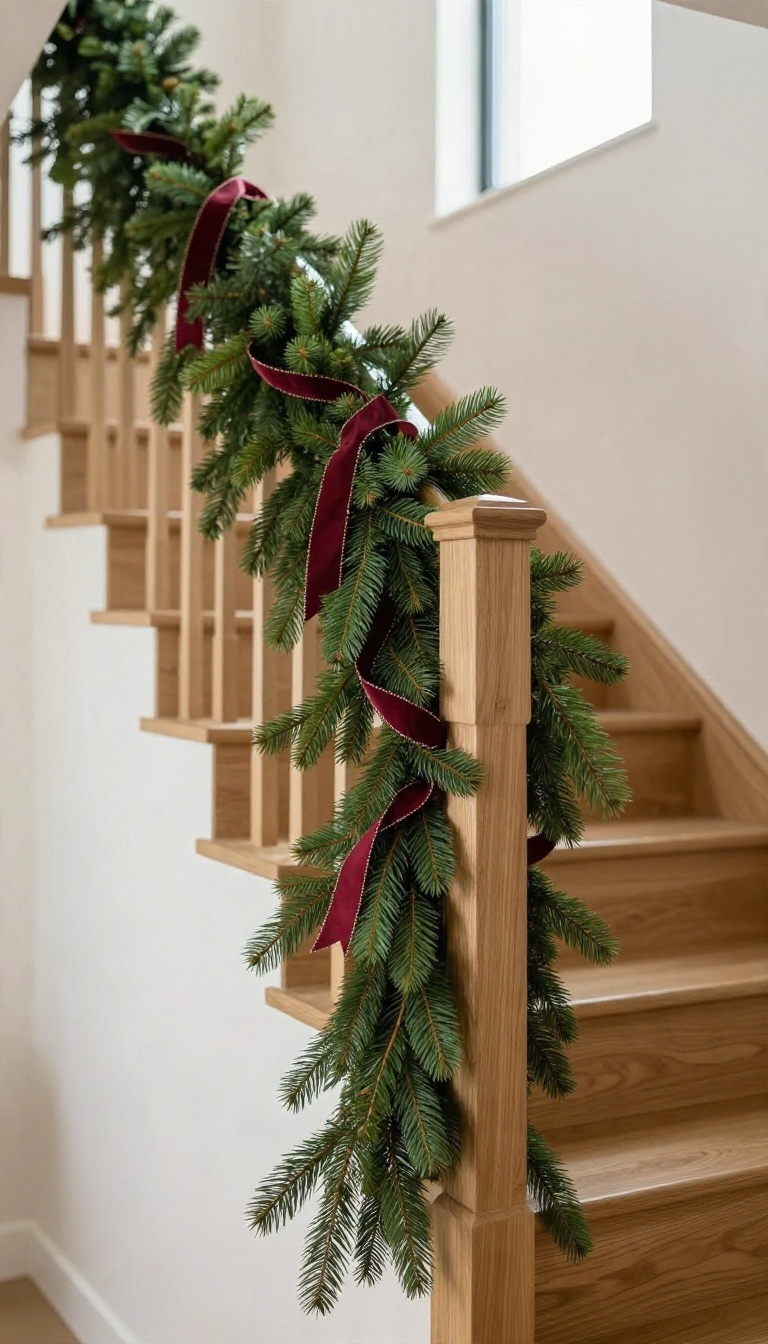
Garland alone can look a little wild, and that's part of its charm. But if your staircase leans modern or you just like things to feel pulled together, a wide ribbon changes the whole mood. Weaving ribbon through the greenery and around the railing gives you clean lines and a cohesive finish that makes the rest of your decor look intentional.
The trick is choosing a ribbon wide enough to actually show against the branches. A two- to three-inch width reads well on most banisters, while a four-inch ribbon holds its own on a grand staircase. Wire-edged ribbon is your friend here because it holds a curve instead of flopping.
Work in sections rather than trying to wrestle one long piece around the whole railing. Short lengths are easier to control, and you can hide the joins inside the greenery where no one will notice.
Pick A Ribbon That Plays Well With Your Palette
Match the ribbon to colors already in the room so the staircase feels connected to everything else. A deep burgundy or forest green keeps things classic, while a soft ivory or metallic gold leans elegant. If your tree is full of pattern, a solid ribbon calms the whole scene down.
Weave, Don't Just Wrap
Thread the ribbon through the branches every foot or so instead of spiraling it straight around the outside. That in-and-out motion makes the garland look fuller and the ribbon look woven in rather than taped on. Leave a little slack so the greenery still shows through.
Finish The Ends Cleanly
Tuck the ribbon ends into the garland or secure them behind the newel post with a small clip. A loose, dangling tail undoes all that polished work. For a final touch, add a simple bow at the bottom post to anchor the whole run.
5. Frosted Garland for a Snowy Effect
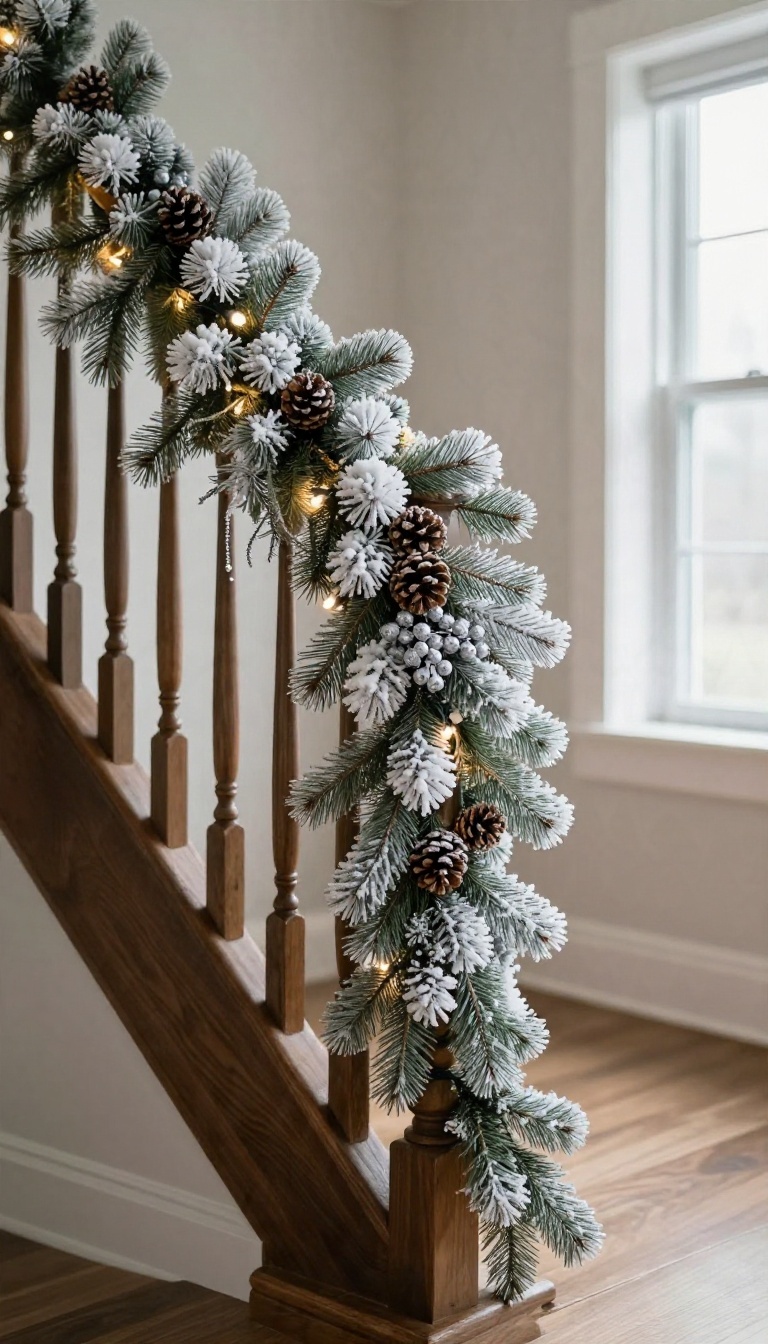
Frosted garland brings a quiet, snowy magic to your staircase without a single flake of real snow. The flocked tips catch the light and make everything feel softer and more wintery. It's an easy way to get that cozy cabin feel, even if you live somewhere that rarely sees a white Christmas.
The key is the flocking—that faux snow coating that makes garland look like it just came in from a snowy walk. Paired with dark wood, the contrast is stunning. The white fluff pops against the rich tones, and suddenly your stairs look like something from a holiday card.
Choosing The Right Frosted Garland
Not all frosted garland is created equal. Look for one with a generous coating that won't shed everywhere when you touch it. A mix of pine and cedar with frosted tips gives a natural, uneven look that reads as real snow.
If you want a heavier snow effect, go for a heavily flocked option, but keep in mind it might look more like a blizzard than a dusting.
Styling Against Dark Wood
Dark wood staircases are the perfect backdrop for frosted garland. The white snow effect stands out beautifully, and the contrast adds depth. Drape the garland loosely along the banister, letting some strands hang down for a relaxed feel.
Add a few warm white lights to make the frost sparkle, and you've got a look that's both elegant and cozy.
Adding Subtle Accents
Keep the accents simple so the frosted garland remains the star. A few pinecones, some faux berries in soft red or silver, or even a touch of ribbon in a muted tone can enhance the snowy vibe without overpowering it. Avoid anything too bright or glittery—the goal is a serene, wintery feel.
6. Garland with Battery-Operated Lights for Easy Setup
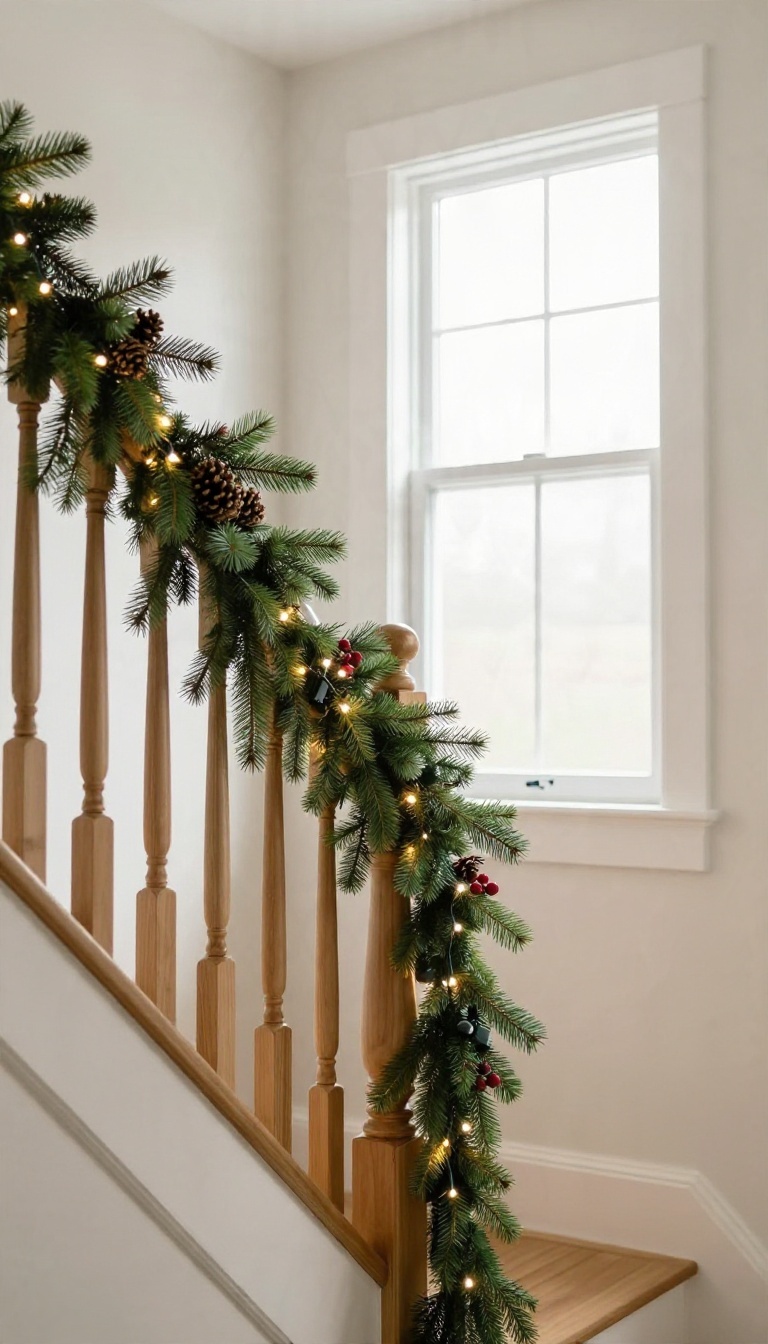
Cord management is the quiet villain of Christmas decorating. You find the perfect spot for garland, then realize the nearest outlet is across the room and behind a couch. Battery-operated lights solve that problem completely, letting you drape wherever the staircase looks best.
They also make the whole setup faster. No extension cords to hide, no tape to wrestle, and nothing to trip over on the stairs. Clip the lights in, switch them on, and you're done.
The appeal here is freedom. You can wrap a banister post, trail garland down a newel, or string lights along a handrail that never had power access. Everything runs on a small battery pack you tuck out of sight.
Just plan for battery life before you commit. Most packs last a few weeks on a timer, so check them once mid-season and keep a spare set of batteries in a drawer.
Pick The Right Battery Pack
Battery packs come in a few sizes, and the smaller ones are easier to hide. Look for a pack with a built-in timer so the lights turn on and off on their own. That saves you from crawling under the garland every night.
If your staircase is long, split the run into two or three shorter strands. Each gets its own pack, which keeps the light even and the batteries from draining too fast.
Hide The Pack Without Losing Access
Tuck the battery box behind a garland loop or inside a small fabric pouch that matches the greenery. The goal is invisible but reachable. You want to swap batteries without dismantling your whole display.
A zip tie or small clip holds the pack against the railing underside. Just make sure it doesn't dangle where a hand would brush it on the way up.
Warm White Vs. Cool White
Warm white lights read cozy and traditional against pine garland. Cool white looks crisper and pairs well with frosted or silver accents. Pick one and stay consistent across the staircase so it feels intentional.
If you're mixing in other lit decor nearby, match the color temperature. Mismatched whites are the fastest way to make a beautiful staircase look accidental.
7. Layered Garland with Mixed Greenery
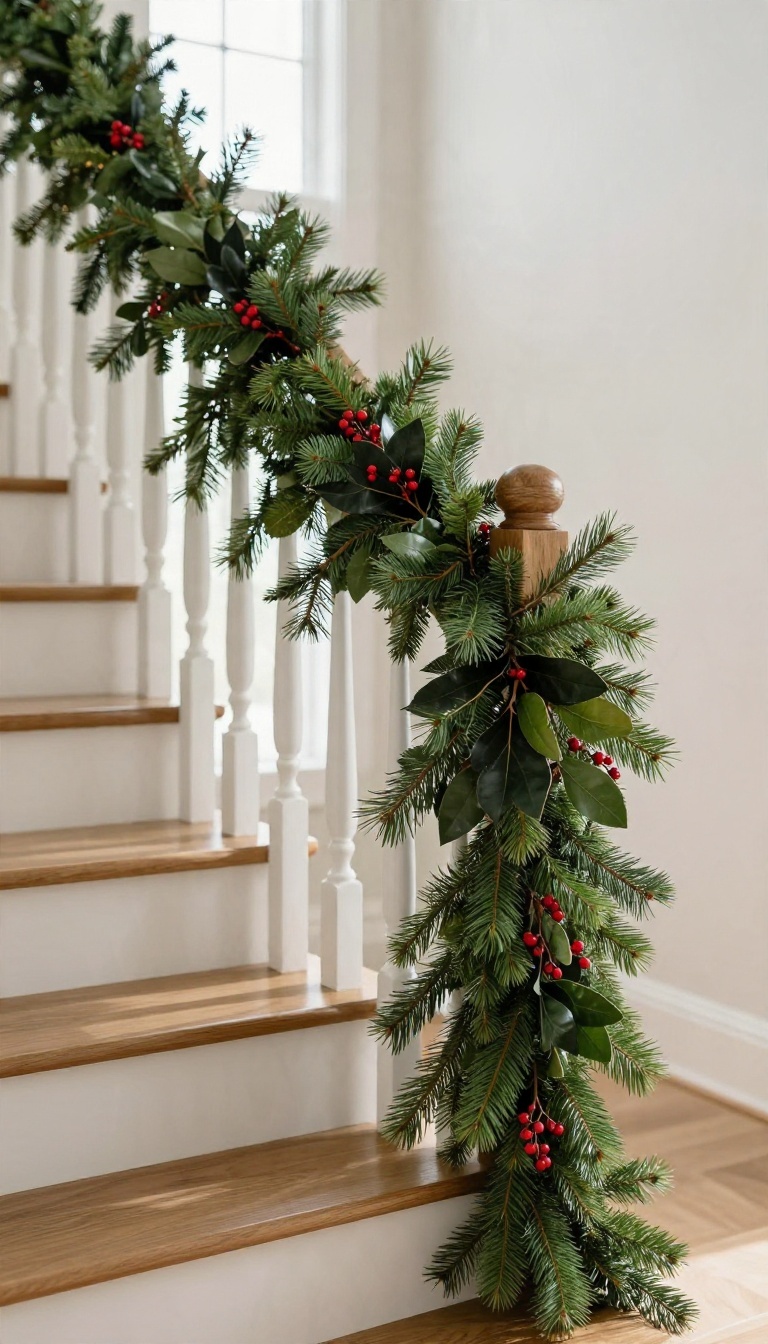
A single type of greenery does the job, but it doesn't do much for the eye. Layering pine, cedar, and magnolia together gives your staircase real depth, because each texture catches light and shadow differently. The result reads as fresh and natural rather than store-bought, and it's one of the easiest upgrades you can make to a basic garland.
Start with a base garland of faux pine or a real pine roping, then weave in the other greens on top. The pine gives you structure and bulk, cedar adds soft, feathery movement, and magnolia leaves bring those glossy, dark-green leaves that make everything look expensive. You don't need equal amounts of each.
Pine should dominate, with cedar and magnolia used as accents. Work in sections rather than trying to do the whole staircase at once. Attach the base garland first, step back, then add clusters of cedar and magnolia where the garland looks flat or thin.
This keeps the layering intentional instead of random.
Getting The Proportions Right
A good rule of thumb is roughly 60 percent pine, 25 percent cedar, and 15 percent magnolia. Too much magnolia and the garland turns heavy and stiff. Too much cedar and it looks wispy and unfinished.
Keep the magnolia clusters spaced out so each one reads as a deliberate accent. If you're using real greens, remember that magnolia leaves hold up well while cedar dries out fastest. Plan to refresh the cedar midway through the season if you want it looking sharp through New Year's.
Making It Look Grown, Not Glued
The trick to a natural layered look is uneven placement. Don't space your accents at perfect intervals, because real greenery never grows that way. Tuck some cedar sprigs higher and let others droop below the base garland for a slightly wild edge.
Fluff and bend as you go. Pull individual pine tips outward so the garland looks fuller, and angle magnolia leaves so their shiny sides face the room. A few minutes of shaping makes a big difference.
Securing It Without Squashing It
Use green floral wire or zip ties in a matching color to attach the layers, and hide the ties under leaves. Wrap the wire loosely so the greenery keeps its shape instead of getting pinched. For heavier magnolia stems, anchor them at two points so they don't sag.
Check the whole run from the bottom of the stairs before you call it done. That's the angle guests actually see, and it's where gaps tend to show up.
8. Garland and Stocking Display
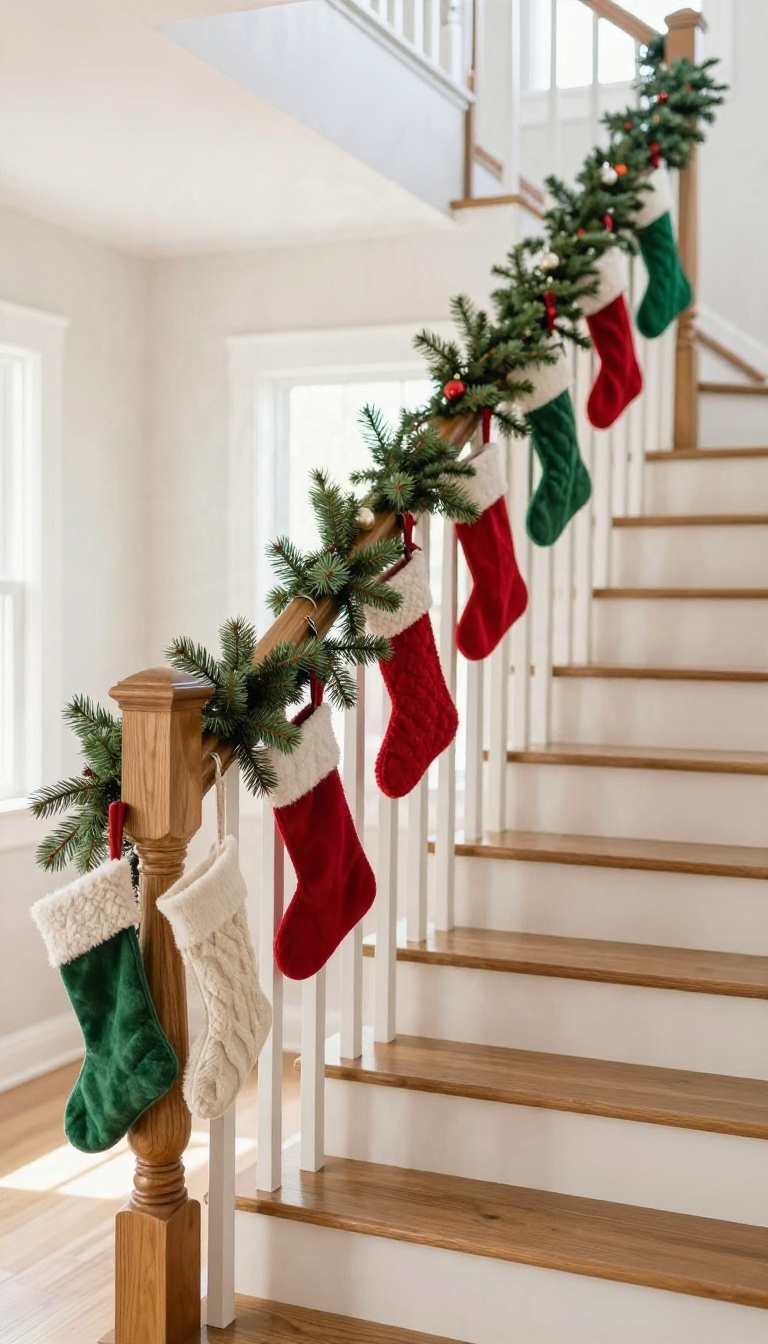
Stockings need a home, and the staircase garland can be that home. Hanging them from the greenery turns a decorative swag into a functional display that saves wall space and adds charm. It's a smart solution for small homes or anyone who wants to keep the mantel free for other decor.
The trick is to treat the garland as a sturdy backbone, not just a pretty accent. With the right support and a little planning, you can hang stockings of different sizes without sagging or damage. This approach works with real or faux garland, though faux tends to hold up better under the weight.
Choosing The Right Garland
Not all garlands can handle the weight of filled stockings. Look for a thick, wired garland with a sturdy central vine or a faux pine with a metal core. Real evergreen works, but it dries out and weakens over the season, so you'd need to reinforce it with floral wire.
A full garland also hides the hooks and hardware, keeping the look clean.
Hanging Stockings Securely
Use ornament hooks or small S-hooks to attach stockings to the garland's wire spine, not just the outer branches. Space them evenly and test each one with a light tug. If your stockings will hold gifts, add a few extra zip ties or floral wire wraps around the garland and rail for support.
Distribute weight evenly to prevent the garland from pulling to one side.
Styling For A Cohesive Look
Mix stocking sizes and textures for visual interest, but keep the color palette tied to your garland. Add small ornaments or picks between stockings to fill gaps and add sparkle. If your staircase is narrow, hang stockings on the side facing away from the steps to avoid bumps.
For a playful touch, tuck a small gift or treat into each stocking toe.
9. Minimalist Garland for Small Spaces
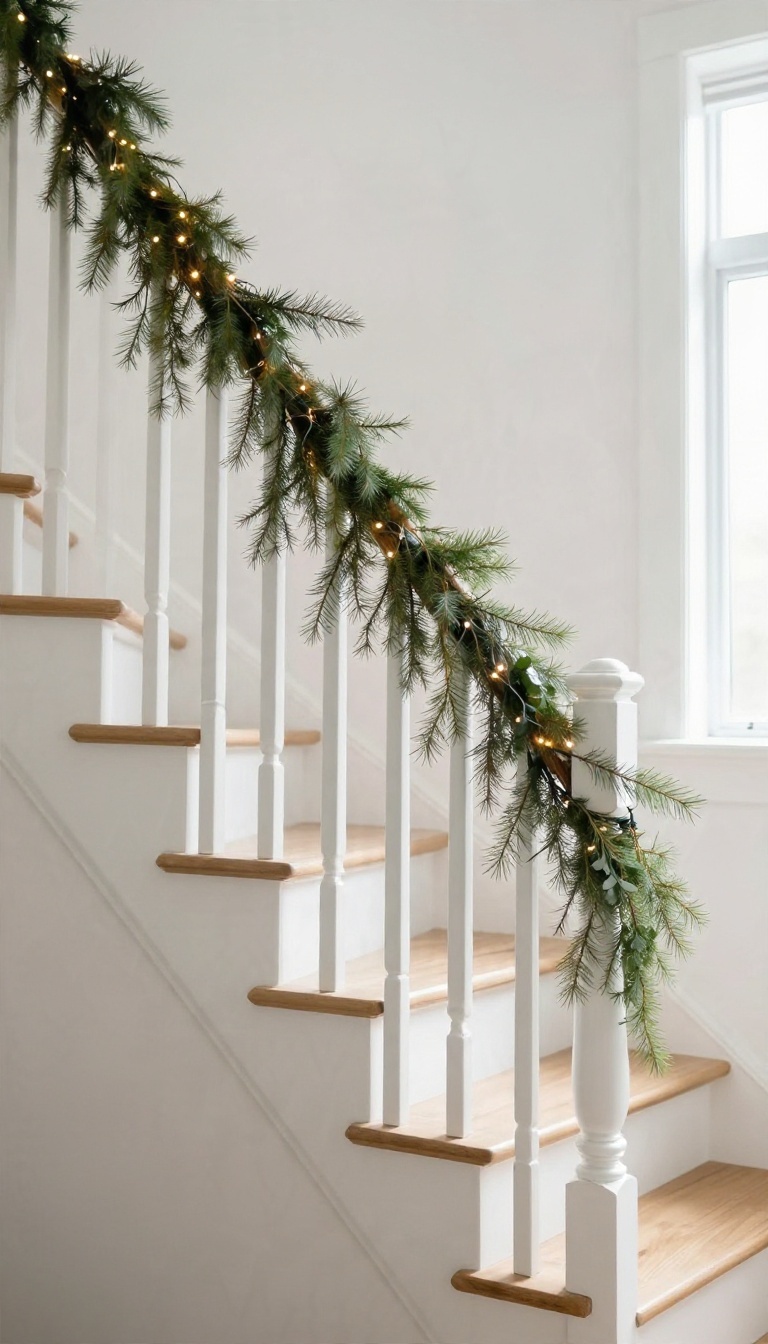
Not every staircase wants to be a showstopper. If your stairs are narrow, your entryway is tight, or your whole vibe leans clean and calm, a heavy garland can feel like too much. A thin, sparse garland with a few small lights gives you the festive note without crowding the space you actually walk through every day.
The trick with minimalist garland is restraint. You want enough greenery to read as Christmas, but not so much that the railing disappears under it. Pick a slender garland, drape it loosely, and let the architecture do the heavy lifting.
This approach also solves real problems. A bulky garland on a tight staircase eats elbow room and catches on coats. A sparse one stays out of the way and still looks intentional.
Pick A Thin, Sparse Garland
Look for garlands described as natural, wispy, or lightly flocked rather than dense and full. Real cedar or pine works beautifully here because it has an open, airy structure. Faux options labeled as sparse or rustic tend to look more believable than thick, uniform ones.
Skip the pre-lit monster garlands with heavy ornaments built in. You want room to see the railing through the greenery.
Drape It Loosely, Not Tightly
Wrap the garland in a gentle swag rather than spiraling it tight around the banister. A loose drape with a little slack reads as relaxed and lets the stairs stay visible. Secure it with clear zip ties or twine at a few points so it holds its shape.
On very tight staircases, run the garland along just one side or the top rail. Half the coverage still gives you the full festive effect.
Add A Few Small Lights
Battery-operated fairy lights in warm white are the easiest match for a minimalist look. Tuck them into the garland rather than wrapping them on top, so the glow comes from within. A single strand is usually enough.
Stick with one light color and skip the ornaments, ribbons, and bows. The quiet sparkle is the whole point.
10. Garland with Natural Elements
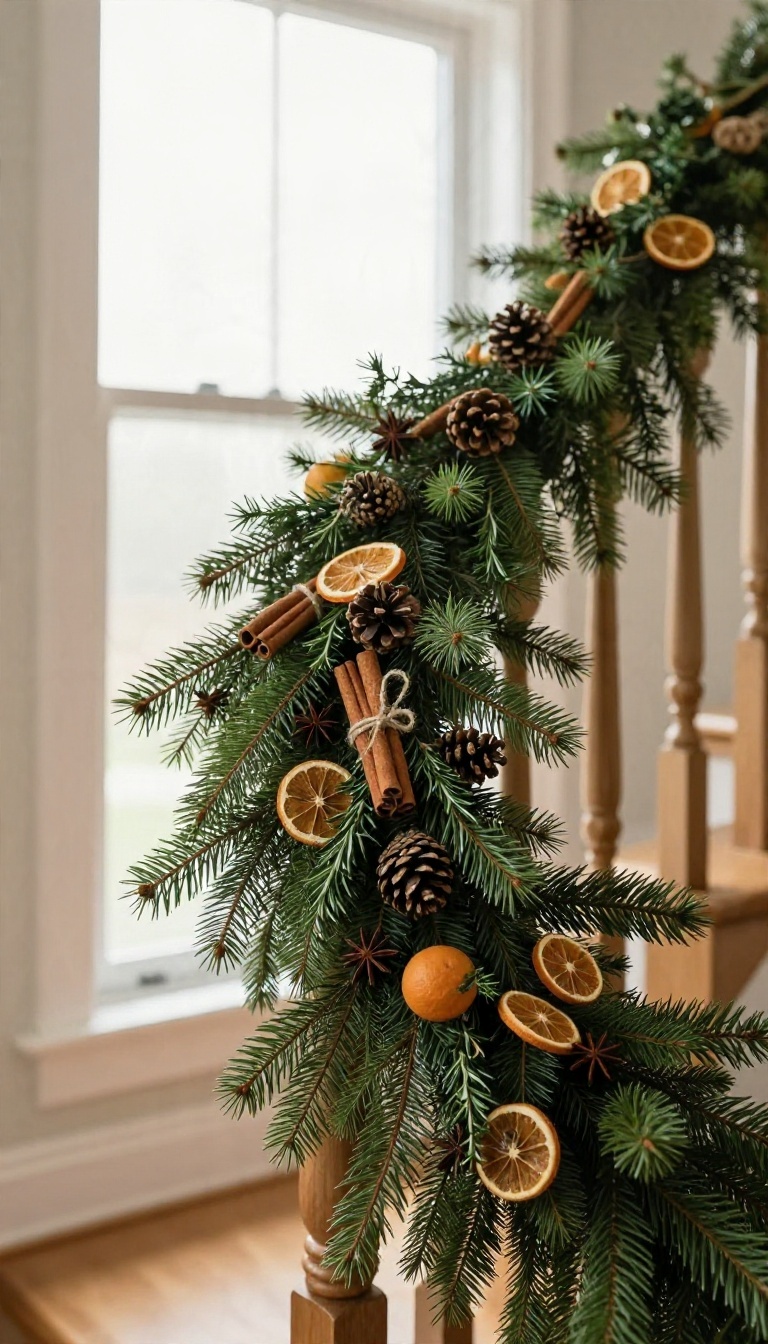
Bring the outdoors in with garland that feels like a walk through a winter forest. Pinecones, cinnamon sticks, and dried oranges add texture, color, and a subtle scent that makes your staircase feel warm and welcoming. It's a simple way to get that rustic, homemade look without spending a fortune.
This approach works with any greenery base, real or faux. The key is mixing in natural bits that contrast with the green and add visual interest. You can go as simple or as layered as you like, and the result always feels cozy and personal.
Choosing Your Natural Bits
Start with a mix of textures: pinecones for their woody shape, cinnamon sticks for a warm spice tone, and dried orange slices for a pop of color. You can also add star anise, whole nutmeg, or small bundles of rosemary. Use what you have or can forage, but make sure everything is clean and dry.
If you're using fresh elements, like citrus, dry them thoroughly to prevent mold.
How To Attach Them
The easiest way is to wire each piece onto the garland. Use floral wire or twine to secure pinecones and cinnamon sticks, and thread dried oranges with a needle and invisible thread. Space them evenly but not too perfectly—a little randomness looks more natural.
If you're using a faux garland, you can also tuck items into the branches. For a quick fix, hot glue works, but wire allows you to reposition.
Keeping It Fresh And Fragrant
Natural elements can lose their scent over time. To refresh, add a few drops of cinnamon or orange essential oil to a cotton ball and tuck it into the garland. If you're using fresh pinecones, you can bake them at a low temperature to kill any bugs and bring out the resinous smell.
Dried oranges will keep their color for a season if stored in a dry place. Avoid placing the garland near heat sources to prevent drying out too fast.
11. Colorful Garland for a Playful Christmas
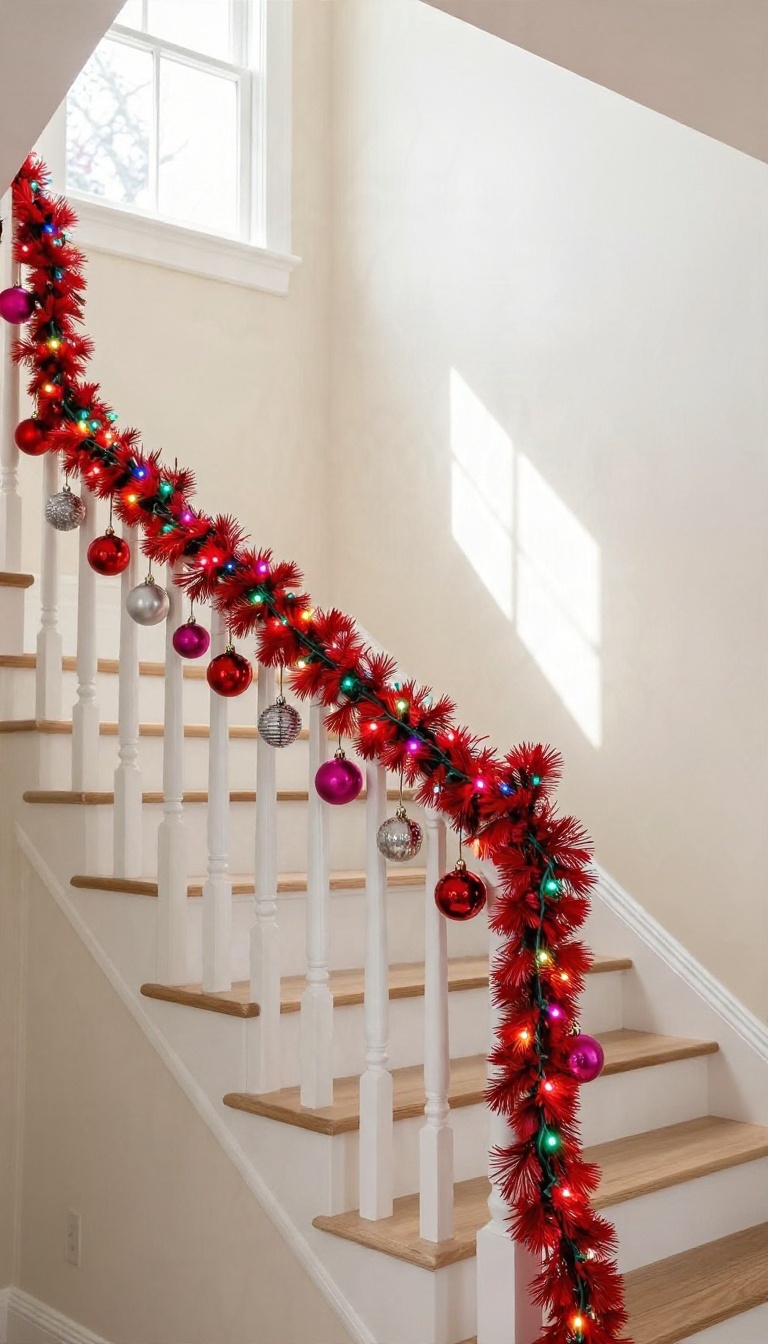
Some staircases want to whisper. Yours might want to throw confetti. A colorful garland turns the railing into the most cheerful corner of the house, and it doesn't take a designer budget to pull off.
Bright ornaments, colored lights, and a garland in a bold shade like red or silver do the heavy lifting. The look leans playful rather than polished, which is exactly the point. It suits kids, busy family homes, and anyone who thinks December should feel like a party.
The one rule: pick a palette and stick with it so the color reads as a choice, not a happy accident.
A colorful garland works because it breaks the usual green-and-gold script. Instead of blending into the banister, it announces itself. That energy is great for a staircase guests actually walk past, since it gives the entry an instant mood boost.
The trick is editing. Three or four colors max keeps things lively without turning chaotic. Once you lock that in, every ornament and light strand has a job to do.
Pick A Palette That Pops
Start with two anchor colors and one accent. Think red and silver with a hit of hot pink, or teal and gold with a pop of orange. Write it down before you shop so impulse buys don't muddy the mix.
If your walls are neutral, you can go louder than you think. Busy wallpaper or dark paint calls for a tighter palette with one standout shade. Either way, repeat each color at least three times along the railing so the eye connects the dots.
Layer Lights And Ornaments
Wrap colored fairy lights around the garland first, then weave ornaments in on top. Battery-powered strands save you from hunting for an outlet near the stairs, and warm white mixed with colored bulbs adds depth. Use shatterproof ornaments in mixed sizes.
Clip a few to the railing itself so the color spills beyond the greenery. A handful of ribbon loops in your accent color ties the whole thing together without extra fuss.
Try A Non-traditional Garland
Greenery isn't mandatory. A red tinsel garland, a silver metallic strand, or even a felt ball garland gives you the same festive effect with more color punch. Tinsel catches the lights beautifully at night.
Mix a bold garland with a thin greenery strand if you still want that natural texture. Just keep the proportions uneven, like two-thirds color and one-third green, so it looks deliberate.
Keep It Safe And Secure
Stairs get used, so anything hanging low is a trip risk. Tie the garland at the top and bottom of the railing, then add zip ties or ribbon every few feet. Keep the swag above knee height on the open side.
Skip real candles and check that light cords don't cross the handrail where people grab it. A little planning keeps the playful look from becoming a hazard.
FAQ
How do I secure garland to a staircase railing without damaging it?
Use zip ties, floral wire, or removable hooks to attach garland. Avoid nails or screws. Zip ties are strong and easy to cut off later.
Can I use real garland on stairs?
Yes, real garland looks and smells amazing, but it dries out. Keep it away from heat sources and mist it with water every few days to make it last longer.
How much garland do I need for my staircase?
Measure the length of your railing and multiply by 1. 5 to 2 for a full, swagged look. For a simple drape, multiply by 1.
2.
What kind of lights work best on stair garland?
Warm white LED fairy lights are the most popular. Battery-operated ones are great if you don't have an outlet nearby. Use twinkle lights for a magical effect.
How do I keep garland from looking messy?
Fluff the branches before hanging, secure it at regular intervals, and hide the ends by tucking them into the garland or using a decorative tie.
Conclusion
Stairs can be the trickiest spot in the house to decorate, but a garland makes them feel finished without blocking the way. Pick two or three ideas that suit your railing, your budget, and how much traffic those steps get, then skip the rest. You don't need to wrap every inch or buy anything new.
Start with what you already own, secure it well, and step back before adding more. A staircase that looks warm from the bottom is a win, and it's one you'll actually enjoy all season.