15 Budget Friendly Backyard Ideas with Big Visual Impact
You step outside, coffee in hand, and see the same bare fence, patchy grass, and empty corners you've been ignoring for months. You want a backyard that feels intentional and inviting, but your budget says otherwise.
The good news? You don't need a contractor or a second mortgage to make a real difference.
These 15 ideas focus on smart, affordable moves that create the biggest visual bang for your buck. From lighting tricks to layout tweaks, each one is designed to be doable on a weekend and easy on your wallet.
1. String Lights Across the Patio
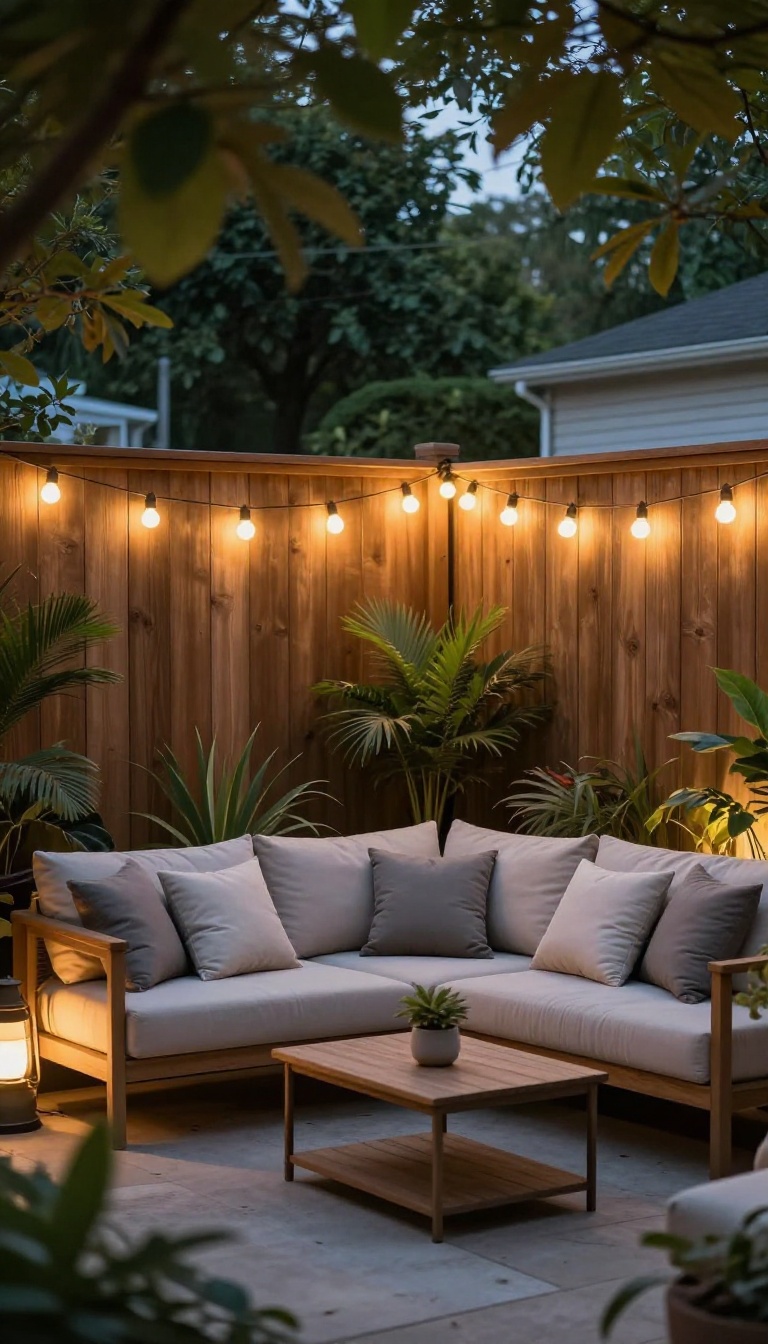
String lights are the closest thing to a magic trick for a boring backyard. They don't need an outlet, a permit, or a single nail in your house. You just hang them, plug them in, and suddenly your patio looks like it belongs in a magazine.
The trick is in the zigzag. Run the lights from one fence post to another, then back again, creating a soft canopy over your seating area. Warm-white bulbs work best because they flatter everything and don't feel harsh.
You can use a single long strand or connect a few shorter ones, depending on the size of your space. The goal is to cover the area where people actually sit, not the whole yard.
What You'll Need
A 50- to 100-foot strand of outdoor string lights, a few screw-in hooks or zip ties, and an outdoor extension cord if your outlet is far. That's it. No electrician, no wiring, no stress.
How To Hang Them Without Damaging Anything
Screw small hooks into fence posts or use adhesive clips on smooth surfaces. If you're renting, zip ties around tree branches work great and come off in seconds. Keep the lights high enough that people won't bump their heads, but low enough to feel cozy.
Making It Look Intentional
Don't just drape them in a straight line. Alternate the height of your hooks slightly so the lights dip and rise. That gentle wave is what makes it look designed instead of thrown together.
Add a dimmer plug if you want to control the mood from bright and festive to soft and romantic.
2. Painted Fence for a Fresh Backdrop
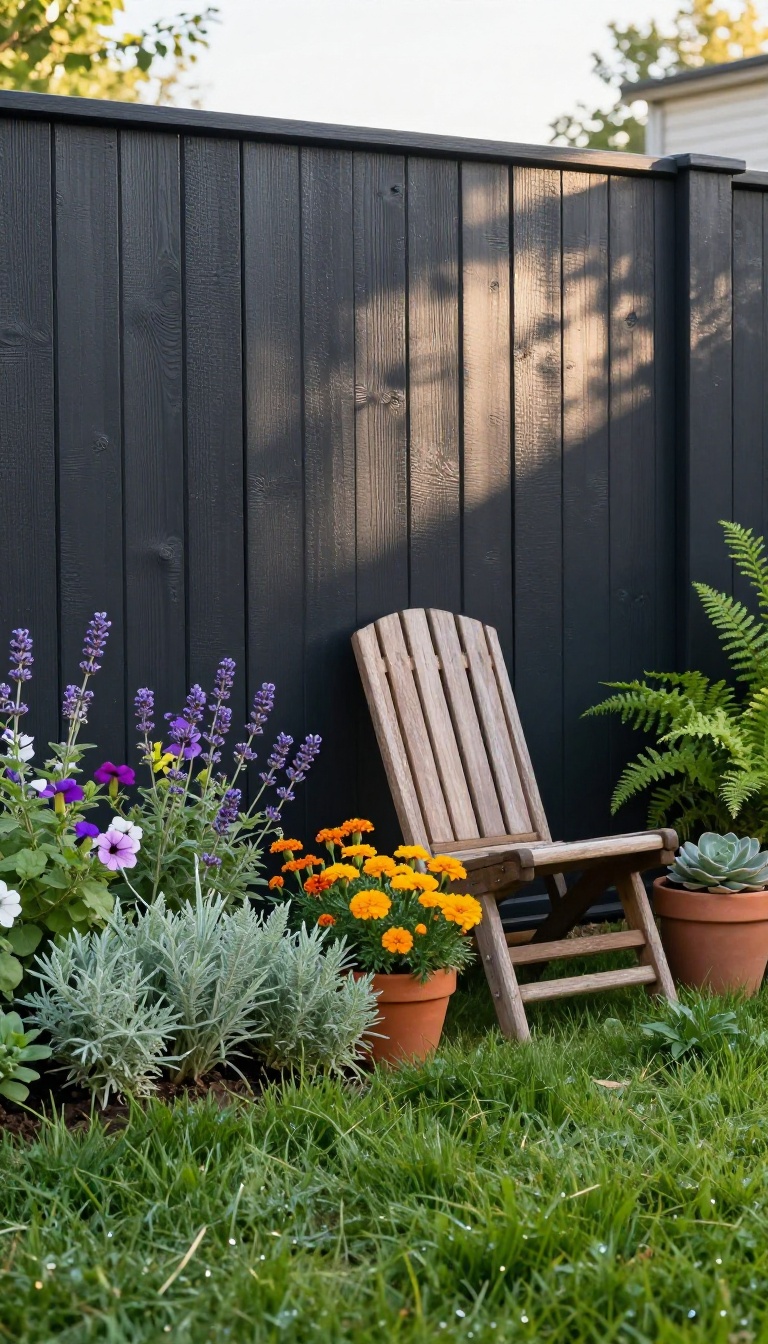
A fence does more than mark property lines. It sets the background for everything else in your yard, and when it's faded, weathered, or mismatched, the whole space feels tired. Painting or staining it in a deep charcoal or soft sage gives you a clean, modern backdrop that makes plants, furniture, and lighting pop.
It's one of the cheapest ways to make your backyard look intentionally designed. The best part? You can tackle it in a weekend with basic tools and a little patience.
Pick A Color That Works With Your Greenery
Deep charcoal creates a dramatic contrast that makes green foliage and colorful flowers stand out. It also hides dirt and shadows well, so the fence looks crisp longer. Soft sage is softer and more organic.
It blends with plants while still feeling fresh, and it pairs nicely with wood tones and white trim. Avoid bright, saturated colors unless you want the fence to be the star. Muted, earthy shades keep the focus on your yard.
Prep And Paint Without The Mess
Start by cleaning the fence with a pressure washer or a stiff brush and mild soap. Let it dry completely, then sand any rough spots and fill cracks with exterior wood filler. Use a paint sprayer for large sections to save time, or a roller and brush for smaller areas.
Apply two thin coats rather than one thick one for even coverage. Tape off nearby plants and cover the ground with drop cloths. A little prep keeps paint off your grass and patio.
Make The Color Last
Choose an exterior paint or stain made for wood and your climate. A satin or semi-gloss finish is easier to wipe clean than flat. Check for peeling or fading each spring and touch up as needed.
A quick recoat every few years keeps the backdrop looking sharp. If your fence is cedar or pressure-treated, use a stain rather than paint so it can breathe and resist moisture.
3. Mulch Beds with Sharp Edges
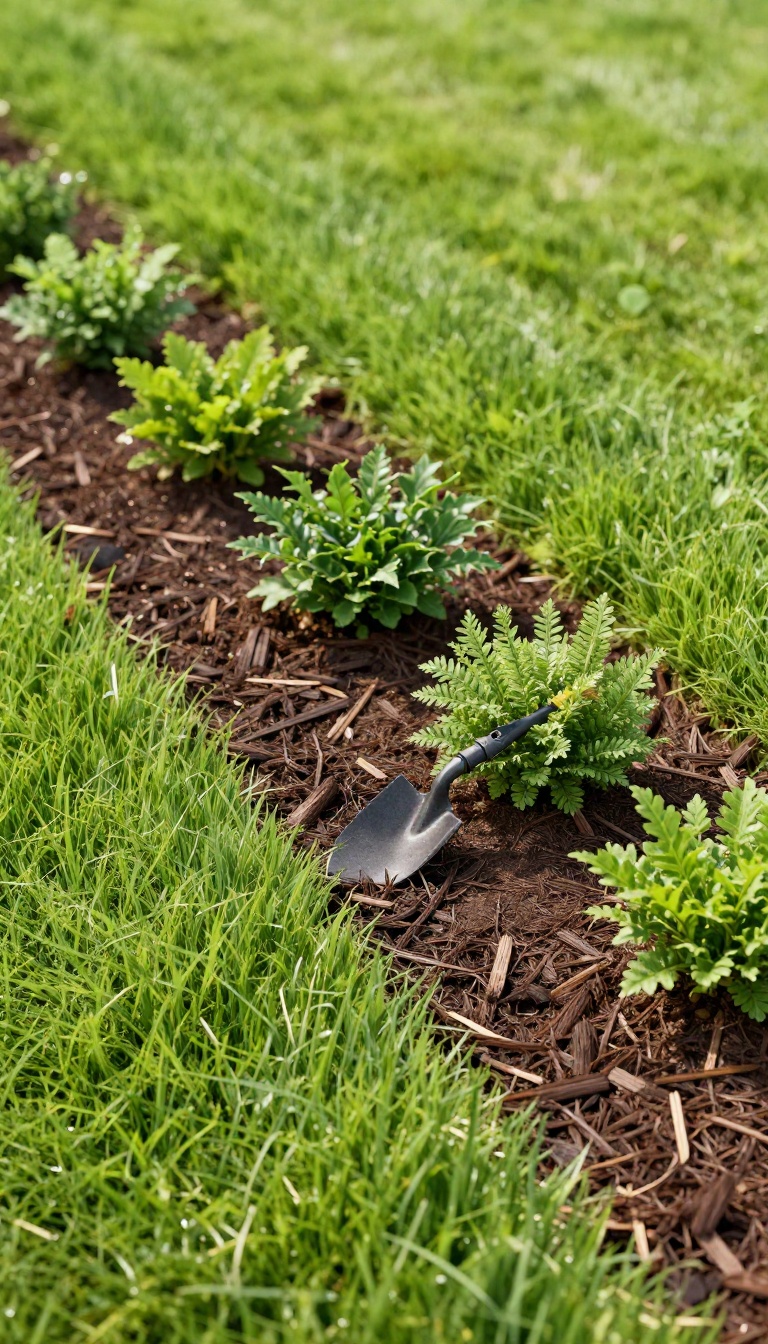
Mulch is one of those quiet heroes of a budget backyard. It costs next to nothing, takes an afternoon to spread, and instantly makes everything around it look more polished. The real trick isn't just the mulch itself — it's the edge.
A crisp, spade-cut line between your beds and your lawn creates a clean visual break that reads as 'professional' even if you did it yourself in flip-flops.
Think of your planting beds as picture frames for your plants. When the frame is messy and blurred, the whole picture suffers. When it's sharp and defined, even ordinary shrubs and perennials look intentional.
That's the power of a good edge combined with a fresh layer of dark mulch.
Why Dark Mulch Works So Well
Dark brown or black mulch does two things at once. It makes green foliage pop because of the contrast, and it visually recedes, so your eyes go to the plants instead of the ground. It also hides bare soil and minor imperfections better than lighter mulches.
A thick layer — two to three inches — blocks weeds and holds moisture, which means less work for you later.
How To Cut A Clean Edge
You don't need fancy tools. A sharp flat spade and a steady hand are enough. Start by defining the line you want — a gentle curve usually looks more natural than a rigid straight edge.
Push the spade straight down along that line, then slice underneath the sod to lift it away. Angle the cut slightly inward so the bed sits a little lower than the lawn. That small trench keeps grass from creeping back in and gives you a crisp shadow line that makes the edge look razor-sharp.
Keeping It Sharp Without The Hassle
Once the edge is cut, refresh it once or twice a season with a quick pass of the spade. It takes ten minutes and keeps the definition intact. If you want zero maintenance, consider edging with steel or stone, but honestly, the spade-cut look is more organic and costs nothing.
Just avoid piling mulch over the edge — leave that clean line visible. That's what sells the whole manicured look.
4. Container Gardens for Instant Greenery
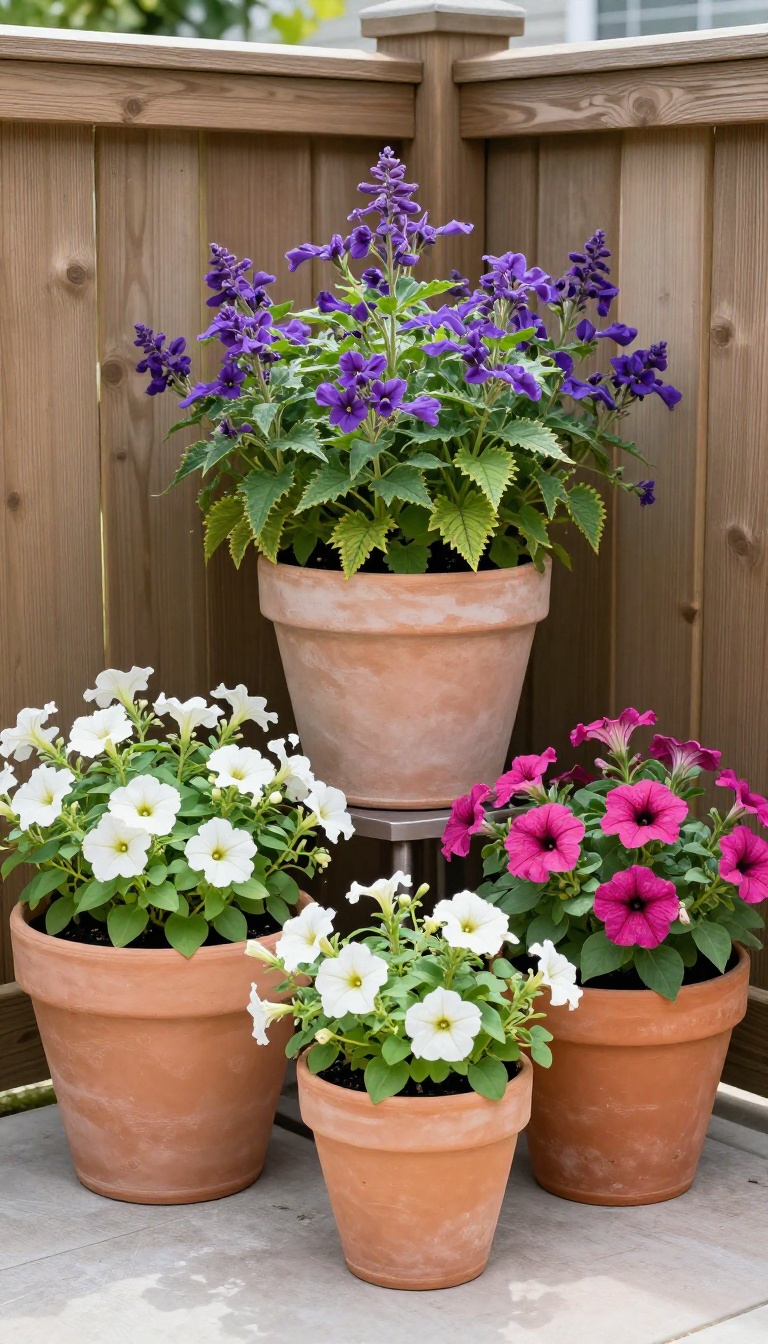
Empty corners and bare spots along a fence or patio can make even a decent backyard feel unfinished. Container gardens solve that problem fast, no shovel required. Group a few large pots together and you get a full, layered look that reads as intentional—like you planned it all along.
The trick is treating your containers like a mini garden bed. You're not just lining up pots; you're creating a composition with height, color, and movement. Three to five pots in varying sizes usually do the job.
Place the tallest in back, medium in the middle, and let trailing plants spill over the front. This works on a patio, beside a door, or in that awkward corner where grass refuses to grow.
Pick The Right Pots
Bigger is better here. Large pots hold moisture longer, give roots room, and make a bolder statement. Look for lightweight resin or fabric grow bags if you want to save money and your back.
Terracotta and ceramic look great but get heavy and pricey. A mix of sizes and heights keeps things interesting. Just make sure every pot has drainage holes—soggy roots kill the vibe fast.
Choose Plants With Punch
Start with a tall grass like purple fountain grass or switchgrass for vertical interest. Add colorful annuals such as petunias, calibrachoa, or coleus for pops of color. Finish with a trailer like sweet potato vine or bacopa to soften edges.
This thriller, filler, spiller combo is a classic for a reason. It fills space quickly and looks full all season.
Arrange And Maintain
Cluster pots tightly so they read as one mass, not a scattered collection. Turn them occasionally so plants grow evenly. Water deeply when the top inch of soil feels dry—containers dry out faster than ground beds.
Feed with a liquid fertilizer every couple of weeks. Deadhead spent blooms to keep flowers coming. In colder months, swap in evergreens or ornamental cabbages for year-round interest.
5. DIY Fire Pit from a Kit or Blocks
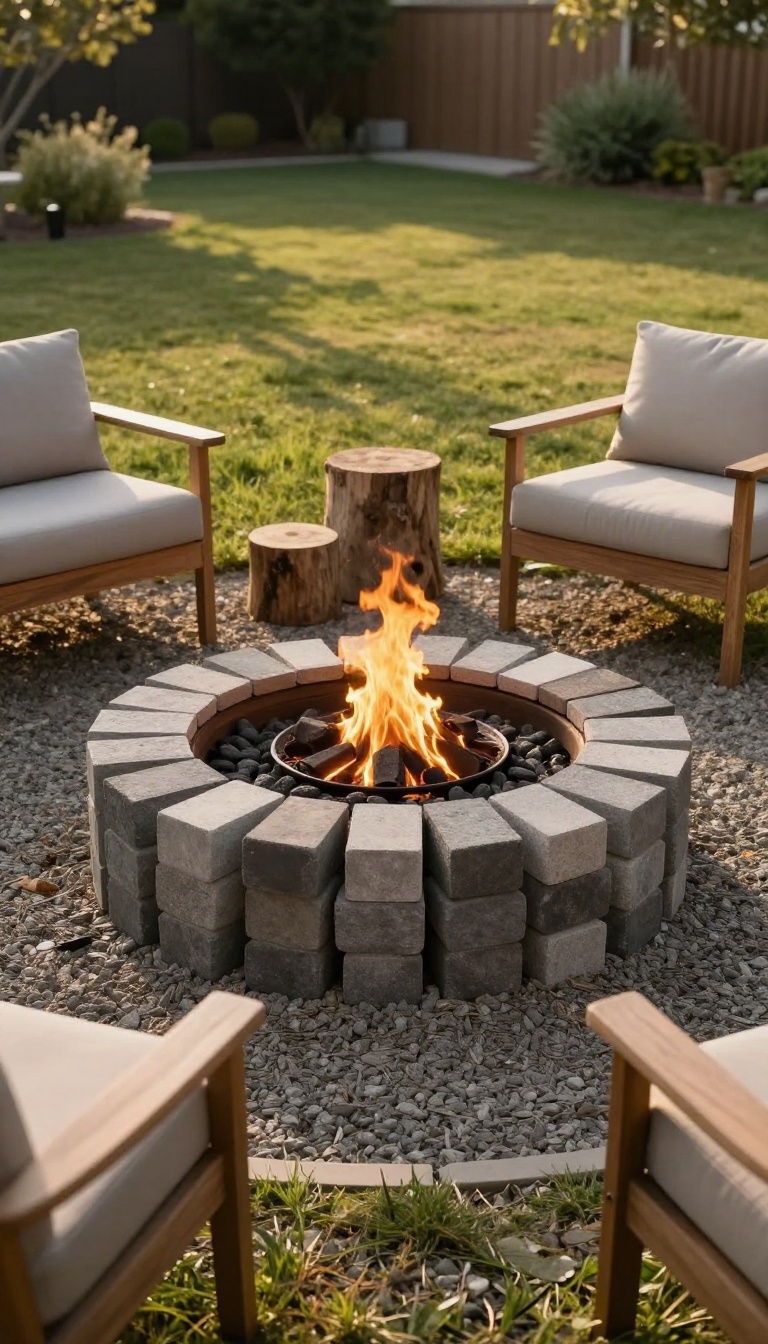
A fire pit changes how you use your backyard after dark. It gives people a reason to linger, and it instantly makes the space feel intentional. You can build one with a kit or a stack of landscape blocks for under a hundred dollars, and it becomes the anchor of your outdoor evenings.
You don't need a mason or a fancy custom design. A simple circle of blocks or a metal insert does the job. The key is picking a spot that's safe, level, and far enough from anything flammable.
Once it's in, you've got a gathering spot that works for cool nights, s'mores, and easy conversation.
Pick The Right Spot
Keep it at least 10 feet from your house, fence, and low-hanging branches. Look for a flat, open area that's easy to see from your patio or kitchen window. A spot that's slightly away from the main seating area gives you a natural destination without crowding the yard.
Choose Your Build Style
A metal fire pit insert is the fastest route. You just drop it in a gravel base and you're done in an afternoon. If you want a more built-in look, stack two or three rows of landscape blocks in a circle.
No mortar needed, and you can rearrange them later if you change your mind.
Add Simple Seating
You don't need new furniture. Move a few chairs from your patio, or use stumps or cushions around the circle. The fire pit itself draws the eye, so the seating just needs to be comfortable and close enough to feel the warmth.
Keep It Safe And Low-maintenance
Line the bottom with a layer of gravel or sand for drainage. Use a metal grate or screen to keep sparks contained. When you're not using it, a simple cover keeps leaves and rain out.
That's it—no complicated upkeep, just a spot that's ready when you are.
6. Outdoor Rug to Define the Space
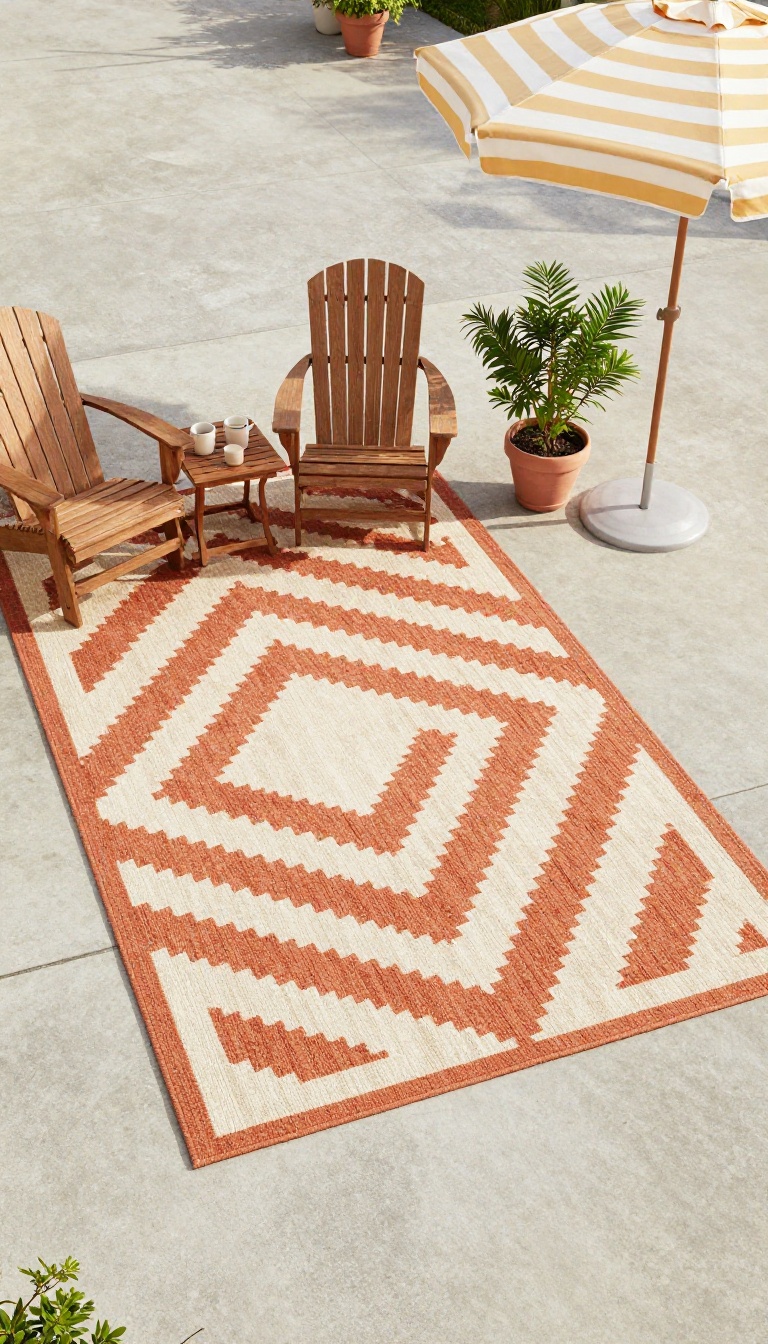
A plain concrete patio can feel cold and unfinished, like an empty room waiting for furniture. An outdoor rug instantly changes that by anchoring your seating area and giving it a clear purpose. It adds color, pattern, and softness without the cost of new flooring or hardscaping.
The best part is that outdoor rugs are built to handle sun, rain, and foot traffic, so you don't have to baby them. They come in tons of styles, from bold geometric prints to subtle natural textures. For the price of a nice dinner out, you can make your patio look like a designed space.
Pick The Right Size
A rug that's too small makes the area feel cramped and disconnected. Measure your seating zone and choose a rug that's large enough to sit under all the main furniture pieces, or at least the front legs. A good rule of thumb: the rug should extend a few inches beyond the edges of your chairs or sofa.
Choose Weather-ready Materials
Look for polypropylene, recycled plastic, or treated natural fibers like jute or bamboo. These materials resist mold, fading, and moisture, so they last through the seasons. Avoid anything that says 'indoor only' unless you plan to bring it inside during bad weather.
Style It With Your Space
A patterned rug can hide stains and add a pop of personality, while a solid neutral keeps things calm and clean. Match the rug to your existing cushions, plants, or umbrella for a pulled-together look. Don't be afraid to go bold—it's an easy way to test a color you love without committing to paint or furniture.
7. Repurposed Pallet Furniture
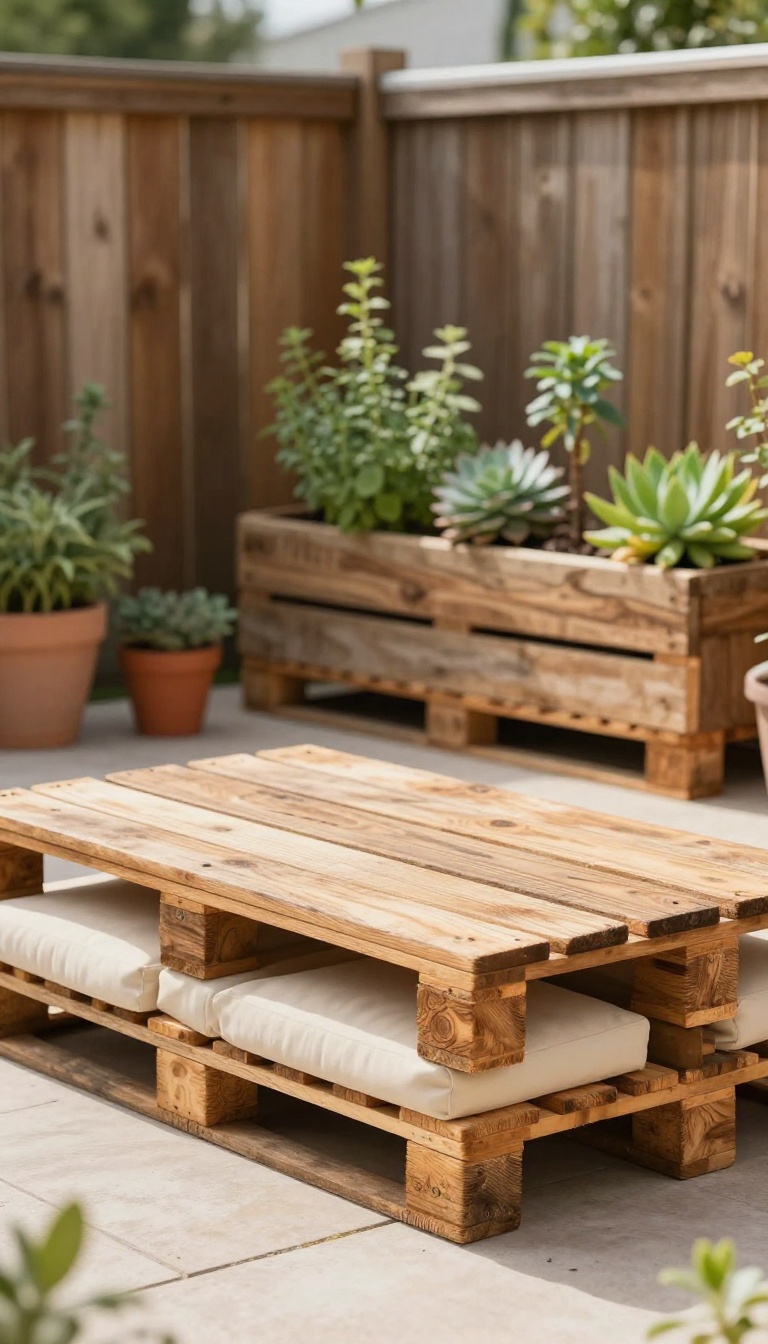
Pallets are everywhere if you know where to look—behind stores, on job sites, or listed for free on marketplace apps. They're built to haul heavy loads, which means they're sturdy enough to become real furniture with a little effort. The best part?
You can build a sectional, coffee table, or vertical garden for next to nothing, and the rustic look fits almost any backyard style.
The trick is treating pallets like raw material, not trash. Once you sand them down and seal them, they lose that rough, splintery feel and gain a warm, weathered finish that looks intentional. You'll spend more time than money, but the payoff is furniture that feels custom-made for your space.
Finding And Prepping Pallets
Not all pallets are safe to use. Look for the stamp 'HT' (heat treated) instead of 'MB' (methyl bromide), and avoid any with visible chemical stains or odd smells. Once you've got clean ones, pull the nails with a pry bar and give every board a good sanding—start with 80-grit, then finish with 120.
A quick coat of outdoor sealant or paint protects the wood from rain and sun, so your project lasts more than one season.
Easy Builds For Beginners
Stack two pallets on top of each other for an instant coffee table—just add casters or cut legs if you want it taller. For a sectional, stand pallets on their sides and screw them together in an L-shape, then top with thick cushions. A vertical garden is even simpler: attach pallets to a fence, staple landscape fabric to the back, fill with potting mix, and plant herbs or succulents in the gaps.
Finishing Touches That Make It Look Custom
Cushions and pillows do most of the heavy lifting here. Choose outdoor fabrics in solid colors or simple stripes to keep the look clean, not cluttered. A coat of white or charcoal paint can modernize the wood if rustic isn't your thing, and a few sanded edges give it a soft, worn-in feel.
Add a small side table made from a single pallet cut in half, and you've got a cozy seating area for under $50.
8. Solar Path Lights Along Walkways
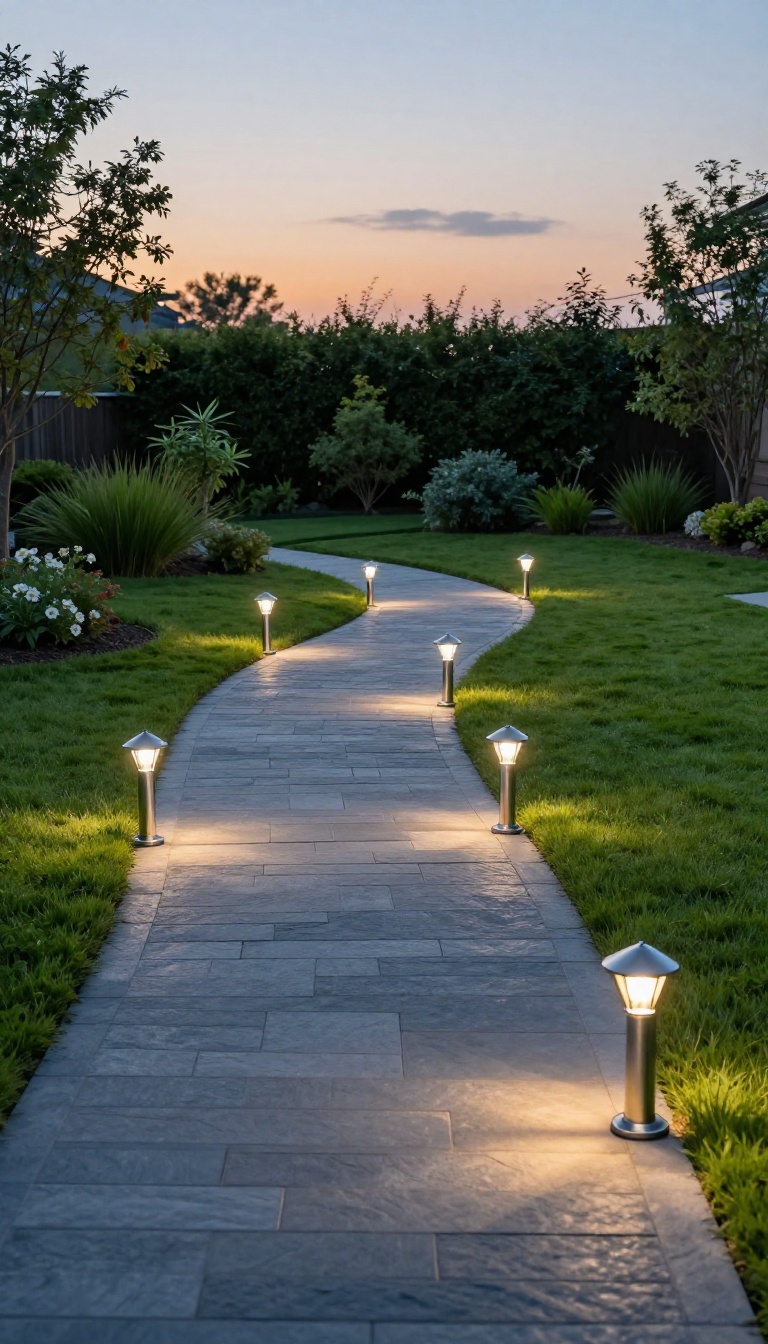
Walkways that disappear into the dark feel like a missed opportunity. Solar stake lights fix that for a few dollars a pop, no wiring or electrician required. They soak up sun all day and switch on at dusk, turning a plain path into a guided, glowing route.
The best part? You can install a full line of them in under an hour. Just push the stakes into the ground and let the sun do the rest.
No trenching, no timers, no added utility costs.
Solar path lights come in a range of styles, from simple stainless-steel stakes to decorative lanterns and even color-changing globes. The trick is to pick a consistent look and space them evenly so the line feels intentional, not scattered. You’re aiming for a soft, continuous glow that marks the way without turning your yard into a runway.
Placement matters more than price. A $5 light in the right spot beats a $25 light in the wrong one. Follow the natural curve of your path, or create a gentle rhythm along a straight walk.
The goal is guidance and ambiance, not interrogation-level brightness.
Pick The Right Spot
Stake lights work best along the edges of walkways, garden beds, and steps. Space them 4 to 6 feet apart for a steady line of light. If your path curves, place a light at each turn so the route reads clearly after dark.
Avoid putting them directly under trees or shrubs that will block the sun during the day.
Get More Glow For Less
Cheap solar lights often have weak batteries, but you can boost performance without spending more. On sunny days, make sure the panels face up and stay clear of shadows. If a light starts fading fast, swap in a higher-capacity rechargeable battery—most take standard AA or AAA.
A $2 upgrade can double the runtime.
Style Without The Sticker Shock
You don’t need matching designer lights to get a polished look. Choose one finish—like black, bronze, or stainless—and stick with it. Mix heights for a little visual interest, or line both sides of a path for a formal feel.
Dollar-store lights can look surprisingly good when they’re arranged with a plan.
9. Privacy Screen from Lattice or Bamboo
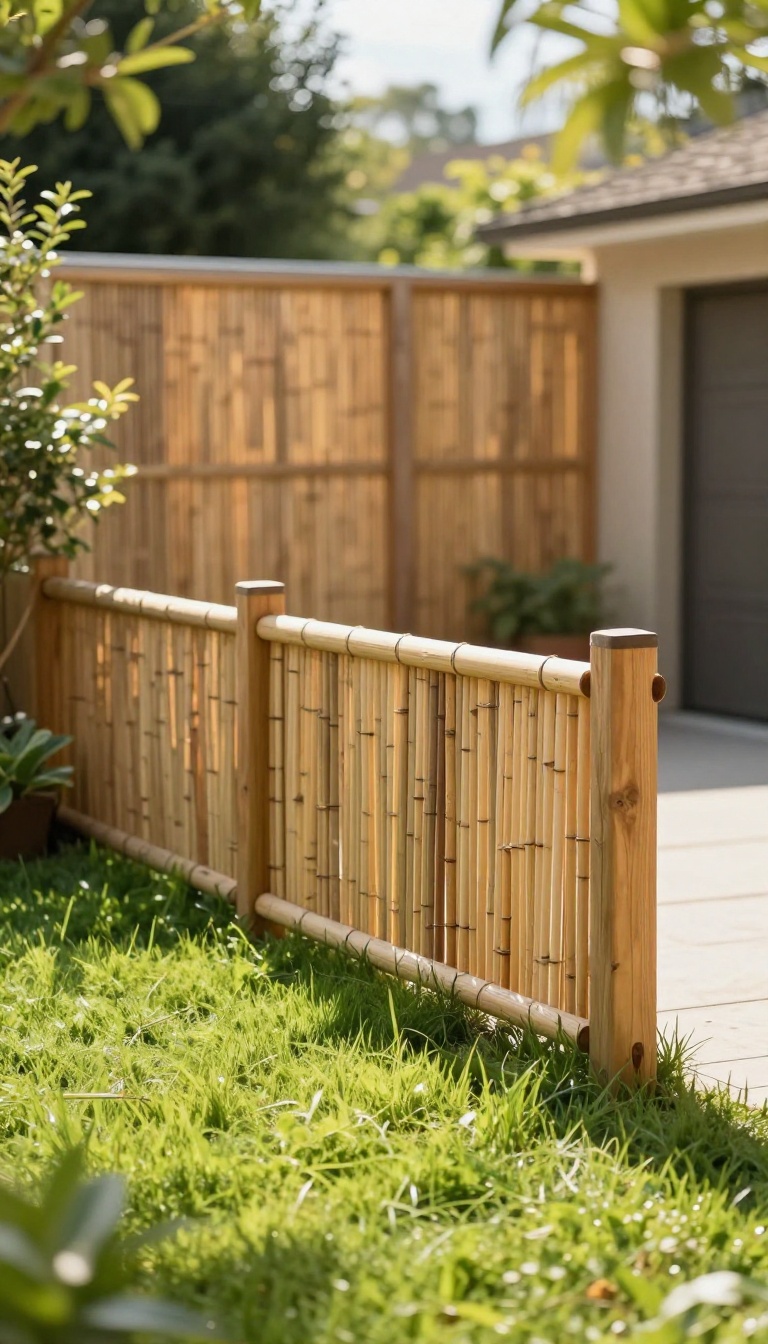
That spot behind the garage where the trash cans live? Or the side yard where your neighbor's shed stares back at you? A simple privacy screen made from lattice or bamboo fencing can hide the ugly stuff and make your yard feel more put-together in an afternoon.
It's one of those rare fixes that's cheap, fast, and actually looks good.
You don't need a custom-built wall to get privacy and polish. A basic lattice panel or a roll of bamboo fencing costs way less than you'd think, and you can install it yourself with just a few tools. The trick is picking the right material for your space and mounting it so it stays put through wind and weather.
Here's how to make it work.
Pick Your Material
Lattice comes in wood or vinyl, and both are affordable. Wood gives you a natural look that you can paint or stain to match your fence, while vinyl holds up better in wet climates and never needs painting. Bamboo fencing is another great option—it's rollable, lightweight, and adds instant tropical texture.
A 6-foot by 8-foot roll usually costs under $30, and a standard lattice panel is often $20 to $40. For a small area, one panel or roll is often enough.
Mount It Without A Fence
If you don't have a fence to attach to, you can still make it work. Use pressure-treated 4×4 posts set in concrete or sturdy metal post anchors. Space them 4 to 6 feet apart, then screw your lattice or bamboo directly to the posts.
For a renter-friendly version, try zip-tying bamboo fencing to an existing chain-link fence or using adjustable tension rods between two walls. Just make sure it's secure—you don't want it flopping around in a storm.
Style It Up
A plain screen does the job, but you can make it look intentional with a few cheap touches. Paint lattice a bold color like charcoal or deep green to make it feel like a design feature. Weave string lights through the holes for a cozy glow at night.
Or plant fast-growing vines like morning glory or climbing jasmine at the base—they'll cover the screen in greenery within a season. Bamboo screens already have texture, so keep it simple with a few potted plants in front.
10. Gravel Patio on a Budget
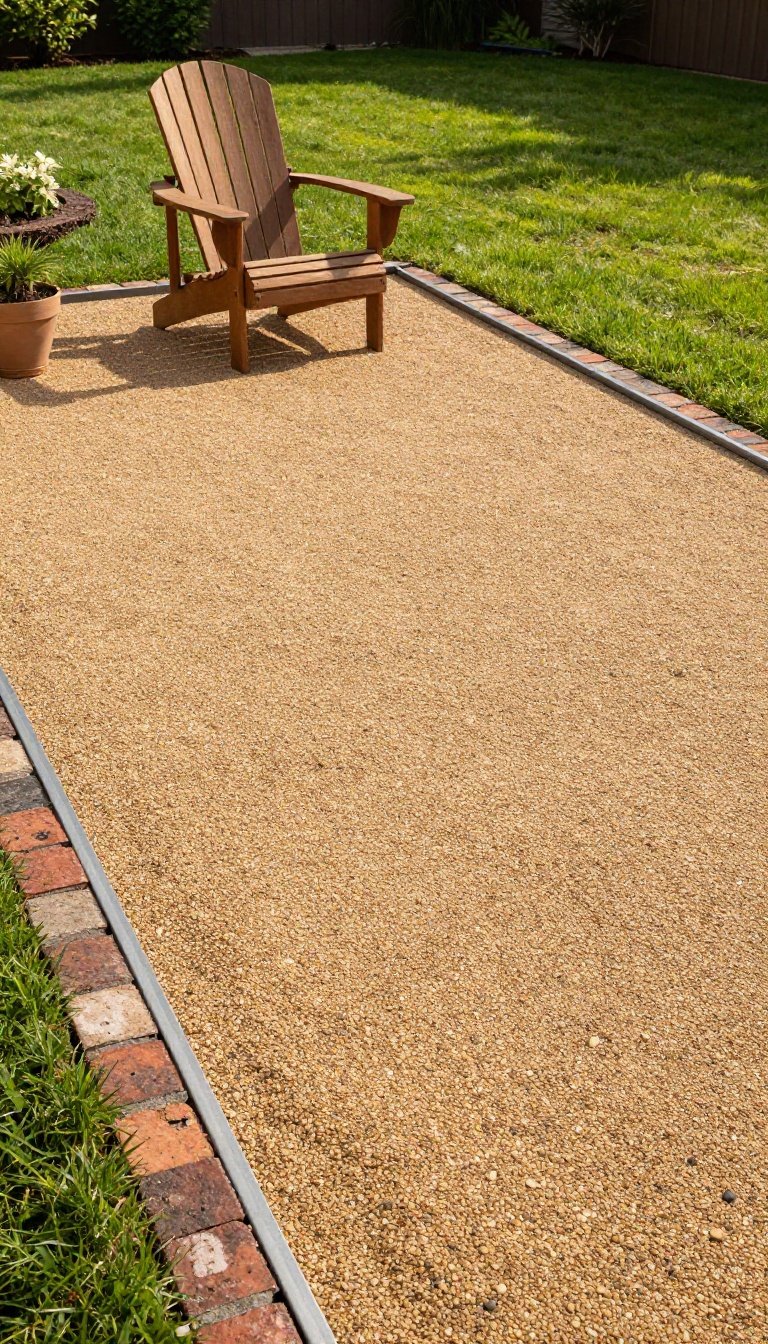
Pavers look great until you price them out. A gravel patio gives you the same clean, finished feel for a fraction of the cost, and you can knock it out in a weekend without renting a cement mixer. It drains beautifully, handles foot traffic, and works with just about any backyard style.
All you really need is a shovel, a tamper, and a willingness to get a little dusty.
Gravel patios have been around forever for a reason. They're cheap, they're forgiving, and they age better than most hardscapes because you can always top them off. The trick is doing it right so it doesn't turn into a weed-filled mud pit after the first rain.
That comes down to prep, edging, and picking the right stone.
Pick The Right Gravel
Pea gravel is cheap but shifts underfoot and rolls into the lawn. Crushed stone or decomposed granite compacts into a firm, stable surface that feels more like a real patio. Go with a 3/4-inch crushed rock for the base and a finer 1/4-inch layer on top.
If you want a softer look, decomposed granite in a warm tan or gray tone blends nicely with most yards.
Prep And Edge It Properly
Dig out about three inches of soil and rake it level. Tamp it down, then lay landscape fabric to block weeds from pushing through. For the edge, steel edging, pressure-treated lumber, or a single row of bricks will keep the gravel contained.
Without an edge, gravel migrates into the grass and your patio slowly disappears.
Lay, Compact, And Top Off
Dump your base gravel in two-inch layers and tamp each one. This is the step people skip, and it's the reason their patio feels loose and spongy. Spread the finer top layer, wet it lightly, and tamp again.
Add a few stepping stones or a small bistro set, and it reads as a designed space rather than a pile of rocks.
11. Hanging Planters for Vertical Color
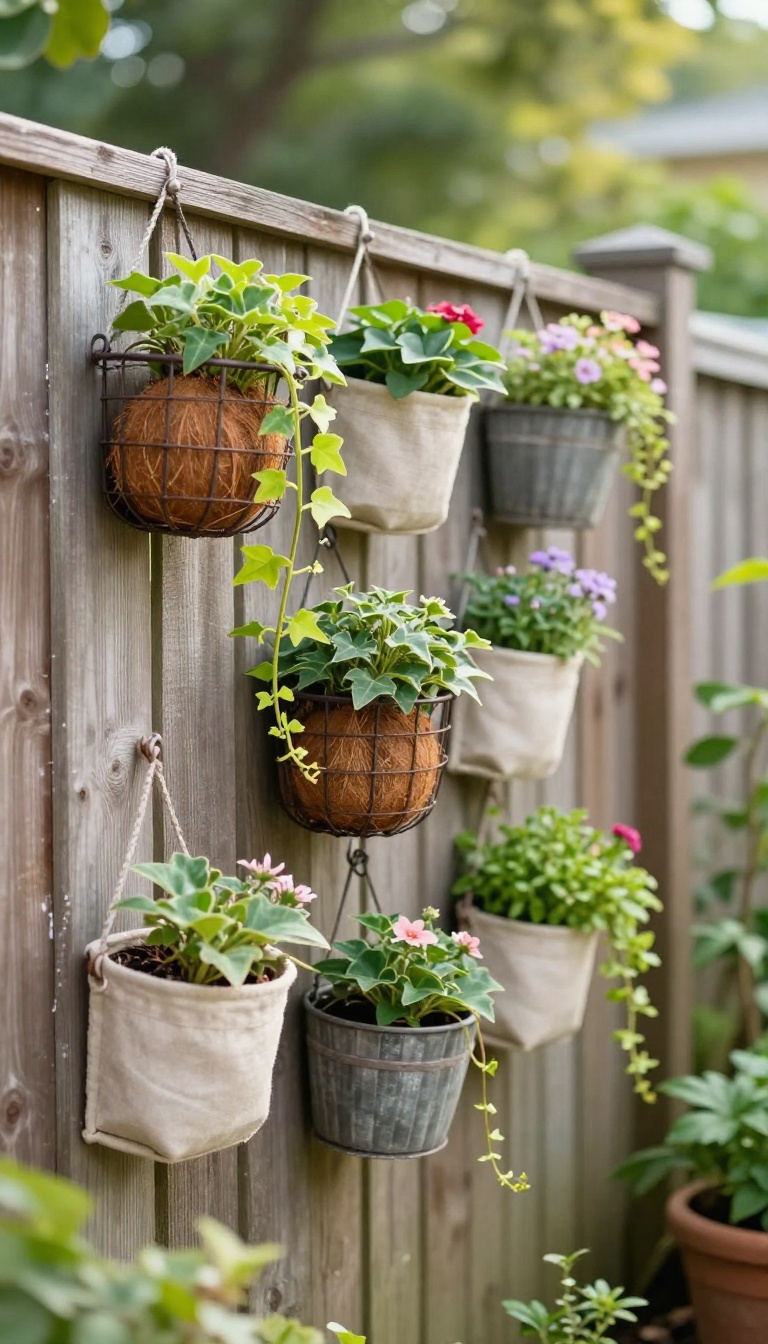
Blank fence boards and bare wall space are wasted opportunities. Hanging planters fill that vertical real estate with color and life, often for less than the cost of a single bag of mulch. A few baskets at eye level can transform a plain boundary into a lush, layered backdrop.
The best part? You don't need to own a drill or spend a weekend digging.
Hanging planters work because they use space you already have. Instead of crowding the ground, they draw the eye upward and soften hard edges. You can start with one or two and add more over time.
Most styles cost between $5 and $20, and many can be made from things you already own.
Pick Your Planters
Classic wire baskets with coconut liners are cheap and look great. Fabric wall pockets are even easier—just nail them up and tuck in plants. For a rustic touch, use a wooden crate or a repurposed bucket.
Whatever you choose, make sure it has drainage or you'll drown your plants.
Choose Tough Plants
Not every plant loves hanging in the air. Trailing plants like ivy, sweet potato vine, and bacopa spill over the edges beautifully. For sunny spots, try portulaca or calibrachoa.
In shade, ferns and coleus thrive. Mix one upright plant with one trailer per basket for instant fullness.
Hang Them Right
Use sturdy hooks rated for the weight of wet soil—it's heavier than you think. Space baskets 18 to 24 inches apart so plants have room to grow. Group them at different heights to create a cascading effect.
If you're renting, adhesive hooks can work for lightweight fabric planters.
Keep Them Looking Good
Water more often than you would ground plants—hanging baskets dry out fast. A slow-release fertilizer at planting time saves you from constant feeding. Deadhead spent blooms weekly to keep flowers coming.
In hot spells, a quick morning soak keeps everything perky.
12. Upcycled Window Frame as Garden Art
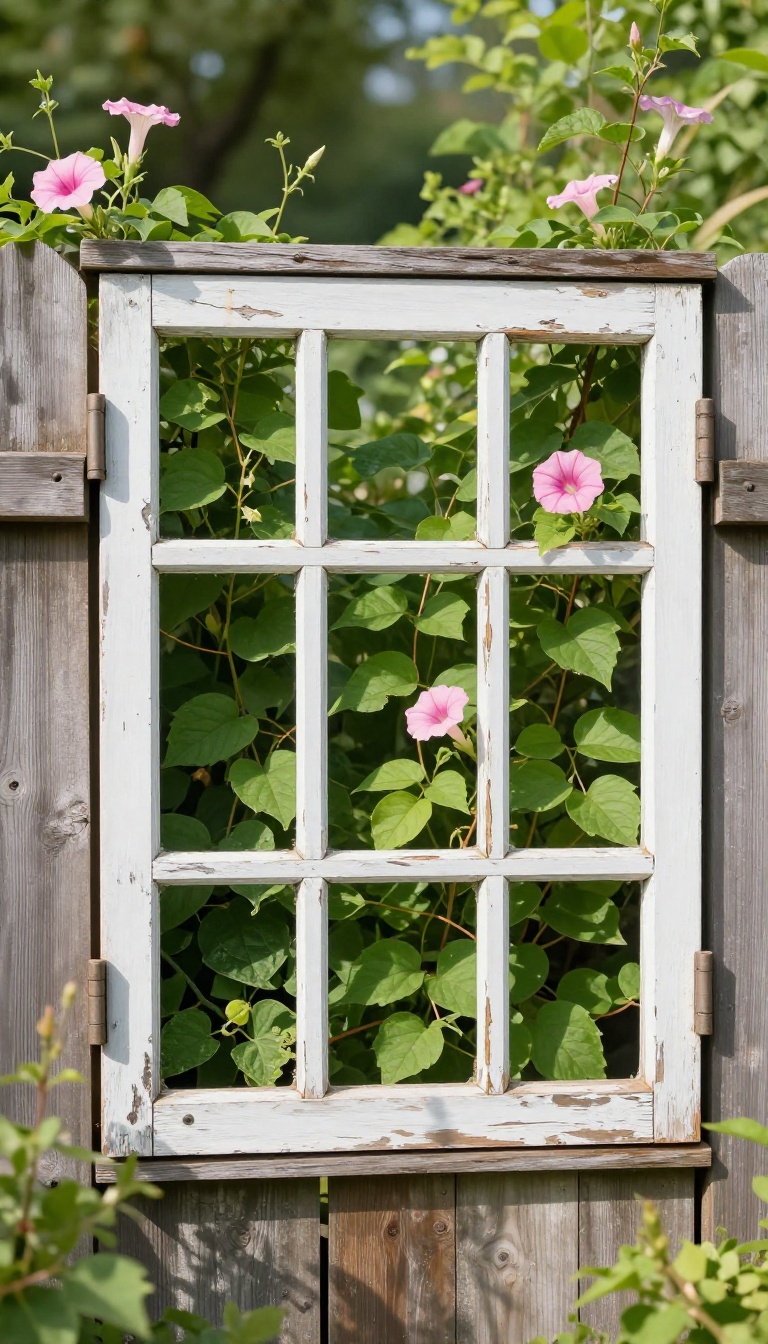
Old window frames get tossed to the curb every week, and most people never give them a second glance. But that castoff sash can become the most charming thing on your fence. Hang one up, let a vine weave through it, and you've got garden art that looks collected, not bought.
The trick is treating the frame like a living picture frame. You're not just nailing wood to a wall—you're creating a stage for plants to climb and flowers to peek through. It reads as intentional, even though it cost you next to nothing.
This works on wood fences, shed walls, garages, and even bare exterior walls that need some life. The frame breaks up a flat surface and gives vines something to grab onto. Once the greenery fills in, the whole thing looks like it grew there on purpose.
Where To Find One For Free
Check curb piles on trash day, local buy-nothing groups, and Habitat ReStore. Single-pane wood sashes are the easiest to hang and the most charming. Avoid vinyl frames with broken seals—they look cheap and won't hold up.
A little peeling paint is fine; it adds character.
Hanging It Without Damaging The Wall
Use two heavy-duty D-rings on the back of the frame, then hang it on screws driven into studs or fence rails. If you're renting, hang it from a shepherd's hook or lean it against a wall with a brick at the base. Either way, make sure it's secure before vines start climbing.
Vines That Play Nice
Annual morning glories are fast and forgiving—they'll cover the frame in weeks. For something perennial, try climbing hydrangea or a small clematis. Avoid aggressive growers like wisteria unless you want to prune constantly.
Train the vine through the frame early, and it'll follow the shape you set.
Styling The Frame Itself
Leave the glass out so vines can pass through. If the frame feels too plain, dry-brush a little white paint on the muntins for a weathered look. You can also tuck a small solar light behind it for a soft glow at night.
Just don't overdo it—the plants are the star.
13. DIY Stepping Stone Path
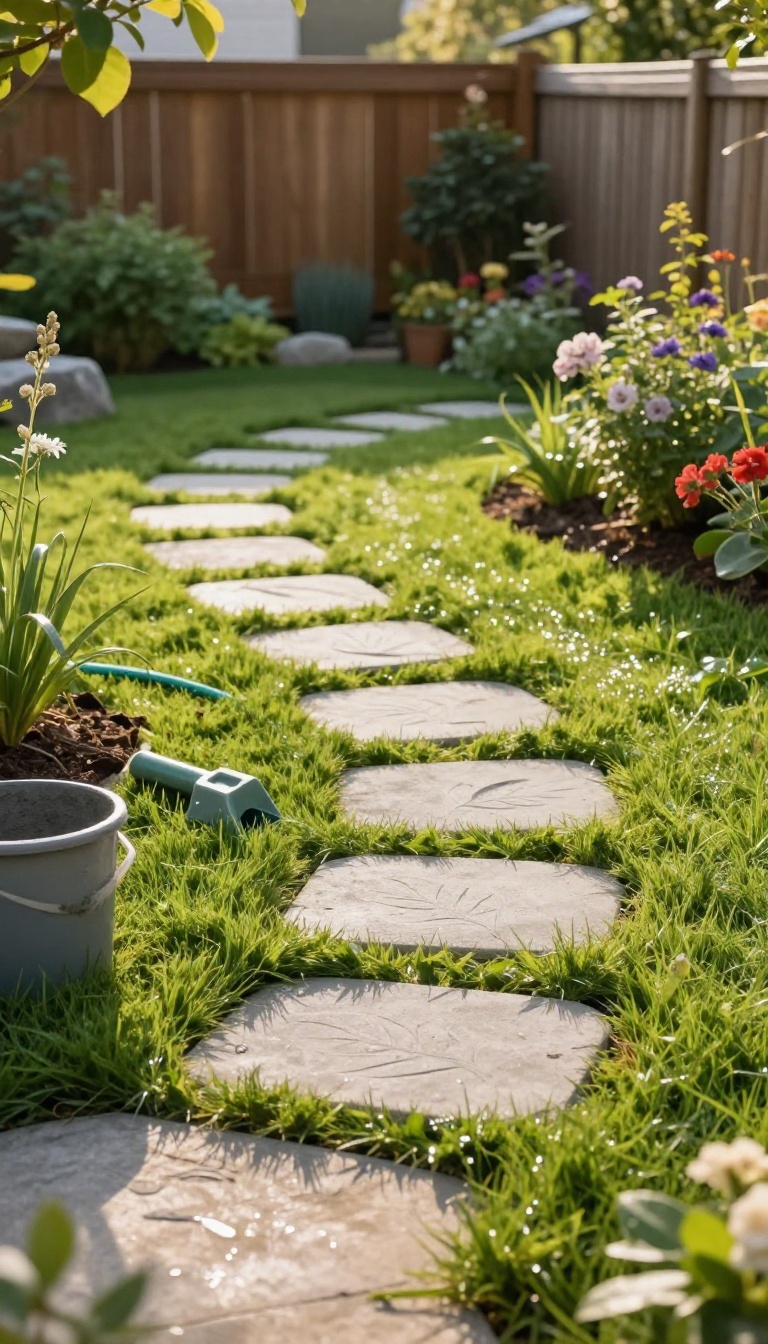
A plain stretch of grass between your patio and garden doesn't have to stay plain. A curved stepping stone path adds instant charm, guides the eye, and keeps your feet clean and dry. Best of all, you can make it yourself with basic materials for very little money.
You don't need fancy pavers or a pro installer. Concrete mix, a few molds, and a free afternoon are enough to create a custom path that looks like it cost way more than it did. The curve is what sells it—straight lines feel rigid, but a gentle bend makes the whole yard feel more inviting.
Choose Your Stone Style
You have two main routes: buy inexpensive concrete pavers or make your own stepping stones. Store-bought pavers are quick and uniform, but homemade ones let you customize the shape, color, and texture. If you go DIY, use a simple mold—like a plastic tub or a purchased stepping stone form—and mix concrete according to the package directions.
Add a handful of pebbles or a leaf imprint on top for a custom touch.
Lay Out The Curve
Before you dig or pour anything, map the path. Use a garden hose or a rope to test a curve that feels natural. Step back and check it from different angles—especially from your main seating area.
Once you're happy, mark the spots for each stone with a shovel or spray paint. Space them so you can walk comfortably, about 2 to 3 inches apart.
Set And Level Each Stone
Dig a shallow hole for each stone, about 1 inch deep. Tamp the soil flat, then set the stone in place. Use a level to make sure it's not wobbly.
If it rocks, add or remove a little dirt underneath. For homemade stones, let them cure for at least 24 hours before setting them. Once they're all in, fill the gaps with sand or fine gravel to lock them in and keep grass from creeping over.
14. Bold Outdoor Pillows and Cushions
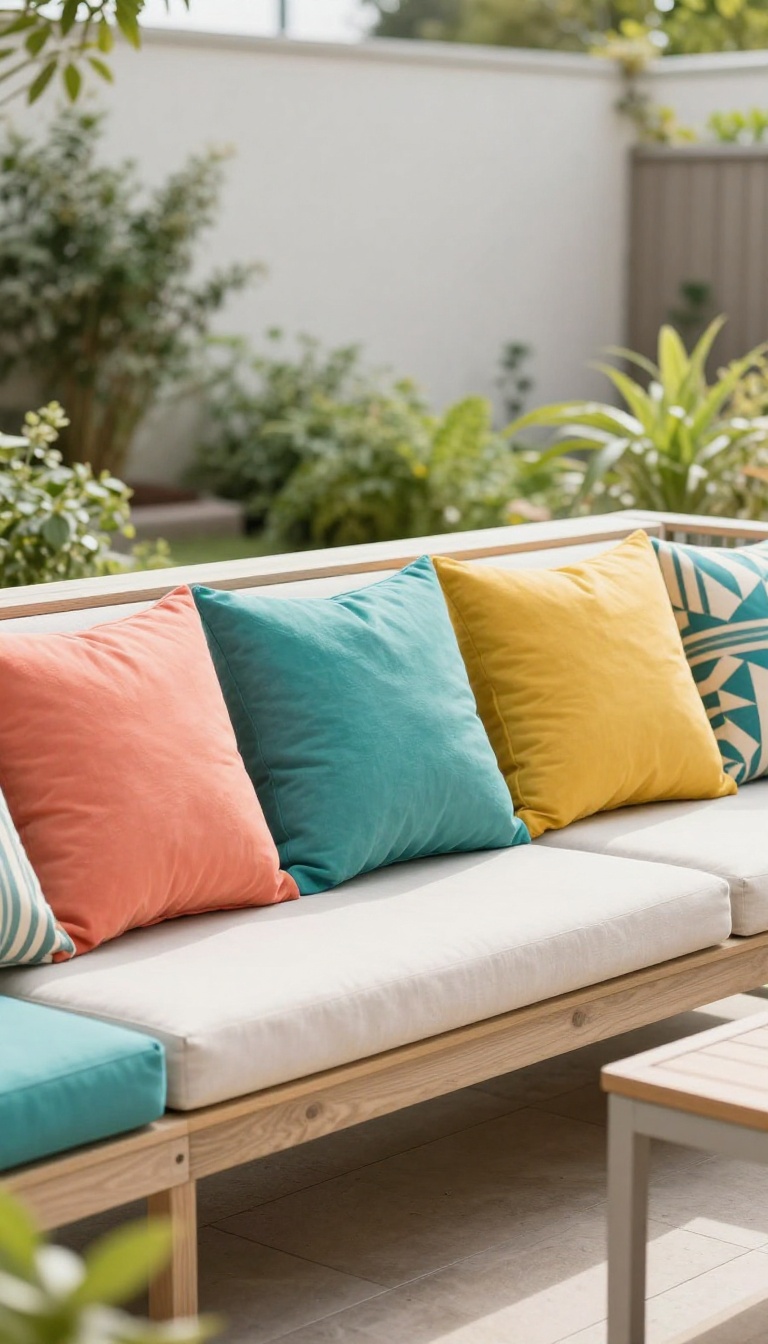
Faded cushions can make even sturdy patio furniture look tired. Instead of replacing the whole set, swap out the covers for bright, weather-resistant fabrics in a cohesive color scheme. It's the cheapest way to make your outdoor space feel brand new.
You don't need to spend hundreds on new furniture. A few well-chosen pillows and cushion covers can transform the look of your seating area in minutes. Plus, you can change them with the seasons or your mood.
Why It Works
Color draws the eye and sets the tone. A pop of coral, teal, or mustard can wake up a neutral patio. Weather-resistant fabrics like solution-dyed acrylic hold up to sun and rain, so your investment lasts.
Choosing The Right Fabrics
Look for outdoor-specific materials that resist fading and mildew. Sunbrella and similar brands are worth the slight splurge. If you're on a tight budget, check discount stores for ready-made covers in durable polyester.
Mixing Patterns And Colors
Stick to two or three colors and repeat them across pillows. Mix a solid, a stripe, and a geometric print for visual interest. Don't be afraid to go bold—outdoor spaces can handle more saturation than indoors.
Quick Diy Options
If you're handy with a sewing machine, you can make covers from outdoor fabric by the yard. No-sew options using fabric glue or iron-on tape work too. Even simple pillowcases in bright hues can do the trick.
15. Simple Water Feature from a Planter
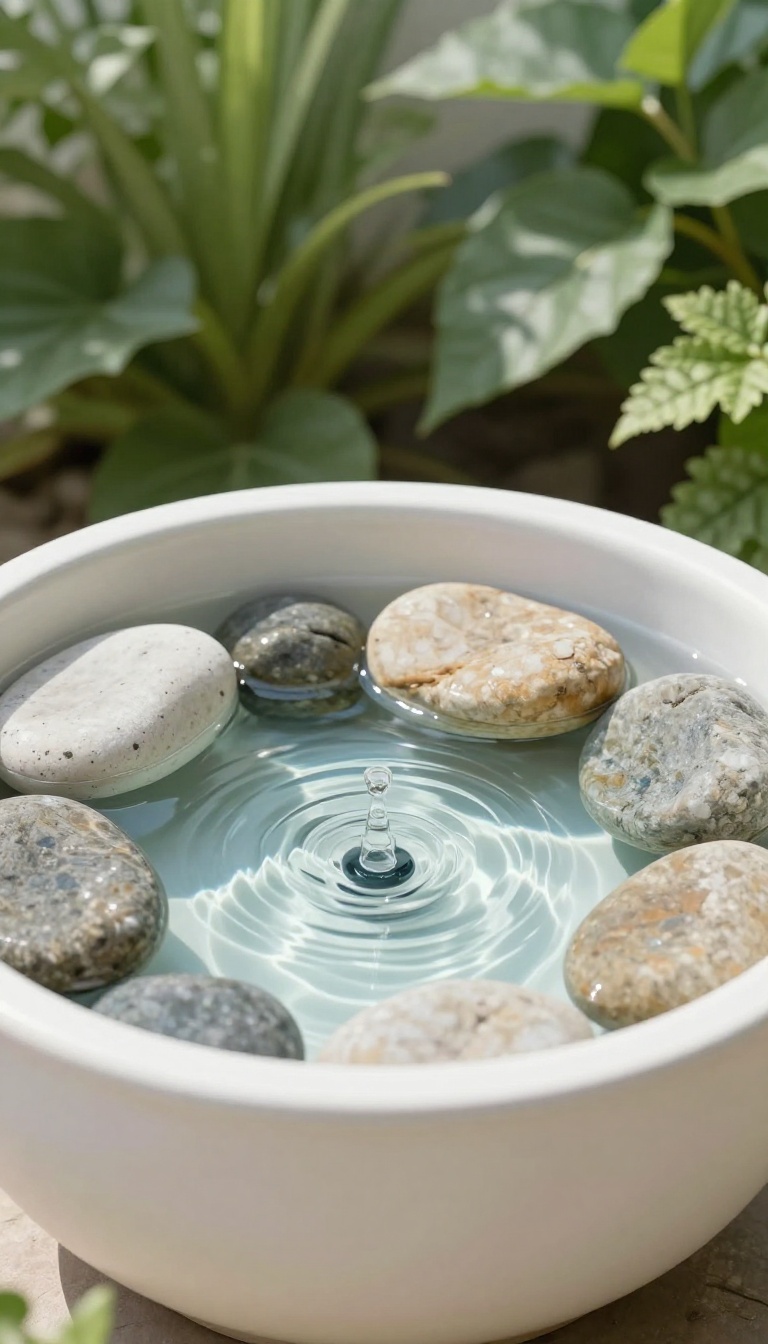
A glazed pot, a small pump, and a handful of rocks can turn a quiet corner into a soothing focal point. The gentle sound of bubbling water adds movement and calm without the cost of a built-in fountain. It's a weekend project that looks like you spent way more than you did.
You don't need a pond or a plumber to get the relaxing effects of water. A container water feature works anywhere you have an outlet or a solar pump. It's self-contained, easy to move, and surprisingly affordable.
Pick The Right Pot And Pump
Choose a glazed ceramic or resin planter that's at least 12 inches wide and 10 inches deep. Make sure it holds water and has no drainage hole. A small submersible pump rated for 50 to 100 gallons per hour is plenty.
Look for one with adjustable flow so you can dial in the sound.
Assemble Without The Fuss
Place the pump in the center of the pot and run the cord through the bottom hole if there is one, or over the rim. Add a layer of river rocks around the pump to hide it. Fill with water until the rocks are just covered.
Plug it in and adjust the flow until you get a gentle bubble, not a splash.
Keep It Looking And Sounding Fresh
Top off the water every few days, especially in summer. Once a month, unplug the pump and rinse the intake screen to prevent clogs. A few drops of algaecide made for fountains will keep the water clear.
In winter, drain the pot and store the pump indoors if you live where it freezes.
FAQ
What is the cheapest way to make my backyard look better?
Start with a deep clean, fresh mulch, and string lights. These three moves cost under $100 total and instantly make the space feel cared for and inviting.
Can I really build a fire pit for under $100?
Yes. A simple ring of landscape blocks or a basic metal insert from a hardware store costs between $50 and $80. You can often find free bricks or stones online.
Do solar lights work well in shady yards?
They need direct sun to charge fully. In shady spots, look for solar lights with separate panels you can place in a sunnier area, or mix in a few battery-powered options.
How do I hide an ugly fence without replacing it?
Try bamboo screening, lattice panels, or a row of tall grasses and climbing vines. A fresh coat of paint also works wonders and costs far less than a new fence.
What is the best budget-friendly patio material?
Crushed gravel is the most affordable. It drains well, comes in several colors, and you can install it yourself over a weekend with basic tools.
Conclusion
You do not need a big budget to make your backyard feel like a destination. Pick one or two ideas from this list and start there. Small changes add up fast, and you can always layer in more over time.
The best backyard is the one you actually use, so focus on what makes you want to step outside. With a little creativity and a free weekend, you can turn a plain space into something you are proud to show off.