11 Kitchen Island Christmas Decor Ideas for a Festive Home
Your kitchen island already handles breakfast, homework, and every platter you own during the holidays. Decorating it for Christmas means working with that reality, not against it.
The trick is adding festive touches that survive real cooking and still look good when guests walk in. Most of these ideas lean on things you probably already have: a garland, a tray, a few ornaments, some candles.
You can drape, hang, and layer your way to a room that feels like December without clearing off the counter every night. Some take five minutes, and a couple are worth a lazy weekend afternoon.
1. Drape a Fresh Garland Along the Island Edge
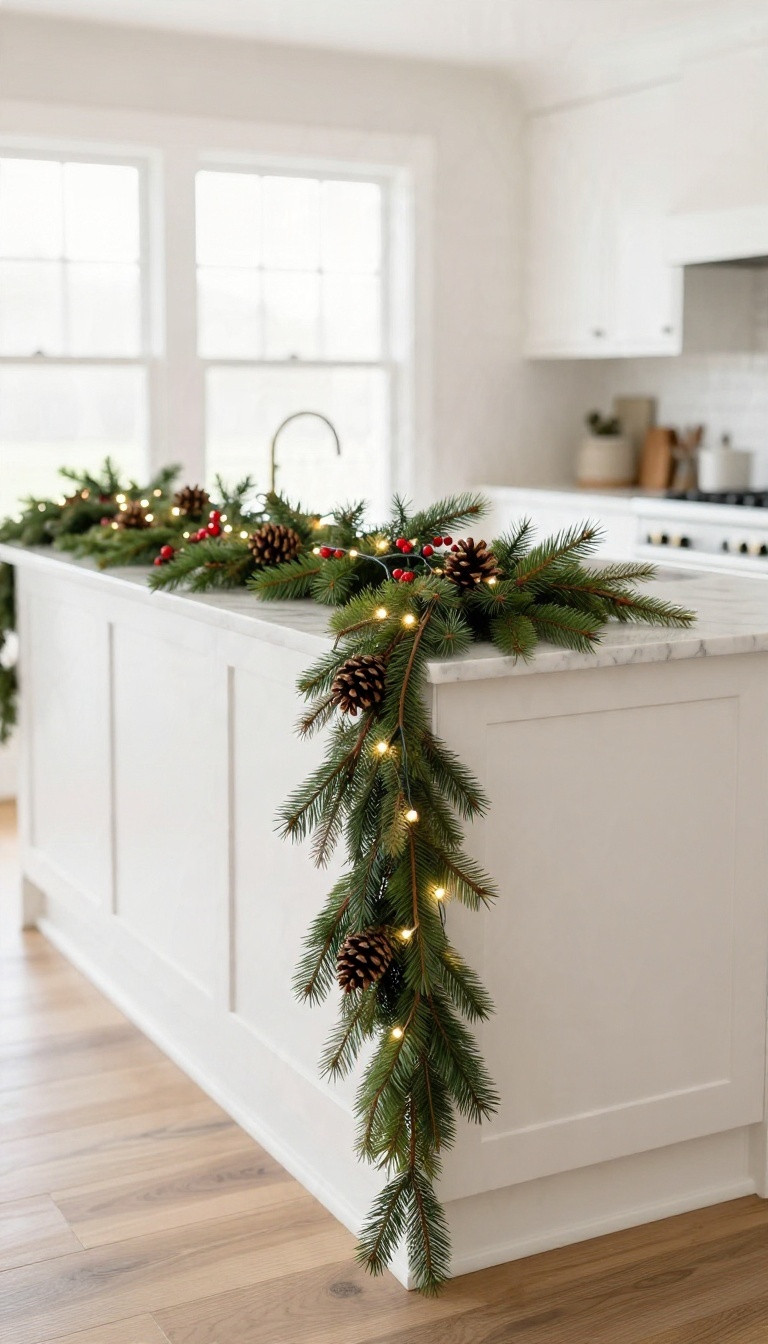
A garland is the fastest way to make an island look like it belongs in a Christmas movie. Run one along the front lip or the backsplash side and you get instant holiday without losing an inch of prep space. The key is securing it so it stays put through dinner, dishes, and the occasional elbow bump.
A few small hooks or a little floral wire solve that without leaving marks on your countertop or cabinets.
You don't need a designer's toolkit for this one. A garland, a handful of hooks or wire, and ten minutes will do it. The result reads warm and traditional, and it comes down just as easily in January.
Picking Your Garland
Real evergreen smells amazing and looks rich up close, but it dries out and drops needles onto the floor. Faux garland holds up all season and you can reuse it every year. If you go real, buy it fresh and keep it away from direct heat.
If you go faux, look for a mixed-tip style with some brown stems or pinecones so it doesn't read too plastic.
Hanging It Without Damage
Small command hooks stick to the side of the island and peel off clean when the season ends. Press them on a clean, dry surface and let them set before you hang anything. For a backsplash side, floral wire looped around a cabinet knob or a hidden bracket works well.
Skip nails and screws, and keep the wire tight so the garland doesn't sag.
Making It Look Intentional
Fluff the branches outward as you go so it looks full instead of flat against the panel. Tuck in a few battery-powered fairy lights or a sprig of berries for a little sparkle. Let one end trail slightly past the corner for a relaxed, natural look.
A perfectly straight garland can feel stiff, so a little droop goes a long way.
2. Hang a Mini Wreath on the Island Pendant Lights
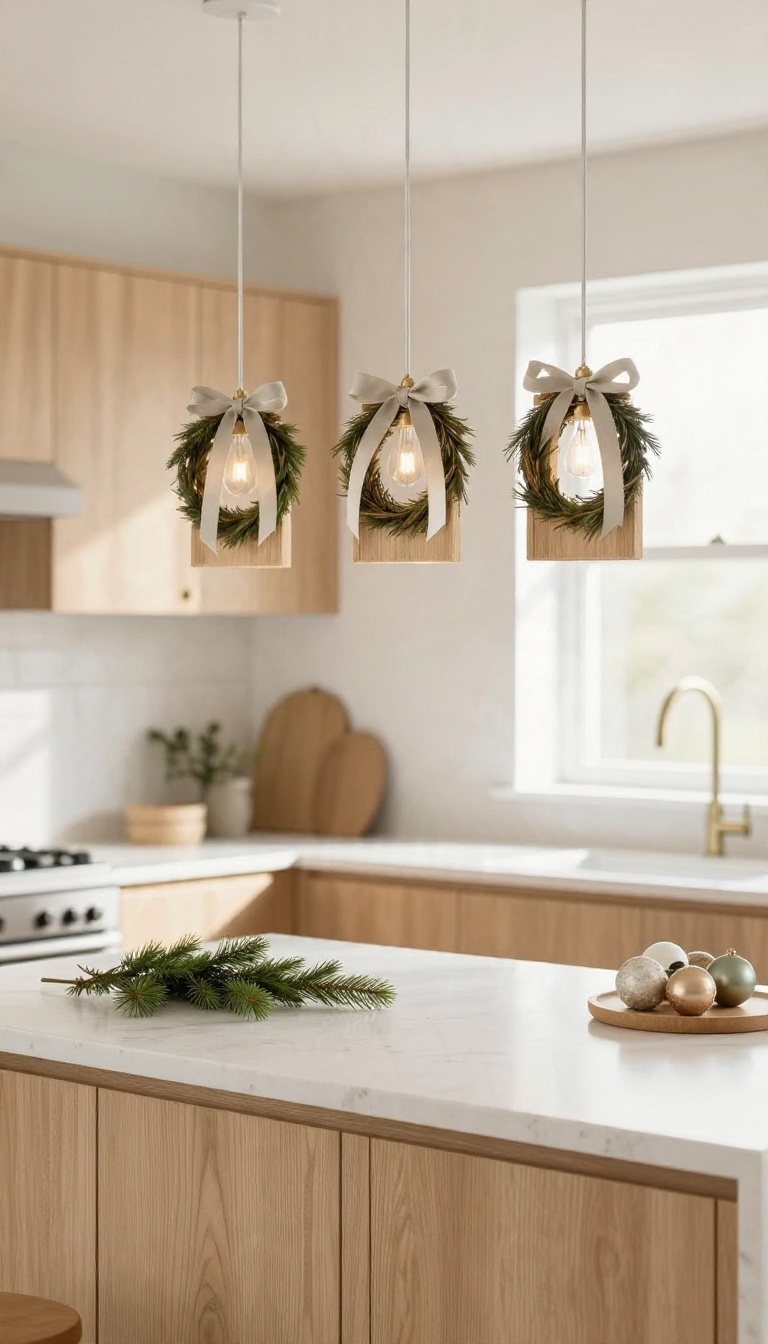
Pendant lights hang right where everyone looks, so they make an easy spot for a small festive detail. Tie a mini wreath to each one with ribbon and you get overhead charm without touching an inch of counter space. The key is keeping them high enough to stay out of sightlines and well clear of anything hot.
Done right, this is one of the quickest wins on the list.
Mini wreaths work here because they're small, light, and forgiving. A six- to eight-inch wreath suits most pendant shades without looking heavy or blocking the bulb. You're basically dressing the fixture, not the room, so the effect stays subtle until someone glances up.
That's usually the reaction you want in a working kitchen.
Pick The Right Wreath Size
Match the wreath to the shade, not the ceiling. A wreath that's wider than the pendant looks clumsy, and one that's too tiny disappears. Faux boxwood, cedar, or a simple twig ring all read well from below.
Skip anything with glitter that sheds onto the island, and go light on berries if the wreath sits near a bulb that runs warm.
Tie It On So It Stays Put
Use a ribbon that holds a knot, like grosgrain or a cotton blend, and loop it through the top of the wreath and around the pendant stem or chain. Two ties, one on each side, keep it from sliding sideways. Leave the bow small and tidy.
A long, floppy bow catches on things and looks messy from across the room.
Keep It Clear Of Heat And Heads
Hang the wreath so the bottom sits well above eye level for anyone standing at the island. Nobody wants greenery in their face while they're chopping onions. Check the clearance around hot bulbs too.
If your pendants use exposed bulbs that get warm, keep the wreath and ribbon a few inches away, or switch to LED bulbs that stay cooler.
3. Build a Tiered Tray Hot Cocoa Station
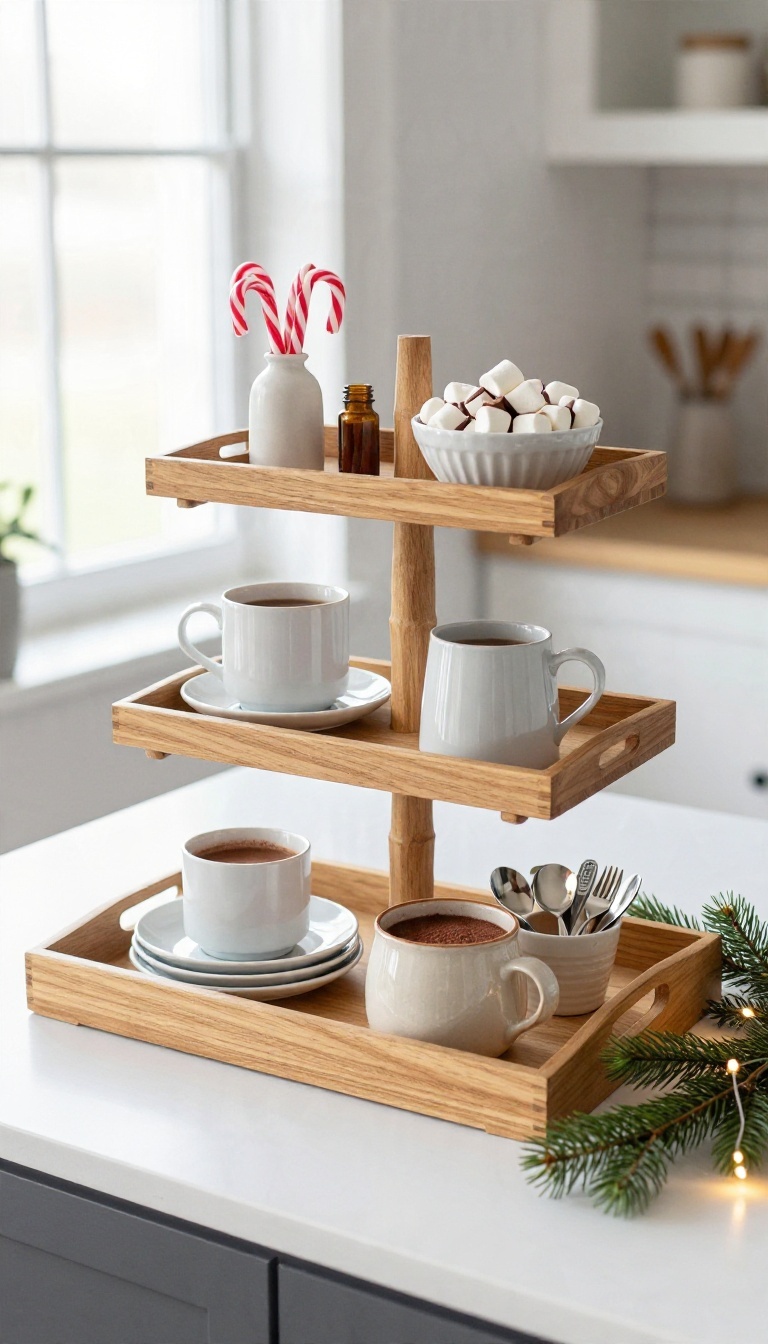
A tiered tray turns a small patch of island into a self-serve drink bar. Stack mugs, cocoa packets, candy canes, and marshmallows so guests can help themselves without hunting through cabinets. It looks styled but stays practical, and you can refill it in seconds between rounds of cookies.
Start with a three-tier tray that has a wide base and a sturdy center rod. Wood, galvanized metal, or ceramic all work; pick a finish that contrasts with your island so the station stands out. Clear a 12- to 14-inch circle of counter space near an outlet if you plan to keep a kettle or warmer nearby.
Wipe the tray clean before loading it, then build from the bottom up so the weight stays balanced.
What Goes On Each Tier
Put the heaviest items on the bottom: a small canister of cocoa mix, a stack of saucers, or a short vase of candy canes. The middle tier holds mugs turned upside down or a row of cocoa packets standing in a little basket. Save the top for marshmallows in a small bowl, chocolate stir sticks, and a tiny bottle of cinnamon.
Keep one tier mostly empty so the whole thing doesn’t look cluttered.
Keep It Guest-ready
Fill a thermal carafe with hot water or milk so nobody has to microwave a mug during the party. Add a small scoop to the cocoa canister and a spoon rest for sticky stirrers. A tiny sign or a chalkboard tag listing “cocoa, marshmallows, candy canes” helps guests know it’s fair game.
Place a small bowl for used spoons beside the tray, not on it.
Style It For Christmas
Drape a short garland or a strand of battery fairy lights around the base of the tray. Tuck a few small ornaments between the mugs on the middle tier. Use red-and-white striped straws in a cup for a candy-cane nod.
If you want a cohesive look, stick to two or three colors—like red, white, and wood tones—and repeat them on each level.
Reset It In Minutes
Keep backup cocoa packets, marshmallows, and candy canes in a bin under the island so you can restock without leaving the kitchen. Wipe the tray with a damp cloth each morning and toss any sticky wrappers. At the end of the night, consolidate leftovers into one container and stack the mugs for tomorrow.
The station should look just as good on day five as it did on day one.
4. Fill a Glass Cloche with Ornaments
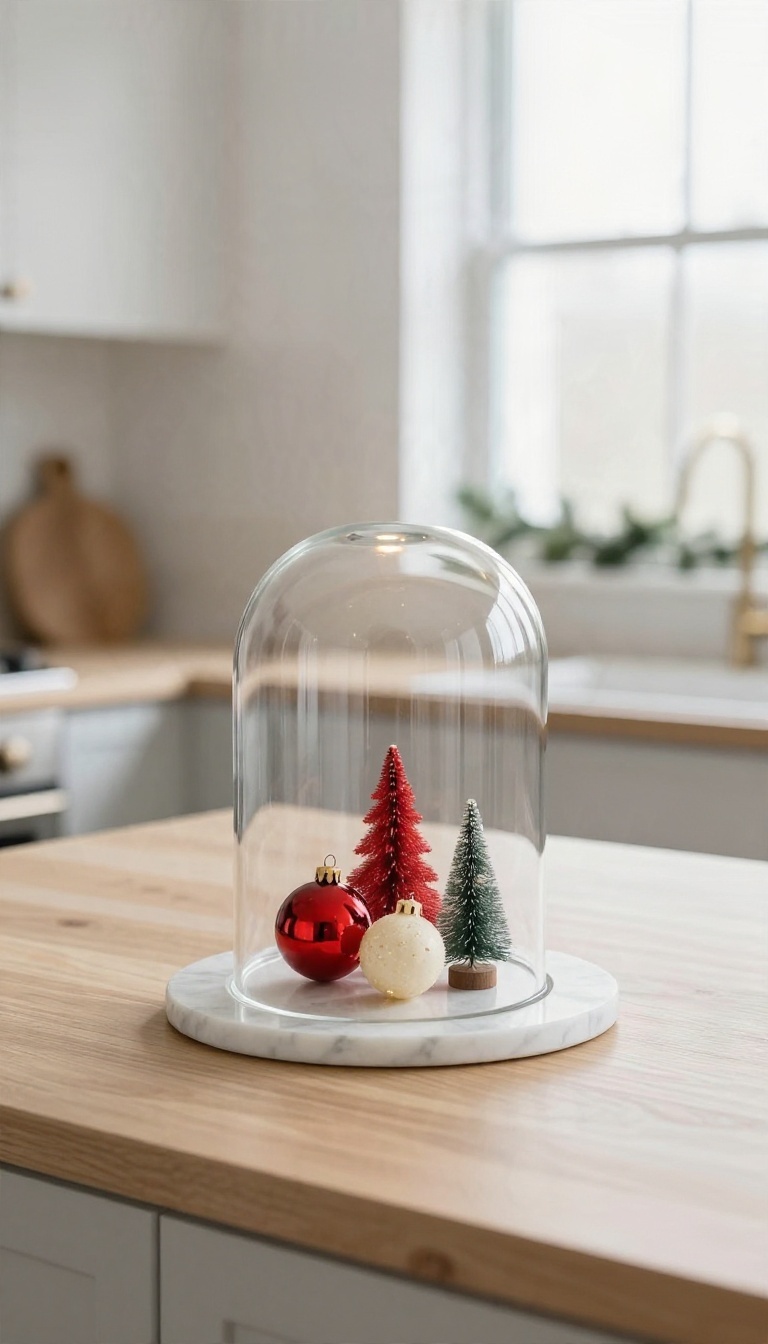
A glass cloche does something clever for a kitchen island: it makes whatever sits underneath look intentional and finished. Drop in a few ornaments or tiny bottle-brush trees, and you get a centerpiece that reads as polished without crowding the workspace. The glass keeps everything contained, so there's nothing to knock over while you chop vegetables or set down a hot pan.
It's the kind of decor that looks styled but stays out of your way.
The appeal here is simple. A cloche turns a small cluster of objects into a display, and the glass adds a little shine that catches light from your pendants or windows. Because everything lives under a dome, dust stays off and little hands stay out.
You also get flexibility. Swap the contents when you tire of them, or leave the cloche out year-round with different fillers. For the holidays, a handful of ornaments is all it takes.
Pick A Base That Anchors It
Set the cloche on a wood slice, a marble board, or a simple plate so it has a defined footprint. A base also makes the whole thing easy to lift and move when you need the counter space. Keep the base slightly wider than the dome so it looks grounded rather than wobbly.
Keep The Fillers Low And Loose
You want the ornaments to sit below the widest part of the glass, so choose small pieces. Mini ornaments, bottle-brush trees, or a mix of both work well. Leave a little breathing room inside the dome instead of packing it full, which keeps the look clean.
Match The Rest Of The Island
Pull colors from your garland, tray, or pendant shades so the cloche feels part of the room. Two or three tones is plenty. If your island is already busy, stick to one metallic or a single accent color and let the glass do the rest.
5. Set Out a Bowl of Ornaments and Pinecones
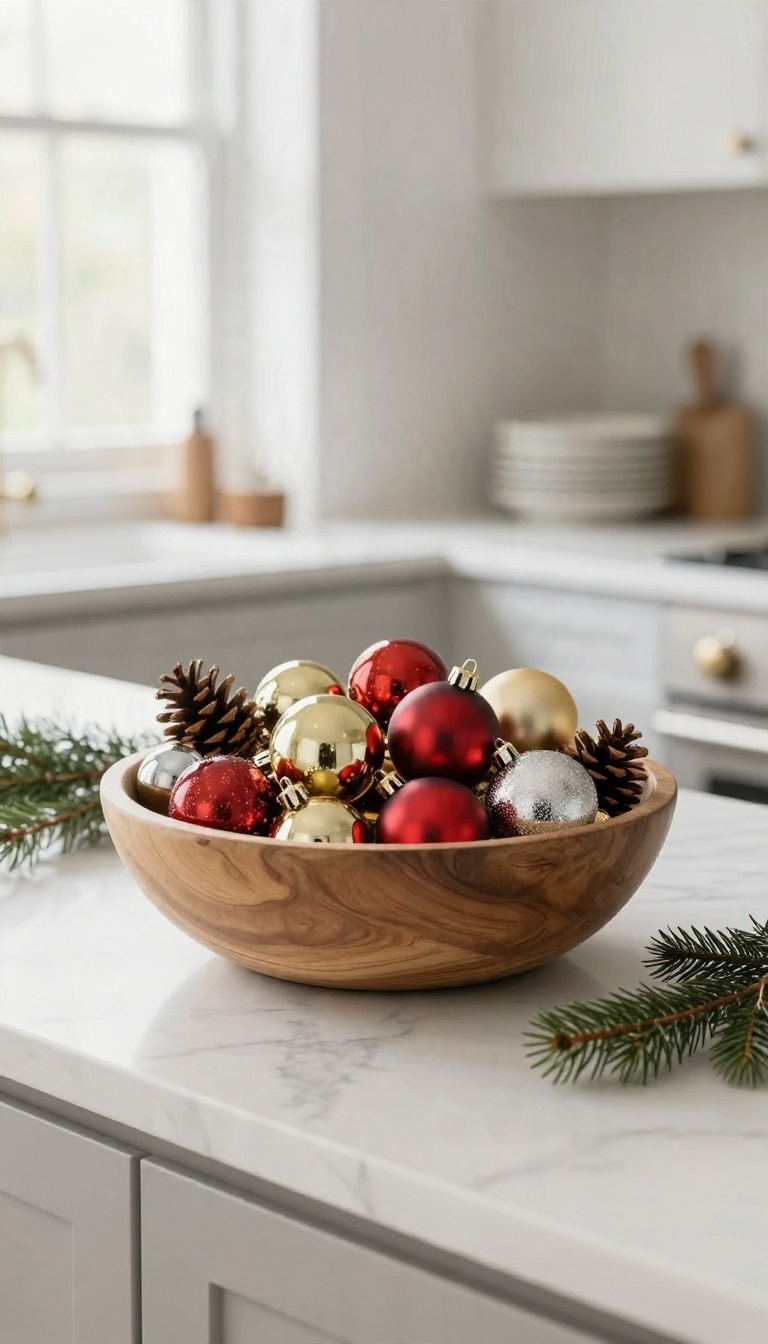
A bowl on the island does a lot of quiet work. It fills an empty corner, adds color and texture at eye level, and gives you somewhere to drop your keys without losing them under a pile of mail. Fill that bowl with shatterproof ornaments and pinecones and you get instant Christmas without a single hook, cord, or outlet.
The best part is how little it asks of you. No hanging, no wiring, no climbing. You set it down, fluff it once, and it looks good through New Year's.
The bowl itself matters more than people expect. A wide, shallow wooden bowl or a low ceramic one keeps the whole thing under the sightline, so you can still see across the island while you chop. Deep bowls hide the ornaments and read as clutter.
Mix sizes on purpose. A handful of large ornaments anchors the arrangement, and smaller ones fill the gaps between pinecones. Aim for roughly two parts ornaments to one part pinecones, then adjust until it looks full but not crowded.
Pick a color story and stick to it. Two or three colors read as intentional, while a full rainbow can look like a storage bin. Red and gold, silver and green, or all-white with natural pinecones all work.
Keep it shatterproof. Ornaments get knocked, rolled, and occasionally used as toddler projectiles. Shatterproof ones bounce instead of exploding into a thousand pieces near your food.
Pinecones That Won't Shed
Plain pinecones from the yard can drop debris and tiny bugs onto your counter. Bake them on a foil-lined sheet at 200°F for about 30 minutes to dry them out and send anything living packing. Cinnamon-scented pinecones from a craft store skip that step entirely and add a warm smell to the kitchen.
Either way, give them a shake over the sink before they go in the bowl.
Keep It Off The Prep Zone
Park the bowl at one end of the island or on a corner, away from where you actually chop and plate. A bowl of ornaments in the middle of your workspace becomes something to move every single time you cook. If your island is small, go with a narrower bowl or a footed one that takes up less surface.
The goal is a festive accent, not a centerpiece you have to relocate twice a day.
Refresh It Through The Season
Swap a few pieces as December goes on to keep the bowl feeling new. Add a sprig of fresh greenery in early December, then tuck in a couple of candy canes closer to Christmas. When the holidays wrap up, dump everything into a zip bag and store it together.
Next year the whole arrangement comes back out in about a minute.
6. Add Candlelight with a Cluster of Pillar Candles

Candles bring a warmth to a kitchen island that no string of lights quite matches. A small cluster of pillar candles on a tray gives you that soft evening glow without much effort. It's a simple setup that looks polished and works with almost any Christmas scheme.
The key is grouping them. Three or four pillar candles of different heights, all set on a tray, create a focal point that feels intentional. You can use real candles or flameless ones, depending on your household.
Choosing The Right Candles
Go for pillar candles in a mix of heights, like 4, 6, and 8 inches. Stick to a single color family—ivory, cream, or even a deep burgundy—so the cluster looks cohesive. If you want a subtle scent, pick one fragrance and use it across all the candles to avoid a muddled smell.
Arranging The Cluster
Start with a tray that fits the island's scale. A round wooden tray or a rectangular metal one both work. Place the tallest candle slightly off-center, then arrange the shorter ones around it.
Leave a little breathing room between them so the flames don't crowd each other.
Real Vs. Flameless
Real candles give you that authentic flicker, but flameless ones are safer if kids or pets are around. Modern flameless pillars look surprisingly realistic and often come with timers. Either way, the glow is what matters.
Safety And Maintenance
If you use real candles, keep them away from paper decorations and never leave them burning unattended. Trim the wicks to about 1/4 inch before each use to keep the flame clean. For flameless, just wipe them down with a dry cloth when they get dusty.
7. Create an Edible Centerpiece from Fruit and Greenery
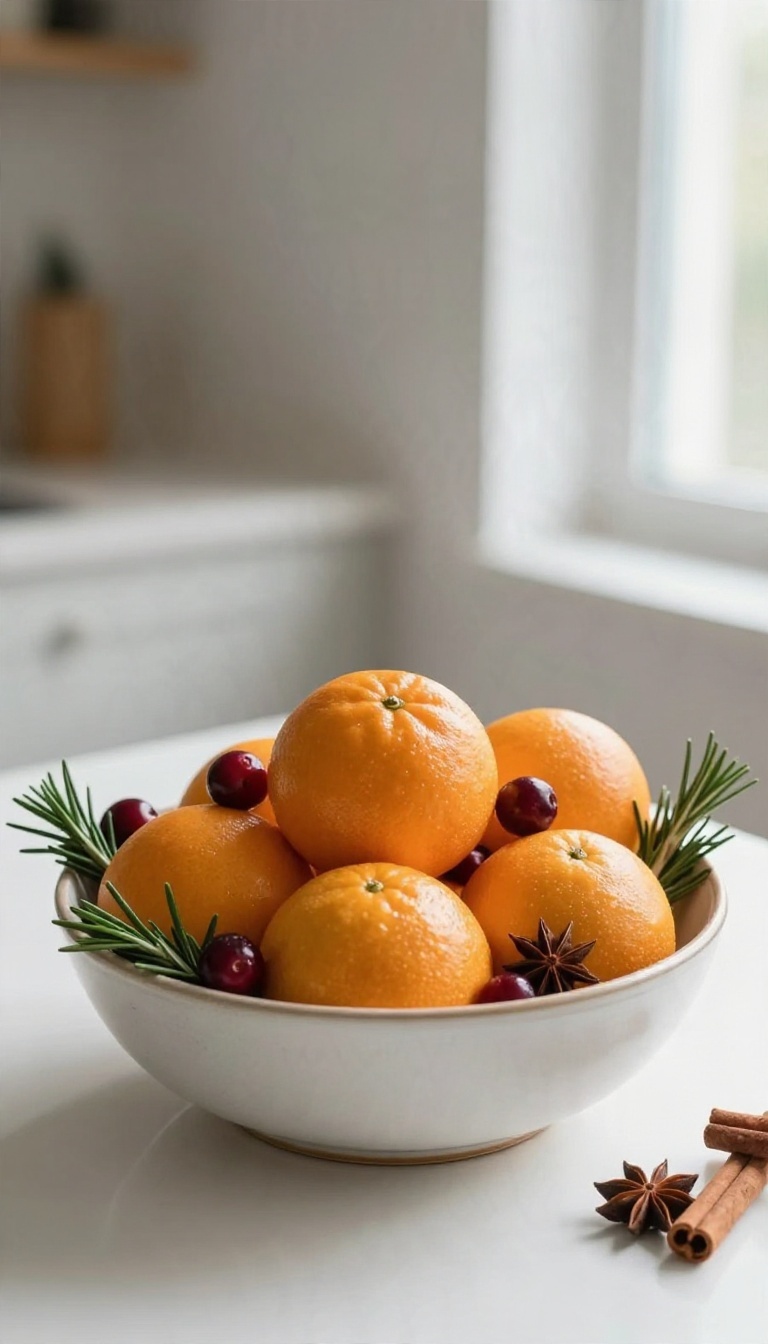
Decorating with food feels risky until you remember that the prettiest holiday arrangements have been doing it for centuries. Clementines, cranberries, and rosemary cost less than a single faux floral stem, and they smell better than anything from a candle aisle. Pile them in a shallow bowl and you get a centerpiece that doubles as a snack station.
Guests pluck a clementine on their way past, kids grab cranberries, and nobody has to move anything to make room for the cheese board.
The whole setup takes about three minutes, which is the real selling point during a month when every task multiplies. You want a wide, shallow vessel so the fruit stays visible and reachable, plus enough contrast in color and texture to keep it interesting. Keep the layers loose.
Tightly packed fruit looks like grocery storage, while a relaxed pile reads as intentional styling.
Pick Your Players
Clementines bring the orange pop and the built-in portion control. Cranberries add deep red and a tart little bite that balances all the sweets nearby. Rosemary gives you that piney holiday scent without a tree in the room.
Tuck in a few cinnamon sticks or star anise if you have them, but don't overthink it. Three ingredients already look generous.
Build It In Layers
Start with the rosemary along the bottom and let some sprigs drape over the rim. Add clementines in a single loose layer, then scatter cranberries into the gaps so they look tucked in rather than dumped on. Leave a few bare spots.
A little breathing room makes the arrangement look styled instead of frantic.
Keep It Fresh And Snackable
Rinse the fruit and dry it well so nothing gets sticky on the counter. Swap in fresh clementines every few days, and pull any rosemary that starts to brown. Set a small bowl nearby for peels so guests don't leave them on the island.
Refill as people eat, which is the best kind of restocking.
8. Layer a Festive Runner Under Everything

A table runner might seem like an afterthought, but it’s the quiet hero of island decor. It anchors your arrangement, protects the counter from scratches and spills, and pulls your color scheme together without shouting for attention. Whether you go plaid for a classic Christmas feel or keep it neutral for a calmer look, a runner sets the stage for everything else you layer on top.
Think of the runner as the foundation of your island’s holiday outfit. It defines the space, gives your decor a home, and makes even a simple bowl of ornaments look intentional. Plus, it’s an easy way to add pattern or texture without committing to a full tablecloth.
Here’s how to make it work for your kitchen.
Pick A Pattern That Plays Well With Your Kitchen
Plaid is a holiday staple for good reason—it feels cozy and instantly festive. But if your kitchen already has a lot of pattern, a solid linen or a subtle stripe might blend better. Consider your cabinet color, backsplash, and even your dishware.
A runner that complements rather than competes will make the whole room feel more cohesive.
Choose The Right Length And Fabric
You want the runner to drape slightly over the edges of the island, but not so long that it becomes a tripping hazard or gets in the way of stools. Measure your island and aim for a runner that hangs about 6 to 8 inches on each side. As for fabric, cotton and linen are durable and washable, while burlap adds rustic texture.
Avoid anything too slippery if you’ll be setting hot dishes on it.
Build Your Decor On Top
Once the runner is in place, treat it as the base for your other decorations. A centerpiece tray, a cluster of candles, or a small potted rosemary tree all look more grounded when they sit on a runner. It also makes it easier to clear the island for cooking—just lift the whole arrangement off if needed.
And don’t be afraid to mix textures: a plaid runner with a smooth ceramic bowl or a neutral runner with a shiny metallic tray creates nice contrast.
9. Style a Small Christmas Tree or Tabletop Tree
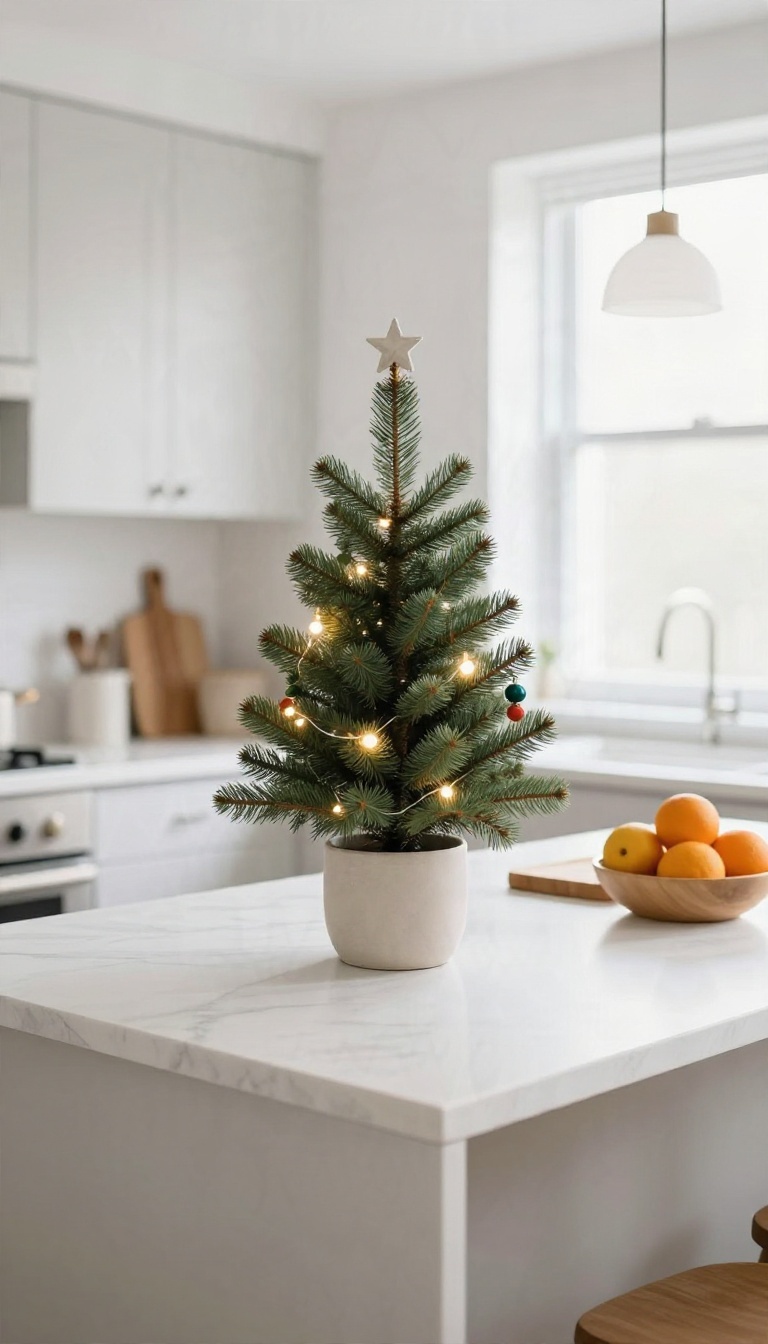
A mini tree at one end of the island adds height and a focal point, especially in open-plan kitchens where the island is the visual anchor. It draws the eye upward and gives the room a clear holiday center without overwhelming the space. You don't need a full-size tree to make an impact—a tabletop version can do just as much for the room's mood.
The best part? A small tree is easy to move when you need the counter space, and it doesn't block your view or your workflow. It's a low-commitment way to bring real Christmas spirit to the hardest-working spot in your home.
A small tree on the island works because it uses vertical space that usually goes unused. In an open-plan kitchen, that extra height helps define the island as a separate zone while still keeping sightlines open. You can go with a traditional green tree, a flocked version for a snowy look, or even a minimalist wire tree if your style leans modern.
Placement matters more than size. Put the tree at one end of the island—preferably the end that's farthest from your main prep area—so it doesn't get in the way when you're cooking. If your island is long, a pair of small trees at each end can create a nice symmetry, but one is usually enough to make a statement.
When it comes to decorating, keep it simple. A small tree can get crowded fast, so choose a theme and stick to it. You might use mini ornaments in a single color, a strand of tiny lights, or even dried fruit slices for a natural look.
The goal is to add charm without creating clutter.
Choosing The Right Size And Style
A tabletop tree between 18 and 24 inches tall usually works best for an island. Anything taller might block your view or feel overwhelming, while anything shorter can get lost. Measure the height of your island and consider how the tree will look from the main living area—you want it to be visible but not dominate.
Style-wise, you have options. A traditional artificial tree with realistic branches is classic and easy to find. A flocked tree adds a wintery touch and hides imperfections.
If you prefer something more modern, a wire or wooden tree with minimal decorations can look sleek. Just make sure the base is stable and won't tip over if someone bumps the island.
Decorating Without The Clutter
Small trees can quickly look messy if you overdo it. Start with a strand of battery-operated fairy lights—they're safe and don't require an outlet. Then add a few small ornaments, but don't cover every branch.
Leave some space so the tree can breathe. If you want a cohesive look, pick a color scheme that matches the rest of your kitchen decor. For example, if your kitchen has warm wood tones, go with gold and red ornaments.
If it's more modern, try silver and white. You can also use ribbon or a small garland to add texture without bulk.
Keeping It Practical
Remember that your island is a work surface, so the tree should never interfere with cooking or cleaning. Choose a spot that's out of the way, like a corner or an end that doesn't get much traffic. If you have a lazy Susan, you can place the tree on it for easy rotating when you need to wipe down the counter.
Also, consider the base. A sturdy pot or stand will keep the tree upright, and you can wrap the base in fabric or a basket to hide it. If you have pets or kids, make sure the tree is secure and avoid using glass ornaments that could break if knocked over.
10. Hang Stockings or a Countdown Calendar from the Island

Countertop space disappears fast in December. Between cookie sheets, serving platters, and the random pile of mail that always lands there, the island's surface is prime real estate you can't afford to lose. So use the space underneath and along the edges instead.
The overhang on most islands gives you a natural spot to hang stockings, a garland strung with tiny stockings, or an advent calendar. Everything stays visible and festive, but the work surface stays clear for actual cooking. It's one of those rare decor moves that makes the room feel more decorated without making it harder to use.
The key is choosing what you hang based on how your island is built. A deep overhang on the seating side can hold full-size stockings. A slim rail or a tension rod tucked under the counter works better for a countdown calendar or a row of mini stockings.
Either way, you're decorating the vertical space and leaving the horizontal space alone.
Stockings On The Overhang
If your island has a seating overhang, you've got a built-in stocking display. Space hooks or small adhesive clips along the underside of the counter, then hang stockings so they dangle just below the edge. They stay out of knee range but still read as festive from across the room.
Keep it to three or four stockings so it looks intentional rather than cluttered. If the overhang is shallow, use mini stockings instead of full-size ones. A simple garland swagged along the same edge ties the whole thing together and hides the hardware.
A Countdown Calendar That Fits The Island
Advent calendars are usually wall decor, but a fabric calendar with pockets hangs nicely from a rail or a rod mounted under the island lip. Fill the pockets with tiny treats, notes, or ornaments the kids can pull out each morning. It turns the island into a daily ritual instead of just a surface.
A tension rod wedged between the island legs works if you don't want to drill anything. String the calendar pockets along it with small clips. Just check that it hangs high enough to clear chairs and feet.
Hardware That Won't Mar The Island
Rental kitchens and brand-new cabinets both deserve a no-damage approach. Command hooks, adhesive clips, and tension rods handle most of these setups without a single screw. Test the adhesive on an inconspicuous spot first, especially on painted or stained wood.
If you're comfortable with a small permanent change, a slim curtain rod or a decorative rail mounted under the overhang gives you a sturdier anchor. It also looks tidy when the stockings come down in January.
Keeping It Practical Through The Season
Hanging decor is only useful if it stays out of the way. Keep stockings and calendars clear of the dishwasher door swing, the trash pull-out, and any spot where people lean. Nothing kills the festive mood like a stocking snagged on a cabinet handle.
Check the height with a chair pulled out, too. If someone sitting at the island bumps their knees on a dangling stocking, raise the whole setup a few inches. A quick adjustment now saves a month of annoyance.
11. Keep It Practical with a Decorating Zone
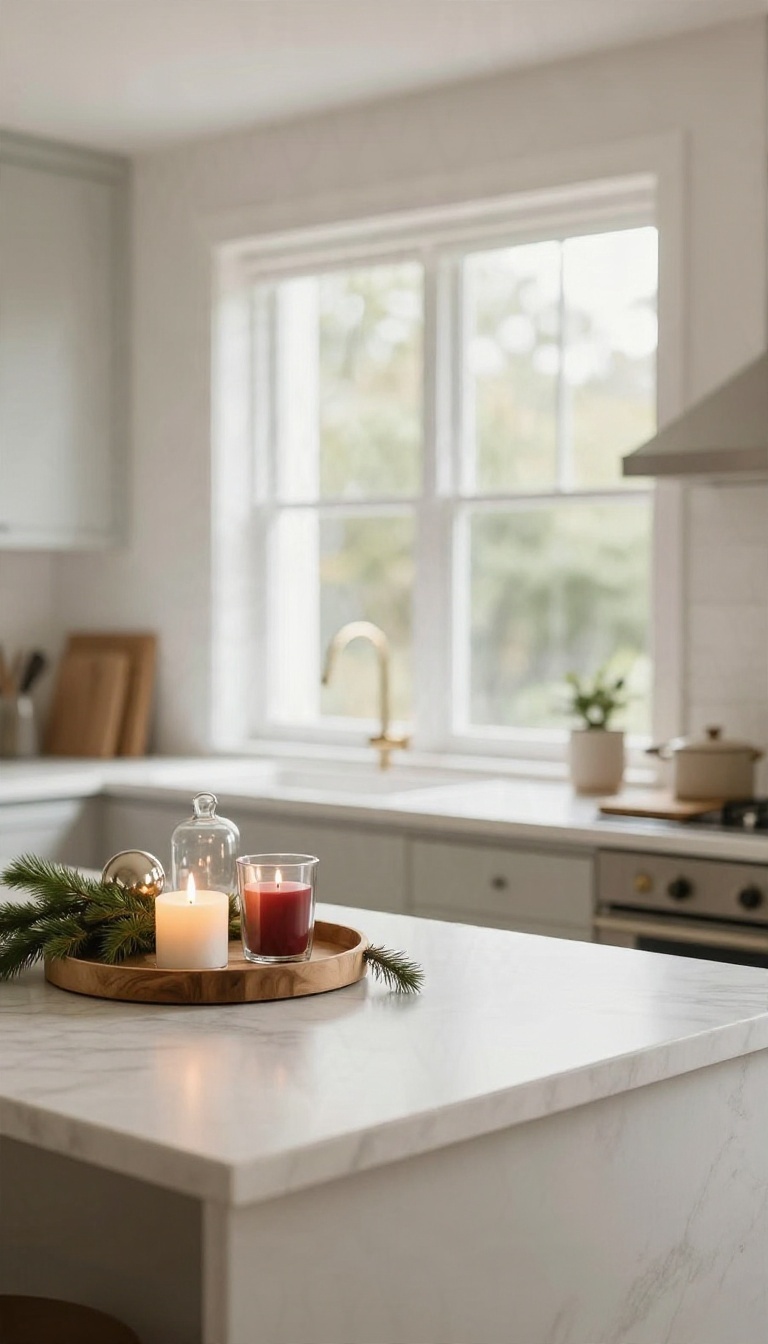
A fully decorated island looks great in photos, but you still need room to chop onions and set down a hot pan. The fix is simple: pick one end as your official decorating zone and leave the rest open for actual work. That way the festive parts stay put, and you don't have to clear a path every time you cook.
Think of it like setting up a holiday display in a store window—you contain the magic to one spot so the rest of the floor stays usable. On a kitchen island, that means choosing the end farthest from your prep area, usually the one facing the room or the sink. Once you claim that real estate for decor, everything else can stay functional.
Pick The Right End
The best spot is the end that gets the least foot traffic and the fewest spills. If your island has a seating overhang, the opposite end often works well. Stand at your usual prep spot and look across the island—whichever end feels out of the way is your winner.
Set Clear Boundaries
Use a tray, a cutting board, or a shallow basket to define the zone. A tray with a few ornaments, a small candle, and some greenery keeps everything contained and easy to move if you need to. The boundary also stops decor from creeping toward your workspace.
Keep It Easy To Shift
Even with a dedicated zone, there will be times you need every inch of counter. Choose decor that lifts off in one piece—a tray, a basket, or a small crate—so you can relocate it to the dining table or a shelf in seconds. That flexibility is what makes this idea actually practical.
FAQ
How do I decorate a kitchen island without losing counter space?
Keep decor to one end or the outer edges, use vertical elements like hanging wreaths and garlands, and choose trays or cloches that contain small items in a compact footprint.
Are real garlands safe near kitchen heat and food prep?
Keep real greenery away from stovetops and open flames, mist it to slow drying, and consider faux garland for areas close to heat or heavy food prep.
What colors work best for kitchen island Christmas decor?
Classic red and green, neutral whites and greens, or a metallic scheme all work well. Pick two or three colors and repeat them across the garland, tray, and runner for a cohesive look.
Can I decorate a small apartment kitchen island?
Yes. Use a mini wreath on a pendant, a small bowl of ornaments, and a narrow runner. Scale each piece down so the island still feels open.
How do I keep island decor kid- and pet-friendly?
Choose flameless candles, shatterproof ornaments, and secured garlands. Skip glass and low-hanging items that curious hands or tails can reach.
Conclusion
Your kitchen island already does the heavy lifting all December, so let the decor work with it instead of against it. Pick two or three ideas that fit your space and skip the rest.
A garland, a tray, and a little candlelight usually do more than a counter piled with decorations. Swap pieces in and out as the month goes on, and enjoy the fact that the coziest spot in the house is also the most useful.