13 Small Vanity Ideas for Bedroom DIY Style on a Budget
A cramped bedroom corner can turn into a real getting-ready spot with nothing more than a shelf, a mirror, and a Saturday afternoon. The transformation starts with one smart swap instead of a full furniture haul. You do not need a dedicated room or a designer budget to pull it off.
Most of these builds lean on thrifted pieces, wall space, and things you already own. A fold-down desk, a repurposed bookshelf, or a rolling cart can do the same job as a pricey vanity set.
The trick is matching the setup to your actual routine and the space you have. Below are 13 small vanity ideas for bedroom DIY style on a budget.
1. Floating Shelf Vanity with Hidden Storage
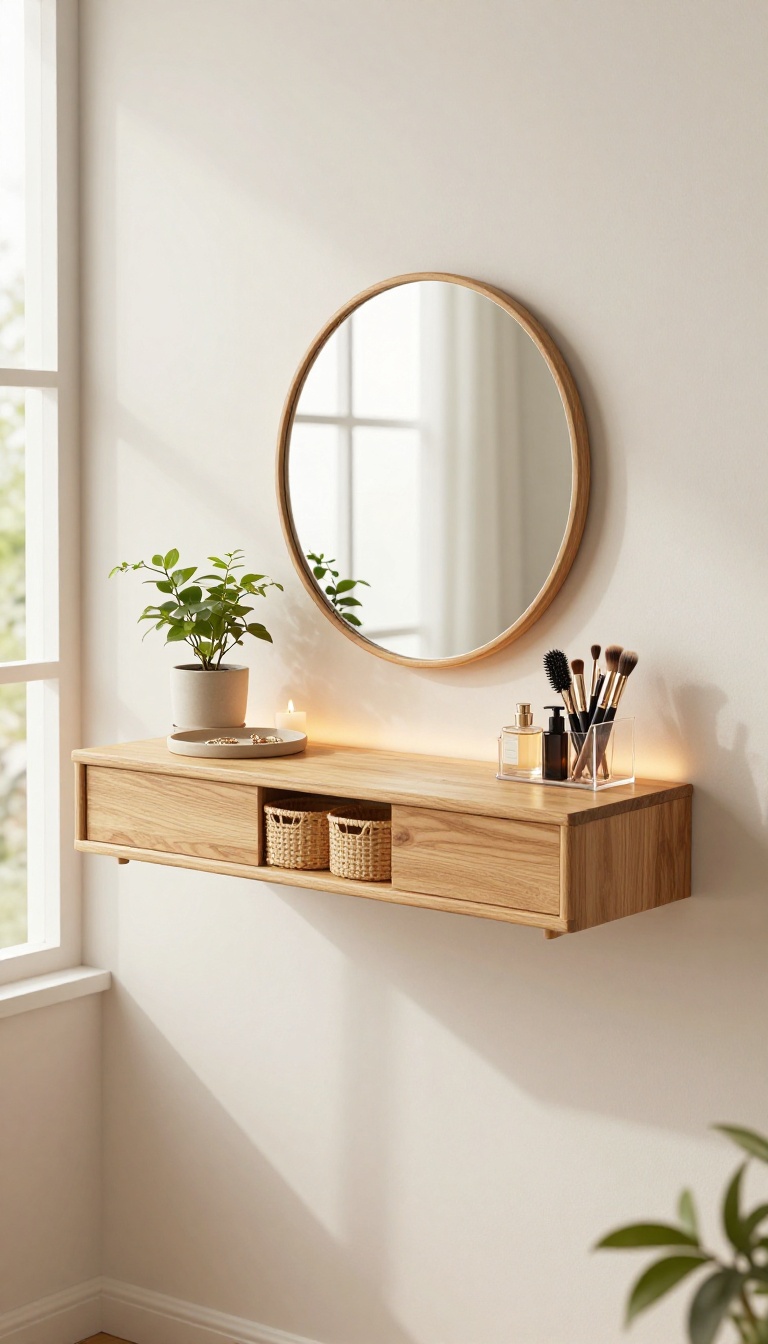
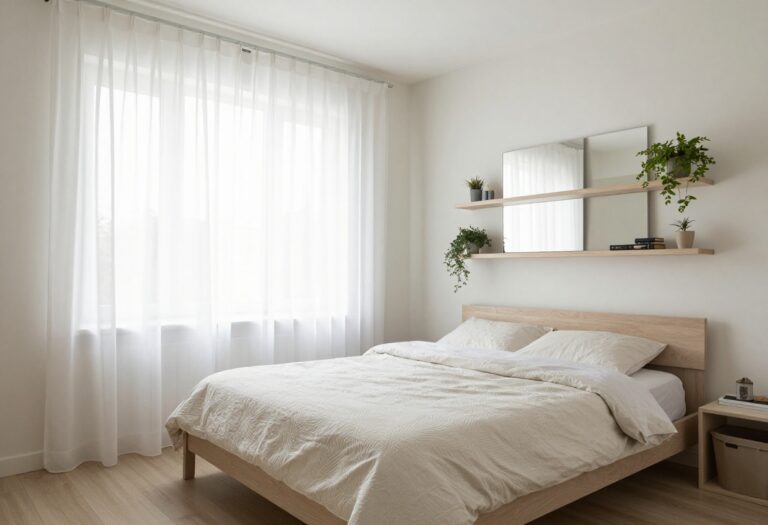
A floating shelf might not sound like much, but mount it at sitting height and it becomes a sleek vanity that saves floor space. The trick is going deep—at least 10 to 12 inches—so you have room for a mirror, a few daily essentials, and maybe a small plant. Underneath, small baskets or bins hold brushes, bottles, and hair tools, keeping the surface clear and the whole setup looking custom.
The best part? You can build this for under $40 if you shop smart. A sturdy floating shelf from a home improvement store or thrift shop does the job.
Just make sure it's anchored into studs—vanities get leaned on, and you don't want a shelf collapse mid-mascara.
Choosing The Right Shelf
Look for a shelf that's at least 24 inches wide and 10 inches deep. Solid wood or MDF works fine; avoid flimsy particleboard. If you're handy, you can DIY one from a plank and some L-brackets, but pre-made floating shelves are easier and often cheaper.
Smart Storage Below
Small woven baskets, acrylic bins, or even a hanging shoe organizer cut to size can slide under the shelf. Use them to corral brushes, perfumes, and cords. Label if you want, but clear containers let you see everything at a glance.
Styling And Lighting
Add a slim mirror—maybe a thrifted find painted to match your room. A clip-on lamp or a small LED strip under the shelf gives you light without taking up surface space. Keep the top uncluttered: a candle, a tiny tray for jewelry, and you're done.
2. Fold-Down Desk Vanity for Tight Corners
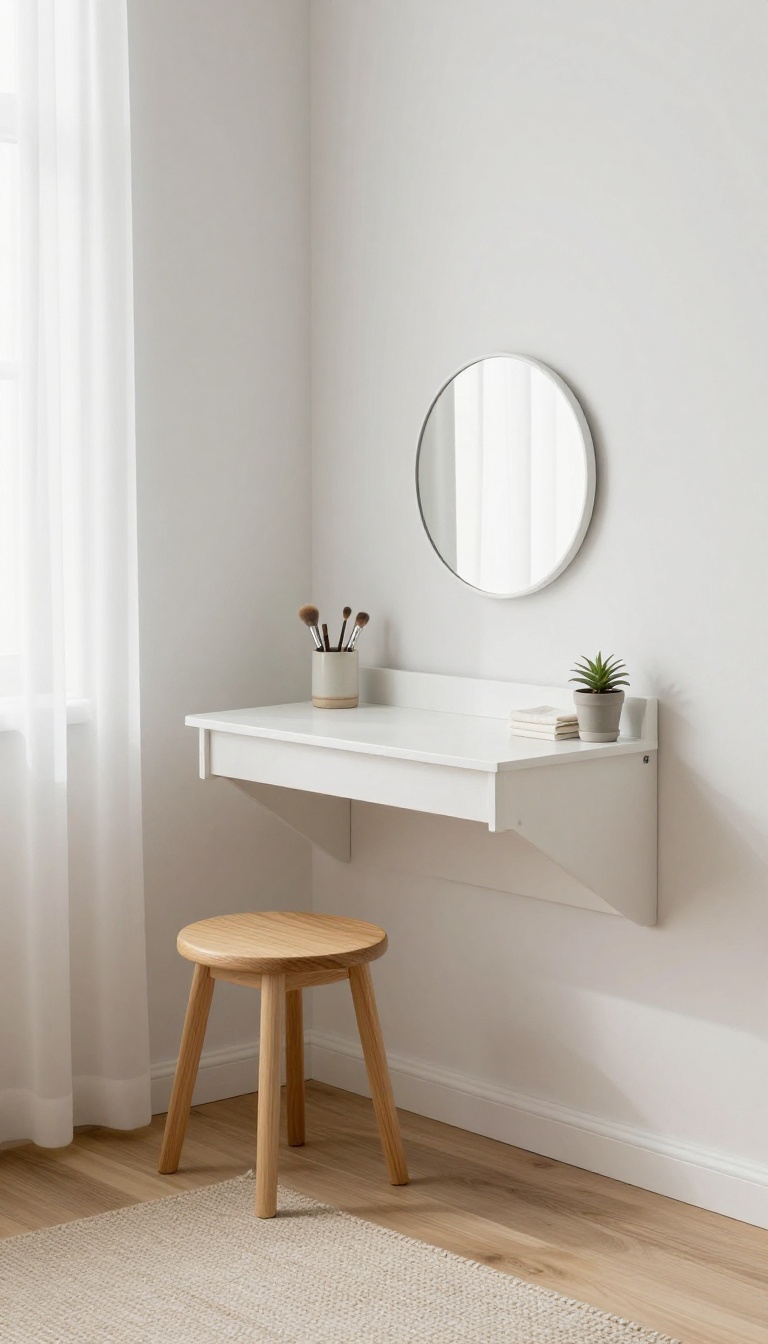
A fold-down desk vanity is the ultimate space-saver for a tight corner. It's a wall-mounted table with a drop-leaf design that stays flat against the wall when you're not using it. When you're ready to get ready, it flips up to give you a sturdy surface for your makeup and mirror.
The best part? It takes up zero floor space when it's folded away, so even the smallest bedroom feels open.
You don't need a dedicated vanity to have a functional getting-ready spot. A fold-down desk, sometimes called a drop-leaf table, mounts directly to the wall and extends out only when you need it. Paint it the same color as your walls and it practically disappears when it's closed.
Add a mirror above and you've got a full vanity that vanishes in seconds. This setup works in corners, behind doors, or at the end of a narrow hallway. It's perfect for renters because it only puts a few screw holes in the wall.
And since you're building it yourself, you can customize the height to fit your favorite chair or stool. The whole project can cost under $50 if you use a thrifted table and a fresh coat of paint. Before you start, measure your space carefully.
You want enough room to sit comfortably when the desk is down, but not so much that it blocks traffic when it's up. A depth of 12 to 16 inches is usually plenty for a laptop or makeup mirror. Height should be around 28 to 30 inches from the floor to the top of the desk when it's extended.
Once you've got your measurements, it's time to find the right table. Thrift stores, Facebook Marketplace, and even curbside finds are great sources. Look for a solid wood drop-leaf table with sturdy hinges.
Avoid particleboard if you can, since it doesn't hold screws well. If you can't find a drop-leaf, you can also use a standard wall-mounted folding shelf bracket system with a piece of wood as the top.
Choosing The Right Table
Not every drop-leaf table will work for this project. You want one that's lightweight enough to lift easily but sturdy enough to hold your things. A single drop-leaf table (with one leaf that folds down) is ideal because it's simpler to mount.
Look for one with a width of 24 to 36 inches so it fits in a corner without overwhelming the space. Check the hinges before you buy—they should move smoothly and lock securely in the up position.
Mounting It Safely
You'll need to attach a cleat (a sturdy piece of wood) to the wall studs, then screw the table's frame to that cleat. If you can't find studs, use heavy-duty toggle bolts rated for at least 100 pounds. The table should sit flush against the wall when folded down.
Test the weight capacity by gently pressing down on the extended leaf before you put anything on it. If it feels wobbly, add a folding leg for extra support.
Styling And Storage
Keep the vanity clutter-free so it folds away easily. Use a small basket or tray to hold your everyday items, and store it on a nearby shelf when the desk is up. A wall-mounted mirror above the desk is a must—choose one that's lightweight and hangs securely.
Add a hook on the side for a hand towel or a small pouch for brushes. When everything has a place, the fold-down routine becomes second nature.
3. Thrifted Dresser Turned Vanity Station
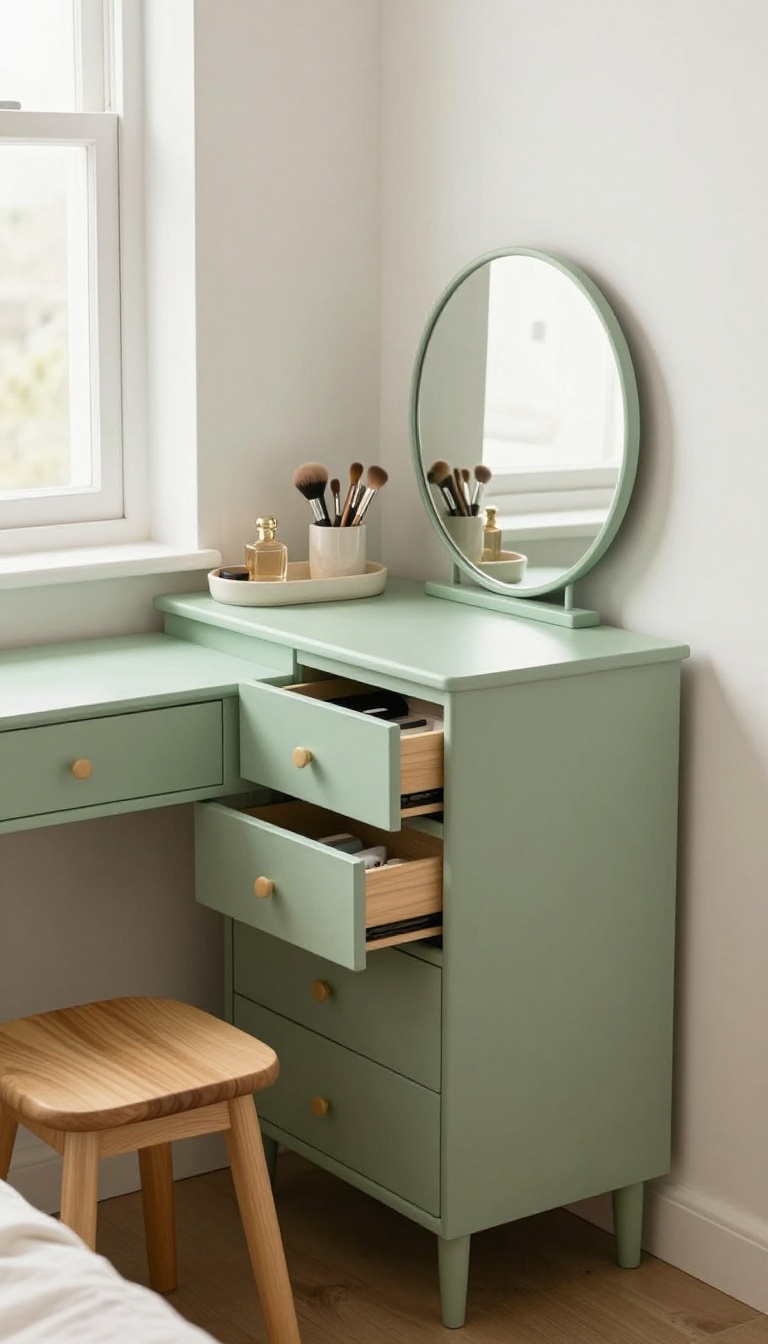
A low, narrow dresser from a thrift store can become the backbone of a bedroom vanity without costing much. The drawers swallow all your makeup, brushes, and hair tools, while the top gives you a clean surface to work on. It is a simple flip that solves two problems at once: storage and style.
The best part is that you are not limited to furniture labeled as a vanity. Any sturdy dresser with a flat top and a shallow depth will do. You just need to look past the dated finish and see the bones.
What To Look For
Search for a dresser that is no taller than 32 inches so you can sit comfortably. Width matters too—aim for something between 30 and 42 inches to fit a tight corner. Check that the drawers slide smoothly and the frame is solid.
Avoid pieces with water damage or missing hardware unless you plan to replace it.
Prepping And Painting
Give the dresser a good scrub with a degreaser, then lightly sand the surface. A coat of bonding primer helps paint stick without peeling. Choose a satin or semi-gloss finish for easy wipe-downs.
Two thin coats of paint in a color that matches your room will make it look intentional, not thrifted.
Setting Up The Vanity
Once the paint cures, attach a mirror to the wall above or lean a full-length one against the dresser. Add a small stool or chair that tucks underneath. Use drawer dividers or small bins to keep items organized.
A tray on top corrals everyday essentials and keeps the surface from feeling cluttered.
4. DIY Vanity from a Repurposed Bookshelf
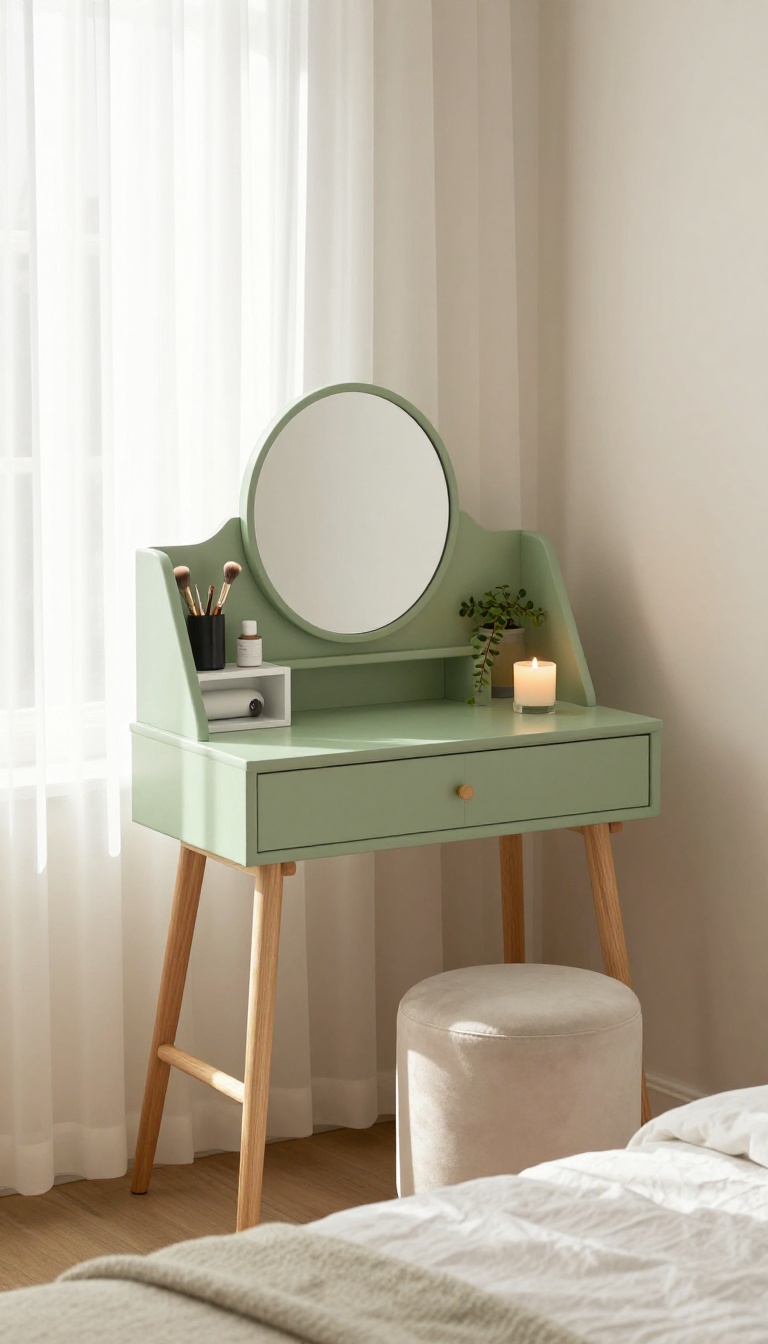
That old bookshelf collecting dust in the garage? Flip it on its side and it becomes a vanity with built-in storage. The cubbies that once held paperbacks now organize your makeup, brushes, and hair tools.
Add legs for height and a mirror to the back, and you have a custom piece that looks anything but DIY.
A short, sturdy bookshelf works best for this project. Look for one that's at least three feet wide and a foot deep, so you have a comfortable surface for your items. Solid wood or thick particleboard holds up better than flimsy particleboard, especially once you start adding legs and a mirror.
If you don't have one on hand, thrift stores and Facebook Marketplace are goldmines for cheap bookshelves. Just check that all the shelves are intact and the frame is square before you commit.
Prep And Paint
Give the bookshelf a good cleaning with a damp cloth and mild soap. If it's glossy, lightly sand the surface so paint or primer sticks. A coat of primer followed by two coats of paint in your chosen color will give it a fresh look.
Chalk paint is a popular choice because it adheres well and dries to a matte finish. Let it dry completely before moving on. If you want a two-tone look, paint the inside of the cubbies a contrasting color for a pop of personality.
Add Legs For Height
The bookshelf alone will sit too low for a vanity. You need to raise it to a comfortable sitting height, usually around 30 inches from the floor to the top surface. Furniture legs come in all styles, from hairpin metal to turned wood.
Attach them to the bottom corners using heavy-duty mounting plates or screws. Make sure they're secure and can support the weight of the shelf plus your items. If you're using a very wide shelf, add a center support leg to prevent sagging.
Attach The Mirror
A mirror attached to the back of the shelf turns it into a proper vanity. You can mount a full-length mirror to the wall behind the shelf, or attach a smaller mirror directly to the back panel. For a seamless look, use a mirror that's slightly narrower than the shelf width.
Secure it with mirror clips or heavy-duty adhesive, making sure it's level. If you want adjustable angles, consider a pivot mirror. Just double-check that the shelf is stable enough to support the mirror's weight.
Organize And Style
The cubbies are the real star here. Use small bins, baskets, or acrylic organizers to keep items tidy. Tall items like brushes and hairspray can go in a cup or mason jar.
Add a small stool or chair that tucks under the shelf when not in use. A power strip tucked inside a cubby keeps cords neat and accessible. Finish with a small plant or a candle on top for a cozy touch.
Now you have a functional vanity that cost a fraction of a store-bought set.
5. Wall-Mounted Mirror with a Slim Ledge
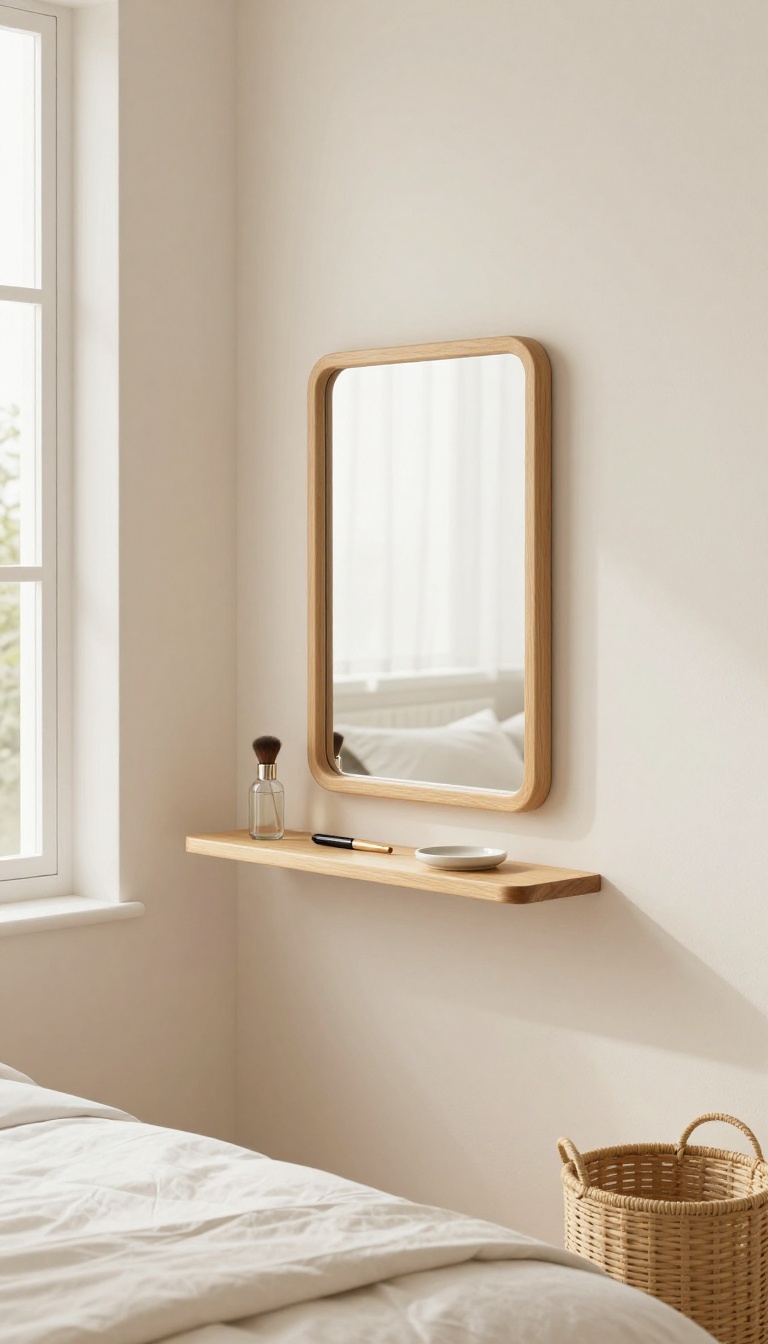
A wall-mounted mirror with a slim ledge flips the usual vanity layout on its side. Instead of a table taking up floor space, everything hangs on the wall. The mirror does the visual work while the ledge holds only what you reach for daily.
It suits bedrooms where a chair, hamper, or bed already claims the open floor.
The magic here is subtraction. You remove the bulky base, the drawers, and the legs, then keep the two things you actually use: a reflection and a spot for essentials. A slim ledge, usually three to five inches deep, holds a couple of bottles, a brush, and a small tray.
Anything more starts to feel cluttered, which defeats the purpose. This setup also plays well with rentals. Since it mounts to the wall, you avoid dragging furniture through tight doorways or rearranging the whole room.
And because the ledge is shallow, you can hang it in a narrow gap between a closet and a window without blocking either one. Best of all, it works at almost any height. You can set it for standing, sitting on a stool, or even applying makeup from the edge of your bed.
That flexibility is why it fits so many small bedrooms.
Pick The Right Mirror Size
A mirror that is too small forces you to lean in, which gets old fast. Aim for at least 20 to 24 inches wide so you can see your face and shoulders without bobbing around. Height matters too.
A rectangular mirror around 30 to 36 inches tall gives you room to check a full outfit from the waist up. If the wall space is extra tight, go vertical rather than wide. A tall, narrow mirror takes up less horizontal room and still gives you a solid view.
Avoid frameless mirrors that need perfect wall prep. A simple framed mirror hides small mounting mistakes and looks more finished.
Build Or Buy A Slim Ledge
You can buy a ready-made picture ledge for under twenty dollars, or make one from a single board and two small brackets. Keep the depth between three and five inches. Deeper than that and it becomes a shelf that collects clutter.
Paint or stain the ledge to match your trim or your mirror frame. If you rent, use removable adhesive strips rated for the weight, or ask your landlord about putting two small screws in the wall. A level is your friend here.
A tilted ledge looks careless and sends bottles rolling. Add a small lip or a piece of quarter-round along the front edge if you want extra security. That tiny strip stops items from sliding off when you bump the wall.
Style The Ledge Without The Mess
Treat the ledge like a tiny stage. Put your most-used items in front and keep the rest in a drawer or basket nearby. A small tray or a shallow dish corrals hair ties, bobby pins, and lip balm so they do not scatter.
Use one or two small bottles or a tiny vase for personality. A single sprig of dried eucalyptus or a mini plant adds life without eating space. Skip tall items that block the mirror.
If you need more storage, hang a small pouch or a wire basket on the wall beside the mirror instead of piling it on the ledge. Clean the mirror often. A quick wipe with glass cleaner keeps the whole setup looking sharp, and it takes ten seconds.
6. Rolling Cart Vanity That Moves with You
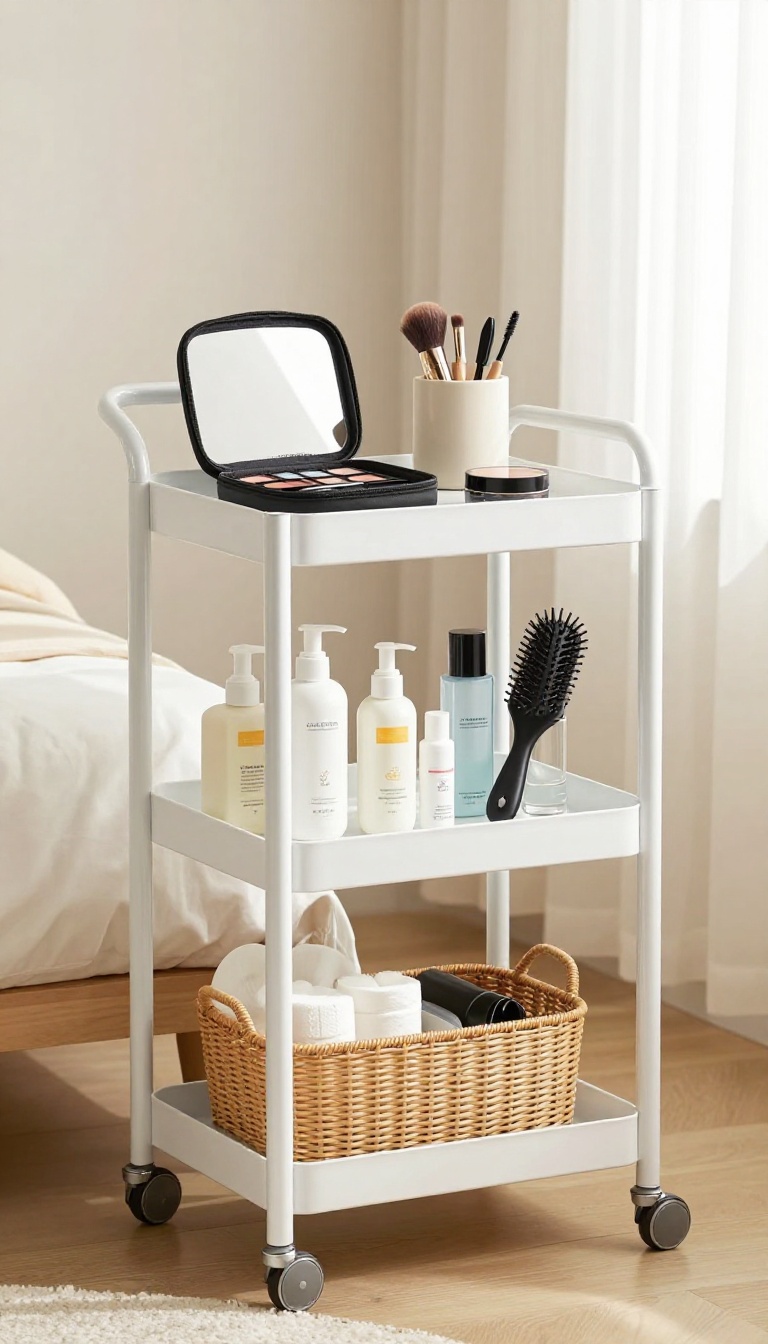
A three-tier rolling cart gives you a vanity that never has to claim permanent floor space. It holds your makeup, hair tools, and skincare on separate levels, then rolls into a corner or closet when you need the room back. You get a full getting-ready station without losing a single square foot to a fixed piece of furniture.
The cart itself is the cheap part. A basic utility cart from a big-box store, a thrift find, or even a garage sale score usually costs less than a single drugstore haul. The magic is in how you load it, not how much you spend on it.
Think of each tier as a zone. Top shelf for daily makeup and brushes, middle for skincare and hair tools, bottom for backups, refills, and anything bulky. That way you never dig through a pile to find your concealer at 7 a. m.
Because it rolls, you can park it beside your bed, in front of a window, or next to a mirror on the wall. When guests come or you need the floor clear, one push sends it into the closet. No rearranging, no heavy lifting.
What To Put On Each Tier
Top tier: your everyday face. Foundation, concealer, mascara, a brush cup, and maybe a small mirror if the cart has a lip. Keep it to what you actually use on a normal morning.
Middle tier: skincare and styling. Moisturizer, sunscreen, a hairbrush, a flat iron or curling wand if it fits, and a heat-resistant pouch for hot tools. A small basket keeps bottles from sliding around.
Bottom tier: the overflow. Backup products, extra cotton rounds, travel sizes, and anything you reach for once a week instead of daily. This is also a good spot for a small bin of hair ties and clips.
Make It Look Intentional
A bare metal cart can read as utility, not vanity. A few small moves change that fast. Line the shelves with shelf liner or a cut piece of contact paper in a color you like.
Add a small mirror that clips or leans on the top tier, or hang a lightweight mirror on the wall behind where you park the cart. A tiny vase, a candle, or a pretty jar for cotton swabs adds personality without clutter. If the cart has wheels that stick, swap them for smoother casters or add felt pads.
You want it to glide, not fight you every time you move it.
Budget And Space Tips
Shop sales, Facebook Marketplace, or IKEA as-is sections for carts under $30. A plain white or black cart is easiest to style and blends with most bedrooms. Measure your tightest doorway and closet opening before you buy.
A cart that cannot roll where you need it defeats the purpose. Most standard carts are about 12 to 15 inches wide, which fits through almost any door. Use small containers, cups, or drawer organizers on each shelf to keep things from toppling when the cart moves.
A cheap turntable or two on the top tier makes everything reachable with a spin.
7. Corner Vanity with a Triangle Shelf
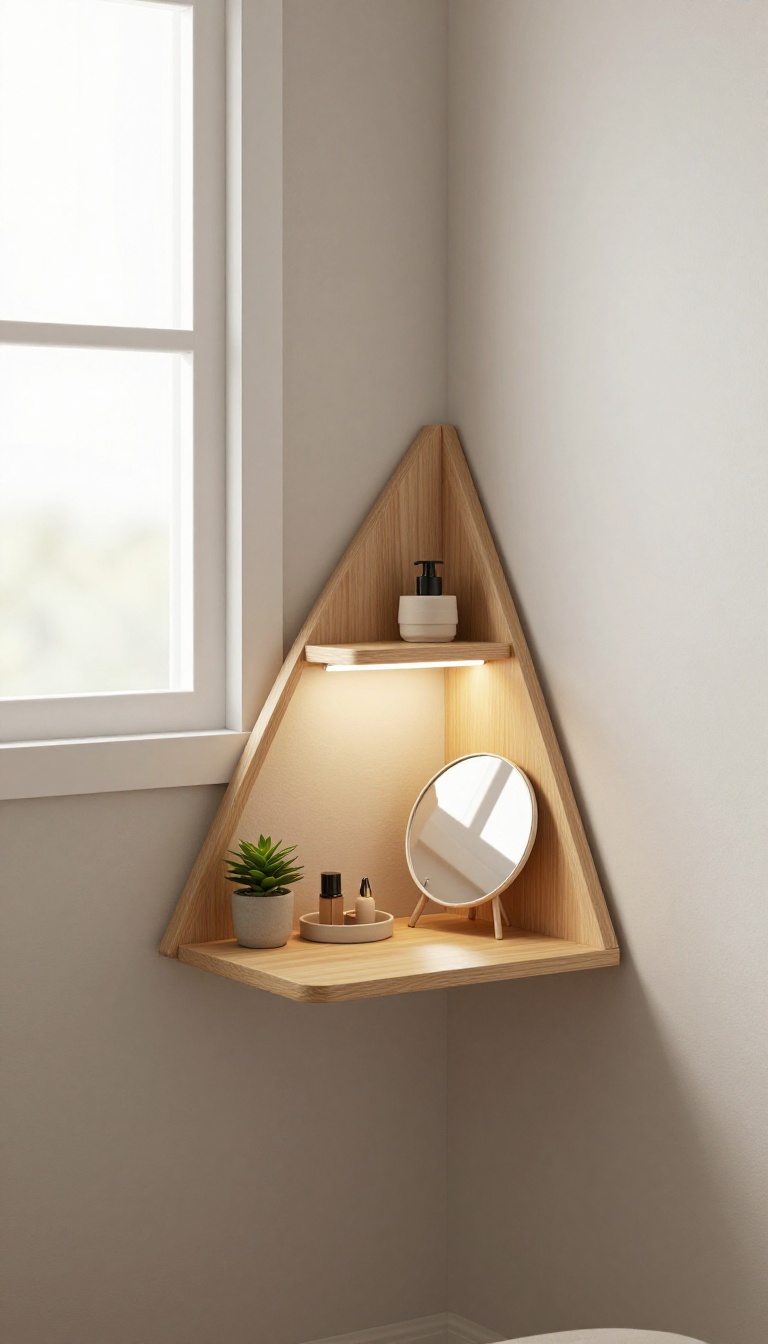
Corners are the most wasted real estate in a small bedroom. A triangle shelf kit turns that dead angle into a functional vanity top without eating up floor space. The result looks custom, but it costs a fraction of a built-in unit.
You can buy a corner shelf kit at most hardware stores or online for around $20 to $40. These kits usually include two or three wedge-shaped shelves and the brackets to mount them. Pick a height that works for sitting or standing, depending on your routine.
Once mounted, the flat front edge gives you a stable surface for a mirror, a few products, and a small light. The rest of the room stays open, which is the whole point.
Measure The Angle First
Not every corner is a perfect 90 degrees. Use a protractor or a scrap piece of cardboard to trace the angle before you buy a kit. Most kits assume a right angle, but you can trim a wooden shelf to fit odd angles with a jigsaw.
If you rent, use removable adhesive strips or a freestanding corner shelf instead of drilling.
Pick The Right Shelf Depth
A depth of 10 to 12 inches gives you enough room for a mirror and a few items without sticking out too far. Deeper shelves feel bulky in a small room. Shallower ones won't hold much.
Stick to 12 inches max unless you have a very tall corner and want a two-tier setup.
Style It Without Clutter
Keep the top surface minimal: a small mirror, one tray for daily products, and maybe a tiny plant. Use the shelf below for extras like hair tools or a basket of samples. A slim LED strip light under the upper shelf adds brightness without wiring.
Stick to a single color family for a clean look.
8. Pegboard Vanity Wall for Organized Chaos
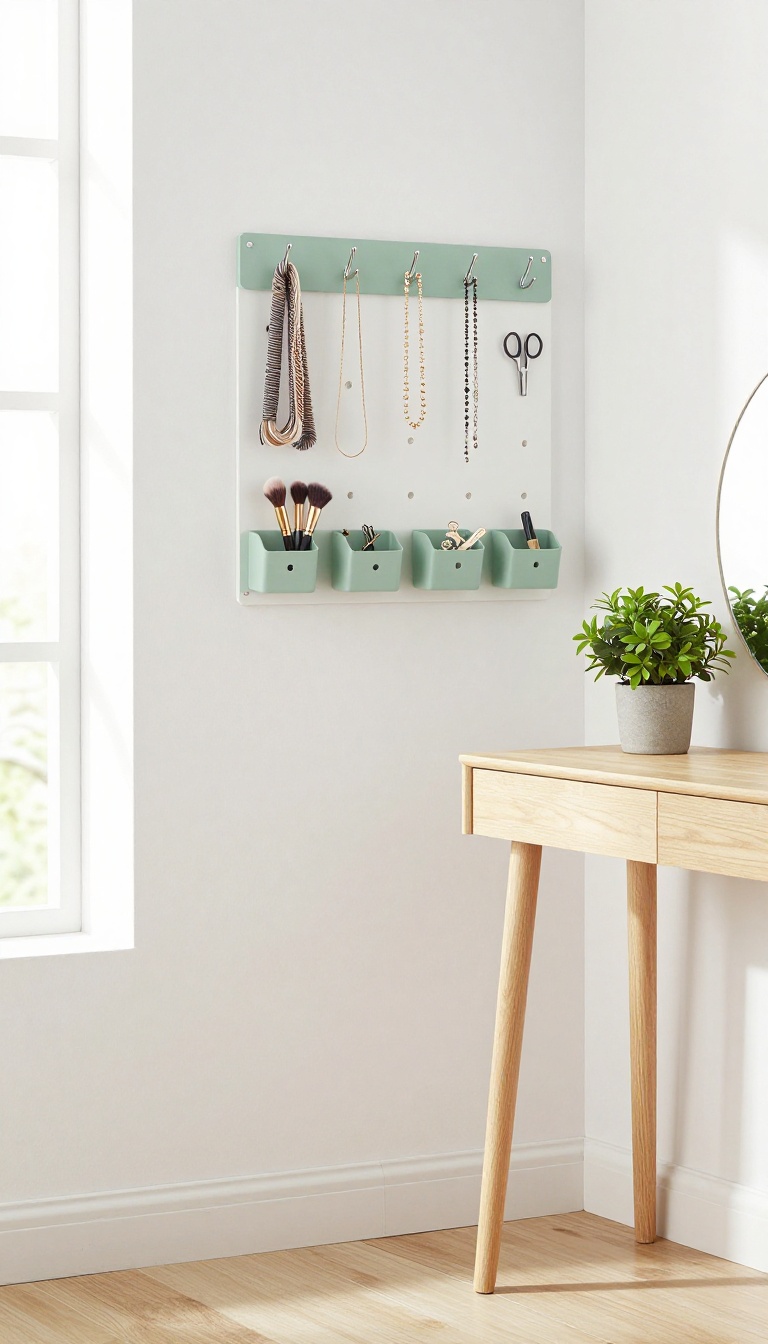
Pegboards have escaped the garage and found a second life on bedroom walls, and for good reason. They hold a ton of stuff without eating up an inch of floor or table space. Paint one to match your room, mount it above a small table, and your brushes, clips, and jewelry stay visible and tidy instead of buried in a drawer.
The magic here is vertical storage that you can rearrange whenever your routine changes. A pegboard turns a blank wall into a flexible tool board, and the whole thing costs less than most single-purpose organizers. You get the look of a curated vanity wall without the curated price tag.
Pick The Right Pegboard And Paint It
Standard 1/8-inch pegboard from a hardware store is cheap and comes in big sheets they can cut down for you. Ask for a piece sized to your wall space, then sand the edges so they feel smooth. A coat of primer followed by two thin coats of paint in your room's accent color keeps it from looking like a workshop castoff.
Let it cure fully before you hang anything, or the hooks will stick.
Mount It Without Wrecking The Wall
Pegboard needs a little breathing room behind it so the hooks can seat properly. Use 1×2 furring strips as spacers, screwing them into studs or using heavy-duty drywall anchors. If you rent, look for removable adhesive pegboard kits or mount the board to a slim frame you can patch over later.
A level line and a pencil mark save you from a lopsided install you will stare at every morning.
Hooks, Bins, And A Place For Everything
Straight hooks hold hair ties, necklaces, and small scissors. Loop hooks keep brushes upright so bristles do not bend. Small wire baskets or clear plastic bins snap onto the board for lipsticks, bobby pins, and samples you forget you own.
Add a shallow shelf ledge along the bottom for a mirror and a candle, and the whole wall reads as intentional rather than chaotic.
Keep It From Looking Cluttered
The pegboard shows everything, so edit as you go. Group like items together, leave a little empty space between zones, and store the stuff you rarely touch in a drawer below. Rotate seasonal pieces so the board stays useful instead of becoming a catch-all.
A quick weekly reset takes two minutes and keeps the organized chaos on your side.
9. Vintage Suitcase Vanity on a Budget
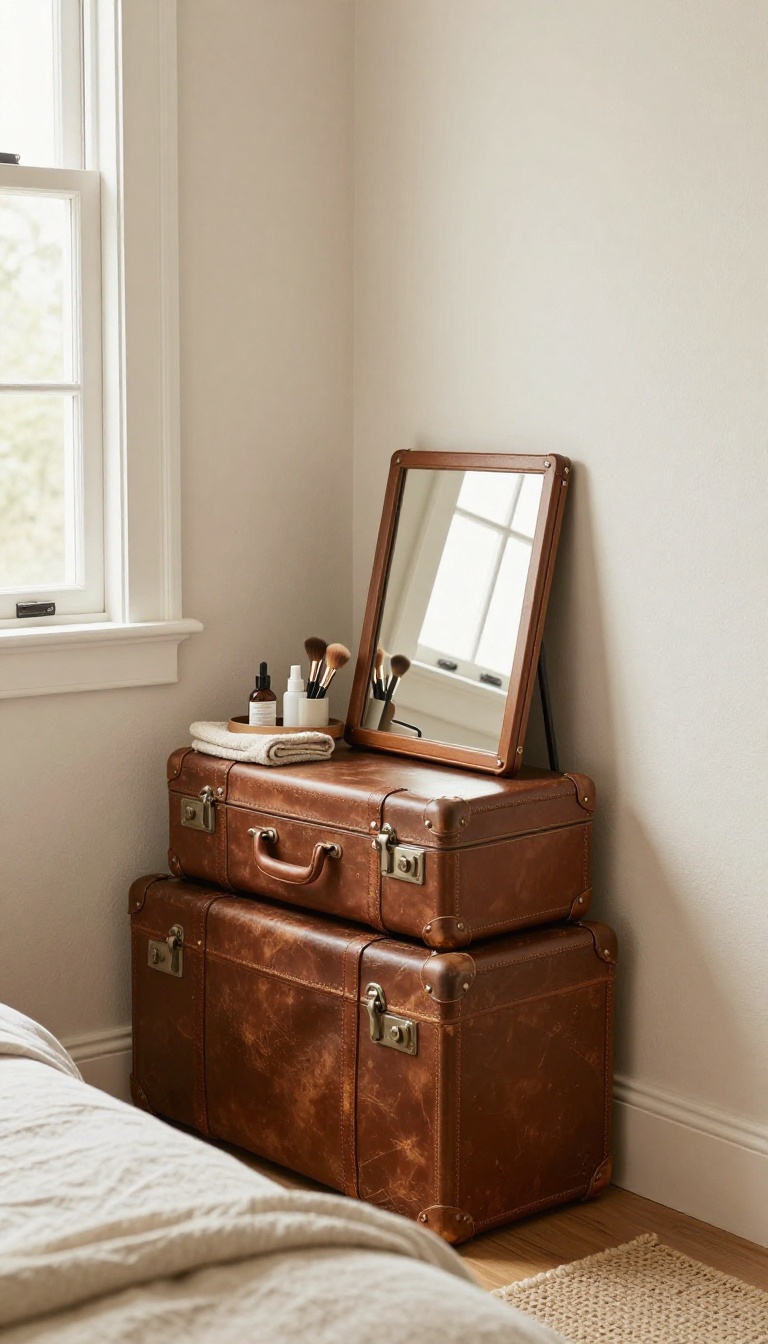
Two hard-shell suitcases stacked in the corner can become a charming vanity without spending a dime if you already own the luggage. The bottom case acts as a sturdy base, while the top one holds your mirror and daily essentials. It is a quirky, portable setup that adds instant character to a small bedroom.
This idea works best with vintage or thrifted suitcases that have a flat top and a hard exterior. Soft-sided bags will sag under the weight of a mirror, so stick with rigid styles. Once stacked, the whole thing becomes a freestanding vanity that you can break down and move whenever you need the floor space back.
Stacking And Stabilizing The Cases
Place the larger suitcase on the floor and the smaller one on top. If the stack feels wobbly, tuck a folded towel or a thin rubber mat between them to stop sliding. For extra security, lean the stack against a wall so it cannot tip forward when you open the top case.
Adding The Mirror And Tray
A lightweight mirror with a folding stand sits perfectly on the top suitcase. If you do not have one, a cheap frameless mirror from a thrift store works just as well. Use a small tray or a shallow box to corral your makeup, brushes, and skincare so nothing rolls off the rounded edges.
Using The Inside For Storage
The bottom suitcase does not have to stay closed. Pop it open and use the interior as hidden storage for extra products, hair tools, or jewelry. If the lid gets in the way, remove it or keep it propped open against the wall.
This keeps your surface clear and your vanity clutter-free.
Styling It Without Spending More
Drape a small vintage scarf over one corner or set a tiny plant on the tray to soften the look. A string of battery-operated fairy lights wrapped around the handle adds a warm glow at night. These little touches make the suitcase feel intentional rather than like random luggage in the corner.
10. DIY Vanity from a Console Table
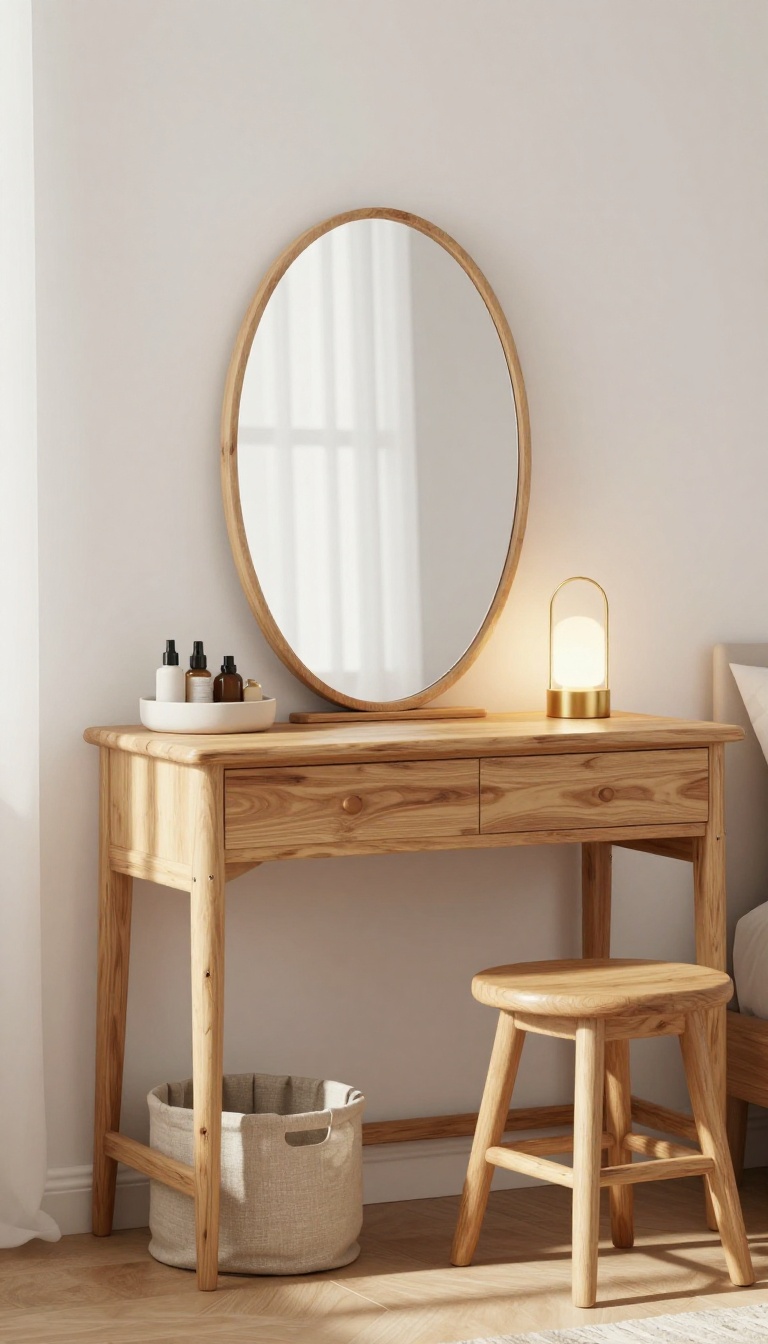
A console table is the sleeper hit of small-space vanities. It's narrow enough to slide behind a door or into a hallway nook, but long enough to hold a mirror, a tray of products, and a small lamp. The open space underneath is the real gift: it gives your knees somewhere to go when you pull up a stool, and it leaves room for storage that doesn't crowd the top.
Best of all, console tables are everywhere secondhand. Thrift stores, Facebook Marketplace, and even curbside finds turn up solid wood versions for a fraction of a new vanity. With a little measuring and a quick style tweak, you can turn one into a functional getting-ready station that looks intentional.
The setup is simple: find a console table that fits your wall, add a mirror above it, and tuck a stool or chair underneath. Because consoles are typically 12 to 16 inches deep, they don't eat up much floor space. That makes them perfect for bedrooms where a full-depth desk would feel like a roadblock.
You'll want to anchor the mirror to the wall if you can, especially in a rental where you might not want to drill. A leaning mirror works too, but secure it with a safety strap. For lighting, a plug-in wall sconce or a small table lamp on one end keeps the surface from feeling cluttered.
Once the basics are in place, the real fun is hiding the mess. That's where the space below the table earns its keep.
Hide The Clutter Underneath
The open area under a console table is a blank canvas for storage. A fabric skirt is the quickest fix: measure from the tabletop to the floor, add a hem, and attach it with velcro strips or a tension rod. Choose a washable fabric in a color that blends with your walls so the table visually disappears.
If sewing isn't your thing, slide in a set of woven baskets or a narrow storage ottoman. Baskets corral brushes, hair tools, and backup products while adding texture. An ottoman does double duty as a seat and a hiding spot.
Just make sure whatever you choose leaves enough legroom for comfortable sitting. For a more polished look, try a pair of matching bins or a small rolling cart that fits underneath. You can pull it out when you need something and push it back when you're done.
Pick The Right Stool Or Chair
Height matters more than style here. You want a seat that lets you see into the mirror without hunching or stretching. A standard console table is about 30 inches tall, so a stool with a seat height of 18 to 24 inches usually works.
Test it before you commit if you can. Backless stools and small benches tuck away easily, which keeps the floor looking open. If you want back support, look for a slender chair with a low profile.
A folding chair can work in a pinch, but a dedicated stool feels more like a real vanity. Don't overlook a simple wooden crate or a stack of sturdy boxes topped with a cushion. It's cheap, lightweight, and easy to move when you need to vacuum.
Style The Top Without Crowding It
A console tabletop is narrow, so every item counts. Start with a mirror, then add one or two functional pieces: a small tray for everyday makeup, a cup for brushes, and maybe a tiny plant or candle. Group things on a tray so you can lift the whole thing out of the way when you need space.
Use vertical space with a slim shelf or a wall-mounted organizer above the table. That keeps daily items within reach but off the surface. If you have a lamp, choose a skinny base so it doesn't hog the corner.
Finally, corral cords with clips or a cable box. A clean top makes the whole setup feel bigger and more intentional.
11. Bedside Vanity That Doubles as a Nightstand
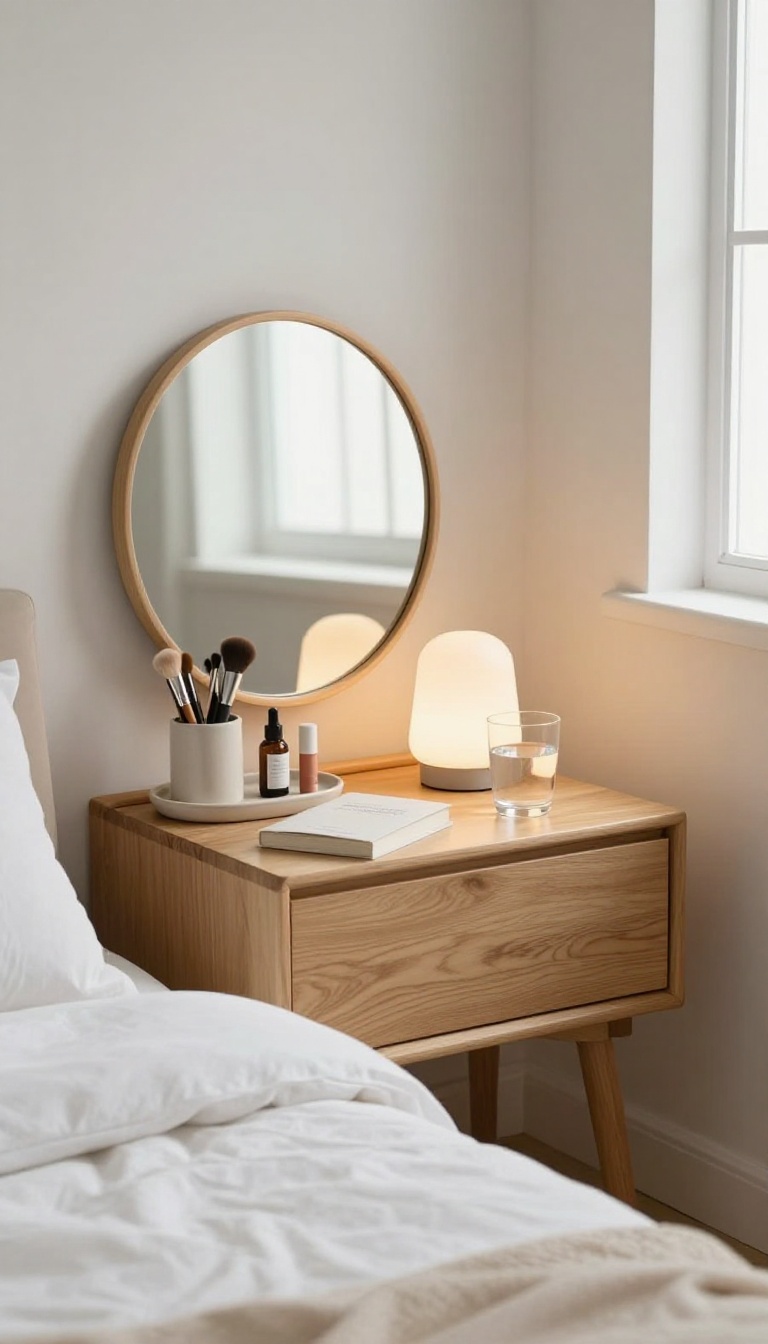
Your nightstand already holds your phone, your water glass, and the book you keep meaning to finish. Adding a mirror and a small tray turns that same surface into a morning vanity without buying a second piece of furniture. It is one of the simplest swaps in this whole list because nothing has to move to a new room.
The whole trick is keeping the vanity layer portable. A mirror you can lean or hang, a tray you can lift off, and a few small containers do the heavy lifting. When the day is done, the tray slides into a drawer or onto a shelf and the nightstand goes back to being a nightstand.
That matters in a small bedroom where every surface has to earn its keep. You are not adding a station so much as giving one piece of furniture a second job.
Pick A Nightstand With A Flat, Open Top
A nightstand with a lip, a drawer that juts out, or a slanted top makes balancing a mirror annoying. Look for a flat surface with at least a little depth. If yours is small, a wall-mounted mirror above it frees up the entire top for your tray.
Use A Tray To Keep The Vanity Layer Contained
A shallow tray or a pretty box corrals your brushes, serum, and lip balm so they do not spread across the whole surface. When you want the nightstand back, you lift the tray and set it aside. Choose one with low sides so it still feels open and airy.
Light It Without Waking Your Partner
A clip-on reading light or a small rechargeable lamp aimed at the mirror gives you enough glow for makeup without flooding the room. Warm bulbs are easier on sleepy eyes. If you share the bed, keep the light pointed toward the wall or mirror, not across the mattress.
Keep The Nighttime Stuff In Its Own Zone
Reserve one side of the nightstand for the lamp, charger, and water glass, and the other side for the tray. That way you are not clearing your makeup every night just to set down your phone. A small divider or a second shallow dish keeps the two zones from blending.
12. Closet Door Vanity with Over-the-Door Storage
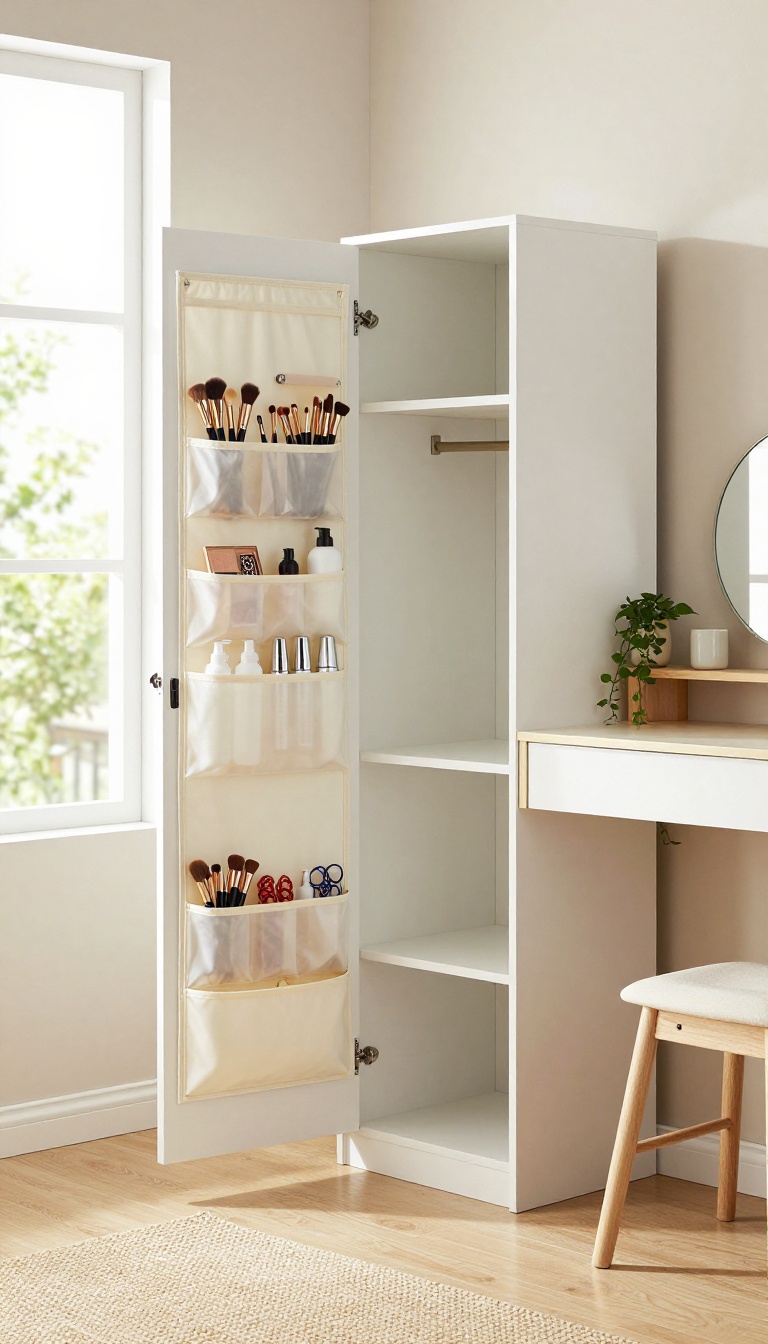
Your closet door is already there, so why not put it to work? Hang an over-the-door organizer on the side that faces your room, then add a slim shelf or a small floating ledge nearby. It turns a blank wall into a functional vanity without drilling a single hole.
The best part is that you can take it down and move it whenever you want. No landlord headaches, no patch jobs. Just a smart use of vertical space that most people ignore.
Pick The Right Organizer
Look for a fabric or mesh over-the-door organizer with clear pockets. Those pockets hold brushes, palettes, hair ties, and skincare bottles. A shoe organizer works great too, especially the kind with deep pockets.
Just make sure the door can still close with the organizer in place.
Add A Slim Shelf Or Ledge
You need a flat surface for your mirror and a few daily items. A narrow floating shelf mounted next to the door gives you that. Or use a tension rod between the door frame and the wall to hold a small tray.
Keep it shallow so it does not crowd the space.
Make It Feel Like A Vanity
Hang a mirror on the door itself or lean a lightweight one against the wall. Add a small stool or a folding chair that tucks away when you are done. A clip-on light or a stick-on LED puck light solves the lighting problem without wiring.
Keep It Tidy
Because the organizer is open, it can get messy fast. Use small cups or dividers inside the pockets to corral little things. Once a week, do a quick reset.
It takes two minutes and keeps the setup looking intentional instead of chaotic.
13. Budget Lighting Tricks for a Small Vanity
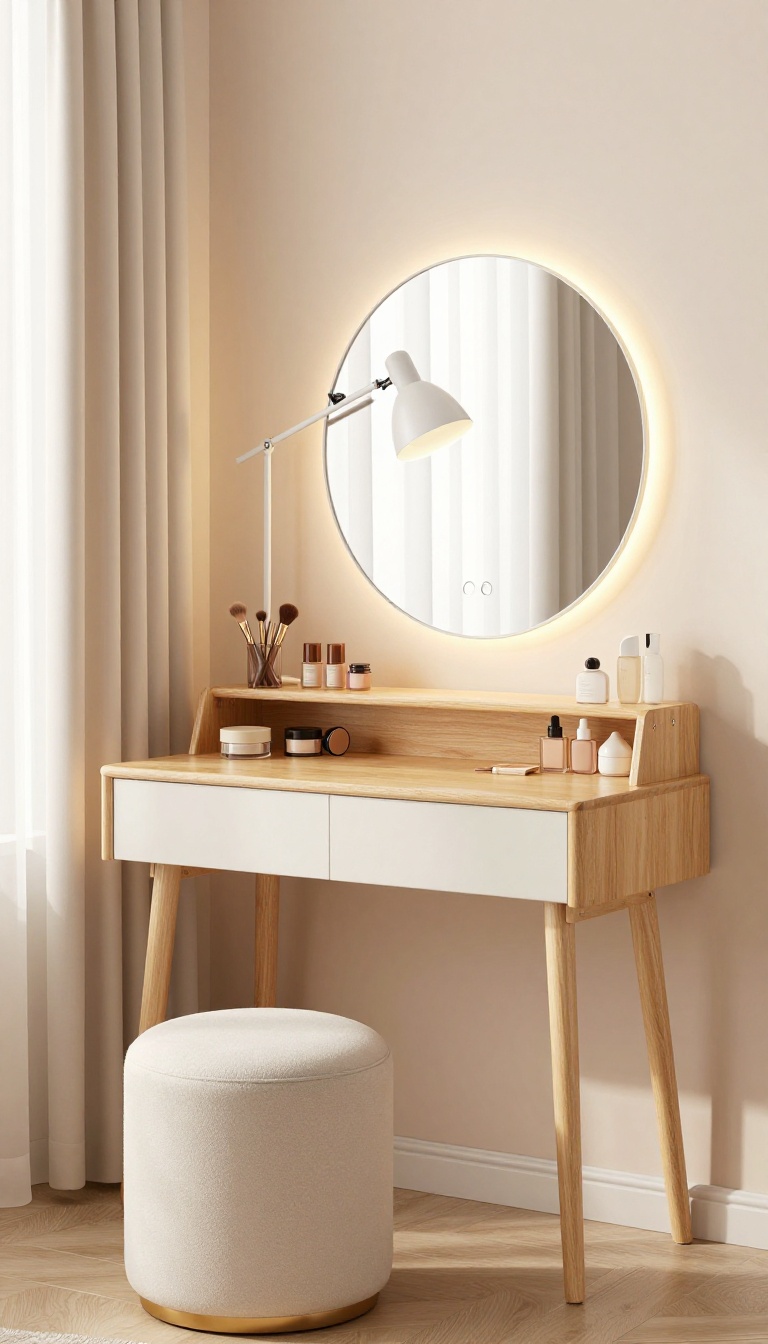
Bad lighting can make even the cutest vanity feel like a cave. A single overhead bulb casts shadows across your face, and suddenly blending foundation feels like guesswork. The fix does not require an electrician or a big spend.
Stick-on LED strips and clip-on lamps can turn a dim corner into a usable, polished spot in minutes.
You want to see your face clearly, not squint into a shadow. The right light also makes your whole setup look intentional, even if it is just a shelf and a mirror. Here are a few cheap ways to get there without touching your walls or your wallet.
Start with the problem areas. Most bedroom corners only have one light source, usually behind you. That puts your face in shadow.
Adding a light in front of you, at eye level, changes everything.
Stick-on Led Strips
LED strips are the easiest win. They come with adhesive backing and plug into a USB port or a small wall adapter. Run a strip along the top edge of your mirror or the underside of a shelf.
Look for warm white or adjustable color temperature so you do not get that harsh blue glow. You can cut most strips to length, which means no messy extra wire hanging around. A remote control dimmer is worth the extra few dollars.
It lets you go bright for makeup and soft for winding down.
Clip-on Lamps That Go Anywhere
A clip-on reading lamp can attach to a shelf, a headboard, or the side of a mirror. Aim it toward your face, not the wall. Battery-powered versions skip the cord entirely, which is great if your outlet is across the room.
Just check the brightness. You want something that lights your whole face, not a tiny spotlight. A gooseneck model lets you adjust the angle until the shadows disappear.
Mirror Lights Without The Price Tag
Hollywood-style mirror bulbs look expensive, but you can fake the effect. Small puck lights with adhesive backs stick right to the mirror frame. Space them evenly around the edges.
Battery-operated puck lights are cheap and easy to swap out. If you want a cleaner look, use a single LED strip behind the mirror to create a soft halo. That backlight reduces glare and makes the whole area feel bigger.
Small Habits That Keep It Bright
Once your lights are up, use them well. Turn on your front light and your overhead light together for the most even look. Keep a small microfiber cloth nearby to wipe fingerprints off bulbs and strips.
Dust dulls light fast. If you use batteries, keep a spare set in your vanity drawer. That way you are never stuck getting ready in the dark.
FAQ
What is the cheapest way to make a small vanity?
Use a floating shelf or a thrifted side table you already own. Add a mirror and a few small baskets, and you have a vanity for under $20.
How do I make a vanity in a tiny bedroom without drilling?
Try a rolling cart, an over-the-door organizer, or a fold-down desk that uses adhesive strips. These options need little to no hardware.
What can I use instead of a vanity table?
A console table, a low bookshelf, a nightstand, or even a stack of sturdy suitcases can work as a vanity surface.
How do I organize a small vanity?
Go vertical with pegboards, stackable bins, and magnetic strips. Keep only daily items on top and store the rest in drawers or baskets.
What kind of mirror works best for a small vanity?
A wall-mounted mirror saves surface space and can be angled. Look for one with a slim frame and a small ledge for extras.
Conclusion
A vanity doesn't need its own room or a matching furniture set. Most of the ideas here cost less than a dinner out, and the best one is probably the fix you've been putting off, whether that's better light, a spot for your brushes, or a mirror that isn't propped against the wall.
Start with the change that makes your morning routine easier, live with it for a week, then add the next piece when you're ready. Small bedrooms reward a few smart moves, not a crowded corner.