25 Bathroom Deep Cleaning Checklist Steps to Follow
Deep cleaning a bathroom can feel like a chore that never ends, especially when you're short on time or motivation. But breaking it down into 25 focused steps makes it manageable—and even satisfying.
From clearing out clutter to scrubbing the toilet tank, this checklist covers every nook and cranny so you don't miss a spot. You'll work through each task systematically, using supplies you likely already have.
Ready to transform your bathroom from grimy to gleaming? Let's start with step one: clearing everything out.
1. Clear Out Everything
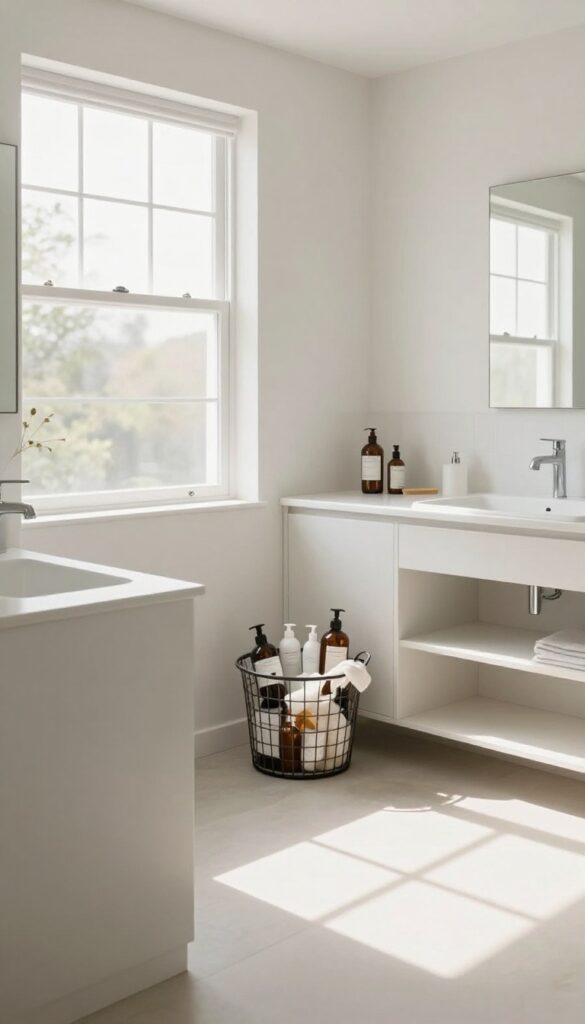
Before you can scrub a single surface, you need a blank slate. Grab a laundry basket or a box and start removing every item from countertops, shelves, the shower, and the floor. Toothbrushes, soap dispensers, shampoo bottles, bath mats—everything goes.
This step isn't just about tidying up; it gives you full access to every nook and cranny so you can clean thoroughly without moving things around as you go.
Why Starting Empty Makes A Difference
When you clean around clutter, you inevitably miss spots. Products block corners, hide grime, and get in the way of your spray or scrub. By clearing out everything first, you expose every surface—including those sneaky areas behind bottles and under the sink.
Plus, you can wipe down each item before putting it back, so everything comes out clean.
What To Do With The Stuff You Remove
Sort items as you go: toss empty bottles, set aside things that need a wipe-down, and group like items together. For example, put all hair products in one pile and skincare in another. This makes it easier to decide what to keep, what to toss, and what to reorganize later.
Don't forget to check expiration dates—old products can harbor bacteria.
A Quick Tip For Staying Organized
Use a caddy or small bin to hold the items you've removed. This keeps them contained and off the floor. If you're deep cleaning the whole bathroom, consider leaving the items in another room until you're done.
That way, you won't be tempted to set them back on a wet or just-cleaned surface.
2. Toss Expired Products
Your bathroom shelves and cabinets are probably hiding products that have long passed their prime. Expired toiletries, medications, and makeup can harbor bacteria or lose effectiveness, making them not just clutter but a hygiene risk. This step is about clearing out the old to make room for a truly clean space.
Start by pulling everything out of cabinets, drawers, and shower caddies. Check expiration dates on sunscreens, contact lens solution, and first-aid items. For makeup, be ruthless: mascara should go after three months, and anything that smells off or changed texture is a no-go.
Don't forget to inspect medications—pills that are past their date can be less potent or even dangerous. Dispose of them properly, following local guidelines for hazardous waste or drug take-back programs. Once you've purged, wipe down the empty shelves before returning only the keepers.
You'll be amazed at how much space you free up.
Where To Check First
Focus on the medicine cabinet, under-sink storage, and any decorative baskets or bins. These are prime spots for forgotten items. Also check the shower caddy and any travel bags that might contain trial-size products that have been sitting for years.
How To Dispose Safely
Never flush medications down the toilet—they can contaminate water. Instead, mix them with coffee grounds or cat litter in a sealed bag and throw them in the trash. For aerosols and nail polish, check your local waste management rules.
Many communities have special collection events for hazardous household items.
Organize What's Left
Group like items together: all hair products in one bin, skincare in another. Use clear containers or labels so you can see what you have at a glance. This prevents future overbuying and makes it easy to spot when something is about to expire.
3. Wipe Down Light Fixtures and Fans
Light fixtures and exhaust fans are easy to overlook, but they collect dust, grime, and even mold over time. A clean fan works more efficiently, pulling moisture out of the air and preventing mildew growth. Taking a few minutes to wipe them down makes the whole room feel fresher.
Turn off power to the fixtures at the circuit breaker before cleaning. Use a microfiber cloth or a duster to remove loose dust from bulbs, glass shades, and fan blades. For greasy buildup, dip the cloth in a mixture of warm water and mild dish soap, then wipe carefully.
Dry everything thoroughly to avoid water spots or electrical hazards.
Start With The Exhaust Fan
The fan cover often traps the most dust. Remove it according to the manufacturer's instructions—usually it snaps off or unscrews. Soak the cover in warm, soapy water for a few minutes, then scrub with a soft brush to dislodge stubborn grime.
Rinse and let it air dry completely before reattaching. While the cover is off, vacuum the fan interior with a brush attachment to remove dust from the motor and blades.
Tackle Vanity Lights And Sconces
Vanity lights above the mirror and any wall sconces get splashed with toothpaste, hairspray, and soap residue. Wipe each bulb and fixture with a damp cloth, then dry immediately. For glass globes, use a glass cleaner or a vinegar-water solution to restore shine.
Be gentle with bulbs—they can break easily if twisted or pressed too hard.
Don't Forget The Ceiling Light
Ceiling lights, especially flush-mount fixtures, accumulate dust and dead insects. Use a step stool to reach safely. Remove the lens or cover if possible, wash it in soapy water, and wipe the base.
If the fixture has exposed bulbs, dust them with a dry microfiber cloth. Reassemble once everything is dry.
4. Dust Vent Covers and Baseboards

Air vents and baseboards might seem like minor details, but they collect a surprising amount of dust and grime. Over time, that buildup can recirculate into the air or make your freshly cleaned bathroom look dingy. Taking a few minutes to tackle these spots makes a big difference in both air quality and appearance.
Start With The Vents
Remove vent covers if possible and vacuum both sides with a brush attachment. For stuck-on dust, wipe them down with a damp microfiber cloth. Don't forget the opening in the wall—use the vacuum hose to pull out any loose debris.
This step helps your exhaust fan work more efficiently and reduces allergens.
Hit The Baseboards
Baseboards in bathrooms often get splashed with water, toothpaste, and cleaning products, leading to sticky residue. Wipe them with a damp cloth or a gentle all-purpose cleaner. Pay extra attention to corners and the top edge where dust settles.
A dry microfiber cloth afterward will prevent water spots.
Don't Skip The Corners
Corners, especially behind the toilet or near the shower, collect cobwebs and dust bunnies. Use a vacuum crevice tool or a long-handled duster to reach them. For stubborn grime, a small brush or an old toothbrush works wonders.
These hidden spots are often the first to show neglect.
5. Clean Windows and Window Sills
Bathroom windows take a beating from steam, splashes, and condensation. Over time, hard water spots and mildew can make the glass look foggy and the sills grimy. This step brings back clarity and freshness.
Tackle The Glass
Start by dusting the window frame and sill. Then mix equal parts white vinegar and warm water in a spray bottle. Spray the glass generously and let it sit for a minute to break down hard water deposits.
Wipe with a microfiber cloth in a circular motion, then buff dry with a clean cloth for a streak-free shine.
Scrub The Sill And Tracks
Window sills collect dust, soap scum, and often mildew. Use a stiff brush or an old toothbrush dipped in a baking soda paste (baking soda plus a little water) to scrub the sill and the tracks. Pay special attention to corners and crevices.
Rinse with a damp cloth and dry thoroughly.
Don't Forget The Hardware
If your window has locks, handles, or a crank, wipe them down with a disinfecting cleaner. For stubborn grime, use a cotton swab dipped in rubbing alcohol. This prevents buildup and keeps the hardware working smoothly.
6. Scrub the Shower Walls and Door
Shower walls and doors are prime spots for soap scum, hard water stains, and mildew. Giving them a thorough scrub not only makes your bathroom look cleaner but also prevents long-term damage to tile and glass. You don't need harsh chemicals—a simple vinegar solution works wonders on most surfaces.
Start by spraying your chosen cleaner (bathroom spray or a 1: 1 vinegar-water mix) over all tile, grout, and glass surfaces. Let it sit for 5–10 minutes to break down grime. Then, use a non-abrasive scrub brush or sponge to work in circular motions, focusing on corners and grout lines.
Rinse thoroughly with warm water and wipe dry with a squeegee or microfiber cloth to prevent water spots.
Tackle Grout Lines
Grout is porous and traps dirt easily. After applying cleaner, use an old toothbrush or a grout brush to scrub along the lines. For stubborn stains, make a paste of baking soda and water, apply it, let it sit for 15 minutes, then scrub and rinse.
Don't Forget The Glass Door
Glass shower doors get cloudy from mineral deposits. Spray with vinegar solution, let it sit, then scrub with a sponge. For tough spots, rub with a cut lemon or use a commercial glass cleaner.
Rinse and dry with a squeegee for a streak-free shine.
Prevent Future Build-up
After cleaning, apply a protective coating like a glass sealant or a mixture of water and car wax. This makes future cleaning easier. Also, keep a squeegee handy and use it after every shower to minimize soap scum and water spots.
7. Deep Clean Grout Lines
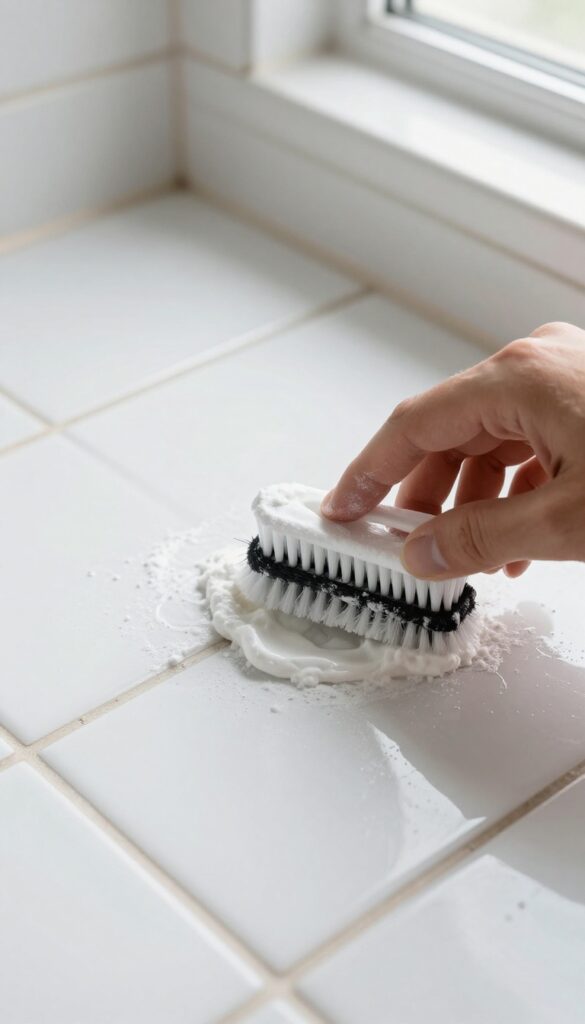
Grout lines are like magnets for dirt, soap scum, and mildew. Over time, they can turn from bright white to dingy gray or even black. But with a little elbow grease and the right paste, you can bring them back to life without harsh chemicals.
Make A Simple Paste
Mix equal parts baking soda and water to form a thick paste. Apply it to the grout lines using a grout brush or an old toothbrush. Let it sit for about 10 minutes to break down grime.
Scrub And Rinse
Scrub the paste into the grout using small circular motions. Focus on one small section at a time. Rinse with warm water and wipe away residue with a damp cloth.
Tackle Tough Stains
For stubborn stains, add a splash of hydrogen peroxide to the baking soda paste. It creates a gentle bleaching effect. Apply, scrub, and rinse thoroughly.
Test on a hidden area first to ensure no discoloration.
8. Soak and Clean Showerheads
Your showerhead works hard every day, but mineral deposits and grime can build up inside, reducing water pressure and spray quality. Giving it a deep soak in vinegar restores performance and keeps water flowing freely. This simple step takes just a little time but makes a big difference.
Start by unscrewing the showerhead from the arm. If it's stuck, wrap a cloth around the nut for grip and use pliers gently. Place the showerhead in a bowl or plastic bag filled with white vinegar, making sure the water openings are fully submerged.
Let it soak for at least an hour—overnight is even better for heavy buildup. After soaking, scrub the surface with an old toothbrush to loosen any remaining deposits. Rinse thoroughly with water and reattach.
Run the shower for a minute to flush out any loosened debris.
Why Vinegar Works Best
White vinegar is mildly acidic, which dissolves calcium and lime scale without harsh chemicals. It's safe for most metal and plastic showerheads, but avoid using it on brass or gold-plated fixtures—check manufacturer guidelines. The acidity breaks down mineral bonds, making them easy to rinse away.
What If The Showerhead Doesn't Come Off?
If your showerhead is fixed or hard to remove, fill a plastic bag with vinegar and secure it around the head with a rubber band or zip tie. Let it soak for an hour, then remove the bag and scrub the face with a brush. This method works just as well without any disassembly.
Prevent Future Buildup
To keep your showerhead clean longer, wipe it dry after each use to reduce mineral deposits. You can also install a water softener or a showerhead filter if your water is particularly hard. Regular monthly vinegar soaks will maintain optimal water pressure.
9. Wash Shower Curtain and Liner
Your shower curtain and liner take a daily beating from water, soap, and humidity. Over time, they can develop soap scum, mildew stains, and even mold. Giving them a proper clean not only freshens up your bathroom but also extends their life.
Fabric curtains and liners can usually go right in the washing machine. Check the care label first, but most can be washed on a gentle cycle with warm water. Add your regular detergent plus a half-cup of baking soda to boost cleaning power and a half-cup of white vinegar to the rinse cycle—this helps kill mildew and remove soap residue.
For stubborn mold spots, add a small amount of bleach if the fabric allows. Once washed, hang the curtain back up immediately to air dry; this prevents wrinkles and lets gravity pull out creases. If your liner is plastic and has mold that won't come off, it's time to replace it.
A new liner is cheap and instantly makes your shower look cleaner.
Machine Washing Fabric Curtains
Remove the curtain and liner from the rod. Take out any metal rings or hooks to avoid rust stains. Place the curtain in the washing machine with a couple of towels to help scrub the fabric.
Use warm water, a gentle cycle, and a normal amount of detergent. Add half a cup of baking soda during the wash cycle and half a cup of white vinegar during the rinse. The vinegar neutralizes odors and helps break down soap scum.
Avoid fabric softener—it can leave a residue that attracts mildew. After the cycle finishes, hang the curtain back up right away to air dry. The towels will have absorbed excess water, so dripping should be minimal.
Dealing With Stubborn Mold Or Mildew
If your fabric curtain has dark spots that didn't come out in the wash, treat them before drying. Mix a solution of equal parts water and white vinegar, or use a diluted bleach solution if the fabric is bleach-safe. Spray the stains and let it sit for 15 minutes, then scrub gently with a soft brush.
Rinse well and rewash if needed. For plastic liners with mold, try the same vinegar spray—if the mold doesn't come off, it's best to replace the liner. Moldy plastic can be hard to fully sanitize, and a new liner costs just a few dollars.
When To Replace Instead Of Wash
Plastic shower liners are inexpensive and disposable. If you notice persistent mold, mildew, or a musty smell even after cleaning, toss it. Also replace if the liner has tears, holes, or the bottom hem is frayed.
Fabric curtains can last longer, but if the fabric is thinning or the mildew stains are set in, consider replacing them. A good rule: if you've washed it twice and it still looks dingy, it's time for a new one.
10. Clean the Toilet Exterior
Once the inside of the toilet is sparkling, it's time to turn your attention to the outside. The exterior can collect dust, fingerprints, and even urine splatters, so a thorough wipe-down is essential. You'll want to hit every surface, including the tank, lid, base, and the often-overlooked seat hinges.
Start by spraying a disinfectant or all-purpose cleaner onto a microfiber cloth—not directly onto the toilet—to avoid overspray. Work from top to bottom: wipe the tank lid, then the tank itself, followed by the bowl exterior and the base. Pay extra attention to the seat hinges, where grime and bacteria love to hide.
Use a cotton swab or an old toothbrush to get into the crevices. Finally, wipe down the seat and lid, both top and bottom. Let the disinfectant sit for the recommended time to kill germs, then do a final dry wipe for a streak-free shine.
Don't Forget The Base And Floor
The area around the toilet base can be a magnet for dust and spills. After cleaning the toilet itself, use a separate cloth or sponge to wipe the base and the floor around it. If you have a caulked base, check for any cracks or mold—if you spot any, plan to recaulk later.
A quick scrub with a disinfectant wipe or a diluted bleach solution will keep that area fresh.
Tackle The Seat Hinges And Bolts
Seat hinges and the bolts that secure the toilet to the floor are notorious for collecting grime. Use a small brush or an old toothbrush dipped in cleaner to scrub around the hinges and bolt caps. If the bolts are rusty, consider replacing them—it's a cheap fix that makes a big difference.
Wipe everything dry to prevent water spots.
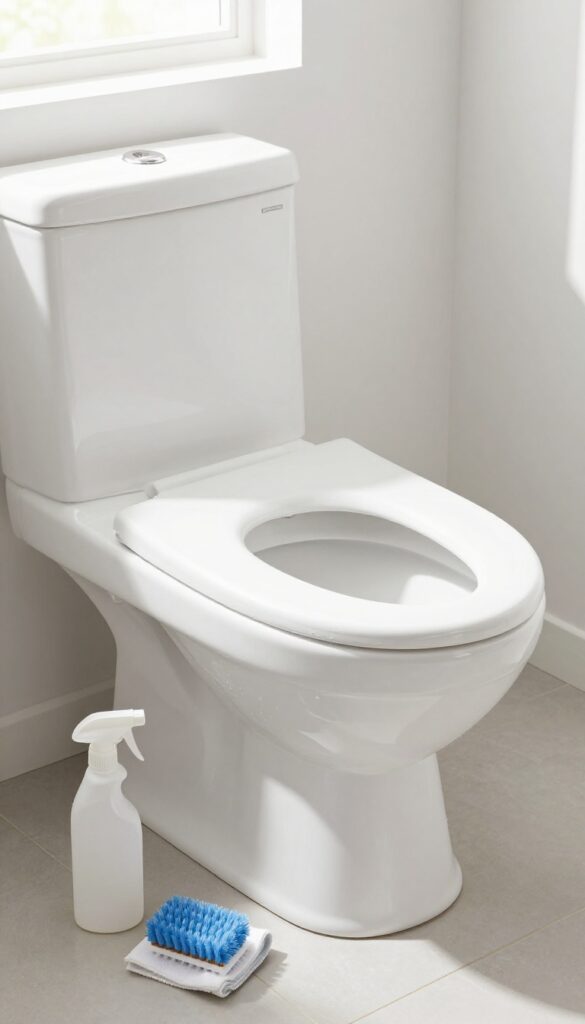
11. Scrub the Toilet Bowl
The toilet bowl is one of the most used—and most neglected—spots in the bathroom. A quick swish with the brush isn't enough for a deep clean. This step focuses on removing stains, mineral buildup, and bacteria that hide under the rim and in the water.
Start by applying a generous amount of toilet bowl cleaner under the rim, making sure it drips down into the water. Let it sit for at least 10 minutes to break down grime and disinfect. Then, scrub the entire bowl with a toilet brush, paying extra attention to the rim and the jet holes.
Flush to rinse. For stubborn rings or hard water deposits, use a pumice stone gently while the bowl is wet—never dry, to avoid scratching the porcelain.
Choosing The Right Cleaner
Not all toilet cleaners are created equal. For tough stains, look for a cleaner with bleach or hydrochloric acid. For regular maintenance, a milder gel cleaner works fine.
Avoid mixing cleaners, especially bleach with ammonia, which creates toxic fumes.
Reaching Hidden Areas
Under the rim is where bacteria and mold love to hide. Use a brush with angled bristles or a specialty rim brush to get into those hard-to-reach spots. You can also use a small mirror to check for missed areas.
Dealing With Stubborn Rings
Mineral rings from hard water can be persistent. A pumice stone is effective but must be used gently. Alternatively, try a paste of baking soda and vinegar, let it sit, then scrub.
For severe buildup, a commercial descaler may be needed.
12. Clean the Toilet Tank
The toilet tank is an often overlooked area that can harbor mineral deposits, mold, and unpleasant odors. Cleaning it regularly not only keeps your bathroom smelling fresh but also helps your toilet run efficiently. Here's how to tackle this task without making a mess.
Prep The Tank
Start by turning off the water supply valve located behind the toilet. Flush to empty the tank, then use a sponge or cloth to soak up any remaining water at the bottom. This prevents cleaner from diluting and makes scrubbing easier.
Scrub Away Grime
Apply a mild cleaner or a mixture of white vinegar and water to the inside walls and bottom of the tank. Use a non-abrasive sponge or a soft brush to scrub away mineral buildup and any slimy film. Pay extra attention to corners and around the fill valve.
Rinse And Refill
After scrubbing, rinse the tank thoroughly with clean water. You can use a cup to pour water in and flush several times to ensure all cleaner is gone. Turn the water supply back on, let the tank fill, and do a final flush to clear any residue.
13. Wipe Down Vanity and Countertops
Your vanity and countertops collect toothpaste splatters, hair products, and dust bunnies faster than you'd think. After you've cleared everything off, you can finally give them the attention they deserve. This step is all about restoring that fresh, clean surface that makes the whole bathroom feel better.
Start by removing all items from the vanity and countertops—toothbrush holders, soap dispensers, makeup organizers, everything. This gives you full access to the entire surface. Choose a cleaner that's safe for your countertop material: granite and quartz need a pH-neutral cleaner, while laminate can handle a mild all-purpose spray.
Spray the cleaner directly onto the surface or onto a microfiber cloth, then wipe in a consistent pattern to avoid streaks. Don't forget the backsplash—it's a magnet for splashes and grime. Use a soft brush or sponge for any stuck-on residue around the faucet base or edges.
Finally, let the surface air dry or buff it with a dry cloth for a streak-free shine.
Use The Right Cleaner For Your Material
Granite and quartz countertops are porous and can be damaged by acidic or abrasive cleaners. Stick to a dedicated stone cleaner or a mild dish soap and water solution. For laminate, a gentle all-purpose cleaner works fine.
Avoid bleach or ammonia on any surface, as they can dull the finish over time.
Don't Skip The Backsplash
The backsplash often gets overlooked, but it's a hotspot for soap scum and toothpaste splatters. Spray it down and wipe thoroughly. If you have grout lines, use a small brush to clean them.
A quick wipe now prevents buildup that's much harder to remove later.
Tackle Stubborn Spots Around The Faucet
The area around the faucet base can collect hard water stains and gunk. Use a toothbrush or a small scrub brush dipped in your cleaner to get into those tight spaces. Rinse with a damp cloth and dry to prevent water spots.
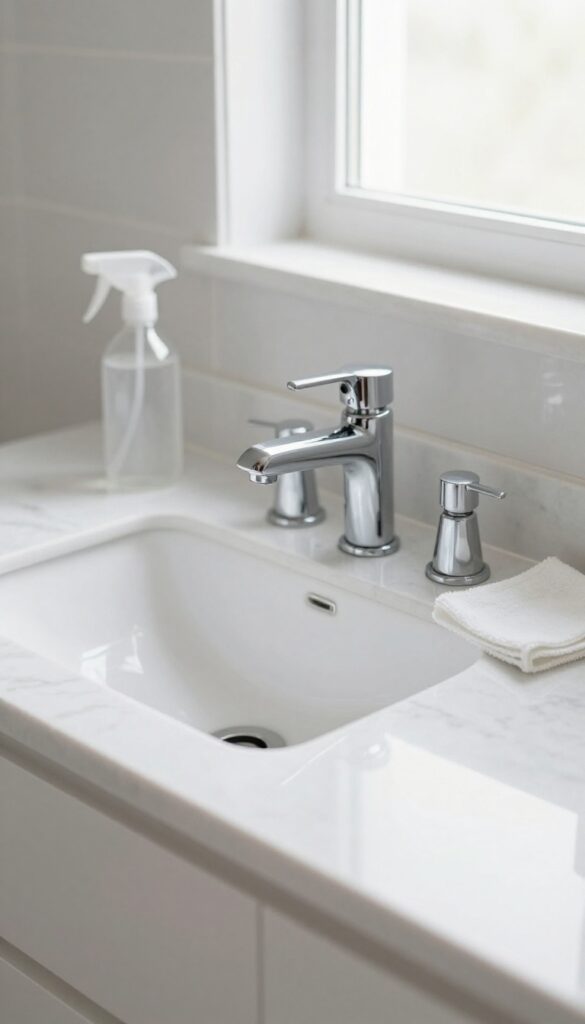
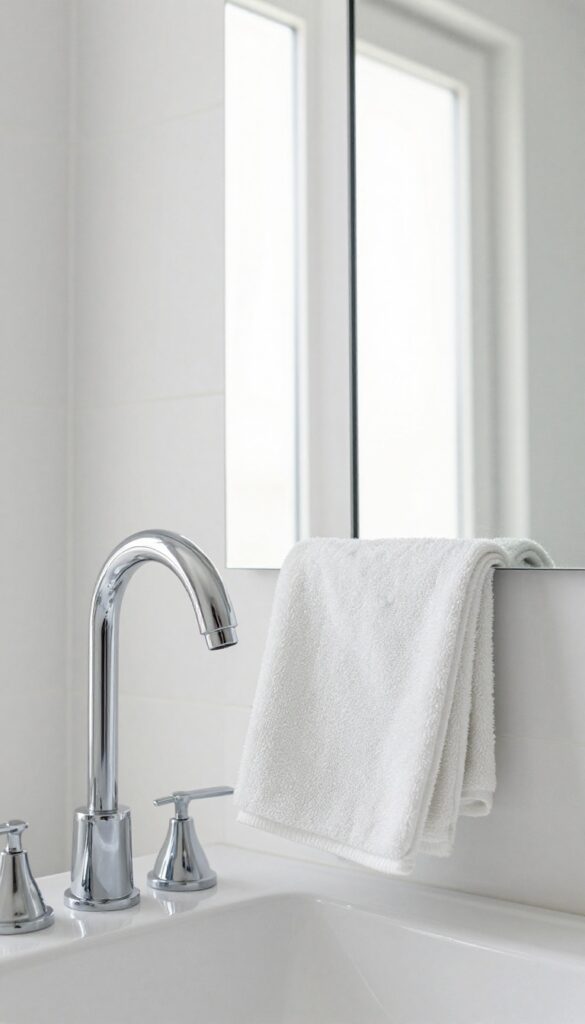
14. Clean the Sink and Faucet
The sink and faucet see a lot of action every day—toothpaste splatters, soap scum, and water spots build up fast. A deep clean here makes the whole vanity area look fresh and polished. Grab your supplies and give them the attention they deserve.
Scrub The Sink Basin
Start by clearing the counter around the sink. Apply a non-abrasive cleaner—like baking soda paste or a gentle bathroom spray—to the basin. Use a soft sponge or cloth to scrub in circular motions, focusing on the drain area and any buildup around the rim.
Rinse thoroughly with warm water and dry with a clean towel to prevent water spots.
Polish The Faucet And Handles
Faucets collect fingerprints, water spots, and grime, especially around the base and handles. Spray a mixture of equal parts white vinegar and water onto a microfiber cloth (never directly onto the faucet to avoid damage). Wipe down the entire fixture, then buff with a dry microfiber cloth for a streak-free shine.
Don't forget the area where the faucet meets the counter—grime hides there.
Don't Skip The Drain And Overflow
The sink drain and overflow opening can trap hair, soap residue, and odors. Remove the stopper if possible and clean it separately. Use an old toothbrush dipped in vinegar or a mild cleaner to scrub the drain opening and the overflow plate.
Flush with hot water to clear any loosened debris. This step prevents slow draining and keeps smells at bay.
15. Descale the Faucet Aerator
That weak or uneven stream from your bathroom faucet isn't always a plumbing issue. Often, the culprit is a clogged aerator—the small screen at the tip of the spout. Mineral deposits and debris build up over time, restricting flow and causing splashing.
Luckily, cleaning it is quick and requires only a few minutes and some vinegar.
Removing and descaling the aerator restores full water pressure and prevents messy splashes. It's a simple step that makes a noticeable difference every time you wash your hands.
How To Remove The Aerator
First, check if the aerator is screwed on by hand or requires a tool. Many unscrew easily with a twist, but some need a small wrench or pliers. Wrap the jaws with tape to avoid scratching the finish.
Turn counterclockwise and set the aerator aside.
Soaking And Scrubbing
Place the aerator in a small bowl of white vinegar, ensuring it's fully submerged. Let it soak for at least 30 minutes—longer if buildup is heavy. After soaking, use an old toothbrush to scrub away any remaining debris.
Rinse thoroughly under running water.
Reattach And Test
Screw the clean aerator back onto the faucet by hand until snug. Avoid overtightening, which can damage the threads. Turn on the water and check the flow.
You should notice a strong, even stream with no splashing.
16. Organize Medicine Cabinet and Drawers
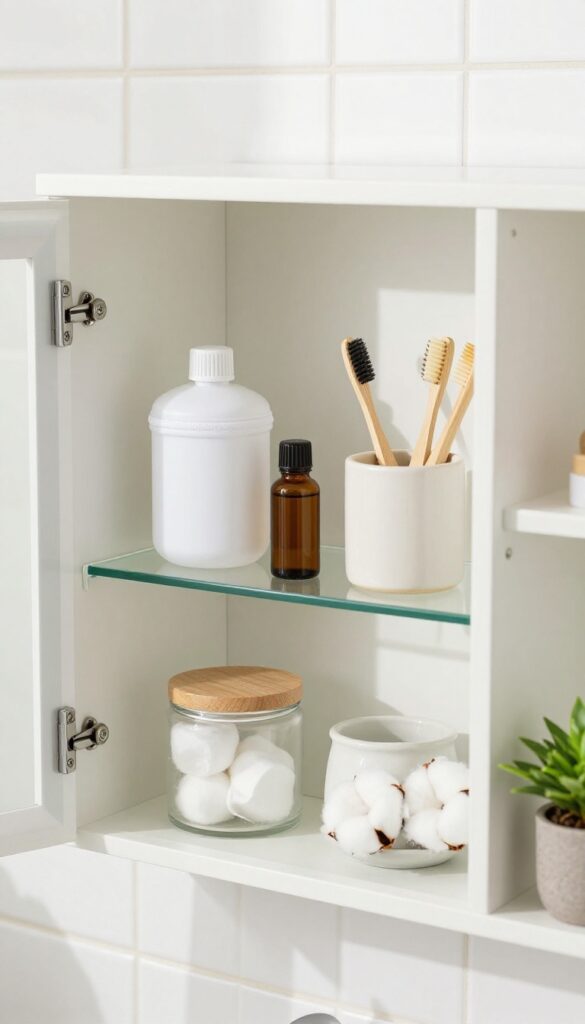
Your medicine cabinet and bathroom drawers often become catch-alls for half-empty bottles, expired pills, and stray hair ties. Taking everything out and starting fresh not only clears clutter but also makes your daily routine smoother. You'll be surprised how much space you free up once you toss the old and group the useful.
Empty And Wipe Down
Pull out every item from the cabinet and drawers. Wipe the shelves and interior surfaces with a damp cloth and mild cleaner. Let them dry completely before putting anything back.
This step removes dust, sticky residue, and any spills that have accumulated.
Check Expiration Dates
Go through each product—medications, ointments, sunscreen, and cosmetics. Throw away anything past its expiration date or that looks discolored, separated, or smells off. For prescription meds, check for disposal instructions or take them to a pharmacy drop-off.
Sort And Group Like Items
Arrange what's left into categories: first aid, daily toiletries, hair care, and backup supplies. Use small bins, trays, or drawer dividers to keep groups separate. This makes it easy to grab what you need without rummaging.
Return Only Essentials
Put back only the items you use regularly. Store less frequently used supplies in a separate drawer or bin elsewhere. Keep the most used products at eye level or in the front of drawers.
Label bins if you share the space with others.
17. Clean Mirrors and Glass
Mirrors and glass surfaces are the first things you notice when you walk into a bathroom, so they need to sparkle. Over time, they collect toothpaste splatters, hairspray residue, and water spots that dull their shine. Getting them streak-free is easier than you think with the right technique and a few simple supplies.
Choose Your Cleaner
You can use a commercial glass cleaner or make your own with equal parts white vinegar and water. The vinegar cuts through grime and leaves a streak-free finish. Avoid using too much product; a light mist is all you need.
Pick The Right Cloth
Lint-free microfiber cloths work great, but old newspapers are surprisingly effective for a streak-free shine. Paper towels can leave lint behind, so skip them. Fold your cloth or newspaper into a small square so you can flip to a fresh side as it gets dirty.
Wipe In The Right Pattern
Start at the top and work your way down in an S-shaped pattern. This prevents drips from running onto already-cleaned areas. For large mirrors, use horizontal strokes across the top half, then vertical strokes on the bottom half to catch any drips.
Don't Forget Glass Shelves
If you have glass shelves, remove everything and spray them down. Wipe both sides if possible, and let them air dry before putting items back. This prevents water spots from forming under bottles and jars.
18. Wipe Down Cabinet Doors and Hardware
Cabinet doors and hardware take a daily beating from wet hands, toothpaste residue, and splashes. Over time, a sticky film builds up that not only looks dull but can even attract mildew. Giving them a thorough wipe-down makes the whole bathroom feel fresher and cleaner.
Choose The Right Cleaner
A mild all-purpose cleaner or a mix of warm water and dish soap works well for most cabinet finishes. Avoid harsh abrasives or bleach if your cabinets are wood or laminate—they can strip the finish. For stubborn grime around handles, let the cleaner sit for a minute before wiping.
Don't Forget The Hardware
Handles and knobs collect grease and bacteria from hands. Use a small brush or an old toothbrush to scrub around the base of each knob. For metal hardware, a microfiber cloth with a bit of vinegar water can restore shine without scratching.
Pay Attention To Edges And Crevices
Dirt loves to hide along the edges of cabinet doors and inside the grooves of decorative trim. Run a damp cloth or sponge along these areas, then dry with a separate cloth to prevent water spots. This step makes a surprising difference in how clean the cabinets look.
19. Scrub the Bathtub (if separate)

If you have a separate bathtub, it deserves its own dedicated scrub session. Over time, soap scum, body oils, and mineral deposits build up on the surface, especially around the waterline and drain. A thorough cleaning not only makes the tub look inviting but also prevents slippery film and odors.
Choose The Right Cleaner
For most tubs, a non-abrasive bathroom cleaner or a mixture of baking soda and dish soap works well. If your tub is acrylic or fiberglass, avoid harsh scrubs that can scratch. For porcelain enamel, a mild bleach-based spray can tackle tough stains.
Always test a small area first.
Target The Trouble Spots
Focus on the corners where the wall meets the tub, the area around the drain, and any built-up residue along the waterline. Use an old toothbrush or a small scrub brush to get into crevices. For stubborn rings, apply a paste of baking soda and vinegar and let it sit for 10 minutes before scrubbing.
Rinse And Dry Thoroughly
After scrubbing, rinse the tub with warm water to remove all cleaner residue. Leftover soap can cause new buildup. Use a clean cloth or squeegee to dry the surface, which helps prevent water spots and keeps the tub shining longer.
20. Clean the Drain Covers and Traps
Drains see a lot of action, but they rarely get the attention they deserve. Hair, soap scum, and grime build up over time, leading to slow drainage and funky odors. Tackling drain covers and traps is a quick win that makes a big difference in how fresh your bathroom feels.
Start by removing the drain covers from your sink, shower, and tub. Use a screwdriver if needed—most covers pop off or have a couple of screws. Pull out any visible hair and debris with your fingers or tweezers, then scrub the covers with an old toothbrush and soapy water.
Rinse well and set aside to dry. For the drain itself, a plastic drain snake is your best friend. Feed it into the drain and twist to grab hidden hair clogs.
Pull slowly—you'll be amazed at what comes out. Follow up with a baking soda and vinegar treatment: pour 1/2 cup baking soda down the drain, then 1/2 cup white vinegar. Let it fizz for 15 minutes, then flush with hot water.
This freshens and helps prevent future clogs. If you have a pop-up stopper in the sink, pull it out completely and clean the hinge and underside. Reassemble once everything is dry.
Doing this every few months keeps drains running smoothly and smelling clean.
Remove And Scrub The Covers
Take off all drain covers (sink, shower, tub). Use a screwdriver if they're screwed in. Pick out visible hair and gunk, then scrub the covers with a toothbrush and dish soap.
Rinse and set aside.
Snake The Drain
Insert a plastic drain snake into the drain and twist to catch hidden hair. Pull out slowly. Repeat until no more debris comes up.
This step clears clogs and improves drainage.
Freshen With Baking Soda And Vinegar
Pour 1/2 cup baking soda down the drain, then 1/2 cup white vinegar. Let it fizz for 15 minutes. Flush with hot water.
This deodorizes and helps prevent buildup.
Don't Forget The Pop-up Stopper
If your sink has a pop-up stopper, lift it out and clean the rod and underside. Reassemble after all parts are dry. This prevents grime from accumulating in hard-to-reach spots.
21. Wash Bath Mats and Towels
Bath mats and towels trap moisture, dead skin, and bacteria, making them a hotspot for mildew if neglected. After scrubbing floors and surfaces, it's time to give these fabric items a deep clean. Hot water and a quality detergent will refresh them and keep your bathroom smelling fresh.
Launder all bath mats, towels, and washcloths in hot water with detergent. Dry thoroughly to prevent mildew. Replace if worn.
Sort And Pre-treat
Separate bath mats from towels if they have rubber backing, as high heat can damage it. Pre-treat any visible stains with a stain remover or a paste of baking soda and water. For musty odors, add half a cup of white vinegar to the rinse cycle.
Wash On Hot Cycle
Use the hottest water setting recommended for the fabric. Hot water kills bacteria and dust mites. Add your regular detergent and, for extra sanitation, a cup of bleach (if colors are safe) or oxygen bleach.
Avoid fabric softener—it reduces absorbency and can trap odors.
Dry Completely
Tumble dry on high heat until bone-dry. For rubber-backed mats, use low heat or air dry to prevent cracking. Never fold or store damp towels—mildew can develop within 24 hours.
If any towel feels stiff, toss a wool dryer ball in the dryer to soften it.
Inspect And Replace
Once clean and dry, check for fraying edges, thinning fabric, or lingering odors. Bath mats that shed lint or no longer grip the floor should be replaced. Towels that feel rough or have persistent stains can be repurposed as cleaning rags.
22. Mop the Floor
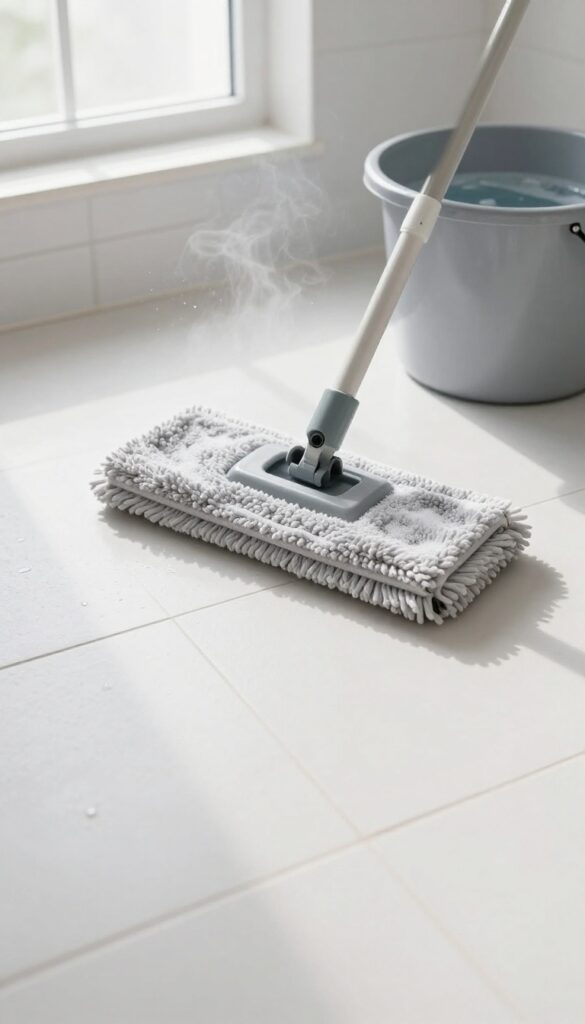
After scrubbing the walls and fixtures, the floor is the final frontier. It collects dust, hair, and splashes from the day's use. A proper mop job leaves the whole room feeling fresh and clean.
Sweep or vacuum first to remove loose debris, then mop with a cleaner suited to your flooring type—whether tile, vinyl, or stone. Pay special attention to corners and under the toilet where grime hides. Let the floor air dry completely before stepping back in.
Prep The Floor
Start by removing any bath mats, rugs, or small items from the floor. Sweep thoroughly or vacuum with a hard floor attachment to pick up hair and dust. This prevents turning dirt into mud when you mop.
Choose The Right Cleaner
Use a cleaner that's safe for your floor material. For tile, a mild detergent or vinegar solution works well. For vinyl or laminate, avoid harsh chemicals that can damage the finish.
Always follow the manufacturer's recommendations.
Mop Technique
Dip your mop into the cleaning solution, wring it out well so the floor isn't soaking wet, and mop in sections. Work from the far corner toward the door so you don't step on wet areas. Change the water if it gets dirty.
Don't Forget The Details
Use a small brush or sponge to scrub corners, baseboards, and the area around the toilet base. For stubborn spots, let the cleaner sit for a minute before mopping. Finish by wiping down the baseboards with a damp cloth.
23. Disinfect High-Touch Surfaces
Your bathroom might look clean, but the surfaces you touch the most are often the dirtiest. Light switches, door handles, cabinet pulls, and the toilet flush lever collect germs from everyone who uses the room. A quick wipe with a disinfectant makes a big difference in keeping your bathroom truly sanitary.
Work your way around the room, targeting every high-touch area. Use disinfectant wipes or a spray with a microfiber cloth. Let the disinfectant sit for the recommended dwell time—usually a few minutes—to actually kill germs.
Don't forget less obvious spots like the handle on the trash can or the fan switch.
Start With The Light Switches And Outlet Plates
Light switches and outlet plates are touched multiple times a day but often skipped during cleaning. Wipe them down with a disinfectant wipe, getting into the crevices. If they're really grimy, use a cotton swab dipped in rubbing alcohol to clean around the edges.
Hit Every Handle And Pull
Cabinet pulls, drawer handles, and door knobs are germ hotspots. Give each one a thorough wipe. For metal finishes, check the disinfectant label to avoid damage—some can be harsh on brass or nickel.
A quick rinse with water after disinfecting can prevent residue buildup.
Don't Forget The Toilet Flush Lever
The flush lever is one of the most touched surfaces in the bathroom, yet it's easy to overlook. Spray it with disinfectant or wipe it down with a bleach-free wipe. Let it air dry completely.
If you have a dual-flush button, clean around the edges with a cotton swab.
24. Restock Essentials
After all that scrubbing and organizing, the final step is making sure your bathroom is ready for daily use. Restocking essentials like toilet paper, hand soap, tissues, and other everyday items transforms a clean space into a truly functional one. A well-stocked bathroom feels more inviting and saves you from those last-minute scrambles.
Take a few minutes to check your supplies and refill what's low. This small effort makes a big difference in how your bathroom feels and functions.
Check Your Dispensers
Refill soap dispensers, toilet paper holders, and tissue boxes. If you have a lotion or hand sanitizer pump, top it off too. A full dispenser looks tidy and ensures you never run out mid-use.
Tidy Up Storage
Arrange extra rolls of toilet paper, backup soap, and any other supplies neatly in a cabinet or basket. Keeping them organized prevents clutter and makes it easy to grab what you need.
Add A Few Nice Touches
Consider placing a small candle, a fresh towel, or a decorative jar with cotton balls. These little extras make the bathroom feel more like a spa than just a utility room.
25. Final Polish and Air Out
You've scrubbed every inch, disinfected high-touch spots, and tackled the grout. Now it's time for the satisfying finish: a quick polish and a breath of fresh air. This step ensures your bathroom not only looks clean but feels clean, with no lingering moisture or chemical smells.
Quick Surface Shine
Grab a clean, dry microfiber cloth and wipe down mirrors, chrome fixtures, and any glass surfaces. This removes water spots and fingerprints, leaving a streak-free gleam. Pay special attention to the faucet handles and shower door tracks—they tend to collect smudges.
Let It Breathe
Open a window if possible, or turn on the exhaust fan for at least 30 minutes. This circulates air, dries out damp corners, and helps eliminate any leftover cleaning product odors. A dry bathroom is less inviting to mold and mildew, so this step doubles as prevention.
Final Touch Check
Do a quick walkthrough with fresh eyes. Look for any missed spots—dust on the baseboards, a smudge on the toilet handle, or a stray hair. A final once-over ensures your hard work is on full display and nothing is overlooked.
FAQ
How often should I deep clean my bathroom?
Aim for a deep clean every 1-3 months, depending on usage and humidity. High-traffic bathrooms may need monthly attention, while guest bathrooms can go longer.
What's the best way to clean grout without harsh chemicals?
Make a paste of baking soda and water, apply it to grout, let it sit for 10 minutes, then scrub with a brush. For tougher stains, add a little hydrogen peroxide.
Can I use vinegar on all bathroom surfaces?
Vinegar is great for glass, tile, and chrome, but avoid it on natural stone (like marble or granite) as the acid can etch the surface. Also, never mix vinegar with bleach.
How do I prevent mold and mildew in the shower?
Run the exhaust fan during and after showers, squeegee walls and doors, and leave the curtain open to dry. Regular cleaning with a mildew-fighting spray also helps.
What's the easiest way to clean a toilet tank?
Turn off the water supply, flush to empty the tank, then scrub the inside with a sponge and mild dish soap or a toilet tank cleaner. Rinse by turning the water back on and flushing a few times.
Conclusion
A deep clean of your bathroom doesn't have to be overwhelming when you break it down step by step. Start with the tasks that bug you most—like that grimy showerhead or dusty vent—and work through the rest at your own pace.
Tackling just a few items each weekend will keep your bathroom feeling fresh without burning you out. Your efforts will pay off in a space that looks and smells truly clean, making your daily routine a little more enjoyable.