17 Floor Grout Cleaning Tricks for Brighter Tile Lines
Bright, clean grout lines can transform the entire look of your tile floors. But over time, dirt and grime settle into those porous lines, making them look dull or even dark.
You don't need harsh chemicals or expensive services to bring them back to life. These 17 floor grout cleaning tricks are simple, effective, and use items you probably already have at home.
Each method targets different types of stains and grout conditions, so you can pick the one that fits your situation best. Say goodbye to dingy grout and hello to brighter tile lines.
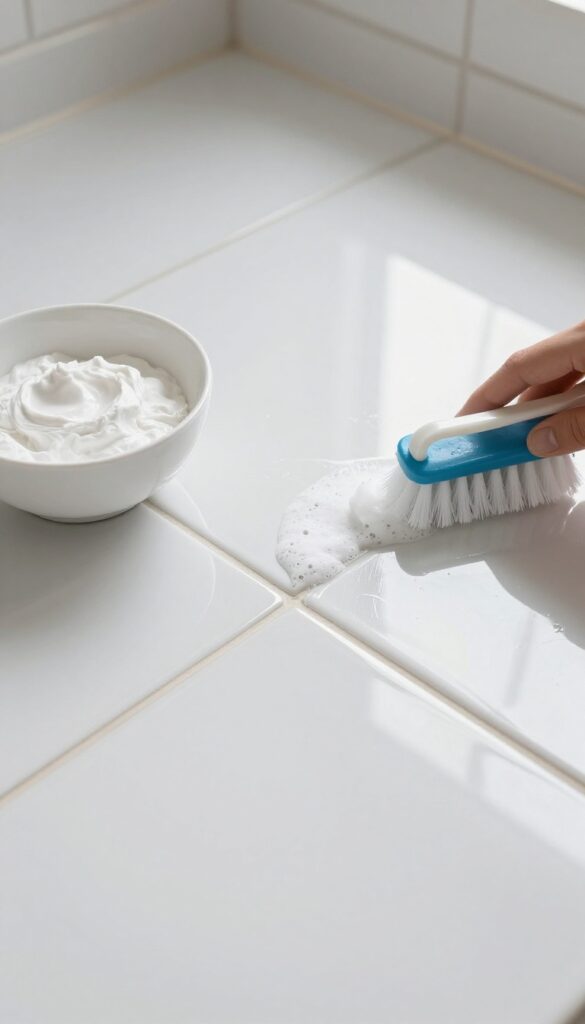
1. Baking Soda and Vinegar Paste
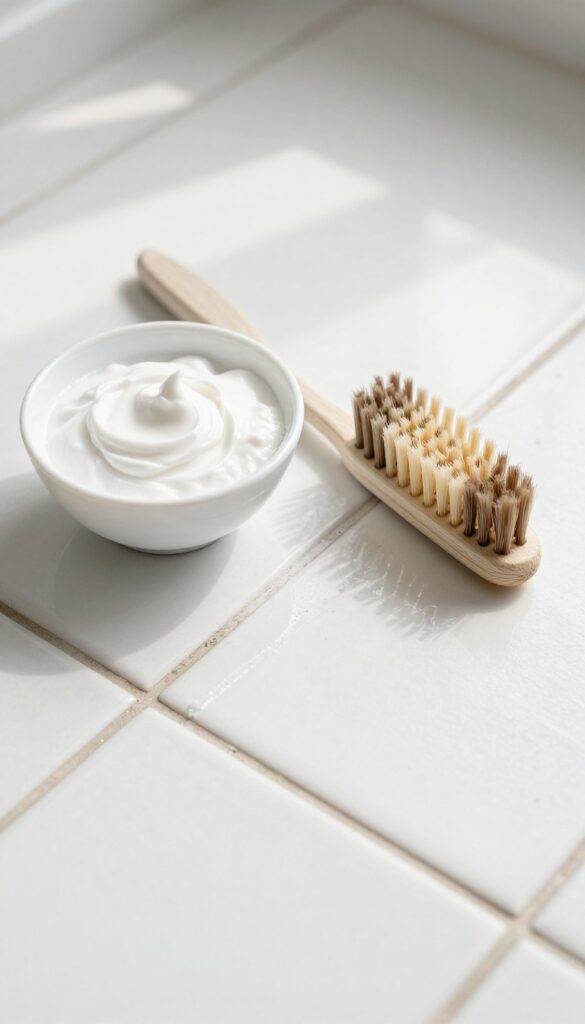
Few things cut through grout grime like the classic combo of baking soda and vinegar. The fizzy reaction helps lift dirt from deep within the porous lines, while the mild abrasiveness of baking soda scrubs away residue without scratching tiles. This method is especially great for light to moderate staining and for anyone who prefers a chemical-free approach.
Mixing The Paste
In a small bowl, combine three parts baking soda with one part white vinegar. Stir until it forms a thick, spreadable paste. If it's too runny, add more baking soda; too dry, a splash more vinegar.
You want a consistency similar to toothpaste.
Applying And Scrubbing
Use an old toothbrush or a grout brush to apply the paste directly onto the grout lines. Let it sit for 5–10 minutes—the fizzing action is working to loosen dirt. Then scrub firmly along the grout lines.
For stubborn spots, let the paste dry completely before scrubbing; the dried powder acts as an extra abrasive.
Rinsing And Drying
Once you've scrubbed all the lines, rinse the area thoroughly with clean water. Use a damp cloth or sponge to wipe away any residue. Follow up by drying the tiles with a towel to prevent water spots or mold growth.
Your grout should look noticeably brighter.
2. Hydrogen Peroxide and Baking Soda
When your light-colored grout needs a serious brightness boost, hydrogen peroxide and baking soda make a powerful team. The peroxide acts as a gentle bleach while the baking soda gives you scrubbing grit. Together, they create a fizzing paste that lifts stains without harsh fumes.
Mix 1/2 cup of baking soda with 1/4 cup of hydrogen peroxide until you get a thick paste. Apply it to the grout lines using a small brush or your finger. Let it sit for about 10 minutes—you'll see it start to bubble as it works.
Then scrub with a stiff brush and rinse with water. For stubborn spots, add a drop of dish soap to the mix.
Why This Combo Works
Hydrogen peroxide is a mild oxidizing agent that breaks down organic stains and brightens surfaces. Baking soda is a mild abrasive that scrubs without scratching tile. The fizzing action helps lift dirt from the porous grout.
Best For Light Grout
This method shines on white, off-white, or beige grout. The peroxide naturally whitens, so it's ideal for restoring that fresh look. Avoid it on dark grout, as it can lighten the color unevenly.
Pro Tips For Best Results
Use a toothbrush or grout brush to work the paste into the lines. If the mix dries out before you finish, add a few more drops of peroxide. Rinse thoroughly to avoid any residue that could attract new dirt.
3. Steam Cleaner for Deep Grout
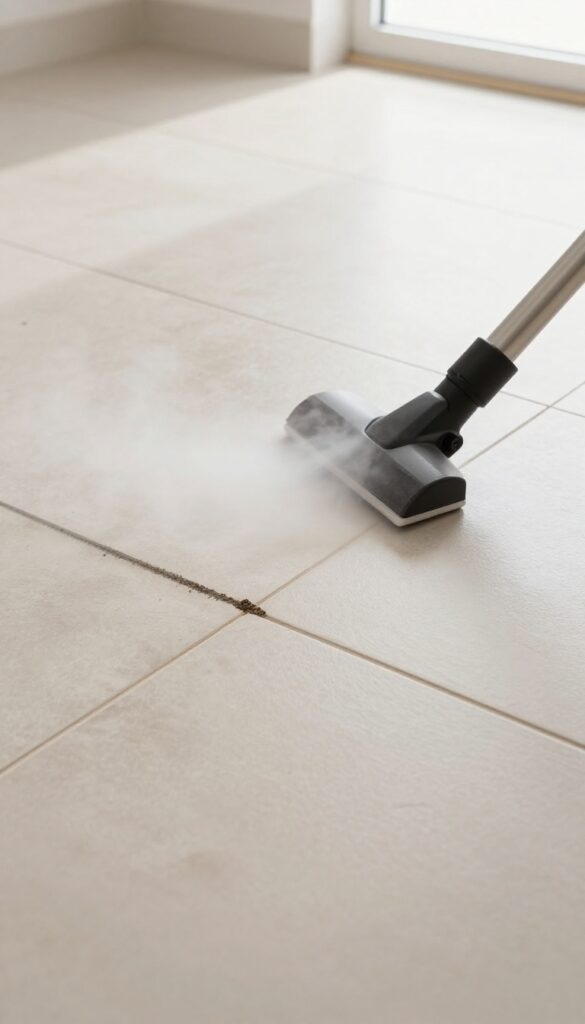
If you want a deep clean without scrubbing or chemicals, a steam cleaner is your best friend. The high heat loosens dirt that's been baked into grout for years, and the targeted attachment lets you focus on the lines without soaking the whole floor. It's especially useful for large tiled areas where hand scrubbing would take forever.
A handheld steam cleaner with a grout attachment delivers a concentrated blast of steam right into the porous grout lines. The heat breaks down grease, soap scum, and embedded dirt on contact. After steaming, simply wipe away the loosened grime with a microfiber cloth or a dry towel.
No rinsing, no residue, and no harsh fumes. This method works great on ceramic, porcelain, and natural stone tiles, but always check your manufacturer's guidelines for steam use on delicate surfaces like marble.
Why Steam Works So Well
Steam cleaning uses only water heated to over 200°F. The high temperature kills mold spores and bacteria while dissolving stubborn grime. Because there are no chemicals, it's safe around kids and pets.
Plus, the steam penetrates deep into the grout, cleaning where brushes can't reach.
How To Use A Steam Cleaner On Grout
Start by vacuuming or sweeping the floor to remove loose debris. Fill your steam cleaner with water and let it heat up. Attach the small brush nozzle or grout tool.
Work in small sections, holding the nozzle against the grout line for a few seconds. Move slowly to let the steam do its job. Wipe away the dirty water with a clean cloth before moving to the next section.
Pro Tips For Best Results
For heavily stained grout, go over the line twice. Let the steam sit for a few seconds before wiping. If your steam cleaner has adjustable steam settings, use a higher setting for tough stains.
Always test on an inconspicuous area first, especially on older grout that might be loose. After cleaning, allow the floor to dry completely to prevent mold regrowth.
4. Toothbrush and Dish Soap
For routine maintenance, nothing beats the simplicity of a toothbrush and a drop of dish soap. This gentle method lifts everyday dirt without damaging grout or stripping sealant. It’s perfect for brightening lines between weekly mops.
Mix a few drops of liquid dish soap into a cup of warm water. Dip an old toothbrush (a firm one works best) into the solution and scrub along grout lines in small circular motions. Focus on high-traffic areas or spots that look dingy.
Rinse with a damp cloth or sponge, then dry with a towel to prevent moisture from seeping in. This trick is ideal for light cleaning and upkeep, not for deep-set stains.
Why Dish Soap Works
Dish soap is a mild degreaser that breaks down oils and dirt without harsh chemicals. It’s safe for all grout types and won’t discolor or erode the material. Plus, it’s already in your kitchen, so there’s no special shopping needed.
Best Practices For Scrubbing
Use a toothbrush with firm bristles to reach into grout pores. Scrub in a back-and-forth motion, then switch to circles to loosen stubborn bits. Rinse thoroughly—soap residue can attract more dirt if left behind.
Blot dry with a clean towel to speed up drying.
When To Use This Method
This trick shines as a weekly or bi-weekly maintenance step. It’s not meant for mold, mildew, or heavy discoloration. Use it after sweeping or vacuuming to keep grout looking fresh between deeper cleans.
5. Grout Brush with Stiff Bristles
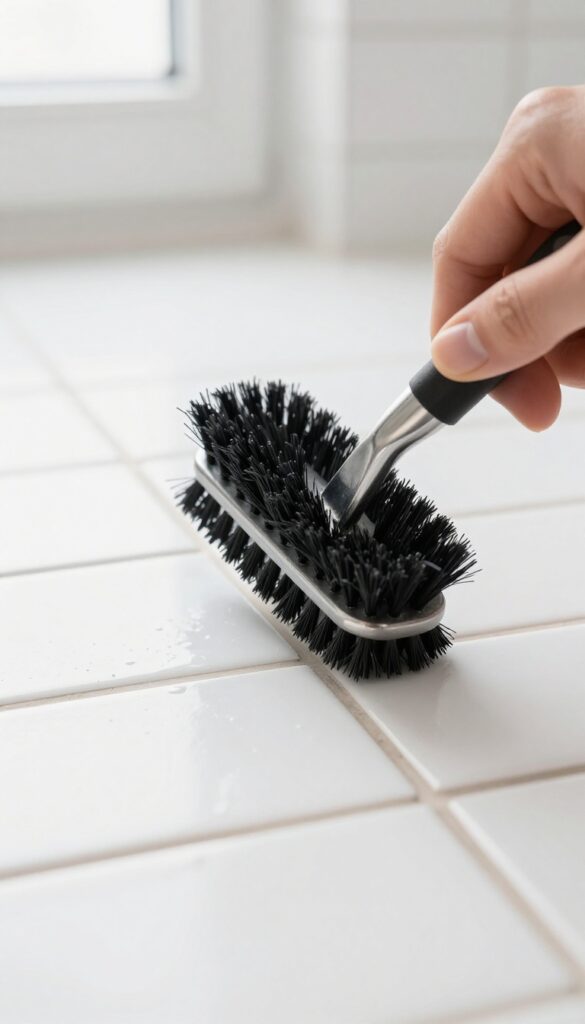
A toothbrush can only take you so far. When grout lines are deeply stained or packed with dirt, you need a tool that can really dig in. A dedicated grout brush with stiff, angled bristles is designed to get into those narrow grooves without scratching your tiles.
It's a small investment that makes a big difference in your scrubbing efficiency.
Using the right brush saves time and elbow grease. The stiff bristles break up grime that softer brushes leave behind, while the angled head lets you work along the lines naturally. Pair it with your favorite cleaning solution—whether it's baking soda paste or a commercial cleaner—and you'll see results faster.
Just remember to rinse the brush after each use to keep it effective.
Why A Dedicated Grout Brush Works Better
Regular scrub brushes have bristles that are too soft or too wide to fit into grout lines. A grout brush features dense, stiff bristles that are narrow enough to reach deep into the porous material. The angled handle also reduces wrist strain, so you can scrub longer without fatigue.
How To Use It Effectively
Apply your chosen cleaner to the grout lines and let it sit for a few minutes to loosen dirt. Then, dip the brush in warm water and scrub in a back-and-forth motion along each line. Focus on one small section at a time, rinsing the brush frequently to avoid redepositing grime.
Maintenance Tips For Your Brush
After each use, rinse the brush thoroughly with warm water and shake off excess. Hang it to dry with bristles facing down to prevent water from pooling in the handle. Replace the brush when bristles become frayed or lose stiffness—usually every few months with regular use.
6. Oxygen Bleach Soak
Oxygen bleach is a gentler alternative to chlorine bleach that still delivers serious stain-fighting power. It works by releasing oxygen bubbles that lift dirt and discoloration from porous grout without damaging the material. This method is especially good for light-colored grout that has yellowed over time, and it's safe to use on colored grout too, as long as you test a small area first.
Oxygen bleach soak is a deep-cleaning method that requires minimal scrubbing. The oxygen bubbles penetrate the grout's pores to break down organic stains like food spills, mildew, and general grime. Unlike chlorine bleach, it won't weaken or discolor your grout, making it a safer choice for regular maintenance.
How To Mix And Apply
Start by dissolving oxygen bleach powder (like OxiClean) in warm water according to the package directions—usually about 1 scoop per gallon. Stir until fully dissolved, then pour or spray the solution onto the grout lines until they're saturated. Let it sit for 15 to 20 minutes; you'll see bubbles forming as it works.
For stubborn stains, you can let it soak up to 30 minutes, but avoid letting it dry completely.
Scrubbing And Rinsing
After the soak, use a stiff-bristled brush or an old toothbrush to gently scrub the grout lines. The bleach will have loosened the dirt, so you won't need to press hard. Rinse thoroughly with clean water and wipe away any residue with a damp cloth.
If you notice leftover suds, repeat the rinse until the water runs clear.
Safety Tips For Colored Grout
Oxygen bleach is generally safe for colored grout, but it's always smart to test a hidden spot first. Apply a small amount of the solution to an inconspicuous area and wait 15 minutes. If the color doesn't change, you're good to go.
Also, avoid using metal brushes or abrasive pads that could scratch the grout surface.
7. Lemon Juice and Cream of Tartar
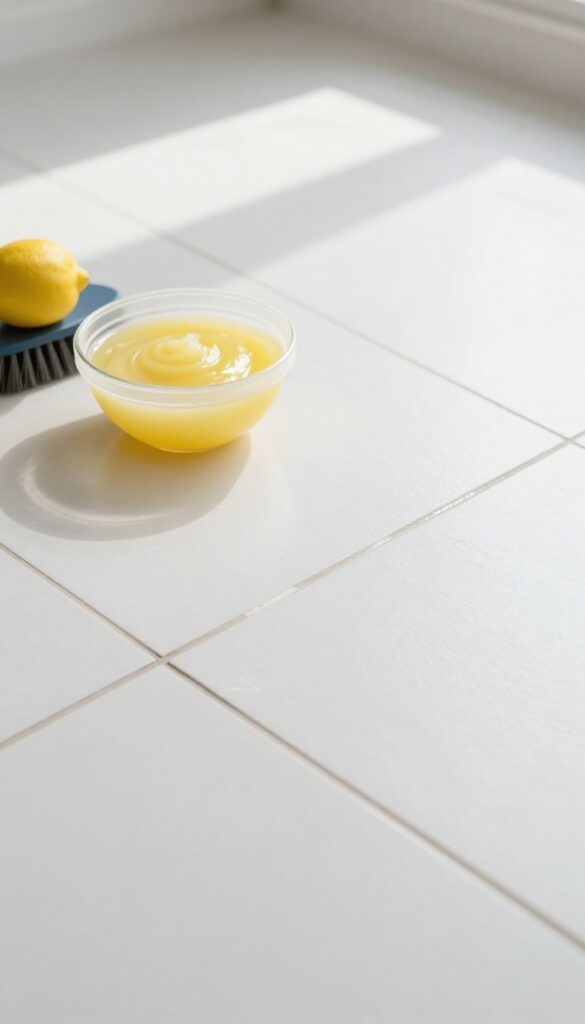
When stubborn stains won't budge, a natural acid combo can work wonders. Lemon juice and cream of tartar create a gentle yet effective paste that tackles discoloration without harsh fumes. This dynamic duo is especially good for whitening grout that has yellowed over time.
The citric acid in lemon juice breaks down grime, while cream of tartar acts as a mild abrasive to lift stains.
Mix equal parts lemon juice and cream of tartar to form a thick paste. Apply it directly to the stained grout lines, let it dry completely (about 30 minutes), then rinse with warm water and scrub lightly with a brush. The acidity works on contact, so you don't need to let it sit for hours.
For extra stubborn spots, you can let the paste dry overnight. Just make sure to test it on a small hidden area first, especially if your grout is unsealed, as prolonged acid exposure can etch natural stone tiles.
Why This Combo Works So Well
Lemon juice is a natural bleaching agent that targets organic stains like coffee, tea, and food spills. Cream of tartar, a byproduct of winemaking, is a fine powder that gently polishes without scratching. Together, they create a paste that clings to vertical grout lines and delivers stain-fighting power exactly where you need it.
Best Uses And Precautions
This method is ideal for light-colored grout that has yellowed or has mild to moderate staining. Avoid using it on unsealed grout or natural stone tiles like marble or limestone, as the acid can cause damage. Always rinse thoroughly after treatment to remove any residue.
8. Magic Eraser for Surface Stains
Melamine foam erasers, often sold as magic erasers, are surprisingly effective at lifting surface stains from grout. They work like a fine abrasive sponge, gently buffing away marks without the need for harsh chemicals. This method is best for light to moderate stains on sealed or well-cured grout.
Dampen a melamine foam eraser and gently rub over grout lines. Works well for surface marks and scuffs. Rinse afterward to remove residue.
How To Use A Magic Eraser On Grout
Cut the eraser into smaller pieces to make it easier to handle. Dampen it slightly with water—don't soak it. Gently rub the eraser along the grout lines, applying light pressure.
The eraser will start to wear down as it picks up dirt. Rinse the area with clean water and wipe away any residue.
When To Skip This Method
Avoid using a magic eraser on unsealed or porous grout, as the abrasiveness can damage the surface. It's also not ideal for deep-set stains or mold. Stick to surface marks like scuffs, dirt, or light discoloration.
Pro Tip For Stubborn Marks
For extra stubborn spots, dip the damp eraser in a tiny bit of baking soda. This boosts its cleaning power without being too harsh. Test on an inconspicuous area first to make sure it doesn't affect the grout color.
9. Commercial Grout Cleaner Spray
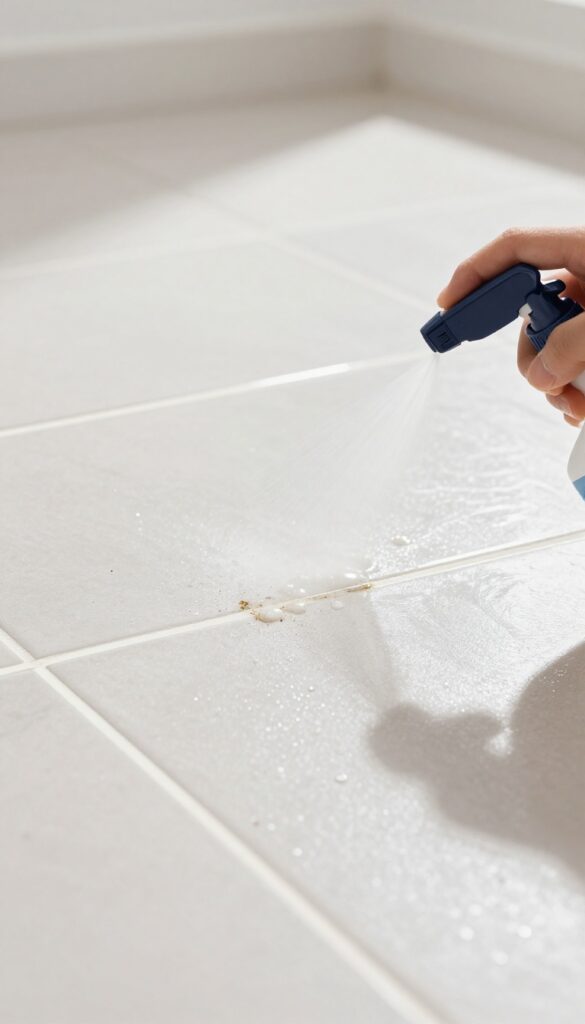
When home remedies aren't cutting it, a dedicated commercial grout cleaner spray can be a game-changer. These products are formulated specifically to break down the grime that builds up in porous grout lines. The key is choosing the right one and using it correctly.
Not all grout cleaners are created equal. A pH-neutral formula is safest for most tile types, especially natural stone like marble or travertine. Acidic or alkaline cleaners can etch or discolor certain surfaces, so always check the label.
For ceramic or porcelain tile, you have more flexibility, but pH-neutral is still a solid choice for everyday cleaning.
How To Apply
Spray the cleaner directly onto the grout lines, saturating them thoroughly. Let it dwell for the time recommended on the bottle—usually 5 to 15 minutes. This dwell time is crucial; it allows the chemicals to penetrate and loosen the dirt.
Don't let it dry out, or it may leave a residue.
Scrubbing And Rinsing
After dwelling, scrub the grout lines with a stiff-bristled brush. A grout brush or an old toothbrush works well. For larger areas, a scrub brush on a long handle can save your knees.
Rinse thoroughly with clean water to remove all cleaner residue. Any leftover product can attract more dirt over time.
Safety Tips
Always wear gloves and ensure good ventilation when using commercial cleaners. Some products have strong fumes. Test the cleaner on an inconspicuous area first to make sure it doesn't damage your tile or grout color.
Follow the label instructions exactly for the best and safest results.
10. Bleach Pen for Spot Treatment
Sometimes you just have a few stubborn spots or mildew patches that refuse to budge. Instead of mixing up a full batch of cleaner, a bleach pen offers pinpoint precision. It's like a white-out marker for your grout lines.
A bleach pen is a simple tool for tackling isolated stains without affecting surrounding tiles. The thick gel clings to vertical or horizontal grout lines, giving the bleach time to work. This method is especially handy for bathroom tile or kitchen backsplashes where mildew tends to show up in small clusters.
How To Use A Bleach Pen
Start by wiping the grout area clean of loose dirt. Twist the pen tip to release the gel, then draw it carefully along the grout line. Let it sit for 5 to 10 minutes—longer for tough stains.
Rinse thoroughly with water and dry with a cloth. Avoid getting the gel on porous tiles like natural stone.
When It Works Best
Bleach pens excel on white or light-colored grout where mildew and organic stains are the issue. They're less effective on deeply embedded dirt or old discoloration. For best results, use them as a maintenance tool between deeper cleanings.
11. Pumice Stone for Hardened Grime
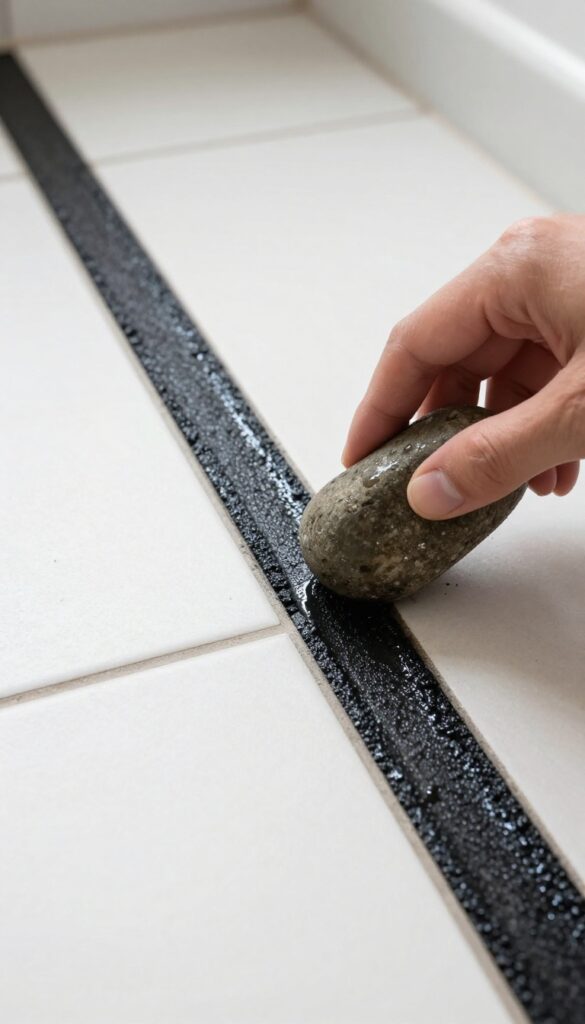
When grout has layers of hardened grime that scrubbing just won't touch, a pumice stone can be your secret weapon. It's a natural abrasive that works like fine sandpaper, but when wet, it's gentle enough to avoid scratching most tile surfaces. This trick is especially useful for older grout lines that have years of buildup.
Pumice stones are porous volcanic rocks that wear down as you use them, exposing fresh abrasive surface. They're ideal for tackling tough, crusty deposits like lime scale, soap scum, or old wax buildup on grout. The key is to keep the stone wet and use light pressure—let the stone do the work.
How To Use A Pumice Stone On Grout
Start by soaking the pumice stone in water for a few minutes. Wet the grout lines as well. Gently rub the stone back and forth over the hardened deposits, rinsing the stone frequently to remove debris.
You'll see the grime lift away as the stone wears down. Rinse the area thoroughly when done.
Important Precautions
Pumice stones can scratch softer tiles like marble, travertine, or polished ceramic. Always test on an inconspicuous area first. If the tile feels rough after a test rub, don't use this method.
Stick to unglazed or matte tiles for best results, and never use a dry stone—it will be too harsh.
When Pumice Works Best
This technique shines on stubborn, crusty stains that have been there for months or years. It's great for removing hard water rings around drains or thick soap scum in showers. For fresh or light stains, skip the pumice and try a gentler method first.
12. Vinegar and Water Spray
A simple vinegar and water spray is one of the most reliable go-to solutions for cleaning grout. It's cheap, non-toxic, and surprisingly effective at cutting through everyday dirt and mild stains. Just keep in mind that vinegar is acidic, so it's best to avoid it on unsealed or natural stone grout, as it can cause damage over time.
This method works best for routine maintenance or light discoloration. It's not strong enough for deep-set stains or mold, but for regular upkeep, it's a solid choice. Always test in a small hidden area first to make sure your grout can handle it.
How To Mix And Apply
Fill a spray bottle with equal parts white vinegar and water. Shake gently to combine. Spray the solution directly onto the grout lines until they're wet but not dripping.
Let it sit for about five minutes to break down the grime. Scrub with a stiff-bristled brush or an old toothbrush, then rinse thoroughly with clean water. Wipe away any excess moisture with a towel.
When To Use This Method
This spray is perfect for light cleaning between deeper scrubs. Use it after sweeping or mopping to keep grout looking fresh. It's also great for spot-cleaning small areas like kitchen backsplashes or bathroom floors.
Just avoid using it on unsealed grout, as the acid can weaken the material over time.
Safety And Precautions
Vinegar can damage natural stone like marble or limestone, so only use it on ceramic, porcelain, or sealed grout. Always ventilate the area well, as the smell can be strong. If you have unsealed grout, consider sealing it first before using vinegar-based cleaners.
13. Baking Soda and Water Scrub
Baking soda is one of those household staples that pulls double duty in the cleaning department. Mixed with a little water, it turns into a gentle abrasive paste that lifts dirt from grout without scratching the tile. This method is perfect for regular maintenance or when you want to freshen up lines without using anything harsh.
Mix about three parts baking soda with one part water to form a spreadable paste. Apply it to the grout lines using an old toothbrush or a small scrub brush. Let it sit for five to ten minutes so the baking soda can work on loosening grime.
Then scrub in small circles, focusing on darker areas. Rinse with water and wipe away any residue with a damp cloth. For extra whitening power, add a splash of lemon juice or hydrogen peroxide to the paste.
Why Baking Soda Works
Baking soda is mildly alkaline, which helps break down acidic dirt and grease. Its fine texture acts like a soft scrubbing powder that polishes grout without wearing it down. It's also non-toxic, so you can use it around kids and pets without worry.
Best For Light Cleaning
This method works best on grout that isn't heavily stained or moldy. Use it weekly or bi-weekly to keep grout looking bright. For deeper stains, follow up with a stronger cleaner like vinegar or hydrogen peroxide.
Tips For Better Results
Use a stiff-bristled brush for more scrubbing power. If the paste dries out, spritz with a little water. Rinse thoroughly to avoid white residue.
Test on a hidden area first to make sure your tile is colorfast.
14. Hydrogen Peroxide Direct Application
For a quick whitening boost, hydrogen peroxide is a surprisingly effective option. The bubbling action helps lift stains from deep within the grout pores while also killing mildew and bacteria. It's especially handy for light-colored grout that has yellowed or dulled over time.
Hydrogen peroxide works best on lighter grout where whitening is the main goal. It's gentle enough for regular use but strong enough to tackle organic stains like mildew or food spills. The 3% solution is safe for most tile types, but always test on an inconspicuous spot first.
This method is ideal for small areas like kitchen backsplashes or bathroom walls where precision matters.
How To Apply
Pour 3% hydrogen peroxide directly onto the grout lines. You can use a small squeeze bottle or a spray bottle for better control. Let it sit for about 10 minutes—you'll see it bubble as it breaks down dirt and stains.
After the bubbling subsides, scrub the grout with a stiff brush, then rinse thoroughly with water. For stubborn spots, repeat the process or let it sit longer.
When To Use This Method
This trick is perfect for whitening grout that has become discolored from age or mildew. It's also a good choice for disinfecting kitchen or bathroom grout without harsh fumes. Avoid using hydrogen peroxide on dark grout, as it can lighten the color.
If you have natural stone tile, check compatibility first, as peroxide can sometimes etch certain stones.
Safety Tips
Wear gloves to protect your hands from prolonged exposure. Keep the area ventilated, especially if you're working in a small space. Don't mix hydrogen peroxide with vinegar or bleach, as this can create harmful fumes.
Store the bottle out of reach of children and pets.
15. Dishwasher Tablet Trick
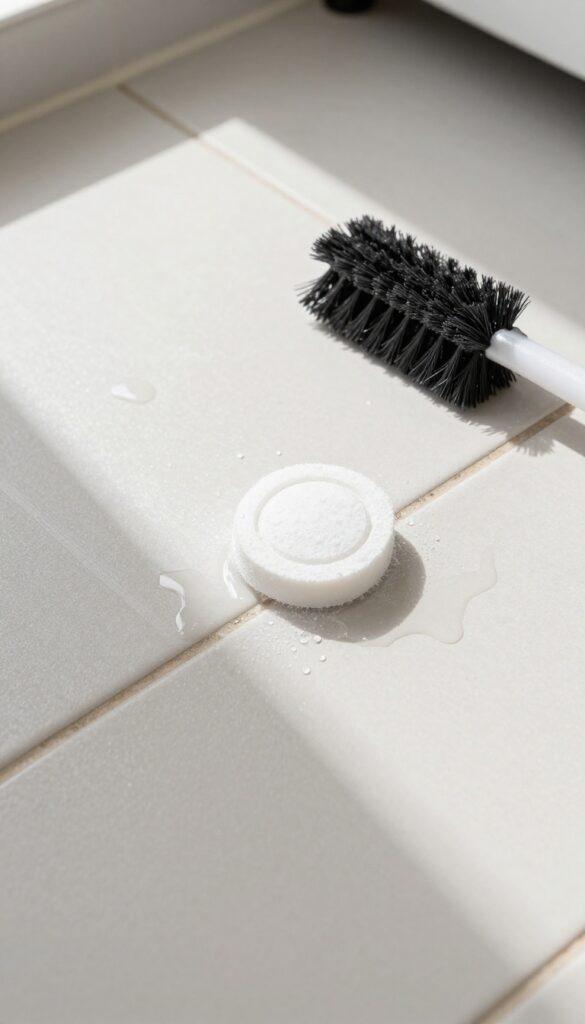
If you have a box of dishwasher tablets under the sink, you already have a powerful grout cleaner. These tablets are packed with enzymes and surfactants designed to break down tough food residue, and they work just as well on greasy grime in your tile lines. The best part?
You only need one tablet and a little warm water to get started.
Drop one dishwasher tablet into a bowl of warm water and let it dissolve completely. Dip a stiff scrub brush into the solution and work it into the grout lines. The enzymes go to work on embedded grease and soap scum, lifting stains with minimal elbow grease.
Let the solution sit for about five minutes, then scrub again and rinse thoroughly with clean water. Your grout should look noticeably brighter.
Why It Works
Dishwasher tablets contain a blend of enzymes, bleach, and surfactants. The enzymes specifically target protein-based stains and grease, while the bleach helps whiten the grout. This combination makes them especially effective for kitchen floors or bathroom grout that sees a lot of soap residue.
Best Surfaces And Safety Tips
This method is safe for most ceramic and porcelain tiles, but avoid using it on natural stone like marble or travertine, as the bleach can etch the surface. Always test a small hidden area first. Rinse thoroughly after cleaning to remove any residue that could attract more dirt.
16. Sealing Grout After Cleaning
You've put in the elbow grease and your grout lines are finally bright again. Now comes the most important step to keep them that way: sealing. Grout is naturally porous, so it soaks up spills and dirt like a sponge.
A good sealer creates a protective barrier that makes future cleaning much easier.
Sealing isn't complicated, but it does require a little patience. Start with completely dry grout—wait at least 24 hours after cleaning. Apply the sealer using a small applicator bottle with a fine tip, running it along each grout line.
Don't flood the area; a thin, even coat is all you need. Let it dry completely according to the product instructions, usually a few hours. For best results, apply a second coat.
Once sealed, your grout will repel moisture and stains, keeping those bright lines looking fresh for months.
Choosing The Right Sealer
Not all sealers are the same. Penetrating sealers soak into the grout and protect from within, while membrane-forming sealers create a surface coating. For most tile floors, a penetrating sealer is a solid choice—it doesn't change the grout's appearance and lasts longer.
Look for one labeled for porous surfaces and check if it's suitable for your grout type (sanded or unsanded).
Application Tips For Even Coverage
Work in small sections, about 2×2 feet at a time. Use a foam brush or the applicator bottle's tip to carefully trace each grout line. Wipe away any excess sealer that gets on the tile surface immediately with a clean cloth.
If it dries on the tile, it can leave a hazy film. Let the sealer cure for the recommended time before walking on the floor or exposing it to water.
How Often To Reseal
Sealer doesn't last forever. In high-traffic areas like kitchen floors, you may need to reseal every 6 to 12 months. In bathrooms or less-used spaces, every 2 to 3 years might be enough.
A simple test: sprinkle a few drops of water on the grout. If they bead up, the sealer is still working. If they soak in quickly, it's time to reseal.
17. Regular Maintenance Routine
Keeping grout bright doesn't have to mean a deep scrub every time. A few small habits woven into your weekly cleaning can stop dirt before it settles in. The goal is simple: make grout cleaning so easy it becomes automatic.
A regular maintenance routine is the secret to grout that stays bright without constant hard work. By sweeping or vacuuming often and wiping spills right away, you prevent the buildup that turns grout dark. A quick weekly scrub with a mild cleaner keeps the surface fresh and reduces the need for deep cleaning sessions.
Sweep Or Vacuum Frequently
Dust and dirt are the main culprits that dull grout. When you walk across the floor, those particles grind into the porous lines. A quick sweep or vacuum a few times a week removes the grit before it can settle in.
Focus on high-traffic areas like the kitchen or entryway.
Wipe Spills Immediately
Liquids seep into grout fast, especially acidic ones like juice or wine. The moment something spills, blot it up with a cloth or paper towel. Don't let it sit—dried spills are much harder to remove and can leave permanent stains.
Weekly Quick Scrub
Once a week, give your grout a quick once-over with a soft brush and a gentle cleaner. A mix of warm water and a drop of dish soap works fine. This step takes just a few minutes but prevents grime from building up.
Your grout will stay brighter and you'll avoid heavy scrubbing later.
FAQ
Can I use bleach on colored grout?
Bleach can discolor colored grout. Stick to oxygen bleach or pH-neutral cleaners for tinted grout to avoid fading.
How often should I clean floor grout?
For high-traffic areas, clean grout every 2-4 weeks. Light traffic areas can go 1-2 months between deep cleans.
Is steam cleaning safe for all tile floors?
Yes, steam cleaning is safe for ceramic, porcelain, and natural stone tiles. Avoid on unsealed or cracked grout.
What's the best homemade grout cleaner?
A paste of baking soda and hydrogen peroxide works well for most stains. For grease, add a drop of dish soap.
Do I need to seal grout after cleaning?
Sealing is recommended to prevent future stains and make cleaning easier. Reapply sealer every 1-2 years.
Conclusion
Bright grout lines are achievable with the right approach and a little elbow grease. Whether you prefer natural solutions like baking soda or tools like a steam cleaner, these 17 tricks cover every level of dirt. Pick the method that matches your grout type and stain severity.
Regular maintenance will keep your tile floors looking fresh for years. Try a couple of these techniques and see which one works best for your home.