13 Elegant Kitchen Island Back Panel Ideas That Add Function and Style
The back panel of your kitchen island often goes unnoticed, but it's prime real estate for both storage and style. Whether you're dealing with a small prep area or a sprawling entertainer's hub, that vertical surface can solve everyday clutter and add a layer of personality.
The trick is choosing a solution that fits your cooking habits and the room's vibe. From clever open shelving to warm natural textures, these 13 ideas turn a plain panel into a hardworking feature.
You don't need a full remodel—just a bit of creativity and the right materials.
1. Open Shelving for Everyday Access
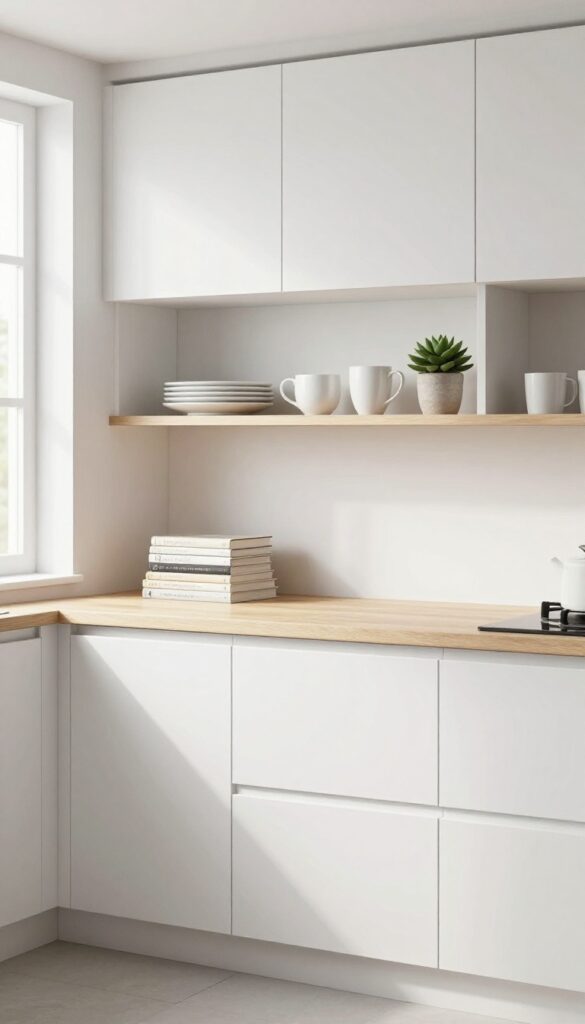
Open shelves on the back of your island put your most-used items right where you need them, without making the space feel closed off. This setup works particularly well for casual kitchens where you want quick access to plates, mugs, or a favorite cookbook. It also gives you a chance to show off a bit of personality through your dishware and styling.
Open shelving on the back panel is a practical choice for anyone who wants to keep daily essentials within arm's reach. By skipping cabinet doors, you create an open, inviting look that makes the island feel less bulky. Plus, it's a great way to break up a large expanse of cabinetry and add visual interest.
Choosing The Right Shelf Depth
Think about what you'll store—if it's mostly coffee mugs and small plates, a shallower shelf (around 8-10 inches) works fine. For cookbooks or large mixing bowls, go deeper, but keep in mind that deeper shelves can make the island feel more massive. A good rule of thumb is to match the shelf depth to the size of the items you use most often.
Styling Your Shelves
Arrange items in a way that's both functional and pleasing to the eye. Group similar colors or materials together, and leave a little breathing room between objects. Use a mix of everyday pieces and a few decorative accents like a small plant or a ceramic vase.
Just remember to keep the most-used items at the easiest-to-reach height.
Maintenance And Durability
Because everything is out in the open, dust and grease can settle on your dishes and shelves. Wipe the shelves regularly with a damp cloth, and consider using a gentle cleaner that's safe for the shelf material. If you're worried about grease near the stove, choose a shelf material that's easy to wipe down, like metal or sealed wood.
2. Decorative Tile Backsplash
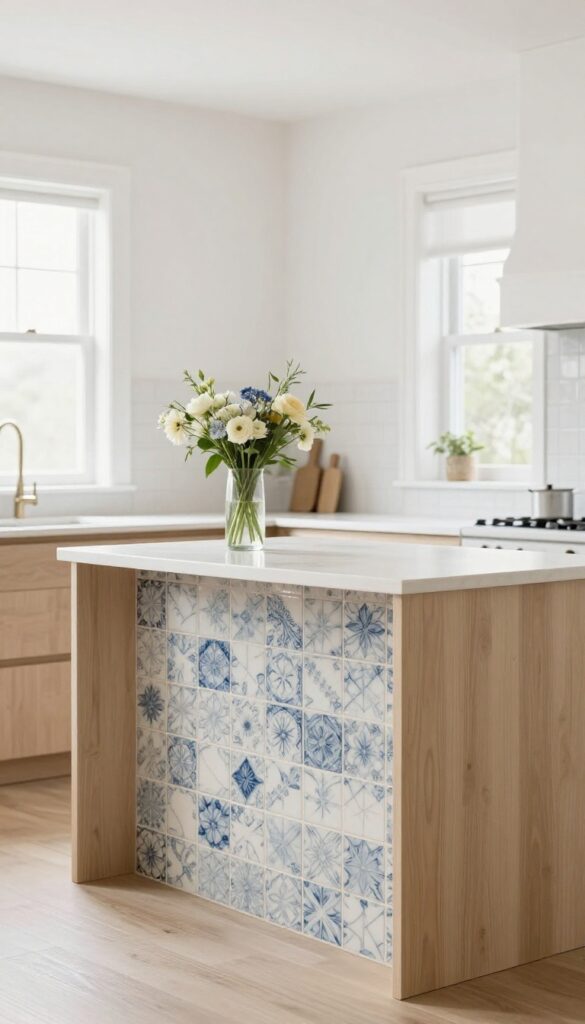
Extending your kitchen backsplash onto the island's back panel is a clever way to tie the whole room together. It’s not just about looks—tile also protects the surface from splashes and scuffs, which is a big win if you’re constantly cooking or baking. Plus, with so many tile options out there, you can easily match your island to the rest of your kitchen or make it the star of the show.
A tile backsplash on the back of your island does double duty: it adds a layer of protection and gives you a chance to play with texture and pattern. Whether you go for a bold Moroccan-inspired print or a simple subway tile, the effect is immediate. The key is to choose a tile that complements your countertops and cabinetry without overwhelming the space.
Choosing The Right Tile
Start by thinking about the overall vibe of your kitchen. If you have a modern, minimalist space, a large-format porcelain tile in a matte finish might be the way to go. For a more traditional or farmhouse feel, classic white subway tile or handmade ceramic tiles add charm.
If you’re feeling adventurous, a colorful encaustic tile can become a conversation piece. Just remember—the back panel is a relatively small area, so you can afford to be a little bolder than you might be with a full backsplash.
Patterns That Pop
A patterned tile can turn the back of your island into a focal point. Herringbone, chevron, and basketweave patterns are all popular choices that add visual interest without being too busy. If you prefer a more subtle look, consider a textured tile that catches the light, like a crackle-glaze or a ribbed tile.
The goal is to find something that makes you smile every time you walk into the kitchen.
Installation Tips
Installing tile on the back panel is a straightforward DIY project, but there are a few things to keep in mind. Make sure the surface is clean and dry before you start. Use a good quality mastic or thin-set mortar, and don’t forget to seal the grout once it’s dry—especially if you’re using a light-colored grout that could stain.
If you’re not confident in your tiling skills, hiring a pro is always a safe bet, but for a small area, it’s definitely manageable.
3. Chalkboard or Whiteboard Panel
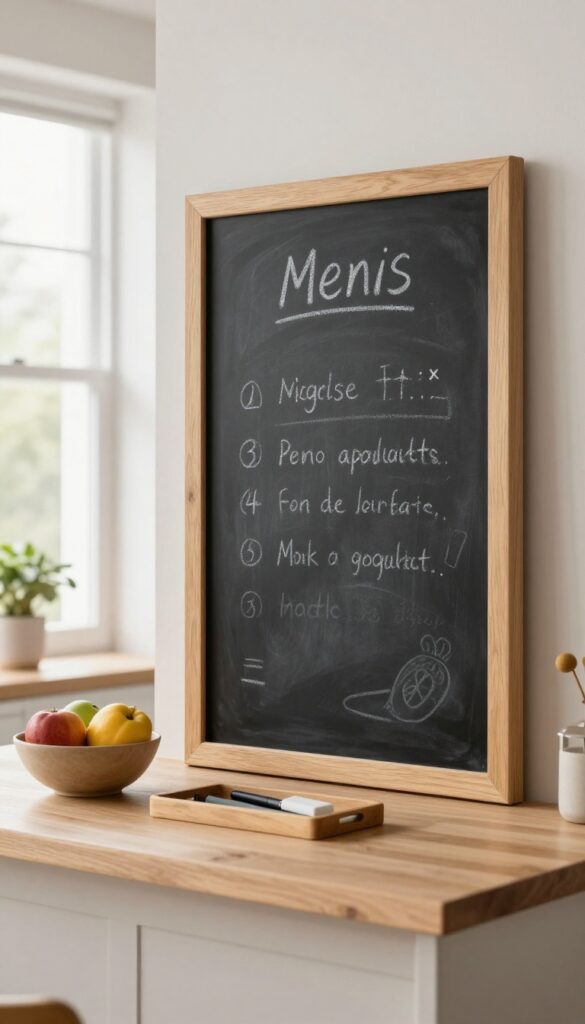
A chalkboard or whiteboard back panel turns your kitchen island into a central command center. It’s a simple, budget-friendly upgrade that adds serious function without eating into your storage space. Whether you’re planning meals, keeping a running grocery list, or leaving sweet notes for family members, this idea keeps everything visible and organized.
One of the best things about a chalkboard or whiteboard panel is how flexible it is. You can change it as often as you like, and it works for any family dynamic. Plus, it’s a great way to keep the busiest room in the house running smoothly.
Choosing The Right Surface
You can go with a traditional chalkboard, which has that classic matte look, or opt for a modern whiteboard that’s easier to erase. If you love the idea of chalk but hate the dust, try a liquid chalk marker on a sealed chalkboard surface. Whiteboards are great for a sleek, contemporary feel and pair well with stainless steel appliances.
Placement And Size
For the best visibility, place the panel at eye level or slightly below, so it’s easy to write on while standing. You can cover the entire back panel for a bold statement, or frame a smaller section to keep it subtle. If your island has seating, position the board so it’s visible to people sitting at the counter—it’s perfect for jotting down ideas during a casual chat.
Styling And Maintenance
To keep the area looking tidy, add a small tray or ledge below the board for markers, chalk, and an eraser. Use a damp cloth to wipe the surface clean regularly, and avoid abrasive cleaners that can damage the finish. You can also add a few decorative elements, like a framed quote or a small shelf with a plant, to make the panel feel intentional.
4. Bamboo or Rattan Panels for Warmth
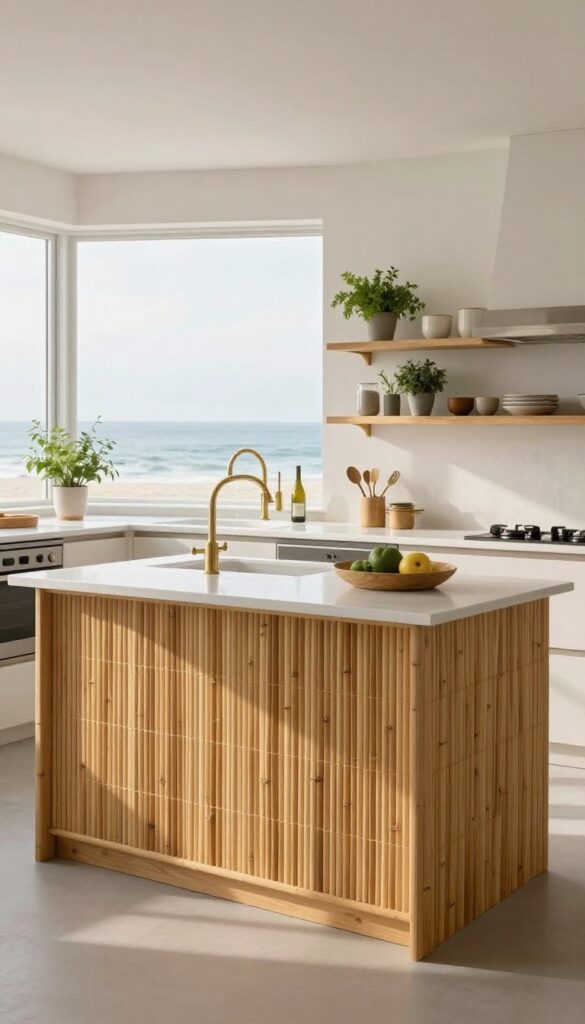
Natural materials instantly soften the hard lines of a kitchen island, and bamboo or rattan panels deliver that effect beautifully. These textures bring a relaxed, earthy feel that pairs well with modern, coastal, or bohemian spaces. Beyond looks, they’re surprisingly practical—durable, easy to clean, and available in various weaves to suit your taste.
Bamboo and rattan panels offer a unique way to add warmth and character to your kitchen island. They create a visual break from typical wood or tile surfaces, making the island feel more inviting. Plus, they’re lightweight and can be installed over existing panels or used as sliding doors for hidden storage.
Choosing The Right Weave
The weave pattern sets the tone. A tight, flat weave looks sleeker and more contemporary, while a loose, open weave adds a breezy, coastal vibe. Consider the scale of your island—a large panel can handle a bolder pattern, but a small one might feel busy with an intricate design.
Installation Options
You can attach bamboo or rattan directly to the back panel using adhesive or small nails. For a more refined look, frame the material with wood trim. If you want flexibility, mount it on a sliding track so you can access storage behind it.
Pairing With Other Materials
Bamboo and rattan work beautifully with natural stone, matte black hardware, or warm brass. Combine them with open shelving or a few potted herbs to enhance the organic feel. Keep the rest of the island simple so the texture remains the star.
5. Reclaimed Wood Accent
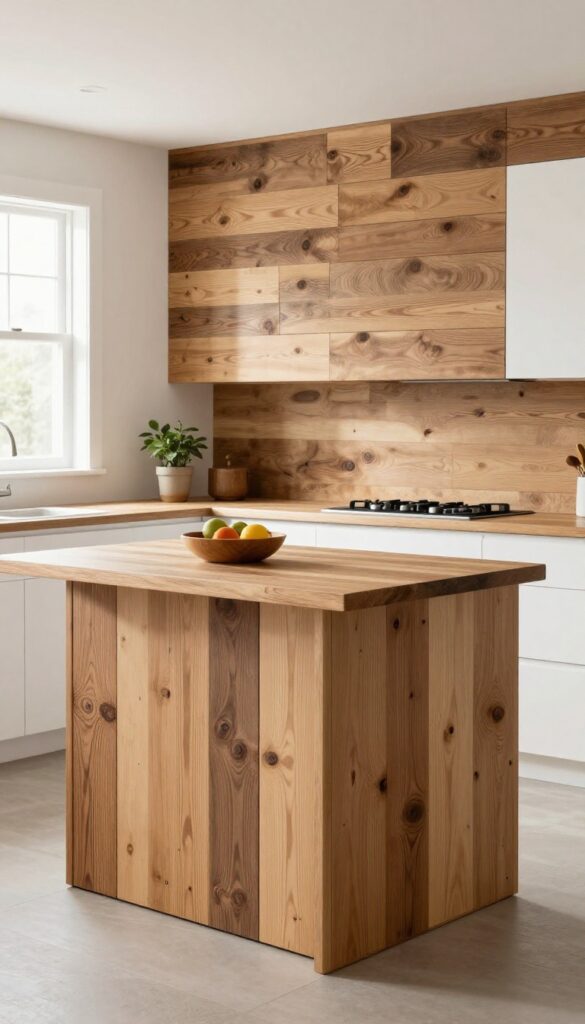
If your kitchen leans farmhouse or rustic, a reclaimed wood back panel is a natural fit. It brings warmth and history to the space, and no two planks are exactly alike. Each board carries its own grain, color, and even nail holes or saw marks, so your island becomes a conversation piece rather than just a prep station.
Reclaimed wood is both durable and sustainable. It's already seasoned, so it resists warping better than new lumber. You can source it from old barns, warehouses, or even pallets, giving new life to materials that might otherwise end up in a landfill.
The result is a one-of-a-kind look that adds depth and texture to your kitchen.
Choosing The Right Wood
Look for planks that are dry, free of rot, and have a flat surface. Hardwoods like oak or maple are sturdy, but softwoods like pine can work if sealed properly. Mixing widths and lengths creates a more organic, patchwork feel.
Just make sure the boards are thick enough to hold screws or adhesive without splitting.
Finishing And Sealing
A clear matte sealer preserves the natural patina without adding shine. If you want a more uniform tone, a light stain can even out color differences. For a food-prep area, use a food-safe finish like shellac or a polyurethane that's labeled safe once cured.
Avoid leaving bare wood exposed to moisture.
Installation Tips
Attach the planks directly to the island's back panel using construction adhesive and finishing nails. For extra stability, add a plywood backing first. Leave a small gap between planks if you want a more rustic look, or butt them tightly for a smoother surface.
Seal the edges where the wood meets the countertop to prevent water damage.
6. Built-In Wine Rack
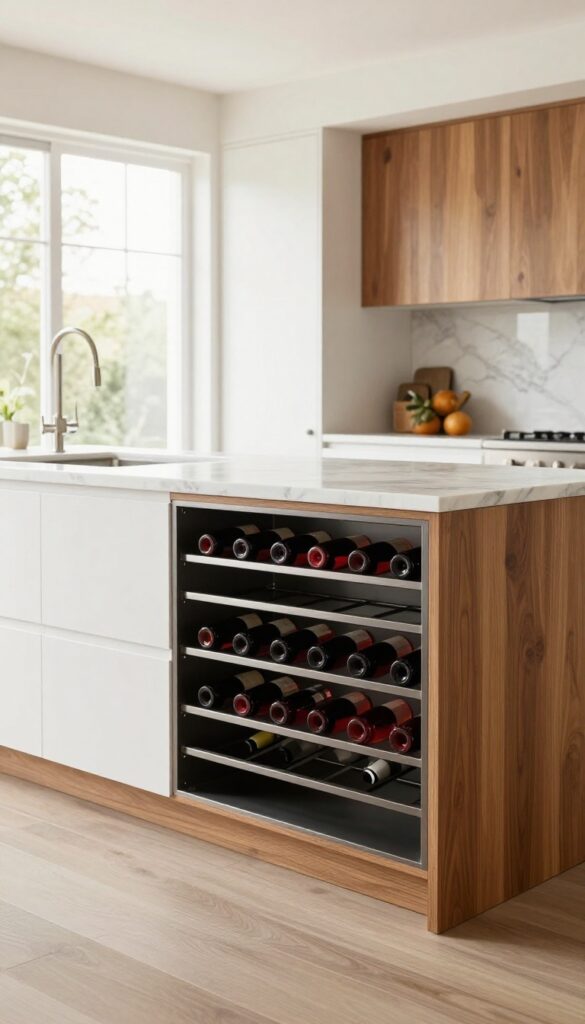
A built-in wine rack on the back panel of your island is a classic choice for anyone who loves to entertain. It keeps your favorite bottles within arm's reach while adding a touch of sophistication to the kitchen. Plus, storing wine horizontally ensures the corks stay moist, preserving the quality of your collection.
Integrating a wine rack into the island's back panel is both practical and elegant. It maximizes unused space and keeps bottles safely stored and easily accessible. Whether you're hosting a dinner party or just unwinding after a long day, having your wine right there makes the experience smoother and more enjoyable.
Choosing The Right Style
Wine racks come in various materials and designs, from sleek metal to rustic wood. Consider the overall look of your kitchen—modern, farmhouse, or transitional—and pick a style that complements it. A simple metal grid offers a minimalist feel, while a wooden cubby system adds warmth and character.
Placement And Accessibility
Position the wine rack at a comfortable height for grabbing bottles without bending or reaching too high. If you often cook and entertain simultaneously, place it near the main prep area. Also, think about the number of bottles you want to store—standard racks hold 6 to 12 bottles, but custom options can accommodate more.
Combining With Other Features
A wine rack doesn't have to stand alone. Pair it with small shelves for glasses or a drawer for corkscrews and stoppers. This creates a dedicated beverage station on the back of your island, making it a focal point for social gatherings.
Just ensure the design stays cohesive and doesn't overcrowd the space.
7. Magnetic Panel for Knife Storage
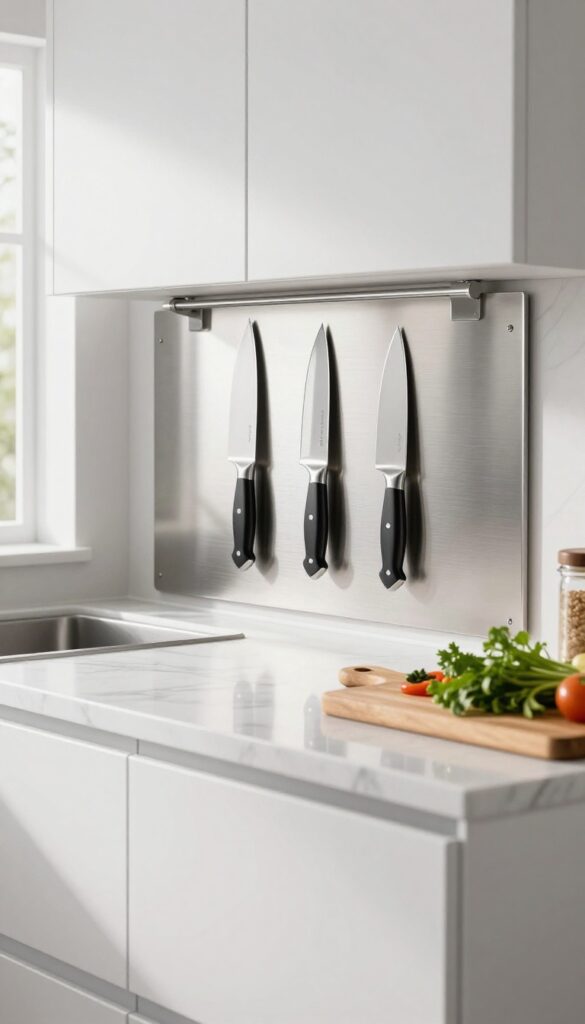
Knife blocks take up counter space and can be a pain to clean. A magnetic strip mounted on the back panel of your island puts your most-used blades right where you need them—within arm's reach while you prep. It's a simple upgrade that feels surprisingly modern and keeps your workspace tidy.
Mounting a magnetic strip on the back panel is a smart way to store knives and other metal utensils. It keeps them visible, safe, and accessible, freeing up drawer space and reducing clutter. Plus, it adds a sleek, professional touch to your kitchen.
Choosing The Right Strip
Look for a magnetic strip with a strong hold—something rated for heavy knives. You'll also want to consider the length; a 12- to 18-inch strip usually works well for most islands. Some strips come with a protective coating to prevent scratching, which is a nice bonus.
Placement And Installation
Install the strip at a height that's comfortable for you to grab knives without stretching. Typically, that's around eye level or slightly below. Use screws or strong adhesive tape, depending on your panel material.
Make sure the surface is clean and dry before mounting.
Safety And Maintenance
Keep the strip clear of clutter so knives are easy to grab and put back. Wipe the strip down occasionally to remove dust and grease. And always store knives with the blade facing away from high-traffic areas to avoid accidental bumps.
8. Floating Desk or Workspace
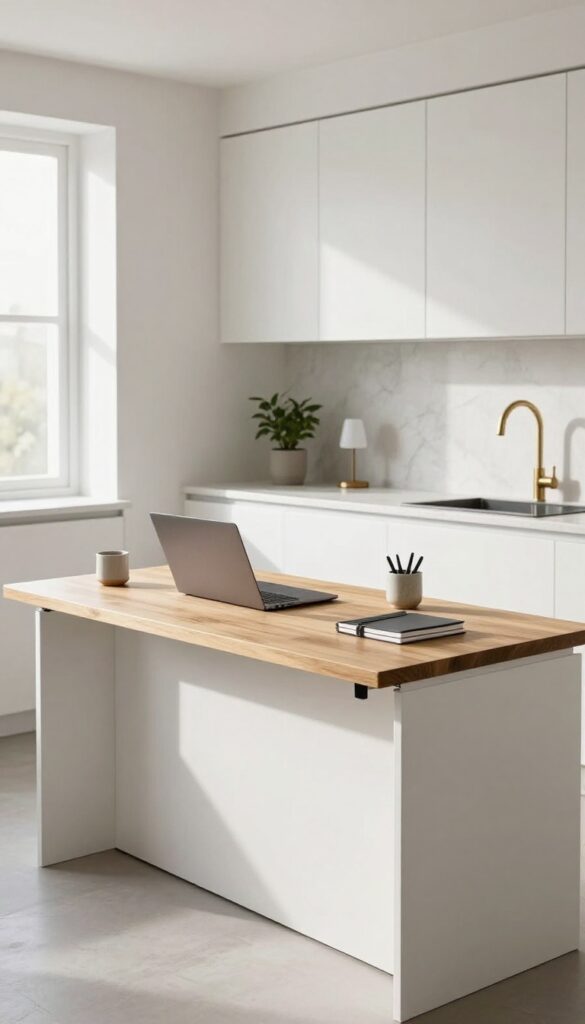
When kitchen counters double as catch-all spots for mail, tablets, and to-do lists, it's time to carve out a dedicated nook. A fold-down desk or a sturdy floating shelf on the back panel of your island gives you a compact workspace without stealing an inch of floor space. Perfect for small kitchens or open-plan living, this idea turns an overlooked surface into a practical command center.
Whether you're paying bills, helping with homework, or just need a spot to park your laptop, a floating desk adds serious function to your island. The key is choosing a design that folds away neatly when not in use, keeping your kitchen looking sleek and uncluttered.
Fold-down Desk With Storage
A fold-down desk attached to the back panel is a game-changer. Look for a design that includes a few shelves or cubbies above the desktop, so you can store notebooks, pens, and a small lamp. When you're done, simply fold the desktop up and the whole unit disappears into a slim cabinet-like profile.
This keeps your kitchen island looking clean while giving you a hidden workspace.
Floating Shelf With Stools
If you prefer a more permanent setup, mount a thick, sturdy floating shelf at bar height. Pair it with a couple of backless stools that tuck underneath when not in use. This creates a casual breakfast bar or a spot for kids to do homework while you cook.
Add a small power strip or USB ports to the underside of the shelf for easy device charging.
Styling And Lighting
Make your floating desk feel intentional with good lighting and a few personal touches. Install a small swing-arm lamp or a plug-in wall sconce to illuminate the workspace. Keep a tray for everyday items like a notepad and pen, and add a small plant or a framed photo to make it feel inviting.
Avoid clutter by designating a drawer or basket for loose papers.
9. Glass-Front Cabinetry
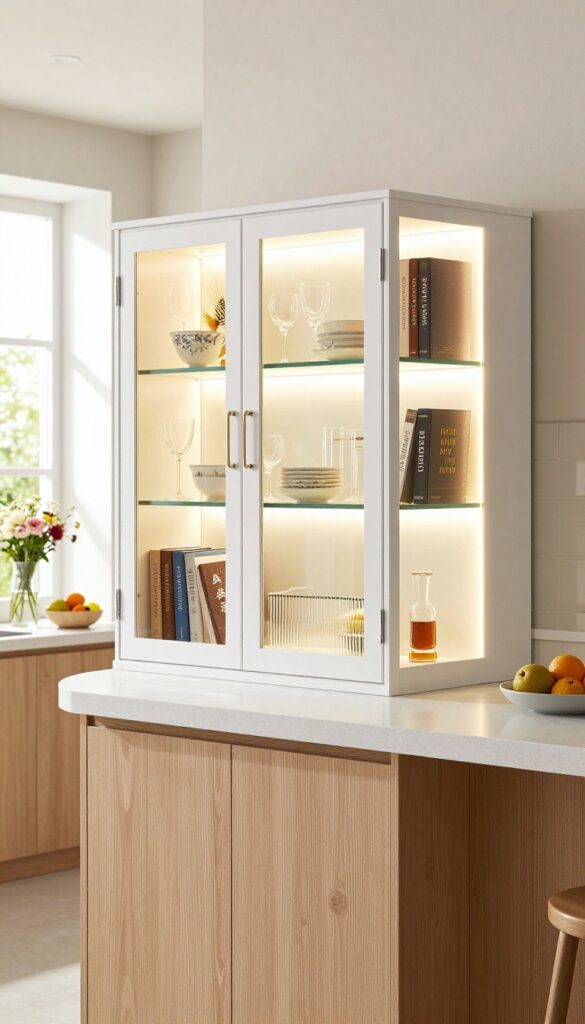
Glass-front cabinets on the back panel of your island turn a plain surface into a showcase. They’re perfect for displaying fine china, heirloom glassware, or a collection of cookbooks. The see-through doors add depth and a touch of elegance, making the island feel more like a piece of furniture than a utilitarian workhorse.
Glass-front cabinetry brings a refined, curated look to your kitchen island. It’s a way to display items you love while keeping them dust-free. Plus, the transparency adds visual lightness, which can make a bulky island appear less imposing.
Choosing The Right Glass
Clear glass gives an unobstructed view, ideal for showcasing a neat collection. Frosted or seeded glass offers a softer look and hides clutter. For a vintage feel, consider leaded or beveled glass.
Think about how much maintenance you’re willing to do—clear glass shows smudges and dust more easily.
Styling The Interior
What you put inside matters as much as the glass itself. Arrange items with breathing room—clutter defeats the purpose. Group by color or type, and use risers or small shelves to add height variation.
Backlighting the interior with LED strips can make your display pop, especially in the evening.
Installation Tips
If you’re retrofitting an existing island, measure carefully and ensure the cabinets are securely anchored. Use soft-close hinges to avoid slamming. For a seamless look, match the cabinet wood to your island’s base.
If you’re building new, plan the wiring for any lighting ahead of time.
10. Upholstered Panel for Seating Comfort
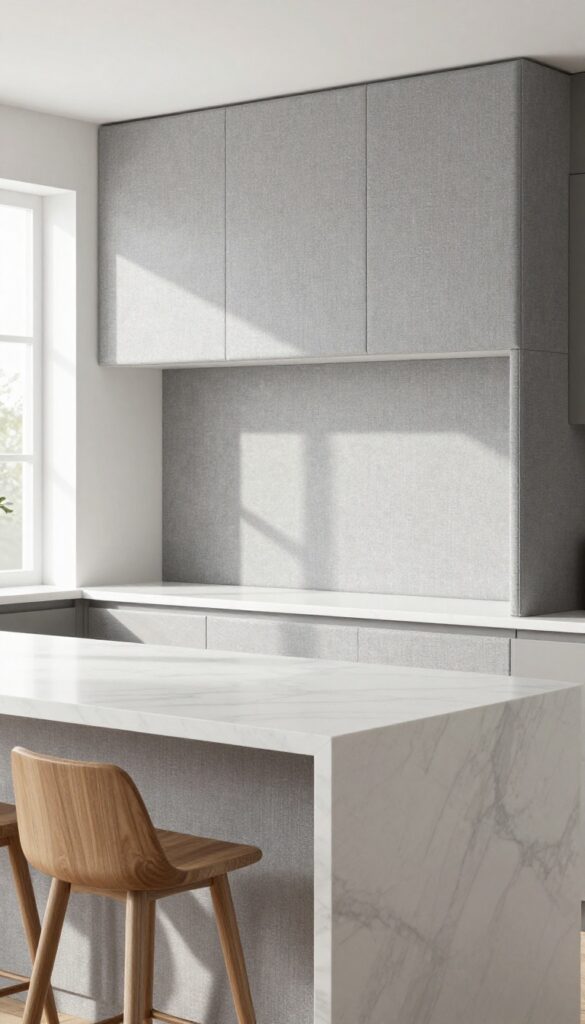
If your kitchen island doubles as a breakfast bar or casual dining spot, hard surfaces can get uncomfortable fast. An upholstered back panel changes that, giving you a soft place to lean while you sip coffee or chat with the cook. It's a simple upgrade that makes the space feel more inviting and a little more like furniture than just a counter.
Upholstering the back panel of your island is a smart move if you've added stools or plan to. The padding provides lumbar support and cushions your back during long conversations or quick meals. It also softens the look of a large island, breaking up hard lines and adding a layer of warmth.
Choose a fabric that's durable and easy to clean, like outdoor-grade canvas or a stain-resistant microfiber, so it stands up to daily use.
Choosing The Right Fabric
Pick a fabric that matches your kitchen's style and can handle life. Performance fabrics like Crypton or Sunbrella resist spills, stains, and fading, making them ideal for a busy kitchen. If you prefer natural textures, look for a tight-weave linen blend that's been treated for durability.
Darker colors hide smudges better, while lighter shades can brighten the space—just be ready to clean them more often.
Installation And Diy Tips
You can hire a professional upholsterer, but this is also a manageable weekend project. Start by measuring the panel and cutting a piece of plywood to fit. Wrap it with foam and batting, then staple the fabric to the back.
Attach the finished panel to the island using heavy-duty brackets or screws, making sure it's secure. For a removable option, use Velcro strips or a French cleat so you can swap the fabric when you want a fresh look.
Styling Around The Upholstery
Treat the upholstered panel as the visual anchor of your seating area. Coordinate the fabric with your bar stools or cushions for a pulled-together look. Add a few throw pillows or a small lumbar cushion for extra comfort and color.
If you're worried about the fabric getting dirty, consider adding a clear vinyl protector or a washable slipcover that you can take off and toss in the laundry.
11. Pegboard for Versatile Storage
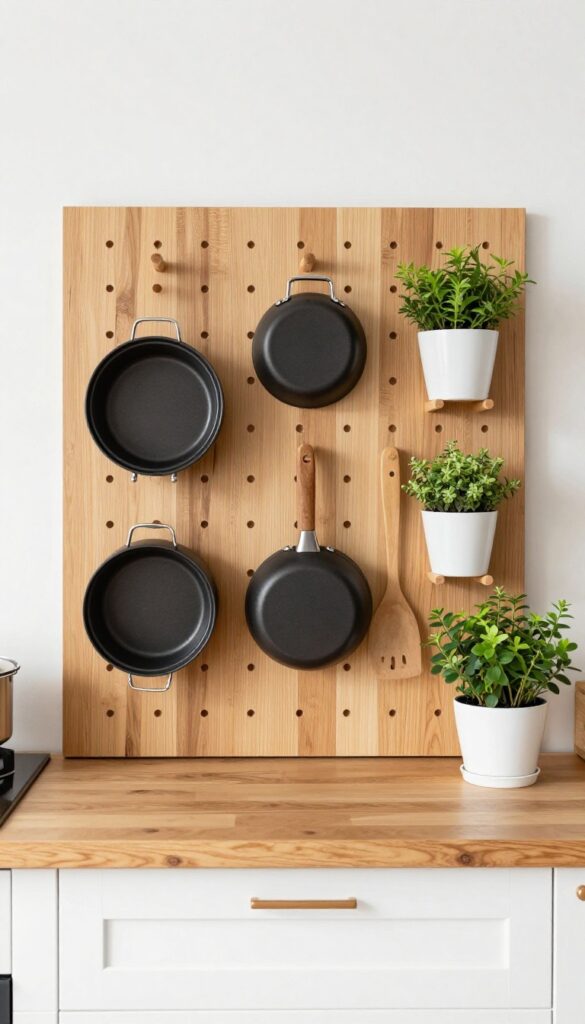
A pegboard on the back panel of your island is like a blank canvas for organization. You can hang pots, pans, utensils, and even small potted herbs, all within arm's reach while you cook. It's a flexible system that grows with you—rearrange the pegs whenever your needs change.
Pegboards are a classic workshop staple, but they work just as well in the kitchen. They turn the back panel of your island into a customizable storage wall that keeps everyday tools visible and accessible. Plus, they add a touch of industrial charm that fits both modern and rustic kitchens.
Choose The Right Material
Go for a wooden pegboard if you want a warmer, more natural look. Metal pegboards are more durable and easier to clean, making them a better choice for heavy pots and pans. Consider a powder-coated finish to resist rust and scratches.
Hang More Than Just Tools
Pegboards aren't just for utensils. Use hooks to hang measuring cups, oven mitts, or even a small chalkboard for notes. Add a few small shelves to hold spices, oils, or a tiny herb garden.
The possibilities are endless.
Keep It Tidy And Accessible
Arrange items by frequency of use—keep your most-used spatulas and ladles at eye level. Use different hook sizes for different items, and leave some space for future additions. A well-organized pegboard makes cooking more efficient and enjoyable.
12. Mirrored Panel to Open Up the Space
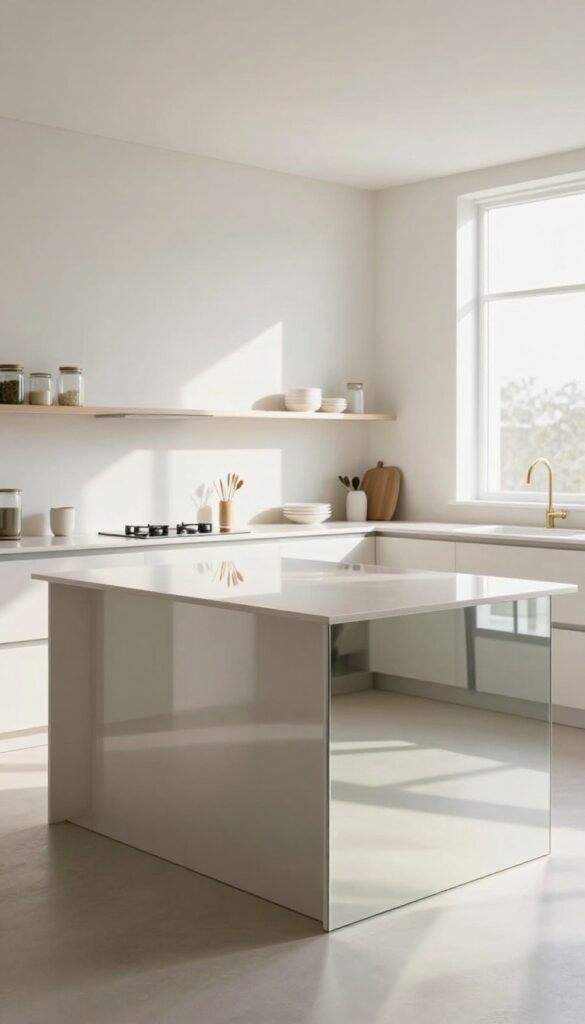
Small kitchens often feel cramped, but a mirrored panel on the back of your island can change that in an instant. The reflective surface bounces light around the room, making the area appear larger and airier. It’s a clever trick that adds a hint of glamour without overwhelming the space.
A mirrored panel works best when your island faces a window or a light-colored wall. The reflection doubles the visual depth, so the room feels more open. It’s also a practical choice for dark corners where you need extra brightness.
Plus, the sleek surface is easy to wipe down, making it a low-maintenance option for busy kitchens.
Maximize Natural Light
Place the mirrored panel opposite a window to catch and spread daylight. This makes the kitchen feel brighter even on overcast days. If your island is in a narrow galley, the mirror can visually widen the walkway.
Just be mindful of direct sunlight, which can create glare—opt for a slightly tinted or antiqued mirror to soften the effect.
Pair With Open Shelving
Combine a mirrored back panel with a few open shelves for a functional yet airy look. The mirror reflects the items you display, making them appear twice as plentiful. Use glass jars or light-colored dishes to keep the reflection clean and uncluttered.
Avoid overcrowding the shelves, as too much visual noise can defeat the purpose.
Add Subtle Backlighting
Install slim LED strips along the edges of the mirror to create a soft glow. This adds warmth and depth, especially in the evening. The backlight also highlights the reflective surface, making it a focal point.
Choose warm white lights for a cozy feel or cool white for a modern, crisp look.
Keep It Spotless
Mirrors show smudges and fingerprints easily, so use a microfiber cloth and a streak-free cleaner. A quick daily wipe keeps it looking pristine. For a low-maintenance option, consider a mirrored tile backsplash instead of a full sheet—it’s easier to replace if damaged and adds a subtle texture.
13. Integrated Herb Garden
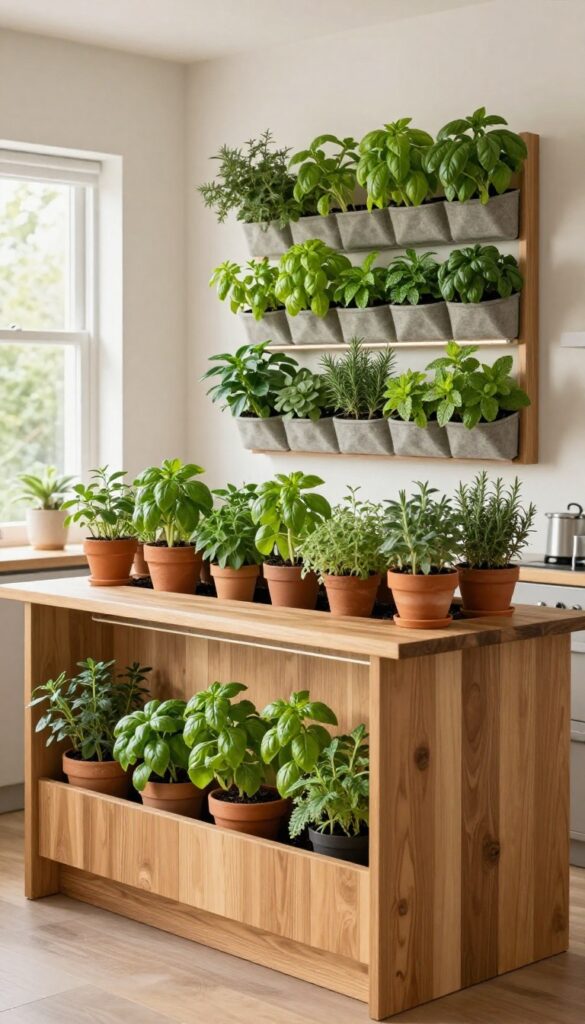
Fresh herbs can transform a meal, but they often take up precious counter space or get forgotten in the fridge. Mounting a vertical herb garden on the island's back panel solves both problems. You'll have basil, mint, or rosemary within arm's reach while you cook, and the greenery adds a lively, organic touch to the kitchen.
Pots And Planters
Start with simple terracotta pots or small metal tins attached to a wooden board or metal rail. You can also use a tiered planter that hangs from the panel. Make sure each pot has drainage and a tray to catch drips.
Group herbs by how much water they need—mint and parsley like more moisture, while rosemary and thyme prefer drier soil.
Living Wall System
For a more polished look, install a modular living wall system with felt pockets or plastic inserts. These systems often come with a watering tray and are designed to keep roots healthy. They're easy to mount and can cover a larger area, giving you room for several herbs at once.
Just check the weight capacity of your island panel first.
Lighting And Watering
Herbs need plenty of sunlight, so place the garden near a window or add a slim LED grow light underneath the island overhang. Water regularly, but avoid overwatering—let the soil dry out slightly between waterings. A small watering can or a spray bottle works well.
Trim leaves often to encourage bushy growth and keep the garden looking tidy.
FAQ
What is the best material for a kitchen island back panel?
The best material depends on your needs. For durability and easy cleaning, consider tile, stainless steel, or solid wood. For a softer look, bamboo or upholstered panels work well.
Can I install a back panel myself?
Yes, many back panel ideas are DIY-friendly, like open shelving, pegboards, or chalkboard paint. More complex options like tile or glass-front cabinets may require professional help.
How do I choose a back panel that matches my kitchen style?
Consider your existing cabinetry, countertops, and overall theme. For a modern kitchen, go with sleek materials like glass or metal. For a farmhouse look, reclaimed wood or beadboard are great choices.
Will a back panel add value to my kitchen?
Yes, a well-designed back panel can enhance the look and functionality of your kitchen, which can increase your home's resale value. It's a relatively small investment that can make a big impact.
How do I keep the back panel clean?
Regular dusting and wiping with a damp cloth are usually enough. For tile or glass, use a mild cleaner. For wood, avoid excess moisture and use a wood-safe polish occasionally.
Conclusion
The back panel of your kitchen island is a small surface with a big impact. Whether you choose a classic shiplap or a bold tile pattern, the right material can tie your whole design together while hiding everyday wear and tear.
Start with the option that fits your cooking habits and your budget, and you'll be surprised how much character it adds. Pick one idea that feels right, and let that simple upgrade make your island feel finished and intentional.