13 Shower Tiles Design Ideas for a Distinctive Modern Look
You step into your shower and feel like you're in a dated, boring box. The tiles are dull, the grout is stained, and nothing about the space inspires you. It doesn't have to be that way.
A few smart tile choices can turn your daily rinse into a visual experience. Modern shower design is all about personality and texture. Gone are the days of plain white subway tiles being the only option.
Today, you can play with geometric patterns, natural stone, and even bold colors to create a shower that feels like a spa retreat. Whether you're planning a full renovation or just a refresh, the right tiles set the tone.
1. Large-Format Porcelain Slabs for Seamless Walls
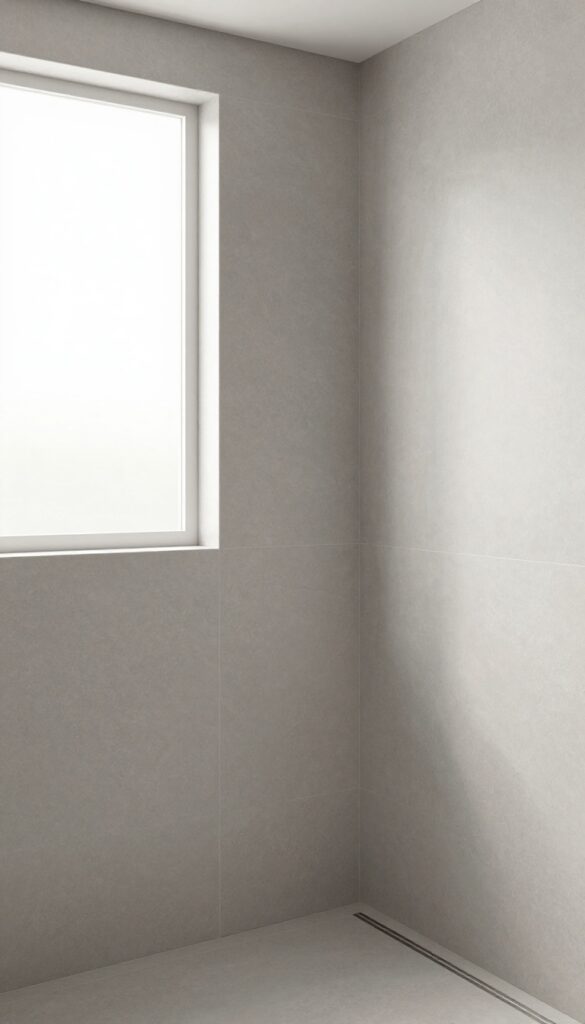
Grout lines are the enemy of a clean, modern look. They trap soap scum, mildew, and dirt, making your shower look tired fast. Large-format porcelain slabs eliminate that problem entirely.
These oversized panels, often 4×8 feet or larger, create a seamless wall surface that feels both luxurious and practical. The fewer joints you have, the less maintenance you'll deal with. Plus, the continuous surface makes a small shower feel bigger and more open.
Why Porcelain Slabs Work So Well
Porcelain is incredibly dense and non-porous, which means it resists water absorption better than natural stone or ceramic. That's a big deal in a wet environment. The large format also means fewer grout lines to seal and scrub.
And because these slabs can mimic marble, concrete, or even wood grain, you get high-end aesthetics without the high-maintenance reality.
Installation Tips To Get It Right
Large slabs are heavy and require a perfectly flat substrate. You'll need a professional installer with experience handling oversized tiles. Plan for extra material due to cutting waste, and consider using a rectified edge for tighter joints.
Also, think about layout—aligning slabs vertically can make the ceiling feel higher, while horizontal placement widens the space.
Best Styles And Finishes
Matte finishes are popular for a contemporary look—they hide water spots and fingerprints better than glossy ones. If you want the marble aesthetic, choose a slab with subtle veining rather than bold patterns, which can look busy in a small area. Concrete-look slabs in warm grays or soft whites are timeless and pair well with natural wood or black fixtures.
2. Hexagon Mosaic for Subtle Texture
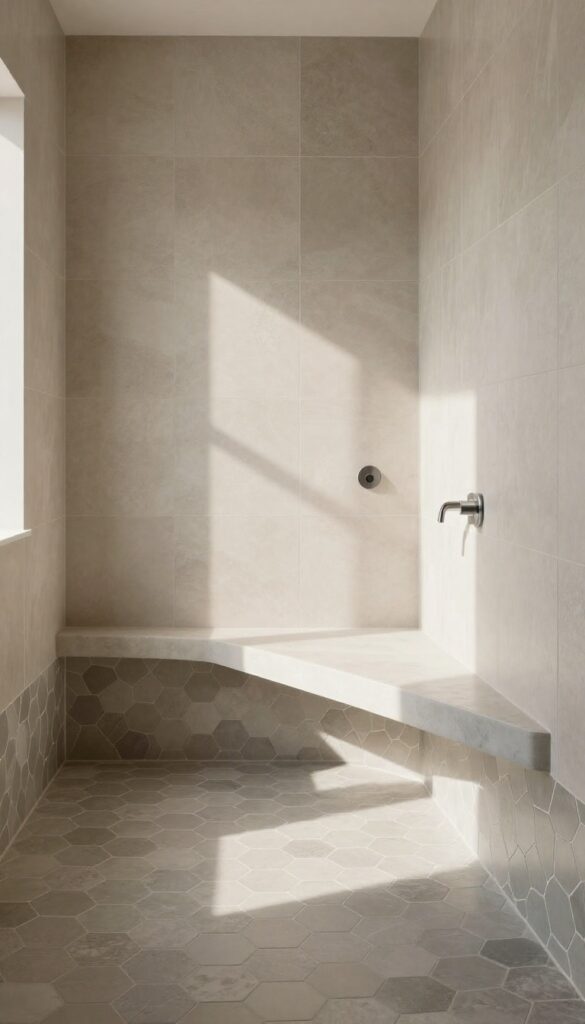
Hexagon tiles bring a soft geometric touch that feels modern without shouting for attention. Their six-sided shape creates a honeycomb effect that adds visual depth, especially when you choose a neutral matte finish. These tiles work beautifully as a full floor covering or as a feature wall behind the shower bench.
Hexagon mosaics are a smart pick for anyone who wants texture without the busy look of larger patterns. The small tile size naturally creates more grout lines, which helps with slip resistance on wet floors. Stick to a single neutral color like warm beige or matte gray to keep the look calm and cohesive.
Why Hexagons Work In Wet Areas
The many grout lines from small hex tiles provide excellent traction underfoot. That means you get safety without needing those ugly stick-on decals. Plus, the subtle pattern hides minor dirt and water spots better than large format tiles.
Best Color And Finish Choices
Matte finishes are your friend here—they reduce glare and feel softer under bare feet. Stick to earthy neutrals like taupe, warm gray, or off-white. If you want a bolder look, try a muted sage green or dusty blue for a pop of color that still feels refined.
Where To Place Them
For a low-commitment upgrade, use hex tiles only on the shower floor and pair them with larger wall tiles. Or go all in with a full hexagon wall behind the showerhead for a cohesive spa vibe. Either way, keep the grout color close to the tile color for a seamless look.
3. Herringbone Pattern Subway Tiles for Movement
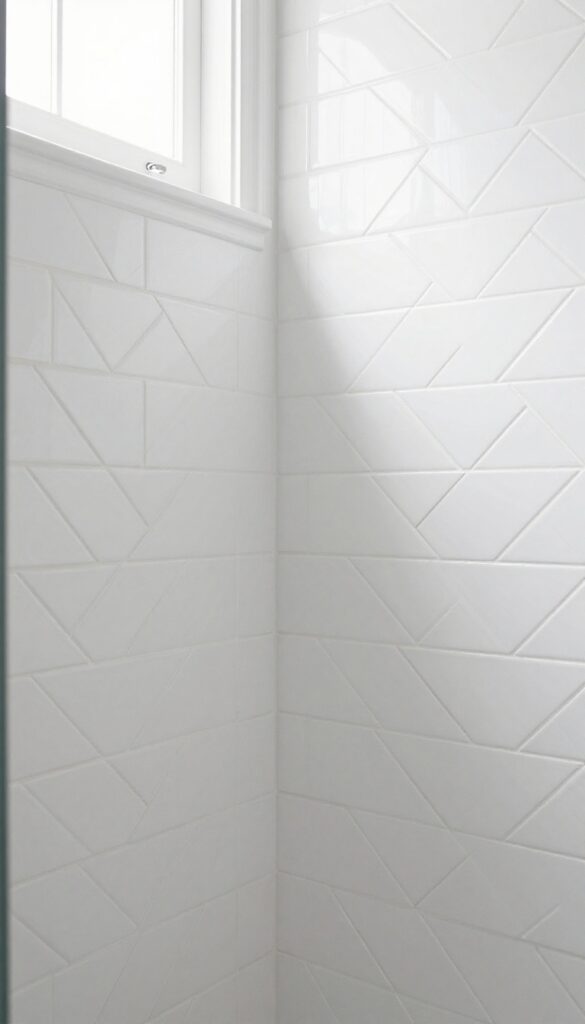
If you love the clean look of subway tiles but want something with more energy, the herringbone pattern is your answer. Instead of stacking tiles in a straight line, you lay them at 45-degree angles to create a zigzag V-shape. That simple shift adds serious visual flow and makes the shower feel larger and more dynamic.
The herringbone pattern works because it tricks the eye into following the lines, which draws attention across the whole wall. It’s especially effective in smaller showers where you want to create the illusion of more space. Stick with classic white or soft gray subway tiles for a timeless look that won’t feel dated in five years.
If you’re feeling bolder, try navy or charcoal tiles to make the pattern pop even more. The contrast between the tile color and the grout lines is key—go with a lighter grout to emphasize the pattern or a matching grout for a more subtle effect.
Why Herringbone Works So Well In Showers
The V-shaped lines naturally guide your eyes upward and outward, making the shower feel taller and wider. That’s a huge advantage in a compact space. Plus, the pattern adds texture without needing any fancy tile shapes—just standard subway tiles laid at an angle.
It’s a low-cost way to get a high-end look.
Color And Grout Choices That Make A Difference
White tiles with white or light gray grout keep things airy and clean. For a more dramatic look, use dark tiles like navy or charcoal with a contrasting light grout. The grout lines become part of the design, so don’t overlook them.
A darker grout hides dirt better, but a lighter grout makes the herringbone pattern stand out.
Installation Tips For A Flawless Finish
Herringbone requires precise cuts and careful layout, so it’s not a beginner DIY project. Hire a pro who has experience with patterns. Make sure the wall is perfectly flat before tiling, and use spacers to keep grout lines consistent.
Plan the pattern starting from the center of the wall to keep it symmetrical.
4. Vertical Stacked Tiles to Raise the Ceiling
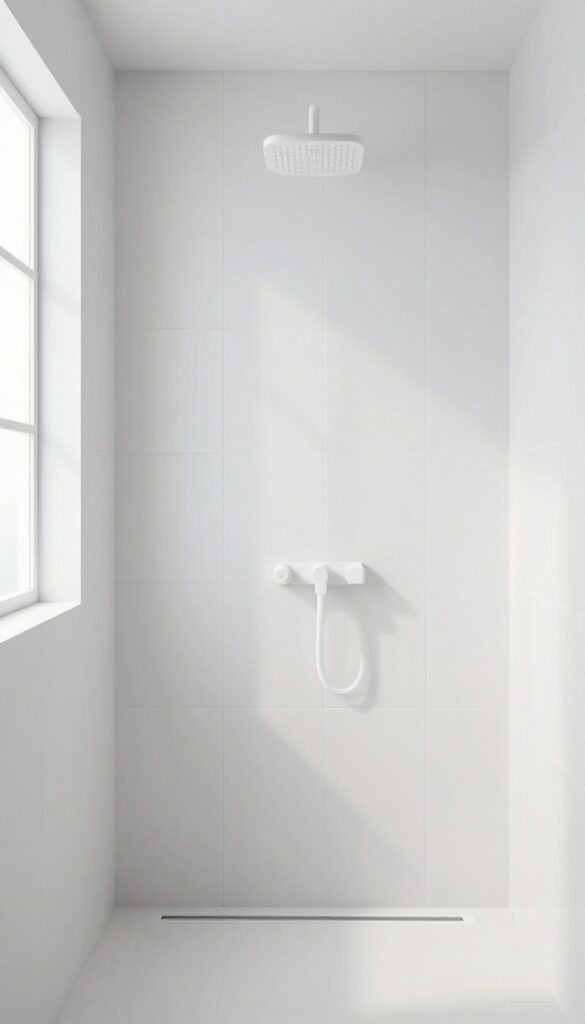
Low ceilings can make a shower feel cramped and boxy. But you don't need to knock down walls to get that airy, open sensation. The trick is all in how you lay your tiles.
Stacking rectangular tiles vertically draws the eye upward, creating the illusion of height. It's a simple visual hack that works wonders, especially in small bathrooms or showers with standard eight-foot ceilings. Pair it with glossy finishes and you'll amplify the effect even more.
Vertical stacking is a straightforward pattern that delivers big results. Instead of running tiles horizontally, you install them in a vertical orientation, one on top of the other. This creates clean, continuous lines that guide the gaze upward.
The effect is subtle but powerful—your brain registers the vertical lines and perceives the space as taller than it actually is. For best results, choose long, narrow planks. Think 3×12 or 4×16 inch tiles.
The longer the tile, the fewer grout lines you'll have, which keeps the look seamless and modern. Glossy finishes are your friend here because they reflect light, further opening up the space. Matte finishes can work too, but they absorb light and won't give you that extra lift.
This technique pairs beautifully with floor-to-ceiling installation. Run the tiles all the way from the shower floor to the ceiling without any trim or border to break the line. You can also extend the vertical stacking onto an adjacent wall or even the shower ceiling for a cohesive, enveloping effect.
Tile Size Matters
Not all rectangular tiles are created equal. For vertical stacking, longer planks are more effective at creating height. Avoid short rectangles (like 3×6) because they produce more grout lines, which can make the wall look busy and actually shorten the perceived height.
Stick with planks that are at least three times longer than they are wide.
Grout Color Choice
Grout color can make or break the vertical illusion. Use a grout that matches your tile color as closely as possible. This minimizes visual breaks and lets the vertical lines flow uninterrupted.
Contrast grout, like dark grout with light tiles, will emphasize the horizontal grout lines and work against the height-enhancing effect.
Lighting Combo
Vertical stacked tiles work best when paired with good lighting. Install a shower light or a small recessed light directly above the shower area. The light will bounce off the glossy tiles and emphasize the vertical lines.
You can also add a linear drain at the shower floor to keep the horizontal lines minimal and maintain the upward flow.
5. Terrazzo for Playful Speckles
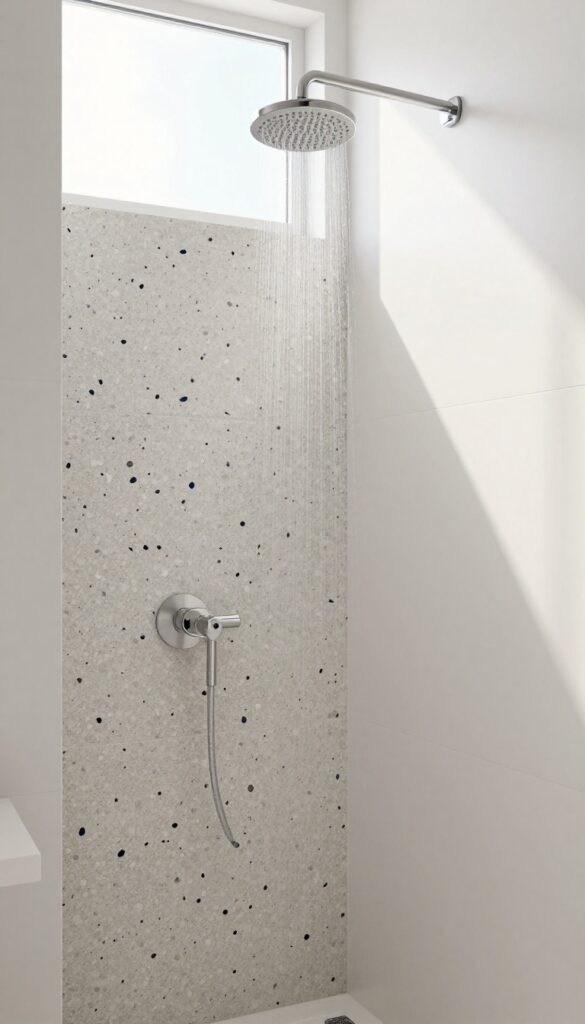
Terrazzo is making a huge comeback, and for good reason. Those playful speckles of marble, quartz, or glass chips bring a retro-modern vibe that feels fresh and fun. It’s a tile that hides soap scum surprisingly well, so it stays looking cleaner longer.
Plus, the pattern adds personality without being overwhelming—perfect for a shower that wants to stand out without screaming for attention.
Terrazzo works best when used on one accent wall or the floor. A full surround can be busy, but a single feature wall creates a focal point that draws the eye. Pair it with solid-color tiles in a complementary shade to keep the space balanced.
The speckled pattern also does a great job of camouflaging water spots and minor grime, making it a practical choice for busy bathrooms.
Choosing The Right Chip Size
Terrazzo tiles come in various chip sizes, from fine flecks to larger chunks. For a modern look, go with smaller, more uniform chips for a subtle texture. Larger chips create a bolder, more traditional terrazzo feel.
Consider the scale of your shower: smaller spaces benefit from finer chips to avoid visual clutter.
Color Palette Tips
Neutral bases like white, gray, or beige with contrasting chips (black, navy, or terracotta) keep the look sophisticated. For a playful twist, try a pastel base with colorful chips. Avoid matching the chip color exactly to the grout—contrast helps the pattern pop.
Placement Strategies
Use terrazzo on the shower floor for a durable, slip-resistant surface (choose a matte finish). On walls, limit it to one feature wall or a band at eye level. Combine with large-format solid tiles in the same color family for a cohesive design.
6. Zellige Tiles for Handcrafted Charm
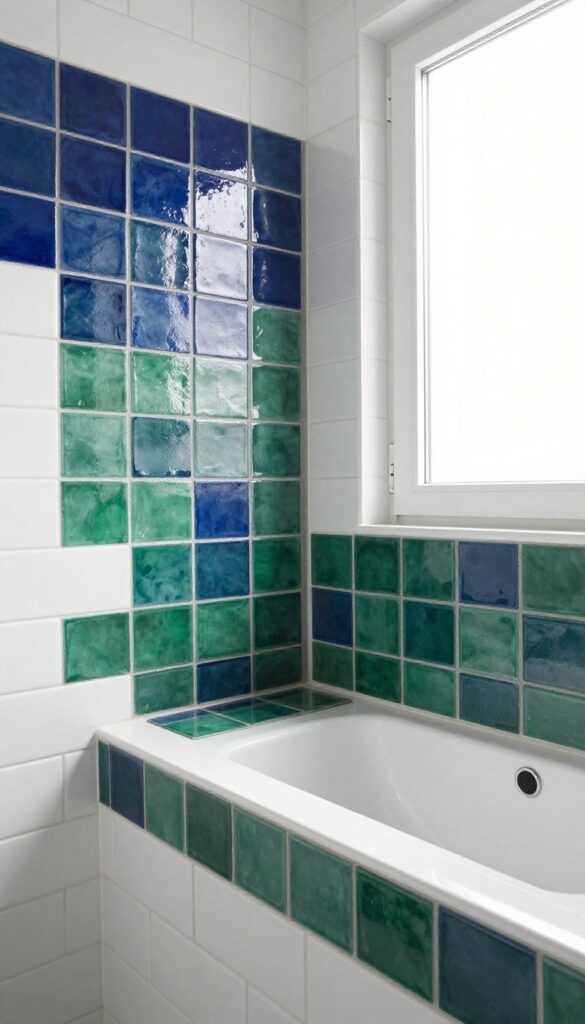
If you want your shower to feel like a piece of art, zellige tiles are the way to go. These handmade Moroccan clay tiles bring an organic, one-of-a-kind texture that factory-made tiles just can't match. The slight irregularities in shape and color create a surface that catches light from every angle, making your shower feel warm and alive.
Zellige tiles are a fantastic choice for adding handcrafted charm without going overboard. Their natural variations mean no two installations look exactly the same, giving your shower a unique personality. Because they're handmade, they work best as an accent or in a niche rather than covering an entire wall—too much can feel busy.
Use them behind a bench, inside a shampoo niche, or as a vertical strip to break up larger tiles. The glossy finish reflects light beautifully, making even a small shower feel brighter and more spacious.
Why Zellige Feels So Special
The magic of zellige lies in its imperfections. Each tile is cut by hand, so edges are slightly uneven and surfaces have tiny dips and bubbles. When light hits them, it creates a subtle shimmer that changes throughout the day.
This gives your shower a soft, living texture that flat tiles can't replicate. Plus, the colors are rich and layered—think deep blues, emerald greens, and warm terracottas—so you get a depth that feels luxurious.
Where To Use Zellige In Your Shower
Because zellige tiles are so distinctive, a little goes a long way. A popular approach is to use them as a backsplash behind a floating bench or as the interior of a shower niche. You can also create a vertical column of zellige tiles from floor to ceiling to add a focal point without overwhelming the space.
For a bolder look, try a zellige accent wall on the shower's back wall, but keep the other walls simple with large-format tiles or neutral stone.
Pairing Zellige With Other Materials
Zellige pairs beautifully with natural stone, wood-look tiles, and matte finishes. The glossy, irregular surface contrasts nicely with smooth, matte tiles, adding visual interest. For a modern organic vibe, combine zellige with warm wood tones and brushed brass fixtures.
If you prefer a more minimalist look, pair it with white or gray large-format tiles and matte black hardware. The key is to let the zellige be the star while keeping everything else understated.
7. Marble-Look Ceramic for Luxury on a Budget
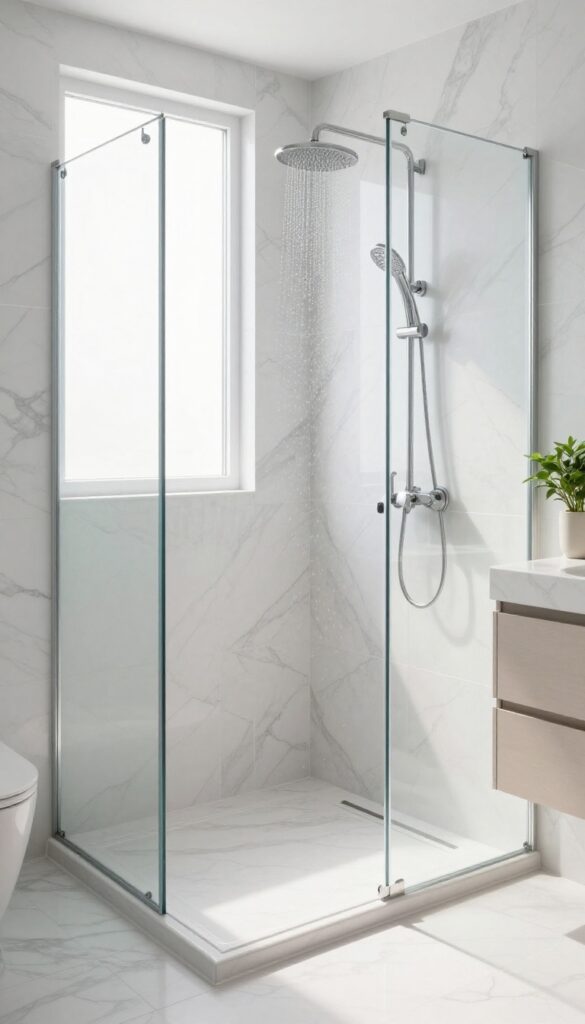
Real marble is stunning, but it comes with a hefty price tag and high maintenance. Luckily, modern ceramic and porcelain tiles have gotten so good at mimicking Carrara or Calacatta marble that you'd have to touch them to tell the difference. You get that high-end spa aesthetic without the worry of staining or etching.
Marble-look ceramic tiles offer the best of both worlds: the elegance of natural stone and the practicality of engineered materials. They're waterproof, scratch-resistant, and much easier to clean. Plus, they cost a fraction of the real thing, making them perfect for a full shower renovation without breaking the bank.
Why Choose Ceramic Over Real Marble
Real marble is porous and can stain easily from soap scum or hard water. Ceramic and porcelain are non-porous and glazed, so they resist moisture and stains. They're also less likely to chip or crack.
You get the same veining and depth but with zero sealing or special cleaners.
Best Styles To Look For
Look for tiles with high-definition printing that captures subtle veining and color variations. Large-format slabs (like 12×24 or 24×48) reduce grout lines and create a seamless, luxurious look. Matte finishes are popular for a more natural stone feel, while polished options add shine and reflect light.
Installation Tips For A Seamless Look
To keep the marble illusion convincing, use matching grout in a light gray or white. Avoid contrasting grout that breaks up the pattern. Consider a linear drain to minimize visible grout lines on the floor.
For the walls, a running bond or stacked layout works best.
8. Dark and Moody Slate for Drama
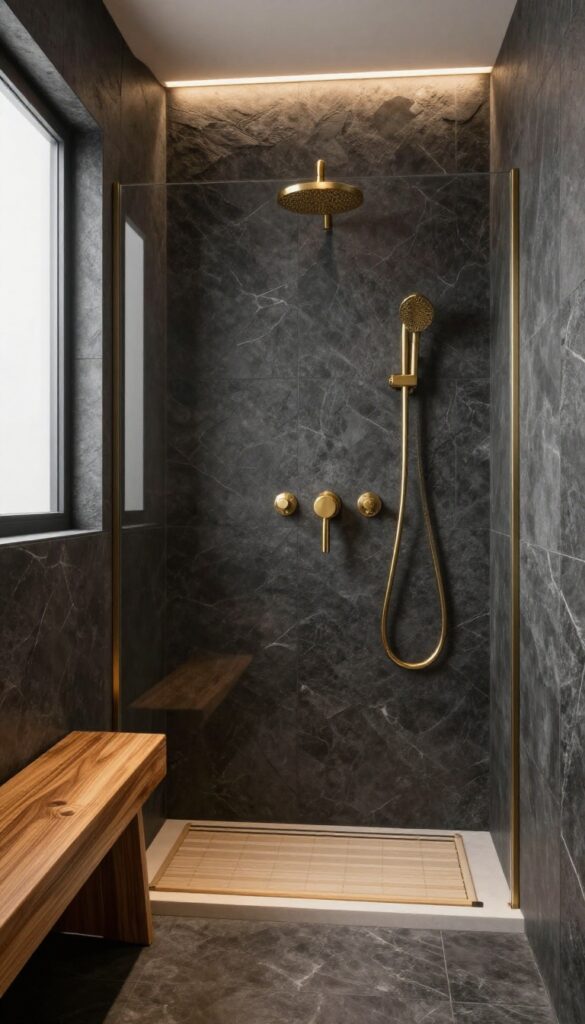
Dark tiles can feel risky, but they also deliver unmatched depth and mood. Charcoal or black slate turns your shower into a private sanctuary where light and shadow play across natural textures. The key is balancing that darkness with warmth so the space feels inviting instead of cave-like.
Why Slate Works So Well
Slate is a natural stone with a cleft surface—meaning it's naturally textured and slip-resistant. That makes it ideal for shower floors. The dark color hides soap scum and water spots better than lighter tiles, so it stays looking clean longer.
Plus, each tile has unique variations in tone and veining, giving your shower a one-of-a-kind look.
Balancing Dark With Warmth
To keep a dark slate shower from feeling cold, introduce warm wood elements. A teak bench or bamboo mat adds organic contrast. Soft, warm lighting—like dimmable LED strips or a pendant light with a warm bulb—prevents the space from feeling like a cave.
Brass or gold fixtures also add a touch of warmth and luxury.
Grout And Layout Tips
Use a matching dark grout to create a seamless, monolithic look. Lighter grout would break up the visual flow and draw attention to every joint. Large-format slate tiles minimize grout lines and make the space feel more expansive.
For a shower floor, consider smaller slate tiles or mosaics to improve traction and conform to the slope.
9. Penny Rounds for Retro Flair
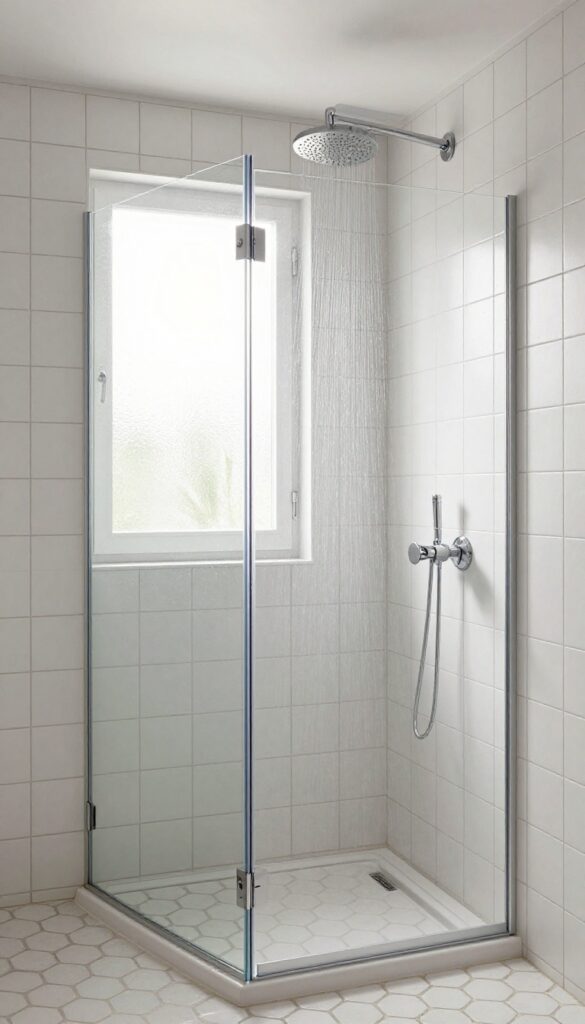
Penny rounds bring a playful, vintage vibe that feels both nostalgic and fresh. These small circular tiles, typically mounted on mesh sheets, create a textured surface that catches light in a unique way. They're especially practical for shower floors because the many grout lines offer slip resistance without sacrificing style.
Penny rounds aren't just for floors—they work beautifully on walls too, either as a full covering or as an accent stripe. Their small scale makes them ideal for curved surfaces or niches where larger tiles would be tricky. The key is to embrace the grout: it becomes part of the pattern, so choose a color that complements or contrasts deliberately.
Why Penny Rounds Work In Showers
The high number of grout joints creates excellent traction underfoot, making penny rounds one of the safest choices for wet areas. They also conform easily to shower pans and corners, reducing the need for awkward cuts. Plus, the retro look pairs well with modern fixtures, creating a balanced aesthetic.
Color And Pattern Ideas
Stick with a single color like matte white or black for a clean, classic look. Or mix two colors—say, white and navy blue—in a random or checkerboard arrangement. You can even create subtle gradients by blending shades from light to dark across the wall.
Installation Tips
Because penny rounds come on mesh sheets, installation is faster than placing individual tiles. But make sure the substrate is perfectly flat—any dips will show. Use a white or color-matched grout to keep the pattern crisp, and seal the grout well to prevent staining in a wet environment.
10. Geometric Patterned Tiles for a Bold Statement
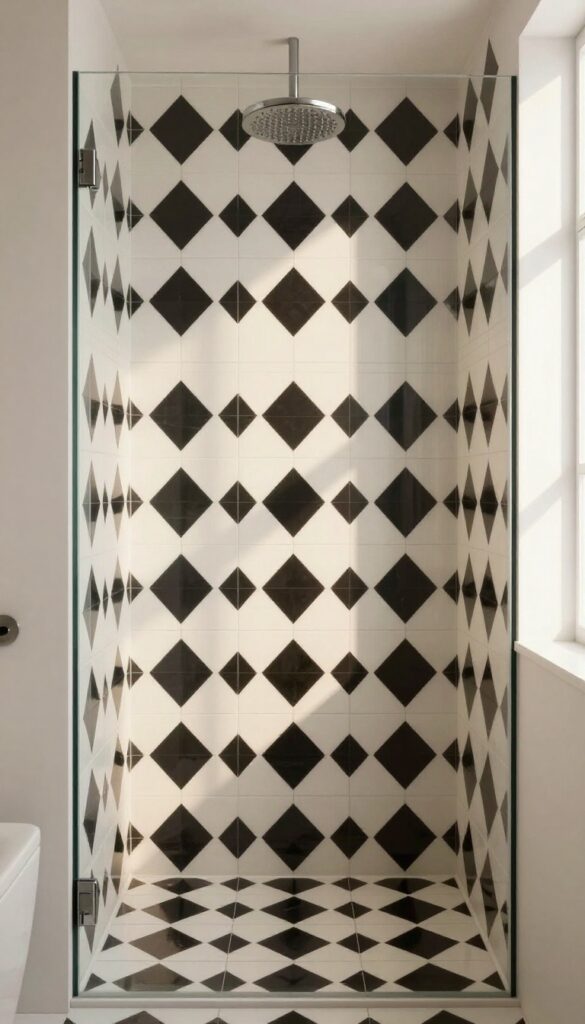
Diamond, chevron, arabesque—geometric tiles bring instant energy to a shower. They turn a functional space into a visual anchor. The key is to let the pattern do the talking by keeping everything else minimal.
Geometric patterned tiles work best as an accent wall or a full floor-to-ceiling feature. Choose contrasting colors like black and white or navy and cream for maximum impact. Pair with simple fixtures and neutral paint to avoid visual clutter.
Choosing The Right Pattern
Diamond shapes create a classic, timeless look. Chevron adds movement and flow. Arabesque offers a softer, more organic feel.
Consider the size of your shower—larger patterns can make a small space feel bigger, while intricate small-scale patterns add texture.
Color And Contrast
High contrast (like black and white) delivers a dramatic, modern vibe. Monochromatic patterns with subtle tonal shifts feel more sophisticated and spa-like. If you're nervous about bold color, stick to one strong hue paired with a neutral.
Installation And Grout
Grout color matters. Use a contrasting grout to make the pattern pop, or match it for a seamless look. Hire a pro for complex patterns—alignment is critical.
Consider matte finish tiles to reduce glare and keep the focus on the design.
11. Wood-Look Planks for Warmth
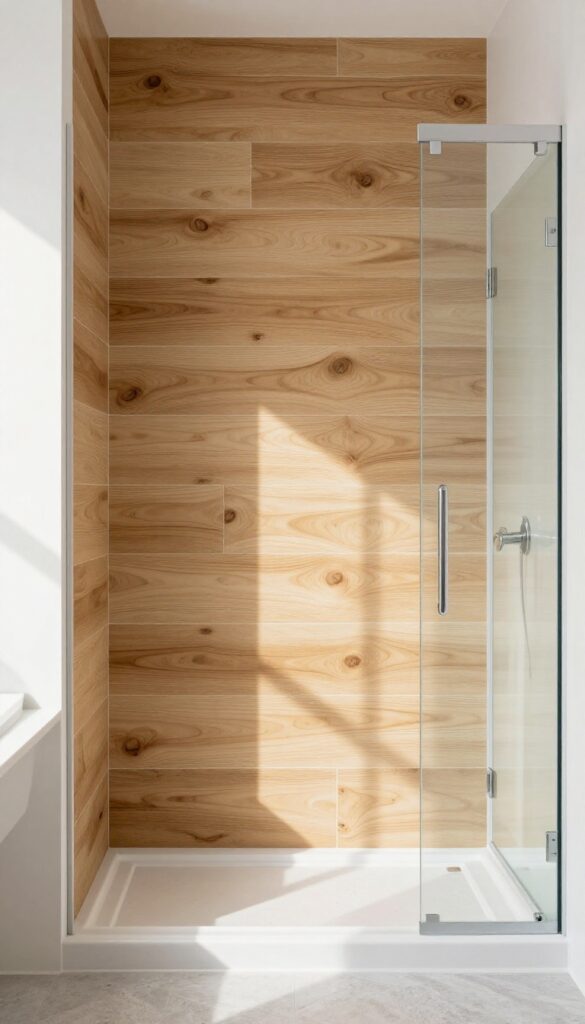
Reclaimed wood brings instant warmth to any space, but in a shower it's impractical—unless you opt for porcelain planks. These tiles mimic the grain, knots, and texture of aged timber while being completely waterproof. They won't rot, warp, or require sealing, making them a smart choice for a humid environment.
Use them on one accent wall or across the ceiling for a sauna-like feel that softens the hard surfaces of a modern bathroom.
Pairing wood-look planks with white fixtures creates a clean contrast that keeps the shower from feeling too dark or rustic. The natural tones of the planks add depth and a tactile quality that makes the space feel more inviting. For a cohesive look, carry the same tile into the niche or bench area.
Installation matters: choose a rectified edge for tight grout lines, and consider a matte finish to enhance the wood-like appearance. Maintenance is simple—just wipe down as usual, no special cleaners needed.
Why Porcelain Planks Work In Wet Areas
Real wood expands and contracts with moisture, leading to warping and mold. Porcelain planks are fired at high temperatures, making them dense and non-porous. They handle steam and splashes without issue, and they're slip-resistant when textured.
Plus, they come in a range of wood species—oak, teak, walnut—so you can match your preferred aesthetic without sacrificing durability.
Placement Strategies For Maximum Impact
Using planks on a single feature wall draws the eye and creates a focal point. For a more enveloping feel, cover the ceiling or the entire shower enclosure. Vertical stacking can make a small shower feel taller, while horizontal laying widens a narrow space.
Mix with solid-color tiles on other walls to avoid overwhelming the room.
Style Pairings That Work
Wood-look tiles pair beautifully with matte black or brushed nickel fixtures for an industrial edge. White subway tiles on adjacent walls keep the look crisp. Add a teak bench or a bamboo mat to reinforce the natural theme.
Keep grout lines thin and in a matching tone to maintain the illusion of real wood.
12. Glossy White Subway Tiles with Dark Grout
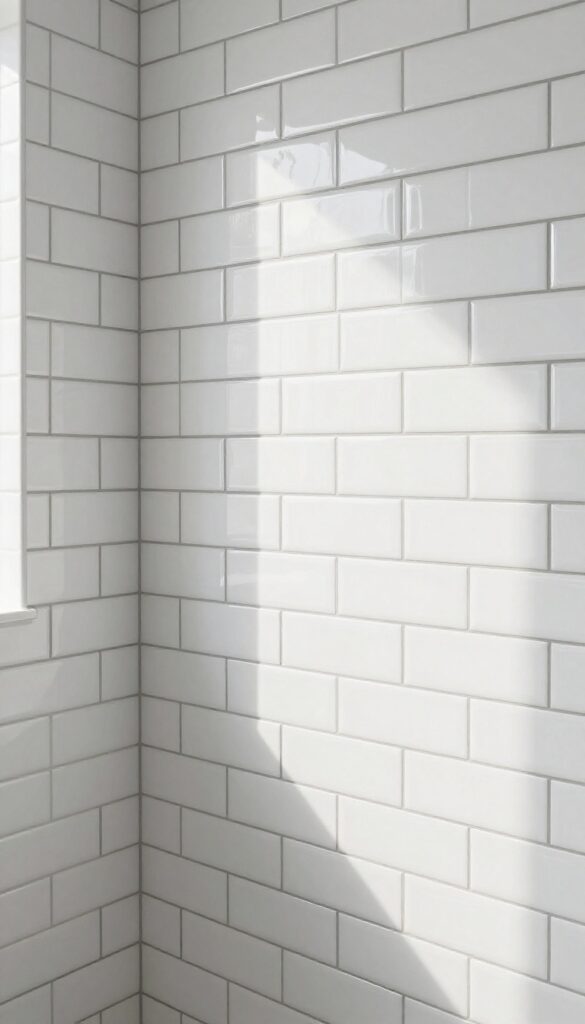
Some combos are classic for a reason. Glossy white subway tiles paired with charcoal or black grout create a crisp, graphic look that feels both timeless and modern. The dark grout lines add definition and hide dirt better than white grout, so your shower stays looking fresh longer.
This is one of the most budget-friendly options out there, but it doesn't look cheap. The contrast gives any bathroom an instant upgrade, whether you're going for a minimalist vibe or something with a bit more edge.
The key to pulling this off is choosing the right grout color and width. Dark grout against white tiles makes the pattern pop, so even a simple brick layout looks intentional and stylish. Plus, it's a practical choice—dark grout doesn't show stains or mildew as easily, meaning less scrubbing for you.
Installation is straightforward, and the materials are widely available, making this a great DIY project if you're handy. The result is a clean, modern shower that feels fresh without breaking the bank.
Why It Works
White subway tiles reflect light, making small showers feel bigger and brighter. The dark grout adds contrast and visual interest, preventing the wall from looking flat. It's a simple trick that delivers a high-end look for a fraction of the cost of natural stone or custom tiles.
Grout Width Matters
For a modern look, go with a grout line that's about 1/16 to 1/8 inch wide. Too wide and it can look rustic or dated. Too narrow and the dark grout might get lost.
A consistent, thin line keeps the design sharp and clean.
Color Variations
While charcoal is the most popular choice, you can also try black, dark gray, or even a deep navy for a subtle twist. Just make sure the grout is sealed properly to prevent staining. Test a small area first to see how the colors interact in your lighting.
13. Mixed Materials for an Eclectic Edge
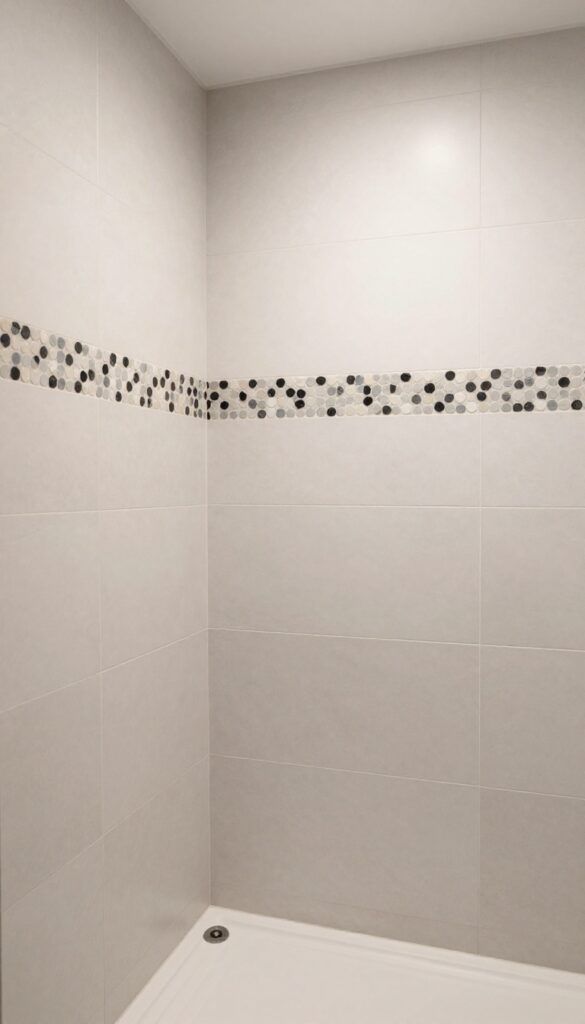
Why settle for one tile when you can have two, or even three? Mixing materials in a single shower is a clever way to break up large surfaces and add personality without going overboard. The trick is to keep the palette cohesive while playing with scale, texture, or finish.
A well-executed mix feels intentional, not chaotic.
Pair Large-format Slabs With Mosaic Accents
Start with large-format tiles—like marble-look porcelain or matte ceramic—on the main walls. They create a seamless, clean backdrop. Then introduce a band of hexagon, penny round, or herringbone mosaic at eye level or as a niche backdrop.
The contrast in size and pattern draws the eye without overwhelming the space.
Mix Glossy And Matte Finishes
Another low-risk way to mix materials is by playing with sheen. Use glossy subway tiles on one wall and matte field tiles on the others. The light reflection changes the mood throughout the day.
You can also use glossy tiles in the shower niche to highlight your products.
Combine Stone And Ceramic For Texture
Natural stone like slate or travertine brings organic texture, but it's porous and high-maintenance. Use it sparingly—maybe on a single accent wall or a bench. Pair it with large-format ceramic or porcelain tiles that are easier to clean.
The rough-smooth contrast adds depth and a spa-like feel.
FAQ
What is the best tile size for a small shower?
Large-format tiles (12×24 inches or bigger) work best for small showers because fewer grout lines make the space feel larger. Avoid very small tiles like mosaics on walls unless you want a busy look.
How do I choose between matte and glossy tiles?
Matte tiles hide water spots and soap scum better, making them lower maintenance. Glossy tiles reflect light and make a space feel brighter but show every drop. For shower floors, always choose matte or textured for slip resistance.
Can I mix different tile patterns in one shower?
Yes, but keep it balanced. Use one dominant tile on most walls and add a contrasting pattern as an accent strip or niche. Stick to a cohesive color palette to avoid a chaotic look.
What grout color is easiest to maintain?
Medium gray or beige grout hides dirt and staining better than white or very dark colors. Epoxy grout is also more stain-resistant than cement-based grout and doesn't need sealing.
How do I make a small shower look more modern?
Use large-format tiles, minimize grout lines, and choose a neutral or monochromatic color scheme. Add a niche with contrasting tile, and consider vertical stacking to draw the eye upward.
Conclusion
Your shower should be a place you look forward to stepping into every day. With the right tile choice, you can transform it from a purely functional space into a design statement that reflects your style.
Whether you lean toward sleek slabs, playful patterns, or natural textures, there's a modern tile idea here for you. Start with one wall or go all in—either way, you'll end up with a shower that feels fresh, distinctive, and uniquely yours.