10 Backyard Lighting Ideas for Warm Evening Ambience
Your backyard doesn't have to disappear when the sun goes down. A few well-placed lights can turn a plain patio into the spot where everyone wants to hang out after dinner.
The trick is layering. You want soft glow, a little sparkle, and enough light to actually see your friends' faces without feeling like you're under interrogation.
These ten ideas cover every budget and skill level, from plug-and-play string lights to simple DIY path markers. Pick a few, mix them together, and watch your evenings stretch out a little longer.
1. String Lights: The Instant Ambience Upgrade
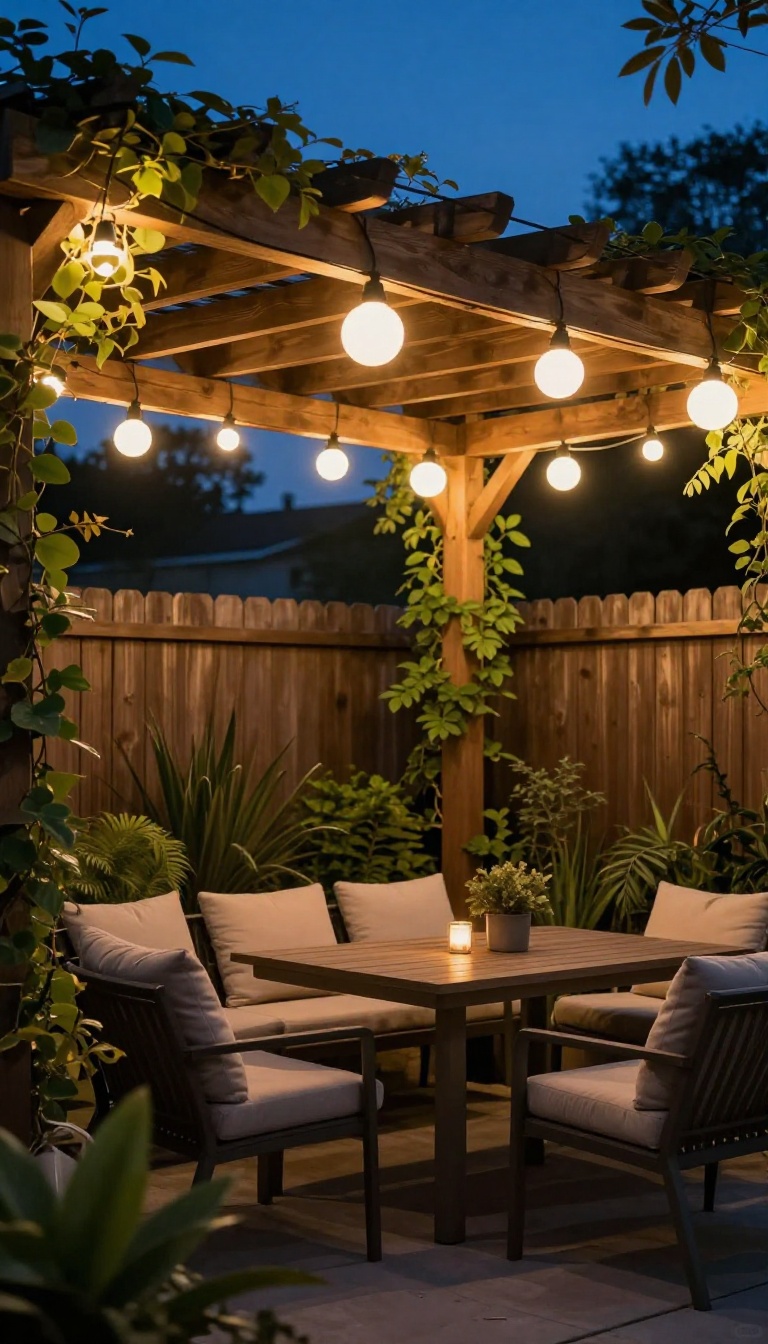
String lights are the fastest way to make a backyard feel intentional. One strand across a patio can shift the whole mood from harsh and functional to soft and inviting. The best part?
You don't need an electrician or a big budget to pull it off. These lights work because they mimic the warm, low glow of candles or a fire, just without the maintenance. They also draw the eye upward, which makes even a small yard feel more expansive.
And since they come in every length and bulb style, you can tailor them to your space without much effort.
The real magic of string lights is how they turn empty overhead space into a cozy ceiling. They soften the hard edges of a pergola, add sparkle to a fence line, and make a plain patio feel like a destination. But the difference between a charming setup and a tangled mess comes down to a few simple choices.
Start by thinking about where you want the light to land. You're not trying to illuminate a parking lot. You want pools of warm light that guide people through the space and make faces look good.
That means hanging them high enough to walk under, but low enough to feel enveloping. Once you've got the placement figured out, the rest is about bulb style and a little planning. Get those right, and your string lights will look like they've always been there.
Pick The Right Bulb Style
The bulb you choose sets the entire vibe. Round globe bulbs give off a classic, even glow that works almost anywhere. Edison-style bulbs add a vintage, slightly industrial feel with their visible filaments.
If you want something more delicate, try tiny fairy lights or rice lights—they disappear into the foliage and create a subtle starry effect. Warm white is the sweet spot for ambience. It's easier on the eyes than cool white and makes skin tones look natural.
Look for bulbs in the 2200K to 2700K range. That's the warm, golden light you see in cozy restaurant patios. Also check the spacing between bulbs.
Closer spacing means more light and a denser look. Wider spacing feels airier and more minimal. Neither is wrong—just match it to the mood you're after.
Hang Them At The Right Height
Too low and you'll be ducking all night. Too high and you lose the cozy factor. For most patios, aim for 8 to 10 feet above the ground.
That gives you plenty of clearance while keeping the light within your field of vision. If you're stringing lights across a seating area, create a gentle swoop rather than a tight line. A little sag looks relaxed and natural.
Use a pole or a hook to add a subtle curve if your anchor points are far apart. For pergolas or covered patios, run the lights along the beams or rafters. That keeps them secure and out of the way.
Just avoid wrapping them tightly around metal—it can damage the wire over time.
Avoid The Tangled Mess
Nothing kills the fun like spending an hour untangling a knot of wire. The fix is simple: wind your lights around a piece of cardboard or a cord winder before you hang them. That keeps them organized and ready to go.
When you're ready to install, start at one end and work your way across. Don't pull the strand tight—leave a little slack so you can adjust as you go. Use outdoor-rated extension cords and secure connections with electrical tape to keep moisture out.
If you're hanging lights permanently, consider a cable kit or guide wire. It gives you a sturdy line to attach the lights to, so you're not relying on nails or hooks that can pull loose. Plus, it makes taking them down at the end of the season a breeze.
2. Solar Path Lights That Actually Look Good
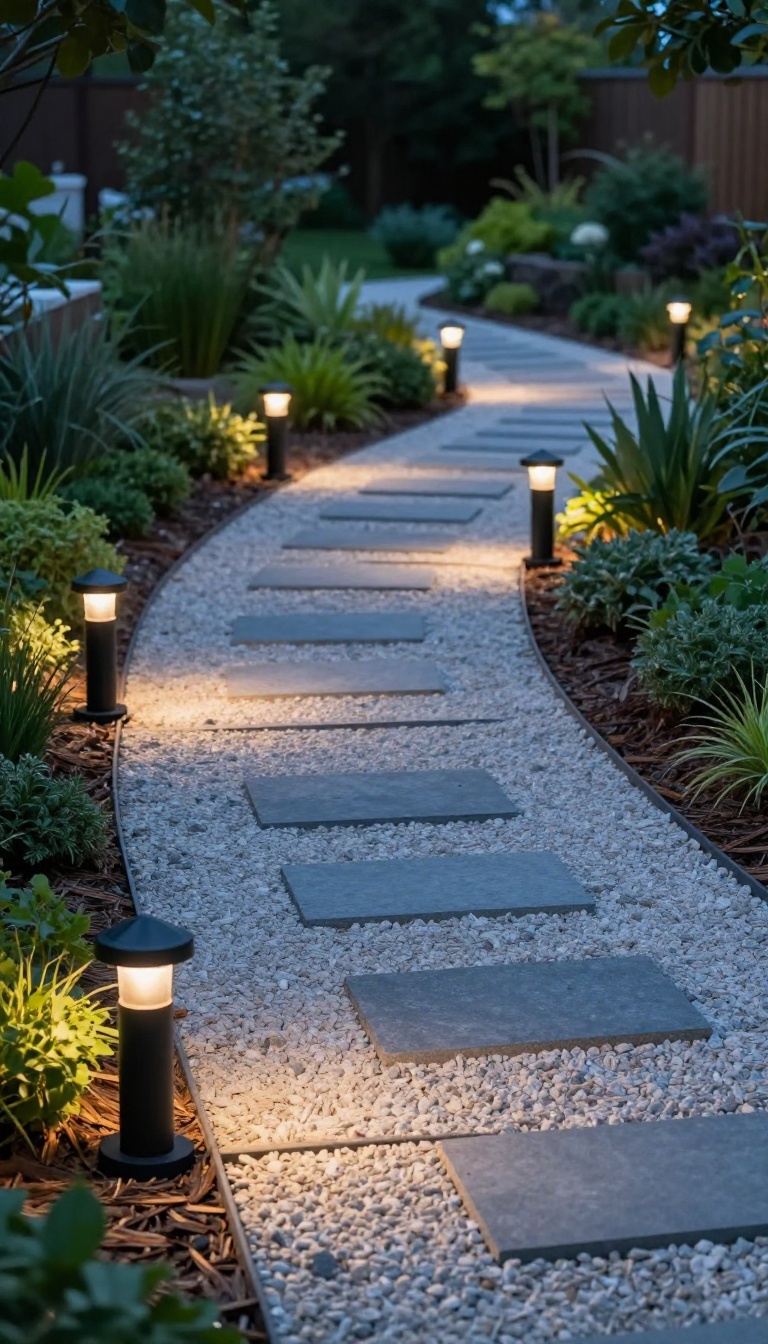
Solar path lights have a bad reputation for a reason. Most of the cheap ones look like plastic mushrooms and glow a sickly blue that makes your garden feel like a discount parking lot. But the good ones exist, and they've gotten much better.
Modern solar stakes come in matte black, brushed metal, and warm white LEDs that mimic candlelight instead of a flashlight. The trick is treating them like design elements, not just utility. Place them with intention, space them like you mean it, and your walkways will look intentional instead of accidental.
Start by picking a finish that disappears into your landscaping during the day. Matte black or dark bronze blends into soil and mulch, while stainless steel works better against gravel or stone. Avoid anything shiny or chrome unless you want your yard to look like a car show.
Light temperature matters more than brightness. Look for 2700K to 3000K bulbs, which give off a soft amber glow. Anything above 4000K reads as harsh and clinical, and that's the look most people are trying to escape.
Output should be subtle. You're lighting a path, not a runway. A good solar stake puts out 10 to 30 lumens, which is enough to see where you're stepping without washing out the rest of your yard.
Spacing And Placement
Space your lights 4 to 6 feet apart along a path. Closer than that and they start to look like a landing strip. Wider and you get dark gaps that feel unintentional.
Stagger them slightly on curves so the light follows the walkway instead of cutting across it. On straight runs, keep them on the same side for a cleaner line. For garden beds, tuck them behind low plants so the fixture hides and only the glow shows.
That's the difference between 'I bought lights' and 'I designed this. '
What To Avoid
Skip anything with a visible plastic lens or a seam down the middle. Those are the tell-tale signs of a cheap fixture, and they'll yellow within a season. Also avoid stakes that are too short.
If the head sits lower than 12 inches, it'll get swallowed by grass and mulch. Aim for 16 to 20 inches of height. And don't mix brands along the same path.
Slight differences in color temperature and height will be obvious once the sun goes down.
Getting The Most From Solar
Solar lights need direct sun to charge, so don't bury them under shrubs or eaves. Six hours of direct light is the sweet spot for a full night of glow. If a spot stays shaded, consider a hybrid model that runs on solar but has a USB backup for cloudy stretches.
It's a small upgrade that saves a lot of frustration. Clean the panels every few weeks with a damp cloth. Dust and pollen cut charging efficiency fast, and it's the number one reason people think their solar lights stopped working.
3. Fire Pit Glow for Natural Warmth
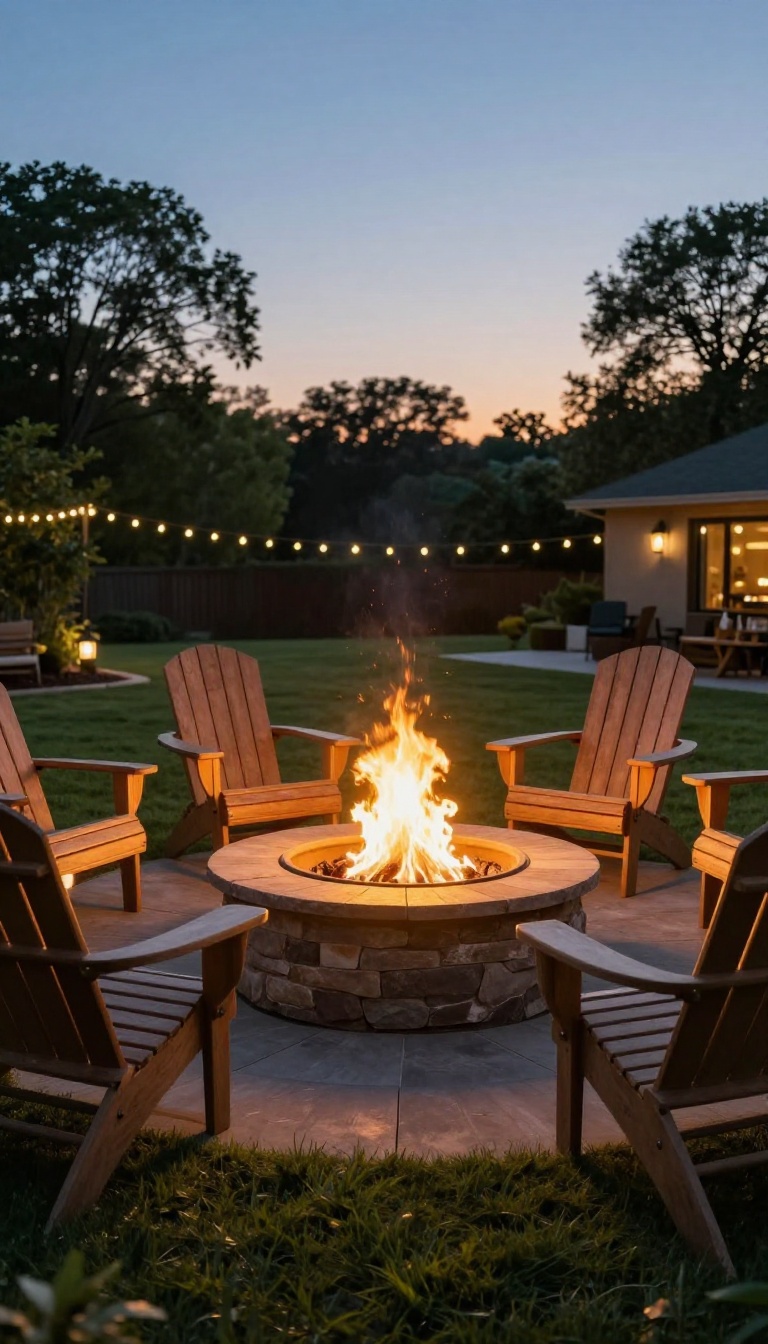
A fire pit does double duty: it throws off heat and casts a dancing light that no bulb can copy. The flicker softens faces, deepens shadows, and makes even a simple circle of chairs feel like a destination. You get warmth on cool nights and a natural focal point that pulls people in without trying.
The glow from a fire is alive. It moves, it breathes, and it changes the whole mood of a backyard in a way that static lights can't. Whether you go wood or gas, the key is placing it where people naturally gather and letting the light do the rest.
Wood Vs. Gas: Pick Your Vibe
Wood gives you crackle, smoke, and that unmistakable campfire smell. It takes more work, but the ritual of building and tending a fire is part of the charm. Gas is instant, clean, and easy to start with a switch.
It won't give you the same sensory hit, but it's reliable and low-maintenance. Choose based on how often you'll use it and how much fuss you want.
Arrange Seating For The Glow
Don't just circle the pit and call it done. Pull chairs close enough that the fire lights faces from below, but leave enough room to move without bumping knees. A mix of chairs and a bench or two keeps the layout flexible.
Angle seats slightly toward the center so everyone gets a piece of the warmth and the view.
Let The Flicker Set The Mood
The flicker is the magic. It's unpredictable, so it keeps your eyes moving and makes the space feel alive. You can enhance it by adding a few candles or low-voltage lanterns nearby, but don't compete with the fire.
Let it be the brightest thing in the circle. The contrast between the fire and the darker edges of the yard is what makes the whole scene feel cozy.
4. Lanterns and Candles for Tabletop Charm
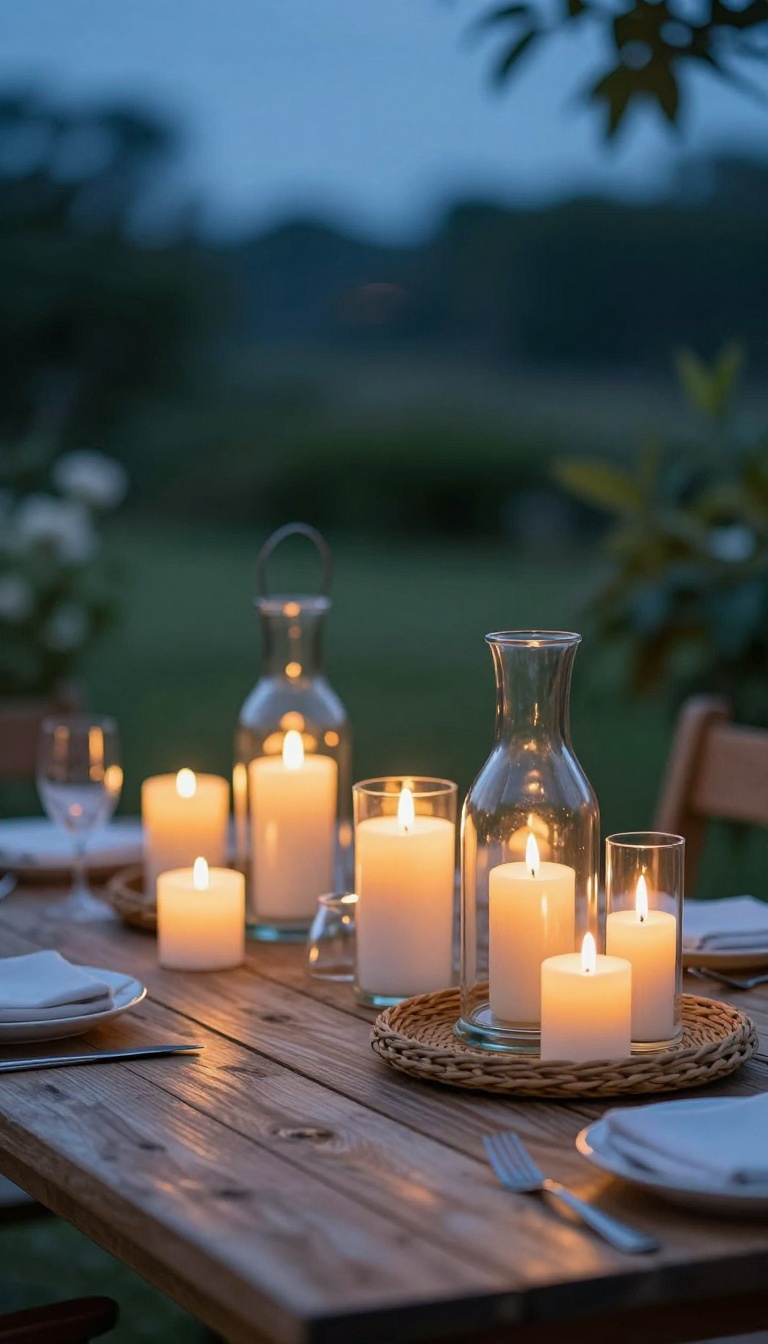
Lanterns and candles bring a soft, intimate glow that overhead lights can't match. They're perfect for scattering across tables, steps, or railings to create little pockets of warmth. And the best part?
You can mix real flames with battery-powered options for a look that's both charming and safe.
Think of lanterns and candles as the jewelry of your backyard lighting. They add sparkle and personality without overpowering the space. Place a few on a dining table and suddenly dinner feels like a special occasion.
Line them along a step and they guide the way with a gentle flicker. The key is to use them in clusters, not as your only light source. They're accents, not spotlights.
And because they're portable, you can move them around as the evening unfolds—from the table to the lounge area to the edge of the pool.
Real Flame Vs. Battery: Which To Choose
Real candles win on ambiance—there's nothing like a live flame to set a romantic mood. But they need constant attention, especially if there's a breeze or kids running around. Battery-operated LED candles have come a long way; many now flicker realistically and even have timers.
They're safe to leave unattended and won't blow out. For a mix, use real candles in sheltered spots like a covered table and LEDs everywhere else. That way you get the best of both worlds without the worry.
Stylish Ways To Display Them
Hurricane holders are a classic for a reason: they protect the flame and look elegant. Group three different heights on a tray for a centerpiece that's easy to move. Lanterns with handles can hang from shepherd's hooks or tree branches.
For a rustic touch, use mason jars with sand and a votive inside. Don't forget steps and railings—a line of tea lights in small holders adds a magical path. Just make sure they're stable and out of walkways.
Safety Tips To Keep In Mind
Never leave real flames unattended, and keep them away from curtains, paper napkins, and dry plants. Place candles on heat-resistant surfaces and use a snuffer to put them out instead of blowing. If you have pets or kids, stick with flameless options.
Battery candles can overheat if left on too long, so check the manufacturer's instructions. And always have a fire extinguisher or a bucket of water nearby just in case.
5. Uplighting Trees for a Magical Canopy
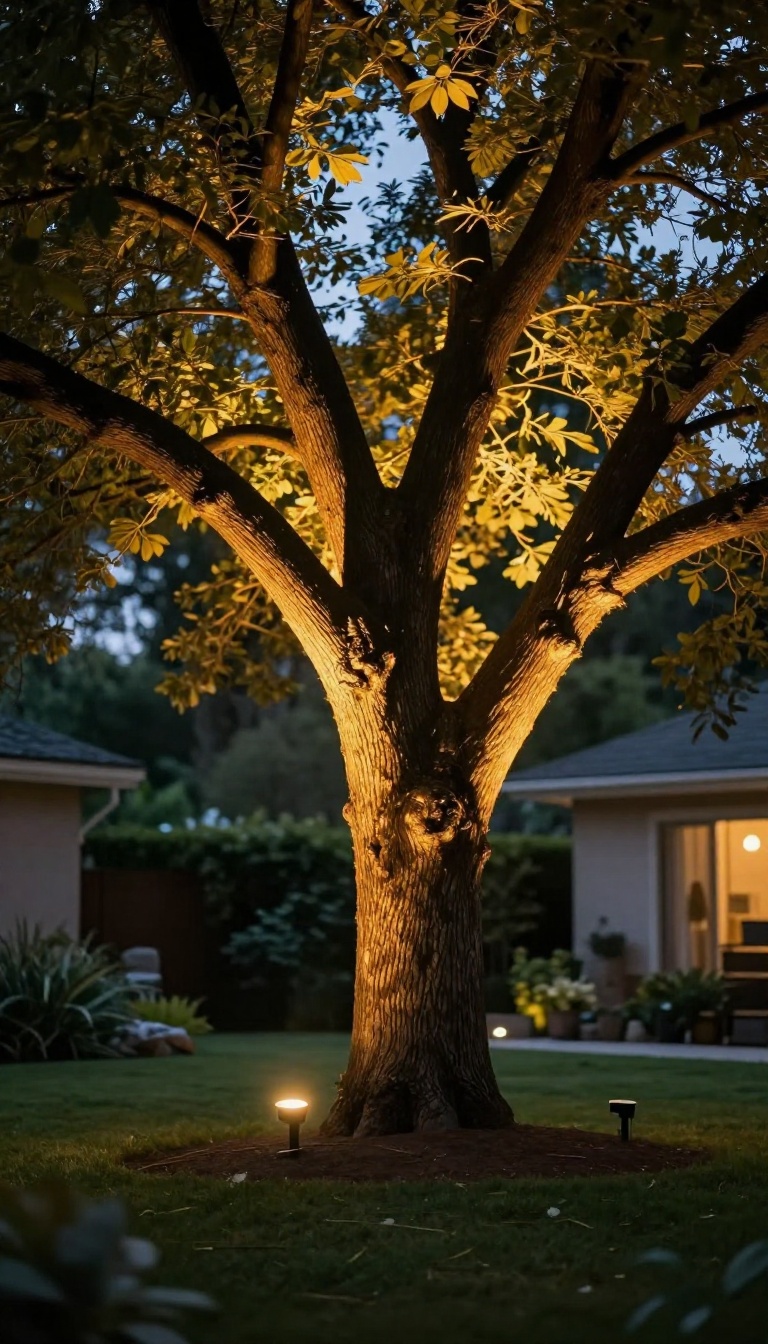
Uplighting is the backyard equivalent of a spotlight on a stage—except the star is your tree. Place a fixture at the base and aim it upward, and suddenly branches glow while the trunk stays dark. It's a simple trick that adds drama, depth, and a touch of magic to any evening.
The effect works because your eye follows the light. Instead of a flat, evenly lit yard, you get pools of brightness and shadow that create a sense of mystery. Trees become living sculptures, and the canopy overhead turns into a soft, glowing ceiling.
It's the kind of detail that makes people pause and look up.
Choosing The Right Fixture
You don't need fancy equipment. A well-made spotlight with a stake is your best bet. Look for LED fixtures—they run cool, last for years, and sip electricity.
Adjustable heads let you aim the beam exactly where you want it. If you want to avoid running cables, solar spotlights have improved a lot, though they're best for smaller trees or accent use.
Beam Angles And Placement
Narrow beams (around 15 to 30 degrees) create a tight, dramatic column of light. Wider beams (40 degrees or more) wash a broader area and work well for trees with sprawling branches. Place the fixture a foot or two from the trunk, angled slightly outward, so the light grazes the bark and catches the undersides of leaves.
For bigger trees, use two or three fixtures spaced around the base to avoid a single hot spot.
Why It Makes Small Yards Feel Bigger
When you light a tree from below, you draw the eye upward. That vertical line makes the space feel taller and more open. The dark sky above becomes part of the design, not just empty space.
In a small yard, that illusion of height is priceless—it turns a cozy patio into an outdoor room with a view.
6. Bistro Lights Over a Dining Area
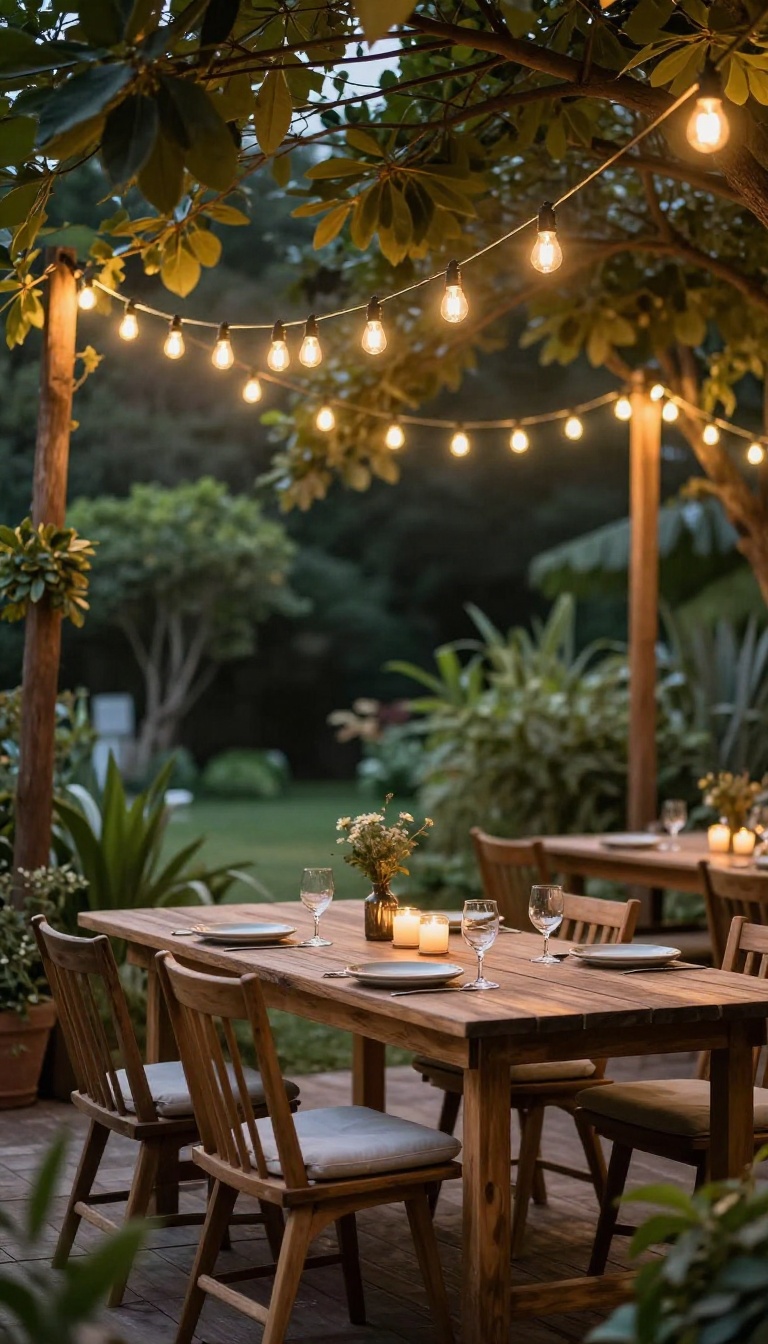
Bistro lights do more than just add sparkle—they define a space. When you string them over a dining table, they create an instant room outdoors, with a ceiling of soft light that pulls everyone in. The key is getting the height and warmth right so it feels cozy, not clinical.
Hanging bistro lights over your dining area is a straightforward project that delivers a big payoff. You'll need a few strands of outdoor-rated string lights, some swag hooks or screw-in cup hooks, and a dimmer switch. The goal is to create a canopy of light that hovers just above head height, casting a warm glow on the table without blinding anyone.
Getting The Height Right
You want the lowest point of the swoop to be about 7 to 8 feet above the ground. That keeps the bulbs out of your line of sight when you're seated and gives enough clearance for people to walk under. If you go too high, the light spreads out and loses its intimacy.
Too low, and you'll feel like you're eating under a low ceiling. Measure from the tabletop up, not the ground, to ensure comfortable headroom.
Hooks And Hanging
Swag hooks are your best friend here. They screw into wood, stucco, or drywall and have a curved shape that holds the light strand securely. Space them every 6 to 8 feet along the path you want the lights to take.
For a gentle drape, add a little slack between hooks—too tight and you lose the relaxed look. If you're attaching to trees, use rope or zip ties wrapped around branches, but avoid damaging the bark.
Warm Light, Not Harsh
The bulbs matter as much as the placement. Look for strands with warm white LEDs (around 2700K) or incandescent bulbs if you prefer a classic glow. Avoid cool white or daylight bulbs—they'll make your backyard feel like a parking lot.
A dimmer is non-negotiable. Plug your lights into a dimmer switch (either inline or smart plug) so you can dial down the brightness as the evening wears on. That's how you go from dinner party to late-night hangout without losing the mood.
7. Floating Pool or Pond Lights for Water Features
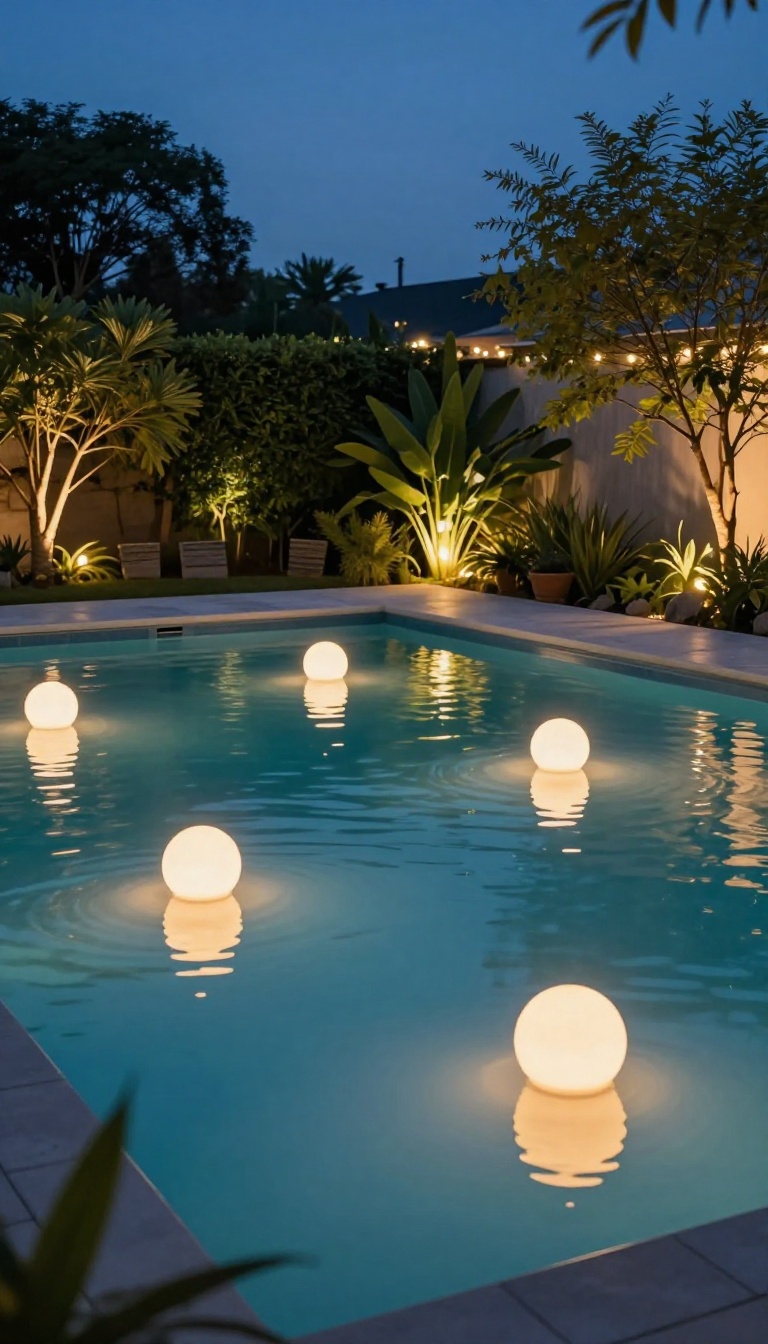
Water already reflects the sky, so why not give it something better to mirror? Floating lights turn a pool, pond, or fountain into a soft, moving light show. They drift, bob, and double the glow with every ripple.
The effect is calm and a little hypnotic. Unlike fixed lights, these orbs move with the water, so the reflections never sit still. That gentle motion keeps the space feeling alive without any harsh brightness.
You can drop them in and forget them. Most run on batteries or solar, and many are fully waterproof. Just check the rating before you buy, because not all floating lights are built for long soaks.
Pick The Right Color Temperature
Warm white (around 2700K) blends best with fire pits and string lights. It feels cozy and doesn't fight the other glows in your yard. If you want a party vibe, go with color-changing LEDs and set them to amber or soft orange.
Cool white can look clinical, so save it for modern, minimalist pools.
Check The Waterproof Rating
Look for an IP68 rating if the light will sit in water for hours. IP67 is fine for splashes but not for full submersion. Also check the battery compartment seal—that's usually the first place water gets in.
A cheap light that leaks is no bargain.
Let Reflections Do The Work
One floating orb can look like two or three because of the reflection. Place them near the edge where you sit, so the doubled glow lands right in your view. A few scattered across a pond creates a trail of light that draws the eye without overwhelming it.
8. Step and Deck Lighting for Safety and Style
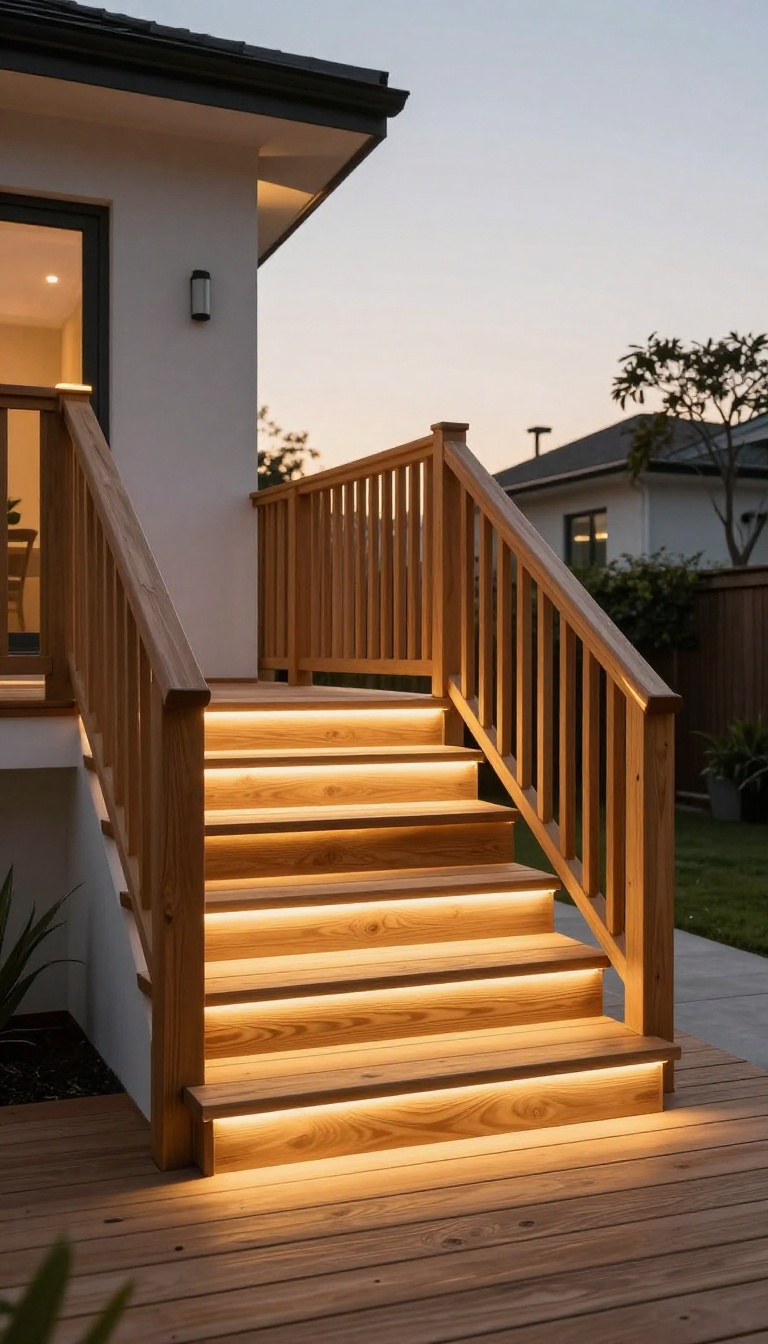
Stairs and deck edges are where good parties go to die. One missed step in the dark, and suddenly the evening's about ice packs instead of conversation. Step and deck lighting fixes that without making your yard look like a runway.
Done right, it's invisible until you need it—then it quietly shows everyone where to put their feet. The bonus? Those same lights draw clean lines along your deck and railings, so the structure looks intentional after dark instead of vanishing into a black hole.
Where To Put Them
Focus on transitions: the top and bottom of every stair run, the edge of any drop-off, and the corners where a deck turns. Those are the spots people misjudge after a glass of wine. On stairs, light the tread or the riser—pick one and stay consistent.
Lighting both usually looks busy. On deck edges, run a soft line along the perimeter so the boundary reads clearly from every angle. Railings count too.
A lit handrail or post cap does double duty: it marks the path and adds a little architecture to the view from the house.
Hardwired Vs. Plug-in
Hardwired lights are the cleanest look. No cords, no visible transformers, and they run off a switch or timer like any indoor fixture. The catch is you'll need an electrician and a bit of planning before the deck boards go down.
Plug-in options skip all that. Low-voltage kits plug into an outdoor outlet and clip or screw into place in an afternoon. You'll see a cord somewhere, but a little cable management hides most of it.
Solar stake lights and battery pucks are the easiest of all. They're not as bright or as consistent, but for a few steps or a small landing, they get the job done with zero wiring.
Getting The Look Right
Warm white is the move here—around 2700K to 3000K. Cool white reads like a parking garage, which is the opposite of cozy. Keep the brightness low.
These lights are for guidance, not illumination. If you can see the individual bulbs glaring, dial it back or add a diffuser. Recessed fixtures and LED strip channels give you that clean, built-in look.
Surface-mounted pucks are cheaper and easier to retrofit, but they stick out a little. Either way, aim the light down and across the surface, not straight into anyone's eyes.
9. Layered Lighting Zones for a Cozy Flow
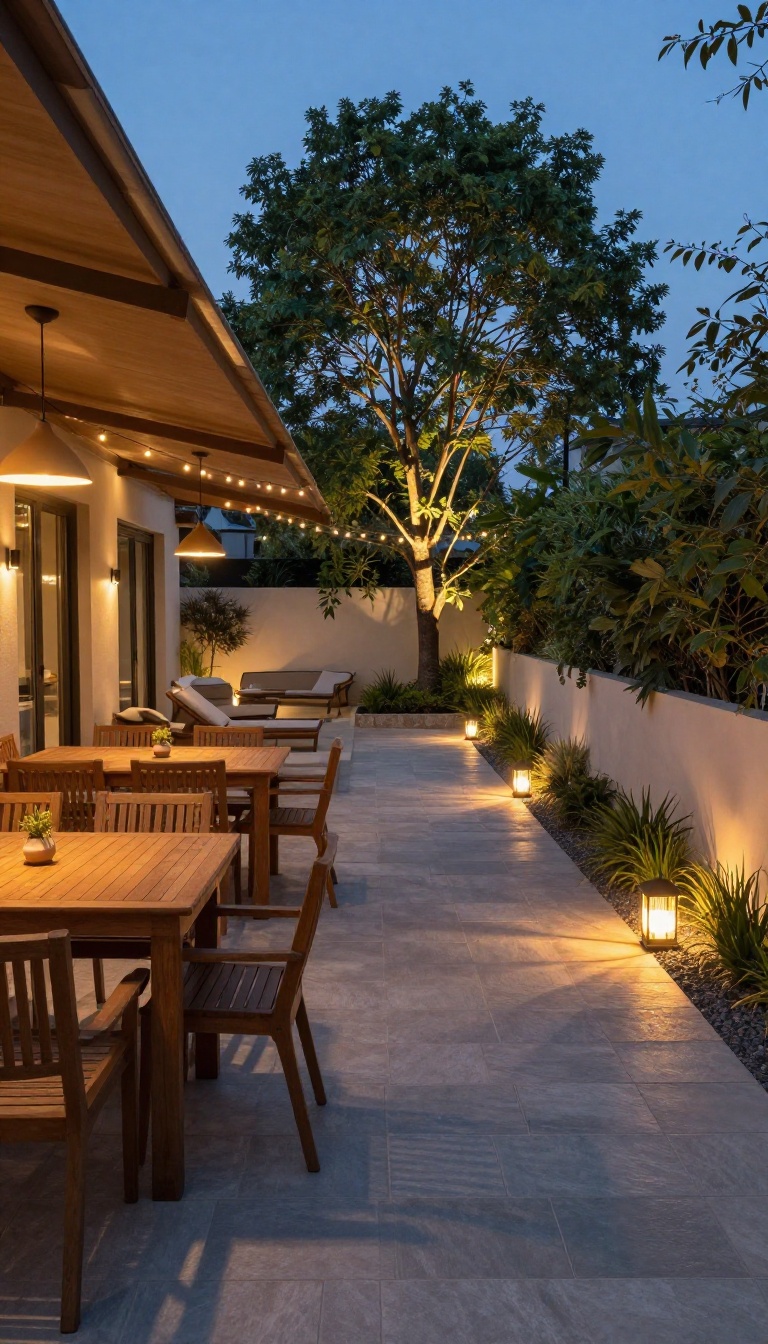
Think of your backyard like a house with different rooms. You wouldn't use the same bright overhead light in your bedroom and your kitchen, right? The same logic applies outside.
By breaking your yard into zones—dining, lounging, and pathways—you can give each area its own mood while keeping the whole space connected. The goal isn't to flood every corner with the same brightness. It's to guide people through the yard with light that feels intentional.
A soft glow here, a focused beam there, and a few gentle markers along the way. When you layer ambient, task, and accent lights across these zones, the result is a space that feels warm and welcoming from every angle. Plus, you avoid that harsh 'stadium' look that comes from one big floodlight.
Instead, you get depth, texture, and a natural flow that makes guests want to wander and linger.
Start by mapping out your zones. Where do people eat? Where do they sit and chat?
Where do they walk? Once you've identified these areas, you can assign the right type of light to each one. Ambient light sets the overall mood.
It's the soft, diffused glow that fills the space without being harsh. Think string lights overhead, lanterns on a table, or a low-wattage wall wash. Task light is brighter and more focused—it's what you need for grilling, reading, or seeing your food.
Accent light adds drama and highlights features like trees, sculptures, or architectural details. The magic happens when you blend all three. A dining zone might have a pendant light for task lighting, surrounded by ambient string lights and a few accent uplights on nearby plants.
A lounging area could rely on ambient floor lamps or tiki torches, with a small task light for reading and accent lights to define the space. Pathways need low-level ambient or accent lights—just enough to see the step, not enough to blind. Balance is key.
You don't want one zone to feel like a runway while another feels like a cave. Use dimmers or smart bulbs to adjust brightness as the evening progresses. Start brighter for dinner, then dim everything down for late-night conversations.
Finally, tie the zones together with a consistent style. If your dining area uses warm white bulbs, keep that temperature in the lounging zone too. Mixing cool and warm lights can make the yard feel disjointed.
Stick with one color temperature—usually 2700K to 3000K—for that cozy, inviting feel.
Dining Zone: Bright Enough To Eat, Soft Enough To Relax
Your dining area needs to serve two purposes: let people see their food and each other, but also feel intimate. A pendant light or chandelier over the table works as your task light. Hang it low enough to create a focal point, but high enough that no one bumps their head.
Surround that with ambient light—string lights zigzagging overhead or lanterns on nearby surfaces. Add a couple of accent lights, like small uplights aimed at a nearby tree or wall, to add depth. Put everything on a dimmer so you can lower the brightness once the plates are cleared.
Lounging Zone: Where Ambience Takes Over
This is where you want to kick back, so ambient light should dominate. Floor lamps, table lamps, or even a fire pit can provide a soft glow. If you have a seating area with a coffee table, a small task light—like a rechargeable table lamp—lets someone read or see their drink without lighting up the whole yard.
Accent lights can highlight a piece of art, a water feature, or the texture of a nearby fence. Keep the light levels low and warm. The goal is to make people feel wrapped in a cozy bubble, not sitting in a waiting room.
Pathways: Guide, Don't Glare
Path lights should be subtle. You're not trying to illuminate the entire walkway like a runway; you just want to mark the edge and prevent trips. Use low-voltage path lights spaced every 6 to 8 feet, or try solar stake lights for an easy DIY option.
Aim for downward-facing light to reduce glare. If you have steps, light them from the side or use recessed lights in the risers. The idea is to create a gentle trail that leads people from one zone to the next without pulling attention away from the main gathering areas.
Balancing The Whole Picture
Stand at the edge of your yard and look at all the zones together. Does one area jump out as too bright? Does another fade into darkness?
Adjust dimmers or swap bulbs until the transition feels smooth. You can also use height to your advantage. Hang lights at different levels—tall string lights, mid-level lanterns, and low path lights—to create a layered look that feels dynamic.
The goal is a yard that invites you to move through it, with each zone offering its own little moment of comfort.
10. Smart Controls and Dimmers for Easy Evenings
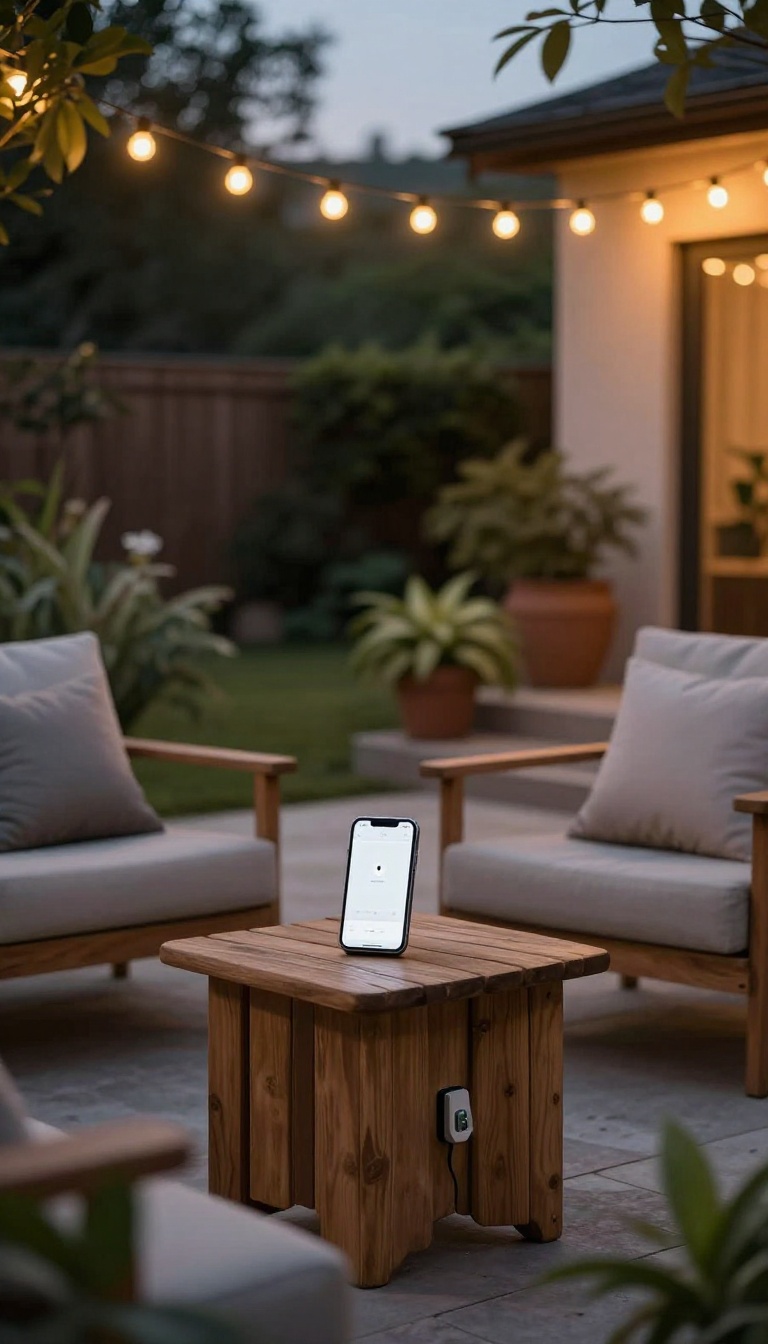
You've probably spent enough evenings walking around your yard flipping switches and unplugging cords. Smart controls let you skip all that. With a few affordable gadgets, you can set the mood from your phone without leaving your seat.
The goal isn't to turn your backyard into a smart home showroom. It's about making your lighting easy to live with. Simple timers, dimmers, and app controls can handle the boring parts so you can focus on enjoying the night.
Smart lighting doesn't have to be complicated or expensive. Start with a smart plug for your string lights. Plug it into an outdoor outlet, connect it to your Wi-Fi, and you can turn the lights on or off with your voice or a tap.
No more crawling under the deck to find that one switch. Dimmers are the other half of the equation. They let you dial the brightness down to a warm glow instead of harsh, glaring light.
Many smart dimmers also let you set schedules, so your lights turn on at sunset and off at bedtime automatically. That means you never come home to a dark yard or leave lights burning all night. When you're picking smart gear, look for warm color temperatures—around 2700K to 3000K.
That range feels cozy and inviting, like candlelight. Cool white or daylight bulbs can make your backyard feel like a parking lot, so avoid those unless you're doing something specific like a security setup. Keep the setup simple.
You don't need a hub or a dozen different apps. A few smart plugs and a dimmer or two will cover most backyards. Group your lights into zones—like patio, path, and garden—so you can control them together or separately.
That way, you can have just the path lights on for a quiet night, or everything glowing for a party. Schedules and scenes are where smart controls really shine. Set a scene for dinner that dims the string lights and turns on the fire pit.
Another for movie night that kills the glare and leaves just a soft wash. You can change scenes with your phone or a voice command, no rewiring needed. If you're not ready for full smart controls, start with a simple plug-in timer.
They're cheap, reliable, and do the same basic job. You can always upgrade later. The point is to make your lighting work for you, not the other way around.
Start With Smart Plugs
Smart plugs are the easiest entry point. Plug your existing lights into them and control everything from an app. No new fixtures required.
Choose Warm Dimming
Dimmers let you go from bright to barely-there. Look for warm white LEDs that dim smoothly without flickering. That soft glow is what makes evenings feel relaxed.
Set It And Forget It
Use schedules and scenes to automate your lighting. Turn lights on at sunset, off at midnight, and create one-tap scenes for different moods. It's the lazy way to a great ambiance.
FAQ
What color temperature is best for a warm backyard glow?
Stick with warm white bulbs around 2200K to 2700K. Anything higher starts looking blue and clinical, which kills the cozy vibe fast.
Can I get warm ambience without running electrical wiring?
Absolutely. Solar stake lights, battery lanterns, and rechargeable string lights all deliver a soft glow with zero wiring. Just charge them during the day and they handle the rest.
How many lights do I actually need for a small backyard?
Start with one main layer, like string lights or a fire pit, then add two or three accent pieces. You can always add more once you see how the light falls at night.
Are string lights safe to leave outside all year?
Outdoor-rated strands can handle rain and snow, but check the IP rating. Look for IP65 or higher, and bring them in during extreme storms to make them last longer.
What's the easiest way to control brightness from inside?
Plug your lights into a smart outdoor plug or a dimmer switch. You can schedule them, dim them, and set scenes without stepping outside or fumbling with cords.
Conclusion
Your backyard doesn't need a full redesign to feel warmer after dark. Start with the one idea that solves your biggest evening problem, whether that's a dark path, a gloomy patio, or a fence that disappears at sunset. Give it a week before adding anything else.
Then layer in the next touch, and the next. Good outdoor lighting builds slowly, one glow at a time, until the yard you ignored after dinner becomes the spot you never want to leave.