13 Backyard Deck Ideas to Upgrade Your Outdoor Living
A good deck earns its keep every single day, turning unused square footage into the room you actually want to hang out in. The right layout, materials, and details can add real function without a full rebuild. That matters whether your yard is flat, sloped, or somewhere in between.
Most decks fail for boring reasons: bad lighting, zero shade, and furniture that fights the space. Fix those and the whole backyard starts working harder. You do not need a contractor on speed dial for every upgrade either.
Below are 13 backyard deck ideas that cover structure, comfort, and the finishing touches people notice. Some are weekend projects, some are bigger investments, and all of them are worth a look.
1. Multi-Level Deck for Sloped Yards
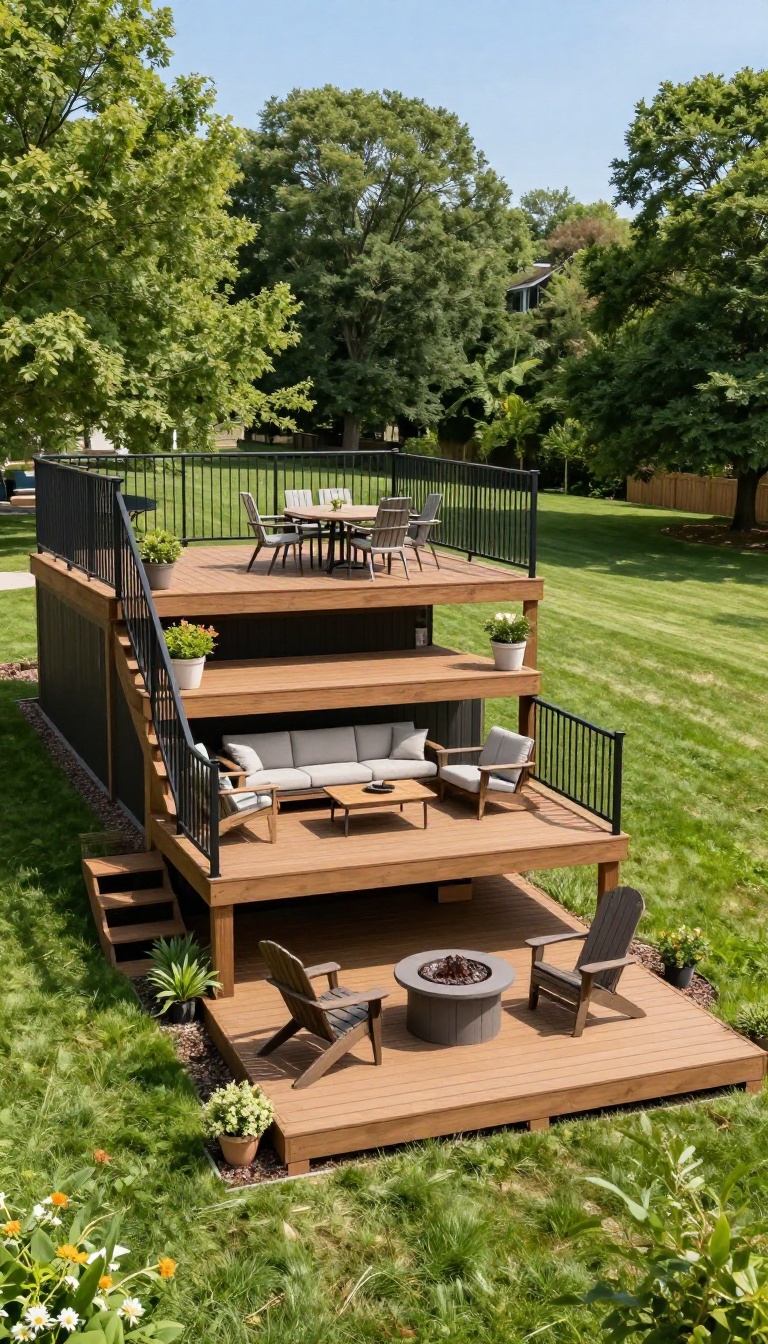
A sloped backyard can feel like dead space, but a multi-level deck turns that grade change into an advantage. Instead of fighting the hill with a massive retaining wall, you break it into two or three flat tiers that each serve a different purpose. The result is more usable square footage and a layout that naturally separates dining, lounging, and traffic.
The trick is working with the slope, not against it. Each tier gives you a level surface for furniture, grills, or planters, and the steps between them double as casual seating. You also avoid the cost and engineering headaches of a tall retaining wall, since the deck structure itself handles the elevation change.
Planning Your Tiers
Start by measuring the vertical drop across the space. A gentle slope might only need two tiers, while a steep yard can handle three. Aim for each level to be at least 8 to 10 feet deep so it feels like a real room, not a landing.
Sketch your zones first: dining near the house, lounging in the middle, and a fire pit or garden nook at the lowest point.
Stairs And Transitions
Wide, shallow steps feel more inviting than a steep run, and they can double as overflow seating. Keep the rise between 6 and 7 inches for comfort, and make the tread at least 12 inches deep. If you have the budget, wrap the stairs around a corner to soften the transition and add visual interest.
Materials And Safety
Use the same decking material on every level for a cohesive look, or mix in a contrasting border to define each zone. Composite decking holds up well on sloped sites because it resists moisture and won't splinter. Don't skip the railing on any tier higher than 30 inches, and add low-voltage step lights so nobody trips after dark.
2. Built-In Bench Seating Along the Railing
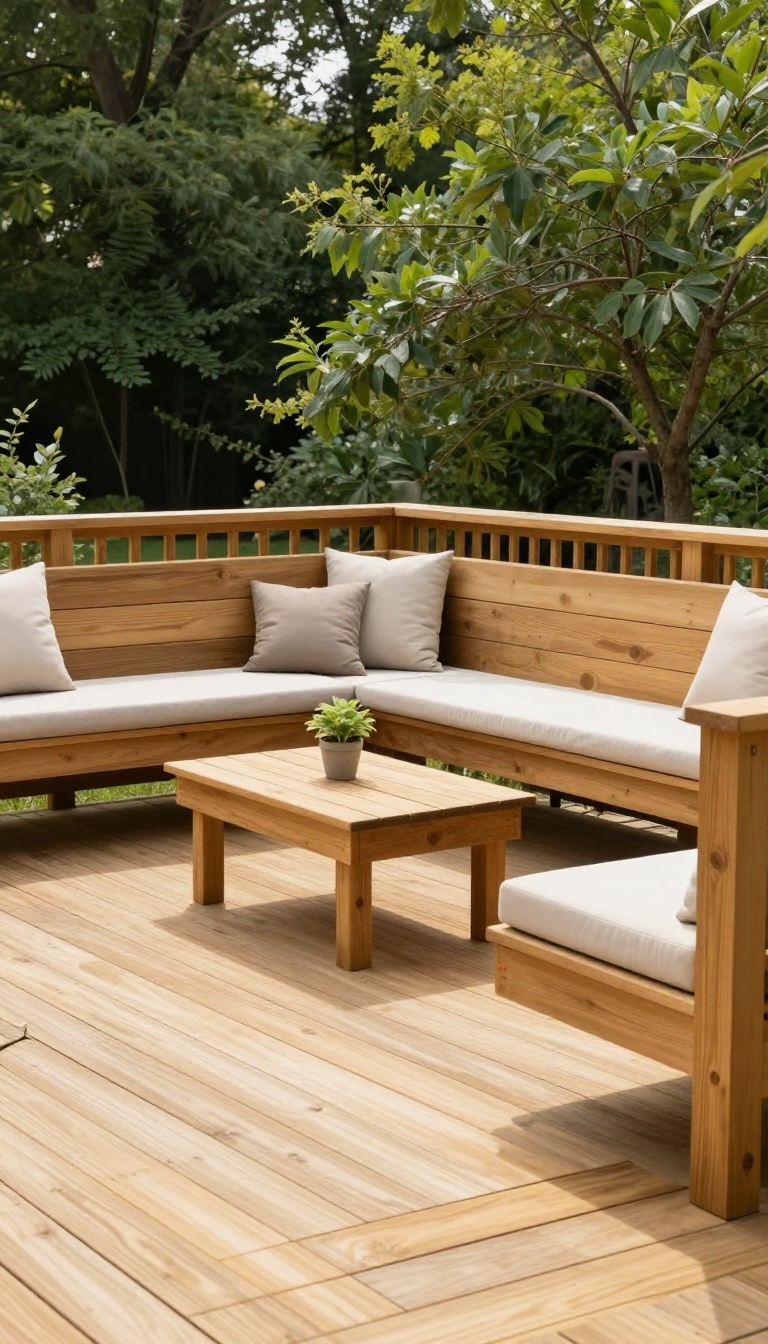
Built-in benches turn your deck's perimeter into prime seating without eating up the middle. They hug the railing, so you keep more open floor for grilling, dancing, or just walking around without weaving through chairs. Underneath, you can hide storage for cushions, tools, or kids' toys.
And when you host a party, people naturally spread out along the edges instead of clustering in one spot. This upgrade works on almost any deck shape, from a simple rectangle to a multi-level layout. It's a smart way to add function and flow at the same time.
Why Perimeter Seating Works
Most decks waste the edges. You put a railing there and nothing else, while the center gets crowded with furniture. Built-in benches flip that by making the railing useful.
They also create a natural traffic path. Guests can grab a seat along the edge and still leave room for people to move through the middle. That's a game-changer for smaller decks.
And because the benches are fixed, you never have to rearrange them. They stay put, look intentional, and free up space for other things.
Storage That Disappears
The space under a bench is prime real estate. Add hinged lids or slide-out drawers, and you've got a spot for everything that usually clutters your deck. Cushions, pool towels, grill tools, even folding chairs can live under there.
Just make sure you use weather-resistant materials and hardware so it holds up. If you don't need storage, you can still use the space for a hidden cooler or a pet bed. Either way, it's better than leaving it empty.
Design Details That Matter
Match the bench material to your deck for a seamless look. Wood benches on a wood deck, composite on composite, and so on. That keeps things cohesive.
Height matters too. Aim for 18 to 20 inches from the deck surface to the top of the seat. That's comfortable for most adults.
Add a backrest if you want more support, or keep it backless for a cleaner line. Either way, round the edges so they're safe and smooth.
Party Flow And Everyday Use
When people have a place to sit along the edges, they naturally spread out. That means less bottlenecking near the grill or the door. On quiet days, the benches become a reading spot or a place to set your coffee.
They're just as useful for two people as they are for twenty. And because they're built in, you never have to worry about someone tipping a chair or fighting over the good seat. Everyone gets a spot.
3. Deck Lighting That Works After Dark
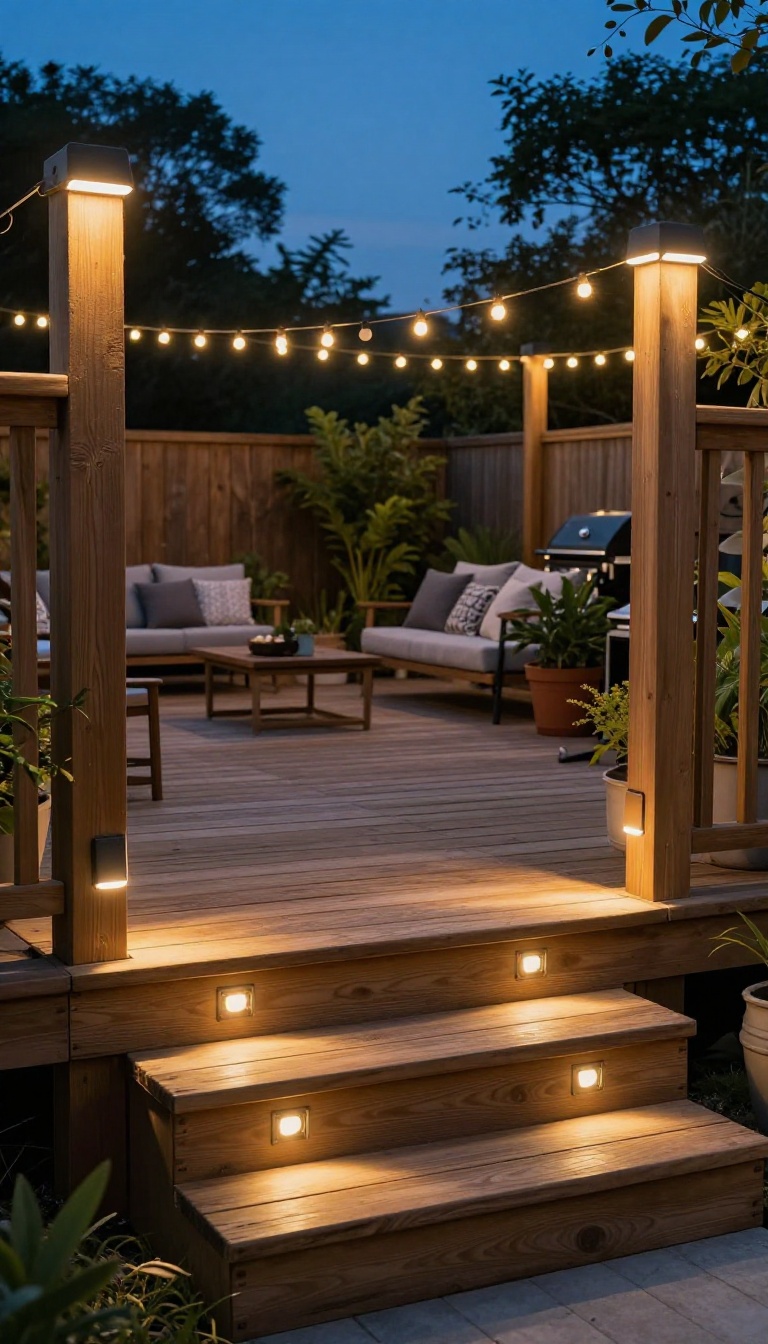
A deck that only works during daylight is a waste of square footage. Once the sun drops, bad lighting turns a great space into a glare-fest or a tripping hazard. The fix isn't one bright floodlight; it's a few layers that each do a small job well.
Think of it like this: you want enough light to see your burger and your steps, not enough to feel like you're on a runway. Layering post caps, step lights, and string lights gives you control. And with solar and low-voltage options, you can skip the extension cord spiderweb.
Here's how to build that layered look without overcomplicating it.
Start with the basics: safety and ambiance are two different jobs. Safety lighting keeps you from missing a step or fumbling with a grill lid. Ambiance lighting makes the deck feel like a place you want to linger.
You need both, but they don't need to come from the same fixture. The trick is to put light where the action is, not in your eyes. That means aiming fixtures down or sideways, keeping bright sources low, and using warm bulbs.
Once you get the layers right, you can dial each one up or down depending on the night.
Post Caps And Step Lights: The Safety Layer
Post cap lights sit on top of your railing posts and throw a soft pool of light downward. They mark the edges of the deck so you can see where the deck ends and the yard begins. Most are low-voltage or solar, so wiring is minimal.
Look for ones with a warm color temperature around 2700K to 3000K; anything cooler starts to feel like a parking lot. Step lights are the other half of the safety layer. They recess into the riser or mount flush on the side of each step.
They light the tread without blinding you when you're walking down. If you have wide stairs, put one on each side. For a low-voltage system, you can daisy-chain them from a single transformer.
Solar step lights work too, but they need direct sun to charge, so shade trees can be a problem.
String Lights And Drop Lights: The Ambiance Layer
String lights are the easiest way to make a deck feel intentional. Run them from the house to a couple of posts, or zigzag them between posts if you have them. Use a heavy-duty outdoor cord and hang them high enough that tall guests won't clothesline themselves.
Warm white bulbs are the safe bet; colored bulbs can be fun but tend to look like a carnival if you're not careful. Drop lights or pendant lights over a dining table or bar area give you focused light for eating and talking. Hang them about 30 to 36 inches above the table so they light faces without blocking sightlines.
If you don't have a pergola or overhead structure, a freestanding shepherd's hook works for a single pendant. Battery-powered options exist, but you'll be recharging them more often than you'd like.
Wiring Without The Tangle
Extension cords across a deck are an accident waiting to happen. If you're going low-voltage, run the main line along the base of the railing or under the deck and tap into it with connectors. That keeps cords out of walkways and looks cleaner.
Bury the transformer near an outdoor outlet, or mount it under the deck if it's rated for that. Solar is the zero-wiring option, but it has limits. Panels need several hours of direct sun, and performance drops in winter or cloudy stretches.
A hybrid approach works well: solar for post caps and step lights, low-voltage for string lights and pendants. That way you get reliable light where you need it most without running a single cord across the decking.
4. Pergola or Shade Sail for Sun Control
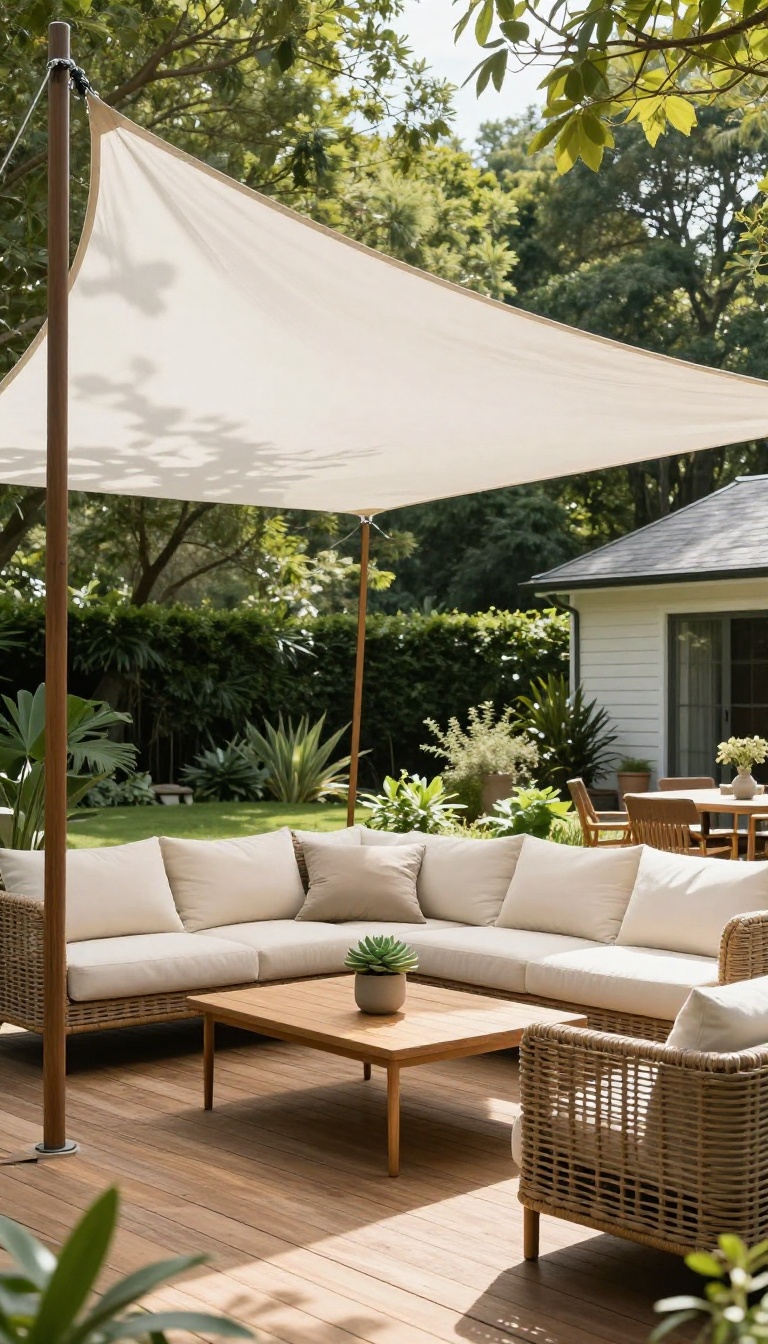
A deck without shade is a deck you abandon by noon. Adding an overhead structure changes that completely, turning a sunbaked platform into a room you can actually use all day. The two most popular routes are a pergola and a shade sail.
Each solves the same problem in a different way, and picking the right one comes down to your budget, style, and how much sun you need to block.
Pergolas bring structure and a sense of architecture. They frame the space, support climbing plants, and can be outfitted with slats or a retractable canopy for adjustable shade. Shade sails are simpler and often cheaper.
They stretch a piece of tensioned fabric over the deck, blocking UV rays while letting breezes through. Both options cut the heat and define an outdoor room, but they feel very different once installed.
Pergola Basics
A pergola is essentially a skeleton of beams and rafters. It provides partial shade, especially when the sun is high, and full shade if you add a cover. Wood pergolas feel warm and traditional, while aluminum ones hold up better in wet climates.
You can attach one to the house or set it freestanding over a seating area. The open design keeps air moving, so it never feels stuffy.
Shade Sail Simplicity
Shade sails are triangular or square pieces of fabric pulled tight between posts or anchor points. They block up to 90% of UV rays and drop the temperature underneath by several degrees. Installation is straightforward if you have sturdy attachment points, and you can remove them in winter.
They come in many colors, so you can match or contrast with your home. Just make sure they slope for rain runoff.
Placement And Size
Where you put your shade matters as much as what you choose. For pergolas, center them over dining or lounge zones so the shade lands where people sit. Shade sails work best when angled toward the afternoon sun, which is the most intense.
Size the sail or pergola to cover at least the main seating area, not just a corner. A good rule is to shade the space from 11 a. m. to 4 p. m. in summer.
Cost And Maintenance
Pergolas range from a few hundred dollars for a basic kit to several thousand for custom wood. Shade sails are usually cheaper, starting around $100 and going up with size and fabric quality. Maintenance is minimal for both.
Rinse sails with mild soap and tighten them seasonally. Pergolas may need occasional staining or repainting, and you should check for loose hardware after storms.
5. Outdoor Kitchen and Grill Station
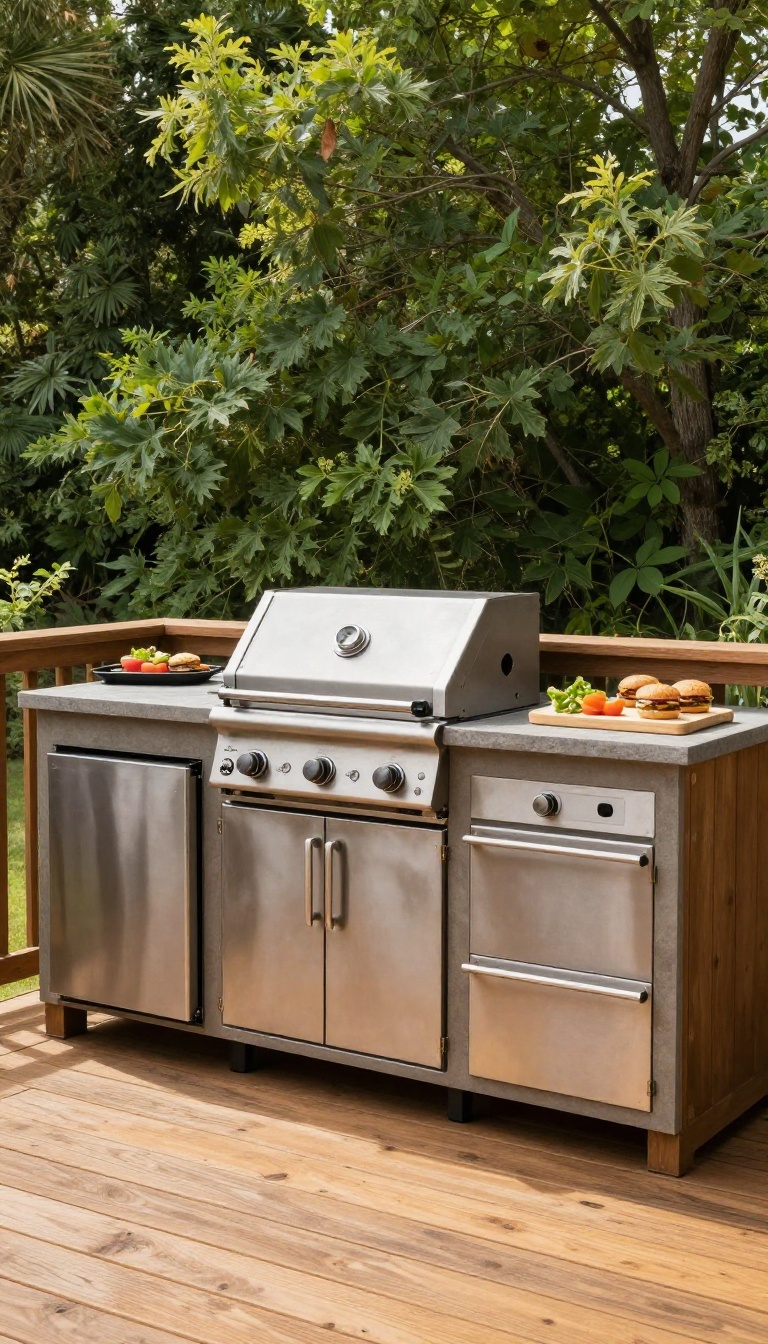
Cooking outside stops being a solo chore when the grill has a proper home. An outdoor kitchen turns the deck into the place where everyone gathers, not just where the food gets made. You get counters for prep, storage for tools, and a reason to stay outside longer.
The trick is planning before you build. Clearances, ventilation, and utilities decide whether this setup feels effortless or annoying. Get those right, and the rest is just picking finishes.
A basic grill station can be as simple as a counter-height cart with a side burner. But if you want it to feel built-in, you're looking at framing, cladding, and a countertop. That's a bigger project, so it pays to think through how you actually cook.
Most people underestimate how much counter space they need. You want at least two feet on each side of the grill for plates, tongs, and that tray of burgers. A small fridge underneath keeps drinks and marinades within reach, so you're not running inside every five minutes.
Ventilation matters more than most folks realize. A built-in grill needs breathing room, and a roof overhead means you need a hood or a well-placed opening. Check your local codes before you frame anything.
It's easier to adjust a plan than to tear out a half-finished island.
Plan The Layout Around Your Cooking Style
Think about how you actually grill. If you're a low-and-slow person, you need room for a smoker and a place to set trays. If you're a quick weeknight cook, a compact two-burner setup with a side shelf might be plenty.
Keep the work triangle in mind: grill, prep space, and fridge or cooler. You don't want to walk around an island to grab a spatula. Sketch it on paper first, then tape it out on the deck to see how it feels.
Clearances, Ventilation, And Safety
Every grill has a required clearance from combustible materials. That number is usually in the manual, and it's not a suggestion. Wood decking, siding, and railing all need breathing room.
If you're building under a roof or pergola, plan for heat and smoke to escape. A vent hood is the gold standard, but a gap or open side can work for smaller setups. Never box a grill in tight without a plan for airflow.
Gas lines and electrical outlets should be installed by a pro. A licensed plumber or electrician will make sure everything is up to code and safe for outdoor use.
Materials That Hold Up Outside
Stainless steel appliances resist rust and look sharp, but they do show smudges. Powder-coated steel is a solid budget option if you keep it covered. For the counter, granite and quartzite handle heat and weather well.
Concrete is another tough choice, though it can crack in freeze-thaw climates. Avoid laminate or anything that swells when wet. Framing should be pressure-treated lumber or steel, and cladding can be stone, brick, or tile.
Just make sure the structure can support the weight of the countertop and appliances.
6. Composite vs. Wood Decking: Which Lasts Longer
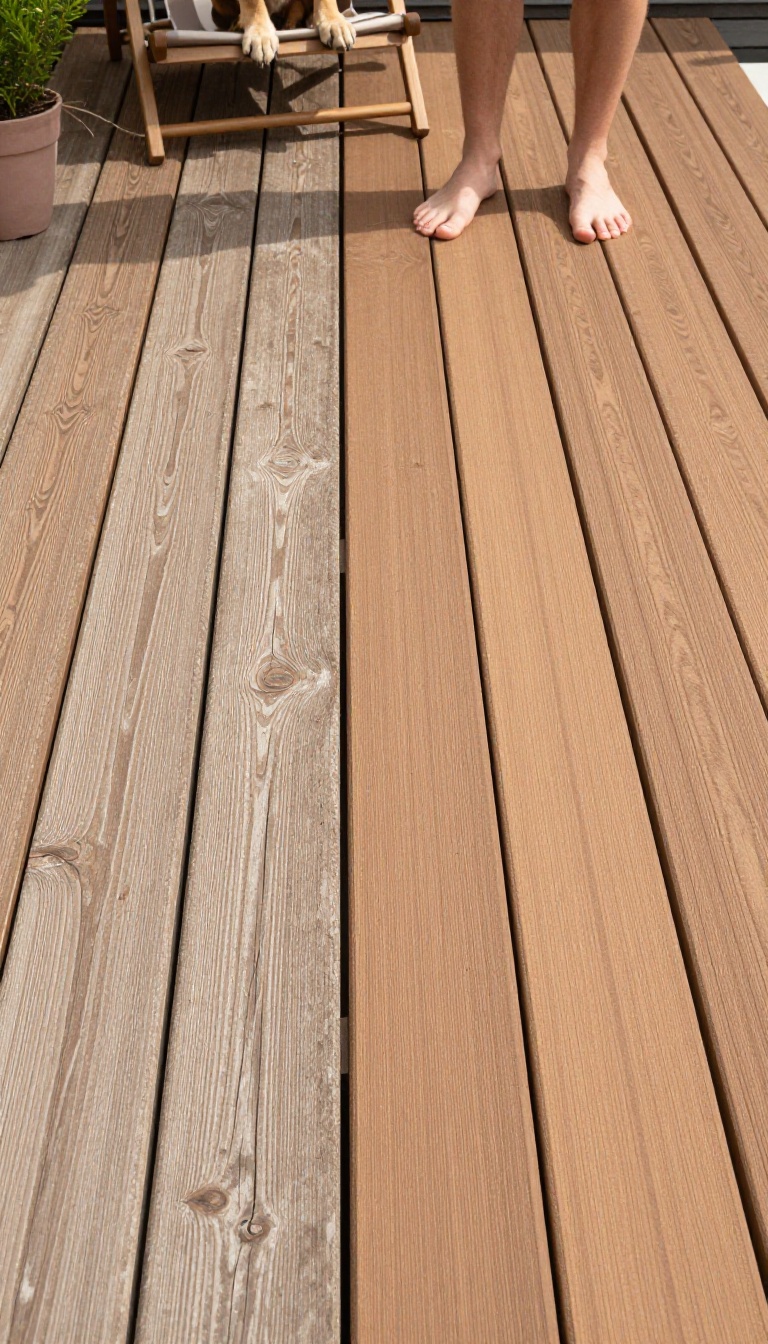
The surface you walk on takes the worst beating of anything on your deck. Sun, rain, snow, bare feet, and dragged furniture all land on the boards first. So picking between composite and wood is less about looks and more about how much work you want to sign up for.
Both can last decades, but they get there in very different ways.
Wood has been the default forever, and for good reason. It looks warm, it feels solid underfoot, and you can sand and refinish it when it starts showing its age. Composite came along to solve wood's biggest headache: constant maintenance.
It will not rot, splinter, or need staining, which sounds like a no-brainer until you factor in cost and heat. The right call depends on your climate, your budget, and how honest you are about upkeep.
Upfront Cost
Pressure-treated pine is the cheapest way onto a deck, often landing well under composite per square foot. Cedar and tropical hardwoods cost more but still usually beat mid-range composite on price. High-end capped composite can run two to three times the cost of basic treated lumber.
If you plan to stay put for 15 years, that gap narrows once you add staining and sealing supplies.
Maintenance Reality
Wood needs a clean and reseal every year or two, and a full re-stain every few years depending on sun exposure. Skip it and the boards gray, cup, and split. Composite asks for a scrub with soap and water a couple of times a year, nothing more.
That difference is the whole reason most people switch.
Heat And Feel
Dark composite gets genuinely hot in direct sun, sometimes too hot for bare feet or paws. Lighter colors and capped boards with reflective tech help, but wood still tends to run cooler. Wood also feels more natural underfoot and takes stains and patterns composite tries hard to fake.
Lifespan And Climate
A well-kept wood deck can hit 20 to 30 years, though neglect cuts that in half. Composite typically carries 25 to 30-year warranties and shrugs off moisture, which matters in humid or rainy regions. In harsh freeze-thaw climates, composite holds up better.
In dry, mild areas, wood ages gracefully and stays affordable.
7. Deck Skirting That Looks Intentional
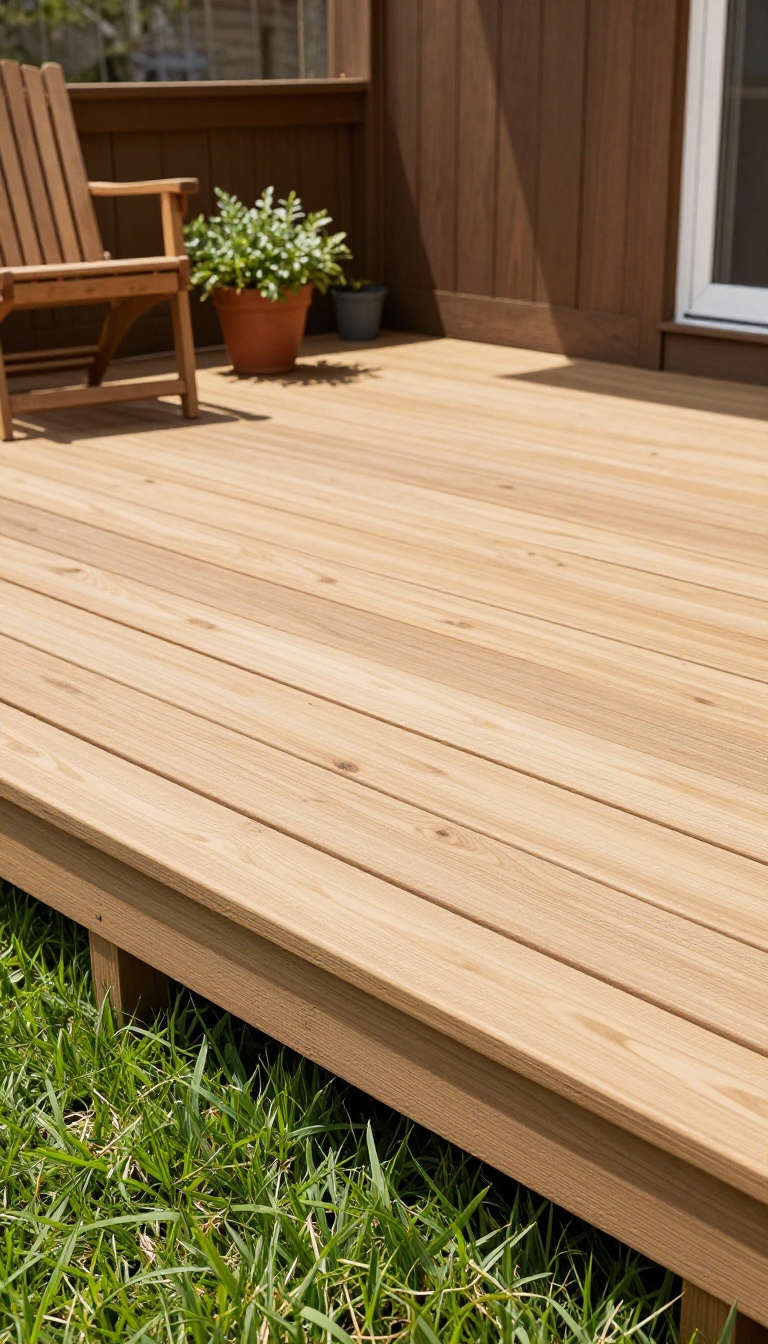
The space under your deck is probably an eyesore right now. You see exposed joists, maybe some weeds, and a few forgotten storage bins. Skirting fixes that by closing off the underside with a material that matches your deck's style.
It hides the mess, keeps pests out, and makes the whole structure look finished instead of half-done. The best part? You can tackle most skirting projects in a weekend without special tools.
Skirting isn't just about looks, though that's a big part of it. It also protects your deck's framing from weather and critters. When done right, it looks like it was always meant to be there.
Here's how to choose and install skirting that feels intentional, not like an afterthought.
Pick A Material That Matches Your Deck
Lattice is the classic choice, and it works with almost any style. Go with vinyl or composite lattice if you want zero maintenance. Wood lattice looks great on natural wood decks but needs painting or staining every few years.
Horizontal boards give a modern, clean look, especially if you use the same material as your decking. Panels, like metal or composite sheets, offer a sleek, solid appearance and are great for hiding bulky items. Whatever you choose, make sure it's rated for ground contact and can handle moisture.
Install It So It Breathes
You don't want to seal the underside completely tight. Air needs to flow through to prevent rot and mold. Leave a small gap at the bottom and top, or use vented panels.
If you're using solid panels, add vents every few feet. Also, keep skirting a few inches off the ground to avoid wicking up water. A simple frame of pressure-treated lumber makes attaching any material easy.
Just make sure it's secure enough to keep raccoons and possums out.
Add Access For Storage And Maintenance
If you use the space under your deck for storage, plan for a door or removable panel. A hinged access door painted to match the skirting keeps things looking neat. Even if you don't store anything, you'll want a way to get under there for inspections or to retrieve a lost ball.
A simple gate latch or a few screws you can back out make it easy. Just don't make it obvious that it's a door; blend it in with the rest of the skirting.
8. Fire Pit Zone with Heat-Resistant Materials
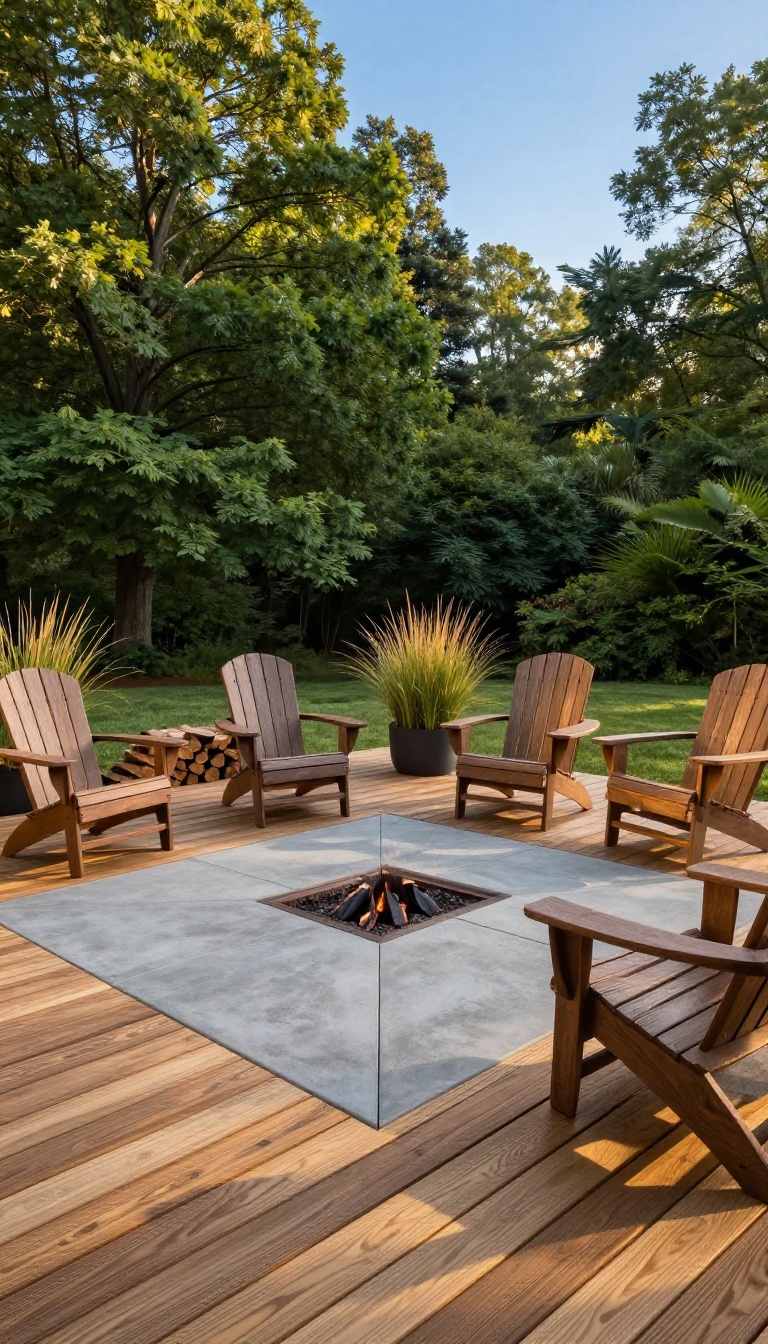
A fire pit turns a chilly evening into a reason to stay outside. But you can't just plop a portable fire bowl on wood decking and call it done. Heat, embers, and sparks demand respect, or you'll end up with charred boards and a story you'd rather not tell.
The good news is that a safe fire feature doesn't require a masonry crew. You just need the right base, clearance, and materials. Get those three things right, and you'll extend your deck season well into fall and early spring.
Start With A Non-combustible Base
Never set a fire pit directly on wood, composite, or vinyl decking. Instead, build a base of concrete pavers, brick, or a pre-cast stone pad. Leave at least a few inches of that base extending past the fire pit's footprint on all sides.
This simple step catches stray embers and keeps heat off the deck surface.
Respect The Clearance Rules
Most building codes call for at least 10 feet of clearance between a fire pit and any combustible structure, including your house, railing, and overhead pergola. Keep furniture at least 3 feet back from the pit, too. If you're unsure, check with your local code office before you light the first fire.
Choose The Right Fire Feature
Wood-burning pits give you that classic crackle and smell, but they throw sparks and ash. Gas and propane models light instantly, burn clean, and let you adjust the flame with a knob. For a low-maintenance deck setup, a gas fire pit on a stone base is hard to beat.
Anchor Your Seating Layout
A fire pit naturally becomes the focal point of your deck. Arrange chairs in a loose circle around it, leaving a clear walkway behind them. Add a small side table for drinks, and you've got a conversation zone that works day or night.
9. Planters and Built-In Greenery
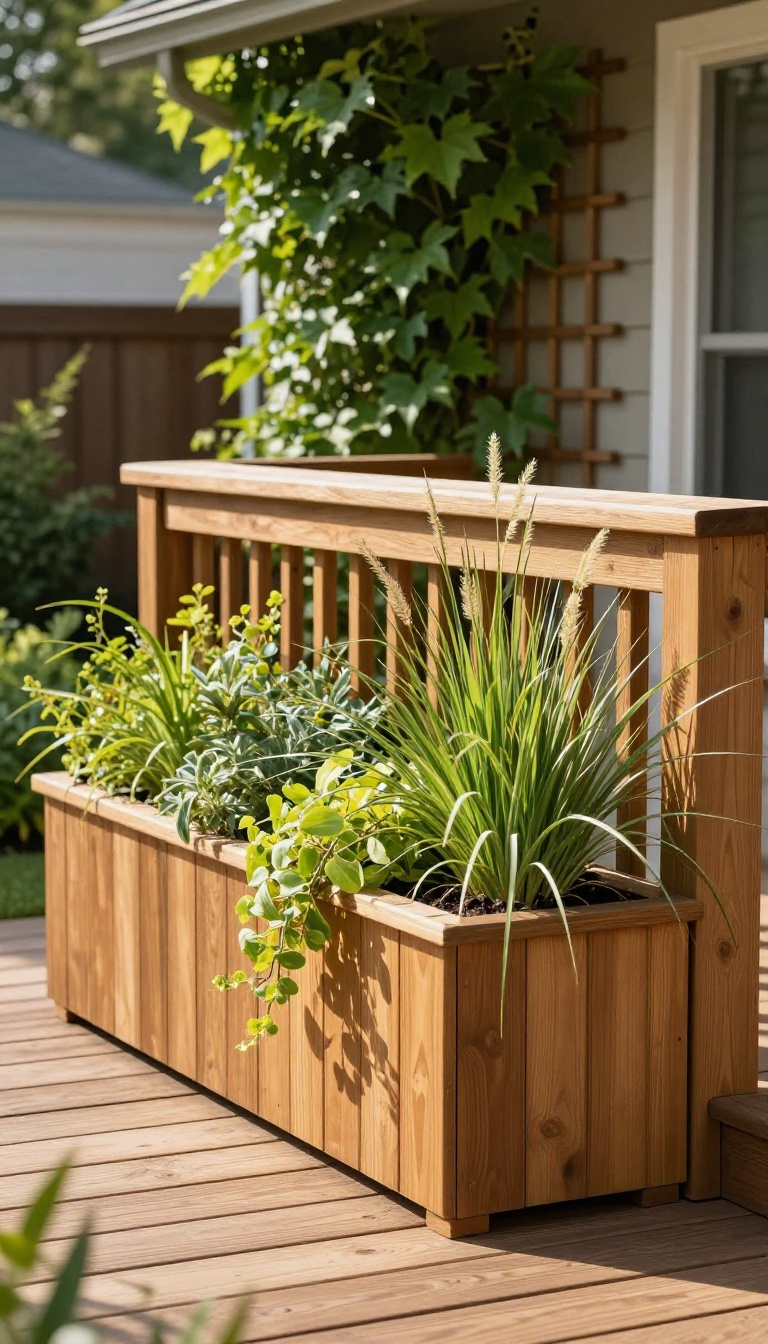
A deck can feel like a stage with nowhere to hide. Planters and built-in greenery fix that by softening hard edges, adding privacy, and making the space feel alive. You do not need a landscaper to pull it off either.
The trick is choosing the right containers and plants for a spot that gets baked by sun and slapped by wind. Get that part right, and your deck stops looking like a parking pad and starts feeling like a garden room.
Rail planters, corner boxes, and trellises are the three workhorses here. Each one solves a different problem without eating up your walking space. Rail planters clip onto or sit over your existing railing, so you get color at eye level without sacrificing floor area.
Corner boxes fill the dead zones where furniture never quite fits. Trellises turn a blank wall or railing into a vertical garden that blocks sightlines from neighbors. Together, they break up the long, straight lines that make decks feel harsh.
They also give you a place to hide utility boxes, hose reels, or that one ugly downspout you have been ignoring.
Pick Planters That Can Take The Heat
Deck planters live a tough life. They get full sun on the roots, wind that dries them out fast, and reflected heat off the decking. Choose containers that are at least 10 to 12 inches deep so roots have room to stay cool and moist.
Resin and fiberglass hold up better than terracotta in freeze-thaw climates. If you go with wood, stick to rot-resistant species like cedar or teak, and line the inside with a coco fiber or landscape fabric. Self-watering planters are worth the extra cost if you travel or forget to water.
They cut your watering frequency in half and keep plants from crashing during a hot weekend.
Choose Plants That Laugh At Wind And Sun
Not every nursery darling belongs on a deck. You want plants that shrug off drying breezes and intense afternoon light without constant coddling. Good picks include lavender, ornamental grasses, sedum, yarrow, and rosemary.
They are tough, look good most of the year, and do not sulk when you miss a watering. For trailing color, try portulaca or calibrachoa in rail planters. If privacy is the goal, go with tall grasses like switchgrass or a columnar evergreen in a corner box.
They block sightlines without creating a solid wall that traps heat.
Use Trellises To Add Privacy Without A Permit
A trellis is the cheapest privacy screen you can build. Mount one on a railing or against a wall, then train a fast-growing vine up it. Annual vines like morning glory or black-eyed Susan vine cover a trellis in one season.
Perennials like clematis or climbing hydrangea take longer but come back every year. Just check that your vine matches your sun exposure. Keep the trellis a few inches off the wall or railing so air moves behind it.
That small gap prevents rot and keeps the plants healthier.
Keep It Looking Good With Minimal Work
Built-in greenery should not become a second job. Group plants by water needs so you are not soaking drought-tolerant sedum to keep a fern alive. Add a slow-release fertilizer in spring and top the soil with mulch or pebbles to slow evaporation.
Deadhead spent blooms every week or two to keep things tidy. In winter, swap out annuals for evergreen boughs or ornamental kale. That way your deck still has life when everything else goes brown.
10. Deck Storage That Disappears
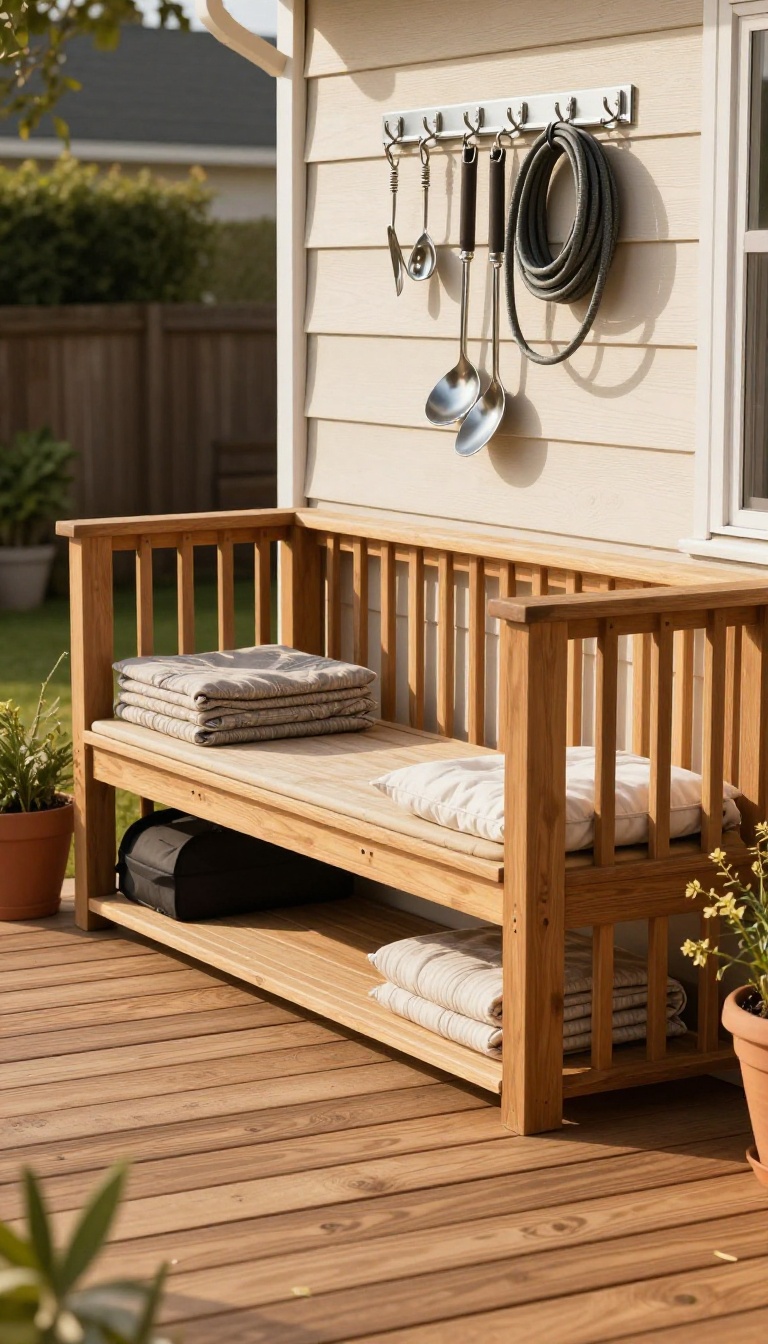
Clutter kills the calm of a good deck faster than bad weather. Cushions, pool toys, grill tools, and garden gear pile up until your lounging space feels like a storage unit. The fix is storage that blends in, so everything has a home you never really see.
You do not need a shed to keep things tidy. A few smart built-ins can swallow the mess without stealing an inch of hangout room. The trick is choosing spots that already exist, like under benches, along railings, or beneath the deck itself.
Benches With A Secret
A built-in bench along a railing or wall can double as a weatherproof box. Lift the seat and you have room for cushions, blankets, or kids' toys. Use marine-grade hinges and a small ventilation gap so damp air does not get trapped inside.
Bins Under The Deck
If your deck sits low to the ground, the space underneath is often wasted. Slide in plastic storage bins or build a simple framed cubby that opens from the side. Keep them on a gravel or paver base so water never pools around them.
Hidden Cubbies In Stairs
Stair risers are dead space unless you make them work. Pull-out drawers or flip-down panels turn each step into a small compartment for tools, toys, or shoes. Just make sure the openings do not create a tripping hazard on the tread.
Vertical Slots And Hooks
Not everything needs a box. A narrow slot between studs or a row of stainless hooks can hold grill tools, folding chairs, or a hose. Mount them on the house side of the deck where they stay out of the main sightline.
11. Railing Upgrades for Safety and Style
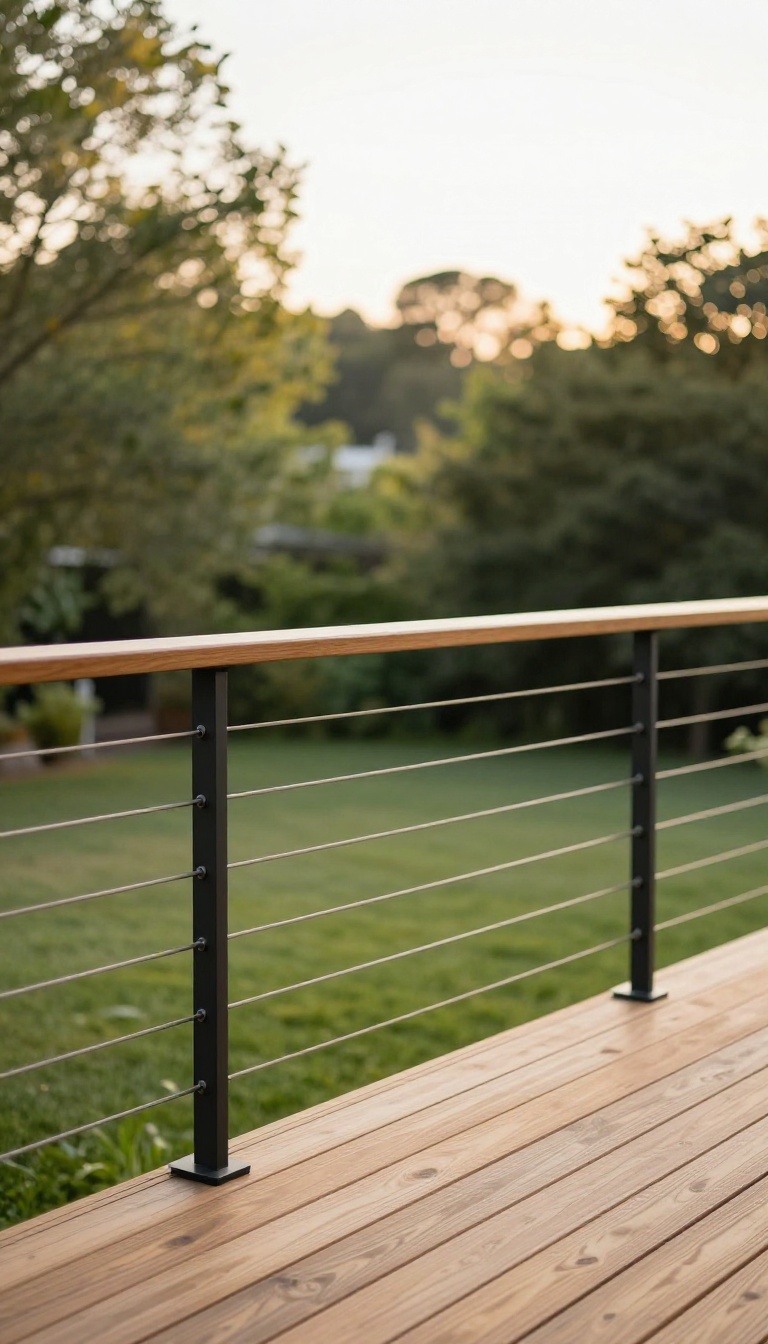
Railings do more than keep people from falling off the edge. They frame your view, set the style, and affect how open the whole deck feels. Swap out those thick wood rails and the space can look twice as big without moving a single board.
Old railings are usually the chunkiest thing on a deck. They block sightlines, collect peeling paint, and make even a nice deck feel closed in. Upgrading them is one of the fastest ways to change the entire vibe.
You get better safety and a cleaner look at the same time.
Pick Your Material
Cable railing uses thin steel lines that almost disappear, so your yard becomes the focus. It is sleek and modern but needs occasional tightening. Metal panels or balusters come in aluminum, steel, and iron, and they hold up well with very little fuss.
Glass panels give you the most unobstructed view, though they show smudges and cost more upfront. Each option changes the feel of the deck in a different way, so think about whether you want invisible, industrial, or polished.
Know The Code Before You Buy
Most areas require guards on decks that sit more than 30 inches off the ground. The usual minimum height is 36 inches, but some places ask for 42. Baluster spacing typically cannot let a 4-inch sphere pass through, which matters if you have kids or pets.
Cable spacing rules can be tighter. Call your local building department or check their website before you order anything. Returning a custom railing system is a nightmare.
Install Tips That Save Headaches
Measure your existing posts and confirm they are solid before you attach new rails. Rotted posts will not hold tensioned cable or heavy glass. If you are switching materials, you may need new mounting brackets or reinforced blocking.
Many systems sell complete kits with posts, rails, and hardware, which keeps guessing to a minimum. Watch a few install videos for your exact product before you start drilling.
12. Outdoor Rug and Furniture Layout That Flows
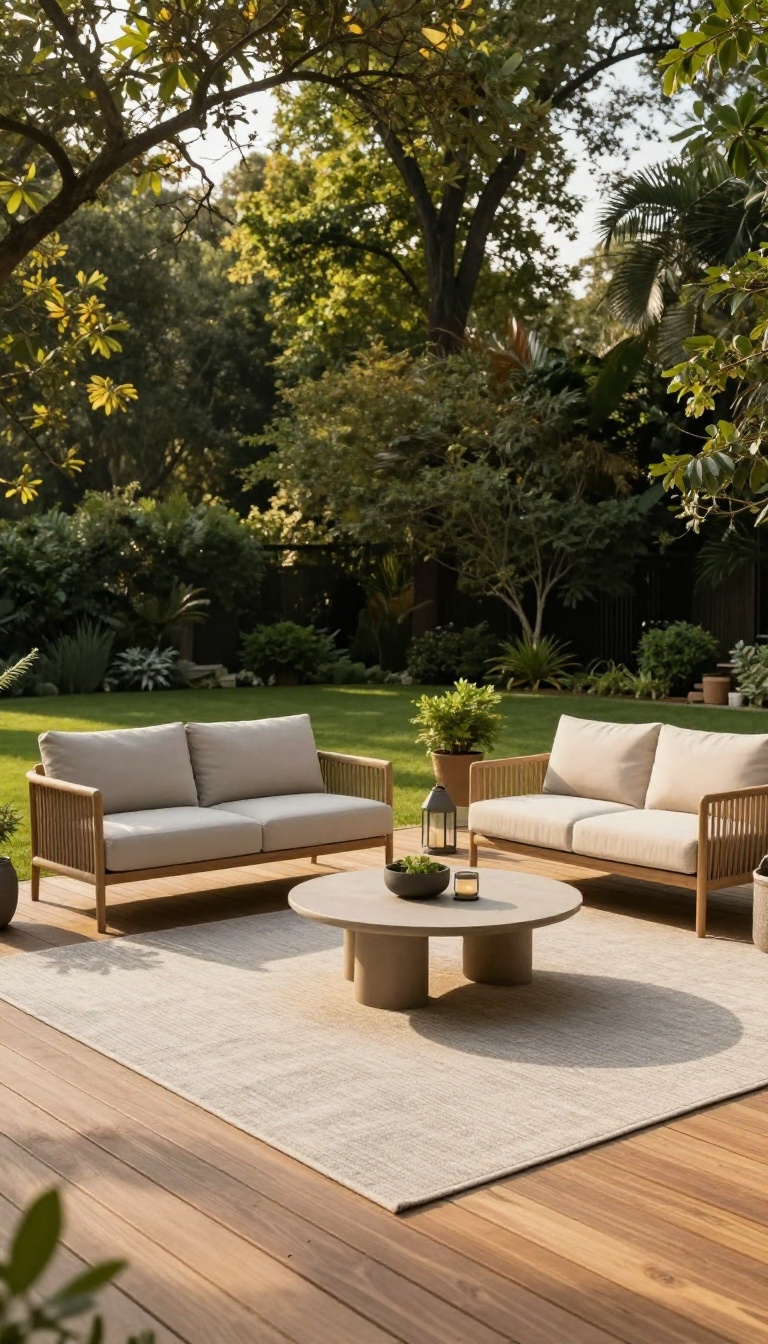
An outdoor rug does more than soften the splinters underfoot. It draws a boundary around the conversation zone, so your deck stops feeling like a random collection of chairs. Once that zone exists, furniture has a home.
The trick is arranging seats so people can talk without shouting or scooting around a coffee table. A simple U-shape or L-shape keeps walkways open and puts everyone within easy earshot. Get the layout right and the whole deck feels intentional, even if the furniture is secondhand.
Start by picking the rug size based on your seating, not the other way around. A rug that is too small makes the furniture look like it is falling off the edges. Measure your sofa or loveseat plus the chairs you plan to pair with it, then add at least a foot on each side.
For a typical four-person setup, an 8×10 or 9×12 outdoor rug works well. If you only have two chairs and a small table, a 5×8 is plenty. The rug should sit fully under the front legs of every seat.
That anchors the group and tells your brain this is one zone. Material matters too. Polypropylene and recycled plastic rugs handle sun and rain without fading or mildewing.
Flatweave styles dry faster than plush ones, which is key if you get sudden storms. Hose it off, hang it over the railing, and it is ready by evening.
U-shape Vs. L-shape: Which Layout Fits Your Deck
A U-shaped layout wraps seating around three sides of a coffee table or fire feature. It works best on square or wide decks because it creates a cozy pocket for four to six people. Everyone can see everyone, and the conversation flows without craning necks.
An L-shaped layout uses two sides, usually a sofa and a pair of chairs at a right angle. It suits long, narrow decks or areas where you still need a clear path to the grill or stairs. The open side becomes your walkway, so nobody has to climb over a chair to get inside.
Pick the shape that matches your deck's proportions, not a photo you saw online. If your deck is deeper than it is wide, go L-shaped. If it is roughly square, U-shaped feels more intimate.
Keep Walkways Clear Without Shrinking The Seating
The biggest mistake is pushing furniture against the railing to make the deck feel bigger. That actually creates awkward dead space in the middle and forces people to yell across the void. Instead, pull the seating group toward the center or slightly off-center.
Leave at least 24 to 30 inches between the rug edge and any railing, stair, or door. That gap is your walkway, and it keeps traffic from cutting through the conversation. If your deck is tight, use a bench along one railing as seating and skip the extra chairs.
A built-in bench takes up less visual space than a bulky armchair. You can also float the rug a few inches from the house to create a natural path along the wall.
Seat Height And Table Spacing That Actually Works
Seats should be close enough that knees almost touch the coffee table, but not so close that people feel trapped. Aim for 14 to 18 inches between the front edge of the seat and the table. That is the sweet spot for reaching a drink without leaning forward.
Keep all seat heights similar. Mixing a low lounge chair with a tall dining chair makes the group feel off, even if you cannot say why. If you have a fire pit, leave 30 to 36 inches between the pit edge and any seat.
That gives legs room to stretch and keeps sparks at a safe distance. For a dining setup, allow 32 to 36 inches from the table edge to the wall or railing so chairs can slide out without scraping.
Small Deck? Use A Rug To Fake More Room
On a tiny deck, a rug can trick the eye into seeing a defined room instead of a cramped platform. Choose a rug that leaves a border of decking visible on all sides. That border acts like a frame and makes the space feel intentional.
Stick to two chairs and a small round table rather than a full sofa set. Round tables take up less visual weight than rectangular ones and let people slide in from any angle. If you need extra seating, use lightweight folding chairs that tuck against the wall when not in use.
A vertical garden or railing planter draws the eye up, which also makes the floor feel less crowded. The goal is flow, not furniture count.
13. Weatherproofing and Seasonal Maintenance
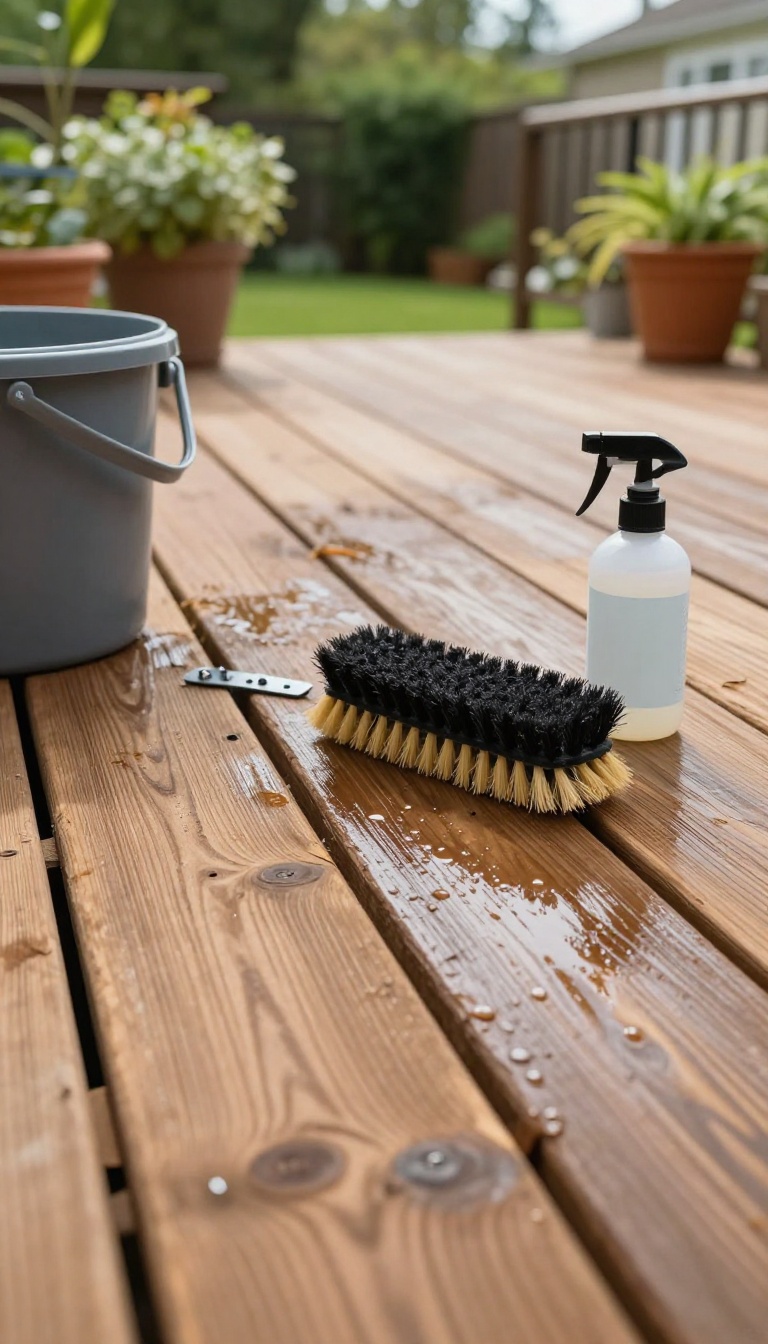
A deck is a lot like a car: it runs fine until you ignore it for a few years, then everything goes wrong at once. Boards rot from the inside out, fasteners back themselves loose, and that one soft spot near the stairs turns into a full board replacement. The fix is boring but cheap.
Twice a year, spend an afternoon sealing, cleaning, and inspecting, and you skip most of the expensive stuff entirely.
Think of maintenance as two checkpoints: one in spring when the weather clears and one in fall before the wet season hits. Each visit takes a few hours and covers the same ground, just with different priorities. Spring is about undoing winter damage.
Fall is about bracing for it. The payoff is real. A sealed deck sheds water instead of drinking it, and a deck that sheds water does not rot.
You also catch loose railings and popped nails while they are still a five-minute fix.
Clean It Before You Seal It
Sealing over dirt and mildew just locks the grime in. Scrub the boards with a deck cleaner and a stiff brush, then rinse and let everything dry for a full day or two. Pay extra attention to shaded corners and anywhere leaves pile up, since those spots stay damp the longest.
Once it is dry, test for moisture by sprinkling a little water on the surface. If it beads up, the wood is still holding water and needs more time. If it soaks in, you are good to seal.
Pick The Right Sealer
Clear sealers show off the wood grain but fade faster and need reapplication more often. Tinted sealers and stains last longer and block UV damage, which is what turns boards gray and brittle. Either works, so pick based on how much upkeep you actually want.
Roll or spray it on in thin coats, following the grain, and keep an eye on the weather. You want a stretch of dry days with mild temperatures, not a hot afternoon that dries the sealer before it soaks in.
Inspect The Structure Twice A Year
Walk the whole deck and look for popped nails, backed-out screws, and boards that flex underfoot. Push on every railing post and tighten anything with play in it. Loose railings are the number one thing people ignore until someone leans on the wrong one.
Check where the deck meets the house and around posts for soft wood. A screwdriver poked into a suspect spot tells you plenty. If it sinks in easily, you have rot, and it is better to cut it out now than replace a whole section later.
Handle The Small Stuff
Clear debris from between boards so water can drain instead of pooling. Trim back bushes and branches that keep the deck shaded and damp. In fall, rake off leaves before they turn into a wet mat that stains the wood.
If you live somewhere with hard freezes, avoid shoveling with a metal blade and skip rock salt, which damages wood and finishes. A plastic shovel and a little sand for traction will get you through winter without wrecking the surface.
FAQ
What is the cheapest way to upgrade a backyard deck?
Start with lighting, an outdoor rug, and a fresh coat of stain or sealer. These cost little and change how the deck looks and feels more than most people expect.
How much does it cost to build a deck?
Most homeowners pay between $15 and $35 per square foot for materials and labor, depending on wood or composite, height, and local rates. A 12×16 deck often lands between $3, 000 and $7, 000.
Is composite decking worth the extra cost?
It usually is if you want low maintenance and live in a wet or humid climate. Composite costs more upfront but skips the annual sanding, staining, and board replacement that wood needs.
Do I need a permit to build or modify a deck?
Most areas require a permit for new decks, structural changes, and anything over a certain height. Check with your local building department before you start work.
What is the best material for deck railing?
Aluminum and cable railing offer low maintenance and open views. Wood suits traditional homes but needs more upkeep. Glass looks great but costs the most and shows smudges.
Conclusion
You don't need to rebuild the whole deck to make it feel new. Pick one idea that fixes your biggest annoyance, whether that's cramped seating, bland railings, or a grill with nowhere to live, and try it this weekend. Give it a few days before adding the next piece.
Notice where people actually gather and what still feels unfinished. A great deck comes from a few smart moves, not one frantic trip to the lumber yard.