13 Elegant Coastal Kitchen Backsplash Ideas That Add Texture and Personality
A coastal kitchen should feel breezy, bright, and effortlessly put together. The backsplash is where that vibe really comes alive—it’s the backdrop for everything from morning coffee to weeknight seafood dinners.
But picking the right material and pattern can feel overwhelming with so many options out there. You want something that looks good, holds up to splashes and steam, and doesn’t scream “theme park beach house. ” The trick is to lean into natural textures, soft colors, and timeless shapes.
Whether you’re remodeling or just refreshing, these 13 ideas will help you find a backsplash that adds depth and character without going overboard.
1. White Subway Tile with a Twist
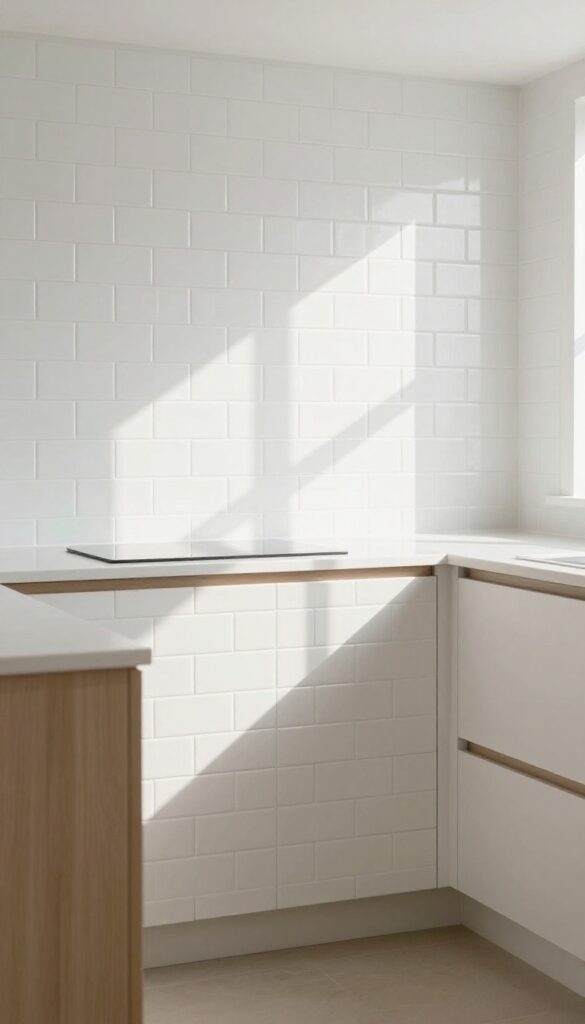
Subway tile is a kitchen classic for good reason—it’s clean, bright, and endlessly versatile. But the standard flat white rectangles can feel a little predictable. Give this timeless favorite a coastal refresh by choosing beveled edges or laying it in a brick pattern that catches the light and adds depth without overwhelming the space.
The result is a backsplash that feels both familiar and fresh, perfect for a breezy seaside aesthetic.
The magic of this twist lies in the details. Beveled subway tiles have a slightly raised center that creates tiny shadows and highlights as the light moves across them. That subtle movement adds visual interest without introducing bold patterns or colors.
A brick-lay pattern—where each row is offset by half a tile—adds a gentle, organic rhythm that echoes the ebb and flow of the ocean. Together, these elements make the wall feel alive, even when the rest of the kitchen is calm and neutral.
Why Beveled Edges Work
Beveled edges are the simplest way to upgrade a basic subway tile. The angled sides catch light differently than flat tiles, creating a soft, dimensional look that’s especially lovely in kitchens with natural light. They also hide minor imperfections in the wall, making installation a bit more forgiving.
Choose a warm white or a slightly creamy tone to keep the coastal vibe cozy rather than stark.
Playing With Layout
The brick-lay pattern is the go-to for a reason, but you can also try a vertical stack for a more modern feel or a herringbone for a touch of drama. If you want to keep things subtle, stick with the classic offset. For a slightly more textured look, consider a matte finish instead of glossy—it softens the reflection and adds a natural, stone-like quality that pairs beautifully with wood and rattan accents.
2. Handmade Ceramic Tiles in Soft Blues
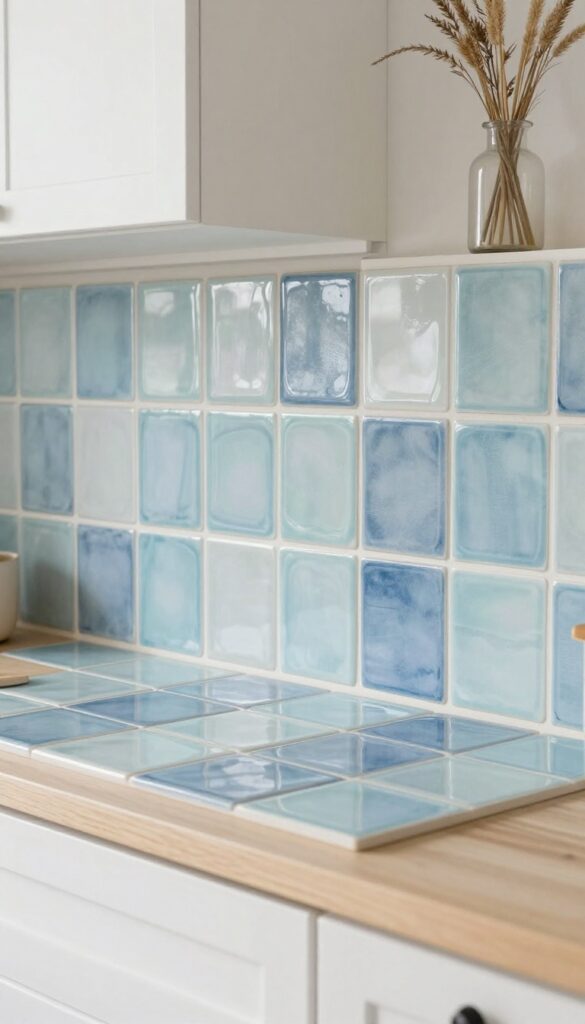
There’s something about handmade ceramic tiles that instantly warms up a kitchen. The subtle variations in color and texture give each tile its own personality, and when you choose soft blues, it’s like bringing a piece of the shore right into your home. These tiles work beautifully with white cabinets and natural wood accents, creating a space that feels both relaxed and refined.
Handmade ceramic tiles are known for their artisanal charm. Unlike mass-produced tiles, each one is slightly different, with gentle undulations and color shifts that catch the light in interesting ways. In soft blues—from pale aqua to dusty periwinkle—they mimic the ever-changing hues of the sea.
The key is to let the tiles shine by pairing them with simple white grout, which keeps the overall look fresh and clean without competing for attention.
Why Soft Blues Work So Well
Soft blues are inherently calming, which is exactly what you want in a coastal kitchen. They don’t overpower the space but instead add a gentle pop of color that feels natural and soothing. These shades also pair beautifully with white, cream, and light gray, making them easy to integrate into existing designs.
Plus, they hide minor stains and water spots better than pure white, so they’re practical as well as pretty.
Choosing The Right Tile Shape And Finish
For a truly handmade feel, look for tiles with irregular edges and a matte or satin finish. Glossy tiles can work too, but they tend to show fingerprints and streaks more easily. As for shape, consider classic squares, rectangles, or even fish-scale patterns for a more playful vibe.
Whatever you choose, make sure the tiles are properly sealed to resist moisture and grease, especially behind the stove.
Styling Tips For A Cohesive Look
To let the backsplash be the star, keep surrounding elements simple. Use white or light-colored cabinets, minimal hardware, and natural materials like wood or stone for countertops. Open shelving with a few ceramic pieces in similar blues can tie the whole look together.
And don’t forget good lighting—under-cabinet lights will highlight the texture and depth of the handmade tiles beautifully.
3. Natural Stone Mosaic in Earthy Tones
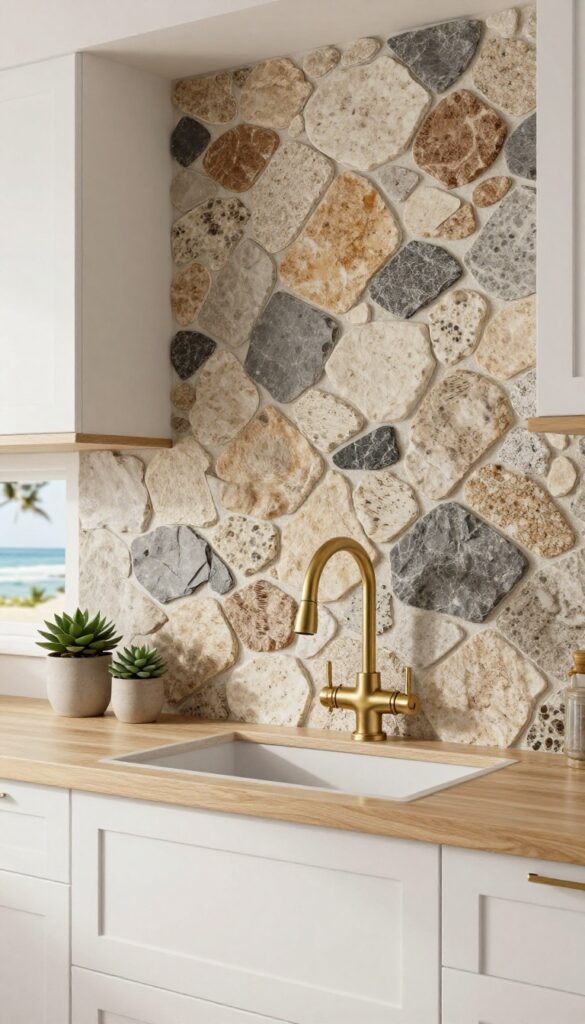
If you want a backsplash that feels like it was plucked straight from a tide pool, natural stone mosaic is a fantastic route. Think travertine, slate, or quartzite cut into small, irregular pieces and arranged in a mesh-backed sheet. The result is a rugged, organic surface that catches light in all the right ways.
The muted beiges, warm grays, and soft browns mimic the colors of beach pebbles and coastal cliffs. It’s not flashy, but it brings a quiet depth that plain tile just can’t match. Plus, the textured surface does a great job of hiding water spots and splashes, so it stays looking fresh with minimal fuss.
Natural stone mosaic adds a tactile, earthy quality that instantly makes a coastal kitchen feel more grounded. Unlike smooth ceramic tiles, the uneven surfaces and varied shades create a subtle, organic pattern that doesn’t overwhelm the room. It’s a choice that pairs beautifully with white cabinets, wood accents, and natural light.
One of the best things about this material is its durability. Stone is naturally resistant to heat and moisture, making it a practical option behind a stove or sink. And because the tiles are small and irregular, they flex a bit, so they’re less likely to crack if the wall shifts slightly.
When it comes to grout, you have options. A lighter grout keeps the mosaic looking airy and bright, while a darker grout adds contrast and hides stains better. Either way, the stone’s matte finish keeps the overall look soft and coastal, not shiny or overly polished.
Why Earthy Tones Work In Coastal Kitchens
Coastal design doesn’t have to be all white and blue. Earthy tones like beige, taupe, and warm gray bring a natural warmth that balances the coolness of water-inspired hues. They echo the sand, driftwood, and rocks you’d find on a shoreline, creating a seamless connection to the outdoors.
These colors also play well with other textures in the room. Pair them with a light wood countertop or a woven pendant light, and the whole space feels cohesive. The key is to let the stone be the star—keep surrounding elements simple so the mosaic doesn’t compete for attention.
Choosing The Right Stone Type
Travertine is a classic pick for its soft, porous surface and warm cream tones. It’s slightly more delicate, so it needs regular sealing, but it develops a lovely patina over time. Slate offers a darker, more dramatic look with deep grays and subtle green or brown undertones.
It’s denser and more stain-resistant, making it a great option for busy kitchens. Quartzite is the toughest of the three, with a hardness that rivals granite. It comes in a range of neutral shades and can handle heat and scratches without breaking a sweat.
Whichever you choose, make sure it’s sealed properly to protect against moisture and staining.
Installation And Grout Tips
Installing a natural stone mosaic is best left to a pro, especially if the sheets are large or the pattern is intricate. The irregular edges can be tricky to align, but a skilled installer will make the seams nearly invisible. If you’re handy, you can tackle it yourself, but be prepared for some fiddly work.
Grout color matters more than you might think. A white or off-white grout keeps the mosaic looking light and airy, but it can be hard to keep clean. A warm gray or sand-colored grout is a smart compromise—it blends with the stone and hides everyday grime.
Use a sanded grout for wider joints, and apply a penetrating sealer after installation to lock out moisture.
4. Glass Tile in Sea Glass Shades
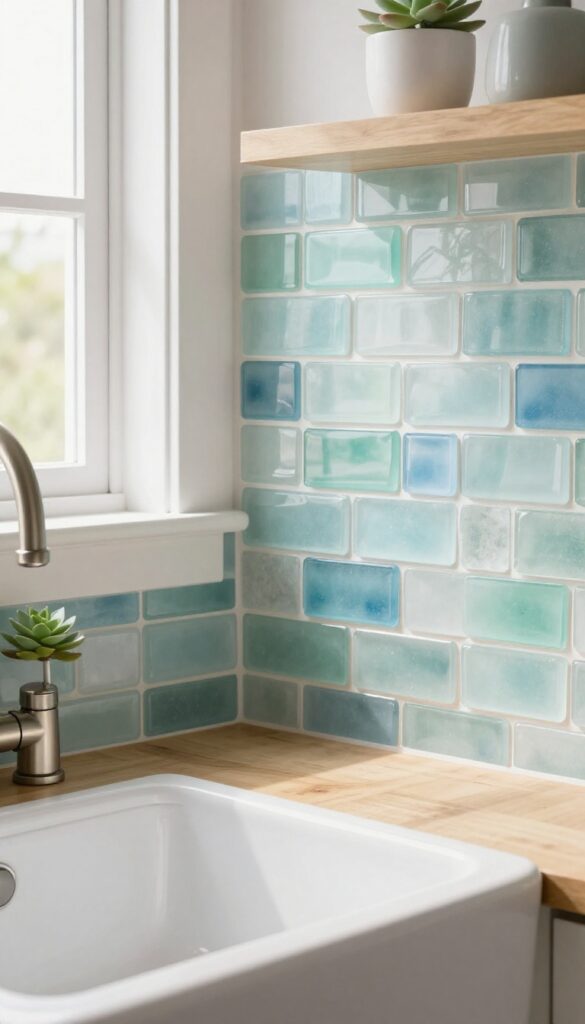
Recycled glass tiles in frosted greens, blues, and whites capture the essence of sea glass. The translucent quality catches light and adds depth. They’re easy to clean and resist moisture, making them perfect for a coastal kitchen.
Glass tile in sea glass shades brings a soft, luminous quality that feels both modern and timeless. The recycled material adds an eco-friendly touch, while the varied tones mimic the natural variation of beach glass. Because glass is non-porous, it won’t absorb stains or harbor mold, so it’s a practical choice behind a stove or sink.
The subtle shimmer of the tiles reflects light, making a small kitchen feel larger and more open. Whether you choose a uniform shade or a mix of colors, this backsplash adds a gentle, watery glow that suits any coastal palette.
Why Sea Glass Tiles Work In A Coastal Kitchen
Sea glass tiles are a natural fit for coastal decor because they echo the colors of the ocean without being literal. The frosted finish softens the glass, giving it a matte, beach-worn look that feels organic. They also pair well with other natural materials like wood, stone, and linen, so you can mix textures without clashing.
Plus, the range of shades—from pale aqua to deep teal—lets you customize the intensity to match your cabinetry and countertops.
Choosing The Right Shade And Finish
When picking sea glass tiles, think about the overall mood you want. Lighter shades like seafoam and white create an airy, bright feel, while deeper blues and greens add a richer, more dramatic touch. The finish matters too: a matte or frosted finish reduces glare and feels more natural, while a glossy finish adds extra shine and sparkle.
You can also mix different shades in a single installation for a more dynamic, organic look that mimics real beach glass.
Installation Tips For A Seamless Look
To get the best result, use a white or light gray grout that blends with the tiles rather than contrasting sharply. This keeps the focus on the glass and avoids a busy grid. Consider a larger tile size, like 3×6 or 4×4 inches, to reduce grout lines and make cleaning easier.
If you’re installing it yourself, use a notched trowel and back-butter each tile to ensure good adhesion. And don’t forget to seal the grout—even though glass is waterproof, grout can still stain.
5. Herringbone Pattern in Light Wood
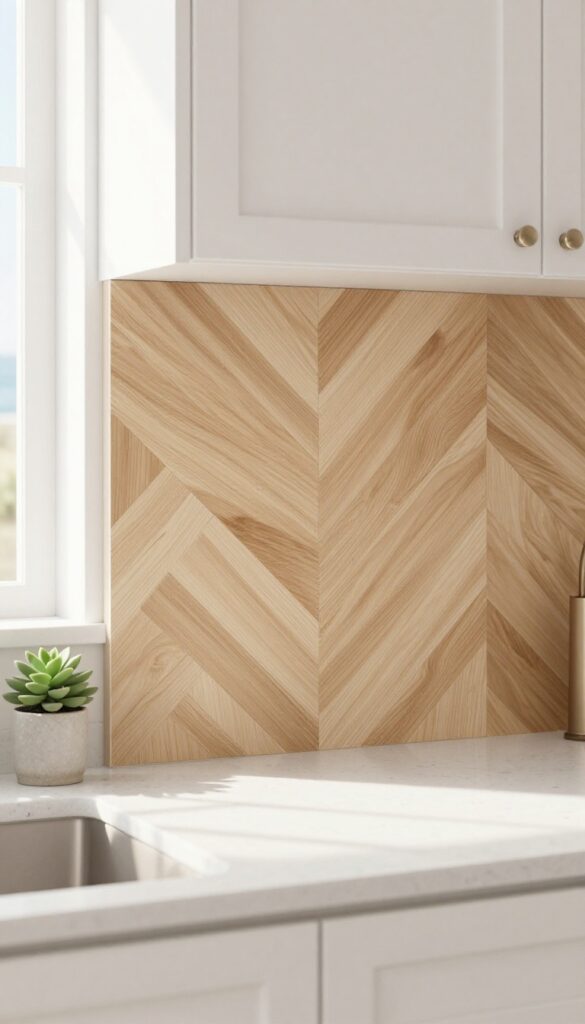
Wood might not be the first material that comes to mind for a backsplash, but light planks arranged in a herringbone pattern bring a warm, organic feel that’s perfect for coastal kitchens. The natural grain adds texture and a beach-cottage charm that tiles just can’t match. When sealed properly, wood can handle the moisture and steam of a busy kitchen while keeping that relaxed, airy vibe.
This idea is all about mixing the classic herringbone layout with the softness of light wood. The pattern draws the eye and adds movement, while the pale tones keep the space bright and open. It’s a fresh take on the usual tile backsplash, giving your kitchen a unique focal point that feels both timeless and unexpected.
Why Light Wood Works
Light woods like maple, ash, or white oak have a subtle grain that doesn’t overwhelm a small space. They reflect light, making the kitchen feel larger and more inviting. The natural variations in tone add depth without being busy, which is ideal for a coastal aesthetic that leans on simplicity and calm.
Sealing And Maintenance
To keep your wood backsplash looking great, use a marine-grade or polyurethane sealant that can handle humidity and splashes. Reapply every couple of years to maintain protection. Wipe down spills quickly and avoid harsh cleaners—just mild soap and water will do.
With a little care, it’ll stay beautiful for years.
Pairing With Countertops
Light wood herringbone pairs beautifully with white or light gray countertops, like quartz or marble. This keeps the look airy and cohesive. For a bit of contrast, you could add a darker island or a few brass fixtures, but keep the main surfaces light to preserve that breezy coastal feel.
6. Large-Format Marble Slabs
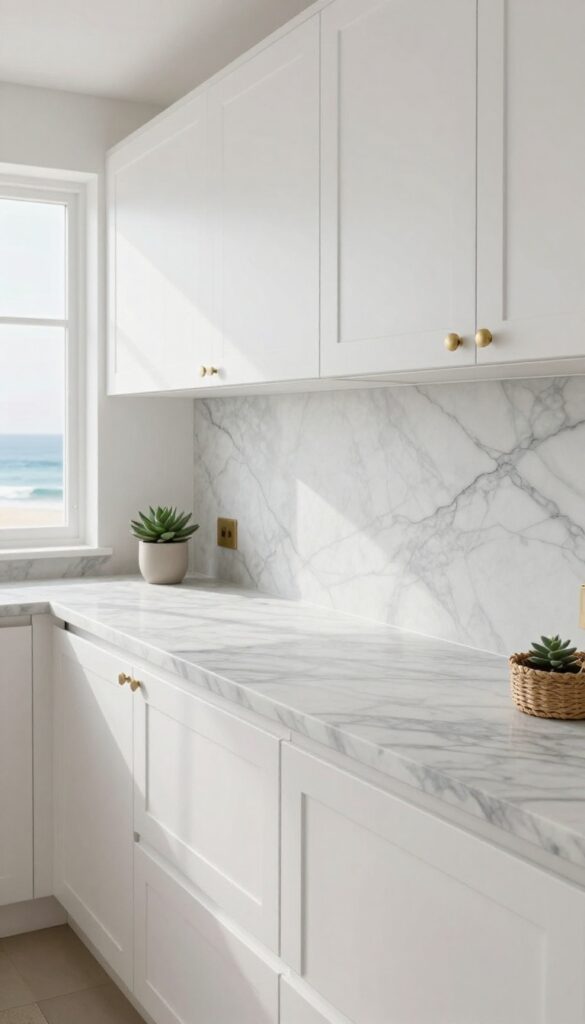
Sometimes the boldest statement is the quietest one. A single slab of marble with soft gray veining creates a seamless, elegant backdrop that feels both airy and grounded. The minimal grout lines make the space look bigger and cleaner, which is exactly what a coastal kitchen needs.
This isn’t a budget-friendly option, but the timeless beauty and coastal sophistication are worth every penny. If you want a backsplash that feels like a natural extension of the countertop, this is your move.
Large-format marble slabs are the ultimate way to bring a sense of calm and luxury to your coastal kitchen. Unlike tiles, a slab has no grout lines to break up the surface, so the eye travels smoothly across the stone. The soft veining—think pale gray on white—echoes the movement of water and clouds, adding depth without clutter.
The installation is more involved than standard tile, so you’ll want a pro who’s comfortable handling heavy stone. But the payoff is a backsplash that looks like it was carved from a single piece of the earth, giving your kitchen a high-end, resort-like feel.
Why Choose A Slab Over Tile?
Tile has its perks, but a slab takes the seamless look to another level. No grout lines means fewer places for grime to hide, which is a big win in a busy kitchen. It also makes the wall feel like one continuous surface, visually expanding the space.
If you’re going for that clean, uncluttered coastal aesthetic, a slab delivers it effortlessly.
Picking The Right Marble
Not all marble is created equal. For a coastal kitchen, look for stones with a light background and subtle veining—think Carrara, Calacatta, or Statuario. Avoid heavy, dark veining that can feel dramatic or busy.
You want the marble to whisper, not shout. Also, consider a honed finish instead of polished; it’s less slippery and has a softer, more natural sheen.
Installation And Maintenance Tips
Because slabs are heavy and fragile, professional installation is non-negotiable. Make sure your wall is perfectly flat and the cabinets are level before the stone goes up. Once it’s in, seal it regularly to protect against stains and etching.
Use gentle, pH-neutral cleaners to keep the marble looking its best. With a little care, it’ll stay beautiful for decades.
7. Zellige Tiles in Sandy White
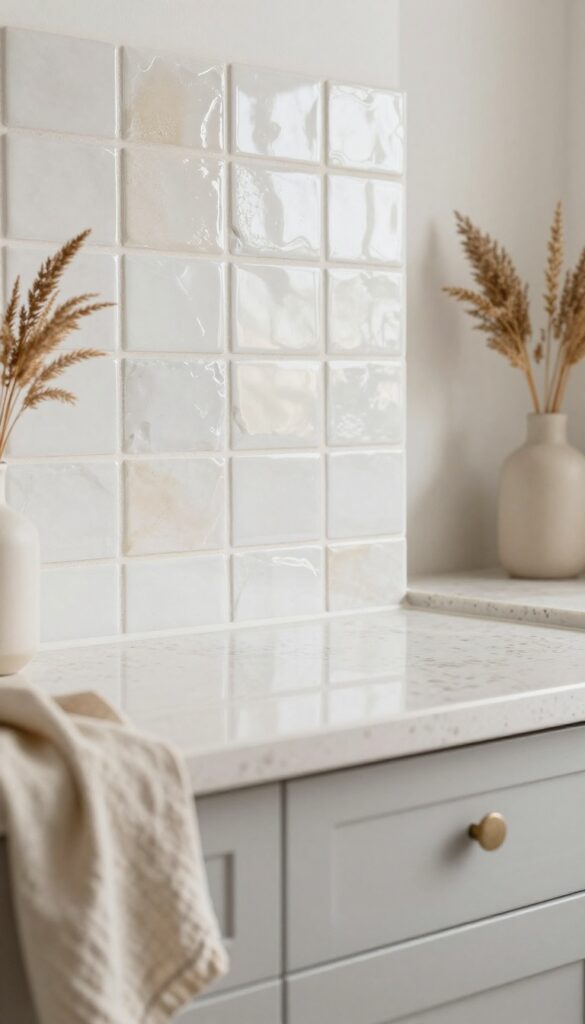
Zellige tiles bring a handcrafted, resort-like feel to any kitchen. Their glossy, uneven surfaces catch light in a way that flat tiles simply can't, adding depth and movement to the wall. In sandy white, they offer a soft, neutral backdrop that pairs beautifully with coastal palettes.
These Moroccan tiles are made by hand, so each one has its own subtle variations in shade and texture. That irregularity is exactly what makes them so appealing—they feel organic and alive, like something you'd find in a luxury spa or a Mediterranean villa. The sandy white tone keeps things light and airy, while the glossy finish reflects light to make the space feel bigger and brighter.
Why Sandy White Works
Sandy white is a versatile neutral that doesn't wash out the kitchen. It has just enough warmth to complement natural wood, rattan, and linen textures, but it stays cool enough to keep the coastal vibe fresh. The subtle color variation in zellige tiles means the backsplash never looks flat or boring, even in a monochromatic scheme.
Installation And Grout Tips
Zellige tiles are typically installed with a thin grout line to keep the focus on the tiles themselves. A white or off-white grout will blend seamlessly, while a slightly darker sand-colored grout can add definition without looking harsh. Because the tiles are handmade, they may have slight size variations—your installer should account for that to ensure a clean, even layout.
Pairing With Countertops And Cabinets
This backsplash shines when paired with light quartz or marble countertops and white or pale gray cabinets. Add brass or matte black fixtures for a touch of contrast, and let the tile be the star. For a more layered look, mix in open shelving with ceramic dishes and glass jars to echo the handmade feel.
8. Checkerboard in Navy and White
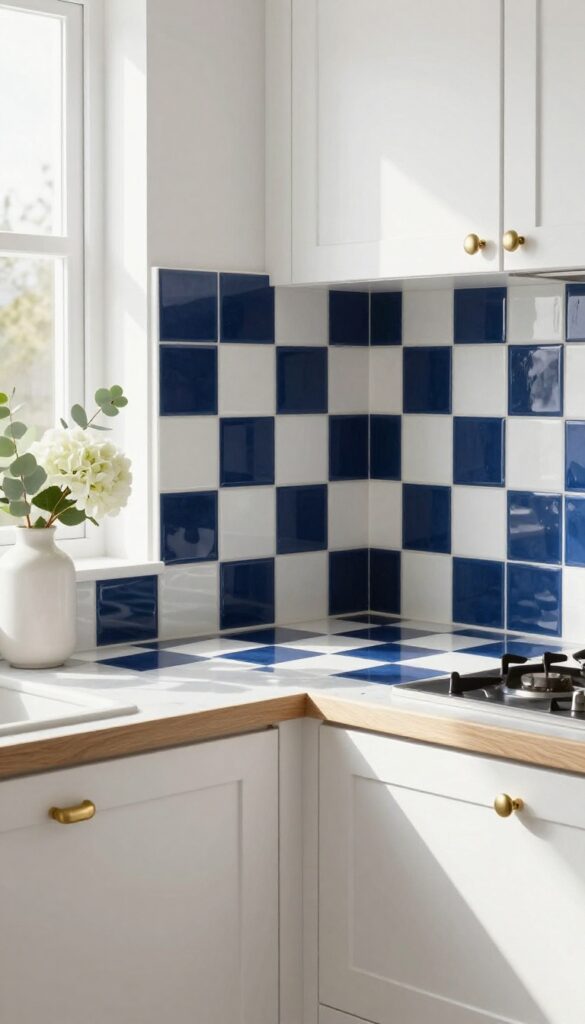
A checkerboard pattern might sound a bit retro, but in navy and white it feels fresh and nautical. The high-contrast pairing adds a crisp, clean look that instantly evokes coastal charm without being kitschy. Whether you go for large-format tiles or small mosaic squares, this pattern brings a playful yet polished energy to the space.
The beauty of a navy and white checkerboard is its versatility. It can anchor a busy kitchen or add a subtle pop of color to a neutral one. The key is balancing the pattern with the rest of the room—let it be the star, and keep surrounding elements simple.
Large Tiles For A Modern Twist
Oversized checkerboard tiles, like 8-inch or 12-inch squares, give the pattern a contemporary edge. The bigger scale makes the design feel less busy and more like a bold geometric statement. Pair it with flat-front cabinets and brushed brass hardware for a sleek, updated coastal look.
Small Mosaic For Vintage Charm
If you prefer a more traditional or cottage-like feel, small mosaic checkerboard tiles—think 1-inch or 2-inch squares—deliver that vintage diner vibe. The dense pattern adds texture and depth, especially when paired with white shaker cabinets and open shelving. It’s a timeless choice that still feels right at home by the sea.
Grout Color Matters
The grout you choose can change the entire look. White grout keeps the contrast sharp and clean, while navy grout blends the dark squares for a softer, more cohesive feel. For a subtle twist, try a light gray grout to tone down the starkness and add a hint of warmth.
9. Pebble Tile in Neutral Grays
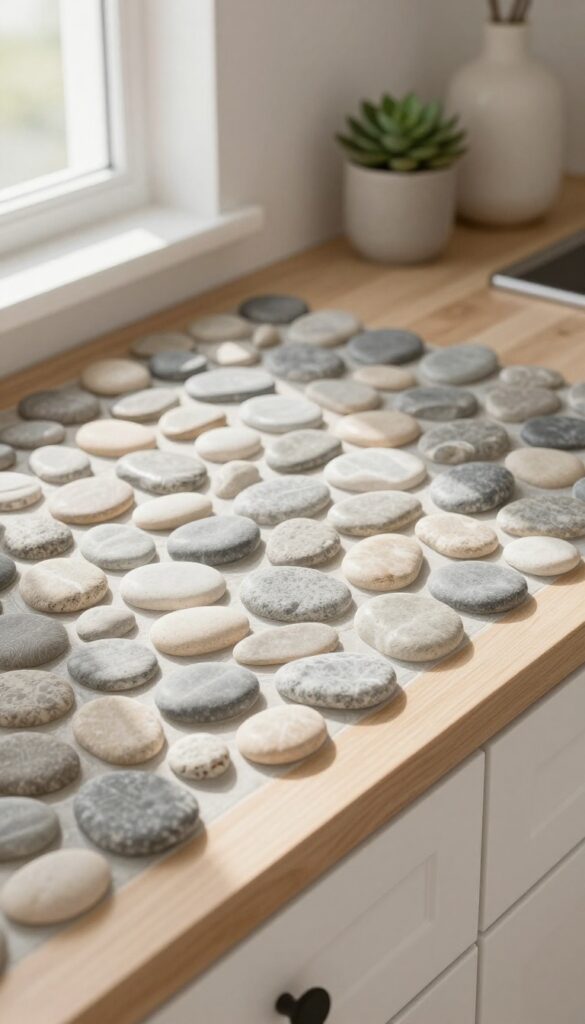
River stones tumbled smooth by water bring a natural, grounding texture that feels like walking on a beach. In soft gray and beige tones, pebble tile adds a subtle, organic pattern without overwhelming the space. It’s a tactile choice that makes the kitchen feel more like a spa retreat than a busy cooking zone.
Pebble tile is made from real river stones, so every piece has its own shape and shading. The rounded surface feels great under your fingers and adds a sensory element that flat tiles just can’t match. The neutral gray palette keeps it easy to pair with white cabinets, light wood, or even navy accents.
Plus, the stones are naturally durable and resist moisture, making them a practical pick for a busy kitchen.
Why Pebble Works In Coastal Kitchens
The organic, uneven surface mimics the look of a shoreline, bringing a bit of nature indoors. Gray and beige tones blend with most coastal palettes, from soft whites to sandy beiges. It also adds depth without drawing attention away from countertops or cabinetry.
Installation And Grout Tips
Pebble tiles come in mesh-backed sheets, so installation is quicker than you might think. Use a sanded grout in a complementary color—light gray or warm beige works best. Make sure to seal the grout to prevent staining, since the surface is textured and can trap spills if not sealed properly.
Styling And Maintenance
Keep the rest of the backsplash simple to let the pebbles shine. Pair with understated hardware and minimal decor. Cleaning is easy—just wipe with a damp cloth and mild soap.
Avoid abrasive cleaners that could scratch the stones or dull the grout.
10. Limewash Paint Over Tile
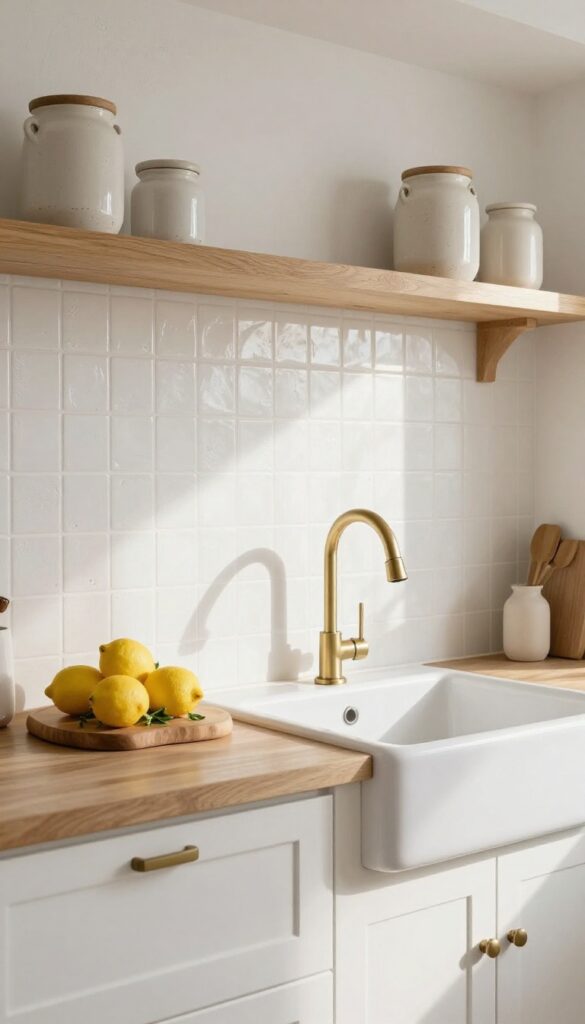
If your current tile is dated or just not your style, you don’t have to rip it out. Limewash paint can go directly over the tile, giving it a soft, matte, textured finish that looks like aged plaster. It’s an affordable way to transform the backsplash without a full renovation.
The best part? Limewash is naturally breathable and develops a beautiful patina over time. Choose a warm white or pale blue to keep that breezy, coastal feel.
It’s a bit of a DIY project, but the results are worth it.
Limewash paint is a traditional finish made from limestone that’s been used for centuries. When applied over tile, it creates a subtle, mottled texture that hides imperfections and adds depth. The finish is matte and slightly chalky, which fits perfectly with coastal aesthetics.
It’s also forgiving—if you make a mistake, you can easily blend it in. Plus, it’s much cheaper than retiling, and you can change the color later if you want a different vibe.
Why Limewash Works Over Tile
Limewash adheres well to porous surfaces like ceramic or porcelain tile, especially if you prepare the surface properly. It creates a mineral bond that’s durable and breathable, so it won’t peel or crack like regular paint. The texture is uneven, which adds character and makes the backsplash feel more organic.
It’s also resistant to mold and mildew, making it a smart choice for a kitchen.
How To Apply Limewash Over Tile
Start by cleaning the tile thoroughly to remove any grease or residue. You don’t need to sand, but a light scuff can help with adhesion. Apply the limewash with a wide brush in thin, uneven strokes—don’t try to make it perfect.
Let the first coat dry, then add a second coat for more coverage. You can also dilute it with water for a more translucent effect. Seal it with a matte sealer to protect against moisture.
Coastal Color Ideas For Limewash
Warm white is a classic choice that brightens the kitchen and feels airy. Pale blue, like a soft sky or sea glass, adds a subtle pop of color that’s still calming. You can also mix a little pigment to create a custom shade, like a sandy beige or a light greige.
The key is to keep the color muted and natural so it complements the coastal theme.
11. Patterned Cement Tiles
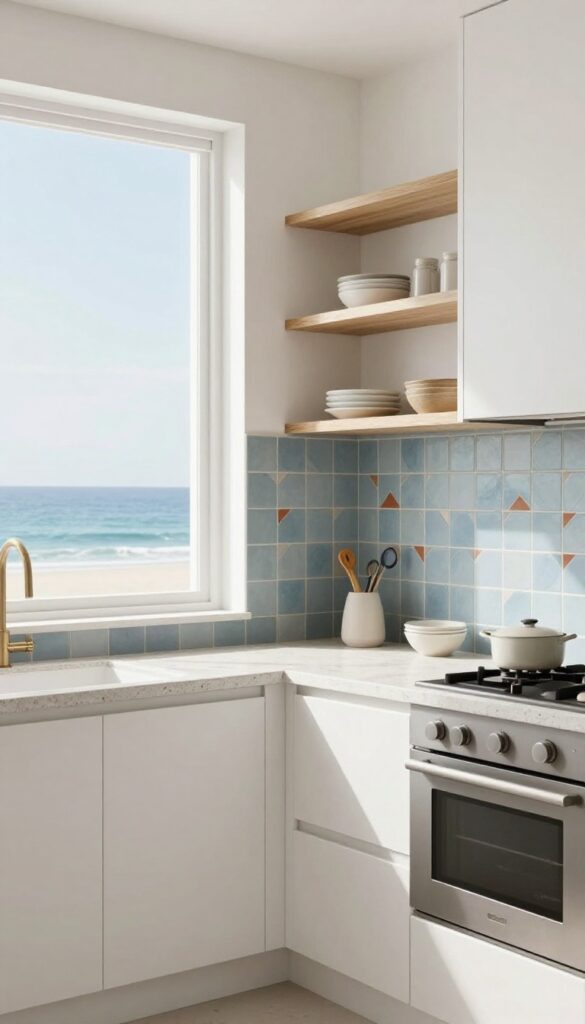
Cement tiles are having a moment, and for good reason. They bring an artisan feel that’s hard to replicate with standard ceramic or porcelain. The muted blues and terracotta tones fit right into a coastal palette, adding warmth without overwhelming the space.
These tiles are also surprisingly durable. They’re pressed, not fired, so they develop a lovely patina over time. That means they get better with age, just like a well-loved beach house.
Using patterned cement tiles is a bold move, but it pays off. The key is to let them shine in a focused area, like behind the range or on a single accent wall. This way, they become a focal point without making the whole kitchen feel busy.
Pair them with simple white or light wood cabinetry to let the patterns breathe. Keep the countertops neutral, too—something like quartz or butcher block works well. The result is a kitchen that feels custom and collected, not like you just picked something off a showroom floor.
One thing to note: cement tiles need sealing to resist stains and moisture. It’s a small step that keeps them looking great for years. If you’re handy, you can do it yourself, but it’s also fine to hire a pro.
Where To Use Them
The stove backsplash is the most popular spot for cement tiles. It’s where the eye naturally goes, and the pattern adds instant character. You could also do a full wall behind open shelving or a coffee station.
If you’re nervous about going all-in, start with a small section. A strip above the counter or a niche can be enough to make a statement.
Color And Pattern Ideas
Stick to two or three colors that echo your coastal theme. Think soft blues, sandy beiges, and a hint of terracotta. Geometric patterns like diamonds or arabesques work well, but even a simple repeating flower can feel fresh.
Mix and match a few different tiles to create a patchwork effect. It’s a playful way to add personality without being too matchy-matchy.
Maintenance And Longevity
Sealing is non-negotiable for cement tiles. It protects them from water and grease, which are inevitable in a kitchen. Reapply the sealer every couple of years to keep the tiles looking their best.
With proper care, cement tiles can last decades. They might chip or crack if you drop something heavy, but that’s part of their charm. Small imperfections add to the handmade feel.
12. Mirrored Tiles for Light and Space
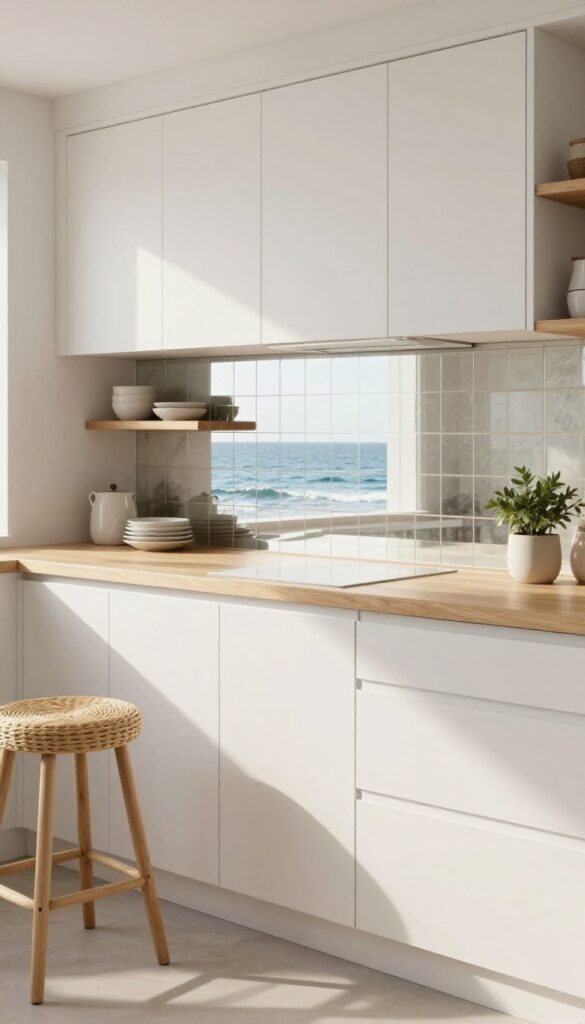
Mirrored tiles are a clever way to bounce light around a compact kitchen, making it feel twice as open. They catch the ocean glow and soft morning sun, adding a subtle shimmer that feels more like a seashell than a disco ball. Paired with white cabinetry and natural wood, they strike a balance between polished and relaxed.
Mirrored tiles work especially well in galley kitchens or spaces with limited windows. The reflective surface multiplies whatever light you have, softening shadows and opening up the room. They also make cleaning a breeze—just a quick wipe and they’re streak-free, which is a win for busy cooks.
Pairing With Coastal Materials
Combine mirrored tiles with organic elements like driftwood shelves, rattan bar stools, or a live-edge wood counter. The reflection picks up those textures and doubles their visual warmth, so the space feels layered rather than cold. Keep grout lines thin and light to maintain a seamless, watery look.
Choosing The Right Finish
Go for a lightly smoked or antiqued mirror finish instead of a stark, high-shine one. This softens the reflection and adds a touch of vintage charm that fits coastal homes. If you’re worried about fingerprints, a matte or brushed mirror tile hides smudges better while still bouncing light.
Placement And Layout Ideas
Use mirrored tiles only behind the stove or sink as a focal point, and keep the rest of the backsplash in a solid neutral. This creates a bright accent without overwhelming the room. For a more dramatic effect, run them floor-to-ceiling behind open shelving to amplify depth and draw the eye upward.
13. Shell and Mother-of-Pearl Inlays
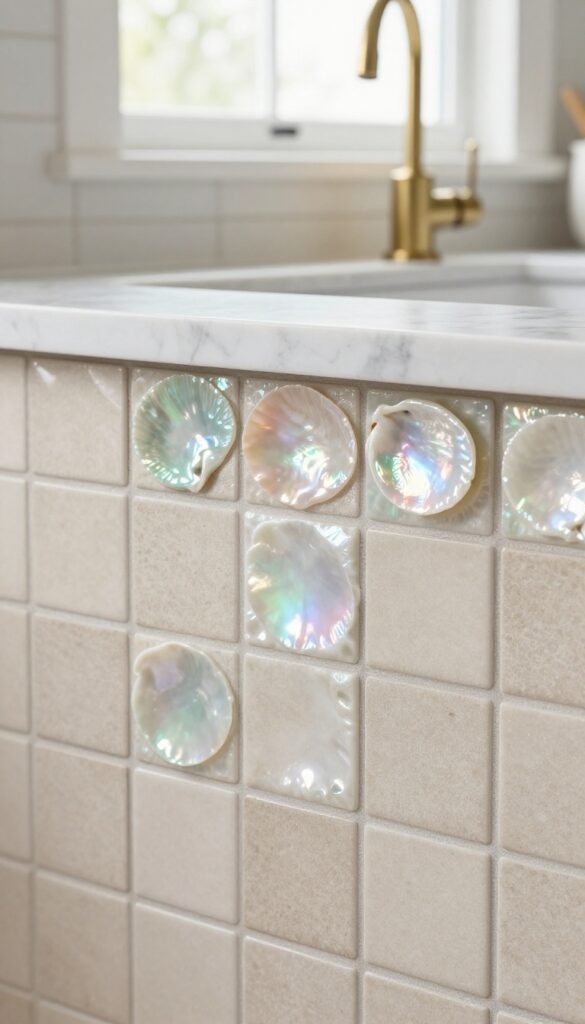
Think your backsplash has to be all one material? Not at all. Shell and mother-of-pearl inlays bring a subtle, iridescent shimmer that shifts with the light, adding a touch of luxury that feels personal and coastal.
It’s a detail that makes your kitchen feel curated, not decorated.
Incorporating shell or mother-of-pearl into a neutral tile design is a beautiful way to add texture and color without going bold. The natural iridescence catches the eye and changes as you move around the room, giving your backsplash a living quality. Plus, shell is surprisingly durable and easy to clean, making it perfect for a busy kitchen.
How To Use Inlays
You don’t need to cover the whole wall. Instead, sprinkle in a few mother-of-pearl tiles among white subway tile or use a single row as an accent. This keeps the look elegant and lets the inlays stand out without feeling busy.
Mixing Materials
Shell pairs beautifully with marble, travertine, or even simple ceramic. The key is to keep the base neutral so the iridescence can shine. Try a soft beige or sandy gray background to let the shell’s colors pop.
Caring For Shell Tile
Shell is more delicate than porcelain, so avoid harsh cleaners. A gentle soap and water solution works best. Also, make sure your grout is sealed to prevent staining.
With a little care, your shell inlays will stay gorgeous for years.
FAQ
What is the most popular coastal backsplash material?
White subway tile remains the most popular choice because it’s timeless, bright, and versatile. It works with any coastal color palette and can be styled with different grout colors or patterns to add texture.
How do I choose the right grout color for a coastal backsplash?
For a clean, airy look, use white or light gray grout. If you want more contrast and definition, choose a darker grout like navy or charcoal. For a seamless look, match the grout to the tile color.
Are glass tiles a good choice for a kitchen backsplash?
Yes, glass tiles are durable, easy to clean, and resistant to moisture and stains. They reflect light, making the space feel brighter. Just ensure they’re properly installed with the right adhesive to prevent cracking.
Can I install a backsplash over existing tile?
In some cases, you can tile over existing tile if the surface is in good condition and properly prepared. However, it’s often better to remove the old tile to avoid issues with adhesion and thickness. Consult a professional for the best result.
What is the best backsplash for a small coastal kitchen?
Large-format tiles or mirrored tiles can make a small kitchen feel bigger by reducing grout lines and reflecting light. Light colors like white, pale blue, or sandy beige also help open up the space.
Conclusion
Choosing the right backsplash is all about balancing style and practicality. Whether you go with classic subway tile, natural stone, or something unexpected like mirrored tiles, the goal is to create a space that feels like you. Don’t be afraid to mix textures or add a personal touch—your kitchen should reflect your coastal lifestyle.
Take your time, compare samples in your own lighting, and think about how the backsplash will work with your countertops and cabinets. With these 13 ideas, you’re well on your way to a kitchen that’s both elegant and full of personality. Happy renovating!