15 Texas Backyard Ideas Made for Heat Shade and Comfort
A Texas backyard in August can feel like a parking lot at noon, and that heat decides how much time you actually spend outside. The right mix of shade, airflow, and low-water landscaping flips that entirely, turning a sunbaked slab into the spot where everyone gathers.
These 15 ideas are built for real Texas conditions, not a catalog photo shoot. Some cost a weekend and a few hundred bucks, like a misting line or a stock tank pool tucked under a cover.
Others, like a louvered pergola or a screened porch, are worth planning before you pour concrete.
1. Shade Sails That Actually Block the Afternoon Sun
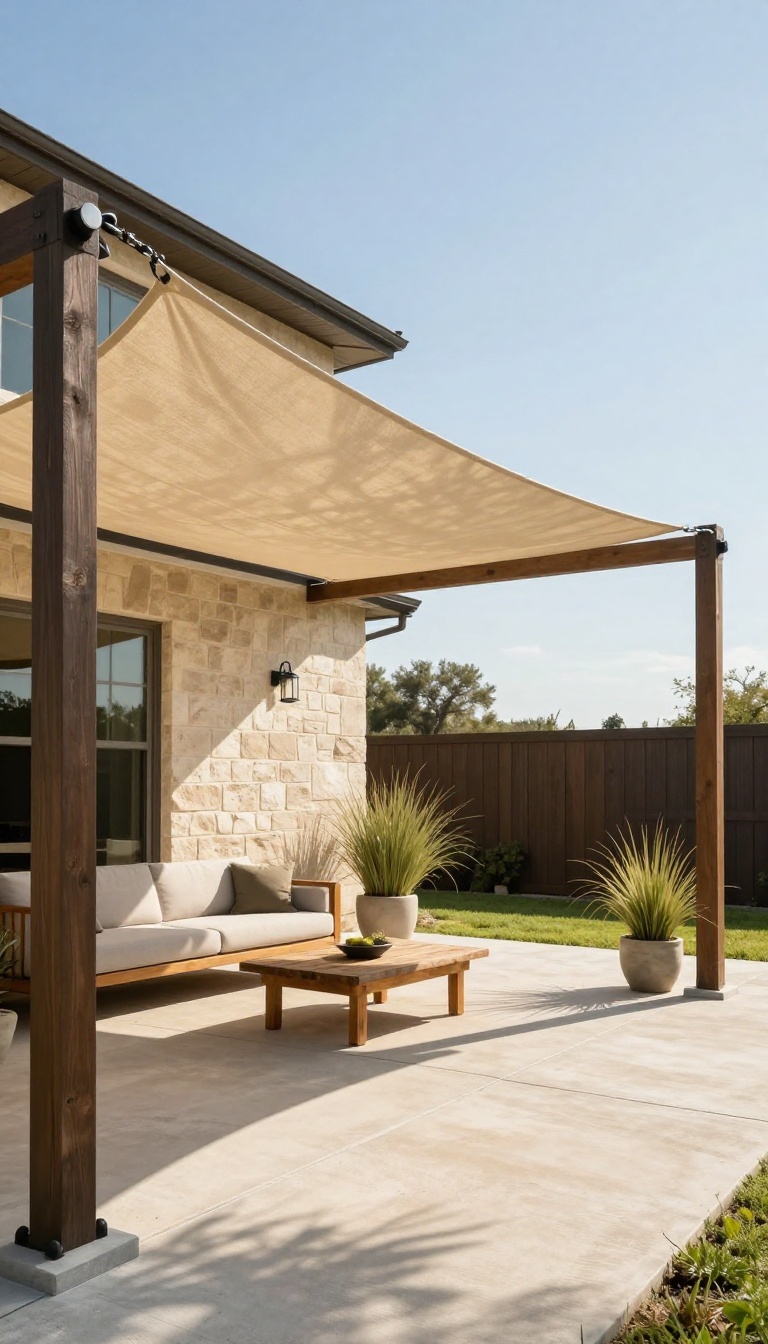
A shade sail is one of the cheapest ways to make a west-facing patio usable again. It stretches fabric across posts or roof anchors, blocking direct sun while letting hot air rise and escape. Get the placement and material right, and it works harder than most solid covers.
Most shade sails fail for one simple reason: they get hung too high, too flat, or in the wrong spot. In Texas, the sun that ruins your evening sits low in the west, so that's the exposure you need to attack first. A sail angled toward the west and tilted slightly downward catches that late sun before it reaches your seating area.
It also keeps the fabric from turning into a giant heat trap overhead. Material matters just as much. Breathable, high-density polyethylene knit lets breeze through and releases heat, while a solid canvas or vinyl sail just holds warmth under it like a lid.
Where To Anchor It
You need three or four solid anchor points that can handle tension and wind. Posts set in concrete work, but existing roof lines, fence posts, and mature tree trunks can save you money. Keep the sail tilted so rain runs off and the low side faces the direction you want shade most.
Fabric That Breathes
Look for woven HDPE or a permeable shade cloth rated for 90 percent or higher UV block. Skip waterproof sails unless you truly need rain cover, because they trap heat and sag under water weight. Breathable fabric dries fast and stays cooler underneath.
Sizing And Tension
Measure the space and buy a sail that's slightly smaller than the span, then use turnbuckles and cables to pull it tight. A loose sail flaps in wind and wears out fast. A taut one sheds heat, rain, and debris without drama.
What It Costs And How Long It Lasts
A basic triangular sail runs $40 to $150, and hardware adds another $30 to $80. Quality fabric lasts five to ten years in Texas sun if you take it down before winter storms. That's a small investment for a patio you'll actually use.
2. A Covered Pergola With Adjustable Louvers
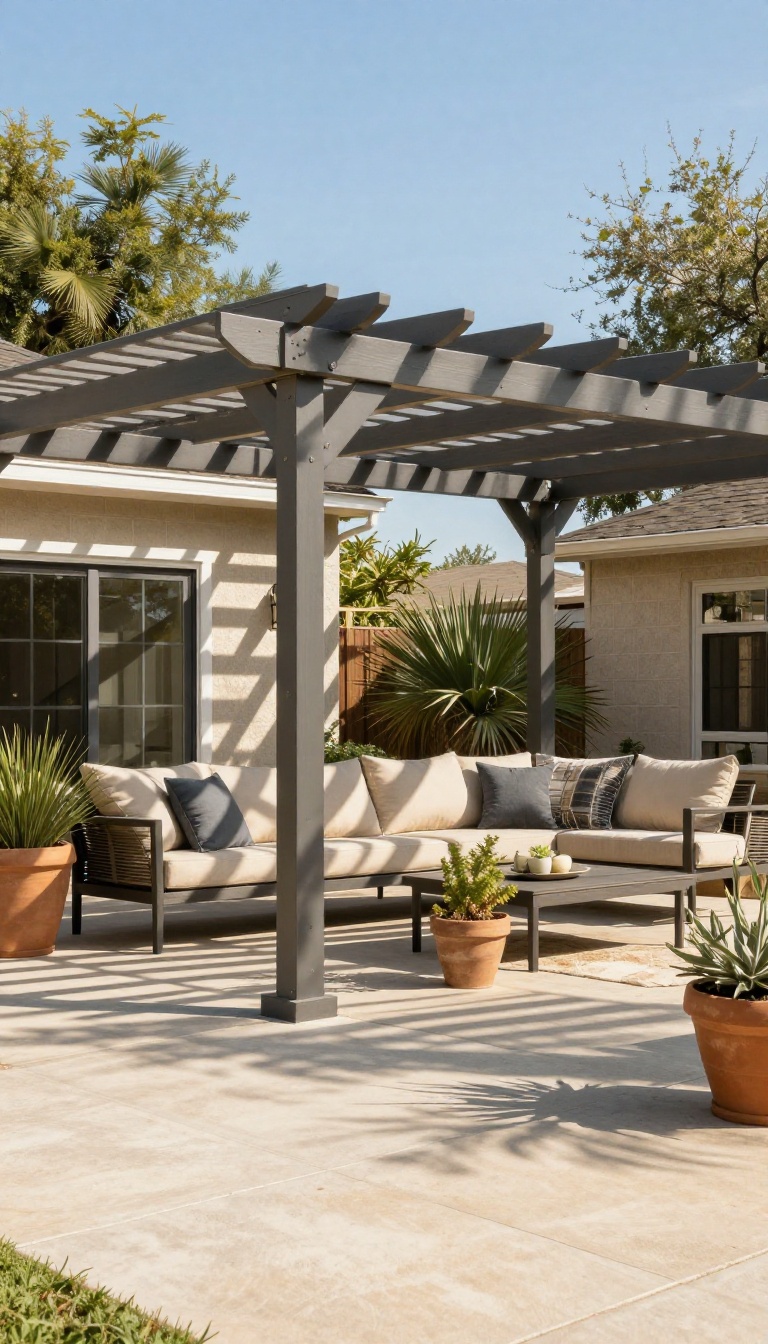
A louvered pergola solves a problem most shade structures can't: it changes with the seasons. In January, you crank the roof open and let the weak sun warm the patio. By July, you close it tight and create a solid lid that blocks the worst of the afternoon glare.
It's not a cheap kit. But it turns one slab of concrete into a room you can actually use year-round, which is hard to put a price on when summer runs from May to October.
Louvered pergolas look like a regular pergola until you notice the roof is made of angled blades instead of fixed slats. Those blades rotate, usually with a hand crank or a motor, so you control how much sun gets through. Close them completely and you've got a covered patio.
Open them a few inches and hot air escapes while a breeze moves through. That flexibility is the whole point in a climate that swings from mild to brutal. The upfront cost runs higher than a basic wood kit.
A quality aluminum louvered pergola can start around $2, 500 and climb past $8, 000 installed, depending on size and motorization. That's real money. But compare it to building a solid roof structure, and the gap narrows fast.
You also skip the permit headaches that come with a permanent addition in many Texas cities, since most louvered pergolas count as open structures. Where they shine is on west- and south-facing patios that get hammered from noon onward. A fixed roof blocks sun all day, which sounds great until you want light in December.
Louvers give you both. They also shed rain when closed, so a sudden storm doesn't send everyone running inside with wet cushions.
What To Look For
Material matters more than brand. Powder-coated aluminum handles Texas heat, humidity, and hail better than wood or steel, and it won't rot or need repainting every few years. Look for a frame with a thick gauge, not the flimsy stuff that flexes when you push on it.
Check the louver mechanism before you buy. Hand cranks are fine for smaller spans, but if your pergola is wider than 12 feet, a motorized option saves a lot of hassle. Some models integrate LED lights or a gutter system, which sounds gimmicky until you're trying to read outside at dusk or watching water pour off the edge onto your grill.
Placement And Airflow
Put it where the afternoon sun hits hardest, usually the west side of the house. That's the wall that turns your patio into an oven by 3 p. m. A louvered roof there cuts the heat before it reaches the sliding door.
Leave at least one side open for breeze. The louvers handle overhead sun, but trapped air still needs an escape route. If your yard is fully enclosed by fence or hedges, consider mounting a ceiling fan under the pergola to keep air moving.
It makes a 95-degree day feel closer to 85.
Cost And Installation Realities
You can install a smaller louvered pergola yourself if you're comfortable with a drill and a level. Larger spans usually need two people and a weekend. Hiring a pro adds $1, 000 to $2, 500 to the project, but it's worth it if you're mounting on concrete or attaching to the house.
Watch for wind ratings. Texas gusts don't play, and a cheap pergola can become a kite. Look for a model rated for at least 75 mph, and anchor it into footings, not just the patio surface.
If you're in a high-wind zone near the coast, bolt it down and keep the louvers slightly open during storms to let air pass through.
3. Misting Lines Along the Patio Edge
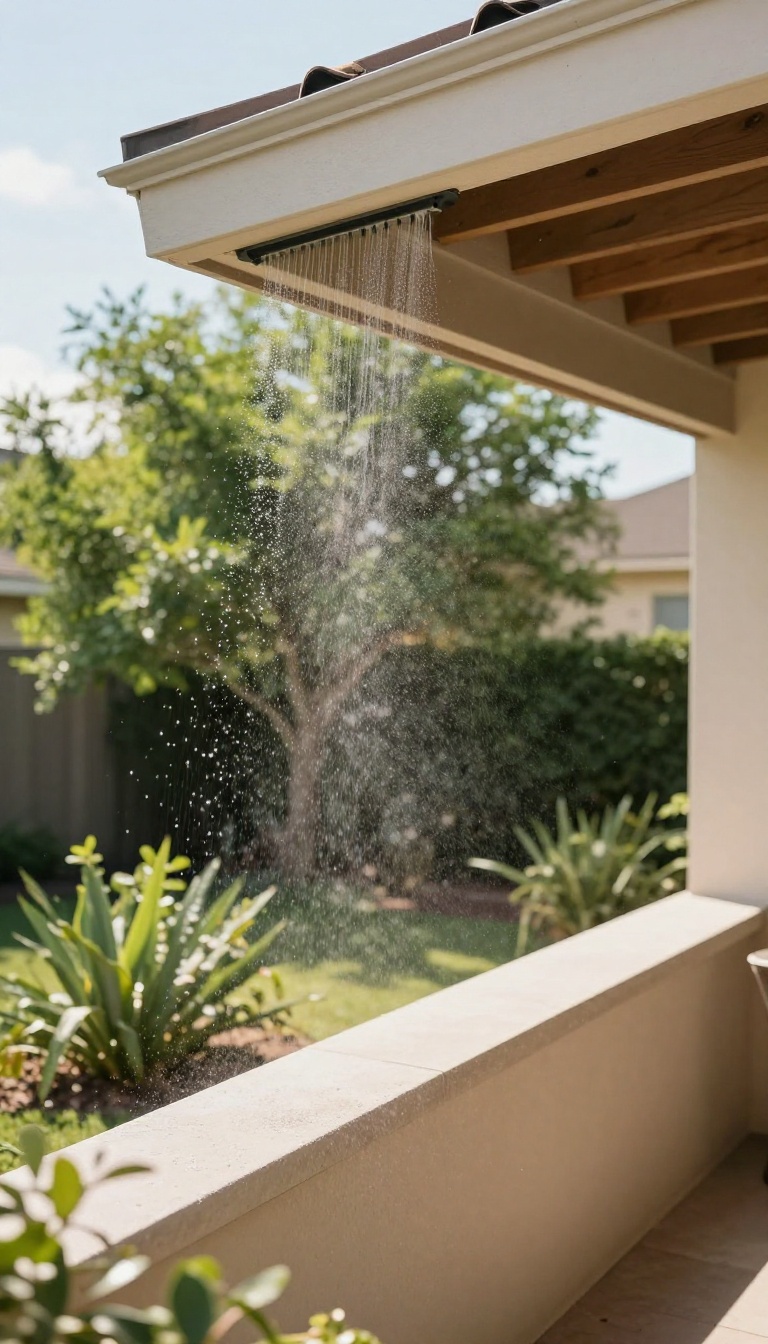
A misting line is the closest thing to air conditioning for your patio, and it works best in the dry heat of West Texas and the Hill Country. It drops the air temperature by 15 to 20 degrees without soaking you, because the water evaporates before it lands. Run it along the roofline or under a pergola, and you can reclaim your patio even on a 105-degree afternoon.
The magic is in the evaporation. In dry Texas heat, tiny water droplets flash into vapor and pull heat out of the air around you. That's why a misting line feels cool instead of damp.
In humid parts of the state, like Houston or Corpus Christi, you'll get less of a temperature drop, but it still helps when paired with a fan. You don't need a custom system to start. A basic kit with 20 to 30 feet of tubing and a few brass nozzles costs under $100.
Hook it to a hose, zip-tie it to your roofline or pergola beam, and you're in business. Just keep the nozzles pointed slightly downward so the mist falls where you sit, not where you walk.
Where To Mount It
The best spot is 8 to 10 feet above the patio floor, along the edge of your roof or the top of a pergola. That height gives the mist time to evaporate before it reaches you. If you mount it too low, you'll just get wet.
For a covered patio, run the line along the fascia board or the inside of the beam. For an open pergola, attach it to the outermost rafters so the mist drifts inward. You can also run a line along a fence or a privacy wall if that's where you get the most sun.
Timers And Controls
A misting line left on all day wastes water and can leave everything soggy. Put it on a simple hose timer or a smart plug so it runs only when you're outside. Set it for 10 minutes on, 10 minutes off during the hottest part of the day.
If you want to get fancy, a Wi-Fi timer lets you start it from your phone before you walk out. Some kits come with a remote, but a basic $20 timer does the job just fine.
Nozzle Care And Water Quality
Hard water will clog nozzles fast, especially in Central and West Texas. Use a filter on the hose bib, and clean the nozzles with vinegar every few weeks. If you have very hard water, look for kits with stainless steel nozzles, which last longer.
A quick soak in a 50/50 vinegar and water solution clears most mineral buildup. Keep a spare nozzle or two on hand so you're not stuck when one clogs mid-summer.
4. Native Texas Plants That Don't Need Constant Water
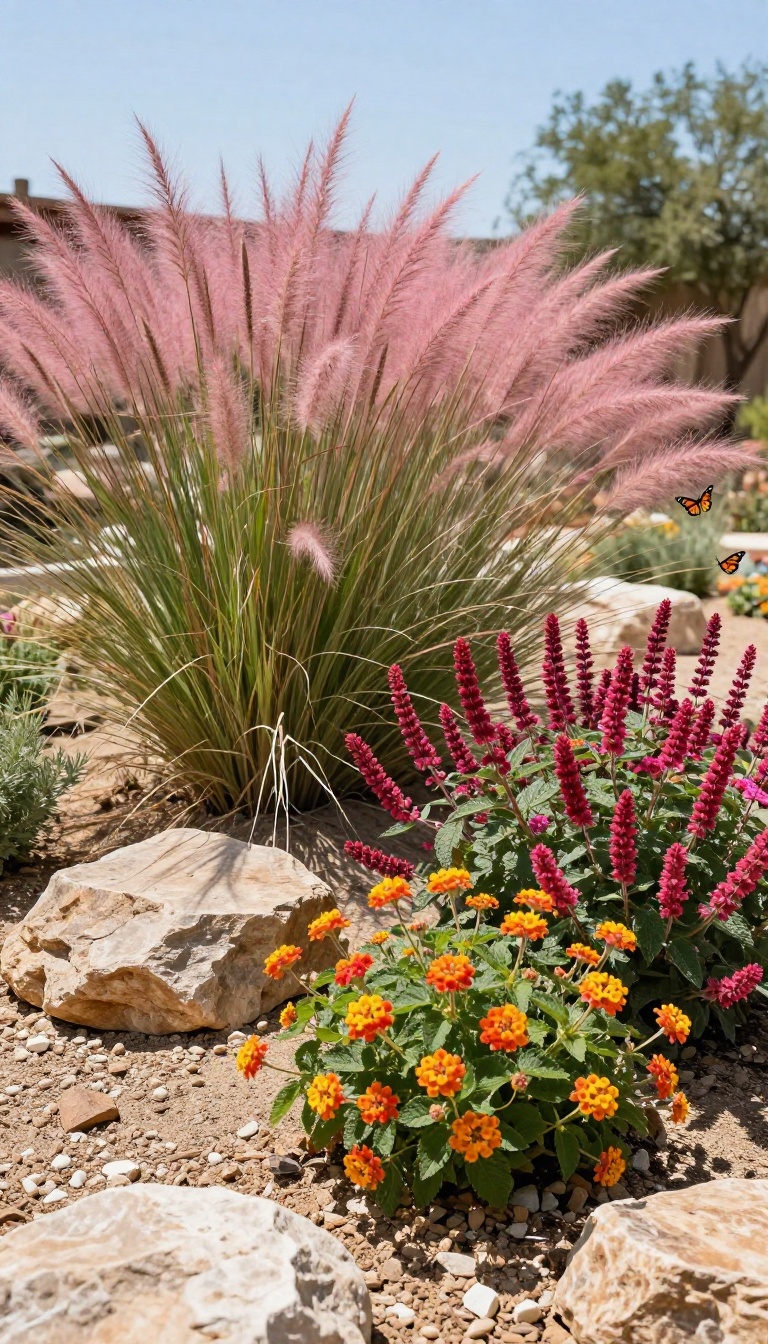
Most nursery plants are bred for looks, not survival. They need constant water and still look rough by August. Native Texas plants evolved here, so they handle drought, heat, and poor soil without babying.
Swap your thirsty ornamentals for these workhorses, and you'll spend less time watering and more time enjoying your yard.
Native plants aren't just a water-saving trick. They feed pollinators, improve soil, and look better in late summer than most exotic species. Once established, they need little to no supplemental irrigation.
Here are the best picks for a Texas backyard.
Native Grasses For Texture And Movement
Muhly grass, little bluestem, and switchgrass are tough as nails. They laugh at drought and add soft, waving texture to beds or borders. In fall, muhly puts on a pink haze that stops traffic.
Cut them back in late winter, and they'll come back stronger every year.
Salvia: Color That Survives The Heat
Salvia greggii (autumn sage) blooms spring through fall in red, pink, or white. It's a hummingbird magnet and needs almost no water once rooted. Plant it in full sun with good drainage, and it'll reward you with color when everything else quits.
Lantana: The Pollinator Powerhouse
Lantana loves Texas heat and blooms nonstop until frost. It's drought-tolerant, deer-resistant, and comes back every year in most of the state. Give it room to spread and watch butterflies and bees show up daily.
Just avoid the invasive species and stick with native varieties like Lantana urticoides.
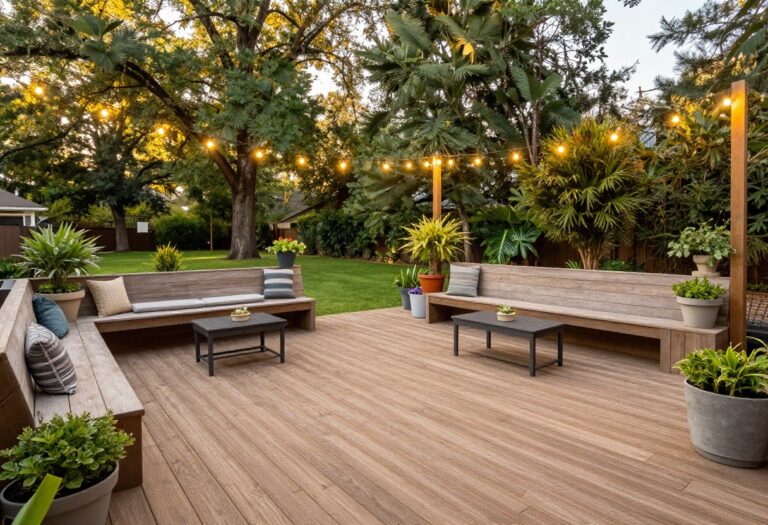
5. A Sunken Conversation Pit With Built-In Seating
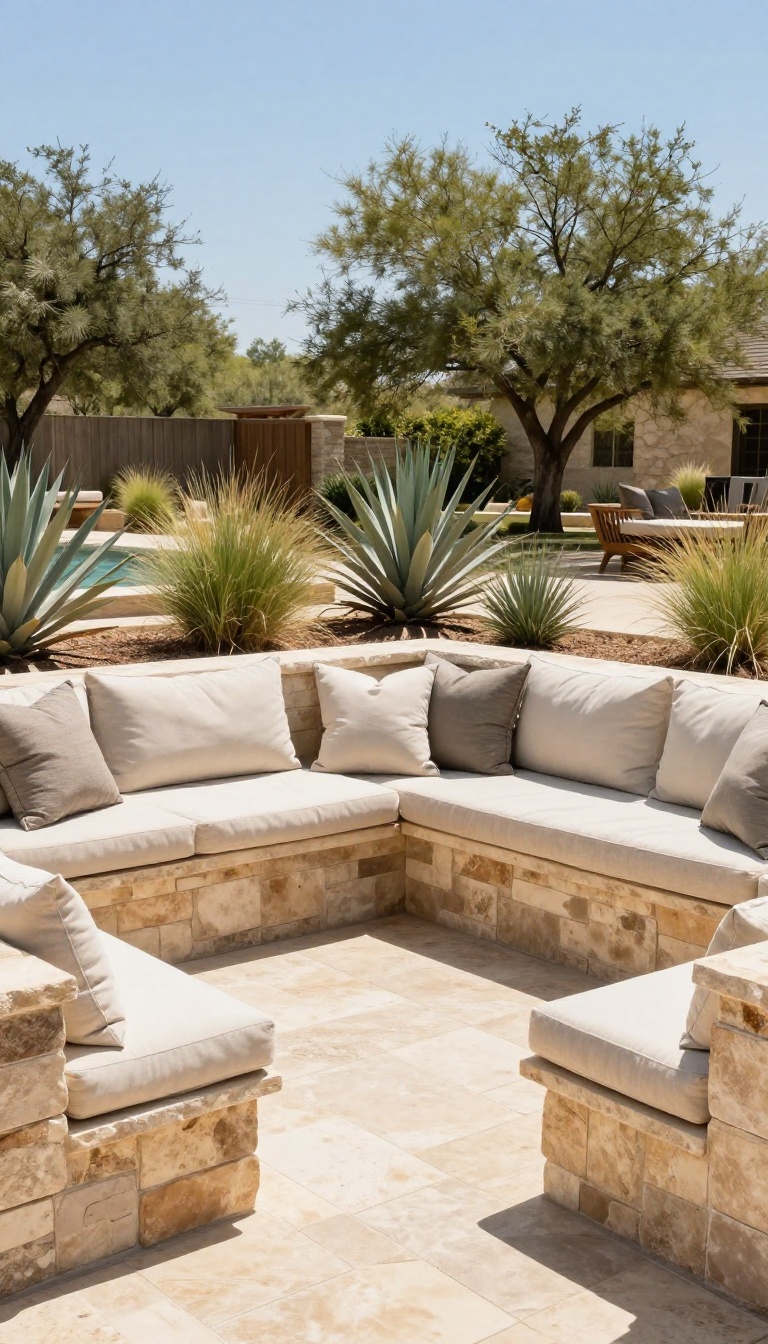
A sunken conversation pit turns a flat, exposed patio into a cool, sheltered gathering spot. You dig down a foot or two, line the walls with stone or concrete benches, and suddenly you have a space that stays comfortable even when the afternoon sun is brutal. The ground insulates the seating, and the low walls block hot wind and create a cozy, intimate feel.
It's a natural place for evening hangs, and it works with almost any backyard style.
Digging a pit might sound like a lot of work, but it's a straightforward project that pays off every time you use it. The key is to plan the depth, drainage, and materials before you start digging. Once it's in, you'll wonder why you didn't do it sooner.
The pit becomes the default spot for drinks, conversation, and watching the stars.
Why It Beats A Raised Deck In Texas Heat
Raised decks catch every bit of sun and radiate heat back at you. A sunken pit sits below grade, where the soil stays cooler and the walls provide shade for the benches. That lower position also shields you from wind, which can make a warm evening feel chilly once the sun goes down.
The result is a space you can use earlier in the day and later into the night.
How To Build It (and What To Watch For)
Start by marking a shape—circle, square, or rectangle—and dig down 12 to 18 inches. Slope the bottom slightly toward a drain or French drain so rainwater doesn't pool. Line the walls with retaining wall blocks, poured concrete, or natural stone.
Cap the benches with smooth, heat-resistant material like travertine or concrete. Add cushions for comfort, but store them when not in use.
Making It Comfortable And Safe
Built-in benches should be at least 16 inches deep and 18 inches high for comfortable seating. Leave gaps or use permeable materials to avoid water buildup. Add a small fire pit in the center for cool evenings, and consider a shade sail or pergola overhead for daytime use.
Keep steps wide and well-lit to prevent trips.
6. Outdoor Ceiling Fans Rated for Wet Locations
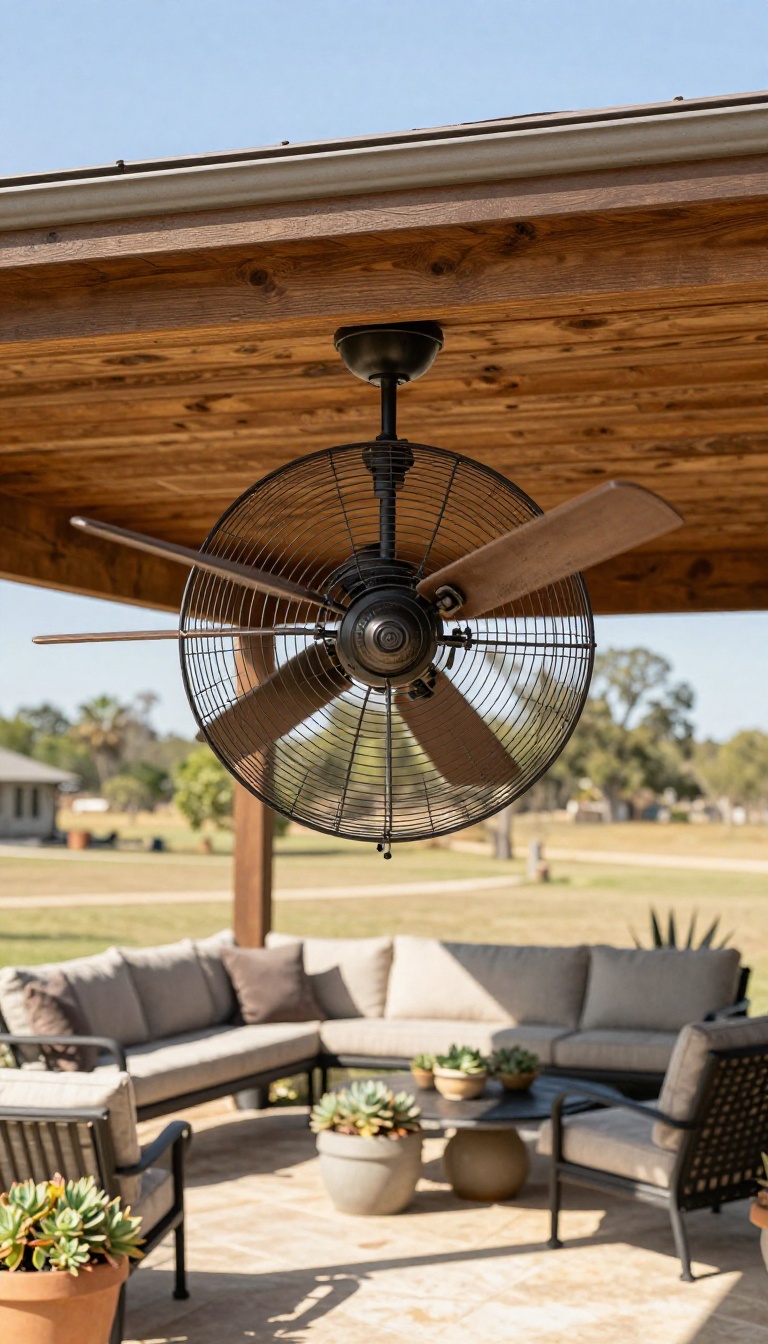
A fan won't drop the temperature on the thermometer, but it changes how the heat feels on your skin. Moving air speeds up evaporation, so a 95-degree afternoon under a covered patio can feel closer to 85. That's the whole trick, and it costs a lot less than adding another AC zone.
The catch is buying the right fan. A standard indoor ceiling fan will rust, warp, and quit within a season or two out here. You need one rated for wet or damp locations, and you need to mount it where it actually belongs.
Texas patios take a beating. Humidity in Houston, dust in Lubbock, and sideways rain in spring all find their way onto anything hanging outside. Fan ratings exist for exactly this reason, and ignoring them is how people end up replacing a fan every summer.
A damp-rated fan handles moisture and covered outdoor exposure. A wet-rated fan can take direct rain. For most covered patios, damp-rated is enough, but if the fan sits near an open edge, spend the extra money on wet-rated and stop worrying about it.
Damp-rated Vs. Wet-rated
Damp-rated fans work under a roof, porch, or pergola where rain doesn't hit them directly. They resist humidity and temperature swings, which is the main killer of outdoor fans in Texas. Wet-rated fans are sealed and built to handle direct rain and spray.
If your fan hangs anywhere rain can reach, go wet-rated. The price gap is small compared to replacing a fan every year.
Size And Mounting
Match the fan size to the space. A 52-inch fan covers roughly a 12-by-12 area, while a 60-inch fan suits larger patios. Too small, and you'll never feel it.
Mount it high enough to clear heads, usually 8 to 9 feet, and use a downrod if your ceiling is tall. A fan mounted too low is a hazard, and one mounted too high just stirs air nobody feels.
How To Run It
Run the fan on low or medium all afternoon, not high. High speed dries your eyes and kicks up dust without making you feel cooler. In summer, set the blades to push air down.
In winter, reverse the direction to pull cool air up and push warm air along the ceiling back down. One switch, two seasons of comfort.
7. A Stock Tank Pool With a Shade Cover
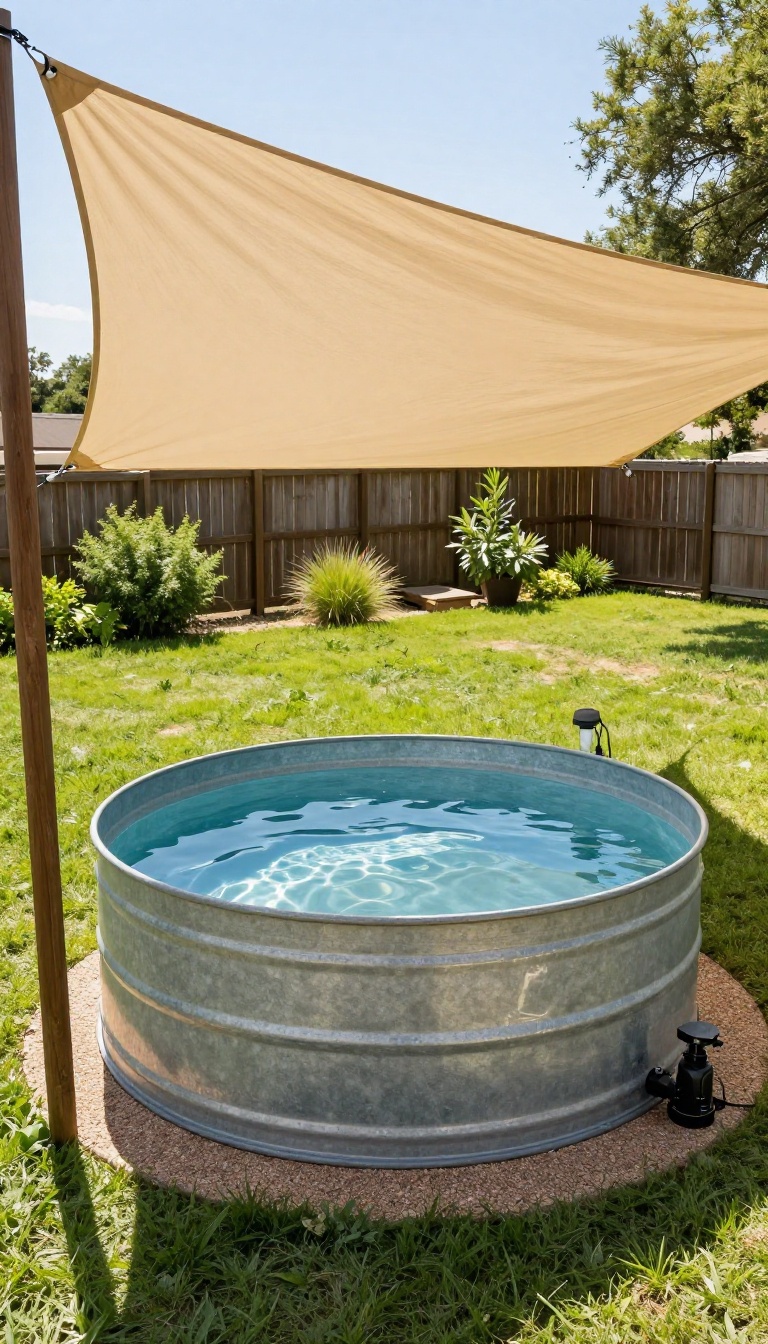
A stock tank pool is the kind of Texas hack that sounds too simple to work, until you're floating in one on a 104-degree afternoon. You can find the tank at any feed store, and most setups come together in a weekend without a permit or a concrete crew. The catch is the sun.
Bare metal gets hot enough to sting your forearms, and water in full sun turns lukewarm by 3 p. m. A shade cover fixes both problems at once. You don't need a fancy structure.
A shade sail, a simple pergola, or even a cantilevered umbrella can drop the water temp several degrees and make the edges safe to grab.
The stock tank itself is the easy part. An 8-foot galvanized tank holds around 700 gallons, which is enough for two adults to float and a couple of kids to splash without constant collisions. You'll want a pump and filter sized for that volume, plus a small chlorine or salt system to keep it clear.
Placement matters more than people expect. Put the tank where it catches morning sun and afternoon shade from a tree or fence, then add your cover on top of that. The goal is to block the harshest rays from noon to 5 p. m. without turning the whole area into a cave.
Before you fill it, set the tank on a level pad of decomposed granite or packed sand. A full stock tank weighs over 5, 000 pounds, and an uneven base will stress the seams over time.
Shade Sail Vs. Pergola Vs. Umbrella
A shade sail is the cheapest and fastest option. A 12×12 triangle or square sail runs $40 to $120, and you can anchor it to fence posts, a house wall, or dedicated steel poles. Angle it so it blocks the southern and western sun, and leave a gap for breeze to pass through.
A pergola gives you more permanent shade and a place to hang lights or a fan. Build it at least 9 feet tall so you don't bonk your head, and use slats spaced wide enough to let heat escape. A louvered roof is nice but overkill for a stock tank.
A cantilever umbrella is the most flexible. You can crank it back when you want sun and tilt it over the water when you don't. Just make sure the base is heavy enough to survive a gust, because Texas wind doesn't ask permission.
Keeping The Water Cool And Clean
Shade alone can drop the water temperature by 5 to 10 degrees, which is the difference between refreshing and bathtub. You can help it along by running the pump at night and adding a fountain or aerator to increase evaporation. Don't skip the cover when the pool is not in use.
A simple solar blanket or even a fitted tarp keeps debris out and slows evaporation, which matters during a drought. It also keeps the metal rim from baking in direct sun. Check your chemicals every few days.
Small bodies of water swing fast in Texas heat, and a cloudy tank is a lot less fun than a clear one. A basic test kit and a scoop of shock after heavy use will keep it swimmable all summer.
Safety And Comfort Details
The metal edge is the main hazard. Even with shade, a galvanized rim can get warm enough to startle you. Wrap the top rail with a pool noodle, a foam pipe insulator, or a section of split rubber tubing.
It costs almost nothing and saves your skin. Add a small step or a sturdy stool beside the tank. Climbing in and out of a 2-foot wall gets old fast, especially for kids or grandparents.
A simple wooden step with a handrail makes the whole thing feel more like a pool and less like a trough. Finally, think about drainage. When you empty the tank for the season, you don't want 700 gallons pooling against your foundation.
Set it on a slight slope or run a hose to a flower bed that can use the water.
8. Gravel and Decomposed Granite Instead of Full Lawn
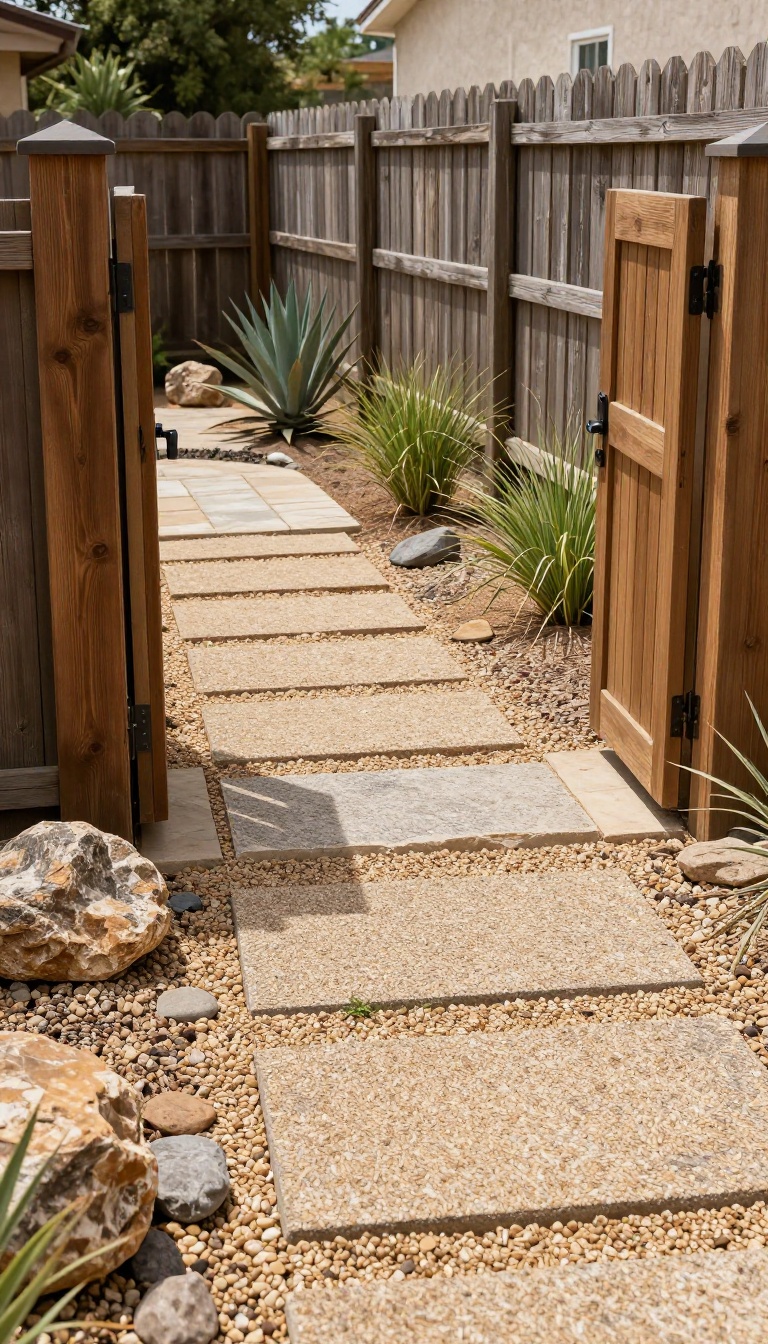
Grass looks great in theory and turns into a part-time job in practice. Between the water bill, the mowing, and the bare patches that show up every July, a full lawn asks for more than most Texas yards can give back. Gravel and decomposed granite offer a way out.
They cover ground, handle foot traffic, and stay solid after a storm instead of turning into a mud pit. You keep the green where it counts and let the rest of the yard breathe.
Where It Makes The Most Sense
Not every part of the yard needs grass. Side yards, the strip along a fence, the path from the gate to the patio, and that awkward corner where nothing grows are all fair game. These are the spots you walk through, not the spots you play on.
Covering them with gravel or decomposed granite cuts your mowing time and your water use without losing anything you actually wanted.
Gravel Vs. Decomposed Granite
Gravel is the tougher of the two. It drains fast, holds up under regular foot traffic, and comes in sizes from pea gravel up to larger river rock. It works well for paths, borders, and utility areas.
Decomposed granite, usually called DG, is finer and compacts into a firm, almost concrete-like surface. It looks cleaner and more finished, which makes it a better fit for patios, seating areas, and spots where you want bare feet to be comfortable.
Getting The Base Right
The base is what separates a surface that lasts from one that shifts every time it rains. Dig down four to six inches, then lay a layer of crushed rock before you add your top material. Skip the weed fabric debate by using a quality woven fabric under the gravel, not the thin stuff that tears.
Edge it with steel, stone, or concrete so the material stays put. In Texas heat, that edge also keeps things from migrating into your remaining grass.
Water, Weeds, And Upkeep
Once it's down, gravel and DG ask for very little. You'll water the plants around it, not the surface itself, which is the whole point in a drought-prone state. Weeds will still show up, but they pull easily from loose gravel and are manageable on compacted DG with a quick pass of a hoe or a spot spray.
Blow or rake the surface a couple of times a year, and it stays looking sharp for a decade or more.
9. A Screened-In Porch for Bug-Free Evenings
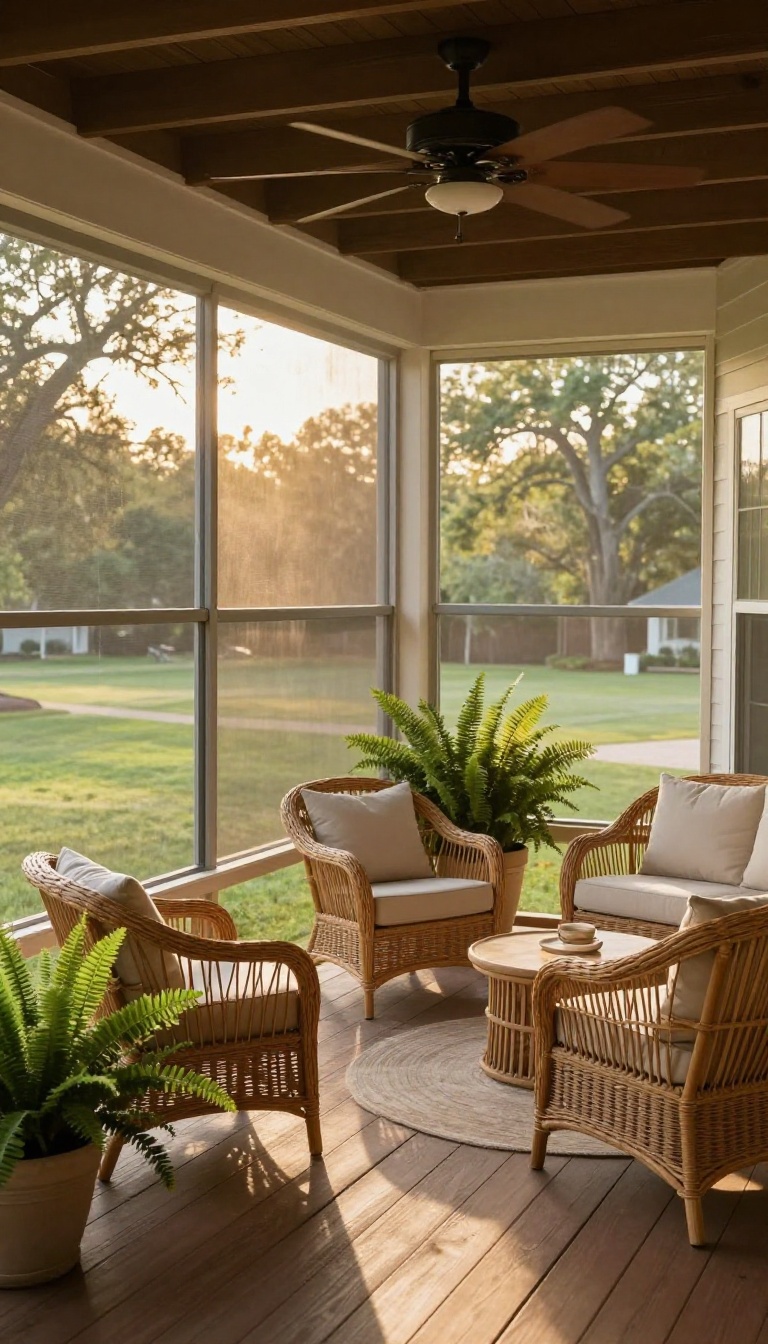
Mosquitoes in Texas don't just bite; they swarm, and they seem to know exactly when you've finally relaxed on the patio. A screened-in porch solves that problem without turning your outdoor space into a sealed box. You get airflow, shade, and a clear view of the yard—minus the constant swatting.
It's also one of the few upgrades that protects your furniture from the sun while keeping the space feeling open. The screen blocks harsh UV rays that fade cushions and crack wicker, so your porch stays comfortable and your stuff lasts longer. Unlike a sunroom, a screened porch doesn't need expensive glass or heavy HVAC work.
It's a practical middle ground for Texas homes that want outdoor living without the bugs and glare.
A screened-in porch is essentially a covered patio wrapped in mesh. The screen keeps mosquitoes, flies, and June bugs out, but lets the breeze move through. In Texas, that breeze is everything.
You can screen an existing porch or build one from scratch. The key is to plan the structure so it blocks the harshest afternoon sun while still catching evening airflow. Done right, it becomes the most-used room in the house from April through October.
Costs vary widely. A basic screen kit on an existing covered patio might run a few hundred dollars if you DIY. A full custom build with electrical, fans, and a fireplace can climb into five figures.
Most homeowners land somewhere in between. Maintenance is minimal but not zero. You'll need to check for tears, clean pollen off the screens, and make sure the framing stays solid.
It's a small trade-off for bug-free evenings.
Why Screening Beats Spraying
Repellents and yard sprays wear off, and mosquitoes always come back. A physical barrier works every night without chemicals. You can leave the door open, eat dinner outside, and never think about West Nile or Zika.
It's also safer for kids and pets who shouldn't be doused in repellent anyway.
Shade And Sun Protection
The roof and screens cut direct sun, which drops the temperature inside the porch by several degrees. That means your outdoor sofa won't fade, your wood table won't crack, and you won't squint every time you look up. It's a simple way to extend the life of your patio furniture.
Design Choices That Matter
Choose screen mesh based on visibility and durability. Standard fiberglass is fine for most yards, but pet-resistant screens are worth it if you have dogs. Add a ceiling fan to keep air moving, and consider a screen door with a slow-close hinge so it doesn't slam.
For the floor, concrete or stone stays cooler than wood decking in full sun.
Keeping It Comfortable Year-round
In winter, screened porches get cold, but you can add removable panels or a patio heater to stretch the season. In summer, a misting line or a portable evaporative cooler makes even August evenings tolerable. The screen itself blocks some wind, so it feels less exposed than a open patio on breezy days.
10. Retractable Awnings for Flexible Shade
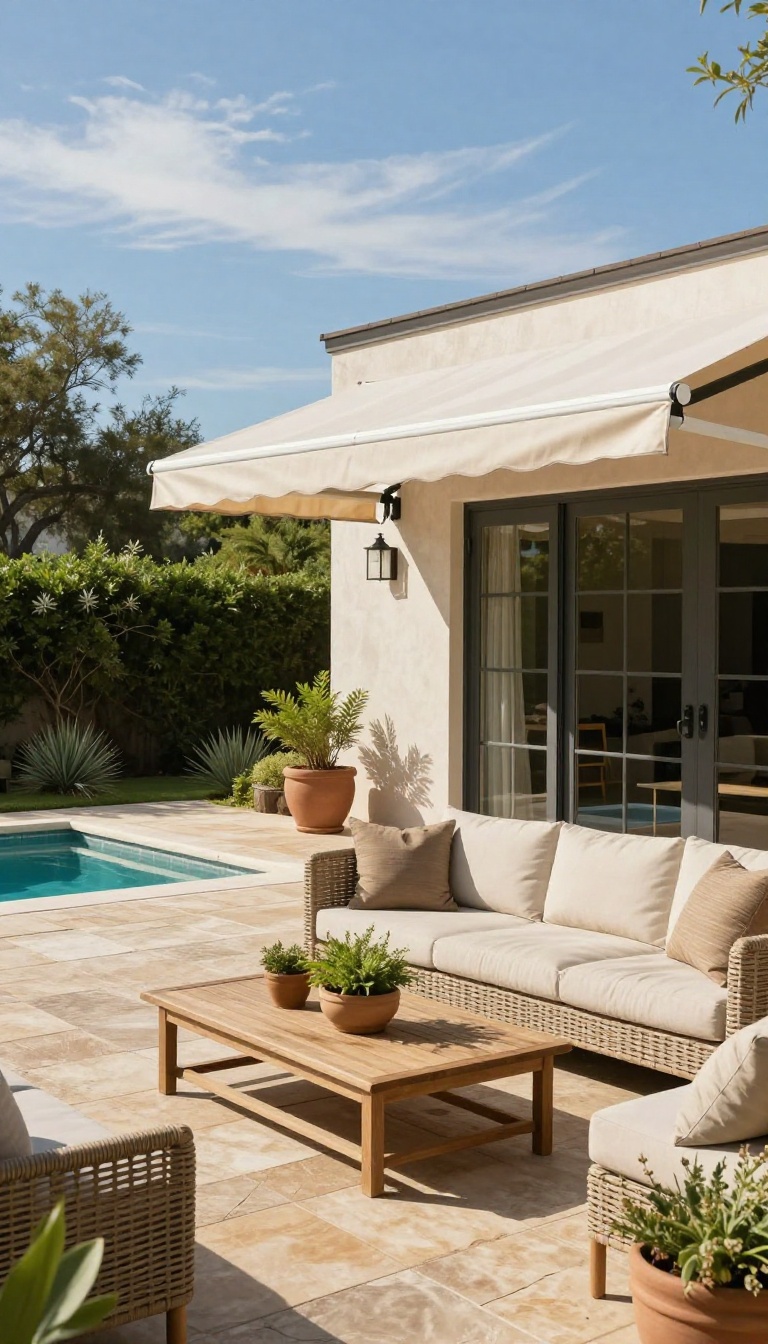
A retractable awning gives you shade when you want it and open sky when you don't. That flexibility matters in Texas, where the sun angle shifts from brutal overhead in July to low and glaring in December. Push a button and the patio goes from exposed to comfortable in seconds.
It's one of the few shade solutions that adapts to the weather instead of fighting it.
Retractable awnings mount on the wall above a door or window and roll out over a patio, deck, or seating area. The fabric stretches across a frame that extends outward, creating an instant canopy. When you're done, it rolls back into a slim cassette that hugs the house.
No permanent footprint, no posts to dodge, no shade where you don't want it. For Texas, the key is picking a model built for intense UV and sudden gusts. Cheap awnings fade, sag, and flap themselves apart in a spring storm.
A quality one with the right fabric and a wind sensor will last years and actually keep the space under it noticeably cooler.
Why Flexibility Wins In Texas
Fixed shade structures like pergolas or roof extensions are great, but they're permanent. They block sun in January when you'd rather soak it up, and they can't be adjusted when the sun moves. A retractable awning lets you chase the shade or open things up depending on the season and time of day.
In a climate where you might want full sun at 9 a. m. and deep shade by 2 p. m. , that adjustability is huge. It also means you can protect outdoor furniture and plants from harsh afternoon rays without darkening the whole yard.
What To Look For
Start with the fabric. Solution-dyed acrylic is the gold standard for fade resistance and UV blocking. It breathes, so it doesn't trap heat, and it holds color after seasons of Texas sun.
Cheaper fabrics might save you a few hundred bucks upfront but will look chalky and worn within two summers. Next, check the frame and mechanism. Powder-coated aluminum resists rust and won't get too hot to touch.
A motorized model with a manual override is worth the upgrade if you use the patio often. And don't skip the wind sensor. It automatically retracts the awning when gusts pick up, which prevents the kind of damage that turns a relaxing afternoon into a repair bill.
Installation And Placement Tips
Mount the awning high enough that it doesn't block your view when retracted, but low enough that it actually shades the space below when extended. A general rule is to install it at least 8 feet above the ground. If you're covering a wide area, consider two smaller awnings instead of one giant one.
They're easier to manage and less vulnerable to wind. Also, make sure the mounting surface is solid. Brick, stucco, and structural wood are fine.
Vinyl siding is not, unless you add blocking behind it. When in doubt, hire an installer who's done awnings in your area. They'll know the local wind codes and the best angle for your sun exposure.
11. A DIY Evaporative Cooling Wall
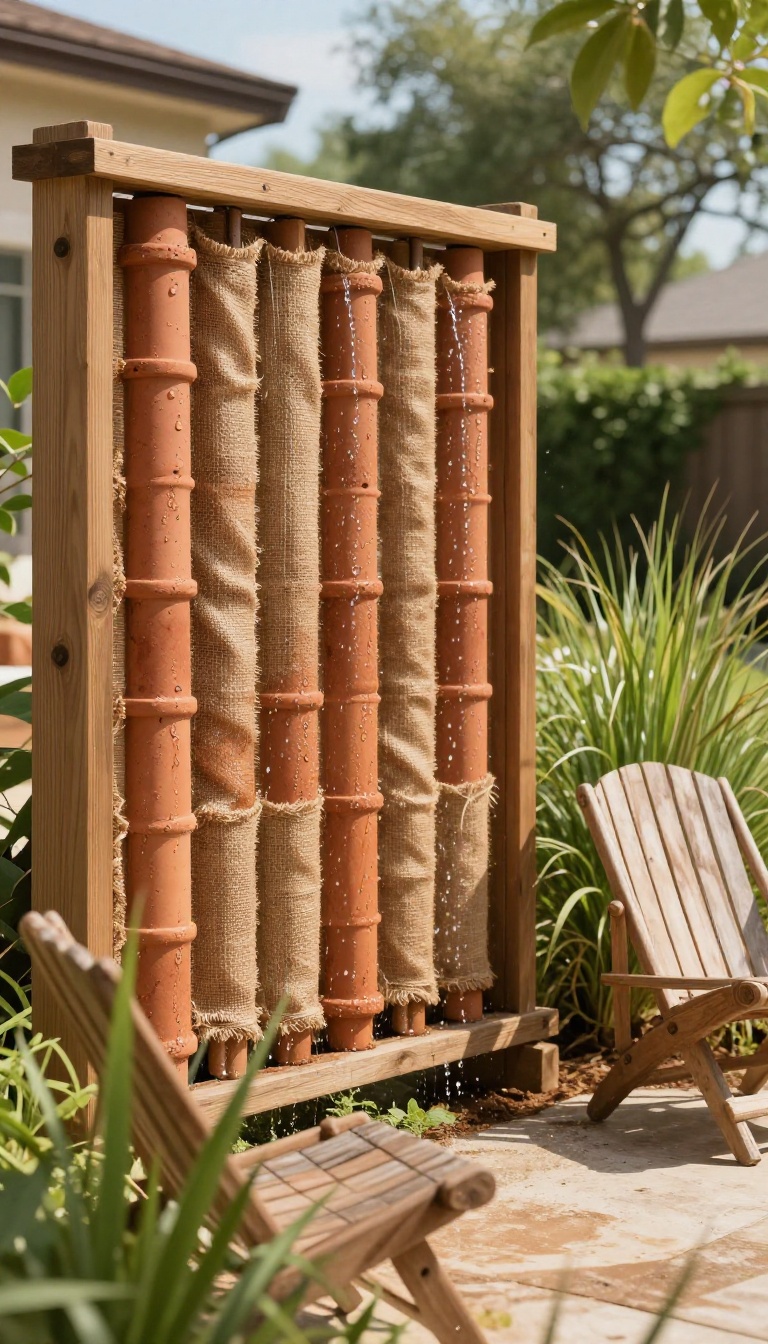
Evaporative cooling works on a simple principle: as water evaporates, it pulls heat from the air around it. A DIY cooling wall puts that physics to work in your backyard by hanging a porous surface and letting water trickle down it. The breeze that passes through comes out noticeably cooler, and the wall itself becomes a living, textured feature that beats another stretch of plain fencing.
You don't need a machine shop or a plumber's license to pull this off. The basic build is a frame, a water source, and a material that stays wet long enough for evaporation to do its job. Clay pipes, terracotta pots, and thick fabric like burlap or canvas all work.
The key is surface area and airflow—more exposed wet surface plus a steady breeze equals more cooling. Place it upwind of your seating area, and you'll feel the difference on your skin even when the thermometer barely budges. This isn't a swamp cooler that drops the temperature ten degrees.
Think of it as a comfort multiplier. It takes the edge off a hot afternoon, especially in drier parts of Texas where evaporation happens fast. In humid Gulf Coast air, it still helps, but you'll want to pair it with a fan to keep air moving.
Either way, it's cheap to build, easy to maintain, and looks a lot better than a plastic mister line stapled to a post.
Choosing Your Wet Wall Material
Terracotta and unglazed clay are the gold standard here. They hold water in their pores and release it slowly, so the wall keeps cooling for hours after you shut off the hose. Stack clay pipes vertically in a wooden frame, or hang a row of terracotta pots with small holes drilled in the bottom.
Fabric is the budget route: burlap or heavy canvas draped over a trellis and soaked with a drip line. It dries out faster, but it's cheap and easy to replace. Avoid plastic or sealed surfaces—they shed water instead of holding it.
Setting Up The Water Flow
A simple drip irrigation line along the top of the wall does most of the work. Run it on a timer so the wall stays damp during the hottest part of the day, usually from late morning to early evening. You want a slow, steady trickle, not a waterfall.
Too much water and it just runs off without evaporating; too little and the wall dries out and stops cooling. A small recirculating pump in a hidden basin works if you want to avoid wasting water, but a fresh drip line is easier to set up and fine for most yards.
Placement And Airflow
Put the wall between your seating area and the prevailing summer breeze. In most of Texas, that means facing south or southeast, where the afternoon wind usually comes from. Give it at least a few feet of clearance on both sides so air can move through.
If your yard is blocked by a fence or thick shrubs, add a small oscillating fan behind the wall to push air through the wet material. The cooler, moister air lands right where you're sitting, and the wall doubles as a privacy screen or a backdrop for plants.
Keeping It Clean And Working
Standing water grows algae and mosquitoes, so don't let the basin sit stagnant. Refresh the water every couple of days, or use a recirculating pump with a filter. Scrub clay surfaces with a stiff brush once a month to clear mineral buildup, which can block pores and cut down on evaporation.
Fabric panels should be swapped out when they get stiff or mildewed. In winter, drain the lines and store the pump indoors. A little maintenance keeps the wall cooling efficiently for years.
12. Shade Trees Planted on the West Side
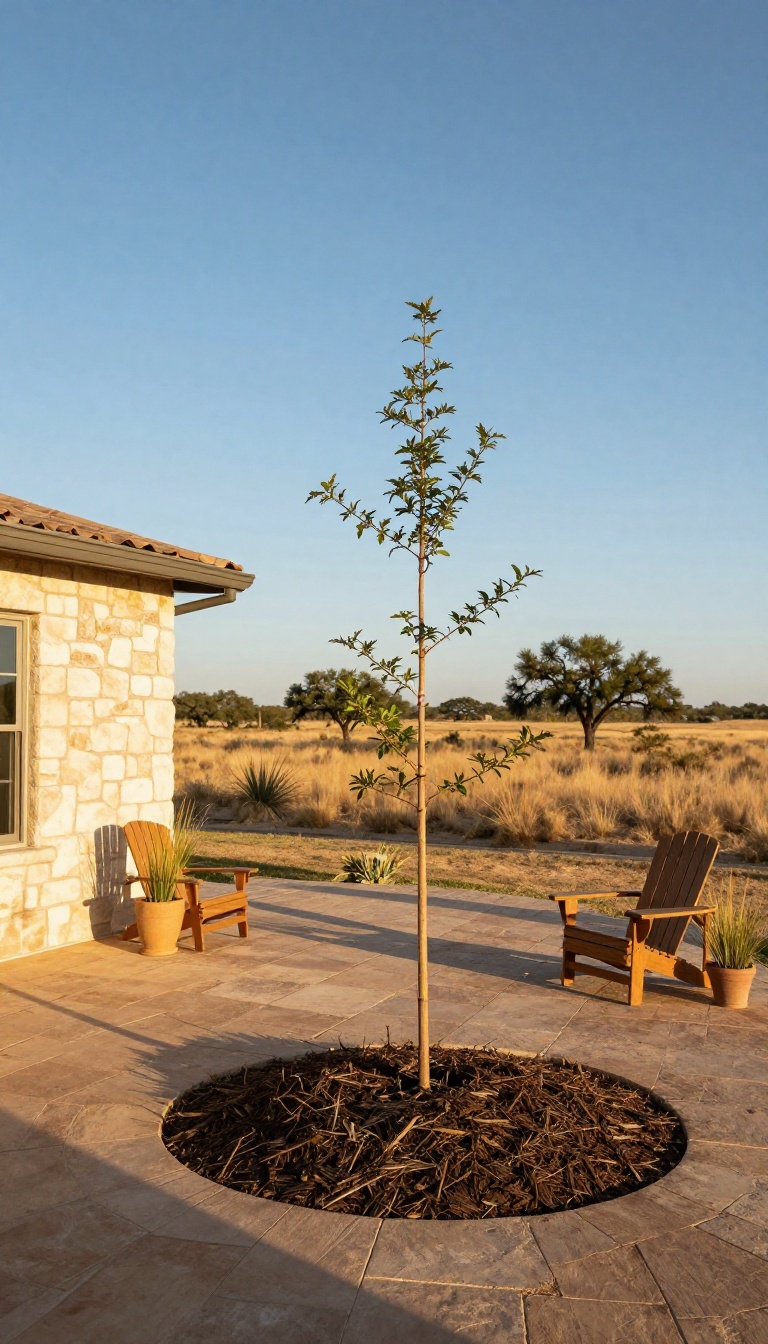
Afternoon sun in Texas hits hardest from the west, and it lingers. That's the side of the house that turns your patio into a griddle and pushes your AC into overtime. A shade tree planted there won't fix anything this summer, but in five or six years it'll be the hardest-working thing in your yard, and it costs less than a single summer of higher electric bills.
The math on west-side shade is almost unfair. A mature canopy can cut the temperature under it by 10 to 15 degrees, and it blocks the low-angle sun that sneaks under awnings and over fences. You're not buying instant comfort here.
You're buying a decade of it, one growing season at a time.
Trees That Actually Handle Texas Heat
Monterrey oak is the workhorse for most of the state. It's semi-evergreen, tolerates drought once established, and grows fast enough to matter. Cedar elm is another solid pick, especially on limestone and clay.
Both shrug off the kind of summers that kill fussier trees. Live oak is tough as nails but slow, so plant it only if you're patient or planning to stay put. Avoid anything that needs constant water, because a west-facing tree in July is already living on hard mode.
Where Exactly To Put It
Plant it 15 to 20 feet from the house, on the west or southwest corner. That distance keeps roots out of your foundation and lets the canopy throw shade across the roof and the patio by mid-afternoon. Watch for power lines and septic fields before you dig.
If you have a west-facing window that bakes a room, aim the tree so its shadow lands there around 3 or 4 p. m. That's the sweet spot.
Planting And The First Few Years
Dig a hole twice as wide as the root ball but no deeper. Backfill with native soil, not amended potting mix, so the roots learn to grow outward. Water deeply once a week for the first two summers, then start backing off.
Mulch a wide ring around the trunk to hold moisture and keep the mower away. Stake it only if it's top-heavy, and remove the stakes after a year.
What To Expect Year By Year
Year one is mostly about survival. Year two you'll see real growth. By year five, you'll notice the patio stays cooler in the late afternoon.
By year ten, you've got a canopy that shades the roof, the AC unit, and half the yard. The payoff is slow, but it compounds, and unlike a shade sail, it never needs restaking after a storm.
13. A Outdoor Kitchen With a Shaded Prep Zone
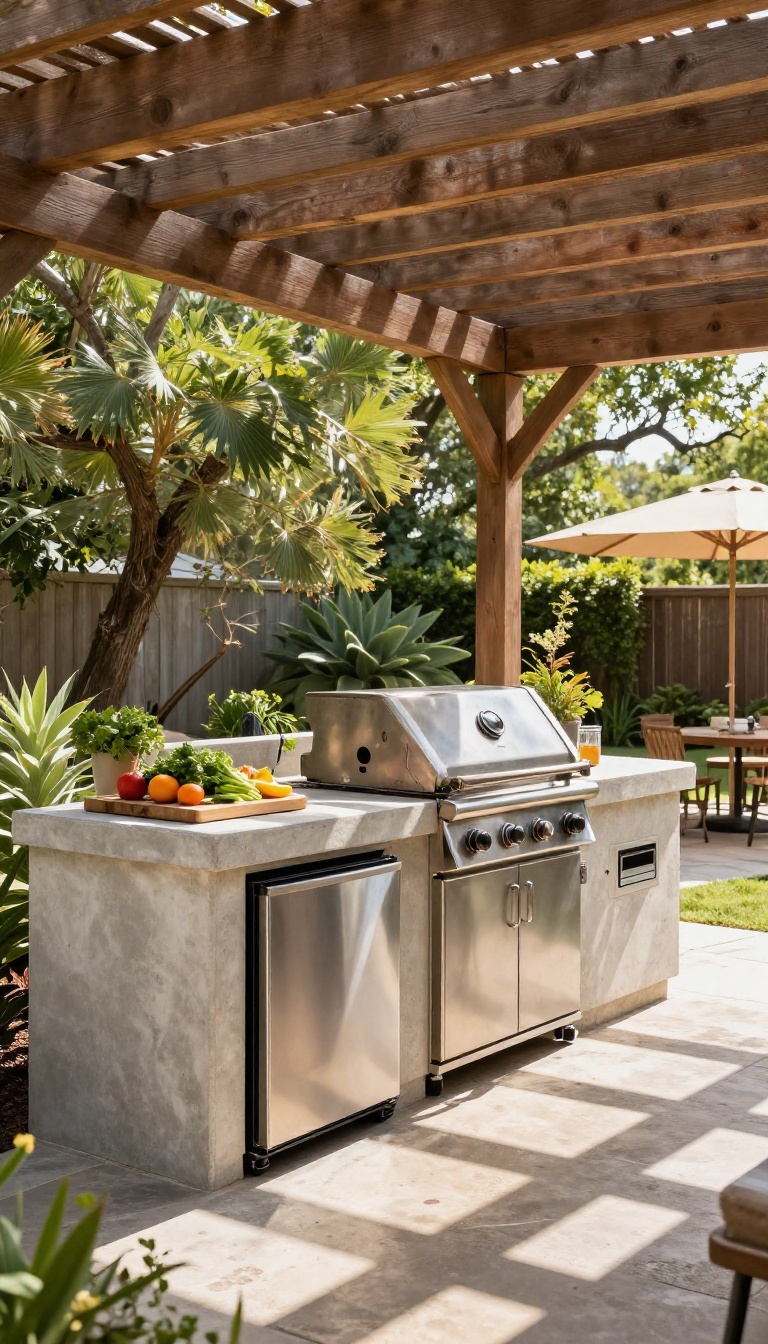
Cooking outside in Texas is great until the sun turns your prep counter into a griddle. A shaded prep zone fixes that by putting a roof or pergola over the grill and workspace. It keeps you cooler, protects food, and makes outdoor cooking something you actually look forward to.
The idea is simple: move your outdoor kitchen under some form of cover. That could be a full roof extension, a pergola with slats, or even a large cantilever umbrella. The goal is to block direct sun while still letting heat and smoke escape.
You'll want the shade to cover both the grill and a small prep area, so you're not stepping into the sun every time you flip a burger.
Why Shade Matters For Cooking
Direct sun raises surface temps fast, and that affects more than your comfort. A shaded counter stays cooler, which helps keep perishables safer during prep. It also reduces glare so you can actually see what you're doing.
And let's be honest: standing over a hot grill in full sun is a quick way to ruin a good meal.
Choosing Your Cover
A solid roof gives the most protection, but it needs proper ventilation. A pergola with adjustable louvers lets you control sun and airflow. For a budget option, a heavy-duty cantilever umbrella works if you anchor it well.
Whatever you pick, make sure it covers the grill and at least a few feet of counter space.
Layout And Materials That Beat The Heat
Keep the grill on the shaded side of the structure, with prep space next to it. Use light-colored, heat-resistant countertops like concrete or stainless steel. Add a small fridge or cooler in the shade to keep drinks and ingredients cold.
A ceiling fan or misting line overhead can drop the temp even more.
14. Light-Colored Pavers and Cool-Deck Coatings
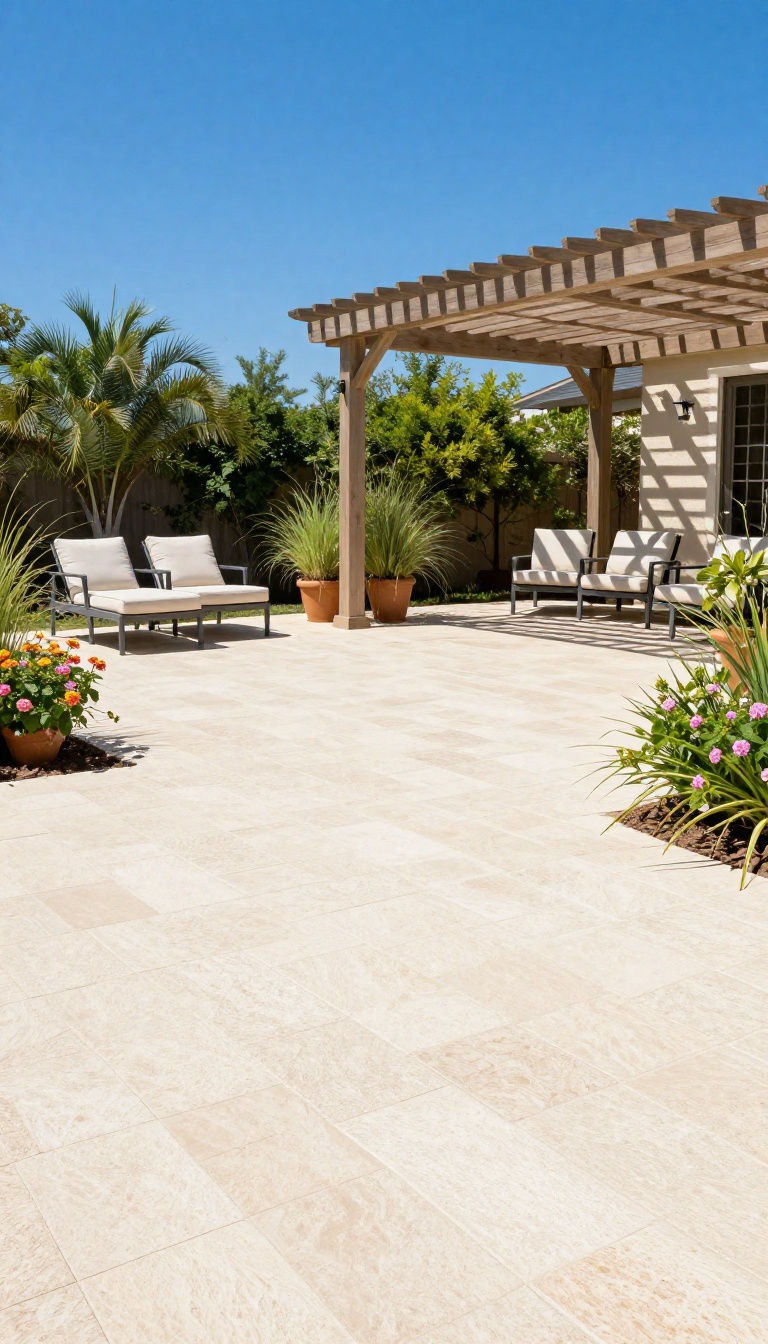
Dark concrete and pavers soak up heat all day and then radiate it back at you well into the evening. That's why a patio that looks great in photos can be almost unusable barefoot by mid-afternoon. Switching to light-colored pavers or adding a cool-deck coating keeps the surface walkable and makes the whole yard feel less like a griddle.
The fix is simpler than ripping out your entire patio. You can either replace the surface with a lighter material or coat what you already have. Both options cut down on heat absorption and make a noticeable difference in comfort.
Why Light Colors Stay Cooler
Light surfaces reflect more of the sun's energy instead of absorbing it. That means less heat stored in the material and less heat released back into the air around your feet. A white or sand-colored paver can be 20 to 30 degrees cooler than a dark charcoal one on the same day.
Choosing The Right Pavers
Look for light-toned concrete, travertine, or porcelain pavers with a matte finish. Avoid dark dyes and sealed surfaces that trap heat. If you're pouring new concrete, ask for a light integral color and a broom finish for better grip when wet.
Cool-deck Coatings Explained
Cool-deck is a textured acrylic coating you roll or spray onto existing concrete. It comes in light colors, feels softer underfoot, and stays noticeably cooler than bare concrete. Most DIY kits cost a few hundred dollars and last several years with basic upkeep.
Install Tips That Actually Matter
Clean the concrete thoroughly and repair cracks before coating. Apply during mild weather, not in direct midday sun, so it cures evenly. For pavers, use a light-colored polymeric sand between joints to keep the whole surface consistent.
15. A Nighttime Lighting Plan That Doesn't Add Heat
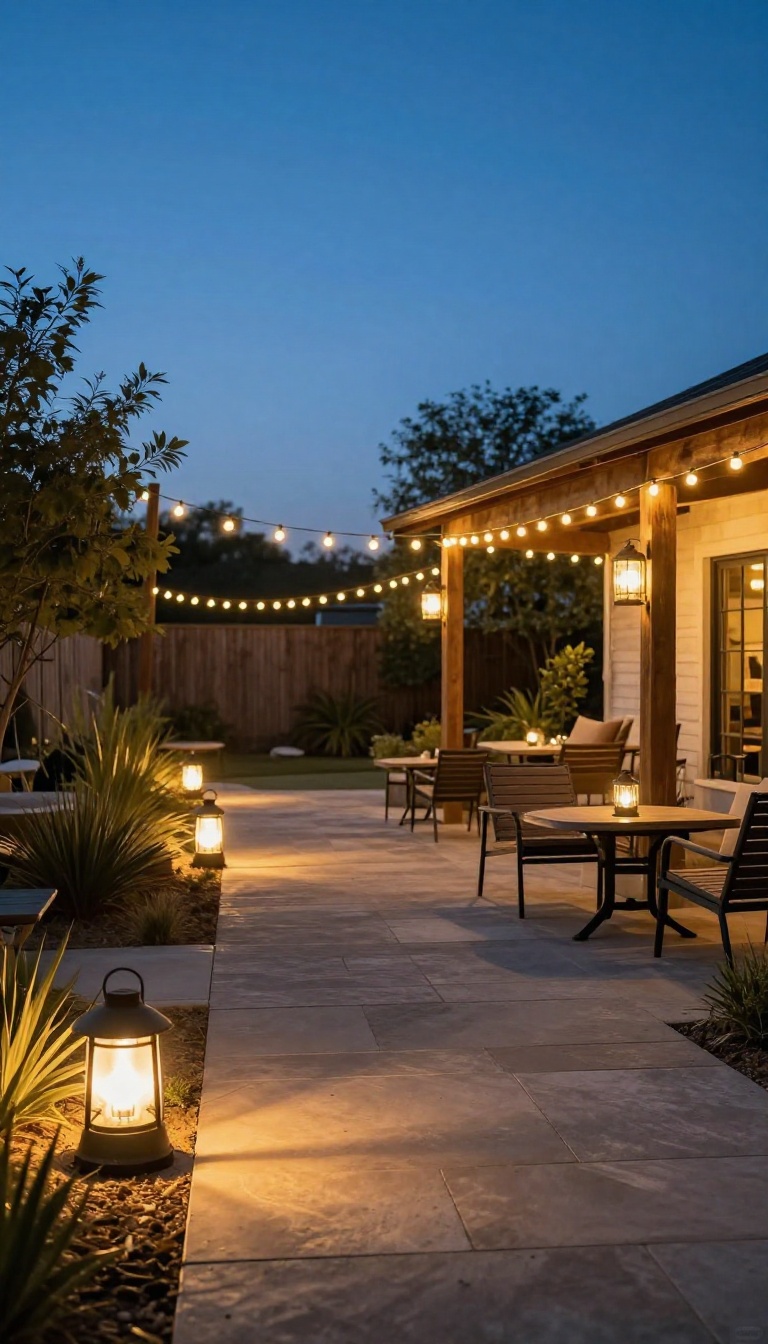
Once the sun finally lets up, the last thing you want is a lighting setup that makes your patio feel like a broiler again. Halogen bulbs and old incandescent strands throw off serious heat, and they can push a comfortable evening right back into uncomfortable territory. Switching to LEDs and battery-powered options keeps the glow warm without the warmth you don't want.
You get to stay outside longer, and your backyard stays pleasant instead of stuffy.
Lighting is one of those details that changes how late you actually use your yard. A few well-placed fixtures make the space feel intentional, safe, and worth hanging out in after dark. The trick is choosing options that look good and stay cool to the touch.
Start by replacing any halogen or incandescent bulbs with LED versions. They use a fraction of the energy, last for years, and barely give off heat. That means you can run them for hours without turning your seating area into a sauna.
Then layer your light sources so you're not relying on one bright fixture. String lights overhead, path lights along walkways, and a few portable lanterns give you flexibility. You can dim the mood or brighten things up depending on the night.
Finally, think about placement. Keep heat-producing fixtures away from where people sit, and use battery or solar options where wiring is a hassle. A little planning now saves you from sweating through your own backyard later.
Swap Halogen For Led
Halogen bulbs are heat machines. They can run 200 degrees or more, which is the last thing you need on a warm Texas evening. LED replacements stay cool, use less power, and come in warm color temperatures that look just as inviting.
Swap them out in your existing fixtures and you're done.
Layer Your Light Sources
One floodlight does you no favors. Instead, mix overhead string lights, low path lights, and a few tabletop or hanging lanterns. This gives you soft ambient light plus practical task lighting.
It also means you can turn off the bright stuff and keep the cozy glow going.
Go Battery And Solar Where You Can
Wiring outdoor lights can be a pain, especially if you're renting or don't want to trench. Battery-powered lanterns and solar path lights are easy wins. They add zero heat and you can move them around as your layout changes.
Just bring the batteries in during extreme heat to keep them lasting longer.
FAQ
What is the cheapest way to add shade to a Texas backyard?
A shade sail or a basic pergola kit is usually the cheapest upfront option. Both block direct sun without major construction, and you can install them in a weekend.
Do misting systems really work in Texas humidity?
They work best in dry West Texas. In humid areas like Houston, misting helps less because the air is already saturated, so pair it with fans for better results.
What plants survive Texas heat with little water?
Native and adapted plants like lantana, salvia, ornamental grasses, and cedar elm thrive in heat. They need less irrigation once established and handle drought better than non-natives.
How do I keep my patio cool without a roof?
Use a shade sail, retractable awning, or large umbrellas. Add a damp-rated fan and light-colored surfaces to reduce heat buildup.
Is a stock tank pool worth it in Texas?
Yes, for many homeowners. They cost far less than a traditional pool, install quickly, and provide a cool plunge. Just add shade so the water and metal stay comfortable.
Conclusion
A backyard built for Texas heat works best when you solve shade and airflow first, then layer in the comfort details. Pick two or three ideas from this list that match your space and budget, and test them through a full summer before adding more.
You will learn fast which spots stay usable at 3 p. m. and which ones need a fan, a misting line, or a little more cover. Start small, adjust as you go, and let the yard tell you what it needs next.