15 Sunken Fire Pit Ideas Backyard Spaces Can Center Around
A sunken fire pit instantly turns a plain backyard into a destination. It draws people in, encourages conversation, and extends your outdoor season well into the cooler months.
Unlike a standard fire bowl, a sunken design sits flush with the ground or slightly below, creating a natural gathering circle. It feels built-in, intentional, and surprisingly easy to integrate into almost any yard.
Below are 15 sunken fire pit ideas that range from simple DIY projects to polished professional builds. Each one offers a different look, budget, and level of effort, so you can find the right fit for your space.
1. Classic Stone Bowl Fire Pit
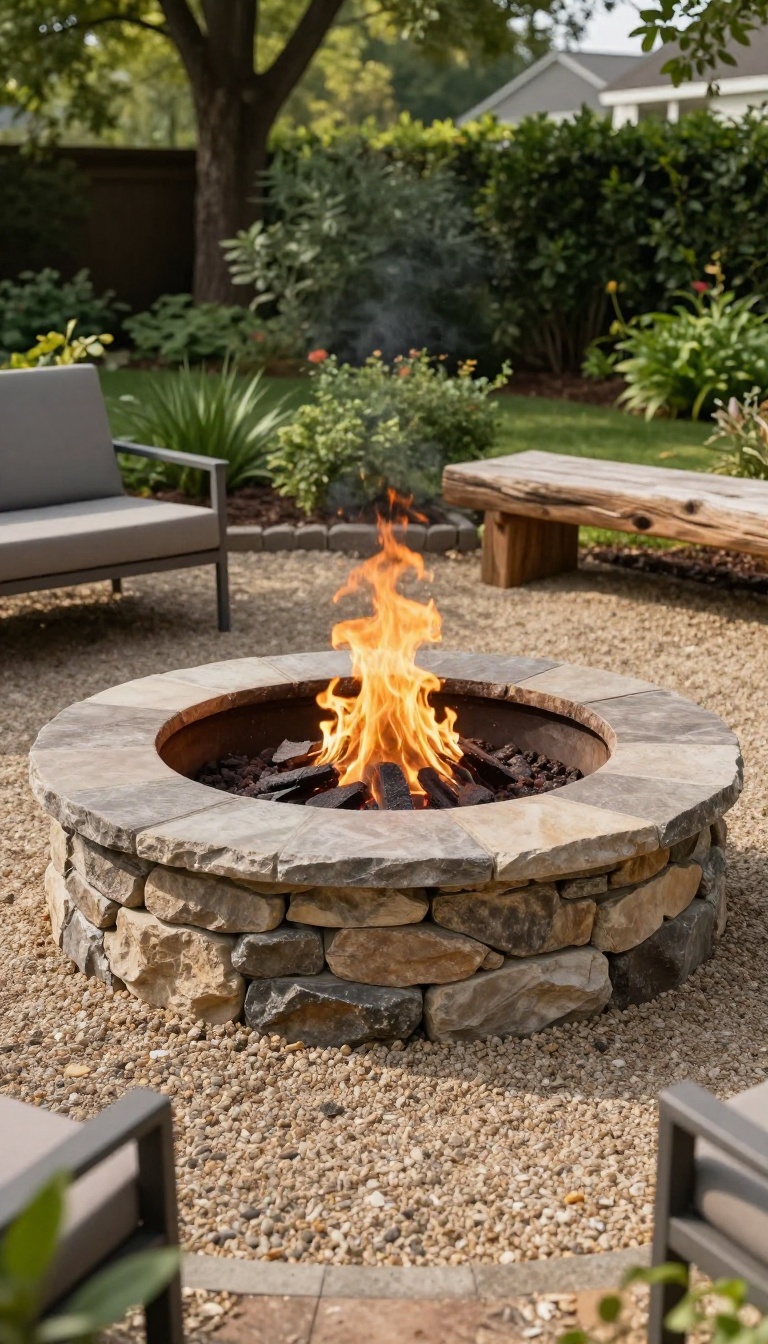
A stone bowl fire pit brings a sense of permanence to any backyard. The thick, natural stone walls radiate heat evenly and stand up to years of use without much fuss. It's a look that works just as well in a rugged cabin yard as it does in a sleek modern patio.
Stone bowl fire pits have been around for centuries, and for good reason. They're built to last, they look great in almost any setting, and they don't demand much attention. Once you set one in place, it becomes the natural anchor of your outdoor space.
You can find ready-made stone bowls at garden centers or have one custom-cut from a local quarry. Either way, the result is a heavy, heat-resistant centerpiece that instantly makes your yard feel more intentional. Because stone holds heat well, the bowl keeps radiating warmth even after the fire dies down, so you can linger a little longer.
Why Stone Works
Stone is naturally heat-resistant, so it won't warp, crack, or rust like metal can. It also handles rain, snow, and temperature swings without fading. That means you can leave it outside year-round and it'll still look good come spring.
Placement And Setup
Set your stone bowl on a level base of compacted gravel or sand to keep it stable. Leave at least three feet of clear space around the rim for seating and safety. If you want a true sunken look, dig a shallow depression and set the bowl so its rim sits just above ground level.
Maintenance And Care
Clean the bowl with a stiff brush and water a few times a year to remove ash and soot. Check for cracks after freezing weather, though most stone bowls handle frost fine. A quick rinse is usually all it needs to stay looking sharp.
2. Concrete Ring with Built-In Seating
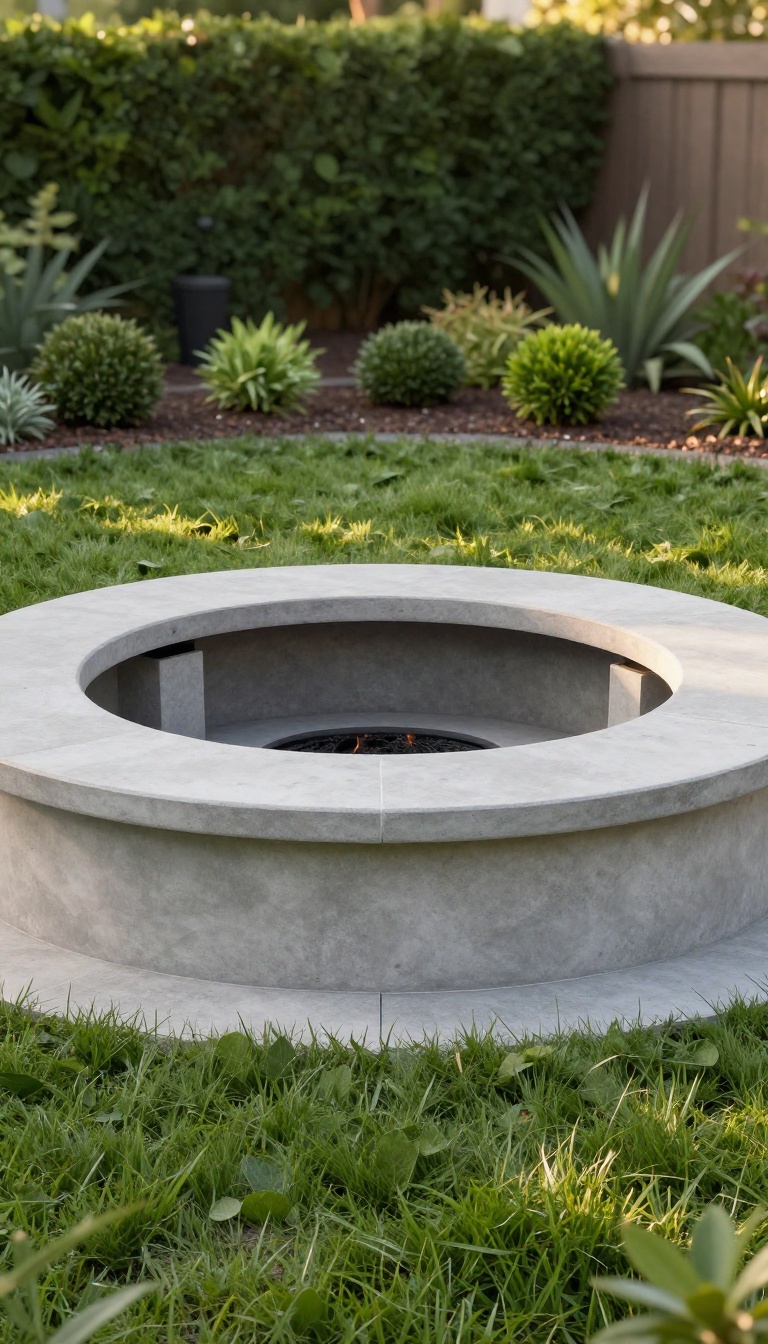
Concrete does more than hold a fire pit in place. When you pour it in a wide ring, the rim becomes a bench that wraps the whole fire. That single move turns a small yard into a full gathering space without adding a single chair.
The shape is simple: a low circular wall with a flat top wide enough to sit on. The fire sits in the middle, recessed a few inches below the seating surface. Because the bench is part of the structure, you never have to drag furniture around or store it when the season ends.
This works especially well in tight backyards. A standard patio set eats up a lot of square footage, but a concrete ring uses the same footprint for both the fire and the seating. You get the cozy factor of a built-in hangout spot with none of the clutter.
A few details make the difference between a ring that looks intentional and one that looks like leftover construction. Keep the wall low, around 16 to 18 inches, so it reads as a bench rather than a barrier. Round the top edges slightly so they feel comfortable against your legs.
And leave a gap or two in the ring if you want a clear path to tend the fire.
Getting The Pour Right
Concrete rings need a solid base, or they will crack with the first freeze. Dig a level trench, tamp the soil, and add a few inches of gravel before you build the form. Use a sonotube or flexible form board to shape the curve, and pour in one continuous session so the ring cures as a single piece.
If you live in a cold climate, add a rebar ring inside the form for strength. It costs a little more and takes an extra hour, but it keeps the bench from splitting after a hard winter.
Finishing And Comfort
Raw concrete looks industrial, which suits some yards and clashes with others. A light acid wash or a coat of concrete stain can warm up the color without hiding the texture. Seal it once a year to keep stains from ash and rain from settling in.
Sitting on bare concrete gets old fast. Add thin outdoor cushions or a few folded blankets for longer evenings. They store in a small bin, so you still avoid the furniture shuffle that makes other fire pit setups feel like work.
Fire Safety And Layout
Keep the fire opening at least 12 inches from the inner edge of the bench. That gap protects knees and gives you room to add a spark screen if your local rules require one. Line the fire bowl with fire brick or a steel insert so the heat does not spall the concrete over time.
Check your setback requirements before you pour. Many areas want the pit a certain distance from fences, sheds, and property lines. A quick call to the city saves you from tearing out a ring you just finished.
3. Rustic Brick and Mortar Pit
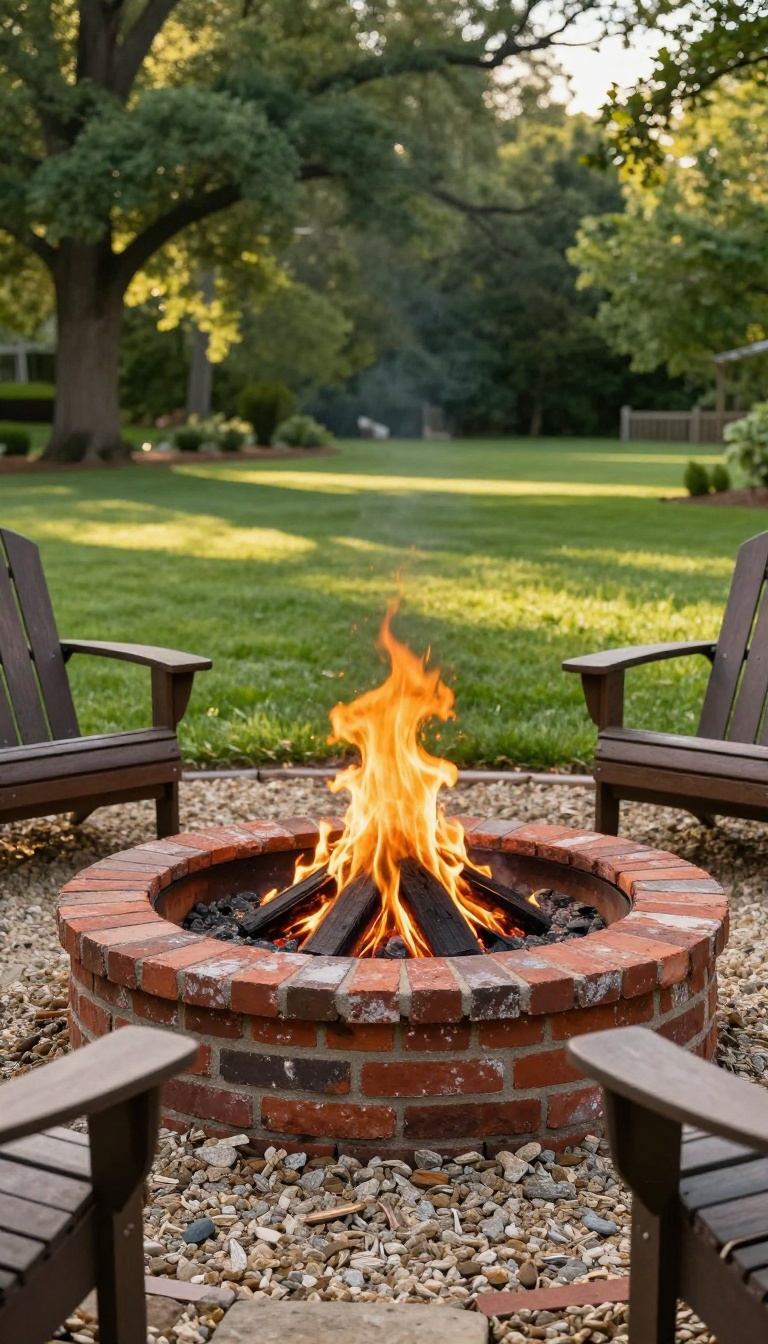
Brick brings a timeless, almost old-world feel to a backyard fire pit. It's the kind of material that looks like it's been there for decades, even when it's brand new. The mortar joints give it texture, and the brick itself handles high heat without flinching.
You can go two directions with this one: hunt down reclaimed brick for a weathered, story-filled look, or buy new brick for crisp, uniform lines. Both work beautifully. Reclaimed brick usually costs less, but you'll spend more time cleaning off old mortar.
New brick is predictable and stacks neatly, which matters if you're building a perfect circle or square. The real charm of brick is how it ages. It picks up a little soot, a little character, and somehow looks better every season.
Pair it with a gravel or flagstone surround and you've got a gathering spot that feels like it belongs on an old estate. ### Choosing Your Brick Reclaimed brick comes with chips, color variation, and a history that new brick can't fake. Just make sure it's solid, not crumbling, and free of paint or chemical residue that could pop under heat. New brick gives you consistent sizing, which makes laying a clean ring a lot easier.
Either way, avoid lightweight or hollow brick—it won't hold up. ### Laying the Ring A simple single or double ring works fine for most yards. Dig down about six inches, add a base of compacted gravel or sand, then start laying. Use a heat-resistant mortar and keep your joints about a half-inch thick.
Let it cure fully before the first burn—usually a few days. ### Heat, Safety, and Finishing Touches Brick handles heat well, but mortar can crack if you rush the fire too soon. Line the inside with firebrick if you plan on big, roaring fires. Add a metal grate or a few inches of lava rock at the bottom to protect the base.
A brick pit also pairs great with a simple stone bench or a few Adirondack chairs for that classic campfire feel.
Choosing Your Brick
Reclaimed brick comes with chips, color variation, and a history that new brick can't fake. Just make sure it's solid, not crumbling, and free of paint or chemical residue that could pop under heat. New brick gives you consistent sizing, which makes laying a clean ring a lot easier.
Either way, avoid lightweight or hollow brick—it won't hold up.
Laying The Ring
A simple single or double ring works fine for most yards. Dig down about six inches, add a base of compacted gravel or sand, then start laying. Use a heat-resistant mortar and keep your joints about a half-inch thick.
Let it cure fully before the first burn—usually a few days.
Heat, Safety, And Finishing Touches
Brick handles heat well, but mortar can crack if you rush the fire too soon. Line the inside with firebrick if you plan on big, roaring fires. Add a metal grate or a few inches of lava rock at the bottom to protect the base.
A brick pit also pairs great with a simple stone bench or a few Adirondack chairs for that classic campfire feel.
4. Metal Insert in a Gravel Bed
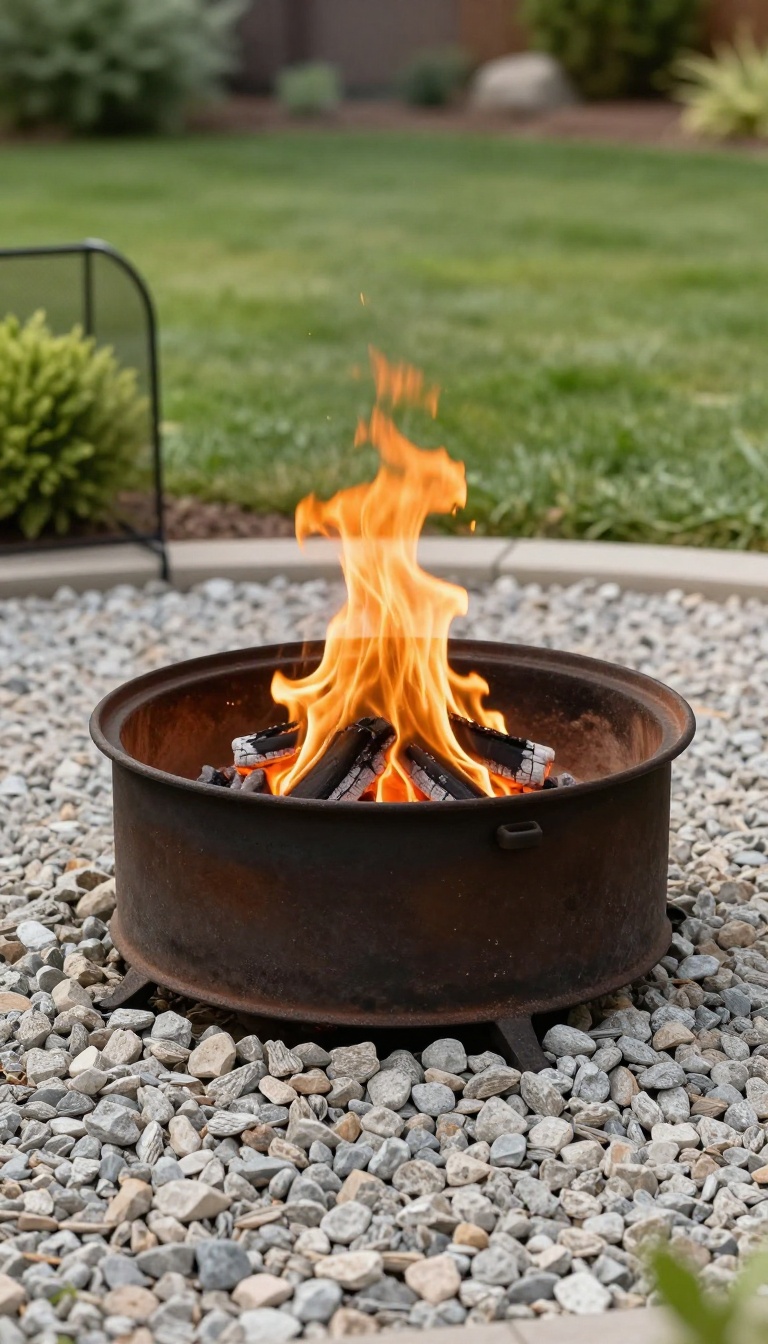
A metal fire pit insert doesn't need a fancy surround to look good. Set a heavy-duty steel or cast-iron ring into a bed of gravel, and you get a clean, functional fire feature that keeps water moving and costs far less than a masonry build. It's the kind of setup that feels intentional without trying too hard.
The gravel handles drainage, so you're not fighting a soggy pit after every rain. The metal insert contains the fire and radiates heat, while the loose stone around it softens the look and hides the utilitarian edges. For a budget-friendly project that still reads as designed, this one is hard to beat.
Why Gravel Works
Gravel drains fast, so standing water never turns your fire pit into a swamp. It also levels easily, which means your insert sits flat without a concrete pad. And because you can rake it smooth or top it off anytime, the bed stays looking tidy with almost no upkeep.
Picking The Right Insert
Go with heavy-gauge steel or cast iron, not thin sheet metal that will warp after a few hot fires. A depth of 12 to 18 inches gives you room for a decent bed of coals. Look for built-in drain holes or a raised base so air can reach the fire from below.
Laying It Out
Dig a shallow circle about a foot wider than your insert on all sides. Fill it with 3 to 4 inches of compacted base gravel, then set the insert in place and check it with a level. Surround it with 2 to 3 inches of decorative gravel, leaving the top rim exposed so you can see the metal edge.
Keeping It Tidy
A simple metal grate or spark screen keeps embers contained and looks sharp. When the season ends, scoop out ash, rinse the insert, and rake the gravel smooth. If weeds pop up, a quick pass with a hand torch or a fresh layer of gravel shuts them down fast.
5. Sunken Fire Pit with a Wooden Deck Surround
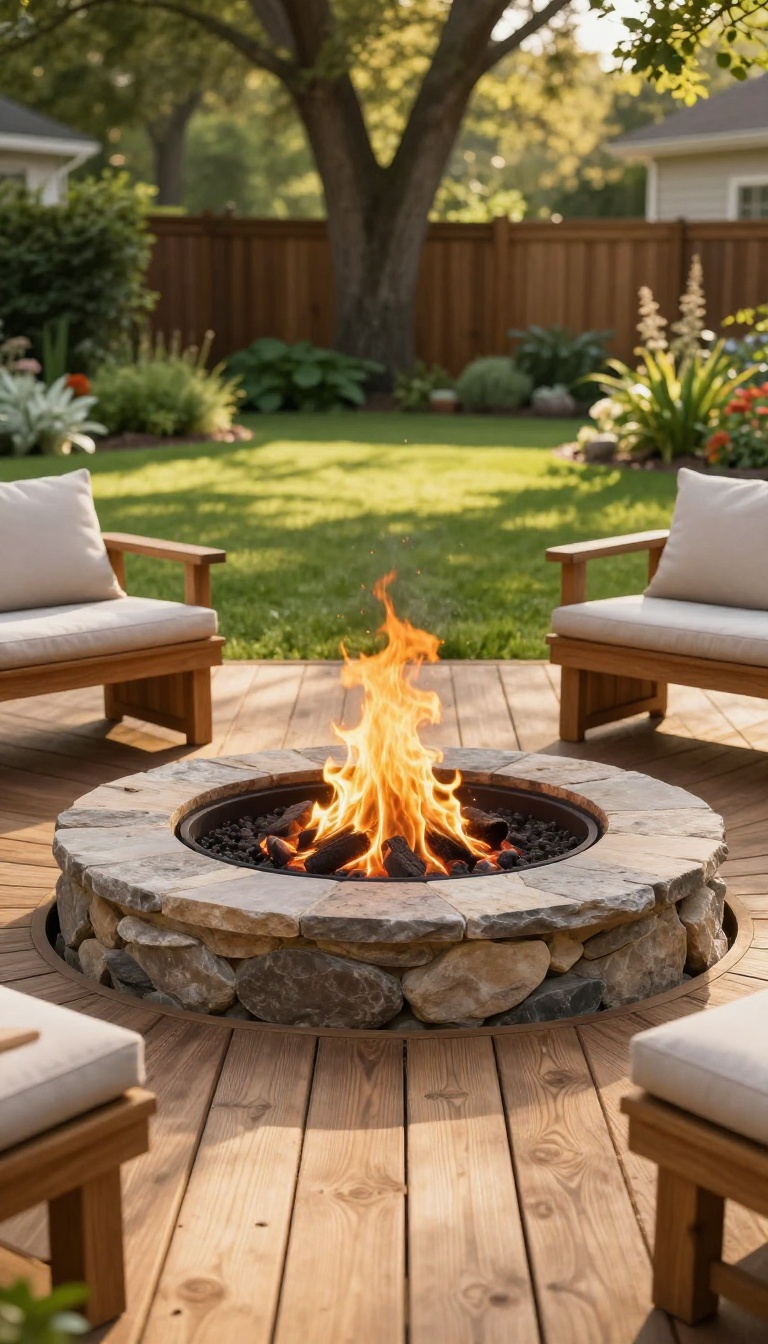
Wood and fire have always paired well, and a deck built around a sunken pit makes that pairing feel intentional. Instead of a hard edge where the patio ends and the fire area begins, the decking flows right up to the rim. The result is a gathering space that feels like one continuous room, just without a roof.
The pit sits low, the boards run level with the ground, and the whole thing reads as a single design decision rather than two separate projects. That's the appeal. You get the cozy, enclosed feel of a sunken pit plus the warmth and texture of real wood underfoot.
It also solves a common problem. Bare concrete or stone around a fire pit can look cold and unfinished. Decking softens that transition and gives you a surface that's easier on bare feet during summer evenings.
Stain it to match your siding, your fence, or your front door, and the whole yard starts to feel tied together. Cost and effort land somewhere in the middle. A full wrap-around deck takes more planning than dropping a prefab ring into the lawn, but it's far less involved than a masonry build.
If you're comfortable with basic framing, this is a realistic weekend-plus project.
Framing The Opening
The pit opening needs a clean, square cutout, and that starts with solid framing. Build a box frame around the pit's outer edge, then run joists out to your deck's perimeter. Leave a small gap between the wood and the pit wall so heat and moisture have somewhere to go.
If you're using a metal insert, check its clearance specs before you cut anything.
Choosing The Right Boards
Not all decking handles heat and moisture the same way. Composite holds up well and needs almost no upkeep, but it can soften near high heat, so keep a buffer zone. Cedar and pressure-treated pine are affordable and classic, though they'll want a fresh stain every couple of years.
Ipe and mahogany cost more but age beautifully and resist rot.
Staining To Match Your Home
A quick color match goes a long way. Pull a paint chip or a piece of siding and take it to the stain aisle. Warm honey tones flatter brick and tan homes, while cool grays and weathered finishes suit modern builds.
Test the stain on an offcut first, since wood takes color differently than a sample card suggests.
Lighting And Safety Details
Recessed deck lights along the inner rim make the pit glow without glare, and they help guests find the edge after dark. Add a spark screen if your yard backs up to trees or dry brush. Keep a small bucket of sand nearby, and never let the deck's finish get closer than the manufacturer recommends to the fire.
6. Natural Stone Boulder Pit
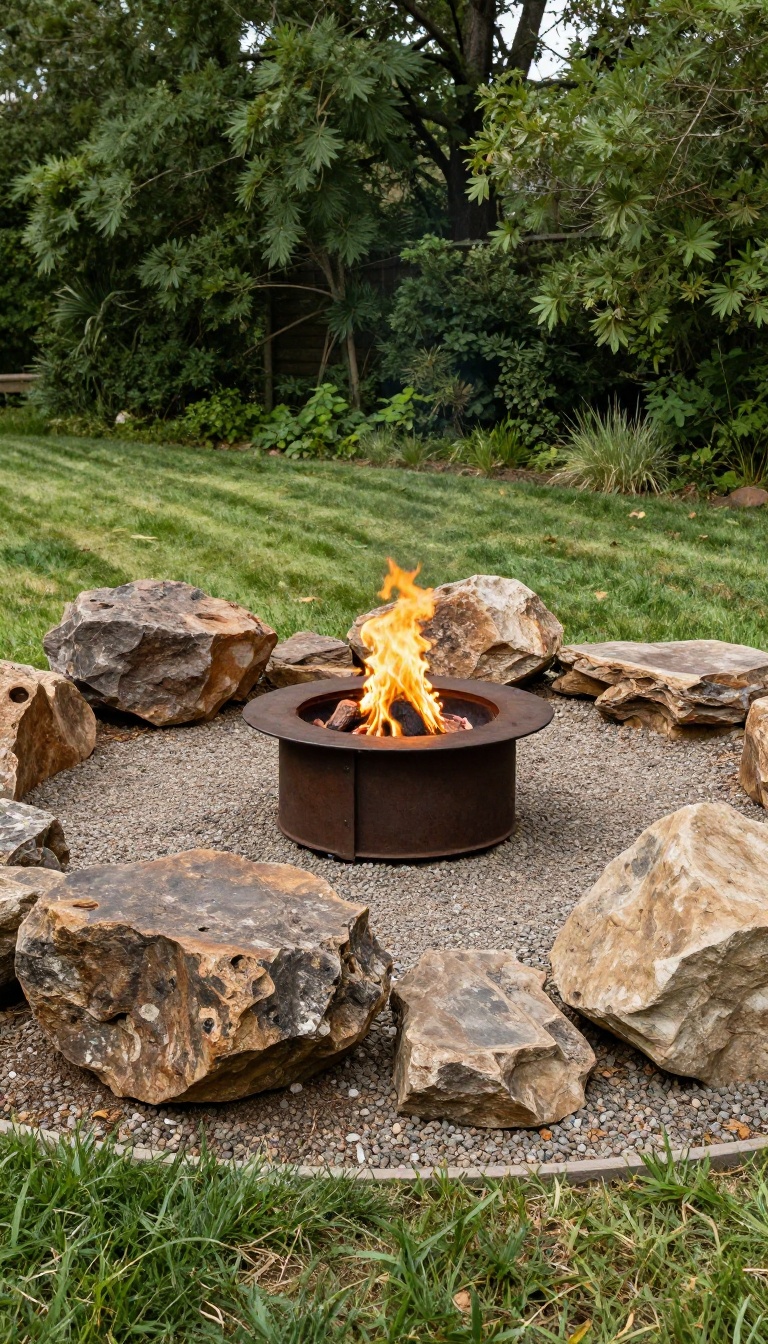
Boulders have a way of making a fire pit feel like it was always meant to be there. Instead of manufactured blocks, you're using raw stone that looks pulled straight from the landscape. The result is a rugged, organic gathering spot that blends into a naturalistic yard rather than standing out against it.
This style works best when you have some room to work with. Large boulders take up space, and the pit itself usually ends up wider than a standard block build. That extra footprint is part of the appeal, though.
It gives the whole area a relaxed, spread-out feel that suits bigger yards with trees, native grasses, or uneven terrain. You don't need perfectly matched stones. In fact, mixing sizes and shapes tends to look better.
The goal is a circle that feels a little wild, not a showroom display.
Choosing The Right Boulders
Go with stones that are at least 18 to 24 inches across so they read as substantial from a distance. Local quarry rock or fieldstone keeps the look regional and often costs less than specialty stone. Avoid boulders with sharp, fragile edges that can chip when they heat up.
Building The Ring
Dig a shallow trench to set the boulders partially into the ground. This locks them in place and makes the pit look settled rather than dropped on top of the lawn. Leave small gaps between stones for drainage, or fill them with gravel if you want a tighter look.
Fire Safety And Function
Line the inside with a steel ring or fire brick to protect the boulders from direct flame. Keep the burn area clear of moss, roots, and debris. A boulder pit can handle a decent-sized fire, but you still want a screen or spark arrestor if you're close to trees.
7. Modern Concrete Cube Fire Feature
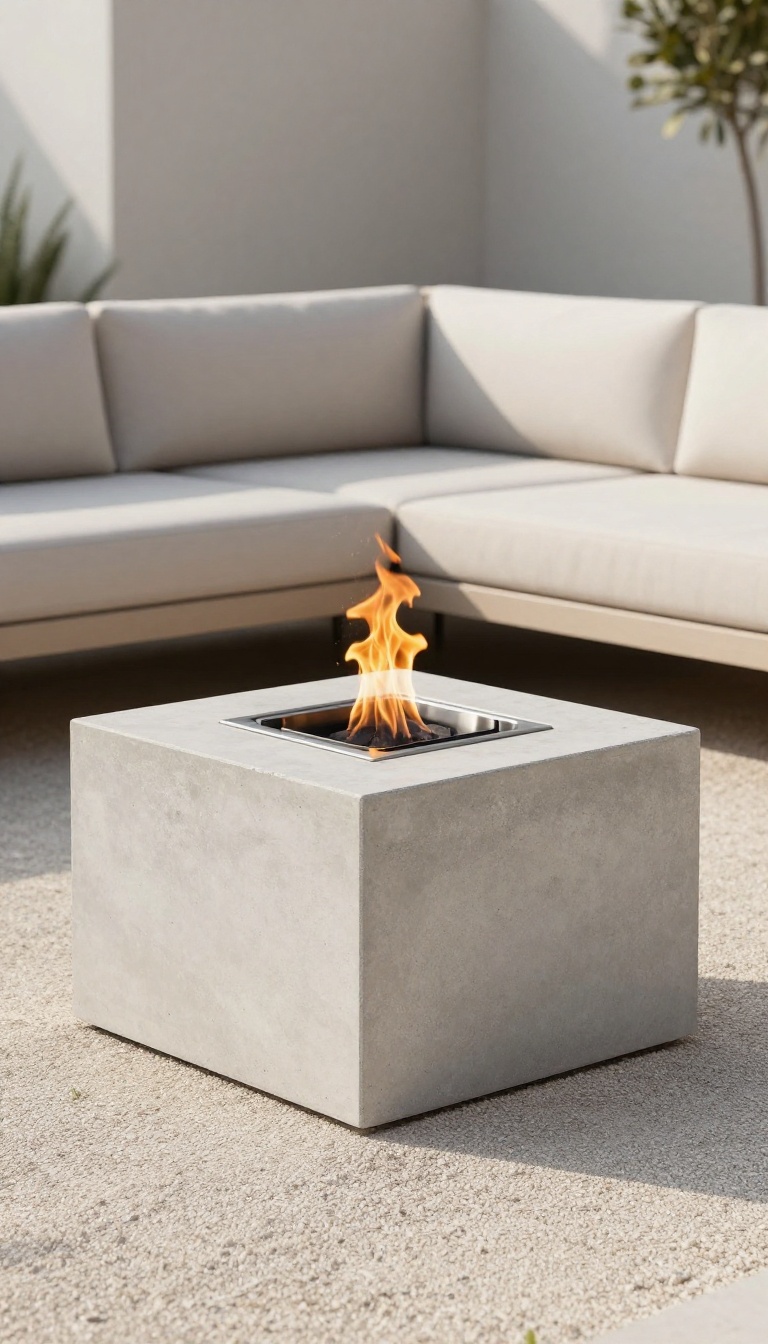
A concrete cube fire feature strips the fire pit down to pure geometry. Instead of a ring or a bowl, you get a clean block with a fire element set into the top. It reads more like sculpture than campfire, and that's exactly the point.
This look works best when the cube feels deliberate rather than accidental. A poured concrete form with crisp edges and a smooth finish gives you that gallery-piece quality. The fire bowl sits recessed on top, so the flames rise out of a flat plane instead of a rounded lip.
Size matters more than you'd think. A cube that's too tall becomes a wall between you and your guests. Something in the 18- to 24-inch range keeps the fire at a comfortable height while still feeling substantial.
Color and texture are your main levers. Board-formed concrete shows wood grain and feels warmer. Polished concrete goes sleek and almost futuristic.
Either way, the cube becomes the anchor of the whole seating area.
Pairing With Minimalist Furniture
Low-profile sectionals, sling chairs, and simple benches let the cube stay the star. Skip anything with busy patterns or heavy ornament. Neutral cushions in charcoal, sand, or off-white keep the palette tight and modern.
Placement And Proportion
Center the cube on a gravel pad, a concrete slab, or a deck cutout so it looks intentional. Leave at least three feet of clearance on all sides for chairs and foot traffic. If your yard is small, a single cube can replace a whole seating arrangement.
Build Vs. Buy
You can pour a cube yourself with a basic form and a bag of mix, or buy a precast unit that's ready to drop in. Precast costs more but saves days of curing and finishing. Either route, plan the fire bowl insert before you commit to dimensions.
8. Sunken Pit with a Built-In Grill Grate
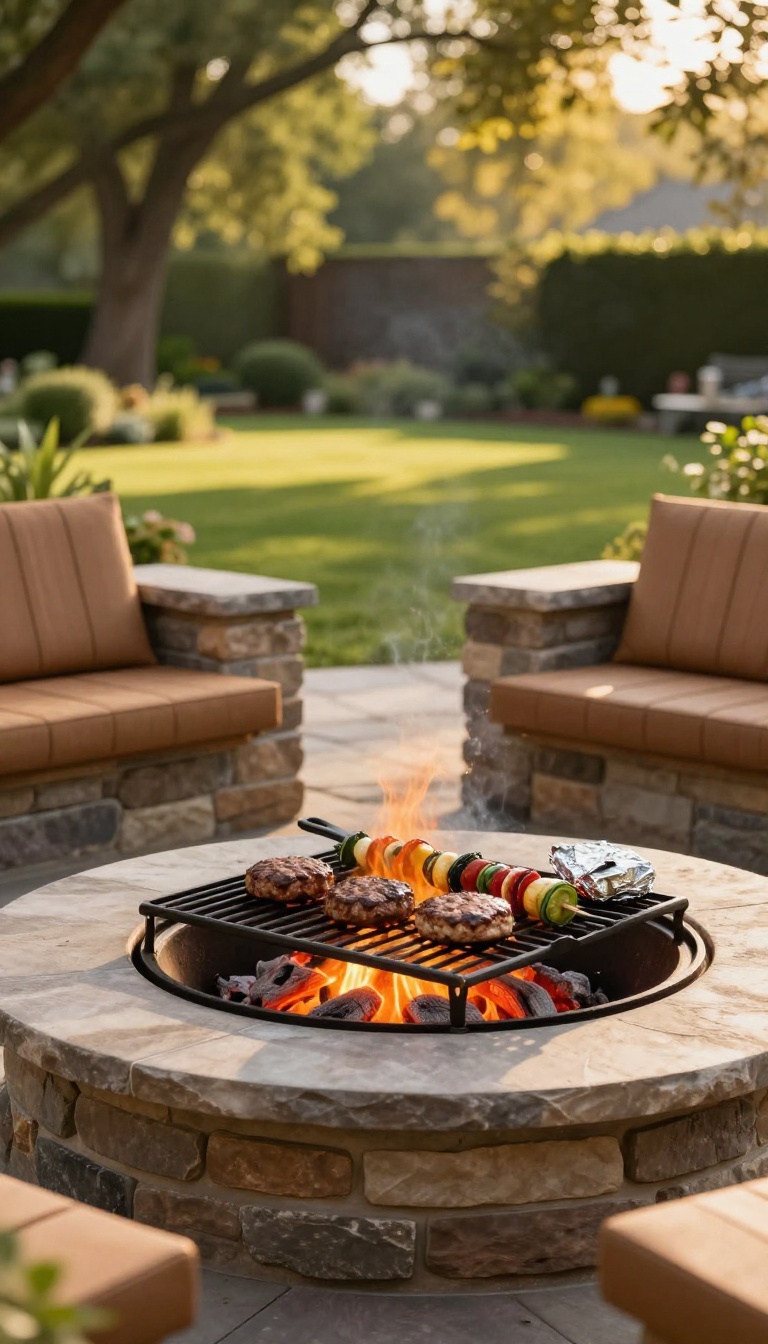
A fire pit that cooks dinner earns its place in the yard fast. Set a removable grill grate across the opening and the same pit that hosts late-night conversations becomes a working outdoor kitchen. The setup stays simple.
You build or buy a grate sized to your pit, drop it on when you want to cook, and lift it off when you just want flames. No second appliance, no extra footprint.
The trick is planning for heat control from the start. A sunken pit gives you a deep bed of coals, and that steady radiant heat is exactly what open-fire cooking wants. You get a sear zone over the hottest coals and a gentler zone toward the edges, all in one circle.
Most people start with burgers and skewers, then branch into foil packets, cast-iron cornbread, and whole grilled fish. Cleanup is a quick scrape and oil while the grate is still warm.
Choosing The Right Grate
Go with heavy stainless or cold-rolled steel with thick bars. Thin grates warp over a hot coal bed and sag in the middle. Measure your pit's inner opening and order a grate that rests on the rim or a set of fire brick ledges.
Handles on both sides make it easy to lift with gloves.
Managing Heat And Coals
Let the wood burn down to glowing coals before you cook. Flames char the outside and leave the middle raw. Bank coals to one side for a two-zone setup.
That gives you a hot side for searing and a cooler side for finishing thicker cuts.
Safety And Storage
Keep the grate off the ground when it's not in use so it doesn't rust or stain the patio. A simple wall hook or a covered bin works fine. Never leave kids or pets unsupervised around an open pit, and keep a bucket of water or sand within reach.
A spark screen helps on breezy evenings.
9. Tiled Fire Pit with a Mosaic Pattern
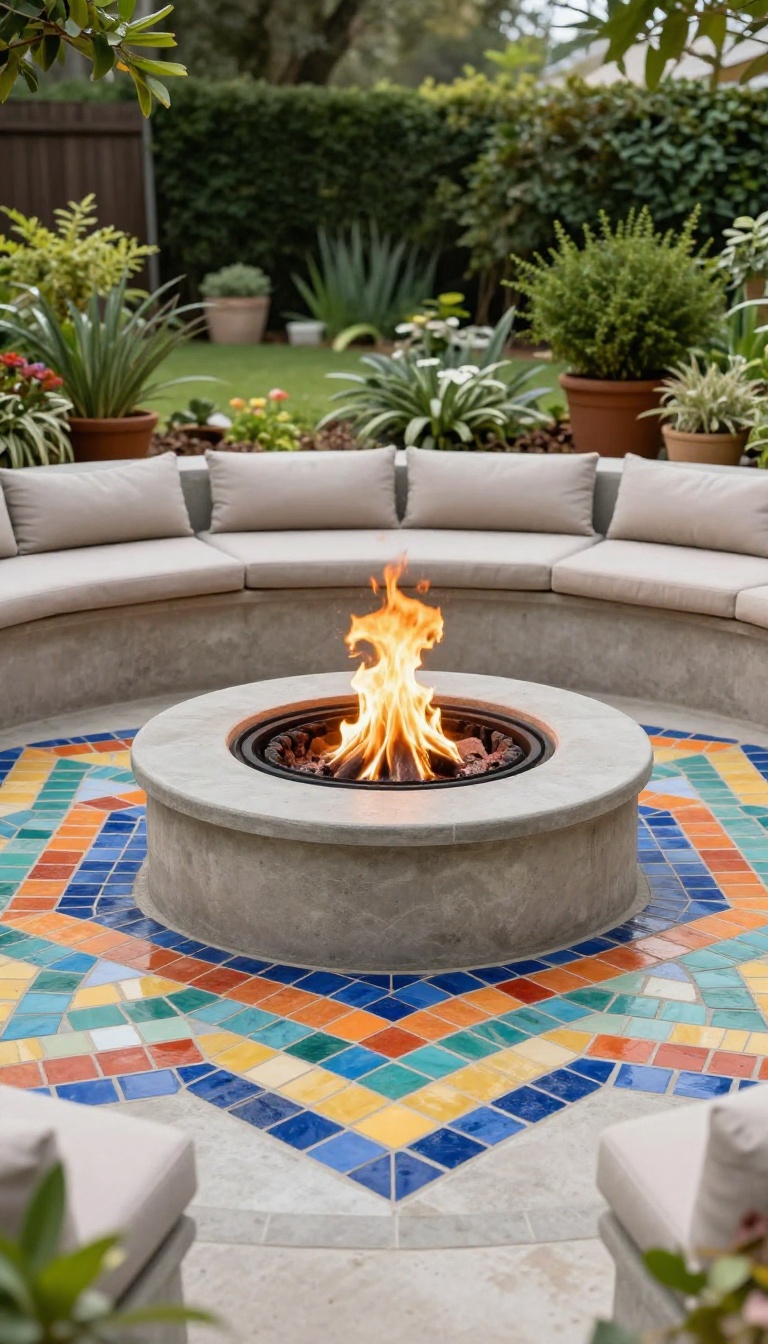
Tile turns a fire pit into a piece of art. With heat-resistant tiles, you can create a mosaic pattern that reflects your style and ties into other outdoor decor. It’s a durable, low-maintenance way to add color and personality to your gathering space.
A tiled fire pit starts with a solid base, usually concrete or masonry. Once the structure is in place, you apply heat-resistant tiles using a suitable adhesive. The mosaic pattern can be as simple or intricate as you like, from a single color to a complex design.
The result is a custom feature that feels both polished and personal.
Choosing The Right Tiles
Not all tiles can handle the heat of a fire pit. Look for ceramic, porcelain, or natural stone tiles rated for high temperatures. Glass tiles can work but may crack if not specifically made for fire features.
Always check the manufacturer’s recommendations. For mosaic patterns, small tiles or pre-made mosaic sheets make installation easier.
Designing Your Mosaic
Your mosaic can be a focal point or a subtle accent. Consider colors that complement your patio furniture, plants, or outdoor rug. Geometric patterns, like chevrons or hexagons, add a modern touch.
Floral or abstract designs feel more organic. You can sketch your design on paper first or use online tools to plan the layout.
Installation Tips
Start by preparing the surface: it should be clean, dry, and level. Use a heat-resistant adhesive, like thinset mortar, to attach the tiles. Leave consistent gaps for grout.
After the adhesive cures, apply a heat-resistant grout. Seal the grout to protect it from moisture and stains. If you’re not confident, hire a pro—this is one project where precision pays off.
Maintenance And Care
A tiled fire pit is relatively low-maintenance. Sweep or vacuum loose debris regularly. Clean with a mild soap and water solution, avoiding harsh chemicals that could damage the grout or tiles.
Inspect for cracks or loose tiles after heavy use or freeze-thaw cycles. Reapply sealant every year or two to keep it looking fresh.
10. Circular Pit with a Steel Ring Edge
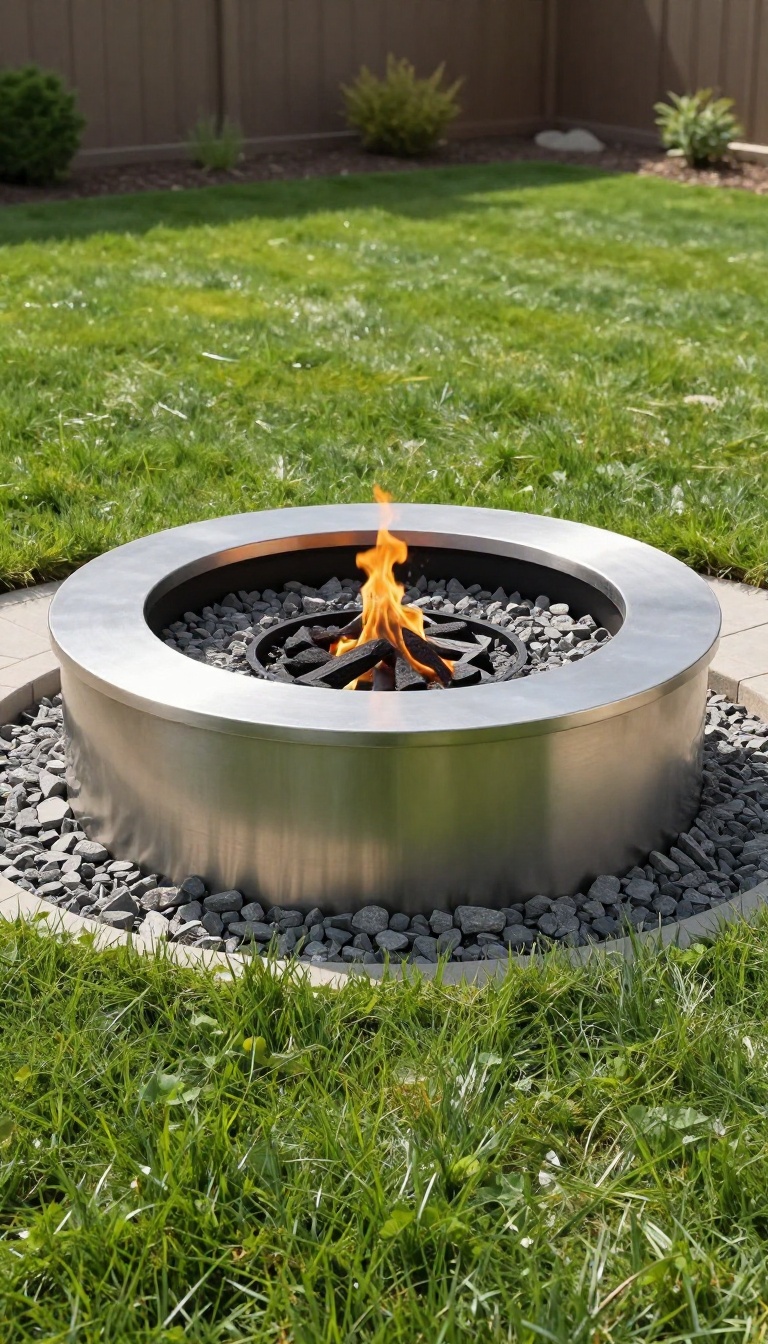
Steel brings a clean, industrial edge to a sunken fire pit. A circular ring caps the opening, giving the pit a crisp border that stands out against grass, gravel, or pavers. The ring does more than look sharp.
It holds the edge in place, keeps soil and grass from creeping into the fire area, and gives you a defined line to work around when you're digging or laying stone. It's a straightforward upgrade that works with almost any backyard style, from modern to rustic.
A steel ring edge is one of those details that makes a fire pit look deliberate. Instead of a ragged transition between fire and lawn, you get a smooth, continuous circle that frames the flames. The metal also protects the pit's rim from chipping and makes it easy to mow right up to the edge without worrying about stray grass.
You can use a prefabricated steel ring or have one fabricated to your exact diameter. For a sunken pit, the ring typically sits flush with the surrounding grade, so it disappears into the ground plane and lets the fire be the focus. If you want a little more presence, you can raise it an inch or two to create a subtle lip.
Steel develops a patina over time, especially if you go with raw or corten steel. That weathered look adds character and blends well with natural surroundings. If you prefer a cleaner look, powder-coated steel holds its color and resists rust, though it may need occasional touch-ups.
Installation is manageable for a DIYer with basic tools. You'll need to excavate the pit, set a base of gravel or sand, and position the ring so it's level. The ring itself doesn't support the fire—it's a border—so you still need a fire-rated inner wall or insert.
But once it's in, the edge stays put and keeps the pit looking tidy season after season.
Why Steel Works
Steel is durable, low-maintenance, and available in custom sizes. It won't rot, crack, or shift like some edging materials, and it handles heat well as long as it's not directly in the fire. The ring also creates a clear boundary that makes the pit feel intentional rather than an afterthought.
Choosing The Right Ring
Measure your pit's diameter and decide on the ring's width—usually 2 to 4 inches. Thicker steel (1/4 inch or more) holds up better over time. Consider the finish: raw steel for a rustic patina, powder-coated for a clean look, or stainless for a modern shine.
Make sure the ring is slightly larger than the pit opening so it overlaps the edge.
Installation Tips
Dig your pit and compact a level base. Set the ring in place, checking level in all directions. You can secure it with landscape adhesive or small stakes if needed.
Backfill around the outside with soil or gravel, and add your inner fire-rated liner. Keep the ring clear of direct flames to avoid discoloration.
11. Sunken Fire Pit with a Swivel Seating Wall
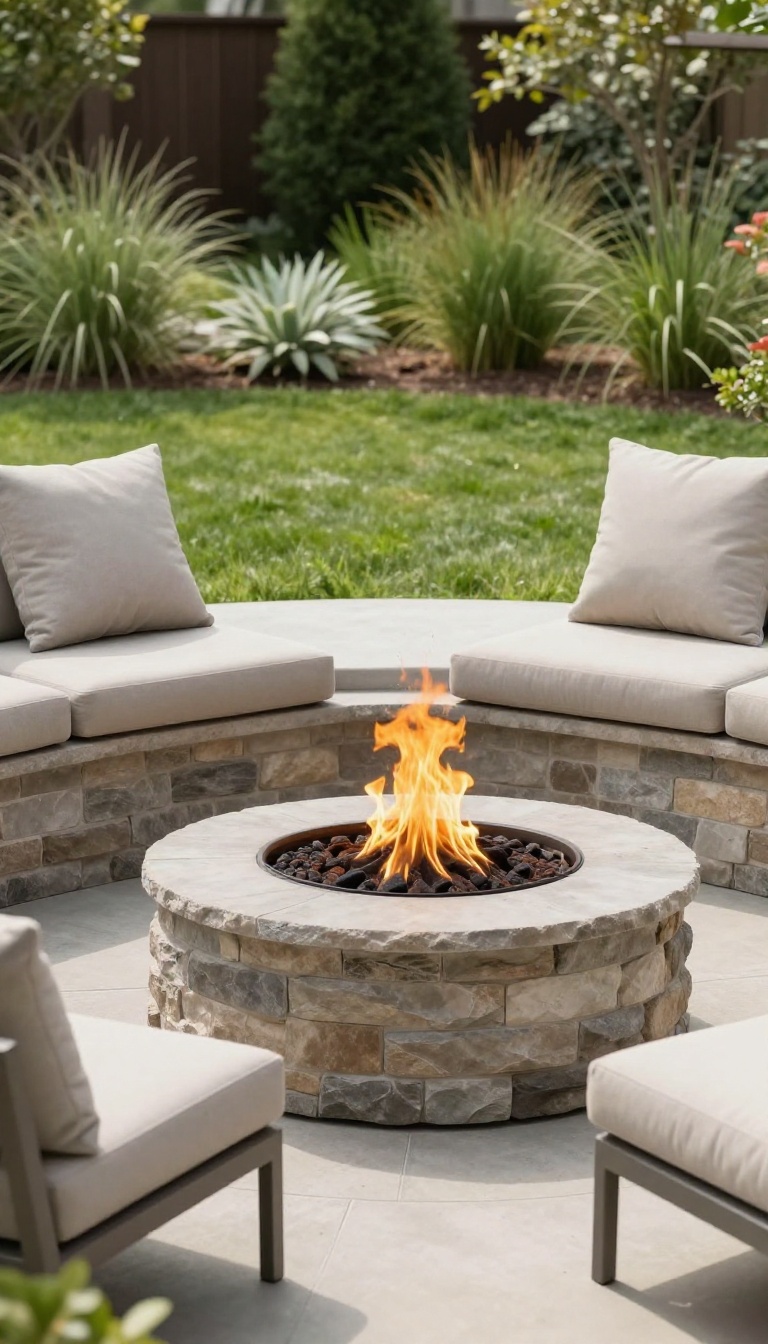
A low wall around a sunken fire pit usually means fixed seating—you sit where the wall says you sit. Swap that for swivel chairs or movable cushions, and the same wall becomes a flexible perch that turns with the conversation. It still blocks wind and defines the space, but nobody gets stuck facing the wrong way.
The trick is treating the wall as a base, not a bench. Cap it with a smooth, level surface wide enough to hold a swivel plate or a thick cushion, and you get seating that adapts to the night. People can face the fire, turn toward the outdoor kitchen, or angle toward whoever is telling the best story.
The wall itself stays put, which keeps the fire pit looking intentional and grounded.
Why Swivel Seating Works Here
Swivel chairs on a wall cap give you the best of both worlds: the built-in look of a masonry surround and the freedom of freestanding furniture. You can rotate toward the flames when it gets cold, then spin around to join a conversation on the patio. Cushions work the same way—just lighter and easier to stack when the party ends.
Either option keeps the wall from dictating where everyone looks.
Building The Wall For Movement
Keep the cap at a comfortable seat height, usually 18 to 20 inches, and make it at least 12 inches deep so swivel bases have room to turn. A slight overhang on the fire side gives knees clearance and keeps cushions from sliding into the pit. If you plan to use chairs, leave a few inches of gap between the wall and the chair back so nothing scrapes when it rotates.
Smooth materials like poured concrete, stone, or capped block work best because they won't snag fabric.
Windbreak Bonus On Breezy Nights
A low wall on the windward side does more than hold seats. It cuts the gust that would otherwise push smoke into your face and steal heat from the fire. Even a 16- to 20-inch wall makes a noticeable difference, especially if you angle it to block the prevailing breeze.
Add a few swivel chairs on the sheltered side, and you've got a fire pit you can actually enjoy when the weather isn't perfect.
Layout And Flow Tips
Don't wrap the wall all the way around—leave one or two open sides for entry and for foot traffic. That gap also lets you pull up extra chairs when more people show up. Keep the swivel zone on the side where you want the best view, whether that's the fire, a screen, or the rest of the yard.
And make sure the wall doesn't block the sightline from the house, so the fire still reads as a focal point from inside.
12. Reclaimed Wood and Stone Combo
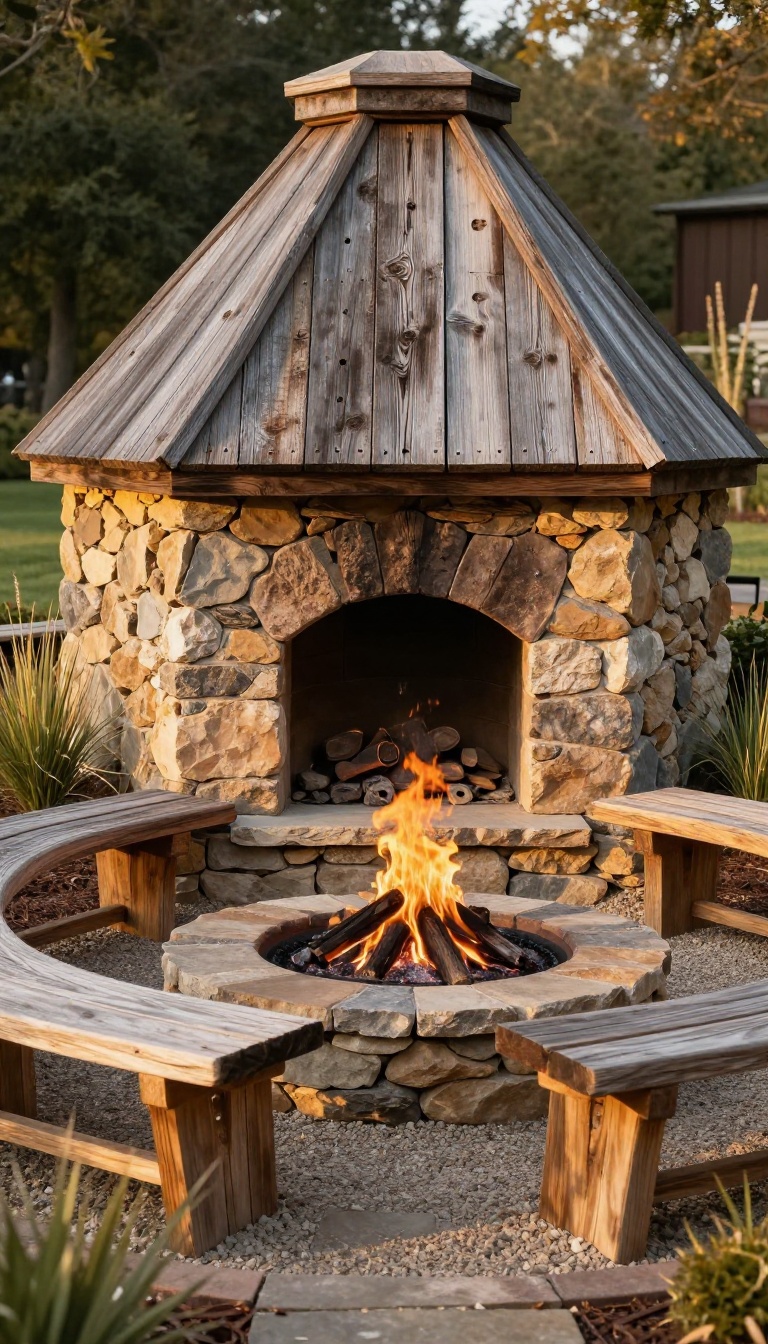
Old barn beams and rough-cut stone give a sunken fire pit a story before anyone even sits down. The pairing works because each material covers the other's weak spots: wood brings warmth and grain, stone brings weight and weather resistance. Together they create a rustic, eco-friendly centerpiece that feels settled into the yard instead of dropped on top of it.
You don't need perfect materials for this look. Salvaged lumber with nail holes, faded stain, and a few checks in the grain actually reads better than fresh boards. Stone can be fieldstone, flagstone, or leftover patio pavers.
The goal is contrast, not matching.
Where The Wood Works Best
Use reclaimed wood for the parts that stay cool and dry: a wide collar around the pit opening, bench seats, or a low backrest ring. Keep wood at least a few inches away from the fire edge, or cap it with a stone lip so embers can't reach it. A clear penetrating sealer slows weathering without hiding the grain.
Choosing Stone That Lasts
The fire-facing ring should be stone, brick, or block rated for heat. Fieldstone and flagstone handle direct flame well when they're natural stone, not concrete composites. Dry-stack the lower courses for drainage, then mortar the top course if you want a crisp rim.
A gravel base underneath keeps everything from shifting after freeze-thaw cycles.
Making The Mix Look Intentional
Repeat one material in two places so the combo feels designed. For example, use the same wood species for bench slats and a small side table, and the same stone for the fire ring and a short retaining edge behind the seating. Keep the palette to two or three tones.
Too many colors and the rustic look turns messy.
Cost And Sourcing Tips
Reclaimed beams often cost less than new hardwood, especially if you buy from a salvage yard or demolition contractor. Ask for pieces without rot, heavy creosote, or lead paint. Stone can come from a quarry's leftover pile or a neighbor's torn-out patio.
Clean both materials before building, and you'll save hours later.
13. Sunken Pit with a Water Feature Edge
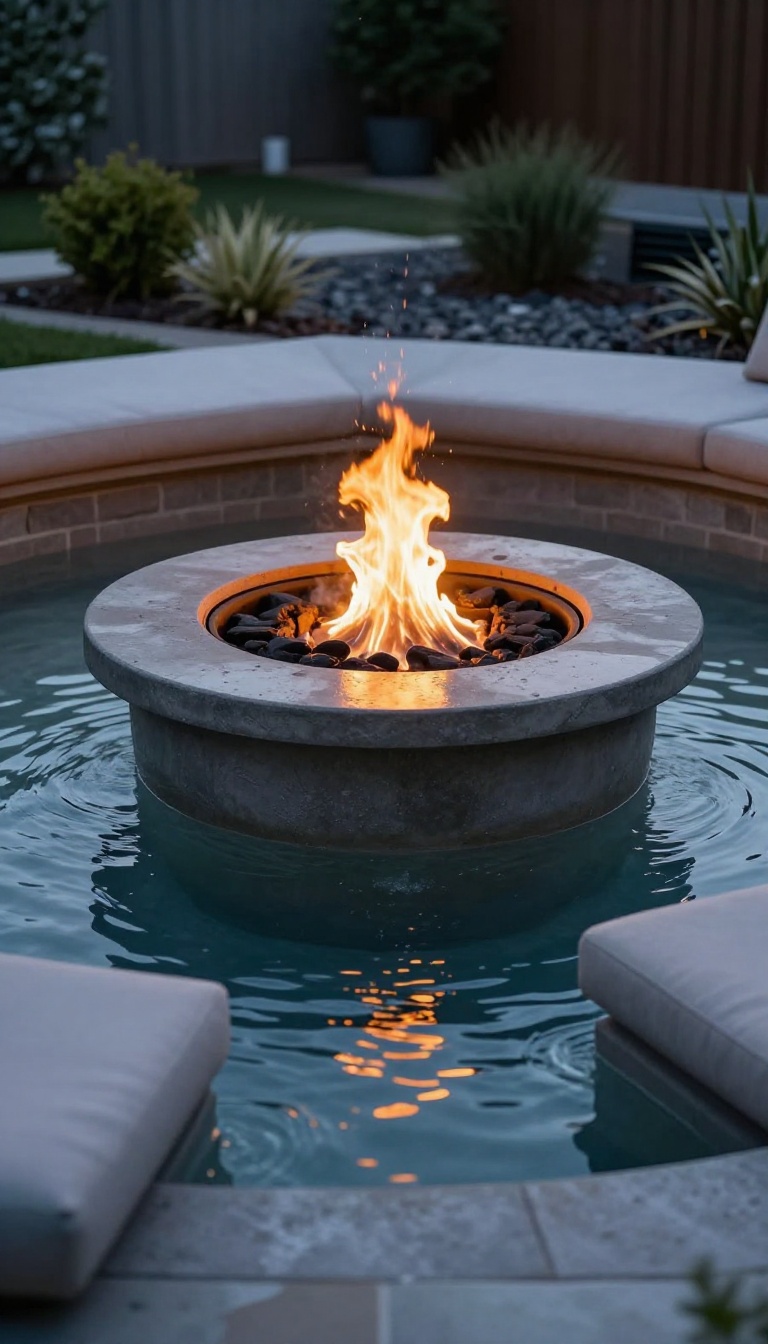
Water and fire don't usually mix, but when they do, the result is mesmerizing. A narrow water channel wrapping around your sunken fire pit creates a gentle soundtrack and a flickering reflection that changes all evening. It's a more involved build than most, but the payoff is a backyard that engages every sense.
Picture this: you're sitting around the fire, and just beyond the flames, a thin ribbon of water glows with the firelight. The sound is soft, almost meditative, and it masks traffic noise or neighbor chatter. This isn't a fountain or a pond—it's a sleek, architectural edge that defines the pit and elevates the whole space.
How The Water Channel Works
The channel is typically 6 to 12 inches wide and just a few inches deep, running continuously around the pit's perimeter. A small recirculating pump pushes water through, and it disappears into a hidden reservoir under gravel or a decorative grate. The effect is subtle, not splashy, so it won't douse your fire.
Design And Materials
You'll want non-porous materials like cast concrete, polished stone, or stainless steel for the channel. The fire pit itself can be the same material or a contrasting one—just keep the water edge consistent. A slight lip on the outer edge keeps water from spilling onto your patio.
Build Considerations And Maintenance
This is a job for a pro with experience in both masonry and water features. You'll need proper drainage, a GFCI outlet for the pump, and freeze protection if you live in a cold climate. Maintenance means skimming debris and checking the pump, but it's minimal compared to a full pond.
Making It Your Own
Add LED lights inside the channel for a glowing outline at night. You can also plant small aquatic grasses or moss along the outer edge to soften the look. Just avoid anything that sheds heavily—leaves and needles will clog the pump.
14. Portable Fire Pit Insert in a Sunken Base
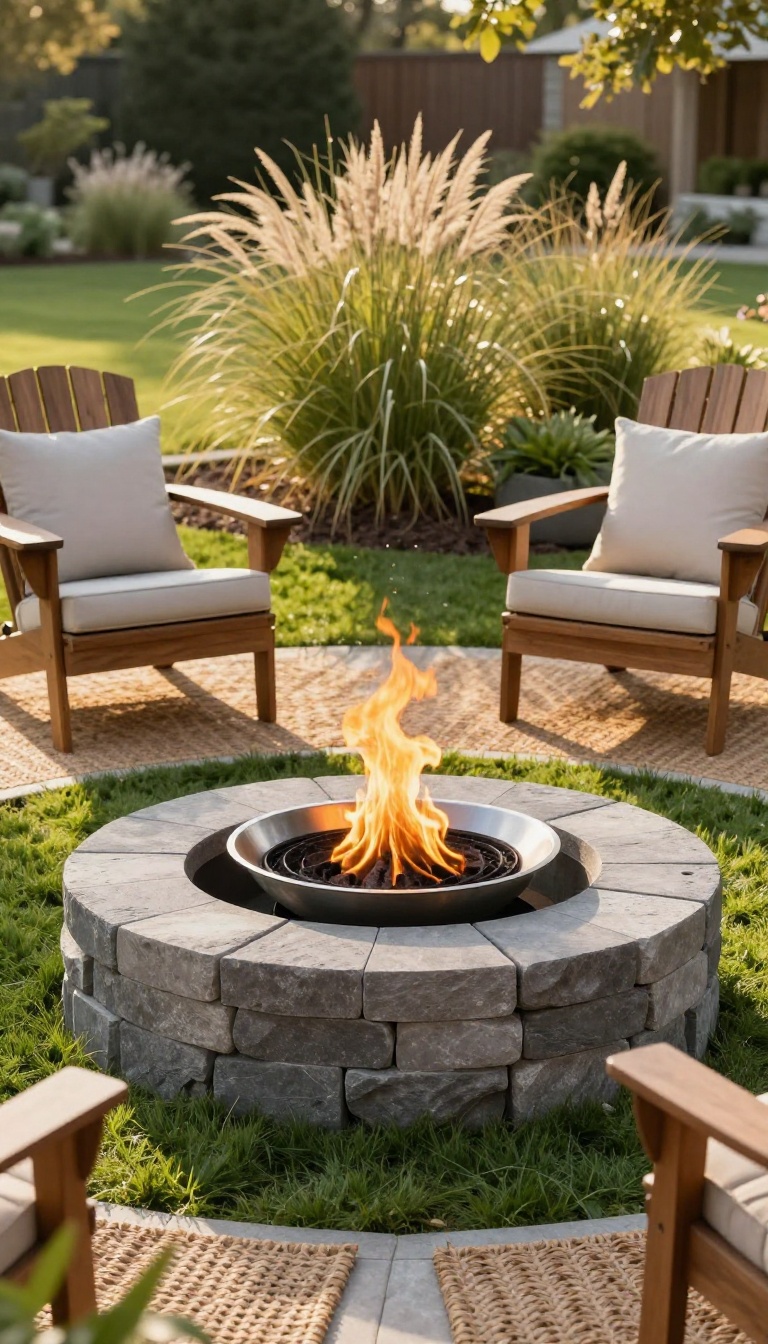
A permanent sunken fire pit looks great, but it locks you into one spot and makes cleaning a chore. What if you could get the built-in look without the commitment? That's where a portable fire pit insert comes in.
You build a sunken base—usually a simple ring of stone, brick, or concrete—and drop a portable fire bowl inside it. When you want a fire, set the bowl in place. When you don't, lift it out and store it.
The base stays put, but the fire stays flexible.
This setup gives you the best of both worlds: the polished look of a sunken pit and the freedom of a movable fire feature. It's also a smart choice if you like to rearrange your yard, or if you just want an easier way to clean out ash and debris.
Why Go Portable?
A portable insert means you can move the fire to a different spot if you want a change of scenery. It also makes cleaning much simpler—just lift the bowl out, dump the ash, and hose it down. No more scooping ash out of a deep, fixed pit.
And if you ever sell your home, you can take the fire bowl with you, leaving the base as a simple planter or decorative feature.
Choosing The Right Base And Bowl
The base should be slightly wider than your fire bowl so it sits securely. A common approach is to use a steel or concrete ring, or stack landscape blocks in a circle. The bowl itself can be anything from a cheap metal fire pit to a high-end stainless steel or cast iron model.
Just make sure the bowl's diameter is a few inches smaller than the base opening, so it drops in without wobbling. Also check that the bowl's height leaves the rim at or slightly above ground level for that sunken look.
Making It Look Built-in
To keep the permanent feel, fill the gap between the bowl and the base with lava rock, gravel, or sand. This hides the fact that the bowl is removable and adds a finished touch. You can also add a decorative collar or a ring of pavers around the top edge.
If you want to get fancy, run a gas line to the base and use a portable gas insert—just disconnect it when you want to move the fire.
Practical Tips For Daily Use
Keep a pair of heat-resistant gloves nearby for lifting a hot bowl—never move it while it's still warm. If you burn wood, line the bowl with a fire pit liner or sand to make ash removal even easier. And if you live in a rainy area, consider a cover for the base when the bowl is out, so it doesn't fill with water.
A portable insert also lets you switch between wood and gas depending on your mood or local burn bans.
15. Sunken Fire Pit with Integrated Lighting
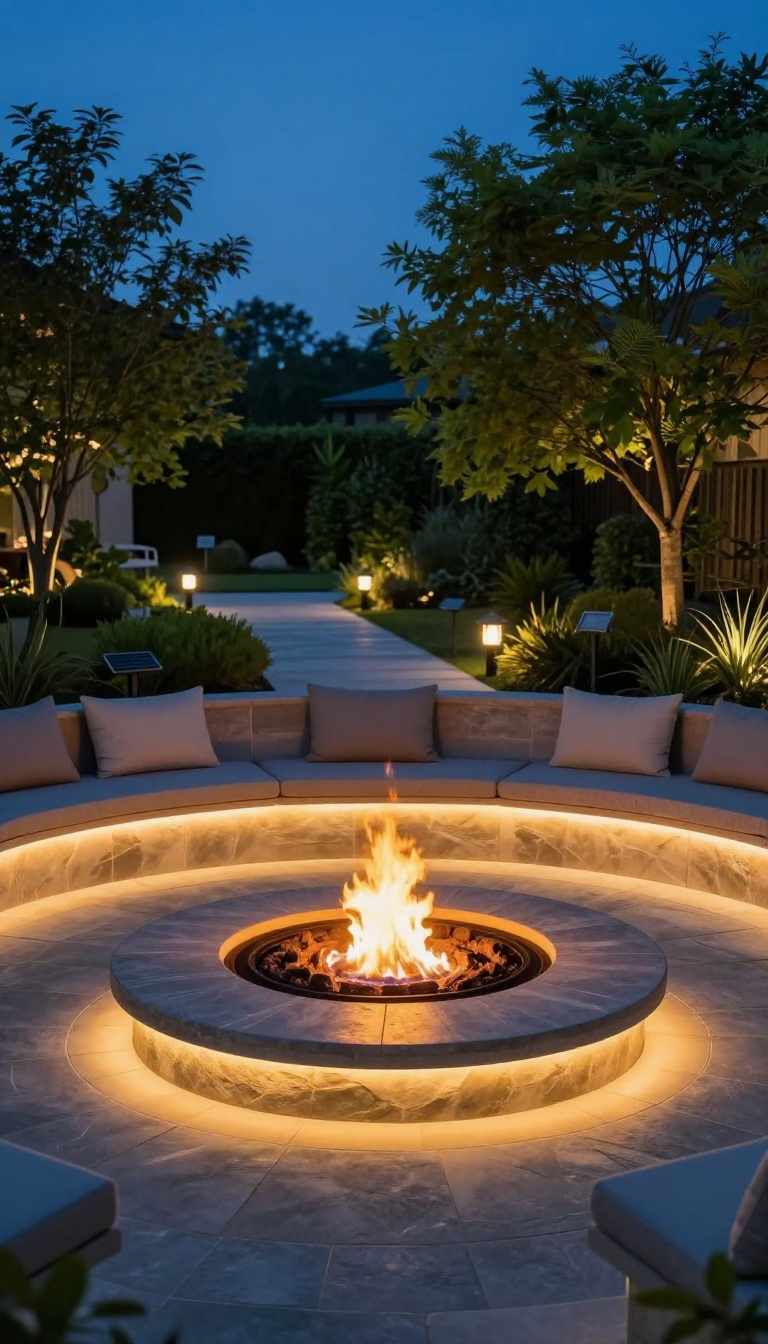
A sunken fire pit already pulls people in, but once the sun goes down, the magic can fade fast. Integrated lighting keeps the space glowing and usable long after dark. LED strips or solar path lights are simple add-ons that boost both safety and ambiance without breaking the bank.
You don't need a professional electrician to make this work. Many lighting options are DIY-friendly and can be installed in an afternoon. The goal is to highlight the pit's edges and the surrounding seating area, so people can move around confidently and enjoy the fire's warmth from every angle.
Think of lighting as a layer that extends your fire pit's personality. It can be subtle and relaxing or bright and festive, depending on your choice. The best part?
You can start small and add more later as your budget allows.
Led Strip Lights For A Clean Look
LED strips are flexible, affordable, and easy to hide. Tuck them under a seating lip or along the inner rim of the pit to create a soft, indirect glow. Look for outdoor-rated strips with adhesive backing and a remote control for dimming.
They use very little power, so you can leave them on for hours without worrying about your energy bill.
Solar Path Lights For Easy Placement
Solar path lights require no wiring and charge themselves during the day. Stake them around the perimeter of your fire pit area to define the space and guide guests at night. They come in many styles, from modern to rustic, so you can match your yard's vibe.
Just make sure they get enough sunlight to stay lit through the evening.
Safety And Ambiance Go Hand In Hand
Good lighting isn't just about looks—it prevents trips and falls. Light the walkways leading to the pit and any changes in level. A few well-placed lights also make the fire feel cozier, creating a warm circle that invites people to linger.
Keep the light sources low and directed downward to avoid glare.
FAQ
How deep should a sunken fire pit be?
Most sunken fire pits are 12 to 18 inches deep. This depth contains the fire, provides a comfortable footrest, and keeps the seating area at a safe distance.
What materials can I use for a sunken fire pit?
Common materials include stone, brick, concrete, and metal. Choose based on your budget, climate, and desired look. Always use heat-resistant materials for the inner ring.
Do I need a permit to build a sunken fire pit?
Permit requirements vary by location. Check with your local building department before digging. Some areas require permits for any open flame, while others only regulate larger structures.
How do I keep water out of a sunken fire pit?
Add a drainage layer of gravel at the bottom and ensure the pit has a slight slope or a drain hole. A cover when not in use also helps keep rain and debris out.
Can I cook on a sunken fire pit?
Yes, if you add a grill grate or use a cooking insert. Make sure the fire pit is designed for cooking and always follow safety guidelines for open-fire cooking.
Conclusion
A sunken fire pit earns its keep by giving your yard a natural gathering point, so start with the one idea that fits how you already hang out. Maybe that means built-in seating, a gravel floor, or a simple stone ring you can build in a weekend. You do not need all fifteen options.
Pick one, get it working, and spend a few evenings around it. The right setup will tell you what to add next, and the yard will grow around the fire instead of the other way around.