13 Backyard Deck and Patio Ideas for Seamless Outdoor Flow
A deck that ends in a two-inch drop to the patio, or a back door you have to step down from like you're exiting a bus, kills the whole point of having outdoor space. The fix usually isn't a full rebuild. It's a handful of decisions about height, materials, and edges that most people make too late.
Good flow comes down to a few practical moves: match your surfaces, widen the transition, and give the eye somewhere to travel. Some of these cost a weekend and a few hundred bucks.
Others are worth planning before you pour concrete. Below are 13 ideas that range from small tweaks to bigger builds.
1. Match Your Deck Height to Your Door Threshold
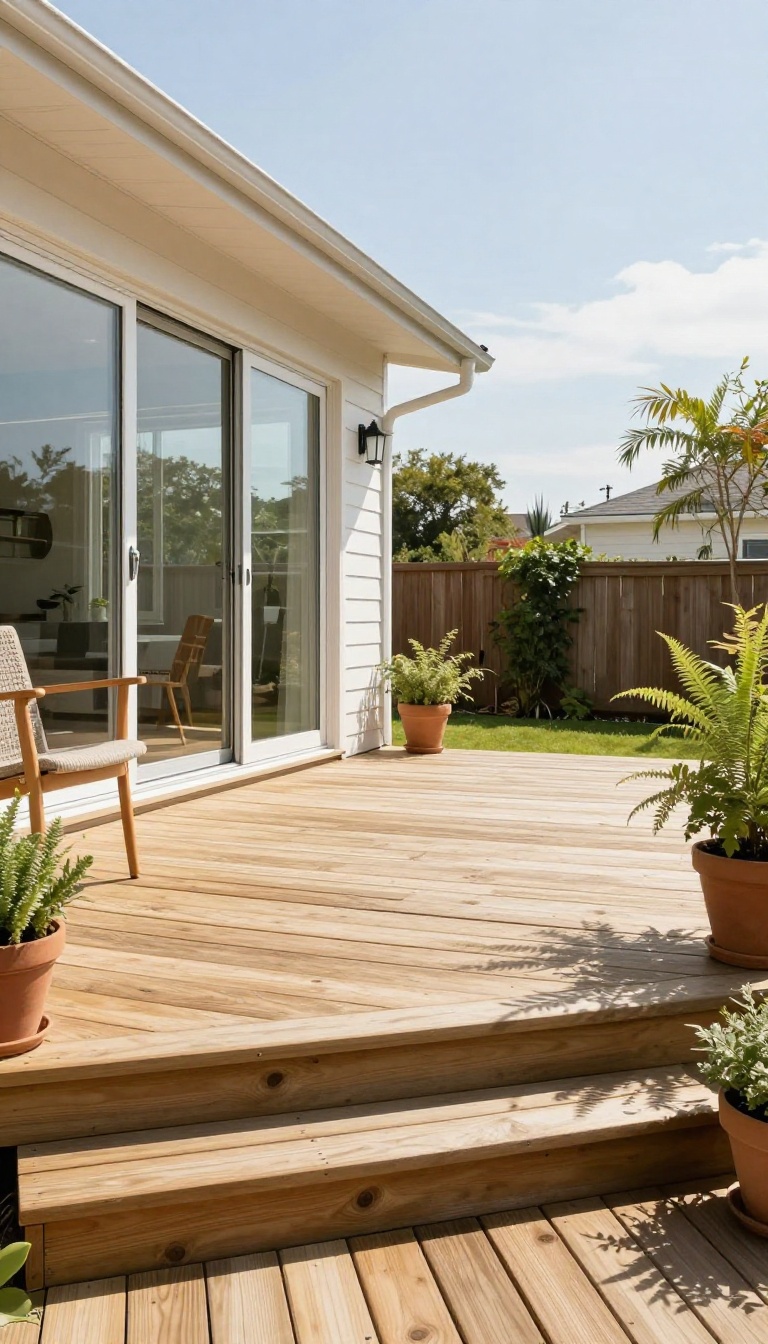
The single biggest thing that makes a deck feel like a natural extension of your house is height. If the deck surface sits more than a step or two below your interior floor, every trip outside becomes a small negotiation with gravity. Get the height right, and people walk out without breaking stride.
That doesn't mean you need a perfect flush transition. A small step down is fine and often necessary for drainage. The goal is to make that step feel intentional and easy, not like a drop-off you have to think about.
The good news is that height is one of the few things you can plan for before you dig a single footing. Get it wrong, and you'll be living with a awkward hop for years.
When your deck sits within a step or two of your door threshold, the whole space reads as one continuous room. People drift out with a coffee, a plate, or a laptop without pausing. That ease is what seamless flow actually looks like in practice.
The magic number is usually between zero and seven inches of drop from the interior floor to the deck surface. That's roughly one standard step. Two steps, or about fourteen inches, still works but starts to feel like a transition rather than an extension.
Anything more than that, and you're building a separate destination. That can be fine for a raised deck with a view, but it's a different experience. For a seamless flow, keep it low.
Framing And Footings
Low decks still need a solid frame. You'll typically use pressure-treated lumber or a composite framing system, with joists spaced according to your decking material. For a low-profile deck, you might not need traditional footings at all.
Instead, you can use deck blocks or a floating foundation on a compacted gravel base. That keeps the deck close to the ground and avoids digging deep holes. Just check your local codes, because some areas require frost-depth footings even for low decks.
If you're attaching a ledger board to the house, flash it properly. Water getting behind the ledger is the number one cause of premature deck rot. A simple metal flashing detail and a bead of sealant will save you thousands down the road.
Drainage And Airflow
A low deck traps moisture. Without airflow underneath, joists stay damp, and wood starts to rot. Leave at least a few inches of clearance between the ground and the bottom of your framing.
Grade the soil under the deck so water runs away from the house, not toward it. A slight slope away from the foundation is enough. If your yard tends to stay wet, consider a gravel trench or a French drain.
Decking boards should have small gaps, usually an eighth to a quarter inch, so water drains through instead of pooling. Composite boards often have specific gap requirements, so follow the manufacturer's guide.
The Step Itself
If you do need a step, make it wide and deep. A single broad step that spans the whole door width feels more like a landing than a stair. That's safer and looks better.
Use the same decking material for the step tread so it blends in. A contrasting color can work, but it draws attention to the transition. For seamless flow, you want the eye to glide over it.
Make sure the step is at least as wide as the door plus a few inches on each side. That gives people room to move naturally, even with an armload of groceries.
2. Build a Low Multi-Level Deck Instead of One Big Platform
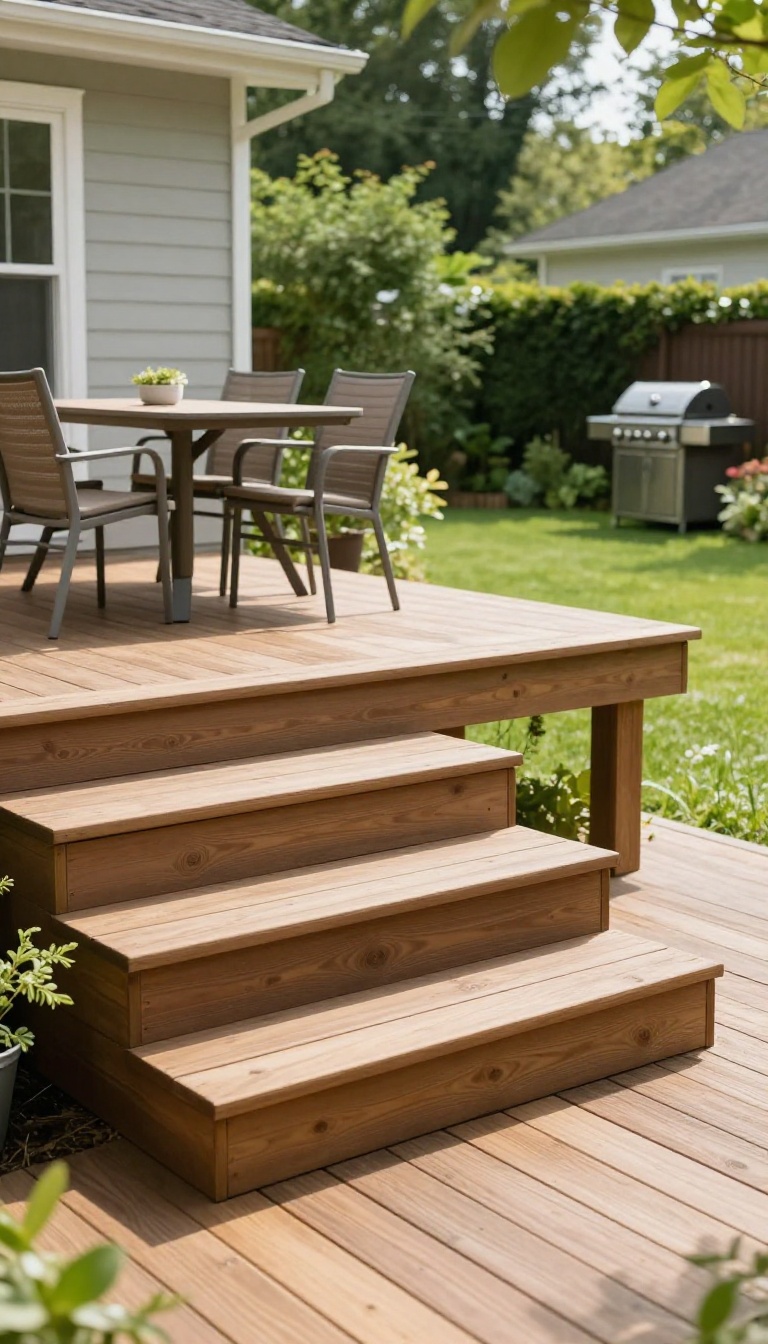
One flat platform sounds simple until you realize it has to serve dinner, lounge chairs, a grill, and a walkway all at once. Everything fights for the same square footage, and the space ends up feeling like a parking lot with furniture on it. Splitting that platform into two or three shallow tiers fixes the problem without adding walls or railings.
Each level quietly tells people where to go, and the whole deck still reads as one connected space.
The trick is keeping the steps between levels short. Aim for a single riser height, usually 6 to 7 inches, so people can step up or down without thinking about it. Two tiers is often enough for a typical backyard.
Three works when you have a long, narrow footprint or a yard that already slopes. You are not building separate decks. You are building one deck with a couple of gentle breaks in it.
That distinction matters for how the finished thing feels.
Assign Each Tier A Job
Put the dining table on the tier closest to the kitchen door. It gets the most traffic and the shortest carry for plates and drinks. Drop the lounge seating one level down, where it feels slightly tucked away and less like a hallway.
If you go with a third tier, make it the smallest one. That is your grill zone, a fire pit corner, or a spot for a couple of chairs facing the yard. Small tiers feel intentional.
Big ones just look like more deck.
Keep The Step Edges Wide And Obvious
A narrow step edge is a trip hazard, especially after a few drinks or when the wood is wet. Build the tread at least 12 inches deep, and 14 if you have the room. That extra depth gives your foot a real landing spot and makes the transition feel calm instead of abrupt.
Use a contrasting board or a slightly different stain color on the step face. It reads as a design detail, but it is really a safety cue. People see the change in height before they reach it.
Plan The Framing Before You Build
Multi-level decks need proper footings under every tier, so this is not a change you make after the fact. Sketch the tiers on paper first and mark where each post lands. Keep the lower tiers pulled back from the upper ones so the structure stays stable and the shadow lines look clean.
If you are working with an existing deck, adding a lower tier off one side is usually easier than cutting into the current frame. Just make sure the new section ties into the old one with proper blocking and hardware.
Let The Materials Do The Connecting
Run the same decking boards across every tier, in the same direction. That single choice makes three levels look like one thought instead of three separate projects. Match the railing too, or skip railings entirely on the low tiers where the drop is under 30 inches.
Where a tier meets the yard, use the same edging stone or gravel strip along the whole run. It ties the bottom of the deck to the patio or lawn and keeps the eye moving instead of stopping at each step.
3. Use Wide, Smooth Pavers for a Patio That Feels Like a Floor
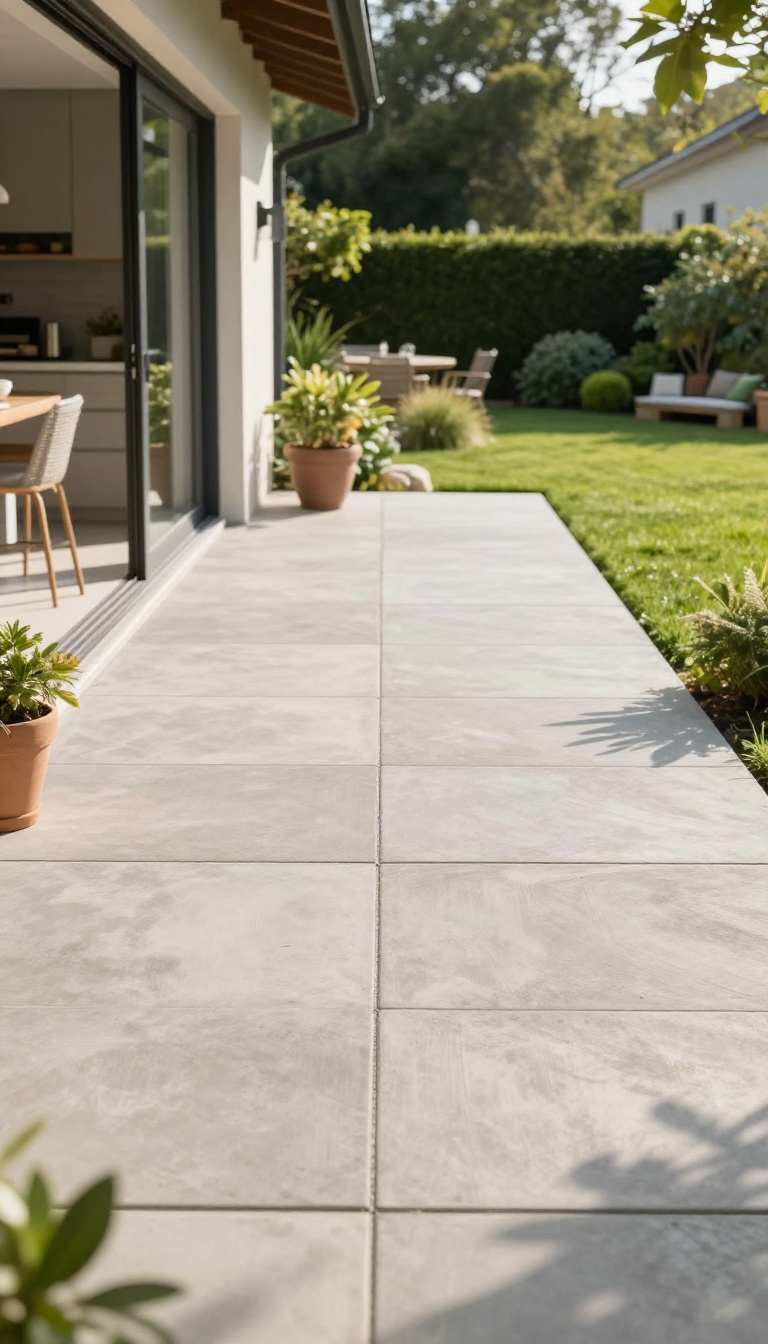
Small, busy pavers with wide grout lines announce themselves as a patio. Big, smooth ones don't. They let the surface read as one continuous floor, which is exactly what your eye wants when it's tracking from the kitchen out to the yard.
The trick is scale. A 24-by-24-inch paver does more for flow than any border or pattern. It cuts down on visual noise and makes even a modest patio feel like a real room.
You can pull this off with concrete, porcelain, or natural stone. The material matters less than the size, the joint width, and what's happening underneath.
Large-format pavers are the closest thing to cheating that outdoor design allows. You get the solid, seamless look of an interior floor without pouring a slab. The catch is that everything below the surface has to be right, because a wavy base shows up fast when each paver is the size of a dinner plate.
Start by thinking about the whole assembly, not just the pretty top layer. Base, bedding, joints, and drainage all work together. Skip one and the patio will telegraph every shortcut within a season.
Pick The Right Size And Joint Width
Aim for pavers at least 24 inches square, and go bigger if your space can handle it. Rectangular formats like 24 by 36 inches can look even sleeker because they mimic plank flooring. Keep joints tight, around an eighth to a quarter inch.
Wider gaps break up the surface and invite weeds. If you're using polymeric sand, tight joints also make it last longer. One caution: bigger pavers are heavier and less forgiving of a bad base.
Two people with a vacuum-lift tool make placement way easier than muscling them by hand.
Build A Base That Won't Move
Dig down about six to eight inches for a patio that sees foot traffic, more if cars will ever roll on it. Fill with crushed stone and compact it in two-inch lifts. Don't skip the compactor rental.
On top of the compacted base, screed a one-inch layer of bedding sand. Use pipes or rails as guides so the sand is dead flat. Any dip here becomes a rocking paver later.
Slope the whole thing away from the house at about a quarter inch per foot. That's enough to shed water without anyone noticing the tilt.
Level, Tamp, And Lock It In
Set each paver with a slight twist into the sand, then check it against a long level and its neighbors. Tap high spots down with a rubber mallet and a block. This is slow work, but it's the difference between a floor and a patchwork.
Once everything's in place, sweep polymeric sand into the joints, mist it, and let it cure. That sand locks the pavers together and blocks most weeds from finding a home. For extra insurance, run a hidden edge restraint around the perimeter.
It keeps the outer pavers from creeping apart over the years.
4. Run the Same Flooring Material From Inside to Outside
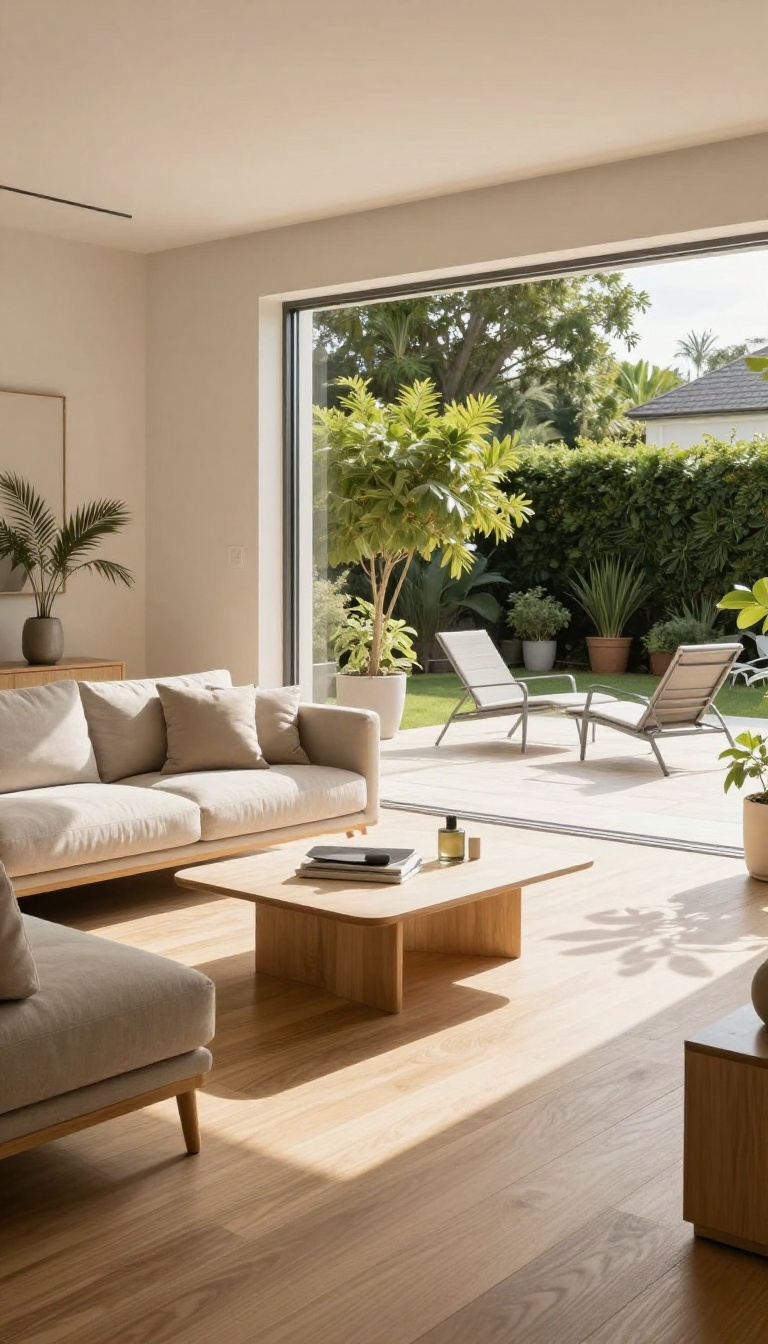
The line between your living room and your patio doesn't have to be a hard stop. When the same flooring material continues from inside to outside, the eye reads it as one continuous space instead of two separate zones. That visual trick makes even a small patio feel like a natural extension of your home, not an afterthought.
You don't need to rip up your interior floors to pull this off. The goal is a close match in color, tone, and scale, not a perfect duplicate. A few smart choices about materials and transitions will get you most of the way there.
Pick Materials That Can Handle Both Sides
Not every interior floor belongs outside. Real hardwood will cup, warp, and fade fast under sun and rain. Instead, look for outdoor-rated options that mimic the look you already have.
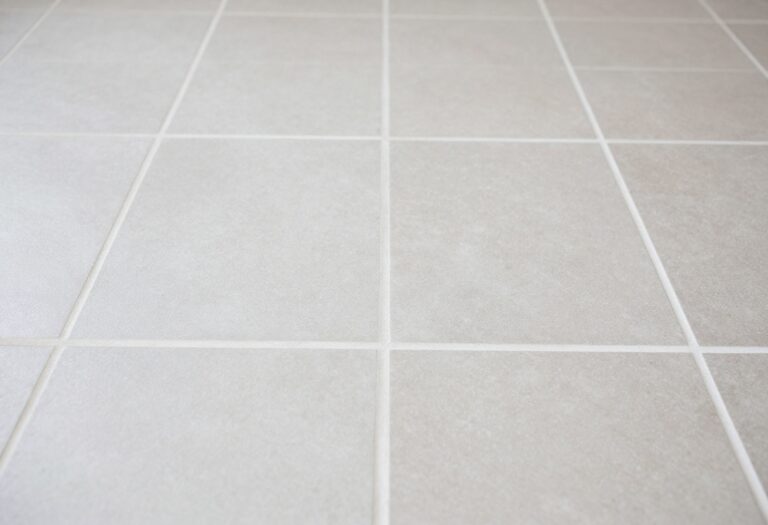
Porcelain tile that resembles wood planks, composite decking with a wood grain, or natural stone tile are all solid picks. If your interior is tile, choose a matching outdoor tile with a slightly higher slip rating for safety. The closer the color and texture, the more seamless the transition feels.
Get The Transition Strip Right
The strip where inside meets outside is where most projects either shine or fall apart. A simple metal or composite transition strip bridges the gap and covers the cut edge. Make sure it sits flush or slightly below the interior floor so you don't stub your toe.
If there's a height difference, a low ramp or a wider threshold piece can smooth it out. This small detail keeps the flow going and prevents a trip hazard.
Match The Layout, Not Just The Material
Running the same plank direction or tile pattern from inside to outside reinforces the connection. If your interior floor runs lengthwise toward the door, continue that line onto the patio. It pulls the eye outward and makes the space feel bigger.
You can also repeat the same grout color or joint width to keep things consistent. Small repeats like this do a lot of heavy lifting for very little cost.
5. Replace a Single Back Door With a Wide Slider or French Doors
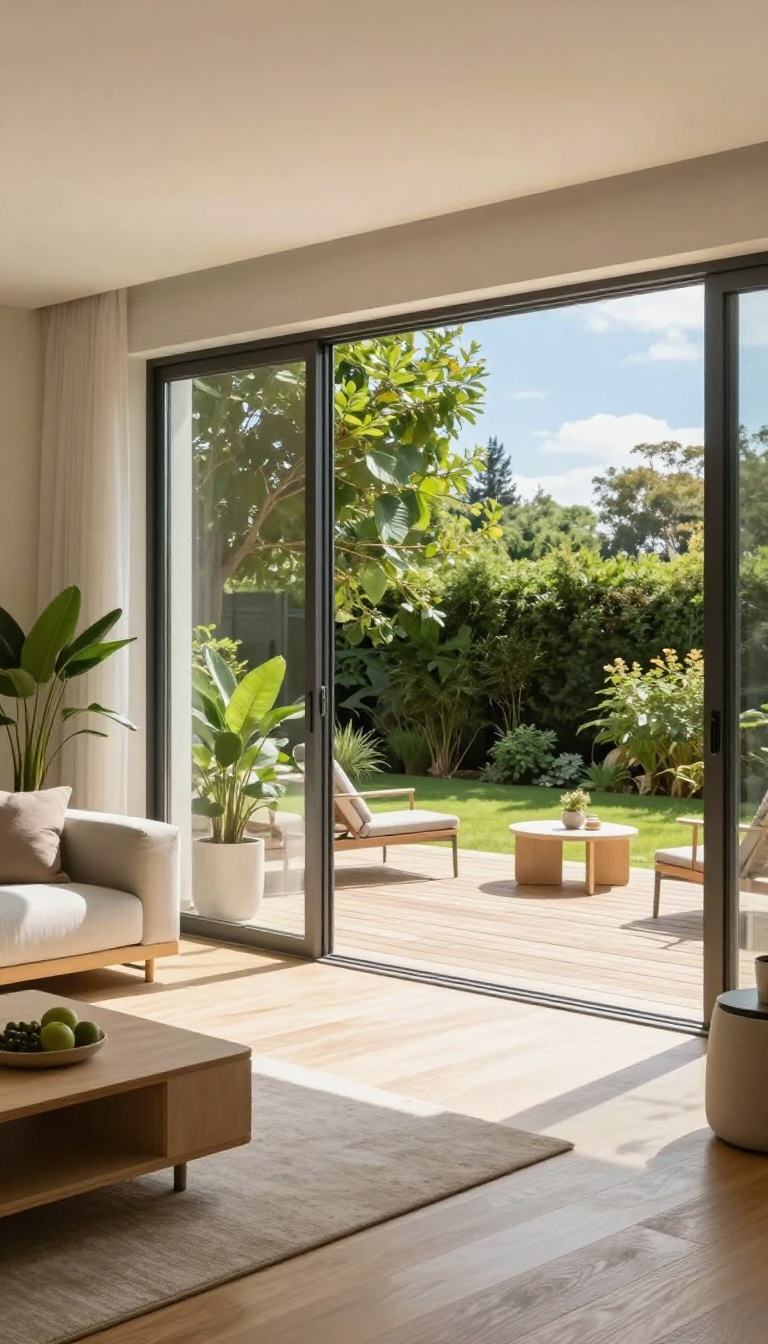
A standard 36-inch back door is a bottleneck. Two people can't walk through it side by side, and the wall around it blocks the view you paid for when you bought the house. Swapping that door for a wide slider or a set of French doors changes how the whole wall reads.
The opening gets bigger, the glass gets bigger, and suddenly the yard feels like part of the room instead of a separate destination. It's also the one idea on this list that involves cutting into your house, so it's worth understanding what's actually involved before you start pricing doors.
The good news is that most houses already have a header above the back door. That's the horizontal beam that carries the weight of the wall over the opening, and it's usually sized for a door, not for a six-foot slider. That's the catch.
A wider opening means a longer span, and a longer span means a beefier header. Sometimes the existing one is fine. Sometimes it isn't.
You won't know which until someone looks at the framing, so treat any online price you see as a starting point, not a final number.
Know Your Rough Opening Sizes
Doors are sold by the size of the hole they fit into, not the size of the door itself. A 6-foot slider needs roughly a 72-inch rough opening. An 8-foot slider needs about 96 inches.
French doors come as pairs, so a 5-foot set needs a 60-inch opening, and a 6-foot set needs 72. Measure the actual gap between the framing, not the trim, before you shop. Write those numbers down and take them to the store.
Guessing here costs you a second trip and a restocking fee.
The Header Is The Real Decision
If your existing header can't span the new opening, you're looking at a structural change, not a door swap. That usually means temporary supports, new framing, and an inspection. A pro can tell you in about ten minutes whether your header is up to it.
That visit is cheap compared to finding out the hard way. If the header has to change, budget for it up front instead of discovering it mid-project.
When To Call A Pro
Any time you're removing part of a load-bearing wall, call someone. That's not a DIY-friendly job, and it's not worth the risk to save a few hundred dollars. If you're just replacing a door with a same-size door, or widening within an opening that's already framed for it, a confident DIYer can handle it.
Anything beyond that, get help. Permits are often required for structural changes, so check with your local building department before you buy anything.
Pick The Door That Fits How You Live
Sliders are cheaper, seal well, and slide out of the way. French doors swing open and look nicer, but they eat floor space and need room to clear. If you grill a lot and carry things in and out, a slider is usually the practical pick.
If the view matters more than the traffic, French doors win. Either way, get a door with a low threshold. A tall sill is just a smaller version of the problem you're trying to fix.
6. Add a Covered Transition Zone Right Outside the Door
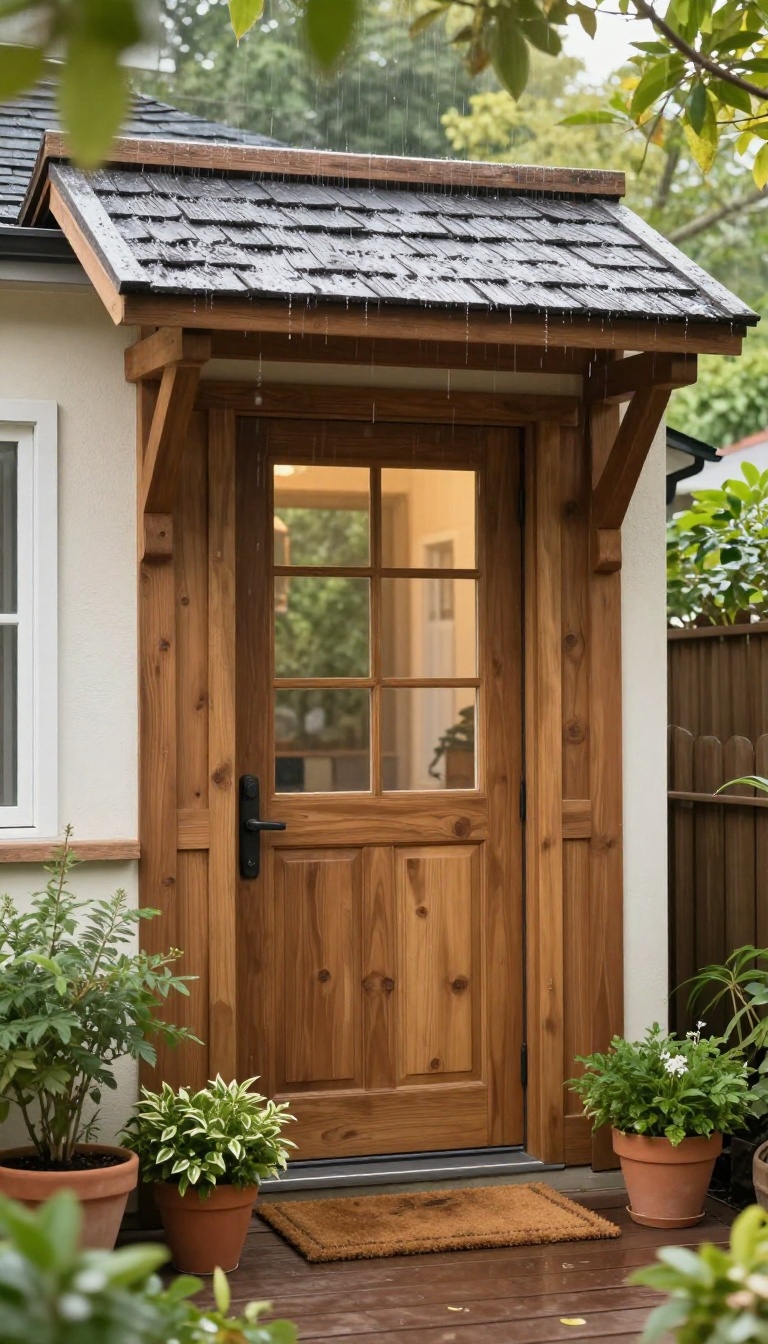
Stepping out of your house and into the elements shouldn't feel like a punishment. A small roof, pergola, or awning over the doorway creates a buffer that keeps rain from pooling at the threshold and blocks harsh afternoon sun from baking the door. It also gives the exit a sense of arrival, turning a plain opening into a deliberate transition.
You don't need a full outdoor room to get the benefit. Even a modest overhang can define the space, protect your door hardware, and make coming and going feel smoother. The key is matching the cover to your home's style and your local weather.
Once it's in place, you'll wonder how you ever lived without it. It's one of those upgrades that quietly improves daily life without demanding a huge budget.
A covered transition zone solves a handful of problems at once. It shields the door from rain, so you're not fumbling with keys in a downpour. It cuts glare and heat on sunny days, making the threshold more comfortable.
And it visually signals that you're moving from inside to outside, which helps the whole space feel intentional. You can go as simple as a small awning or as involved as a gabled roof that ties into your home's architecture. The size and style depend on your climate, your budget, and how much coverage you want.
But even a minimal structure makes a difference. Think of it as a handshake between your house and your yard. It doesn't need to be fancy.
It just needs to work.
Pick The Right Cover For Your Climate
In rainy areas, a solid roof or a well-pitched awning sheds water away from the door. In sunny spots, a pergola with adjustable louvers or a retractable awning lets you control shade. If you get both, consider a polycarbonate roof that blocks UV while letting light through.
Wind matters too. A fixed awning can act like a sail in gusty regions, so choose a sturdy frame and proper anchoring. For mild climates, a simple pergola with a canvas top might be all you need.
Size It For Comfort, Not Just Coverage
A cover that's too small won't keep you dry when the rain blows sideways. Aim for at least three to four feet of depth beyond the door. That gives you room to stand, unlock, and shake off an umbrella without getting soaked.
If you plan to keep shoes, a mat, or a small bench there, go a bit deeper. Just make sure it doesn't block too much light into the house. A good rule is to extend the cover about one-third of the way across your patio or deck.
Integrate It With The Rest Of Your Outdoor Space
The cover shouldn't look like an afterthought. Match materials to your deck or patio, and repeat colors or finishes from your home's exterior. If you have a pergola over the dining area, echo that style at the door for a cohesive look.
You can also use the covered zone to define a mini mudroom outside. Add a hook for keys, a small shelf for plants, or a bench for taking off boots. That makes the transition practical, not just pretty.
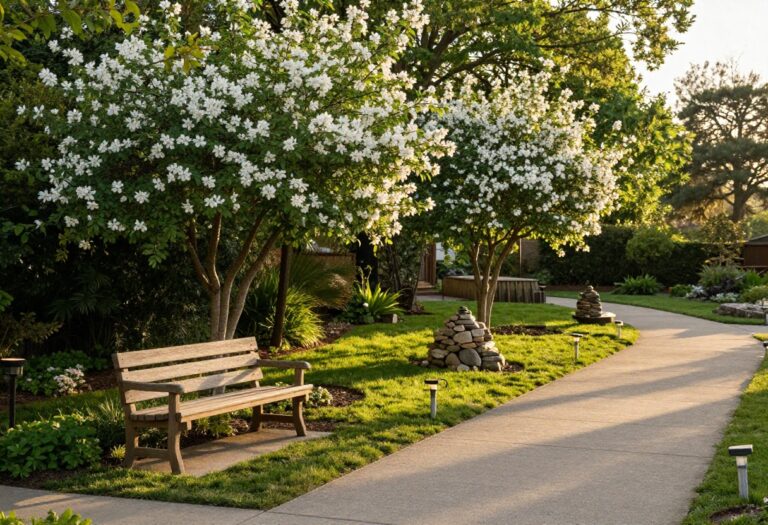
7. Lay a Gravel or Flagstone Path That Connects Patio to Lawn
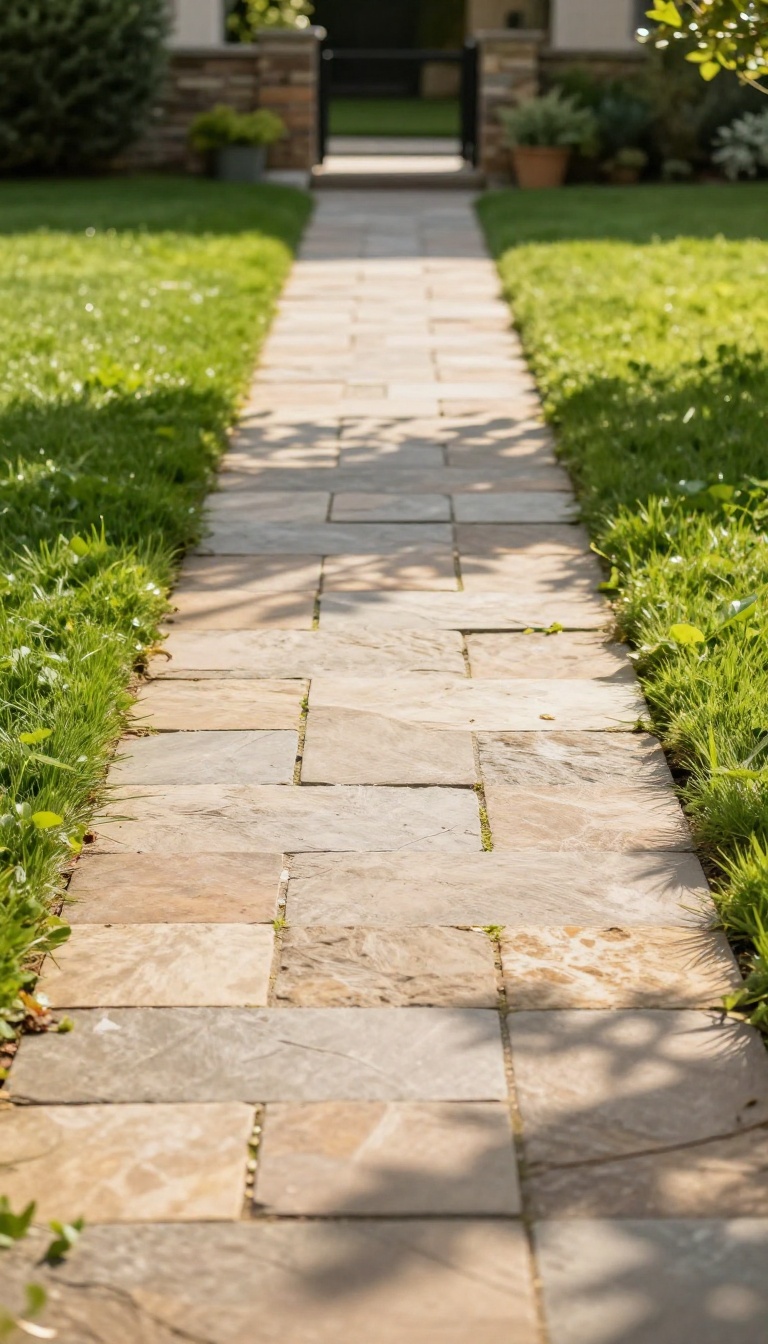
A patio that dead-ends at the grass edge forces everyone to pick a route on the fly. That tiny decision, repeated a hundred times a summer, is what makes a yard feel choppy. A defined path fixes it without a major build.
You're basically drawing a line that says: this way, and it's easy.
The path doesn't need to be wide or fancy. Three feet is plenty for two people walking side by side, and even two feet works if it's just a connector. What matters is that it starts where the patio ends and lands somewhere useful — the grill, the fire pit, the garden gate, the shed.
If it leads nowhere, it's just decoration. Gravel and flagstone both handle this job well, but they behave differently. Gravel is cheaper, faster to install, and forgiving if you change your mind about the route.
Flagstone costs more and takes more prep, but it feels permanent and won't migrate into the lawn. Pick based on how much you care about edges and upkeep. One more thing: the path should feel like part of the patio, not a separate project.
Match the width to your main walking routes and keep the material consistent with what's already there. A flagstone path off a flagstone patio reads as one continuous surface. A gravel path off a concrete patio can work too, but only if you repeat that gravel somewhere else nearby.
Prepping The Base (the Part People Skip)
Gravel and flagstone both fail when the base is lazy. You need to dig down about four inches, tamp the soil, and add a layer of compacted crushed stone. For flagstone, that base gets topped with a thin bed of sand or stone dust so the stones sit flat.
For gravel, you're basically done after the crushed stone — just add your top layer. Skip this and you'll get ruts, weeds, and stones that rock when you step on them. It's the least fun part of the job and the only part that determines whether the path still looks good in three years.
Do it right once and you won't think about it again.
Choosing Between Gravel And Flagstone
Gravel is the practical pick. It drains fast, costs less, and you can install it in a weekend with a shovel and a tamper. The trade-off is maintenance: leaves and twigs disappear into it, and every few years you'll top it off.
If you have dogs or kids who tear around corners, gravel will scatter. Use a edging strip to keep it contained. Flagstone is the polished pick.
It's heavier, pricier, and harder to lay, but it stays put and looks intentional. Irregular flagstone gives you a more natural feel; cut stone gives you cleaner lines. Either way, leave small gaps between stones and fill them with sand or creeping thyme.
That keeps the surface stable and softens the look. A hybrid works too: flagstone stepping stones set into gravel. You get the solid footing of stone with the cheap, fast coverage of gravel.
It's a good compromise if you want the look without the full flagstone budget.
Making The Path Feel Intentional
A path that just shoots straight from point A to point B can feel like a sidewalk. A gentle curve reads as a garden feature instead. You don't need a dramatic S-curve — a slight bow away from the house is enough to make it feel designed.
Line the edges with something low: creeping thyme, liriope, or a simple steel or aluminum edging. That crisp line is what separates a path from a pile of rocks. If you're using gravel, edging is non-negotiable — without it, the gravel will creep into the lawn within a season.
Finally, think about where the path ends. If it stops at the lawn and goes nowhere, add a destination. A small bench, a birdbath, a cluster of pots.
Even a single stepping stone that leads to a gate makes the route feel purposeful. The goal is to give the eye a reason to follow the line.
8. Define the Patio Edge With a Low Seat Wall or Planter
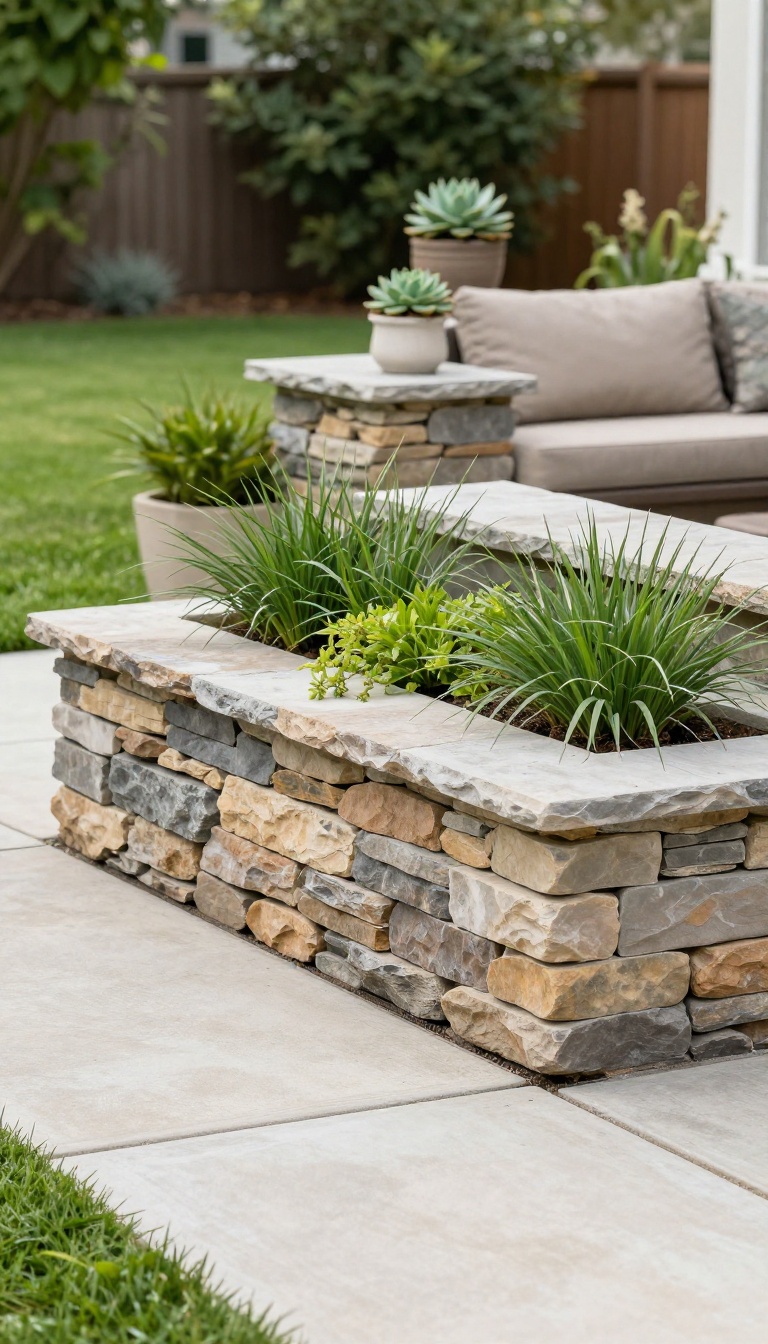
A patio that just stops at the grass looks unfinished, like someone forgot to draw the last line. A knee-high wall or a built-in planter fixes that in a way that actually helps the space work better. It gives the patio a clear edge without turning it into a boxed-in room.
You still see the yard, you still walk right out to it, but now there's a visual boundary doing quiet work.
The key is keeping it low. Around 18 to 24 inches is the sweet spot for a seat wall—tall enough to read as a divider, short enough that you can perch on it or step over it if you want. Anything higher starts feeling like a fence, and that's a different project with a different vibe.
A built-in planter does the same job with a little more life. You get the separation plus greenery, and you don't need a ton of depth. Eighteen inches wide and two feet tall gives roots room and still leaves the view open.
Either option beats a hard material change alone. Switching from pavers to grass is a line on the ground. A low wall or planter is a line with presence.
Cap Stones And Drainage Gaps
Cap stones finish the top of the wall and give you a smooth, flat surface for sitting or setting a drink. Go with something slightly wider than the wall itself—it overhangs just enough to shed water and look intentional. Don't seal the bottom tight against the patio.
Leave small drainage gaps or weep holes every few feet so water doesn't pool behind the wall after a storm. If you're using a planter, make sure it has drainage too, or you'll end up with soggy roots and a mosquito nursery.
Materials That Match Without Matching Exactly
You don't have to use the same stone as your patio, but staying in the same family keeps things calm. A concrete paver patio with a poured concrete seat wall works. So does a bluestone patio with a stacked stone planter.
The mistake is going too contrasty—bright white wall next to dark charcoal pavers can look like two different projects glued together. Pick one dominant material and let the other one support it.
Where To Put It (and Where Not To)
Run the wall or planter along the side of the patio that faces the lawn, not across the main walking path. You want it to guide movement, not block it. Leave at least one wide opening—three feet or more—so people can flow from patio to grass without sidestepping.
If your patio wraps around a corner, a short return wall can define the edge without cutting off the connection to the rest of the yard.
9. Screen the Space With Vertical Elements, Not Solid Fences
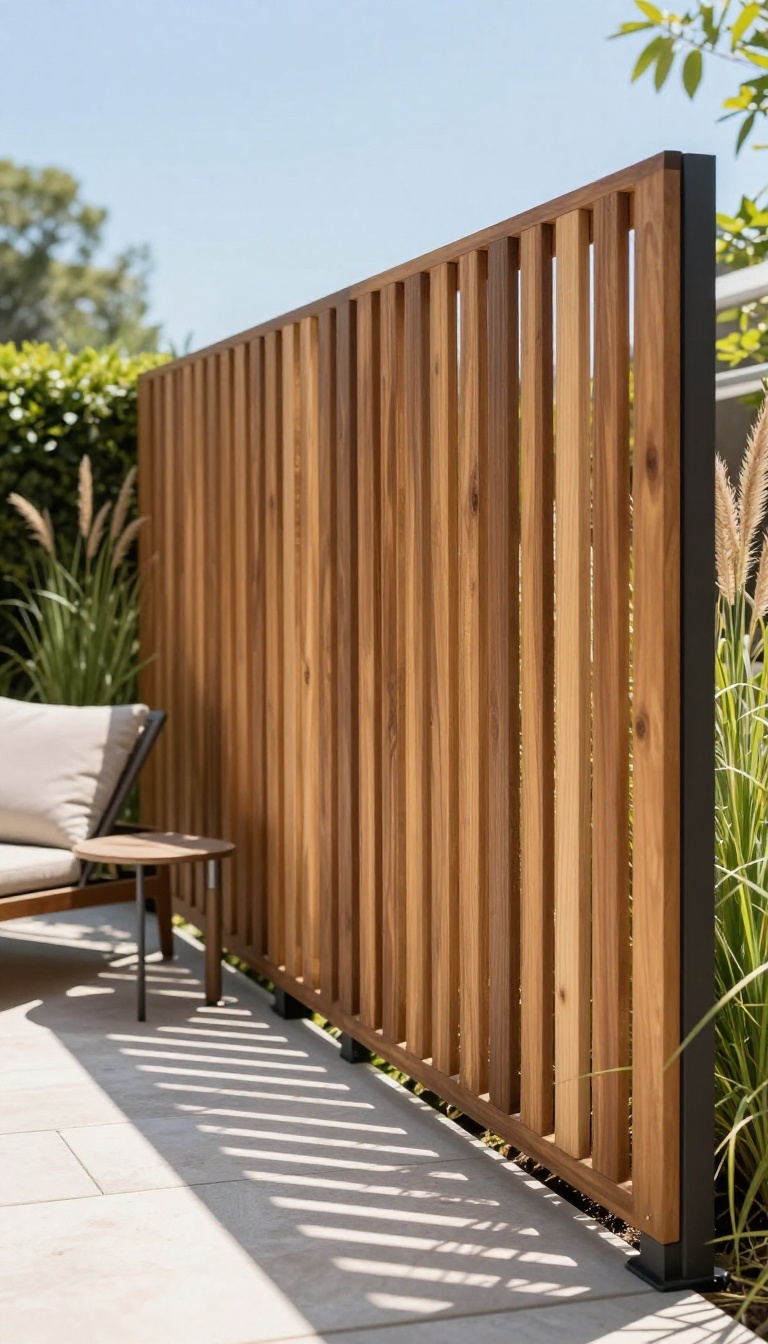
A solid fence solves privacy and creates three new problems: blocked breezes, a shadowy yard, and a wall that makes your patio feel like a box. Vertical screens do the same job without sealing you off from the sky or the wind. Think of them as filters, not barriers.
The goal is to interrupt sightlines and slow gusts while letting light and air pass through. That keeps the yard feeling open and the patio comfortable on hot afternoons. It also gives plants and structures a chance to do the work instead of a flat panel.
Vertical elements also add height and texture, which makes the transition from house to yard feel intentional. They define the edge of a patio without cutting it off from the rest of the landscape. You get privacy where you need it and openness everywhere else.
Slatted Screens That Breathe
Wood or metal slats spaced a few inches apart block direct views from the neighbor's second story while letting air move through. Horizontal slats feel modern and calm; vertical slats add height and a little rhythm. Mount them on posts set just outside the patio edge so they read as a screen, not a wall.
Pergola Slats As A Soft Ceiling
A pergola overhead does more for flow than most people expect. The slats cast moving shadows, break up the sky, and make a patio feel like a room without walls. Space them wider for more sun, tighter for more shade, and run them perpendicular to the house so the lines pull your eye outward.
Tall Grasses And Reeds
Ornamental grasses like miscanthus or switchgrass grow fast, move in the wind, and screen a seating area without any construction. Plant them in a narrow bed along the patio edge, leaving a gap for circulation. They die back in winter, so pair them with evergreens if you want year-round cover.
Layered Screens For Wind And Privacy
Combine a low slatted panel with tall grasses in front and a vine on a trellis behind. Each layer handles a different job: the panel blocks the direct line of sight, the grasses soften the base, and the vine adds green up high. The overlap keeps the screen from looking like a single flat object.
10. Layer Lighting at Three Heights for Evening Flow
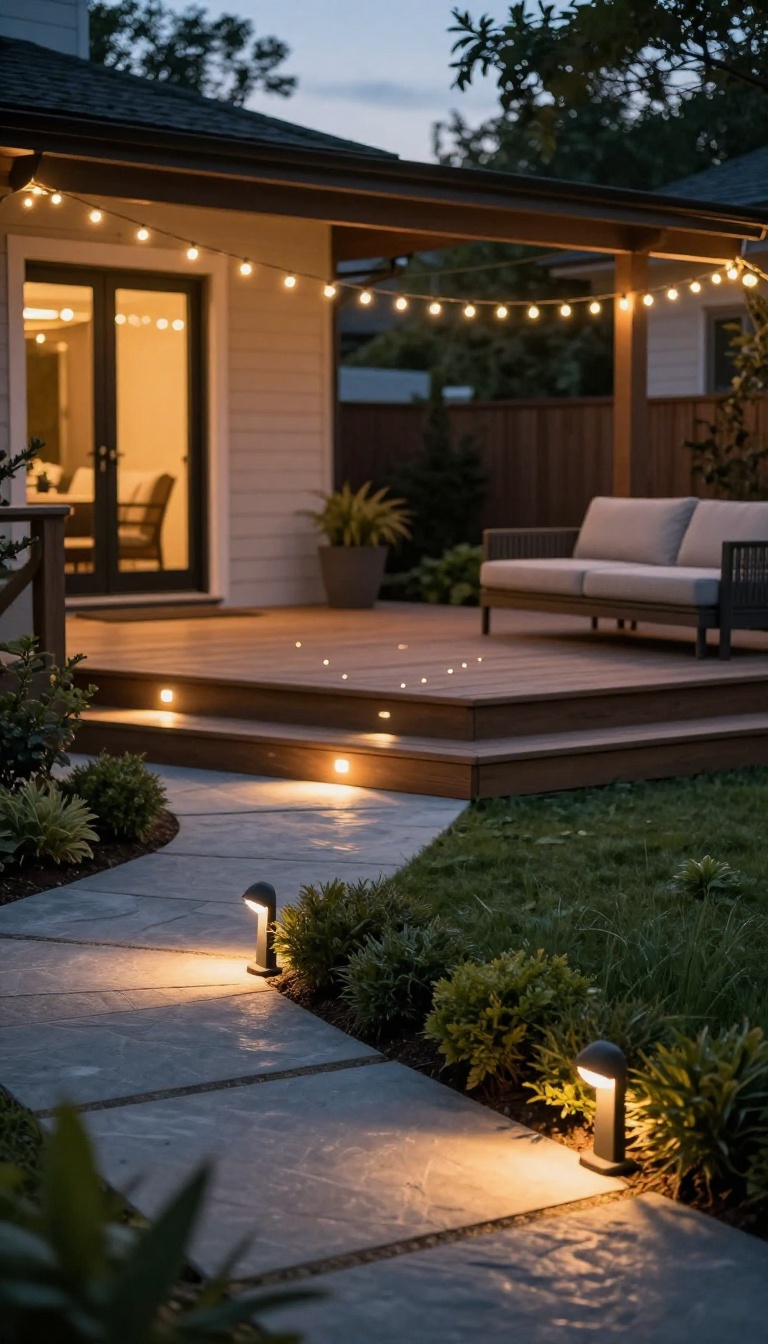
Your deck and patio can look amazing at noon and completely disappear at dusk. Once the sun drops, one floodlight on the back wall turns everything into a flat, shadowy stage. Layering light at three heights—ground, step, and overhead—keeps the yard usable after dark and makes the walk from your kitchen to your lounge chair feel like one continuous space.
The trick is to stop thinking in terms of one bright source and start thinking in terms of levels. Each height does a different job. Ground lights guide your feet.
Step lights mark changes in elevation. Overhead lights create the warm, social glow that makes people want to stay outside. When all three work together, the eye travels smoothly from the door to the far edge of the patio without hitting a dark wall.
Ground Level: Path And Garden Lights
Path lights sit low and point down, so they light the ground without blinding anyone. Place them every 6 to 8 feet along the route from your door to the patio, and tuck a few into planting beds to wash light up onto shrubs. Solar stake lights work fine for this, but low-voltage wired fixtures give you steadier output and a warmer color.
Aim for a soft pool of light, not a spotlight.
Step Level: Mark Every Change In Height
Any step between the deck and patio, or patio and lawn, becomes a trip hazard in the dark. Small step lights recessed into the riser or mounted on the side of the stringer solve that. They also create a dotted line that visually connects the two surfaces.
If you don't want to cut into the deck, use surface-mount fixtures or adhesive LED strips under the nosing. Keep them on a separate switch from the overhead lights so you can leave them on late without lighting up the whole yard.
Overhead: String Lights And Pendants
This is the layer that makes the space feel like a room. String lights zigzagged between posts or trees give you that relaxed, festival vibe. Pendants over a dining table or outdoor kitchen add focused task light.
Hang them 6 to 7 feet above the surface so nobody bumps their head, and use warm bulbs in the 2700K range. Put everything on a dimmer. You want the option to dial it down to a glow when the conversation gets good.
Tie The Layers Together
Run all three heights on separate switches or smart plugs so you can control the mood. Start with step lights on at dusk, add overhead lights when you cook or eat, and keep path lights on a timer for late-night trips to the hot tub. The goal is a seamless wash of light that carries the eye from inside to outside.
When the layers work together, you stop noticing the dark and start noticing how long you stay out there.
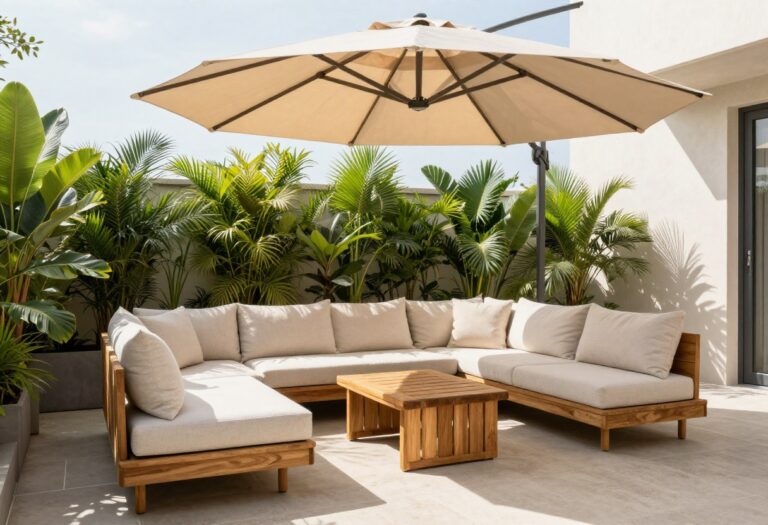
11. Pick Furniture That Straddles the Indoor-Outdoor Line
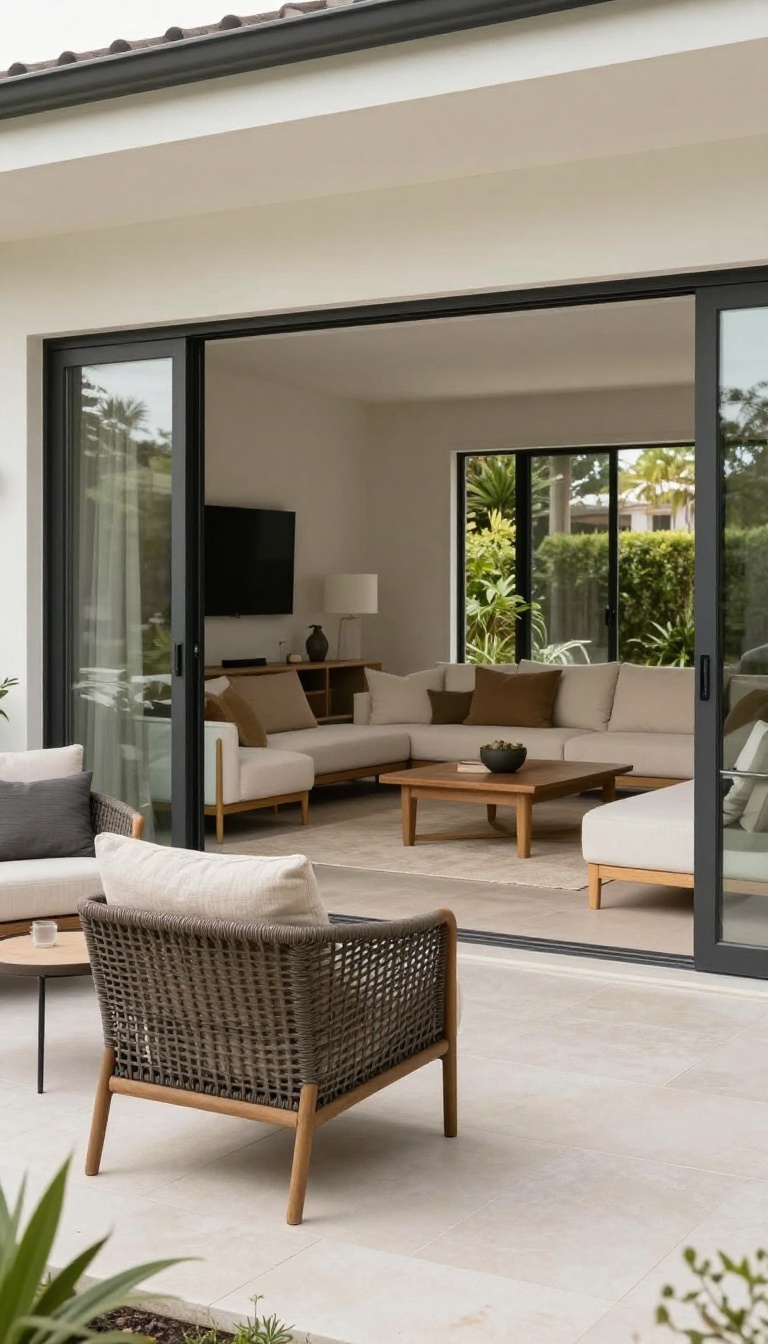
Your furniture does more to blur the line between inside and out than almost any other choice. When your patio chairs look like they belong in your living room—and vice versa—the two spaces start to feel like one continuous room. The trick is picking pieces that can handle weather without looking like they were designed for a campsite.
You don't need to buy a second set of everything. You just need to choose outdoor pieces that share the same DNA as what's inside: similar colors, similar scale, similar materials. That way, when you slide open the door, your eye doesn't hit a hard stop.
Stick To A Shared Palette
Pull two or three colors from your interior and repeat them outside. If your living room is warm neutrals with black accents, look for outdoor cushions in sand, charcoal, and cream. A matching palette makes the transition feel intentional, not accidental.
Match The Scale, Not The Set
A tiny bistro set next to a big sectional looks off. Choose outdoor furniture with similar proportions to your indoor pieces—low backs, deep seats, chunky legs. You're not copying the room; you're echoing its footprint.
Use Materials That Cross Over
Teak, powder-coated aluminum, and all-weather wicker all read as furniture, not gear. Pair them with outdoor fabrics that feel like linen or cotton. When materials feel familiar, the brain stops noticing the door.
12. Add a Fire Feature as the Anchor of the Outdoor Room
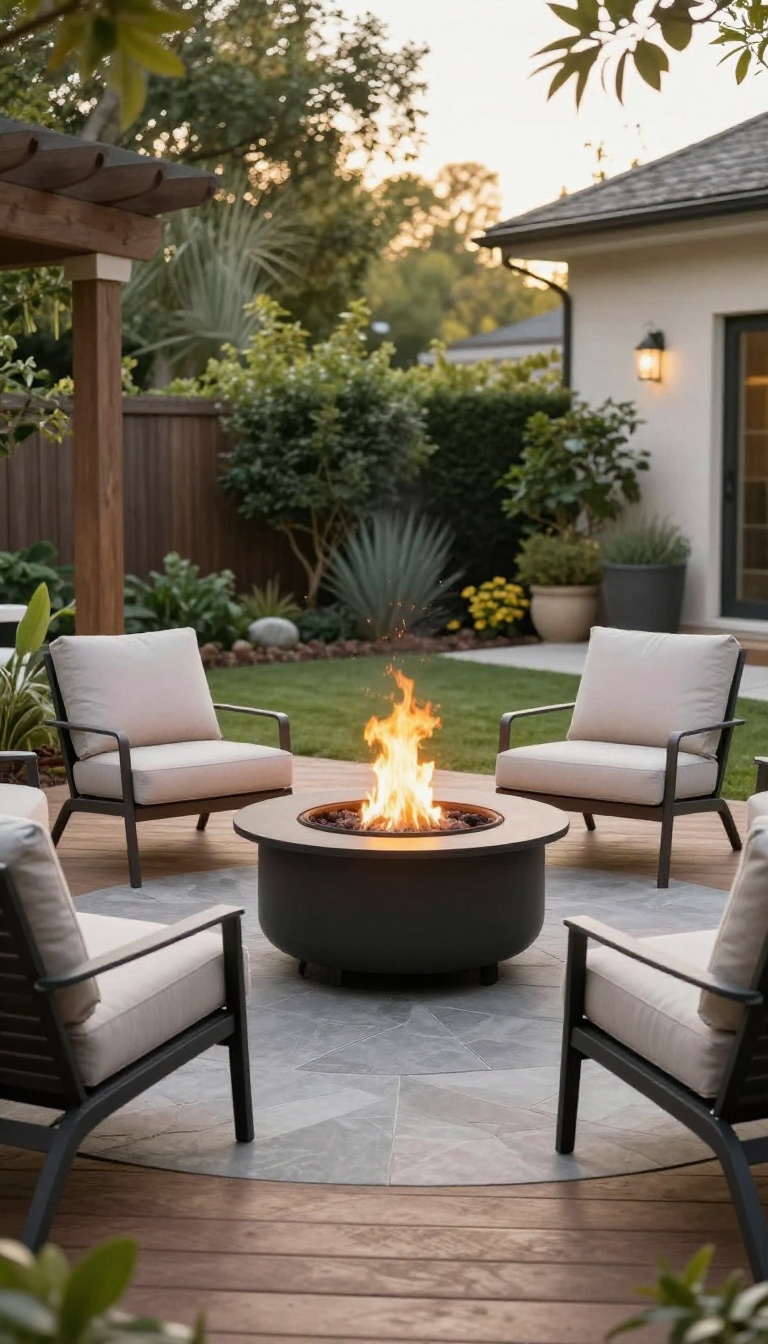
Every outdoor room needs a center of gravity, and fire does that job better than anything else you can put on a patio. It pulls chairs into a circle, gives people a reason to stay past sunset, and turns a flat slab into a destination. It also stretches your season.
A fire pit can buy you an extra month or two of comfortable evenings in spring and fall, which is a lot of return for one feature. The catch is that fire comes with rules. Clearances, fuel type, and budget all shape what you can actually build, so it pays to sort those out before you start digging.
Start by picking the spot before you pick the product. A fire feature works best when it sits slightly off-center, so people can walk past it without squeezing between chairs and the edge of the patio. Leave at least three feet of open floor around it for traffic, and more if you plan to seat a full crowd.
Clearances You Can't Skip
Manufacturers publish clearance distances for a reason, and they vary a lot by fuel type. Wood-burning pits usually want ten feet of overhead clearance and several feet of non-combustible surface around the rim. Gas units run cooler and tighter, often two to three feet from walls and furniture, but check the manual for your specific model.
Keep low branches, pergola beams, and fabric umbrellas well clear of the flame. If you're on a wood deck, set the fire feature on a non-combustible pad or keep it on the patio instead. That single decision prevents a lot of bad outcomes.
Wood, Gas, Or Propane
Wood gives you crackle, smoke, and the real thing, but it demands ash cleanup and a steady supply of dry fuel. Some neighborhoods restrict it during burn bans, so check local rules first. Natural gas is the easiest to live with.
No tanks, no refills, instant on and off, though running a line adds cost and usually needs a plumber or gas fitter. Propane sits in the middle. It's portable and hot, but you'll swap tanks or schedule deliveries, and hidden tank storage takes planning.
Pick based on how often you'll actually use it, not how it looks in photos.
What Each Tier Costs
A basic portable fire pit runs a couple hundred dollars and needs nothing but a flat spot. It's the low-commitment way to test whether you'll use the space. A built-in gas pit with a stone surround typically lands in the low thousands once you add the line, the burner, and the masonry.
That's the sweet spot for most patios. A full outdoor fireplace with a chimney pushes higher, often five figures installed. It's a statement piece, and it doubles as a windbreak and a privacy screen, so the cost can be worth it on an exposed site.
13. Plan Storage and Utilities Before You Finish the Surface
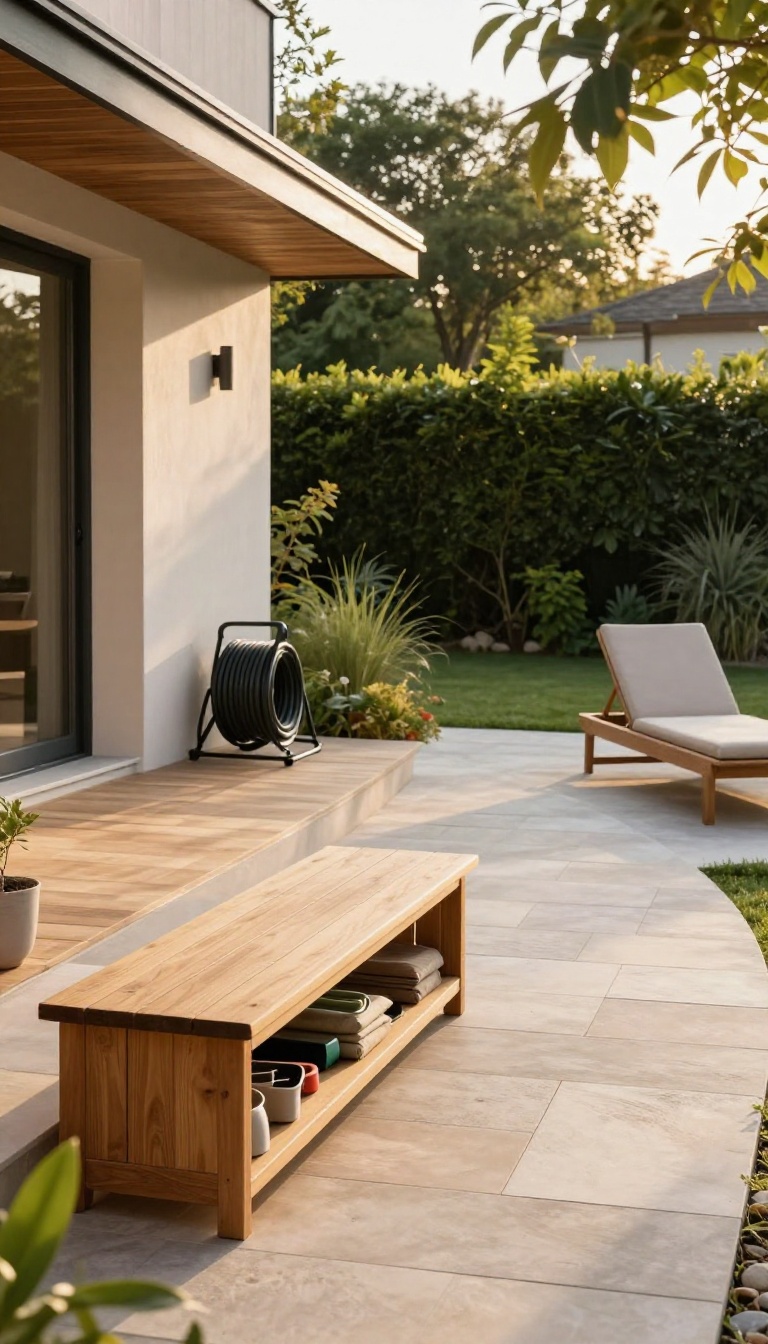
The last thing you want is a beautiful patio with a garden hose coiled like a snake next to the grill. Or a trash bin parked where you planned to put a lounge chair. Storage and utilities are the unglamorous part of outdoor flow, but they decide whether the space actually works day to day.
If you wait until the surface is finished, you're stuck bolting a plastic shed onto a perfect patio or tripping over tools every time you walk out the door. Plan these now, while you can still hide them in plain sight.
The goal is simple: give every hose, tool, and bin a home that doesn't interrupt the view or the path. That means thinking about where things come from, where they go, and how you access them without dragging a mess across the patio. You don't need a giant budget.
You need a few smart spots built into the design before the last paver goes down.
Build Storage Into Benches And Steps
A built-in bench is already a natural spot to sit, so make it earn its keep. Lift the seat and you've got a dry box for cushions, kids' toys, or grill tools. Steps can hide drawers too.
A wide bottom step with a pull-out tray keeps small stuff off the ground and out of sight. Just make sure the lid or drawer opens away from the main walking path so you're not stepping around it every time.
Give Hoses And Cords A Dedicated Spot
A hose reel mounted inside a low cabinet or behind a removable panel keeps the coil out of view. Same goes for extension cords and speaker wire. If you're pouring concrete, run a conduit or sleeve under the patio to the far side.
That way you can pull power or water to a planter or water feature without snaking a cord across the surface later.
Tuck Bins And Tools Out Of The Flow
Trash and recycling bins are the biggest flow killers. A small lean-to shed or a screened enclosure at the edge of the patio keeps them accessible but invisible from the seating area. If you don't want a full shed, use a section of fence with a gate that opens to a gravel pad.
The bins stay put, the patio stays clean, and you're not looking at them while you eat.
FAQ
How much does it cost to add a small deck or patio?
A basic ground-level paver patio often runs a few thousand dollars in materials if you do the work yourself. A small raised deck with railings usually costs more because of framing, footings, and permits. Get local quotes before you commit.
Do I need a permit to build a deck?
Most areas require a permit for decks above a certain height, usually around 30 inches, and for anything attached to the house. Rules vary by city and county, so check with your local building department before you dig.
What's the best material for a low-maintenance patio?
Concrete pavers and porcelain tile hold up well with minimal care. Composite decking needs less upkeep than wood but costs more upfront. Gravel is cheap but needs occasional raking and topping off.
How do I stop water from pooling near the house?
Slope every hard surface away from the foundation at roughly a quarter inch per foot. Add a French drain or channel drain where the patio meets the lawn if runoff has nowhere to go.
Can I connect a deck and patio in the same yard?
Yes, and it often works well. Use steps or a short path to link them, and repeat one material or color in both areas so the yard feels connected instead of chopped up.
Conclusion
You do not have to tackle all thirteen ideas to get a yard that flows. Pick the one or two that solve your biggest daily friction, whether that is a wobbly step, a dark corner, or a door that opens onto nothing. Start there this weekend and live with it for a bit.
The rest tends to reveal itself once you actually use the space. Add a path, soften an edge, or move a chair, and the next upgrade becomes obvious. Good outdoor flow comes from paying attention, not from finishing a checklist.