11 Backyard Hardscape Ideas for Structure and Easy Upkeep
A bare yard turns into a real outdoor room the moment hardscape gives it shape. Paths tell you where to walk, walls hold back a slope, and a proper patio means no more muddy shoes by the door. The right materials also cut down on upkeep, so you spend weekends relaxing instead of weeding and re-leveling gravel.
These eleven ideas focus on structure that earns its keep. Each one solves a specific problem, from grade changes to drainage to parking, without turning your yard into a construction site. Some are weekend projects.
Others are worth planning before you dig. Pick the ones that match your space and budget, then build in phases if you need to.
1. Paver Patio with Tight Joints
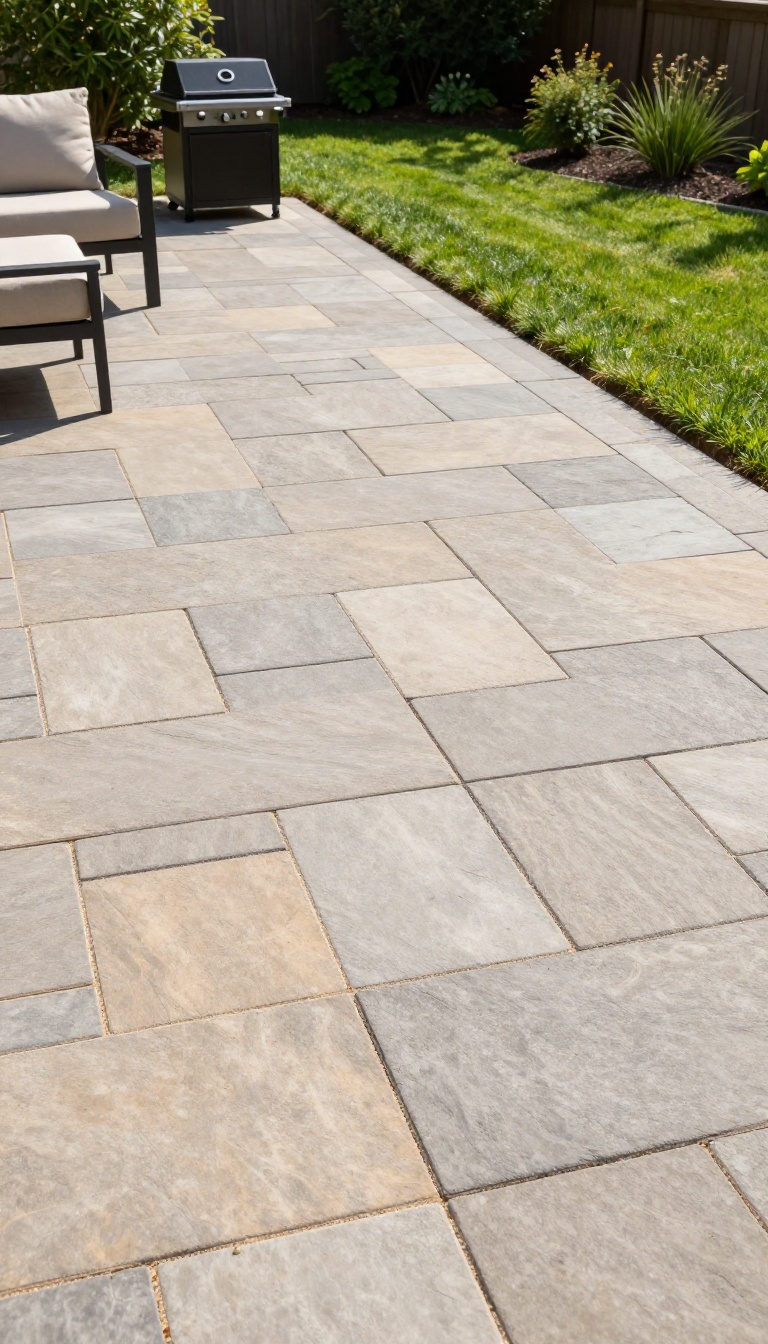
A paver patio with tight joints is the quiet workhorse of a low-maintenance backyard. When pavers sit close together and the base is done right, weeds have nowhere to take hold, and the surface stays flat through freeze-thaw cycles. You get a clean, stable floor for furniture, grills, and bare feet without a weekly battle against shifting stones.
The secret isn't the pavers themselves. It's what happens underneath and between them. A properly compacted base, a thin layer of bedding sand, and joints filled with fine polymeric sand create a surface that locks together like a puzzle.
That interlock spreads weight across the whole patio, so individual pavers don't sink or rock. It also blocks sunlight from reaching weed seeds, which means you sweep instead of pull. Tight joints don't mean zero gaps.
You still want about an eighth of an inch between pavers for sand to settle in. The difference is consistency. Wide, uneven gaps let water pool and weeds sneak through.
Uniform, narrow joints keep the patio looking crisp and make it easy to top off the sand every few years. If you're hiring a installer, ask how they handle edge restraint and joint sand. Those two details separate a patio that lasts from one that turns into a bumpy mess.
Why Tight Joints Matter
Weeds need light and loose soil to grow. Tight joints with polymeric sand cut off both. The sand hardens slightly when wet, forming a flexible barrier that stays put.
It also keeps ants and other insects from tunneling between pavers. Over time, this means less sweeping, less spraying, and fewer repairs. A patio with wide joints is basically a raised bed for weeds.
A tight one stays clean with a leaf blower.
Base Prep Makes Or Breaks It
You can't cheat the base. Dig down about six to eight inches, then layer crushed stone and compact it in lifts. A plate compactor is non-negotiable here.
Once the base is flat and solid, screed a one-inch layer of bedding sand and set your pavers. If the base flexes, the joints will open up within a season. Do this part right and the tight joints will hold for decades.
Keeping It Clean Without Fuss
Once the patio is in, maintenance is mostly sweeping. Rinse it with a hose when pollen or dust builds up. Every two or three years, check the joints and add more polymeric sand if you see low spots.
Pull the rare weed that sprouts from a crack before it seeds. That's it. No sealing required unless you want a wet look, and no re-leveling unless something heavy gouges the surface.
2. Gravel Seating Area with Steel Edging
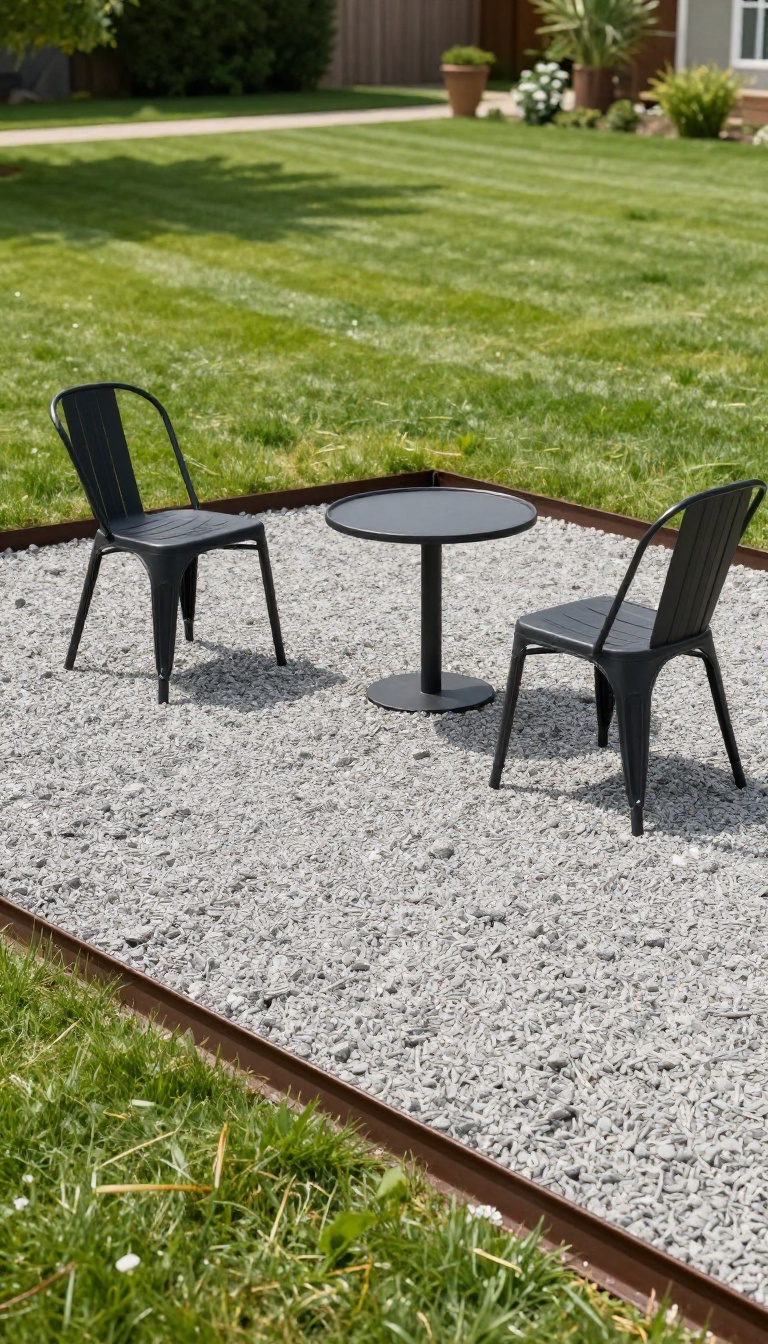
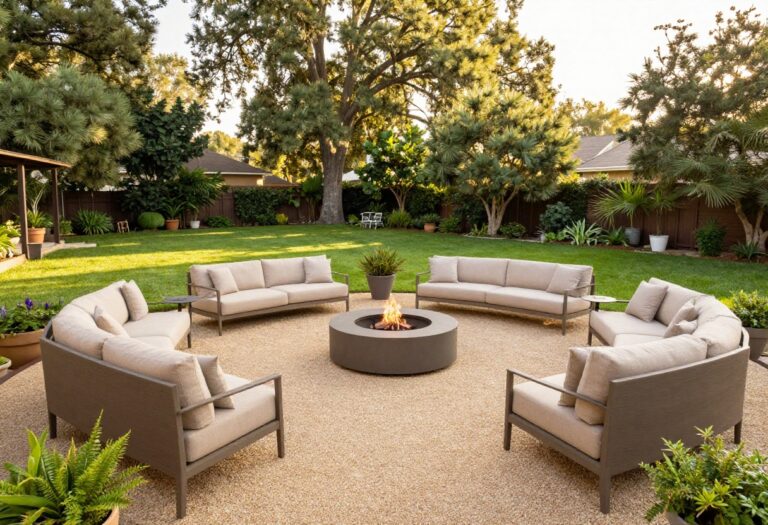
Gravel gets a bad rap as a cheap fix, but a well-edged gravel seating area can look sharp and cost a fraction of a paver patio. The trick is keeping it contained. Steel edging holds the gravel in place so it doesn’t wander into your lawn or turn into a weedy mess.
It’s a simple project with a big payoff: a defined spot for chairs and a fire pit that drains fast after rain.
A gravel seating area works best when you treat it like a room. Start by marking the shape with landscape paint or a garden hose. Curves feel organic; straight lines look modern.
Excavate about three inches deep, then set steel edging along the perimeter. The edging should sit flush with the ground or slightly above, and you’ll want to stake it every couple of feet. Once the edging is secure, lay down a weed barrier fabric.
Not plastic—fabric lets water through. Then dump your gravel. Three inches of 3/4-inch crushed stone or pea gravel is plenty.
Compact it lightly with a plate compactor, and you’re done.
Why Steel Edging Beats Plastic
Plastic edging warps, cracks, and pops out of the ground after a few freeze-thaw cycles. Steel edging is rigid, so it stays put. It also creates a crisp line that makes gravel look deliberate instead of spilled.
Powder-coated steel resists rust, and the top edge sits just above the gravel, which keeps stones from spilling onto the grass. You can mow right up to it without nicking the blade.
Choosing The Right Gravel
Not all gravel is comfortable underfoot. Pea gravel is smooth but tends to shift and migrate. Crushed stone locks together better and stays put, but it’s rougher on bare feet.
A good compromise is 3/8-inch crushed rock with fines—it compacts into a firm surface that’s still easy to walk on. Avoid river rock; it’s too round and rolls around. For a seating area, a light gray or warm tan color hides dust and stays cooler in the sun.
Drainage And Maintenance
Gravel drains fast, which is why it works well in low spots or areas that stay soggy. But it can also collect leaves and debris. A quick pass with a leaf blower keeps it tidy.
If weeds pop up, pull them by hand or spot-treat with vinegar. Every few years, top off with a fresh layer of gravel to keep it looking full. Steel edging means you won’t have to re-edge every season, which is the whole point.
3. Low Retaining Wall for Grade Changes
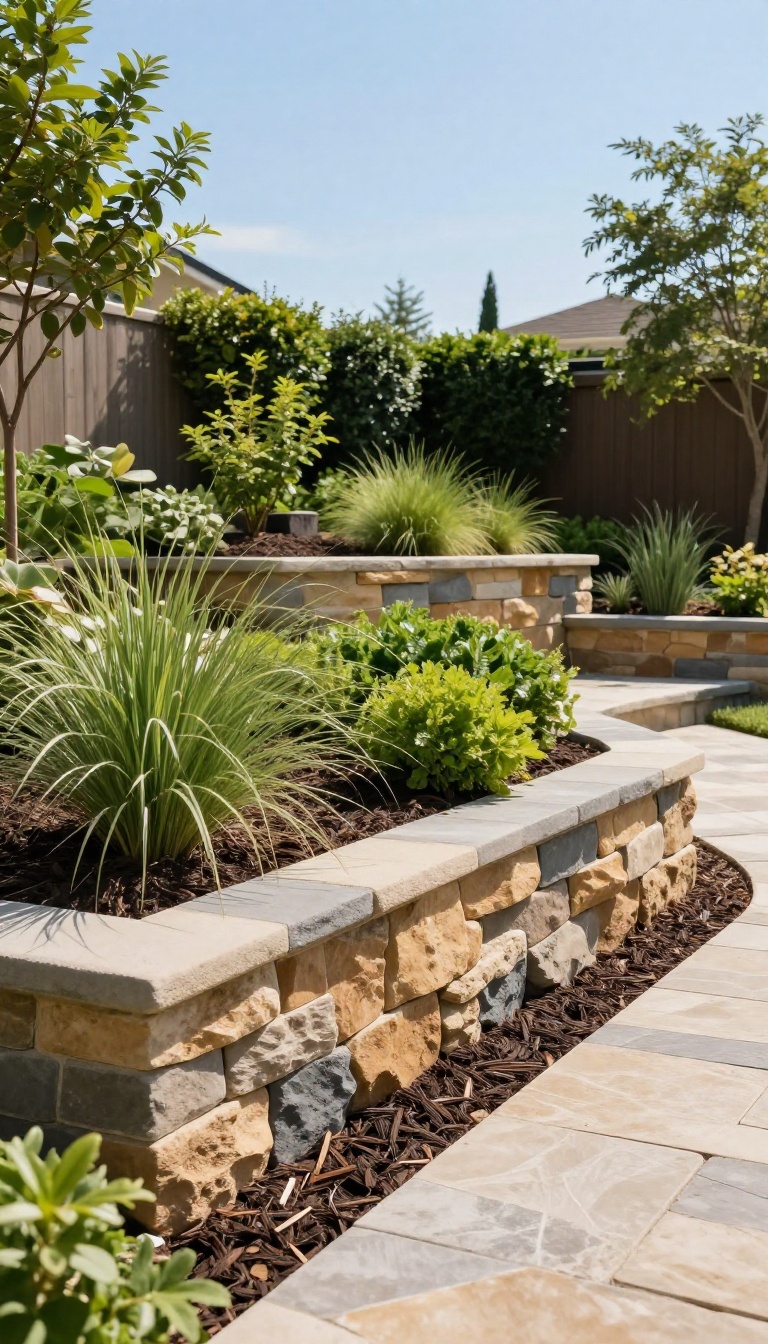
A sloped yard looks fine until you try to use it. Then you're mowing sideways, chasing mulch downhill, and watching soil wash into the street after every storm. A low retaining wall fixes all of that by cutting the slope into flat, usable tiers.
It's one of those hardscape moves that quietly changes how the whole yard functions.
Low is the key word here. Walls under three feet tall usually don't need an engineer's stamp, and they're far easier to build, plant around, and maintain. They also look intentional without dominating the view.
You're not building a fortress; you're just giving the ground a place to pause.
Why Tiers Beat One Big Slope
A single steep slope forces water to run fast, which means erosion and dead spots where soil collects. Tiered beds slow that water down and spread it out. Each flat shelf holds moisture better, so plants establish faster and need less babysitting.
You also get more square footage you can actually sit on, garden in, or walk across without slipping.
Picking Materials That Fit The Job
Segmental block is the easiest DIY option because it stacks and locks without mortar. Natural stone looks more organic and ages well, but it's heavier and less forgiving if your base isn't perfect. Pressure-treated timber is the budget pick, though it won't last as long in wet ground.
Whatever you choose, match the wall to your house and the rest of your hardscape so it doesn't look bolted on.
Drainage And Base Prep You Can't Skip
Most failed retaining walls fail because of water, not weight. Pack a gravel base, compact it in lifts, and add a perforated drain pipe behind the wall wrapped in filter fabric. Backfill with clean gravel, not the clay you dug out.
Leave a little gap or weep holes so water has somewhere to go. Do this part right and the wall will outlast your fence.
Planting The Tiers Without Regret
Keep thirsty, aggressive plants away from the wall face. Their roots can pry joints apart and their foliage hides cracks you need to see. Go with low growers, grasses, and shallow-rooted perennials that won't push.
Leave a foot of clear space behind the top of the wall for maintenance access. A little breathing room now saves a lot of swearing later.
4. Flagstone Walkway with Ground Cover
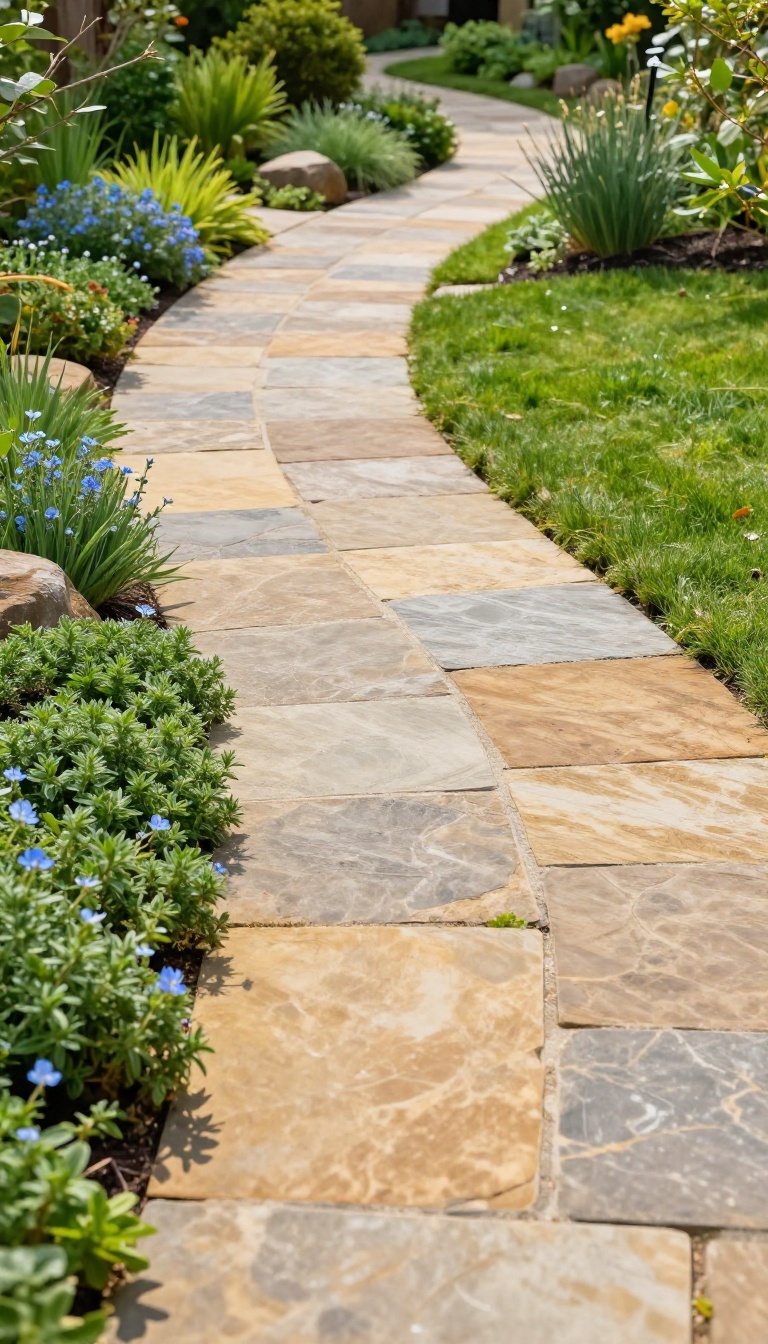
A flagstone path looks like it grew out of the landscape rather than being dropped on top of it. The irregular shapes and natural colors blend with plants and lawn, and the wide joints give you room to tuck in low growers that fill the gaps. It is one of the few hardscape features that actually gets softer and better looking as it ages.
The upkeep story is simple: ground cover shades the soil between stones, so weeds have a much harder time getting a foothold. You still get a solid, mud-free surface to walk on, but the path reads as part garden instead of pure concrete. It works on flat ground or a gentle slope, and you can build it in a weekend with basic tools.
The trick is choosing the right base and the right plants. Flagstone set in sand is forgiving and easy to adjust, while mortar gives you a permanent, sweep-clean surface. Either way, the gaps are where the magic happens.
Pick ground covers that stay low, spread steadily, and tolerate foot traffic. They should knit together without swallowing the stones or turning into a tangled mess you have to trim every other week.
Sand-set Vs. Mortar-set
Sand-set flagstone sits on a compacted gravel base with a layer of coarse sand, and the joints stay open for planting. It drains well, handles freeze-thaw movement, and you can lift a stone later if you need to. The trade-off is that edges can shift over time, so a good border matters.
Mortar-set flagstone uses a concrete base and mortar joints, giving you a rigid, smooth surface that resists weeds on its own. It costs more and takes more skill, but it holds up on heavy-traffic paths and slopes. If you want plants between the stones, leave wider gaps and fill them with mortar-free soil pockets.
Ground Covers That Earn Their Keep
Creeping thyme is the classic choice: fragrant, tough, and happy in full sun. It spills over stone edges and takes light foot traffic, though it sulks in wet shade. Woolly thyme stays lower and softer, which suits a path you walk barefoot.
For shade, try sweet woodruff or creeping jenny. Both spread quickly and stay under a few inches tall. Irish moss works in damp, cool spots and gives you that storybook look, but it browns out in dry heat.
Mix two or three varieties so one can take over if another struggles.
Building The Path Without The Headache
Lay out the route with a garden hose before you dig. Aim for at least three feet wide so two people can pass, and wider at turns or landings. Excavate about four inches for sand-set, more if you are adding a concrete base.
Compact the base in two-inch lifts, then screed the sand smooth. Set each stone so it sits slightly above the sand and wobbles zero. Fill the joints with soil or a sand-compost mix, then water gently and let it settle before planting.
Keeping It Tidy Long-term
Once the ground cover fills in, maintenance drops to an occasional trim and a quick pull of anything unwanted. Avoid walking on new plantings for a few weeks so roots can grab. In spring, top-dress the joints with a little compost to feed the plants without smothering them.
If a stone rocks, lift it, add a bit of sand, and reset it. That is the beauty of a dry-laid path: repairs take minutes, not a crew. A light sweep now and then keeps the surface clean and the lines crisp.
5. Concrete Pad with Exposed Aggregate Finish
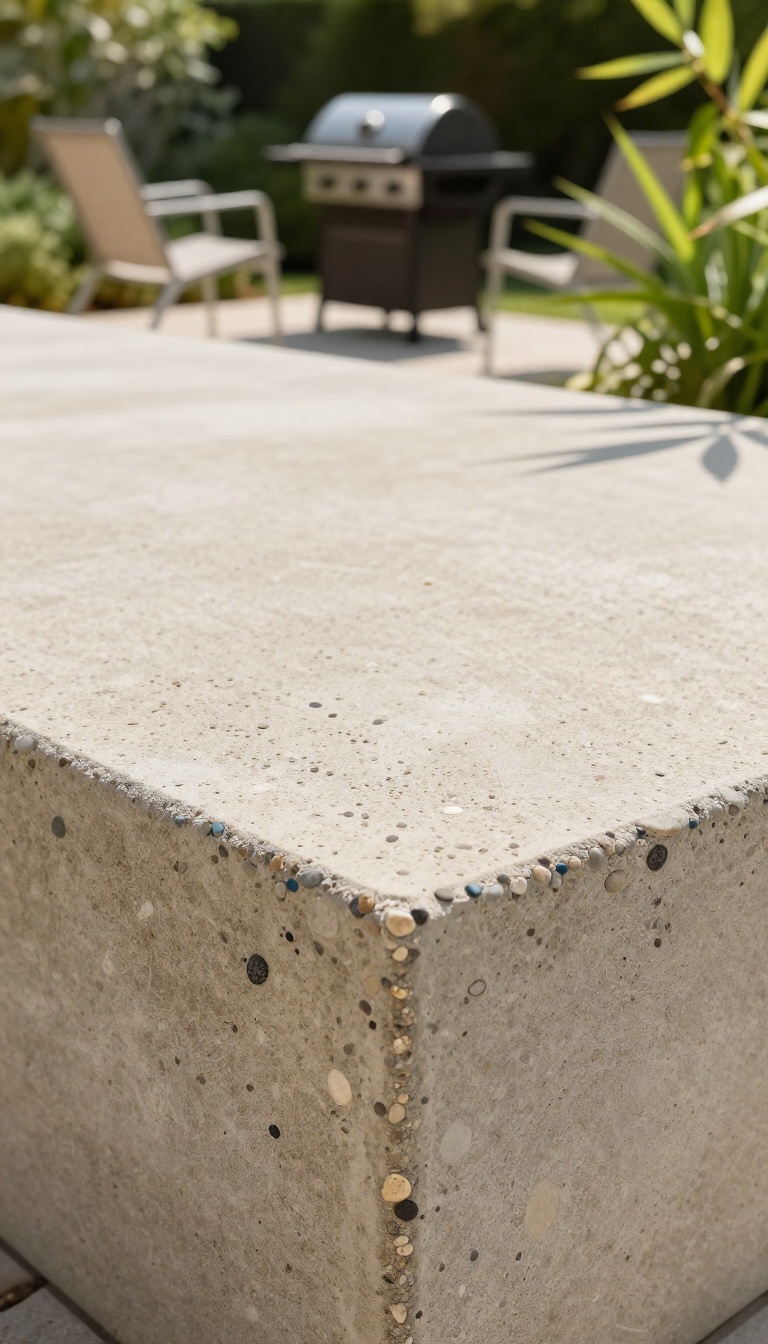
Concrete doesn't have to be boring. An exposed aggregate finish gives it texture and visual interest, turning a plain slab into a surface that looks intentional. The process involves washing away the top layer of cement to reveal the pebbles and stones underneath, creating a speckled, natural look.
It's tough, it's low-maintenance, and it handles everything from patio furniture to a grill without complaint.
A concrete pad with exposed aggregate is one of those hardscape moves that quietly does a lot of work. You get a solid, flat surface that won't shift or settle like pavers can, and the textured finish means you're not staring at a gray slab. It's a favorite for patios, walkways, and even driveway extensions because it stands up to heavy use and looks good doing it.
Why Exposed Aggregate Works
The finish is created by seeding the wet concrete with decorative stones, then washing the surface before it fully cures. That exposes the aggregate and leaves a pebbled texture that's naturally slip-resistant. Because the stones are embedded in the concrete, they won't come loose or require re-sanding like some pavers.
It's a one-and-done surface that keeps its looks with just a quick rinse now and then.
Where It Fits Best
This isn't the right choice for every spot, but it shines in high-traffic areas. Think patios, pool decks, and walkways where you want a seamless surface without joints. It's also great for a parking pad or a spot for your trash cans.
Just avoid using it on steep slopes, since the smooth finish can be slick when wet.
Cost And Upkeep
You'll pay a bit more than plain concrete, but less than many paver systems. The exact cost depends on the aggregate you choose and your local labor rates. Once it's in, upkeep is minimal.
Sweep it, hose it down, and occasionally reseal it if you want to keep the colors vibrant. That's about it.
6. Built-In Bench on a Masonry Base
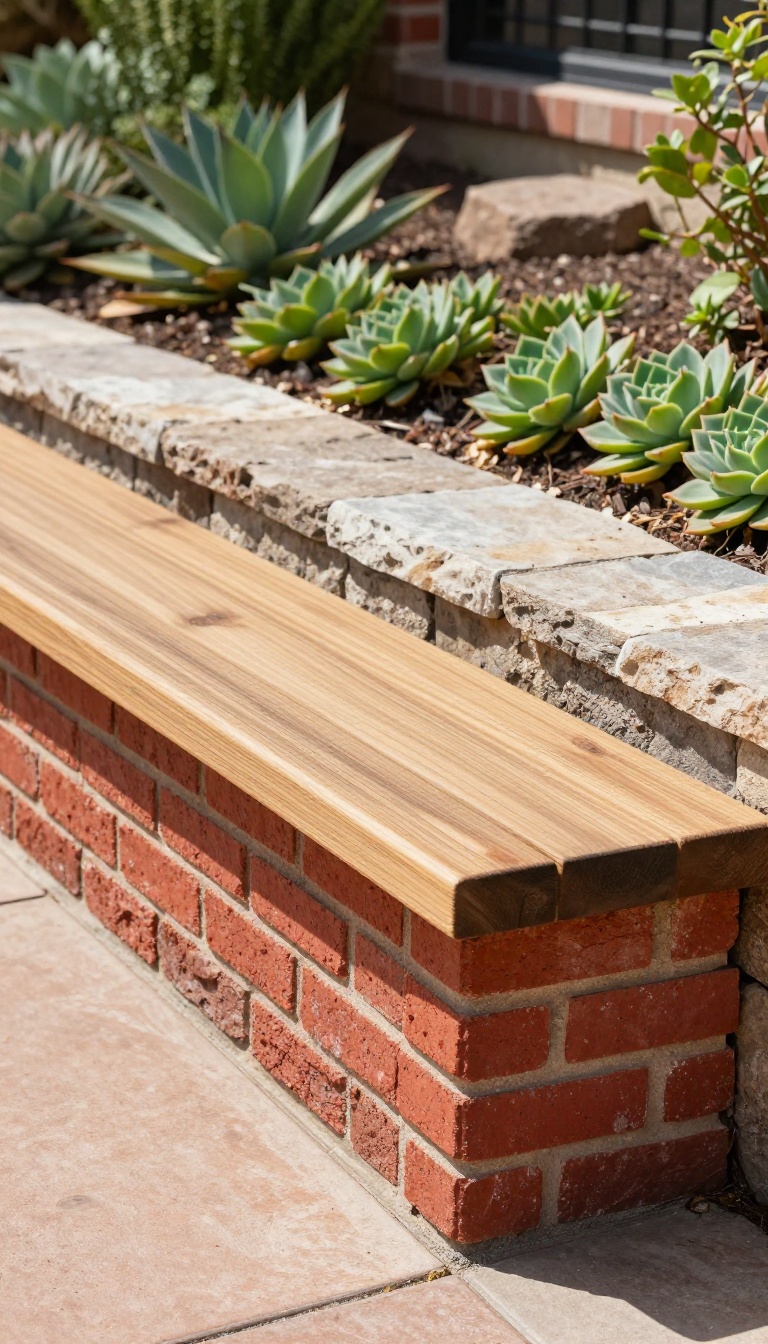
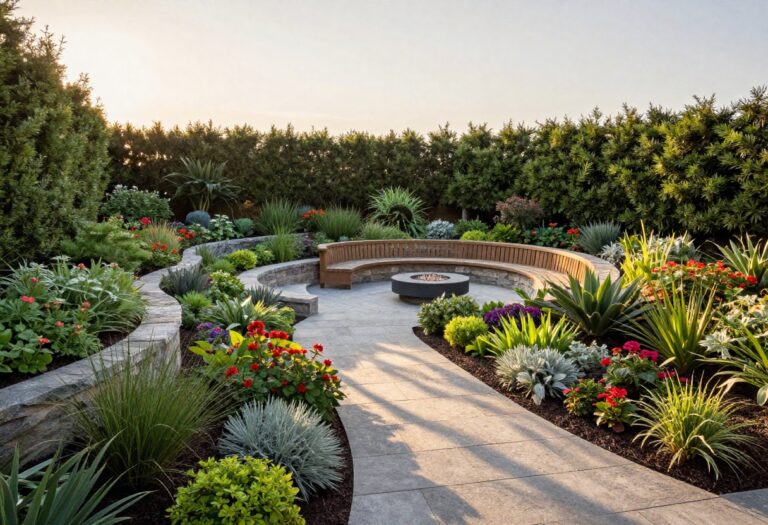
Movable furniture has a way of wandering off, tipping over in the wind, or slowly rotting in the sun. A built-in bench on a masonry base stays exactly where you put it, season after season. It also gives a patio or garden wall a clear focal point.
Instead of a blank stretch of block or stone, you get a spot that invites people to sit, set down a drink, or tie a shoe. The bench becomes part of the hardscape, not an afterthought.
The concept is simple: you build a low, sturdy base from concrete block, brick, or stone, then top it with a seat. The base does the heavy lifting, so the seat material can be almost anything—wood, stone, or even a thick cushion. Because the base is masonry, it won't shift or wobble like a freestanding bench.
This is a good project if you already have a retaining wall or plan to build one. You can extend the wall a few feet and turn that section into seating. Or you can build a standalone bench as a small island of structure in a gravel or planted area.
Either way, it reads as intentional design, not a random piece of furniture.
Choosing The Base Material
Concrete block is the budget-friendly option. It's heavy, stable, and easy to cover with a veneer if you want a nicer look. Brick gives you a classic, warm feel and works well with traditional homes.
Natural stone—like limestone or bluestone—costs more but looks incredible and lasts forever. Whatever you pick, make sure the base is at least 12 to 16 inches deep and wide enough to sit on comfortably. A depth of 18 inches is even better for lounging.
Build it on a compacted gravel base so it doesn't settle unevenly.
Seat Options That Hold Up
Wood is the most common choice because it's warm to the touch and easy to replace. Use rot-resistant species like cedar, teak, or ipe, and seal it every couple of years. Composite decking is another low-maintenance option that won't splinter or fade.
Stone slabs make a dramatic, permanent seat. They stay cool in summer and don't need any finish. Just round the edges so they're comfortable.
For a softer look, you can add custom cushions, but plan to store them when not in use.
Placement And Integration
The best spot is usually along a patio edge, a retaining wall, or a fire pit circle. That way it defines the space without blocking traffic. If you put it against a wall, leave a small gap for drainage and airflow.
Think about sun exposure. A bench that faces west will bake in the afternoon. One under a tree might collect debris.
And if you're building near a slope, tie the base into the retaining wall for extra stability.
7. Fire Pit Surrounded by Heat-Resistant Stone
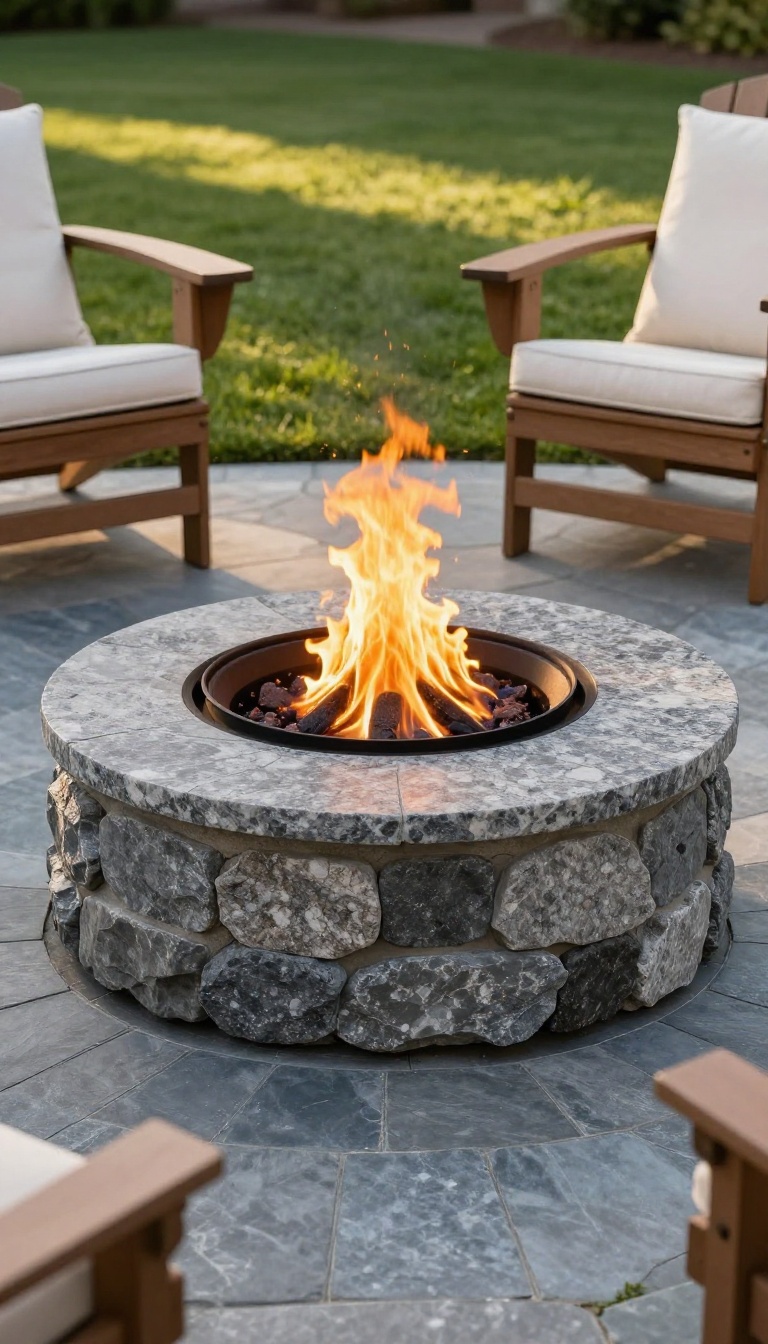
A fire pit pulls people in. Something about a flame makes everyone drag a chair over and stay a while longer. The problem is what sits under and around it.
Bare grass turns to mud, mulch can smolder, and a plain dirt ring looks rough after one season. A hardscape surround fixes all three at once. Heat-resistant stone handles the sparks and radiant heat, keeps the seating zone tidy, and gives the pit a finished look that holds up year after year.
The stone you choose matters more here than almost anywhere else in the yard. Standard pavers can crack or discolor when they sit close to an open flame. You want materials rated for thermal cycling, meaning they expand and contract without spalling or flaking apart.
Think of the surround as two zones: the inner ring that takes the direct heat, and the outer apron where feet, chairs, and dropped marshmallows land. Treat them differently and the whole setup lasts longer.
Best Stone For The Inner Ring
Firebrick, granite, basalt, and certain limestone varieties hold up well against repeated heat. Concrete pavers made specifically for fire features work too, as long as the manufacturer rates them for it. Avoid anything porous or layered.
Flagstone and sandstone can pop and shed flakes after a few hot burns. River rock is a bad call inside the ring, since trapped moisture turns to steam and can send pieces flying. A simple steel or masonry fire ring set inside the stone gives you a clean edge and keeps embers contained.
Building The Outer Apron
The apron is where you have more freedom. Pavers, bluestone, or even stamped concrete all work because they never touch the flame directly. Leave a gap of an inch or two between the fire ring and the apron material.
That expansion joint stops heat from cracking the outer surface and gives you a spot to sweep ash. Set the apron on a compacted base of crushed stone, same as any patio. Skipping that step is why so many DIY fire pits sink and shift after the first winter.
Safety And Clearance
Keep at least ten feet of clear space around the pit, measured from the outer edge. That covers seating, foot traffic, and the occasional gust of wind. Don't park it under a tree canopy or against a fence or wall.
Overhangs and nearby wood can catch sparks you never see coming. Check local rules before you build. Some areas require a certain distance from structures or a specific pit height, and it's easier to plan for that now than to move stone later.
Keeping It Clean
A hardscape surround makes cleanup fast. Ash sweeps off pavers and stone with a stiff brush, and you don't have to reseed a scorched patch of lawn every spring. A thin layer of sand between pavers keeps weeds down and lets water drain.
Skip the polymeric sand right next to the fire ring, since heat can break it down. Cover the pit when it's not in use. A simple lid keeps rain out, which means less soggy ash and a fire that lights easier next time.
8. Decomposed Granite Utility Zone
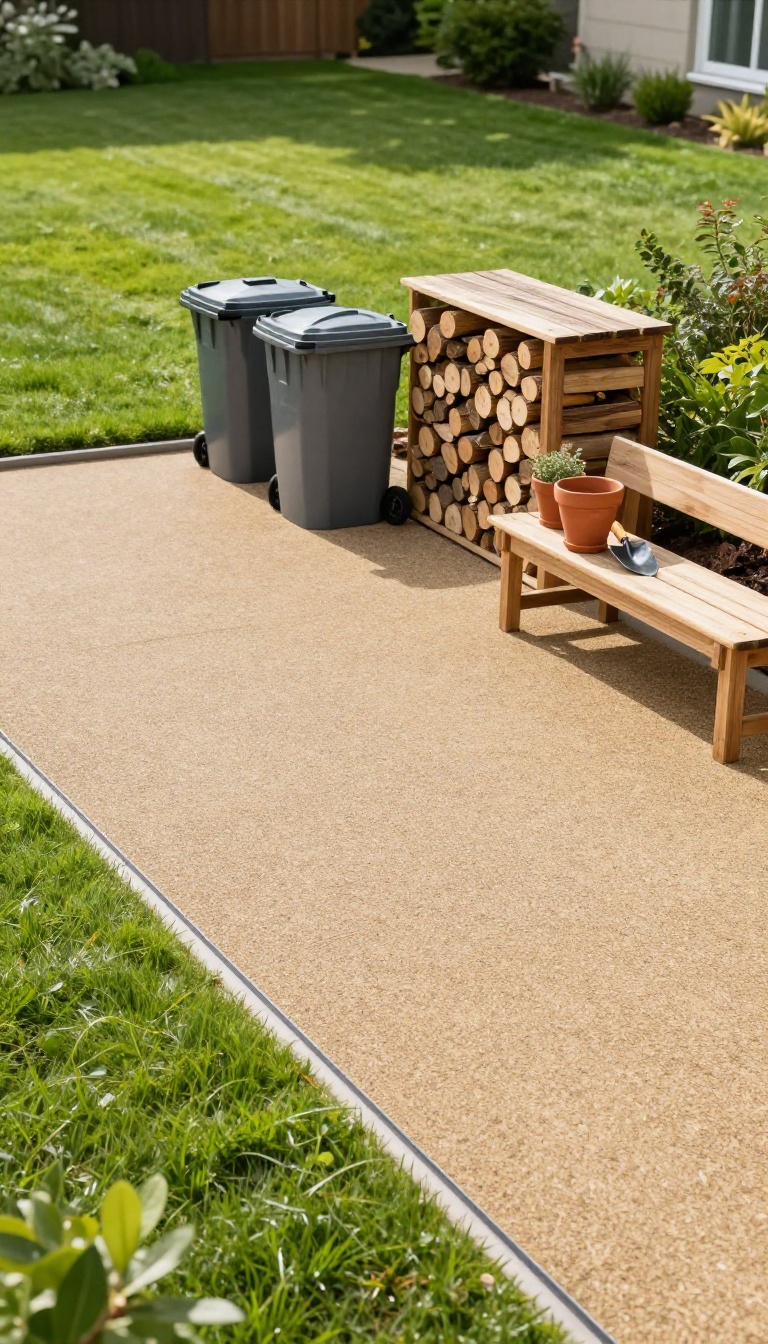
Decomposed granite is the quiet workhorse of hardscaping. It's crushed rock that compacts into a firm, stable surface and lets water drain right through. That makes it perfect for the spots that don't need to be pretty—just functional.
Think trash bins, firewood, or a potting bench. You get a clean, defined area without the cost of concrete or pavers.
A utility zone keeps the messy parts of yard life contained. Instead of bins sinking into mud or firewood rotting on bare dirt, you give them a proper base. Decomposed granite, often called DG, handles that job with almost no maintenance.
It's affordable, easy to install, and looks tidy enough to blend into the landscape.
Why Dg Works For Utility Spots
DG packs down hard when you water it and run a plate compactor over it. That means trash bins roll out smoothly and won't tip into soft ground. It also drains fast, so you won't get puddles or slime after a storm.
And unlike gravel, the finer particles lock together, so it stays put instead of scattering into your lawn.
How To Build The Zone
Start by marking the area—usually a rectangle about 4 by 8 feet works for bins and firewood. Dig down 3 to 4 inches and tamp the soil. Add a 2-inch base of crushed rock, then top with 2 inches of DG.
Wet it lightly and compact it in two passes. Edge it with steel or plastic edging to keep the material contained.
Keeping It Low-maintenance
Once compacted, DG needs almost nothing. Rake it occasionally to smooth tire tracks or footprints. If weeds pop up, pull them by hand or spot-treat with vinegar.
Every few years, top off with a fresh half-inch layer and re-compact. That's it—no sealing, no scrubbing, no fuss.
9. Raised Planter Beds with Stone Veneer
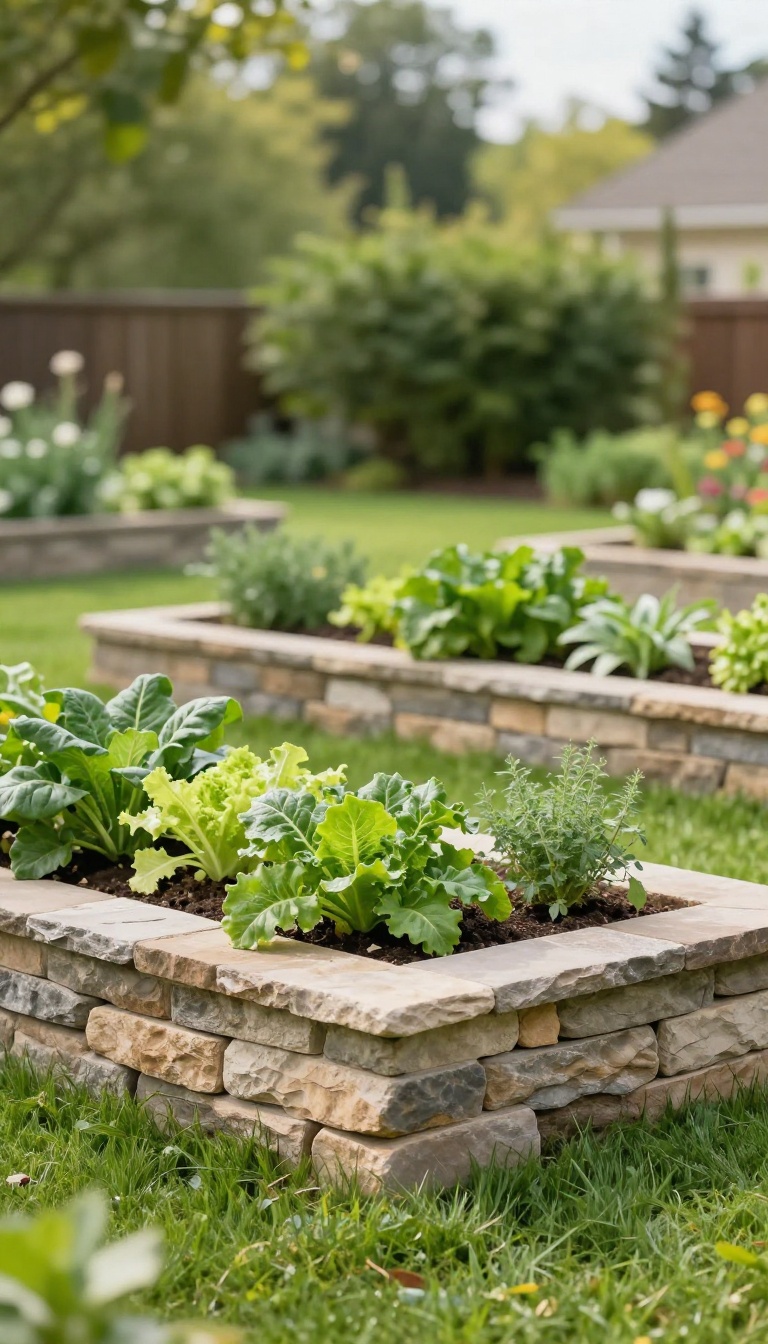
Raised planter beds solve a lot of problems at once. They lift the soil to a comfortable height, so you're not hunched over weeding or planting. And when you face them with stone veneer, they stop looking like utility boxes and start looking like part of the yard.
The stone facing isn't just for show. It protects the bed walls from moisture and UV damage, and it adds a solid, permanent feel that timber or plastic can't match. You get better drainage, fewer weeds, and a garden that's easier on your back.
This is one of those projects that pays you back every season. You build it once, and then you just plant, water, and harvest.
Stone-veneer raised beds work for vegetables, herbs, or ornamentals. The concept is simple: build a sturdy core, attach a stone veneer to the outside, and fill it with good soil. The result is a bed that holds its shape, drains well, and looks intentional.
You can build them as standalone boxes or run them along a fence or patio edge. They also work great on slopes, where you can terrace them to create level planting areas. The stone facing hides the structural core, so you can use pressure-treated lumber or concrete block underneath without it showing.
One thing to keep in mind: stone veneer adds weight. If you're building on a deck or near a foundation, check that the surface can handle it. On grade, it's usually fine.
Just make sure the base is compacted and level before you start stacking.
Building The Core
The core is what holds everything together. You can use 4×4 or 6×6 pressure-treated timbers, or go with concrete blocks for a more permanent structure. Line the inside with a waterproof membrane to keep soil moisture away from the stone adhesive.
If you're using lumber, leave small gaps between boards for drainage. For block, you'll want to cap the top with a solid piece so the veneer has a clean edge to die into. Make sure the core is square and level before you attach any stone.
Applying The Veneer
Stone veneer comes in panels or individual pieces. Panels are faster, but individual stones give you more control over the look. Use a construction adhesive rated for masonry, and start from the bottom up.
Work in small sections so the adhesive doesn't skin over before you set the stone. Stagger the joints like you would with brick. If you're using real stone, you'll also need mortar, but manufactured veneer often just needs adhesive and a little patience.
Soil And Drainage
Fill the bed with a mix of topsoil and compost. If drainage is a concern, add a layer of gravel at the bottom before you add soil. That gives excess water somewhere to go during heavy rains.
Don't fill the bed all the way to the top. Leave a couple of inches of freeboard so water doesn't run off when you water. And if you're planting edibles, avoid treated lumber in direct contact with the soil—use a liner or go with block.
Planting And Upkeep
Raised beds warm up faster in spring, so you can plant earlier. They also drain better, which means fewer root diseases. The height cuts down on weeds because you're not disturbing the soil as much.
For upkeep, top off the soil each year with compost. Check the veneer for loose stones after winter freezes. If you see any, re-adhere them before they fall off.
That's about it—no major maintenance.
10. Permeable Paver Driveway or Parking Pad
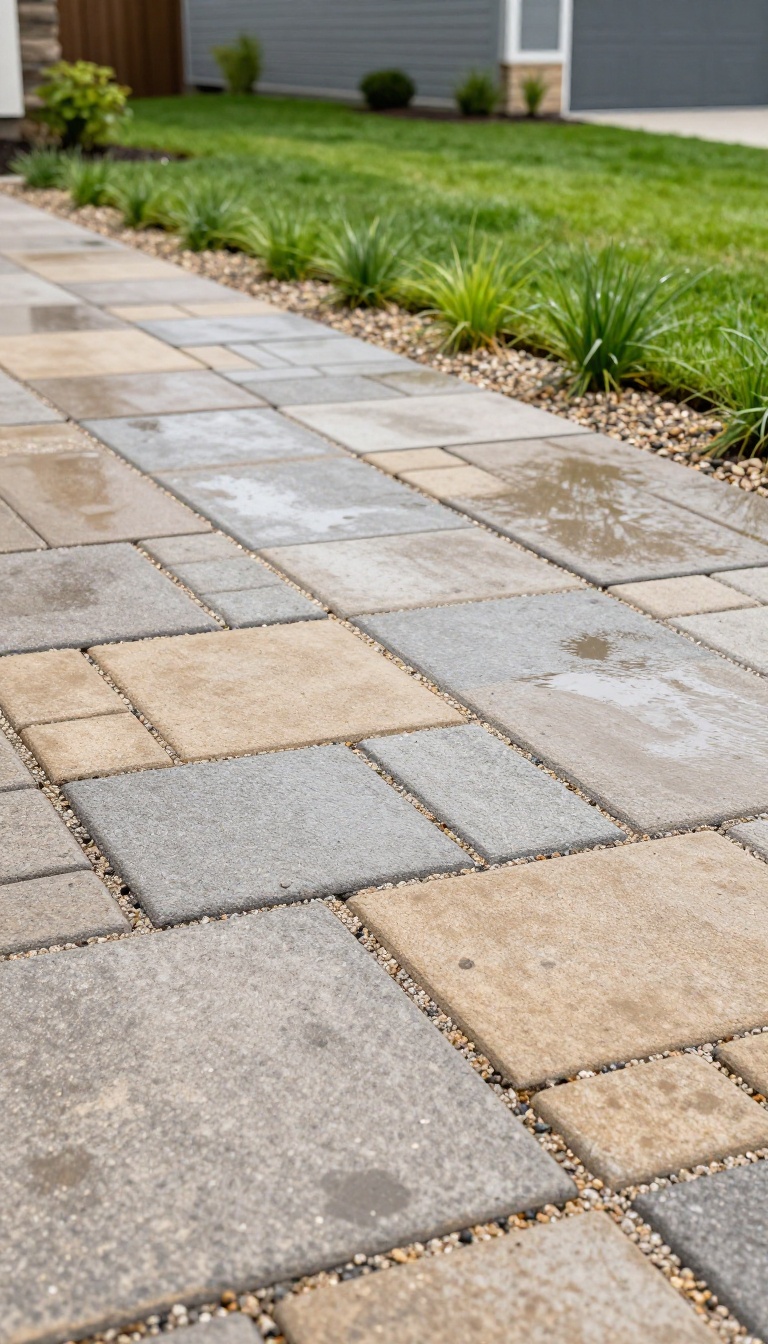
A standard concrete driveway does one thing: it sheds water onto your lawn, your neighbor's yard, or the street. Permeable pavers flip that script. They let rain soak through the gaps and into a gravel base underneath, so runoff stays on your property and puddles never get a chance to form.
That matters more than you might think. Many towns now limit how much impervious surface you can add, and a permeable system can keep you on the right side of those rules. It also gives you a firm, stable parking spot that won't turn into a mud pit after a storm.
The look is a bonus. With the right paver style and joint filler, you get a driveway that reads as intentional design rather than a slab of gray concrete.
How The System Actually Works
Permeable pavers sit on a layered base: a bedding course, a thicker layer of open-graded gravel, and sometimes a drainage fabric to keep soil from migrating up. Water passes through the joints, filters down, and either soaks into the subsoil or gets directed to a French drain or rain garden. You need the right soil and slope for this to work.
Sandy or gravelly ground drains fast. Heavy clay needs an underdrain or an engineered base to move water away. A quick perc test or a chat with a local installer will tell you which camp you're in.
Paver Styles And Joint Fillers
You'll find permeable pavers in the same shapes and colors as standard ones, so you're not stuck with an industrial look. Interlocking concrete blocks with wider joints are the most common. Clay brick, cut stone, and even recycled composite grids work too.
The joints get filled with small, clean gravel—not sand. That's what lets water through. Some systems use a polymer-enhanced filler that locks the stones in place while still draining.
Either way, you'll top off the joints every year or two as the fill settles.
Upkeep That Stays Manageable
A permeable driveway doesn't ask for much. Sweep or blow off leaves and debris so the joints don't clog. Once a year, run a shop vac or a stiff broom across the surface to pull out embedded dirt.
If you live near trees that drop a lot of seed pods or pine needles, stay on top of it. Clogged joints are the main reason these systems stop draining. A quick pass with a leaf blower every couple of weeks during heavy drop season keeps everything moving.
Weeds can pop up in the joints, but they pull out easily by hand. Avoid harsh chemical weed killers—they can break down the base over time. A little vinegar spray or a handheld torch works fine for spot treatment.
Cost And When It Makes Sense
Permeable pavers cost more upfront than asphalt or plain concrete—often 20 to 40 percent more. But you may save on drainage infrastructure, and some municipalities offer rebates for reducing runoff. This option shines on sloped lots, near downspouts, or anywhere you've had standing water.
It's also a smart pick if you want a parking pad that doesn't look like an afterthought. Pair it with a gravel border or a low wall, and it reads as a designed feature rather than a utility slab.
11. Stone Step Transitions Between Levels
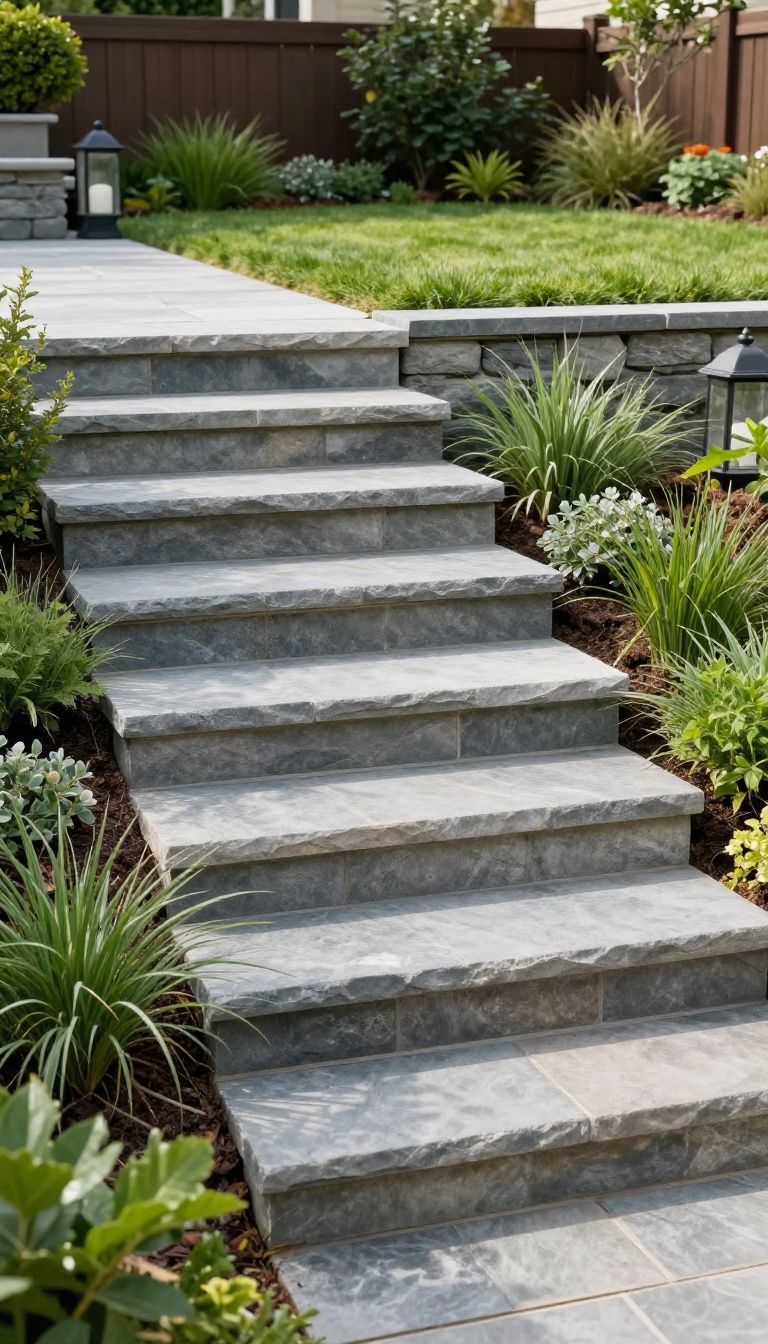
A sloped yard doesn't have to feel like an obstacle course. Wide stone steps turn awkward grade changes into a deliberate feature that connects your patio, lawn, and garden beds. They also make moving between zones safer and more comfortable for everyone, from kids to grandparents.
Done right, steps read as part of the design, not an afterthought.
The trick is to treat steps as a transition, not just a way to get from point A to point B. That means thinking about width, rise, run, and material. Get those right and the steps will feel natural underfoot and look like they belong.
Get them wrong and you'll be reminded every time you carry a tray of drinks across the yard.
Why Wide Steps Work Better
Narrow steps are a pain. They force you to slow down, watch your feet, and often feel like a ladder. Wide steps, on the other hand, let two people pass comfortably and give you room to place a planter or a lantern on the edge.
Aim for at least four feet wide, but if you have the space, go wider. The extra width also makes the steps look intentional rather than squeezed in. And when steps are wide, they double as informal seating during parties.
Getting The Rise And Run Right
Comfortable steps follow a simple rule: the rise plus the run should equal about 17 to 18 inches. A typical rise is 6 inches, so a run of 11 to 12 inches works well. But outdoor steps often feel better with a slightly lower rise, around 5 inches, especially if you're dealing with uneven terrain.
The run can be deeper, too, which makes the steps feel more like a gentle ramp. Just remember that deeper runs mean the steps take up more space, so plan accordingly.
Choosing Stone That Handles Weather
Not all stone is created equal when it comes to freeze-thaw cycles and rain. Bluestone, granite, and sandstone are all solid choices because they're dense and slip-resistant, even when wet. Avoid polished surfaces outdoors; they turn into ice rinks after a storm.
For a more rustic look, consider flagstone with a natural cleft finish. And don't forget the base: a compacted gravel or crushed stone base with a layer of sand will keep your steps from shifting over time.
Lighting And Safety Details
Steps are a common trip hazard, especially at dusk. Tuck low-voltage LED lights into the risers or along the sides to illuminate the treads without glare. You can also use step lights that cast a soft glow downward.
If your steps are more than three risers high, add a handrail on at least one side. It's not just for safety; it also signals that the steps are a real feature, not an afterthought. And keep the tread surface slightly textured to improve grip.
FAQ
What is the most low-maintenance hardscape material?
Concrete and tightly jointed pavers are among the easiest to care for. They resist weeds, handle weather well, and usually just need occasional sweeping or rinsing.
How much does a basic hardscape project cost?
Costs vary widely by region and scope. A small gravel seating area might run a few hundred dollars in materials, while a full paver patio can reach several thousand. Getting a few local quotes helps you plan.
Can I install hardscape myself?
Some projects, like gravel areas with edging or decomposed granite zones, are DIY-friendly. Others, like retaining walls or patios, often need professional help for proper base prep and long-term stability.
Do hardscapes need a lot of upkeep?
Not if they're installed right. Most need periodic sweeping, occasional rinsing, and a quick check for shifting or weeds. Permeable options may need cleaning to keep draining well.
What hardscape works best for small yards?
In small spaces, go vertical or multi-purpose. A built-in bench, a compact fire pit area, or a raised planter bed can add function without eating up square footage.
Conclusion
Structure and easy upkeep do not have to fight each other. A clean edge, a solid path, or a defined seating zone can cut your weekend chores while making the yard feel intentional. Pick one idea that fixes your worst daily annoyance and build from there.
Give it a season. You will quickly learn which surfaces you actually use and which corners need less fuss. The best hardscape is the one that quietly holds everything together, so your backyard works for you instead of the other way around.