13 Townhome Backyard Ideas for Smart Compact Outdoor Living
A townhome backyard often comes with a short list of problems: narrow footprint, shared walls, zero storage, and neighbors close enough to hear your dinner conversation. The good news is that tight spaces force better decisions. You stop buying oversized furniture and start choosing pieces that earn their place.
These 13 ideas focus on what actually works in a compact yard. Some solve privacy. Some add seating without eating the whole patio.
Others handle the stuff you need to stash but don't want to look at. You don't need a huge budget or a full redesign. Pick two or three that fit your space, and you'll notice the difference by the weekend.
1. Build a Vertical Garden Wall to Reclaim Floor Space
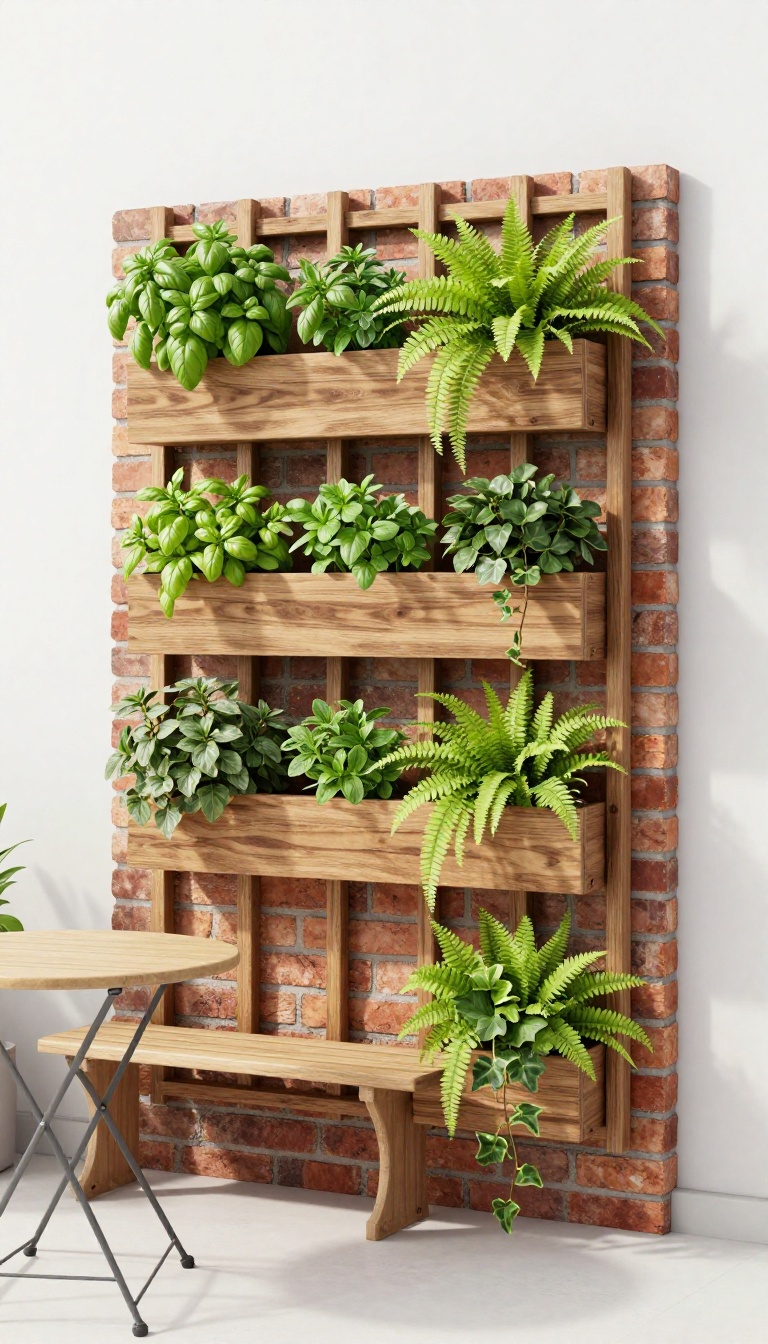
Floor space disappears fast in a townhome yard. A vertical garden flips that problem sideways by growing plants up a wall or fence instead of across your patio. You keep the ground open for a bistro table, a bench, or just room to move.
A vertical garden works because townhome yards usually have more wall than ground. That back fence, side brick, or blank exterior wall is free real estate. Mount a trellis, a grid of planters, or a simple leaning frame, and suddenly you're growing herbs, ferns, and trailing vines without sacrificing a single square foot of walking room.
The bonus is visual. A plain fence becomes a living backdrop. A boring brick wall gets texture, color, and movement.
Instead of staring at your neighbor's siding, you're looking at green.
Pick The Right System For Your Wall
Wall-mounted panels with pockets work great on brick or stucco because they hold soil and drain well. Leaning trellises suit fences you can't drill into, and they move if you rearrange later. If you rent, go with freestanding tiered planters that sit against the wall without hardware.
Match the system to your surface first, then choose plants.
Choose Plants That Climb, Trail, Or Tuck In
Herbs like basil, mint, and thyme stay compact and useful. Ferns and ivy handle shade and fill gaps fast. Trailing plants such as pothos or creeping jenny spill over the edges and soften hard lines.
Mix upright growers with trailers so the wall looks full instead of patchy.
Keep It Watered Without The Hassle
Vertical gardens dry out quicker than ground beds because air moves around every pocket. Drip lines on a timer solve most of that. If you'd rather not run irrigation, group thirsty plants together and water the top tier slowly so it trickles down.
A little mulch on top of each pocket also slows evaporation.
Mount It Safely And Check The Weight
Soil is heavy, especially when wet. Anchor panels into studs or masonry, not just siding. Keep the heaviest planters low and the lightest up high.
If you're unsure about your wall, use a freestanding frame. A five-minute check now saves you a cracked fence panel later.
2. Add a Fold-Down Bar Shelf for Entertaining
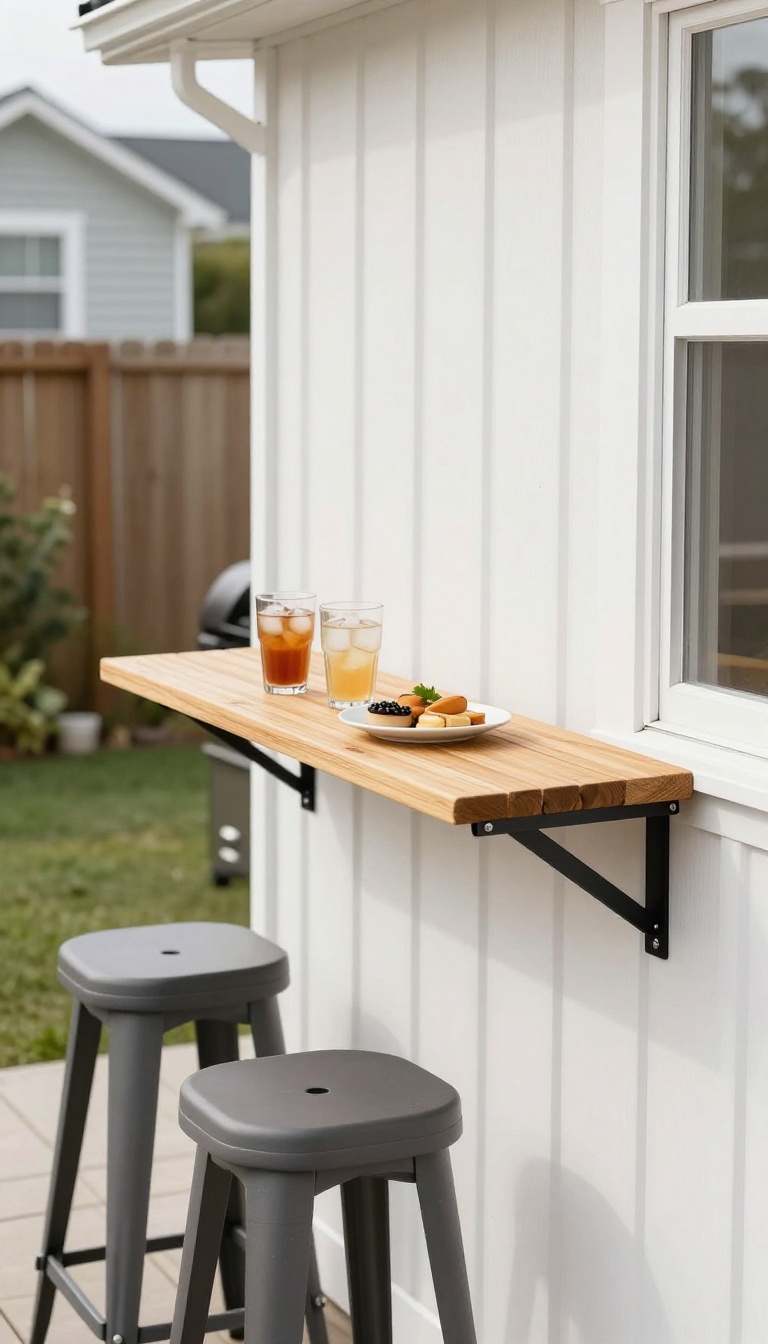
A fold-down bar shelf gives you a serving surface that disappears when the party's over. It hinges flat against the wall, so your narrow patio stays open for traffic. When guests arrive, flip it up and you've got a spot for drinks, plates, and a speaker.
The magic is in the hinge. A sturdy bracket locks the shelf level when it's up, then releases to drop flat against the wall. That means zero permanent footprint when you're not using it.
Most townhome patios have at least one blank wall—usually the side of the house or a privacy fence. That's your mounting spot. You don't need a big span; 36 to 48 inches wide is plenty for two people to set down drinks and a snack plate.
Choose a depth that leaves room to walk past. Twelve inches is the sweet spot for a bar shelf. Sixteen inches starts to feel like a table and can block the path if your patio is really tight.
Pick The Right Spot
Mount it near your grill or outdoor seating, but not where it blocks a door or gate. The shelf should be at bar height—around 40 to 42 inches from the ground—so people can stand and lean comfortably. If you mostly sit, lower it to table height, about 30 inches.
Choose Materials That Last
Teak, cedar, or powder-coated aluminum handle weather well. Avoid untreated pine unless you seal it yearly. For the bracket, look for heavy-duty steel with a locking mechanism.
Cheaper hinges sag over time, especially if you load the shelf with a full cooler.
Keep It Simple To Use
Add a small lip or a shallow groove along the front edge so glasses don't slide off. A few hooks underneath can hold a bottle opener or a towel. If you want extra function, mount a slim outdoor outlet nearby for a blender or string lights.
3. Use a Slim Storage Bench That Doubles as Seating
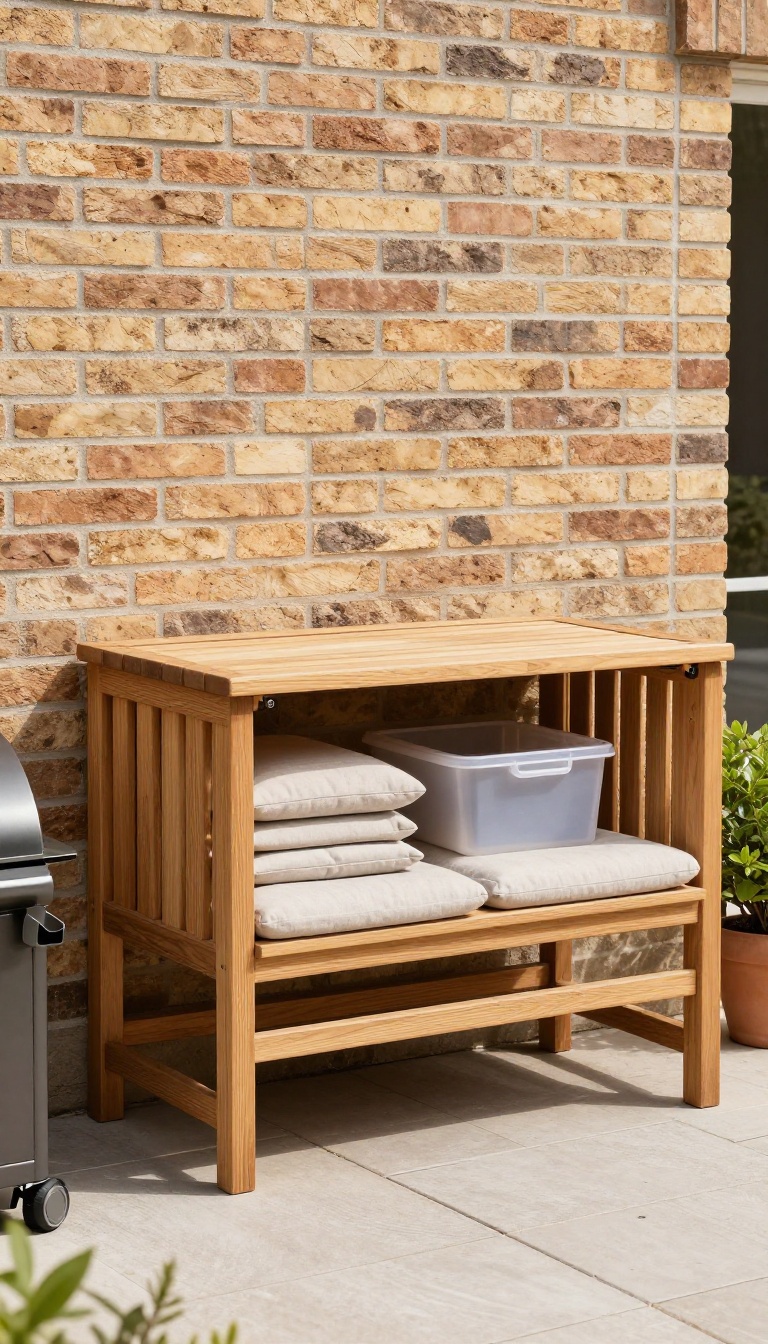
A slim storage bench solves two townhome problems at once: nowhere to sit and nowhere to put things. It gives you a comfortable spot to perch while hiding cushions, tools, and grill accessories inside. Because it replaces a separate chair and storage box, it frees up precious square footage.
The best part? You can find weather-resistant options that look good and last.
A storage bench is one of those rare pieces that earns its keep every single day. It sits flush against a wall or railing, so it barely eats into your usable patio space. When you need a seat, it's there.
When you need to stash something, it's there too. And when you're not using it, it just looks like a clean, intentional part of your setup.
What To Look For
Weather resistance is non-negotiable. Look for cedar, teak, or powder-coated metal frames paired with UV-resistant resin or high-density polyethylene (HDPE) panels. Avoid particleboard or untreated pine, which will warp and rot after one wet season.
Also check the weight capacity—you want to sit on it without worry. A good bench holds at least 300 pounds.
Smart Storage Inside
The hidden compartment is where the magic happens. Use it for seat cushions when it rains, gardening gloves, small hand tools, or a bag of charcoal. Add a plastic bin or two inside to keep things organized and easy to grab.
If the bench has a lid, make sure it has a prop rod or hinge that stays open while you dig around.
Placement Tips
Put the bench where you need seating most—along a blank wall, under a window, or beside your grill. In narrow yards, a bench that's 12 to 18 inches deep is ideal. It gives you a place to sit without blocking the walkway.
If you have a corner that feels awkward, a bench can turn it into a functional nook. Just leave enough clearance so you can open the lid fully.
4. Create Privacy With a Freestanding Screen or Planter Wall
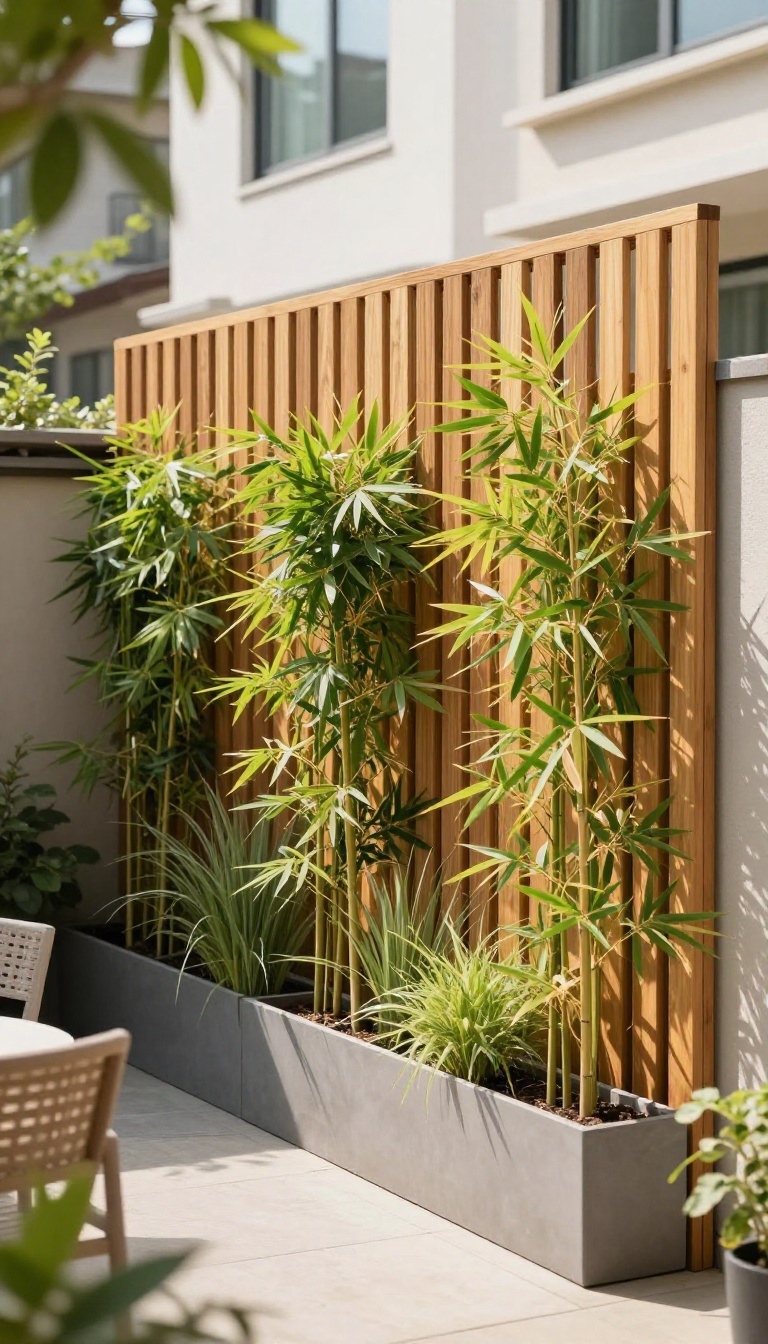
Neighbors can see straight into your yard from their second-floor windows, and you can see straight into theirs. A freestanding screen or planter wall fixes that without a permit or a contractor. The trick is keeping it movable so you can shift it when your needs change.
You don't need a permanent fence to get privacy. A freestanding screen, slatted panel, or row of tall planters does the job in an afternoon. These options block sightlines while staying flexible enough to rearrange.
Slatted Panels That Breathe
Slatted wood or composite panels block direct views but let air and light through. That matters in a narrow yard where solid walls can make the space feel like a box. Look for panels with a weighted base or stake them into the ground for stability.
You can angle them to block the most exposed corner without closing off the whole yard.
Planter Walls That Pull Double Duty
A row of tall, narrow planters filled with bamboo, ornamental grasses, or evergreen shrubs creates a living wall. Choose lightweight resin or fiberglass planters so you can move them when you want to open up the space. Group three or four in a staggered line to block sightlines without a solid barrier.
The plants also soften noise from neighboring patios.
Movable Screens On Wheels
A screen on casters gives you privacy where you need it and rolls out of the way when you don't. Use it to shield a dining table from a nosy neighbor or to create a cozy corner for reading. Look for weather-resistant materials like cedar or powder-coated aluminum.
Just lock the wheels so it doesn't roll away in a gust.
Mix Materials For A Custom Look
Combine a slatted panel with a planter box at the base, or use a metal screen with climbing vines. Mixing materials keeps the setup from looking like a big-box-store kit. It also lets you match your existing patio furniture or home exterior.
Just keep the overall height under six feet to avoid permit issues in most townhome communities.
5. Install a Compact Corner Water Feature for Calm
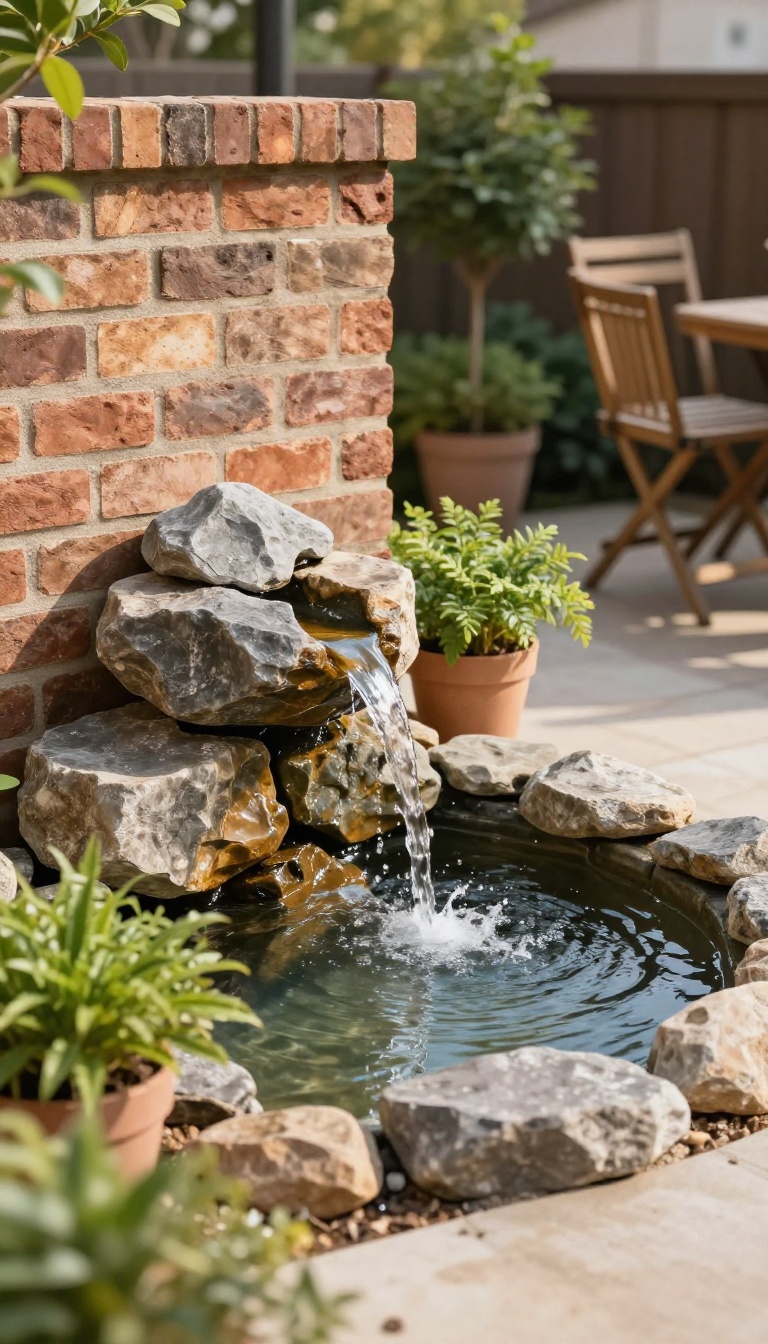
Sound is the most underrated part of a small outdoor space. A townhome yard catches every car door, delivery truck, and conversation from the neighbor's deck. A tiny fountain or bubbling rock in one corner changes that background noise into something you actually want to hear.
The footprint is the real selling point. Most models take up less square footage than a single patio chair, and they slide into the awkward corner you never figured out how to use anyway. Once it's running, the whole yard feels different.
You don't need a pond, a pump house, or a weekend of digging. Plug-in and solar options both work in a compact yard, and the smallest units hold just a few gallons. That means less maintenance and no worry about weight on a small patio.
Placement matters more than size. Tuck it near the shared wall, behind a planter, or beside your seating so the sound lands where you sit. A fountain that faces the street does nothing for you.
Run it during the hours you actually use the yard. Morning coffee, evening dinners, weekend afternoons. That's when the masking effect pays off.
Pick The Right Type For A Tight Corner
Bubbling rocks are the easiest fit. Water wells up and trickles over a stone, so there's no open basin to splash or collect leaves. They're quiet enough for a small yard and heavy enough to stay put in wind.
Tiered fountains add more visual interest but need a wider base. Look for narrow, vertical designs made for patios. A wall-mounted fountain is another option if you have a fence or privacy screen to hang it on.
Solar models skip the cord but need direct sun. If your corner stays shaded, go with a plug-in and hide the cord under mulch or a planter.
Keep It Quiet And Low-maintenance
Aim for a gentle trickle, not a roar. You want white noise, not a waterfall that drowns out conversation. Adjust the flow valve until it sounds like a distant stream.
Top off the water every few days, especially in summer. A pump that runs dry burns out fast. Add a few drops of fountain treatment weekly to keep algae away and the water clear.
Before winter, drain it, pull the pump, and store both indoors. That one step adds years to the unit's life.
Style It So It Belongs
Set the fountain on a small gravel pad or a flat stone to keep it level and tidy. Surround it with low plants, a lantern, or a couple of stacked pots so it reads as part of the yard, not a random object. Warm lighting nearby makes it glow after dark.
A single solar stake light pointed at the water is enough. Keep the area around it clear. The point is calm, and clutter kills calm.
6. Lay Down Interlocking Deck Tiles Over Concrete
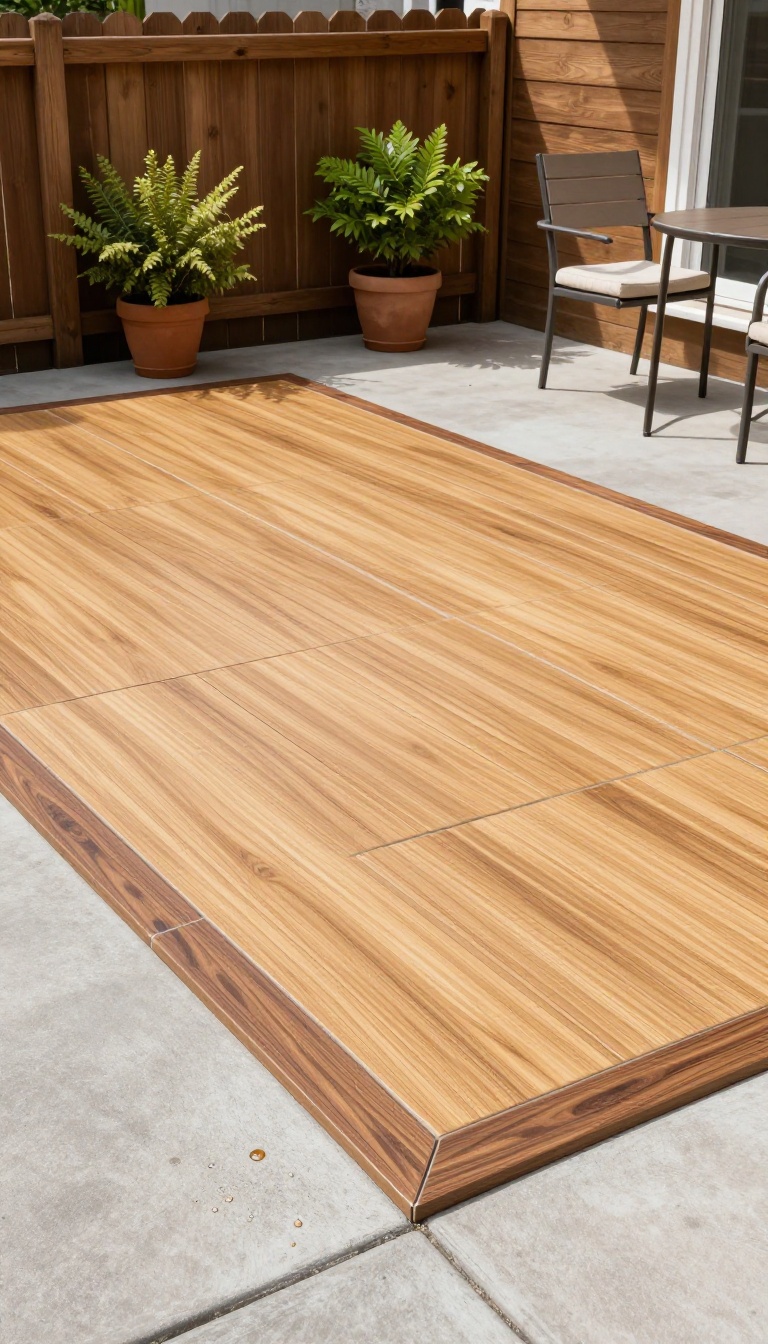
Concrete patios in townhome backyards are common, and they're rarely pretty. They crack, stain, and hold heat. Interlocking deck tiles snap right over that surface without any tools or permanent changes.
You get a warmer, better-looking floor in an afternoon, and you can pull it up just as fast if you move.
These tiles are usually 12 by 12 inches and made from wood, composite, or plastic. They have little connectors on the edges that click together like puzzle pieces. You don't need to glue, screw, or level anything.
Just start in one corner and work your way across. The best part? They drain.
Water falls through the gaps between tiles, so rain doesn't pool on the surface. That means less slipping and no standing water. And because they sit slightly above the concrete, air circulates underneath, which helps prevent mold and mildew.
Renters love them because they're removable. If your lease says no permanent changes, these tiles don't violate that. You can take them with you when you leave.
Owners like them because they hide ugly concrete without the cost of a full patio replacement. You can also mix and match colors or patterns to create a border or define different zones. A darker tile around the edge and a lighter one in the middle can make a small space feel intentional.
It's an easy upgrade that looks custom without the custom price.
What To Look For
Check the tile material. Wood tiles look great but need occasional sealing. Composite tiles handle weather better with less upkeep.
Plastic tiles are the cheapest and lightest, but they can feel less solid underfoot. Also, measure your space first. Order about 10 percent extra for cuts and mistakes.
Installation Tips
Clean the concrete before you start. Sweep away dirt and debris so the tiles sit flat. Start along the longest straight edge, like the house wall.
Leave a small gap around the perimeter for expansion. If you need to cut a tile, a hand saw or utility knife works for most materials. Tap them together with a rubber mallet if they're stubborn.
Maintenance And Care
A quick sweep or hose-down keeps them looking fresh. For wood tiles, apply a sealer once a year. Composite and plastic tiles just need occasional cleaning with soap and water.
If a tile gets damaged, you can pop it out and replace it without touching the rest. That's a big advantage over traditional decking.
7. Hang String Lights on a Perimeter Wire for Evening Ambiance
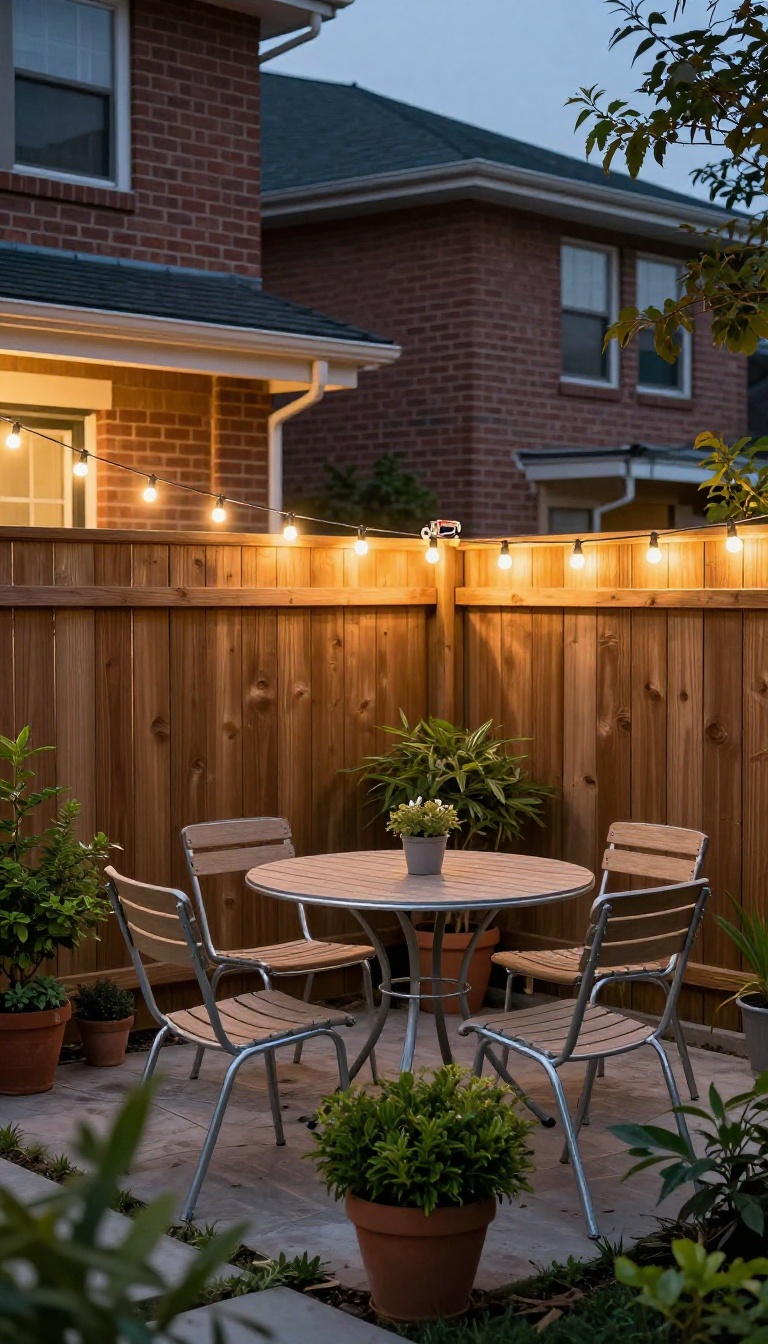
String lights turn a plain townhome backyard into a warm evening hangout. But drilling into brick or stucco walls feels permanent, and you might not have outlets where you need them. A thin cable strung around the fence line solves both problems.
You clip the lights to the wire, so there's no drilling and no rewiring. The glow stays even and overhead, not tangled in the bushes.
Running a perimeter wire is simpler than it sounds. You need a few basic parts and an afternoon. The result is a soft, even light that makes the whole yard feel bigger at night.
What You'll Need
Start with a galvanized steel wire, usually 1/16 to 1/8 inch thick. It's sold as picture-hanging wire or clothesline wire. You'll also need turnbuckles, eye hooks, and a few small carabiners or S-hooks.
For lights, choose outdoor-rated string lights with a plug. LED bulbs stay cool and use less power. A timer or smart plug saves you from remembering to unplug them.
How To Run The Wire
Screw eye hooks into the fence posts or the top of the fence rail. If you have a brick wall, use masonry anchors. Attach a turnbuckle to one eye hook, then run the wire through the hooks around the perimeter.
Leave a little slack so the wire doesn't sag too much. Use the turnbuckle to tighten it until it's taut but not guitar-string tight. Clip the lights to the wire with S-hooks or zip ties every few feet.
Lighting Tips For Small Yards
Keep the lights on one or two sides to avoid a runway look. Warm white bulbs (2700K) feel cozy; cool white feels harsh. If your yard is very narrow, run a single line across the middle instead of around the edge.
That gives you overhead light without lighting up the neighbor's fence. Add a dimmer if you want to change the mood from dinner to late-night drinks.
Safety And Neighbor Considerations
Make sure the wire is high enough that you don't hit it when walking. Use outdoor extension cords rated for the weather. Plug into a GFCI outlet if you have one.
If your fence is shared, check with your neighbor before attaching anything. A polite heads-up goes a long way. And always turn the lights off when you're not outside to save energy and reduce light pollution.
8. Choose a Bistro Set That Fits Two Without Crowding
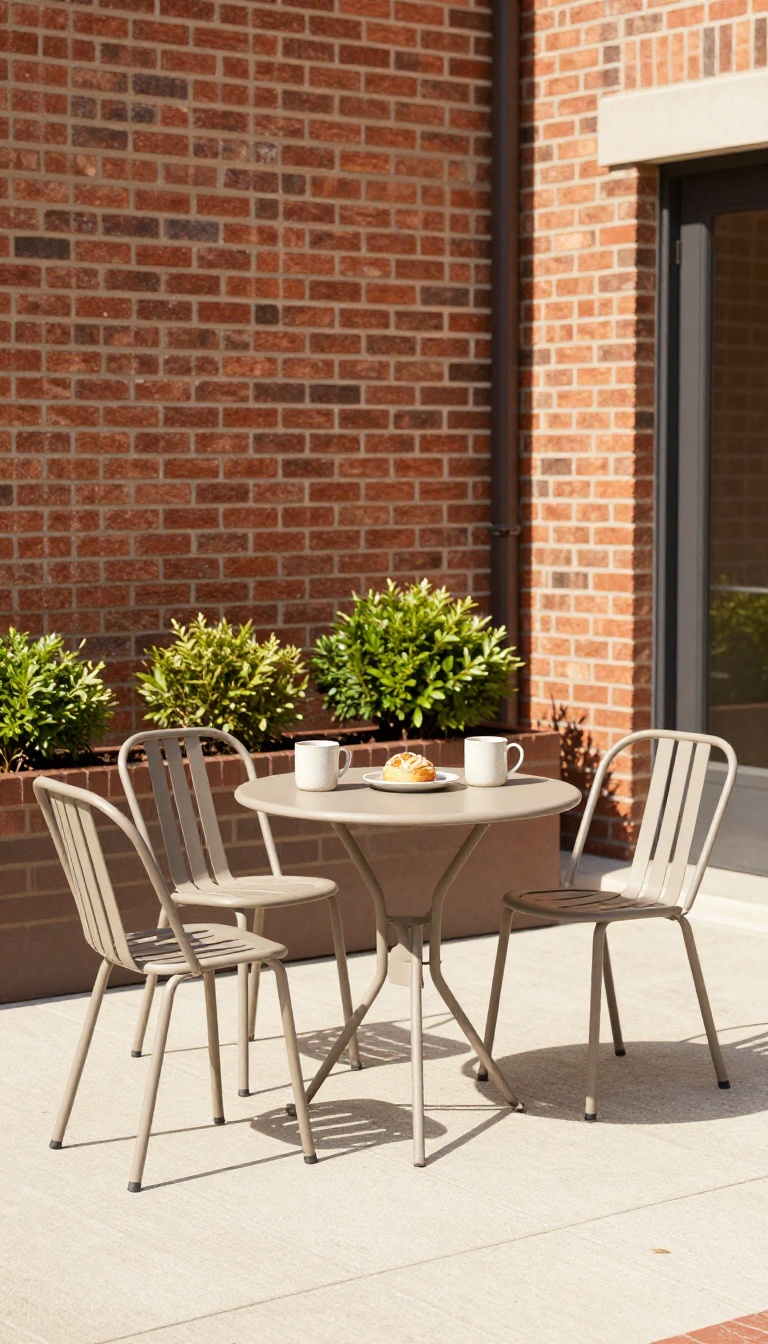
A bistro set is the Goldilocks of townhome furniture: not too big, not too small. A round table around 24 to 30 inches wide with two chairs gives you a spot for morning coffee or a glass of wine at sunset. It doesn't hog the patio, and it leaves room to move around.
The trick is picking a set that feels intentional, not cramped. You want enough surface for two mugs and a small plate, but not so much that you're squeezing past it every time you walk out the door. Measure your space first, then shop with those numbers in mind.
Most townhome patios are roughly 8 by 10 feet, so a bistro set that's 2 to 3 feet across works well. Anything larger starts to feel like a full dining area, which defeats the purpose. Look for sets with a smaller footprint and chairs that tuck in neatly.
Material matters too. Metal sets with a powder-coated finish hold up to weather and wipe clean. Wood adds warmth but needs a little more care.
If your patio gets full sun, consider a lighter color so it doesn't get too hot to touch.
Why Two Chairs Beat Four
Four chairs sound great until you realize you never use them all. Two chairs keep the space open and make the area feel like a cozy nook instead of a crowded cafe. Plus, you can always pull out a folding chair if guests stop by.
Stackable And Folding Options
If your patio doubles as a walkway, stackable or folding chairs are a game-changer. You can tuck them against the wall or into a corner when not in use. Some sets even have a table that folds flat, which is perfect for small spaces.
Placement Tips For Tight Spots
Push the table against a wall or railing to save floor space. Angle it slightly if you have a corner spot. Leave at least 18 inches of clearance around the chairs so you can sit down without bumping your knees.
9. Add a Shallow Raised Bed for Herbs and Greens
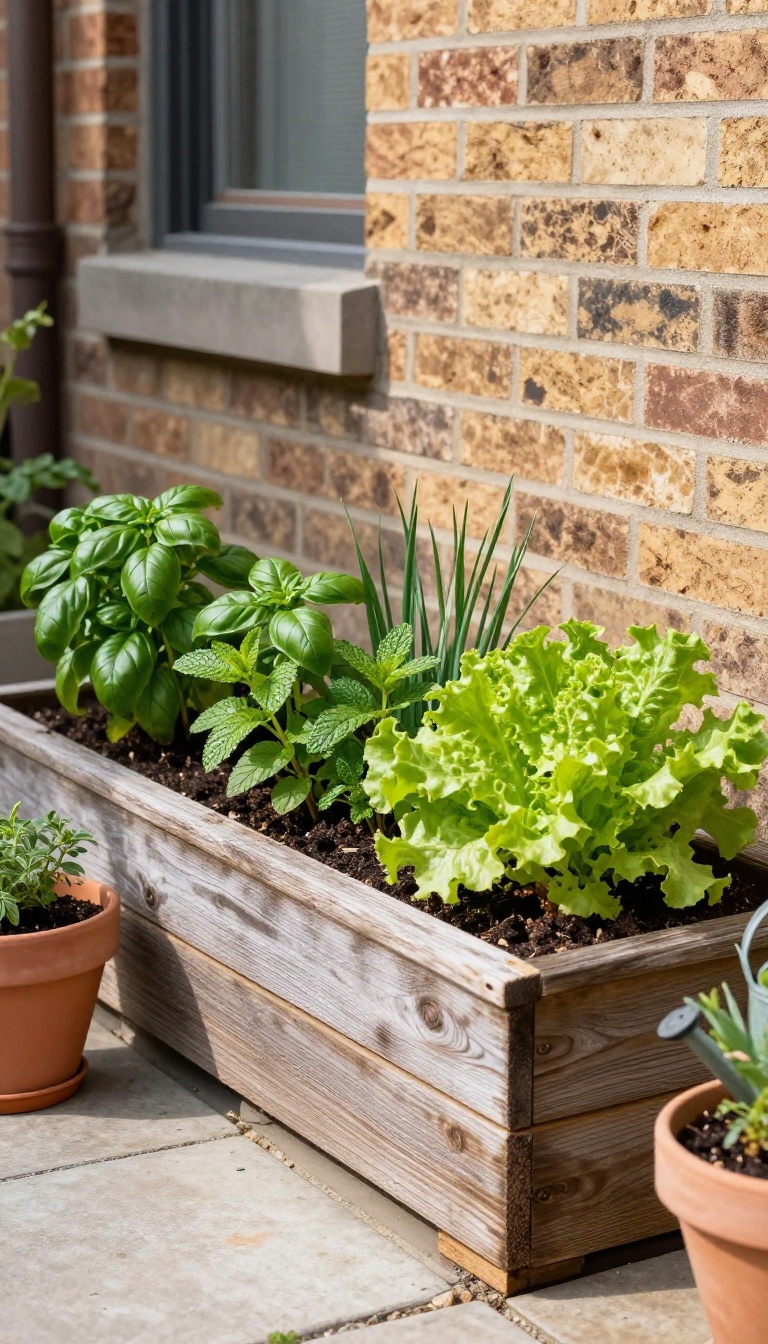
A raised bed doesn't need to be deep to be productive. For herbs and leafy greens, eight to ten inches of soil is plenty. That's shallow enough to fit along a fence or wall without swallowing your patio.
You get fresh basil, mint, lettuce, and chives within arm's reach of the kitchen. And because it's raised, you're not bending over or dealing with poor ground soil. It's a small footprint with a big payoff.
The key is choosing the right spot and the right plants. You want a location that gets at least four to six hours of sun, but doesn't block your main walkway. A bed that's three to four feet long and a foot wide is enough to start.
Fill it with a mix of potting soil and compost. Then plant what you'll actually use. Basil and mint are vigorous, so give them room.
Lettuce and chives are more compact. Water regularly, and you'll be harvesting in weeks.
Pick The Right Spot
Sunlight is non-negotiable for herbs and greens. Most need at least four hours of direct sun. Watch your yard for a day to see where the light lands.
A south- or west-facing wall is ideal. But avoid spots that get blasted by reflected heat from concrete. Also, keep the bed away from your main seating area.
You don't want to brush past wet leaves every time you carry out a tray of drinks.
Build Or Buy A Shallow Bed
You can build a simple frame from cedar or composite boards. Or buy a kit that's already the right depth. Just make sure it has drainage holes or a slatted bottom.
If you're placing it on concrete, add a layer of gravel before the soil. That helps water escape and keeps roots from sitting in a puddle. A depth of eight to ten inches works for most herbs and greens.
Root vegetables like carrots need more, so skip those.
Plant What You'll Actually Eat
Basil, mint, chives, and lettuce are the easiest wins. They grow fast and don't need much space. Mint can take over, so plant it in its own pot sunk into the bed.
That keeps it from crowding out everything else. Lettuce is great for cut-and-come-again harvesting. Just snip the outer leaves and it keeps producing.
Chives come back year after year. Basil loves heat and will thrive in summer. Stick to three or four varieties to start.
Keep It Tidy And Watered
A shallow bed dries out faster than an in-ground garden. Check the soil every couple of days. Water when the top inch feels dry.
A layer of mulch helps hold moisture and keeps weeds down. Trim your herbs regularly to encourage bushy growth. And don't let dead leaves pile up.
A quick cleanup every week keeps the bed looking sharp. It's a small chore that pays off with fresh flavors all season.
10. Use an Outdoor Rug to Define the Seating Zone
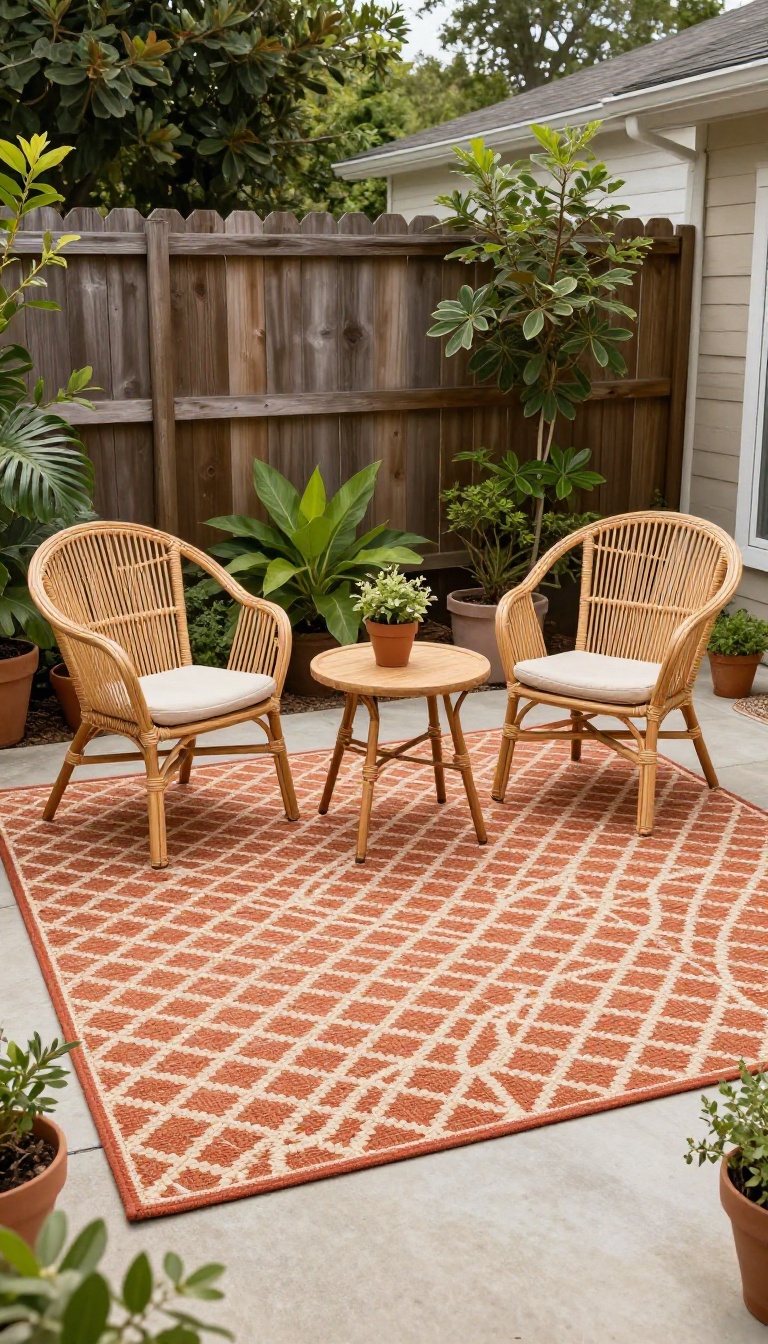
An outdoor rug does more than soften the ground underfoot. It draws a clear line between your seating area and the rest of the yard, making a small patio feel intentional. In a townhome backyard, that visual boundary is a game-changer.
Concrete slabs and compacted dirt don't exactly scream cozy. A weatherproof rug changes that in about five minutes. It adds color, texture, and a sense of enclosure without building a single wall.
Plus, it hides oil stains, cracks, and that weird discoloration you've been ignoring for two years.
Pick The Right Size
Measure your seating area first. You want the rug to extend at least a few inches beyond your chairs or sofa. If it's too small, the space feels cramped.
A 5×8 or 6×9 usually works for a bistro set and two chairs. For a larger sectional, go bigger. When in doubt, size up—just make sure it doesn't block walkways.
Choose Weatherproof Materials
Polypropylene and recycled plastic rugs are your best bet. They resist mold, mildew, and fading. Avoid natural fibers like jute or cotton unless you have a covered patio.
They'll soak up rain and stay damp. A quick hose-down is all the maintenance most synthetic rugs need.
Anchor It And Keep It Clean
Wind can flip a lightweight rug, so use a rug pad or double-sided tape. A pad also adds cushioning and keeps the rug from sliding. Sweep or shake it weekly, and hose it off monthly.
If you get heavy rain, roll it up and store it during storms to extend its life.
11. Mount a Retractable Awning or Shade Sail for Sun Control
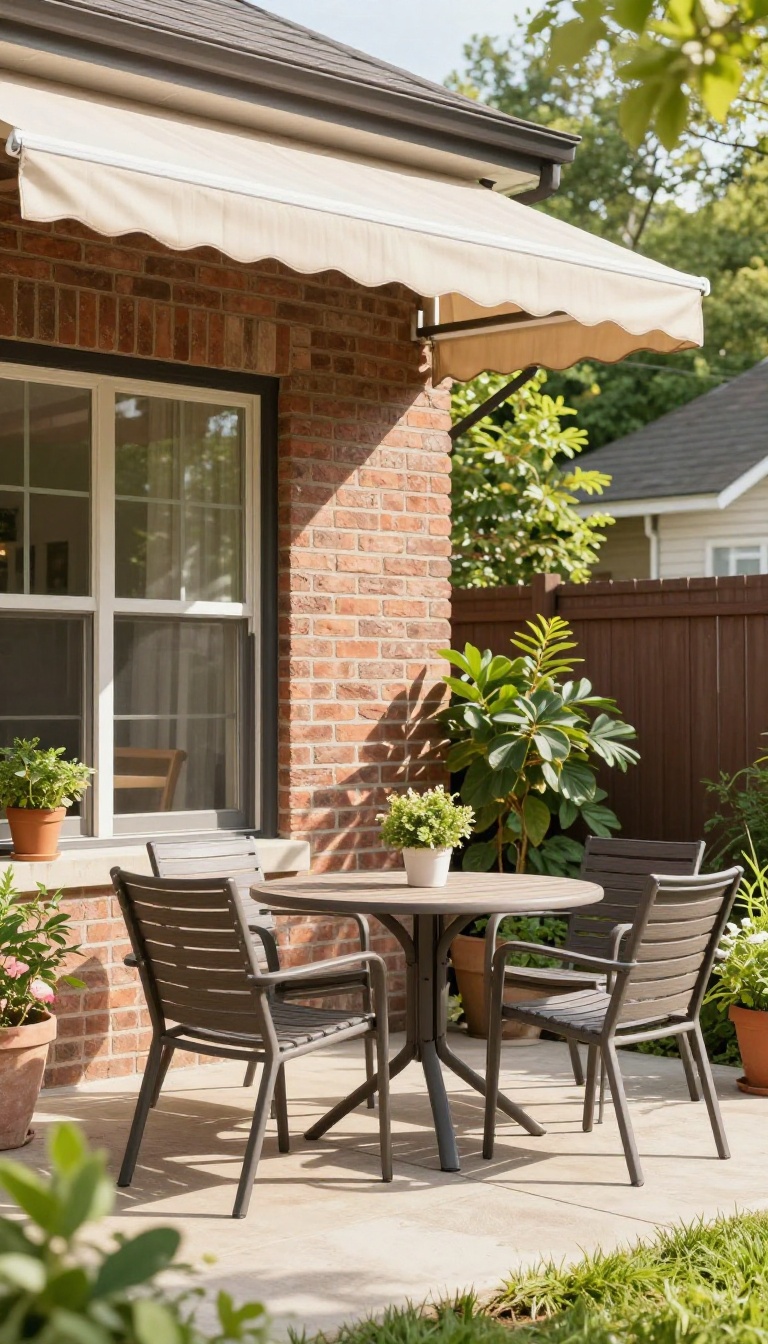
A west-facing townhome patio can turn into a frying pan by 3 p. m. You want shade, but a permanent roof would make the space feel like a cave. That’s where a retractable awning or a shade sail earns its keep.
Both options block harsh afternoon sun without boxing you in. When the heat passes or the season changes, you open up the sky again. The yard stays airy, bright, and flexible.
A retractable awning mounts to the wall of your townhome and rolls out only when you need it. Push a button or crank a handle, and you get instant relief from direct sun. Roll it back, and you keep the open feel that makes a small yard work.
Shade sails take a different approach. They’re triangular or square pieces of tensioned fabric that stretch between posts or anchor points. They stay up all season, but they still let air move through, so the space doesn’t feel closed in.
Neither option requires a full construction project. Both can be installed on a patio, over a deck, or above a small dining area. The goal is simple: control the sun without giving up the sky.
Retractable Awnings: Push-button Shade
A retractable awning is the easiest way to get shade on demand. Mount it on the exterior wall of your townhome, and you can extend it over a patio or seating area in seconds. Most models come with a manual crank or a motorized remote.
Look for a water-resistant fabric and a powder-coated frame that won’t rust. Measure your space carefully—you want the awning to cover the hot zone without hanging too low. A 10-foot projection is plenty for most townhome patios.
One tip: angle the awning slightly downward so rain runs off instead of pooling. And retract it during high winds to avoid damage. When it’s not in use, it rolls up tight against the wall, taking up zero floor space.
Shade Sails: Modern, Airy Coverage
Shade sails are a favorite for compact yards because they look clean and modern. They’re made from heavy-duty fabric that blocks up to 90% of UV rays while letting breezes pass through. You can mount them between your townhome wall and a couple of posts, or between existing structures.
Installation requires sturdy anchor points. Use stainless steel hardware and tension the sail tight so it doesn’t flap in the wind. A triangular sail works well over a corner seating area, while a square sail can cover a small dining set.
Unlike awnings, shade sails stay up all season. That means you get consistent shade without thinking about it. Just hose them down occasionally to keep them looking fresh.
They come in lots of colors, so you can match your outdoor vibe.
Which One Fits Your Townhome?
If you want flexibility and easy storage, go with a retractable awning. It’s ideal for patios that get sun only part of the day. You can extend it during the hottest hours and retract it when the sun moves on.
If you prefer a set-it-and-forget-it solution, a shade sail is your best bet. It’s also a good choice if you don’t have a wall suitable for an awning, or if you want a more architectural look. Both options cost far less than building a pergola or roof.
And both keep your townhome backyard feeling open and breathable. That’s a win for small-space living.
12. Create a Pet-Friendly Potty and Play Corner
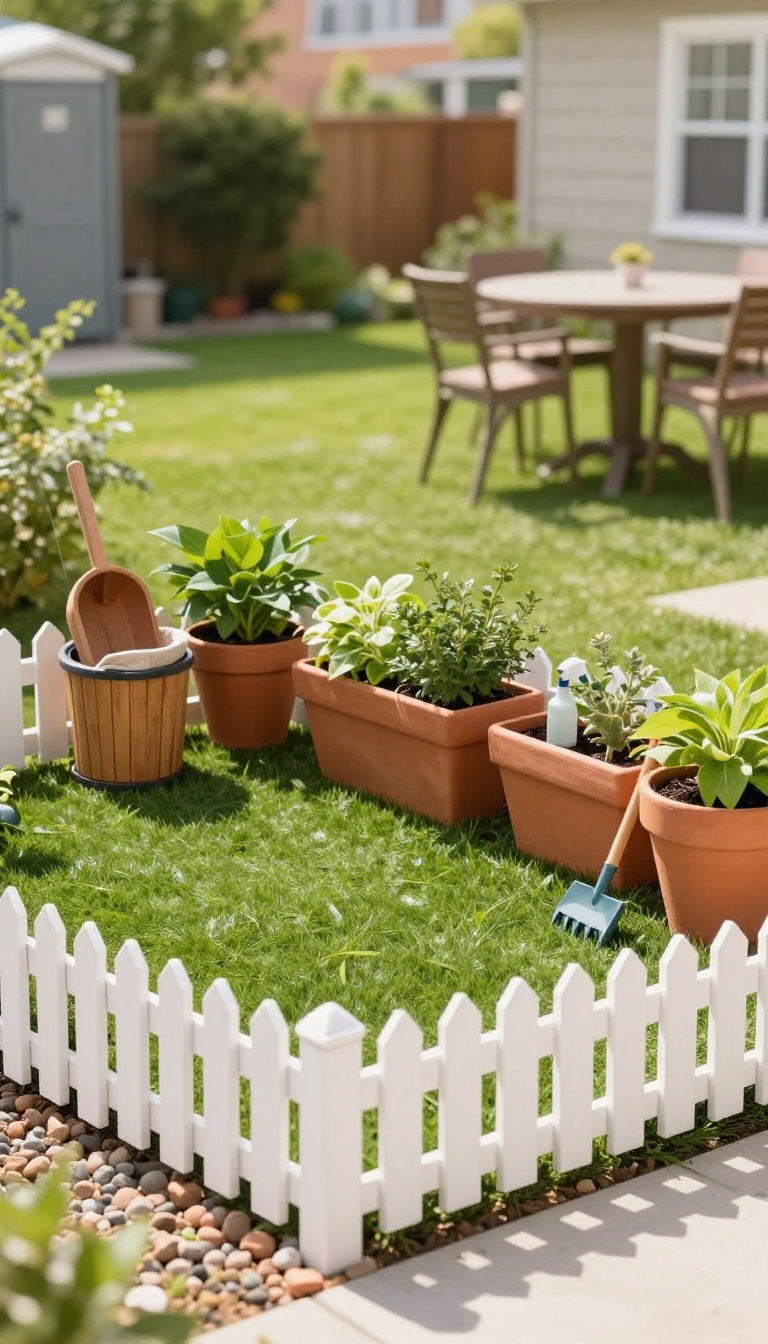
Dogs need a bathroom, and your townhome yard is the only option. Without a dedicated spot, they'll pick your patio or the middle of your grass. A small potty and play corner solves that problem without giving up your whole yard.
Set aside a patch about 3 by 5 feet, either gravel or artificial turf. Add a low fence or a row of planters to separate it from your seating. This gives your dog a clear boundary and keeps mess away from where you relax.
Pick The Right Surface
Gravel drains well and is easy to rinse, but some dogs don't like the feel. Artificial turf looks cleaner and stays green, but you'll need to hose it down regularly. If you choose turf, get a piece with a antimicrobial backing to control odors.
A thin layer of pea gravel over a weed barrier also works and costs less.
Add A Simple Divider
A low picket fence or a few sturdy planters creates a visual barrier without blocking light. Keep it under 2 feet tall so you can step over it if needed. If you rent, use freestanding planters or a foldable pet gate that you can move.
This separation tells your dog where to go and keeps them from running through your seating area.
Make It Easy To Clean
Keep a small bin with a scoop and bags right next to the potty patch. A spray bottle of enzymatic cleaner handles odors between deeper cleanings. For turf, a simple hose-down once a week keeps it fresh.
If you use gravel, a rake helps you pick up solids quickly. A little routine maintenance keeps the corner from becoming a chore.
13. Add a Wall-Mounted Grill Station With a Folding Prep Table
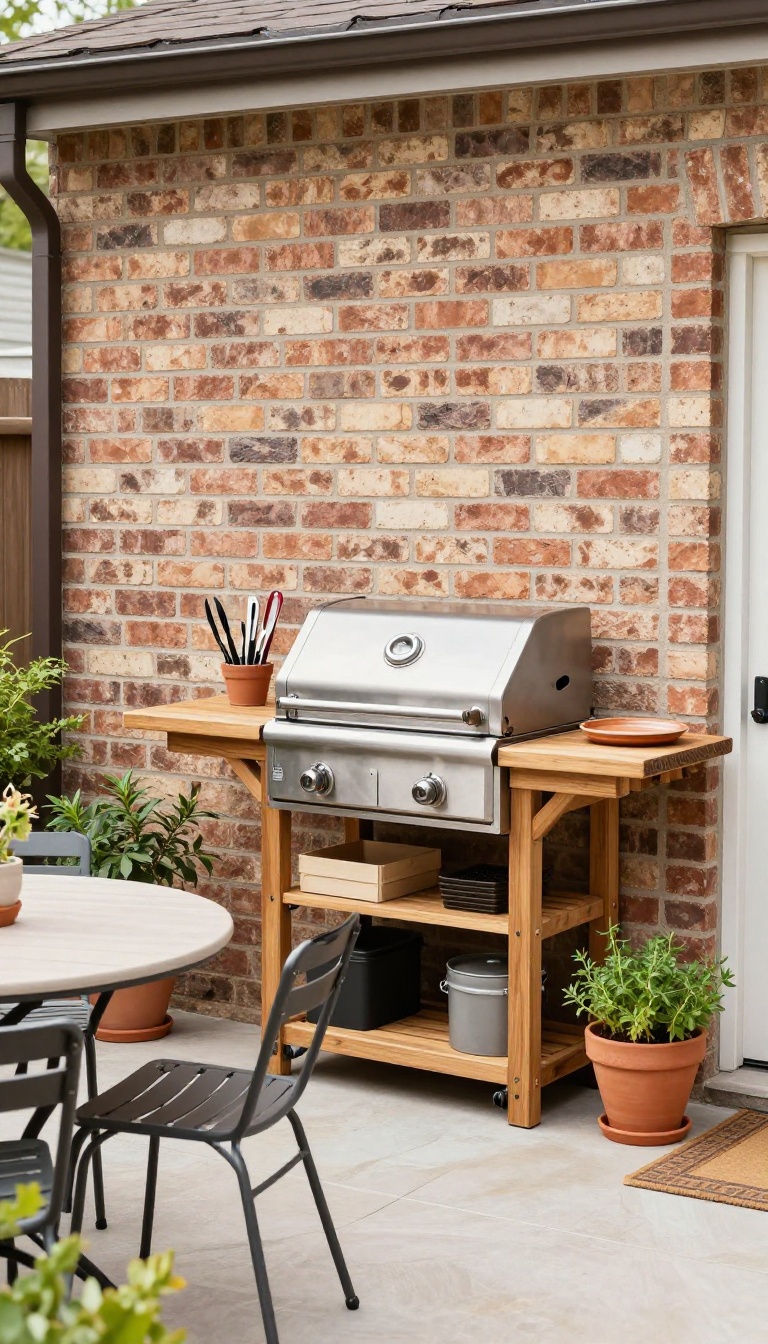
A wall-mounted grill station turns a blank exterior wall into a functional cooking zone. By lifting the grill off the ground, you free up valuable floor space for seating or traffic flow. A fold-down prep table gives you a landing spot for tools and plates, then tucks away when the cooking is done.
In a townhome backyard, every square foot counts. A traditional grill cart eats up floor space and can make a small patio feel cramped. Mounting the grill on the wall eliminates that footprint, so you can use the area underneath for storage or simply enjoy a more open feel.
Plus, keeping the grill at waist height means less bending and better control. Grease splatter is another concern. When the grill sits on the ground, drippings can land on nearby seating or walkways.
A wall-mounted unit keeps the mess contained and easier to clean. You can add a drip tray or a small shelf for grease management, and the wall behind it acts as a natural backsplash. The folding prep table is the secret weapon.
It attaches to the wall or the grill station and flips down when you need it. Use it for chopping veggies, holding a platter, or resting tongs. When you're finished, fold it flat against the wall, and your patio is instantly bigger.
Choosing The Right Spot
Pick a wall that's close to your kitchen for easy trips with food, but not so close that smoke drifts inside. Avoid walls shared with neighbors if possible, and check local codes for grill placement. A spot with some overhead cover will let you grill in light rain.
Mounting And Safety
Use heavy-duty brackets rated for your grill's weight, and anchor them into studs or masonry. Keep the grill at a comfortable height—usually 36 to 40 inches from the ground. Make sure there's clearance from combustible materials, and never mount a grill on a wall with vinyl siding without a heat shield.
The Folding Table Advantage
Look for a fold-down table made from stainless steel or weather-resistant wood. It should lock securely when open and stay put when closed. Some models include hooks for tools or a built-in bottle opener.
If you're handy, you can DIY one with a piano hinge and a sturdy bracket.
Keeping It Clean
Wipe down the table and grill exterior after each use to prevent grease buildup. A small scraper and a spray bottle of vinegar solution make quick work of stuck-on food. Check the mounting hardware every few months to ensure everything stays tight.
FAQ
How do I make a small townhome backyard feel bigger?
Go vertical with plants and storage, choose furniture that folds or stacks, and use a light-colored outdoor rug to visually expand the floor. Mirrors and reflective surfaces can also help, but keep them weather-safe.
What's the best flooring for a townhome patio?
Interlocking deck tiles, gravel, or large concrete pavers work well because they drain and install easily. Avoid solid wood decking if you have poor drainage or a strict HOA.
How can I get privacy in a townhome backyard without building a fence?
Use tall planters with bamboo or grasses, a freestanding screen, or a shade sail positioned to block sightlines. These options are often HOA-friendly and movable.
Do I need permission to install a shade sail or awning?
Check your HOA rules and local codes first. Many allow removable shade sails, but permanent awnings may require approval. When in doubt, ask before you buy.
What are the most low-maintenance plants for a small townhome yard?
Herbs like rosemary and thyme, ornamental grasses, and succulents in containers are tough and need little water. Choose plants that match your sunlight and don't outgrow their pots.
Conclusion
A townhome backyard doesn't need to be big to be useful. The best upgrades are the ones that solve a specific annoyance, whether that's lack of privacy, nowhere to set a drink, or a grill that takes up half the patio. Start with one or two ideas from this list and see how the space feels.
You can always add more later. Small changes tend to snowball into a yard you actually want to use.