20 Bathroom Cleaning Schedule Tips for Busy Family Homes
Between school runs, work deadlines, and endless activities, finding time to deep clean the bathroom feels impossible. Yet a grimy bathroom can quickly become a source of stress and germs. The good news?
You don't need to dedicate an entire Saturday to scrubbing. With a smart schedule and a few clever habits, you can keep your bathroom consistently clean without the overwhelm.
These 20 tips are designed for real families with real schedules. They focus on efficiency, prevention, and small daily actions that add up to a noticeably cleaner space.
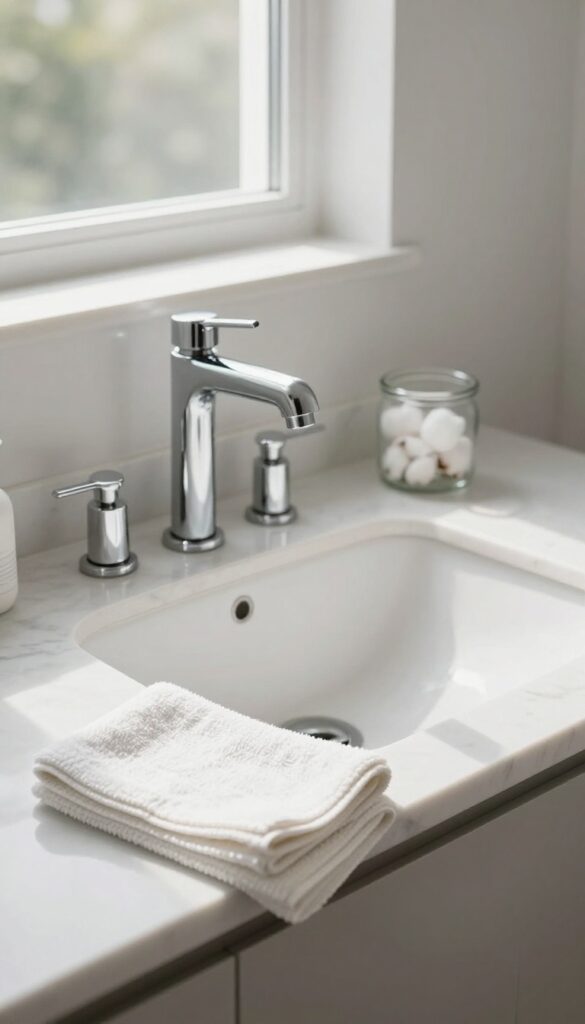
1. Wipe Down the Sink and Counter After Each Use
Toothpaste splatters and water spots are the main culprits behind a grimy bathroom. They harden quickly, making them harder to remove later. The simplest fix?
Keep a microfiber cloth within arm's reach and give the sink and counter a quick wipe after each use. This habit takes 10 seconds but saves you from scrubbing dried-on gunk.
Why Microfiber Works Best
Microfiber cloths trap dirt and moisture without leaving lint or streaks. Unlike paper towels, they can be washed and reused hundreds of times. Keep a clean, dry cloth on the counter or hang it over the faucet so it's always ready.
Make It A Family Rule
Get everyone on board by making this a non-negotiable habit. Teach kids to wipe the sink after brushing their teeth. A quick spray of all-purpose cleaner or a simple dry wipe works—just keep it consistent.
Don't Forget The Faucet And Handles
Faucets and handles collect fingerprints and soap scum fast. A quick swipe with your cloth after each use keeps them shiny and reduces the need for deep cleaning. Focus on the base of the faucet where water tends to pool.
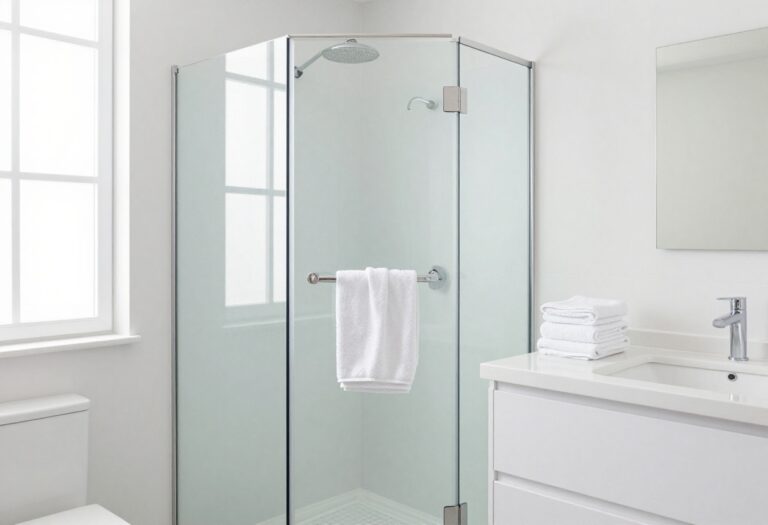
2. Squeegee the Shower Walls Right After Showering
Soap scum and hard water stains are stubborn once they dry. The secret to preventing them is a 30-second habit: squeegee the shower walls right after you finish. Make it a family rule that everyone does it before leaving the bathroom, and you'll cut down on scrubbing time significantly.
A quick squeegee removes water droplets that cause mineral deposits and soap residue. When water dries on glass or tile, it leaves behind a cloudy film that's tough to remove. By wiping it away immediately, you keep surfaces clear and reduce the frequency of deep cleaning.
Plus, it helps prevent mold and mildew from taking hold in damp corners.
Make It A Family Rule
Post a small sign in the shower as a reminder. Assign each family member their own squeegee or keep one in the shower at all times. Kids can easily do it too—just show them once and make it part of the routine.
Choose The Right Squeegee
Invest in a good-quality squeegee with a rubber blade. A wall-mounted holder keeps it handy. Replace the blade every few months to avoid streaks.
For large showers, a wider blade (12 inches or more) speeds up the job.
Pair With A Quick Towel Wipe
After squeegeeing, use a microfiber towel to wipe down the faucet and handles. This prevents water spots on metal fixtures and keeps them shiny. The whole process takes less than a minute.
3. Use a Daily Shower Spray to Prevent Mildew
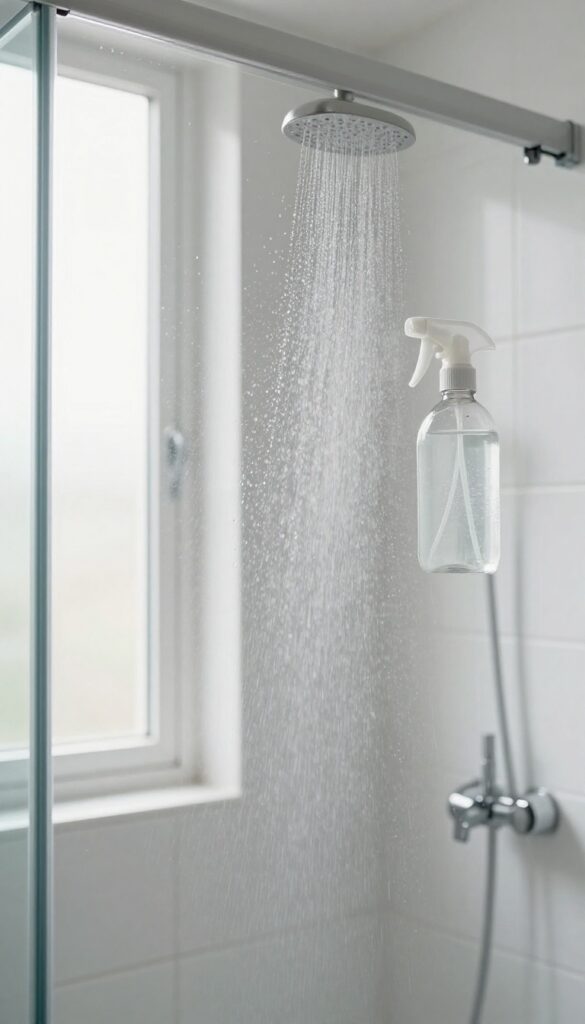
Mildew loves a damp shower, but you can outsmart it with a simple spray. Mix equal parts water and white vinegar in a spray bottle, then add a drop of dish soap. After each shower, give the walls and door a quick spritz.
No rinsing needed—just let it air dry. This daily habit cuts down on scrubbing and keeps mildew from taking hold.
The spray works because vinegar breaks down soap scum and kills mildew spores before they settle. The dish soap helps the mixture cling to vertical surfaces. Keep the bottle in the shower so it's always handy.
One or two sprays per session is enough—you don't need to soak everything.
Why This Works
Vinegar is a natural disinfectant that disrupts mildew's ability to grow. The acid dissolves early-stage soap scum, which mildew feeds on. A daily spritz stops buildup before it becomes visible, so you never have to scrub off black spots.
How To Make It
Use a 16-ounce spray bottle. Fill halfway with white vinegar, then top off with water. Add one drop of liquid dish soap—too much creates suds that leave residue.
Shake gently, then label the bottle. Replace the mixture every two weeks for best results.
When To Spray
Spray right after the last person showers, while the walls are still wet. This lets the mixture spread evenly. If you have glass doors, give them a quick spritz too.
For tile and grout, aim for a light mist—no need to saturate.
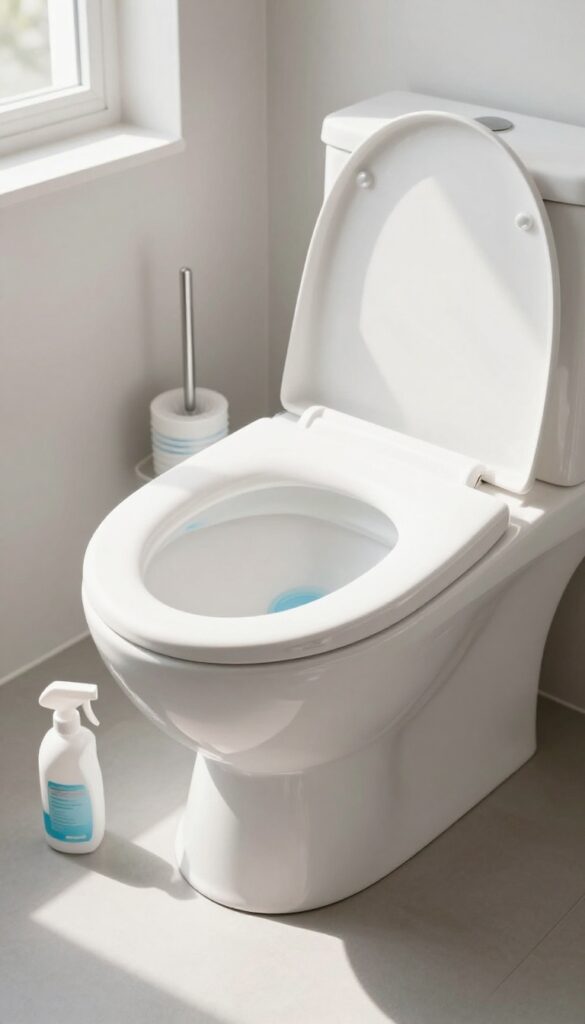
4. Keep a Toilet Brush and Cleaner in the Bathroom
The toilet is the one fixture that can turn from fine to foul in no time. Waiting until you notice an odor or stain means you're already behind. Keeping a brush and cleaner right where you need them makes it easy to stay ahead.
Store a brush with a disinfecting cleaner inside the toilet bowl. A quick swish once a day prevents stains and odors from building up. This simple habit takes less than 30 seconds but makes a huge difference.
Choose The Right Brush And Holder
Look for a brush with stiff bristles and a holder that keeps the brush off the floor. Some holders have a built-in compartment for cleaner tablets, which keeps the bowl fresh between uses.
Pick A Cleaner That Works
Use a gel or liquid cleaner that clings to the bowl. Bleach-based formulas are great for whitening, but enzyme cleaners work well for maintenance without harsh fumes.
Make It A Daily Habit
Tie the swish to a daily routine, like after brushing your teeth at night. Consistency is key—once it's automatic, you'll never go back.
5. Assign a Weekly 10-Minute Bathroom Tidy
A quick, timed tidy works wonders for keeping the bathroom functional without eating into your evening. The key is making it a shared responsibility so no one person feels stuck with the grunt work. Set a timer, assign one task per person, and watch the bathroom transform in minutes.
This strategy turns a potential chore into a quick team effort. Each family member picks one task from a rotating list—wiping mirrors, emptying trash, restocking toilet paper, or swishing the toilet. The timer keeps everyone focused and prevents dawdling.
Over time, this habit prevents messes from piling up and keeps the bathroom guest-ready with minimal effort.
Make A Task List
Write down 4-5 simple tasks on a sticky note or whiteboard inside a cabinet. Examples: wipe counter, spray and wipe mirror, empty trash, check toilet paper, and give the toilet a quick brush. Rotate tasks weekly so everyone learns every job.
Use A Timer
Set a phone timer for 10 minutes and play upbeat music. The countdown creates a sense of urgency and makes it feel like a game. When the timer goes off, stop—even if a task isn't perfect.
Consistency matters more than perfection.
Keep Supplies Handy
Store cleaning wipes, a spray bottle of all-purpose cleaner, and a microfiber cloth under the sink or in a caddy. If supplies are easy to grab, the tidy takes less than a minute to start. No excuses.
6. Deep Clean the Toilet Once a Week
Let's be real—the toilet is the hardest-working fixture in the bathroom, and it shows. A quick daily wipe helps, but a weekly deep clean is the only way to stop stains, odors, and germs from taking over. Carving out 10 minutes once a week keeps this high-traffic spot fresh and cuts down on heavy scrubbing later.
Start by flushing after applying a toilet bowl cleaner—let it sit while you tackle the exterior. Use a dedicated brush to scrub under the rim and down into the trap, then flush again. Next, wipe down the seat, lid, hinges, and the entire exterior with a disinfectant spray or wipe.
Don't forget the base and the floor around it, where splashes and dust collect. This weekly reset prevents stubborn rings and keeps the toilet looking and smelling clean.
Choose The Right Cleaner
Gel-based bowl cleaners cling better and work longer than liquid ones, so they're ideal for weekly deep cleans. Look for one with bleach or a disinfectant label to kill germs effectively. For the exterior, a spray disinfectant or pre-moistened wipes save time and reduce cross-contamination.
Don't Skip The Hidden Spots
The area where the seat meets the bowl, the hinge covers, and the base of the toilet near the floor are magnets for grime. Use an old toothbrush or a small scrub brush to reach these crevices. A quick once-over prevents buildup that can become hard to remove.
Keep Supplies Handy
Store a toilet brush, cleaner, and disinfectant wipes in a caddy under the sink or in a nearby cabinet. When everything is within arm's reach, the weekly deep clean feels less like a chore and more like a quick routine. You're more likely to stick with it when you don't have to hunt for supplies.
7. Wash Bath Mats and Towels Weekly
Damp bath mats and towels are breeding grounds for bacteria. Wash them in hot water weekly to keep the bathroom smelling clean and reduce mildew. This simple habit prevents musty odors and keeps your bathroom feeling fresh.
Why Weekly Washing Matters
Bath mats and towels trap moisture, dead skin cells, and soap residue. After a few days, bacteria and mold start to grow. Washing them weekly in hot water kills germs and removes buildup, so they stay soft and smell clean.
How To Wash Them Properly
Use hot water and a quality detergent. Add a half cup of white vinegar to the rinse cycle to kill bacteria and remove odors. Avoid fabric softener, which can reduce absorbency.
Dry on high heat to ensure all moisture is gone.
Signs You Need To Wash More Often
If you notice a musty smell, visible spots, or the mat feels slimy, it's time to wash. In humid climates or with heavy use, consider washing every 3–4 days. Having multiple sets lets you rotate without waiting.
8. Clean the Showerhead Monthly to Remove Buildup
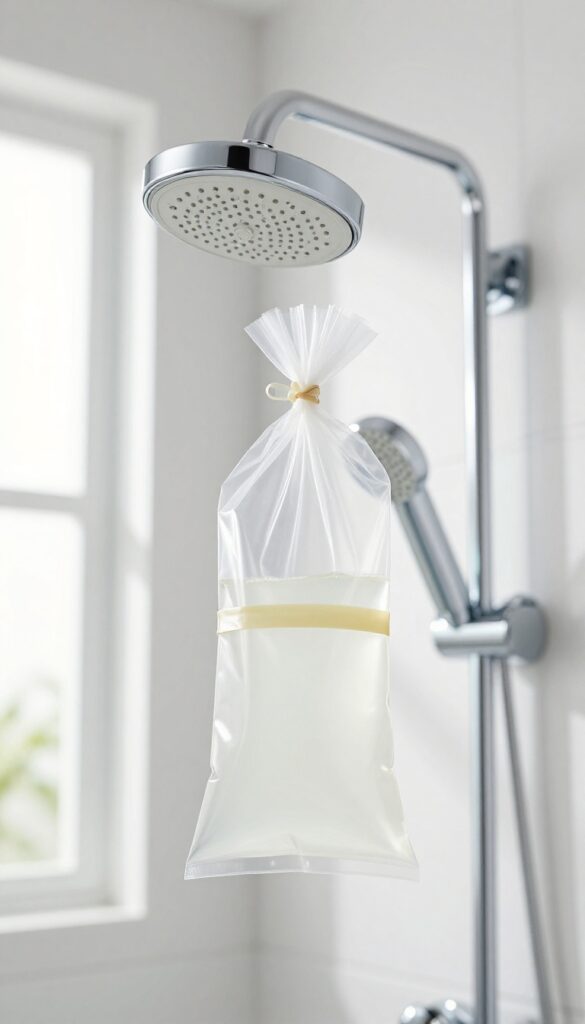
Hard water and mineral deposits can clog your showerhead over time, reducing water pressure and creating an uneven spray. A simple monthly soak with vinegar restores performance without harsh chemicals or scrubbing. This quick task prevents bigger plumbing headaches and keeps your morning shower refreshing.
Mineral buildup is inevitable in busy homes, especially with hard water. The good news is that cleaning a showerhead takes almost no effort—just a little planning. Overnight soaking dissolves the deposits, and a quick rinse in the morning leaves it sparkling.
This habit also extends the life of your showerhead, saving you money on replacements. For families, it's a set-it-and-forget-it solution that fits into any routine.
What You'll Need
Grab a plastic bag (a sandwich or quart-size works), white vinegar, and a rubber band or zip tie. That's it. No special tools or expensive cleaners required.
The vinegar's acidity breaks down calcium and lime scale naturally.
Step-by-step Soak
Fill the bag about halfway with vinegar. Slip it over the showerhead so the head is fully submerged. Secure it with the rubber band or zip tie to keep the bag in place.
Leave it overnight—at least 6 to 8 hours. In the morning, remove the bag and run the shower for a minute to flush away loosened debris.
When To Skip The Vinegar
If your showerhead has a brass, gold, or other delicate finish, vinegar can damage the coating. Check the manufacturer's instructions first. For these, use a mild dish soap solution instead, or wipe gently with a cloth.
Also avoid this method if the showerhead is plastic and the vinegar might weaken the material.
Maintenance Between Soaks
To reduce buildup, wipe the showerhead with a dry cloth after each use. This removes water droplets that leave mineral spots. If you notice reduced flow before the month is up, you can soak more frequently.
For very hard water, a monthly soak is non-negotiable.
9. Wipe Down Cabinet and Drawer Fronts Monthly
Cabinet and drawer fronts might not look dirty at first glance, but they collect fingerprints, dust, and splashes from daily use. Over time, that thin layer of grime becomes harder to remove. A monthly wipe-down keeps them looking fresh and prevents buildup that can dull finishes or attract more dirt.
What You’ll Need
A soft microfiber cloth and a mild cleaner—either a gentle all-purpose spray or a mix of warm water with a drop of dish soap. Avoid harsh chemicals or abrasive sponges that can damage cabinet surfaces.
Quick Wipe Technique
Work from top to bottom so dust falls onto lower areas you haven’t cleaned yet. Pay extra attention to handles and knobs, where oils and grime accumulate. For wood cabinets, dry immediately with a separate cloth to prevent moisture damage.
Make It A Habit
Tie this task to another monthly chore, like changing the toothbrush heads or cleaning the shower curtain. Mark it on your calendar or set a phone reminder. Once it’s part of your routine, it takes less than five minutes.
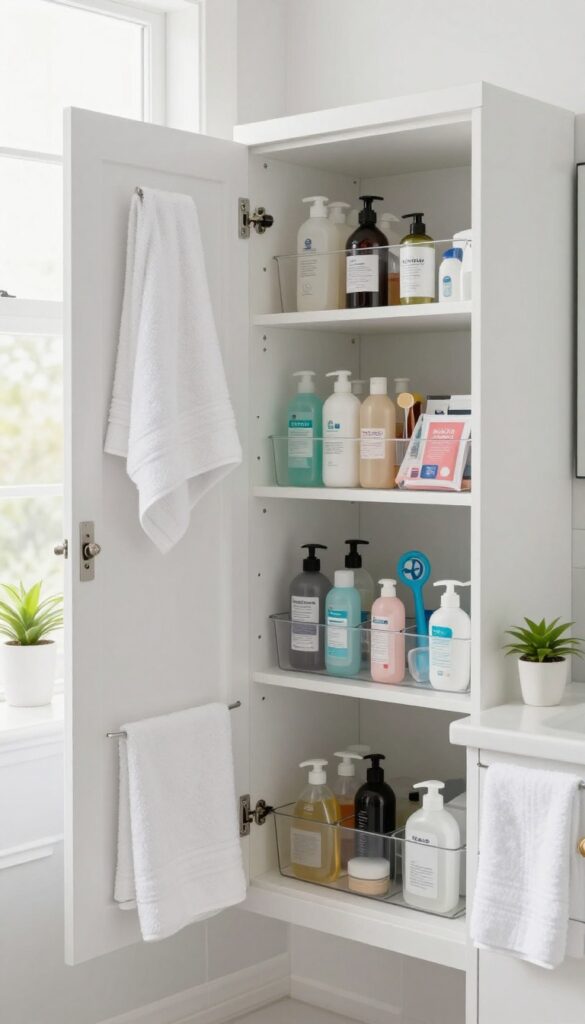
10. Organize Under the Sink with Bins and Labels
The space under your bathroom sink is prime real estate, but it often turns into a black hole of half-empty bottles and tangled cords. When you're rushing to clean, the last thing you want is to dig through a mess. Clear bins and simple labels turn that chaos into a system anyone in the family can follow.
Start by pulling everything out and sorting into categories: cleaning supplies, toilet paper, extra toiletries, and tools like plungers or brushes. Toss anything expired or unused. Measure your cabinet depth and height, then buy clear, stackable bins that fit.
Clear plastic lets you see what's inside without pulling each bin out. Label each bin with a permanent marker or label maker—keep it simple, like "Cleaning" or "Toilet Paper. " Assign a spot for each bin and make sure everyone knows where things go.
This system saves time during cleaning because you grab the right bin and go. It also prevents buying duplicates because you can see your stock at a glance.
Choose Clear Bins For Visibility
Clear bins are non-negotiable. When you're in a hurry, you don't want to open every container to find the glass cleaner. With clear bins, you see the contents instantly.
Look for bins with handles so they're easy to pull out, and consider stackable designs to maximize vertical space.
Label Everything For Family Buy-in
Labels aren't just for you—they help your partner and kids put things back correctly. Use a label maker or simple masking tape and a marker. Keep labels broad enough to be useful (e. g. , "Sprays" instead of listing every product).
If you have young kids, add a small picture next to the word so they can help too.
Group By Frequency Of Use
Store daily-use items like hand soap or toothpaste in the front or on a small turntable. Reserve deeper bins for backups and rarely used supplies. This way, you're not digging for the daily essentials, and the system stays tidy because high-traffic items have their own easy-access spot.
11. Use a Toothbrush Holder That Drains and Dries
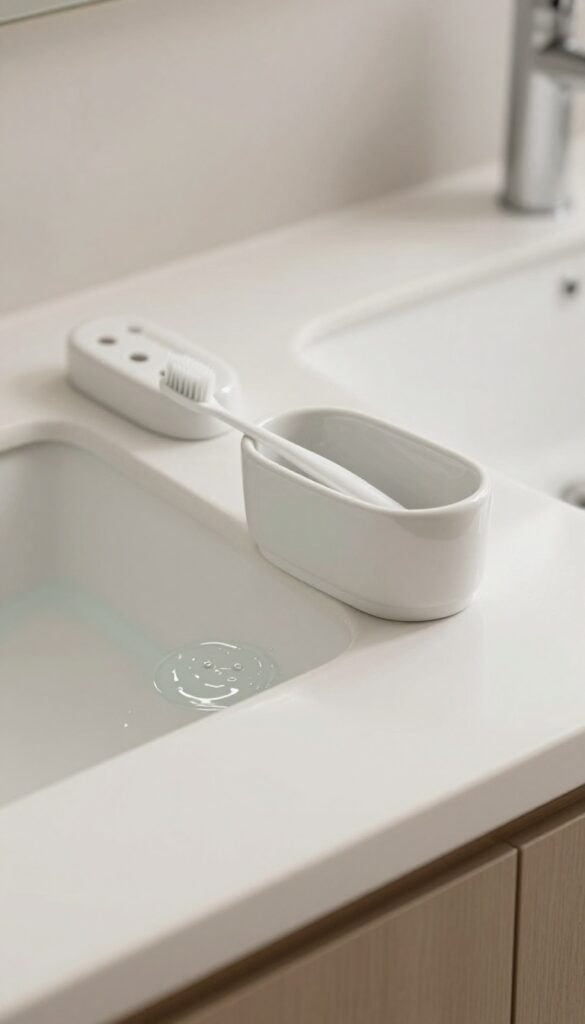
Toothbrush holders are one of those bathroom items that seem harmless until you look closely. That little pool of water at the bottom? It's a perfect breeding ground for mold and bacteria.
Switching to a holder with drainage holes can make a big difference in keeping your family's toothbrushes clean and your counter less grimy.
A closed-bottom toothbrush holder traps moisture, creating a slimy film over time. Opt for a design with slots or holes that let water escape and air circulate. Many modern holders are made of ceramic or stainless steel and can go right in the dishwasher for easy cleaning.
If you prefer a wall-mounted option, look for one that angles downward so water drips off completely. Once a week, give it a quick wash—either in the dishwasher or with a disinfectant wipe—to prevent buildup. This small swap takes two minutes to implement and saves you from scrubbing moldy gunk later.
Why Drainage Matters
Stagnant water is a magnet for germs. A holder without drainage can develop pink or black mold within days, especially in humid bathrooms. By allowing water to escape, you eliminate the moisture that microbes need to thrive.
This simple change can reduce the frequency of deep cleaning needed around the sink area.
Easy Weekly Maintenance
Cleaning your toothbrush holder doesn't have to be a chore. Most dishwasher-safe holders can be tossed on the top rack during a regular cycle. For those that aren't dishwasher-friendly, a quick spray with a disinfectant cleaner and a rinse under hot water does the trick.
Make it part of your Sunday reset routine so it never gets forgotten.
Choosing The Right Holder
Look for holders with wide-set slots to allow airflow between brushes. Avoid designs with deep cups that collect water. Wall-mounted options save counter space and keep brushes upright, which also helps them dry faster.
Materials like ceramic, glass, or stainless steel are easier to keep clean than porous plastic.
12. Keep a Small Trash Can with a Lid
A small trash can with a lid is a game-changer for busy family bathrooms. It keeps used cotton rounds, floss, and other waste out of sight, reducing visual clutter and containing odors. The lid also prevents curious toddlers from rummaging through the trash, making it a safer choice for homes with little ones.
Choose The Right Size And Style
Look for a compact can that fits neatly beside the toilet or under the sink. A step-open or swing-top lid is convenient when your hands are full. Avoid overly large bins that encourage trash buildup—smaller means you're forced to empty it more often, which keeps smells at bay.
Line It For Easy Cleanup
Always use a liner, even for a small can. A simple grocery bag or small kitchen trash bag works. Tying the bag before tossing it out prevents leaks and makes emptying quick.
For extra odor control, sprinkle a little baking soda at the bottom of the can before inserting a new bag.
Empty It Every Few Days
Set a reminder to empty the bathroom trash can every two to three days. In a busy family bathroom, it can fill up fast with diapers, wipes, or hygiene products. Regular emptying prevents smells from building up and keeps the space feeling fresh.
Make it part of your quick daily tidy routine.
13. Use a Shower Caddy with Drainage Holes
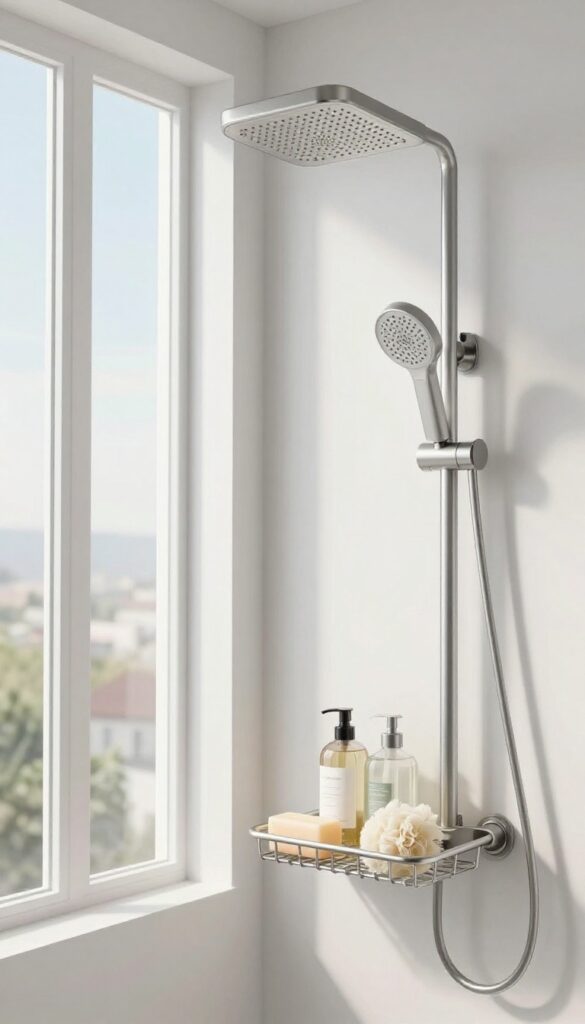
A shower caddy might seem like a simple storage solution, but the wrong kind can trap water and create a science experiment of soap scum and mildew. The key is choosing one with drainage holes so water doesn't pool around your bottles. This small design feature makes a big difference in keeping your shower organized and clean.
Why Drainage Matters
When water sits in the bottom of a caddy, it creates a perfect breeding ground for pink slime and black mildew. Over time, that grime transfers to your shampoo bottles and loofahs. A caddy with holes lets water escape, so everything dries faster and stays fresher.
Choosing The Right Caddy
Look for rust-resistant materials like stainless steel or coated wire. Avoid solid plastic bins unless they have large cutouts. Also consider caddies that hang over the showerhead or attach with suction cups—they keep bottles off the floor and reduce clutter.
Rinse It Weekly
Even with drainage, soap residue can build up. Once a week, take the caddy down and give it a quick rinse with hot water. If you see any scum, spray it with a vinegar solution and wipe it clean.
This habit takes two minutes and prevents buildup.
14. Clean the Bathroom Fan Cover Quarterly
The bathroom fan works hard to pull out moisture and odors, but a dusty cover makes it work twice as hard. When the grille gets clogged, the fan struggles to move air, leaving your bathroom humid and prone to mold. A quick quarterly clean keeps it running efficiently and quietly.
Set a reminder every three months to give the fan cover some attention. It's a five-minute task that prevents dust from recirculating every time you flip the switch.
Vacuum First
Use the brush attachment on your vacuum to gently remove loose dust from the cover. This keeps the grime from falling into the fan motor or onto the floor. Do this before any wet cleaning to avoid making mud.
Wipe With A Damp Cloth
For stubborn buildup, take the cover off (most pop off or have a simple clip) and wash it with warm soapy water. Rinse and dry it completely before snapping it back on. A microfiber cloth works well for a quick wipe-down without removing the cover.
Check For Debris Inside
While the cover is off, peek inside the fan housing. Use a can of compressed air or a soft brush to clear any dust bunnies near the motor. This keeps the fan blades spinning freely and extends the life of the unit.
15. Use a Squeegee for the Mirror Too
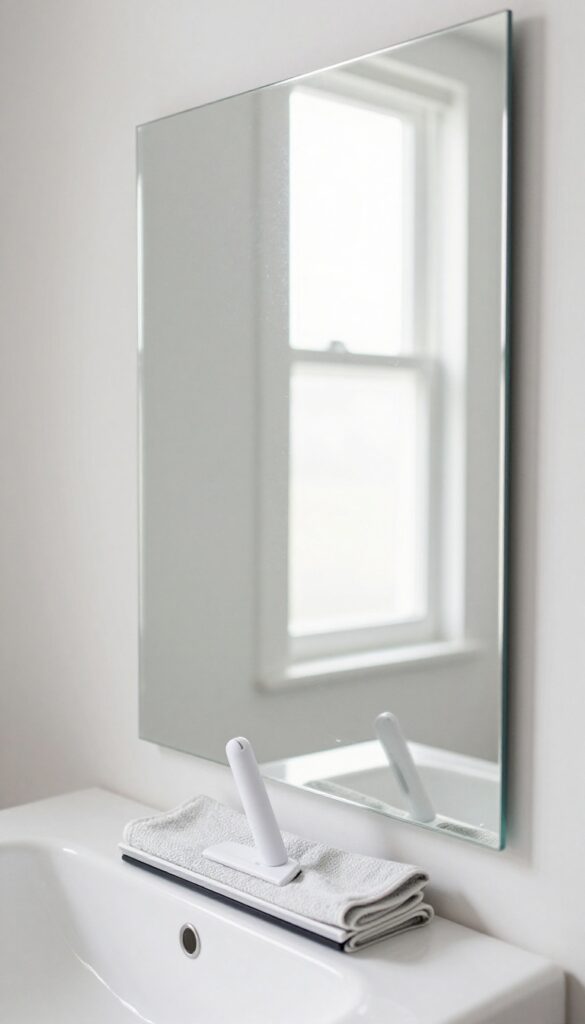
You probably have a squeegee in your shower for the glass doors, but have you ever thought about using it on the mirror? It's a small hack that makes a big difference. After wiping the mirror with a microfiber cloth, a quick pass with a squeegee removes every last streak and water spot.
It takes seconds, and your mirror stays spotless much longer between deep cleans.
Why It Works So Well
Microfiber cloths are great, but they can leave behind fine lint or faint streaks, especially if the cloth isn't perfectly clean. A squeegee glides over the glass and pulls off any remaining moisture or residue without smearing. The rubber blade creates a clean, dry surface instantly.
It's the same reason car detailers use squeegees on windows—it's fast and flawless.
How To Make It A Habit
Keep a small squeegee hanging near the mirror, right next to your microfiber cloth. After you wipe the mirror, grab the squeegee and do one horizontal swipe across the top, then a few vertical passes. That's it.
If you do this every time you clean the mirror—say, twice a week—you'll never have to scrub off stubborn toothpaste splatters or hard water spots again.
Bonus: Less Cleaning Product Needed
When you use a squeegee, you don't need as much glass cleaner or vinegar solution. The blade does the heavy lifting. Just a light mist and a quick wipe before the squeegee pass is enough.
That saves money and reduces chemical use, which is great for busy families trying to keep things simple and safe.
16. Keep a Small Broom and Dustpan in the Bathroom
Hair and dust accumulate fast in a busy family bathroom. A quick sweep every few days prevents buildup and makes the bathroom feel cleaner instantly. Stashing a small broom and dustpan right in the bathroom removes the excuse of not having the tools handy.
Choose The Right Tools
Pick a compact broom with soft bristles that won't scratch tile or grout. A small dustpan with a rubber edge hugs the floor better and scoops up every bit of dust and hair. Keep them in a corner or hang them on a hook behind the door so they're always within reach.
Make It A Quick Habit
Set a reminder to sweep every other day, or tie it to an existing routine like after brushing teeth. It takes less than a minute to sweep the floor around the toilet and sink. Over a week, that's just a few minutes total – way less than dealing with a sticky, hairy floor.
Don't Forget The Corners
Hair tends to gather in corners and under the vanity. Angle the broom to reach those spots. If you have a long-handled dustpan, you can do the whole job without bending over, making it even easier to stay consistent.
17. Use a Disinfecting Wipe on Light Switches and Doorknobs
High-touch surfaces like light switches and doorknobs are germ magnets, especially in a busy family bathroom. Every time someone flips the switch or grabs the door handle, bacteria and viruses hitch a ride. The good news is that a quick weekly wipe-down can significantly cut down on illness-causing germs without adding much time to your cleaning routine.
Make it a habit to grab a disinfecting wipe every time you clean the bathroom. Start with the light switch plate and the doorknob—both inside and out. Don't forget the edge of the door where everyone pulls it shut.
This simple act takes less than a minute but makes a big difference in keeping your family healthier.
Why These Spots Matter Most
Light switches and doorknobs are touched by every family member multiple times a day, often with unwashed hands. In a bathroom, that means germs from toilet flushes, sink use, and even diaper changes can linger. Studies show that these surfaces can harbor cold and flu viruses for hours or even days.
A weekly disinfecting wipe is a low-effort way to break the chain of transmission.
How To Make It A Habit
Keep a container of disinfecting wipes under the bathroom sink or in a caddy with your other cleaning supplies. Set a reminder on your phone for the same day each week—perhaps after your weekly trash pickup. When you wipe down the counters or mirrors, add the light switch and doorknob to your list.
It takes only a few extra seconds and soon becomes automatic.
Choosing The Right Wipe
Not all wipes are created equal. Look for disinfecting wipes that are effective against a broad spectrum of bacteria and viruses, and that are safe for use on painted surfaces and metal finishes. Avoid bleach-based wipes on brass or nickel hardware as they can cause discoloration.
Instead, opt for alcohol-based wipes or those labeled as gentle on surfaces.
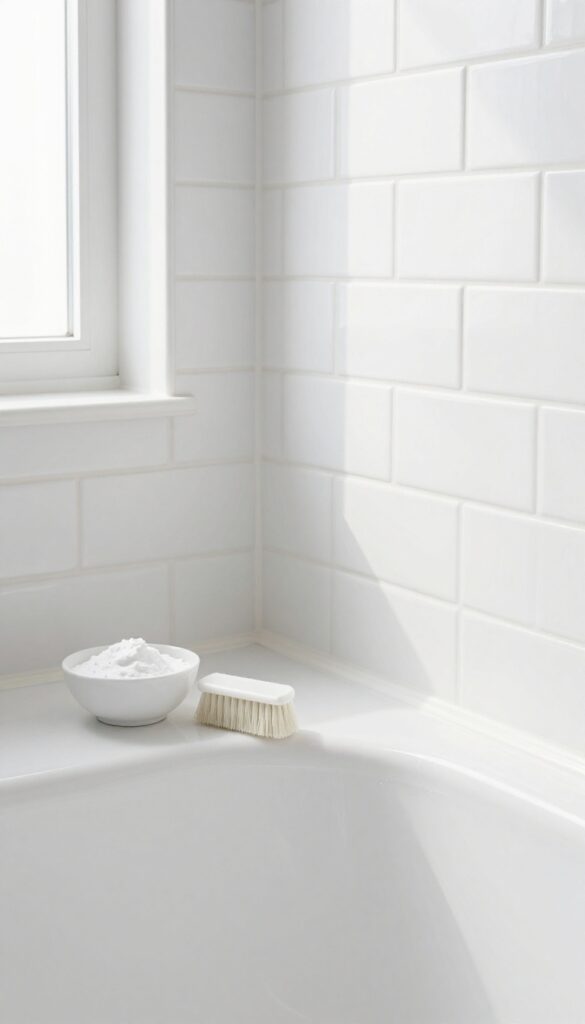
18. Deep Clean Grout and Caulk Every Few Months
Grout and caulk are the unsung heroes of a clean bathroom—until they start looking dingy. Stained grout and peeling caulk don't just look bad; they can harbor mold and lead to water damage. A little focused effort every few months keeps them fresh and functional.
To tackle grout, mix baking soda with a little water to form a paste. Apply it to the grout lines, let it sit for 10 minutes, then scrub with a grout brush or an old toothbrush. Rinse well.
For tougher stains, add a splash of vinegar to the paste (but don't use vinegar on natural stone). If the caulk around your tub or shower is cracked or discolored, it's time to replace it. Use a caulk remover tool or a utility knife to scrape out the old caulk, clean the area, and apply a fresh bead of silicone caulk.
Smooth it with a wet finger or a caulk finishing tool. Let it cure for 24 hours before using the shower.
Why Grout And Caulk Matter
Grout is porous, so it easily absorbs moisture and soap scum, leading to discoloration and mold growth. Caulk provides a waterproof seal at joints and corners. When it fails, water seeps behind tiles and fixtures, causing rot and expensive repairs.
Keeping both in good condition prevents bigger problems down the road.
Simple Grout Cleaning Method
For a quick refresh, spray grout with a 50/50 vinegar-water solution and scrub with a stiff brush. For deeper cleaning, the baking soda paste method works wonders. Let it sit longer for stubborn stains.
Rinse thoroughly and dry with a towel to prevent new mildew.
When To Re-caulk
If caulk is pulling away, has black mold that won't scrub off, or feels brittle, it's time to replace it. This is a straightforward DIY job. Remove the old caulk completely, clean and dry the area, then apply new caulk.
Wait 24 hours before exposing it to water.
19. Keep a Caddy with All Cleaning Supplies in the Bathroom
Nothing kills cleaning momentum like having to hunt down supplies from different rooms. When you're short on time, every second counts. A dedicated caddy stored right in the bathroom removes all excuses.
Choose a sturdy caddy with a handle so you can easily carry it around. Stock it with an all-purpose cleaner, a glass cleaner, a microfiber cloth, a scrub brush, and a squeegee. Keep it under the sink or in a cabinet.
When you spot a mess, grab the caddy and tackle it immediately. This simple setup cuts your cleaning time in half and makes it much more likely you'll actually clean.
What To Put In Your Caddy
Start with the basics: an all-purpose cleaner for counters and sinks, a glass cleaner for mirrors and shower doors, a microfiber cloth (or two), and a scrub brush for the toilet and tub. Add a squeegee if you have glass shower doors. You can also toss in a small bottle of toilet bowl cleaner and a pair of gloves.
Keep it minimal—you don't need a full arsenal, just the essentials that actually get used.
Where To Store It
The best spot is under the sink, but if that's packed, use a wall-mounted caddy or a small shelf near the toilet. The key is visibility and easy access. If you have kids, consider a caddy with a lid or store it out of reach.
For a shared family bathroom, assign a spot where everyone knows to return the caddy after use.
How It Saves Time
No more running to the kitchen for spray or hunting for a clean rag. With everything in one place, you can wipe down the sink, mirror, and toilet in under five minutes. It also makes it easy for other family members to help—they just grab the caddy and go.
Consistency becomes effortless.
20. Do a Monthly Declutter of Bathroom Products
Bathroom counters and cabinets have a way of collecting mystery bottles and half-used tubes. Every month, set aside 10 minutes to pull everything out and sort through it. You'll be surprised how much space you free up and how much easier cleaning becomes when you're not working around clutter.
Monthly decluttering keeps your bathroom functional and fast to clean. When surfaces are clear and cabinets are organized, wiping down counters and shelves takes seconds instead of minutes. Plus, fewer products mean less dust accumulation and fewer items to move around during a deep clean.
Check Expiration Dates
Many bathroom products have a shelf life. Sunscreen, makeup, and certain skincare items can expire and become less effective or even irritating. Look for the little jar icon on the label that tells you how many months the product lasts after opening.
Toss anything that's past its prime.
Recycle Or Dispose Properly
Empty bottles and tubes should go in the recycling bin, but check your local rules—some items like aerosol cans or prescription bottles need special handling. For expired medications, many pharmacies offer take-back programs. Don't just flush them; that can harm the environment.
Group And Store Like Items
After purging, group similar products together: all hair products in one bin, first aid supplies in another, and cleaning tools in a caddy. Use clear containers or labels so everyone in the family can find what they need and put things back where they belong.
FAQ
How often should I clean the bathroom in a busy family home?
Aim for a quick daily wipe of high-use areas like the sink and toilet, a weekly deep clean of the toilet and shower, and a monthly or quarterly deep clean for grout, fan covers, and showerheads.
What's the best way to prevent mold in the shower?
Use a squeegee after each shower, spray a daily vinegar-water solution, and ensure the bathroom fan runs during and after showers to reduce humidity.
How can I get my kids to help with bathroom cleaning?
Assign age-appropriate tasks like wiping the sink, squeegeeing the shower, or restocking toilet paper. Use a timer and make it a game to keep them engaged.
What cleaning products are safe for daily use?
Mild all-purpose cleaners, vinegar-water solutions, and microfiber cloths are safe for daily use. Avoid harsh chemicals that can damage surfaces or irritate skin.
How do I clean a bathroom quickly when guests are coming?
Focus on the toilet, sink, and mirror. Wipe down the counter, empty the trash, and do a quick sweep. A spray of air freshener can help, but address odors at the source.
Conclusion
A clean bathroom doesn't have to be a distant dream in a busy household. Pick just two or three of these tips that fit your family's rhythm—like a quick daily wipe-down of the sink and a weekly toilet scrub—and make them stick. Small, consistent efforts beat a marathon cleaning session every time.
The key is finding what works for your specific schedule and sticking with it. Over time, these micro-habits will keep your bathroom fresh without the overwhelm, giving you back precious time for what really matters.