11 Christmas Mirror Decor Ideas for a Festive Home Look
A mirror already does quiet work in your home, bouncing light around and making small rooms feel bigger. At Christmas, it can do a lot more than that. A little greenery, a string of lights, or a few ornaments turn a plain frame into a festive focal point without rearranging a single piece of furniture.
The best part is how cheap and quick most of these ideas are. You probably already own half the supplies, and the rest cost less than a fancy coffee.
Renters can play too, since almost everything here skips nails and permanent hardware. Below are 11 Christmas mirror decor ideas, from five-minute touches to a weekend project.
1. Drape a Simple Evergreen Garland Across the Top
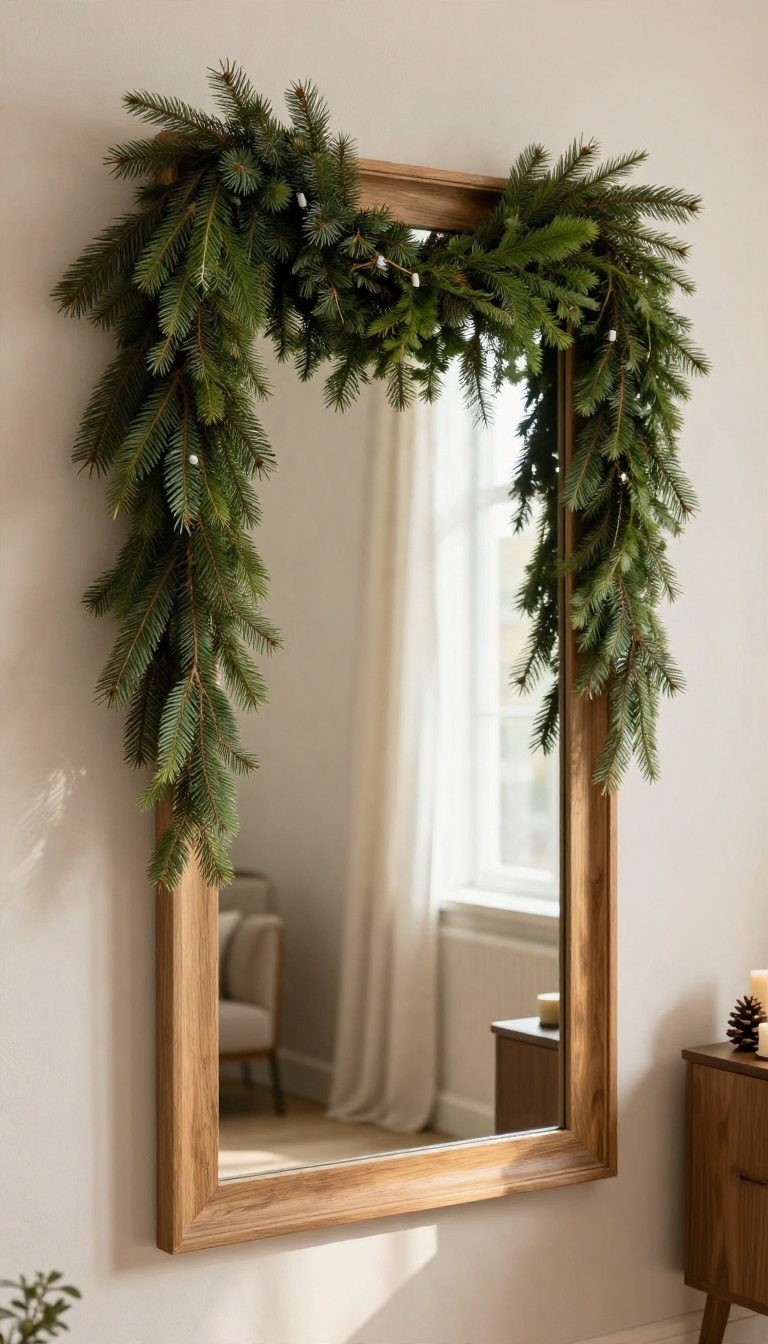
A garland draped over the top corner of a mirror is the Christmas equivalent of a good accessory—it adds instant festive flair without covering up the glass. You can use real evergreen branches for a fresh scent or faux garland that you can reuse year after year. The key is to make it look intentional, not like it fell off the tree.
Start by choosing a garland that matches your mirror's scale. A thin, sparse garland can get lost on a large mirror, while a thick, lush one might overwhelm a small frame. For most mirrors, a medium-thickness garland (about 4 to 6 inches wide) works well.
If you're using real evergreen, opt for cedar, pine, or fir—they hold up well indoors and smell amazing. Faux garlands have come a long way, so look for one with realistic needle texture and a bit of variation in color.
How To Secure It Without Damage
Command hooks are your best friend here. Place two small hooks on the top corners of the mirror frame—or on the wall just above if the frame is too thin. Loop the garland ends over the hooks and let it swoop slightly in the middle for a natural look.
If you're worried about the garland slipping, use a couple of clear zip ties or twine to tie it loosely to the hook. Avoid tape or adhesive putty directly on the mirror glass, as it can leave residue or lose grip in warm rooms.
Getting The Amount Right
A common mistake is using too little garland, which makes the mirror look underdressed. As a rule of thumb, use about 1. 5 times the width of your mirror.
So for a 36-inch-wide mirror, go for a 54-inch garland. This allows for a gentle drape and a little extra to tuck behind the frame. If you want a fuller look, double up on garlands or add a few loose branches tucked in.
Just avoid going overboard—you still want the mirror to function as a mirror.
Keeping It Balanced
Symmetry is nice, but a perfectly symmetrical garland can look stiff. Aim for a natural, slightly asymmetrical drape—maybe one side hangs a bit lower or the middle dips just a touch. Step back and check from a distance.
If it looks lopsided in a bad way, adjust the hooks or fluff the branches. You can also add a small ornament or a bow at the low point to anchor the design and draw the eye. A little tweaking goes a long way.
2. Hang a Few Statement Baubles at Different Heights
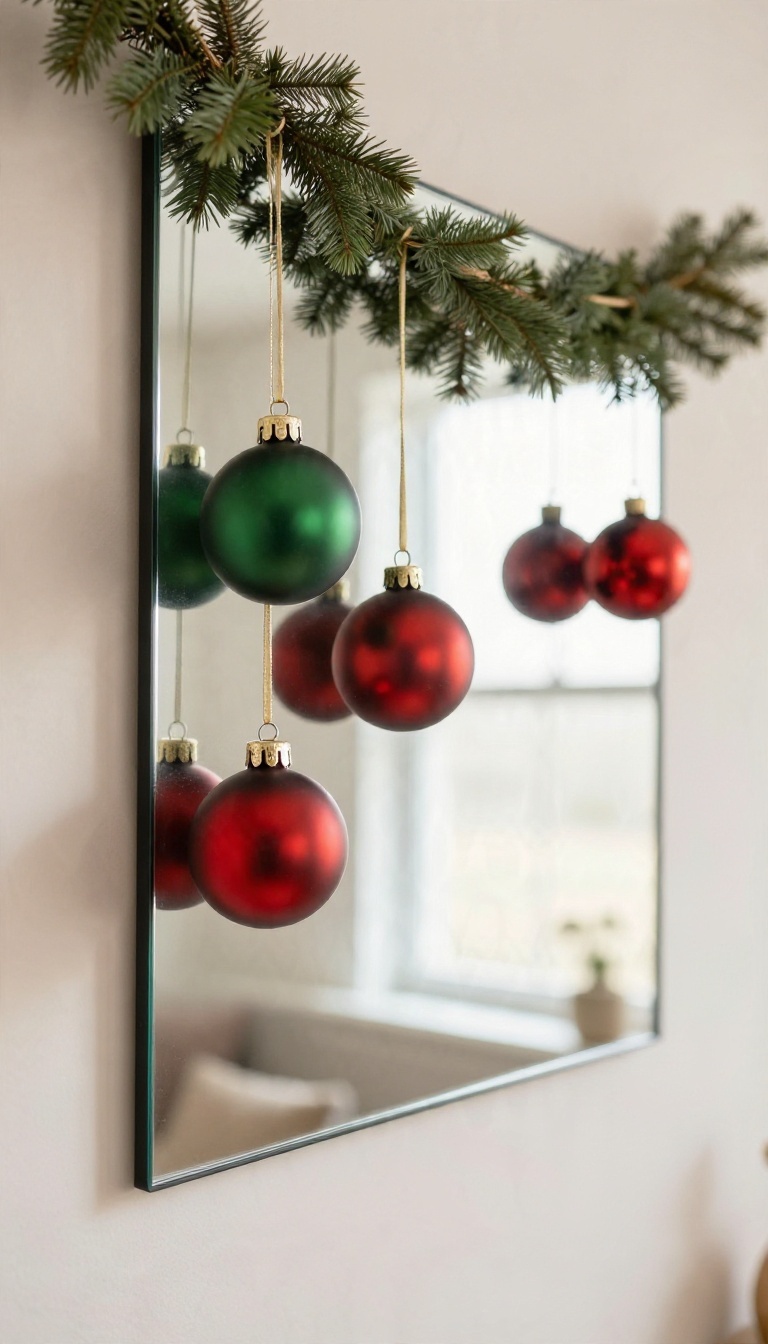
Most mirror decor sits on the frame or drapes over the top edge. This one floats in front of the glass instead. You suspend a handful of oversized baubles from ribbon or fishing line at staggered lengths, so they hover at different heights in front of the reflection.
The mirror doubles every ornament, which makes three or four baubles look like a full cluster. It's a small trick with a big payoff, and it takes about fifteen minutes to set up.
The floating effect comes from contrast. Big ornaments against a plain mirror read as deliberate, while a dozen small ones just look like clutter. Stick to three to five statement pieces and let the space between them do the work.
You also want the heights to look random, not measured. Stagger them by two or three inches so the eye moves up and down the glass instead of scanning a straight line. That uneven rhythm is what makes the whole thing feel light.
Pick Your Anchor Points
You need something above the mirror to hang from, and you have a few options. A picture hook, a curtain rod, a shelf bracket, or even the top edge of the frame itself can work. Command hooks are the renter-friendly pick and hold a surprising amount of weight if you clean the surface first.
If your mirror hangs flush against the wall with no gap above it, run a thin tension rod across the top of the frame or use a removable adhesive strip rated for the ornament's weight. Test each anchor with a gentle tug before you trust it with glass baubles.
Ribbon Or Fishing Line?
Ribbon gives you a softer, more traditional look and comes in every color you could want. Satin reads elegant, velvet reads cozy, and a wide grosgrain holds a knot well without slipping. Cut each length a little longer than you think you need, then trim once it's hanging.
Fishing line is the invisible option. It makes the baubles look like they're floating with nothing holding them, which is the whole point of this idea. Use 20-pound test so it doesn't snap, and tie a small loop at each end.
A dot of clear tape over the knot keeps it from sliding.
Group Colors On Purpose
A random mix of colors can look like a craft bin exploded. Instead, pick a palette of two or three shades and repeat them. Two reds and one gold, or three shades of the same blue, reads intentional and calm.
You can also mirror your room's existing colors so the ornaments feel like they belong. If your tree is red and white, carry that up onto the mirror. If you want a quieter look, go all metallic in one finish and let the reflections add the sparkle.
Keep It From Looking Cluttered
Space is your friend here. Leave at least four inches between baubles, and don't hang anything lower than the middle of the mirror. The bottom half stays clear so the glass still does its job of bouncing light.
Skip tinsel, garland, and lights on the same mirror if you're using floating baubles. One strong idea beats three competing ones. If the arrangement feels busy, remove one ornament and see how it looks.
It usually improves.
3. Wrap the Frame in Twinkle Lights
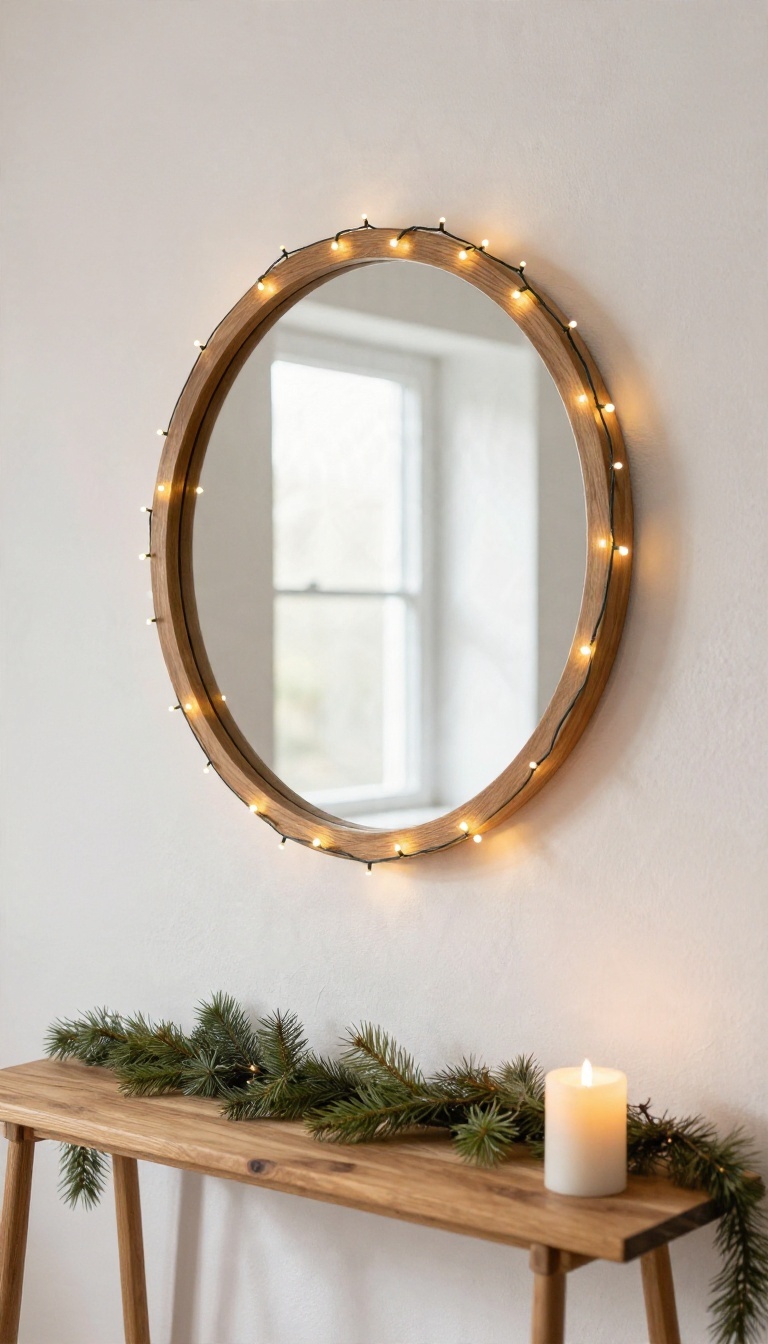
Strings of tiny lights make almost anything feel like Christmas, and a mirror frame is one of the easiest places to prove it. Battery-powered fairy lights give you that soft glow without hunting for an outlet or taping an extension cord across the hallway. The whole thing takes about ten minutes, and you can undo it just as fast in January.
The trick is winding with a little patience instead of looping the strand in one messy pass. Start at the bottom corner and work your way up, letting the wire follow the frame's edge. Keep the coils loose and slightly uneven so the lights look relaxed rather than wound tight like a spool.
Once the lights are on, tuck the battery pack somewhere out of sight and decide how warm you want the glow. A few small choices make the difference between a polished look and a tangled one.
Hiding The Wire And Battery Pack
Run the wire along the back of the frame rather than across the glass, and use a couple of small clear adhesive clips to hold it in place. The battery box can sit on top of the frame, behind it, or on the floor if the mirror reaches down low. A tiny piece of double-sided tape keeps it from sliding.
If the frame is thick, tuck the pack into the gap between the mirror and the wall so nothing shows from the front.
Warm White Or Cool White?
Warm white lights throw a golden, cozy glow that suits wood frames, garlands, and anything rustic. Cool white reads crisper and more modern, and it looks sharp against black or silver frames. If your room already leans warm with lamps and candles, stick with warm white so the mirror doesn't look out of place.
Cool white works best in kitchens, entryways, and rooms with a lot of white and gray.
Making The Glow Last
Battery fairy lights usually run for a few weeks on a fresh set, depending on how long you leave them on. A timer pack saves you from remembering to switch them off every night. Check the strand before you wind it so you're not unwrapping a dead set later.
Keep a spare pair of batteries in a drawer and you're set through the season.
4. Turn the Mirror Into a Christmas Card Display
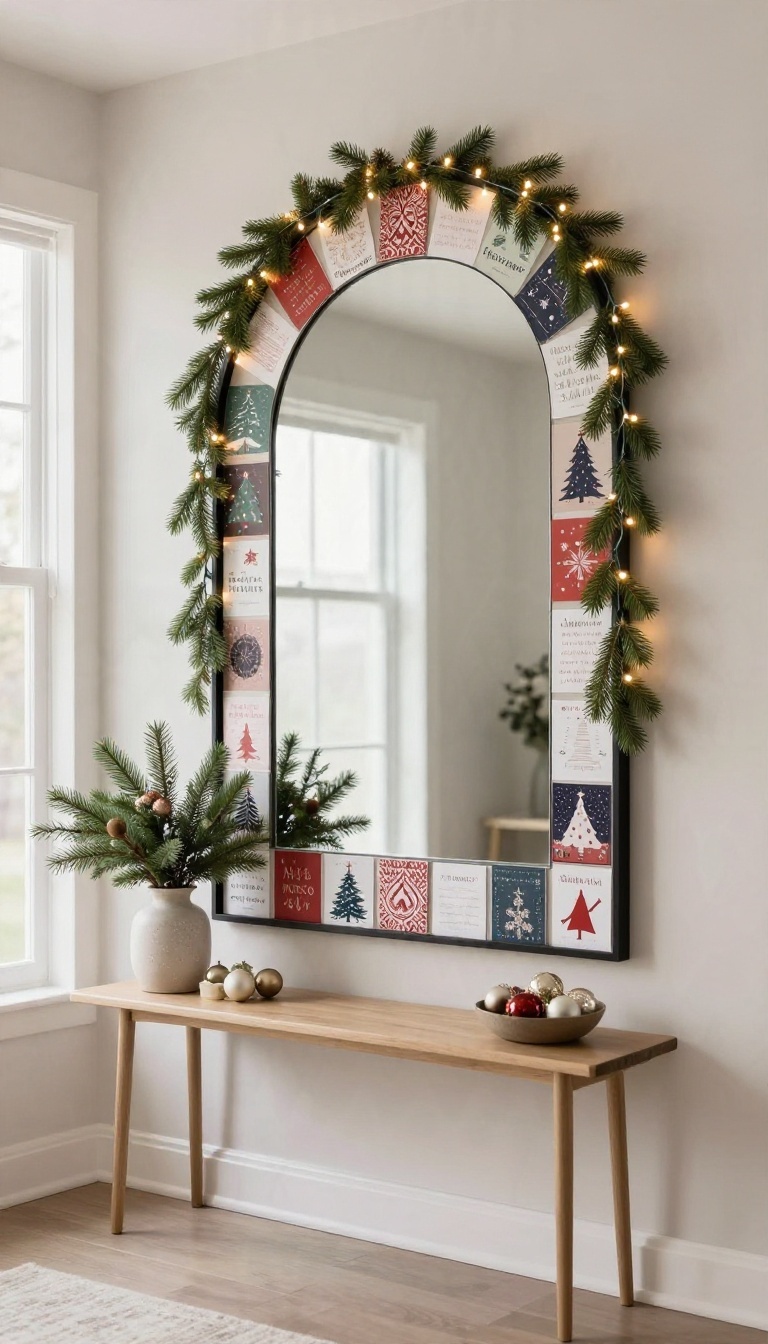
Every December, the same thing happens: cards pile up on the counter, get knocked to the floor, and eventually end up in a sad stack by the recycling bin. A mirror gives them somewhere better to live. Tape or clip your holiday cards around the edges of the glass, and the mirror becomes a frame for the season's mail.
It's one of the fastest ways to make a hallway or entry mirror feel personal instead of just decorative.
The trick is to work with the mirror instead of covering it. Cards go around the border, leaving the center open so the glass still reflects light and the room. That keeps the whole thing looking intentional rather than cluttered.
Start by gathering this year's cards plus any favorites you've saved from past years. Sort them into rough size groups before anything goes on the glass. A few minutes of sorting saves a lot of peeling and repositioning later.
Pick Tape That Lifts Cleanly
Not all tape belongs near a mirror. Standard masking tape can leave gummy residue, and duct tape is a hard no on painted or finished frames. Reach for painter's tape or removable mounting putty instead.
Both hold cards flat and pull off without taking finish with them. Test a small strip in a hidden corner first, especially on antique or painted frames. If the tape lifts a fleck of paint, stop and switch to putty.
For glass-only spots, a tiny loop of painter's tape on the back of each card works great and comes off in seconds.
Arrange Cards By Size And Weight
Big cards anchor the display. Place the largest ones at the bottom corners or along the lower edge, where they feel grounded. Smaller cards fill in the top and sides, and odd-shaped or tall cards work best near the corners.
Leave a little breathing room between each card so the arrangement doesn't look like a wall of paper. Overlap a couple of corners for a relaxed, layered feel, but keep the center of the mirror clear. If you have a lot of cards, rotate a few in and out as new ones arrive.
Try Clips For A No-tape Option
If tape makes you nervous, small clips or mini clothespins do the job. Clip cards to a thin ribbon or string stretched across the top of the frame, or use adhesive hooks on the frame's back edge to hold a short line. Command-style strips work well here and come off clean.
Clips also make it easy to swap cards as the month goes on. New card from Aunt Linda? Clip it up front and move an older one toward the edge.
No sticky residue, no fuss.
5. Add a Wreath That Hangs From the Frame

Hallways and bathrooms rarely have a spare inch of floor or counter space, which is exactly why a wreath hung right on the mirror earns its spot. It floats above the sink or sits at eye level in a narrow hall, adding Christmas color without stealing a single surface. The mirror holds the weight, the wreath does the decorating, and you get festive impact in about two minutes.
The trick is hanging it so the wreath looks intentional rather than like it slid off a door. A few small choices about hooks, size, and where the greenery touches the frame keep it looking polished and protect the glass.
Pick A Hook That Won't Leave A Mark
Over-the-door hooks are the simplest option for a mirror with a thick frame, since they grip the top edge and need no adhesive at all. For thinner frames, a removable adhesive hook rated for a pound or two holds a small wreath fine and peels off cleanly in January. Command strips and suction cups work too, but skip suction on textured or painted frames, where they tend to let go overnight.
Whatever you choose, test it with the wreath's full weight for a day before you trust it above a hard floor.
Match The Wreath To The Mirror
A wreath should take up roughly a third to half the width of the mirror so it reads as a deliberate accent, not a decoration that swallowed the frame. On a tall bathroom mirror, a slim 10 to 12 inch wreath near the top corner looks balanced. On a wide hallway mirror, go slightly bigger or hang two smaller wreaths at opposite corners for symmetry.
Mini wreaths made for cabinets and windows are a great fit for tight spaces and barely add any weight.
Keep Greenery Off The Glass
Real branches, wire stems, and rough twine can all scratch glass if they rub against it, so give the wreath a little breathing room. Hang it so the back sits just off the surface, or add a small felt pad or piece of ribbon behind any spot that touches. If you use a fresh wreath, seal the cut ends or set it on a small saucer of foil so sap and water don't drip onto the frame.
Faux greenery avoids most of this, but check for exposed wire ends before you hang it.
6. Use Chalk Markers for a Festive Message
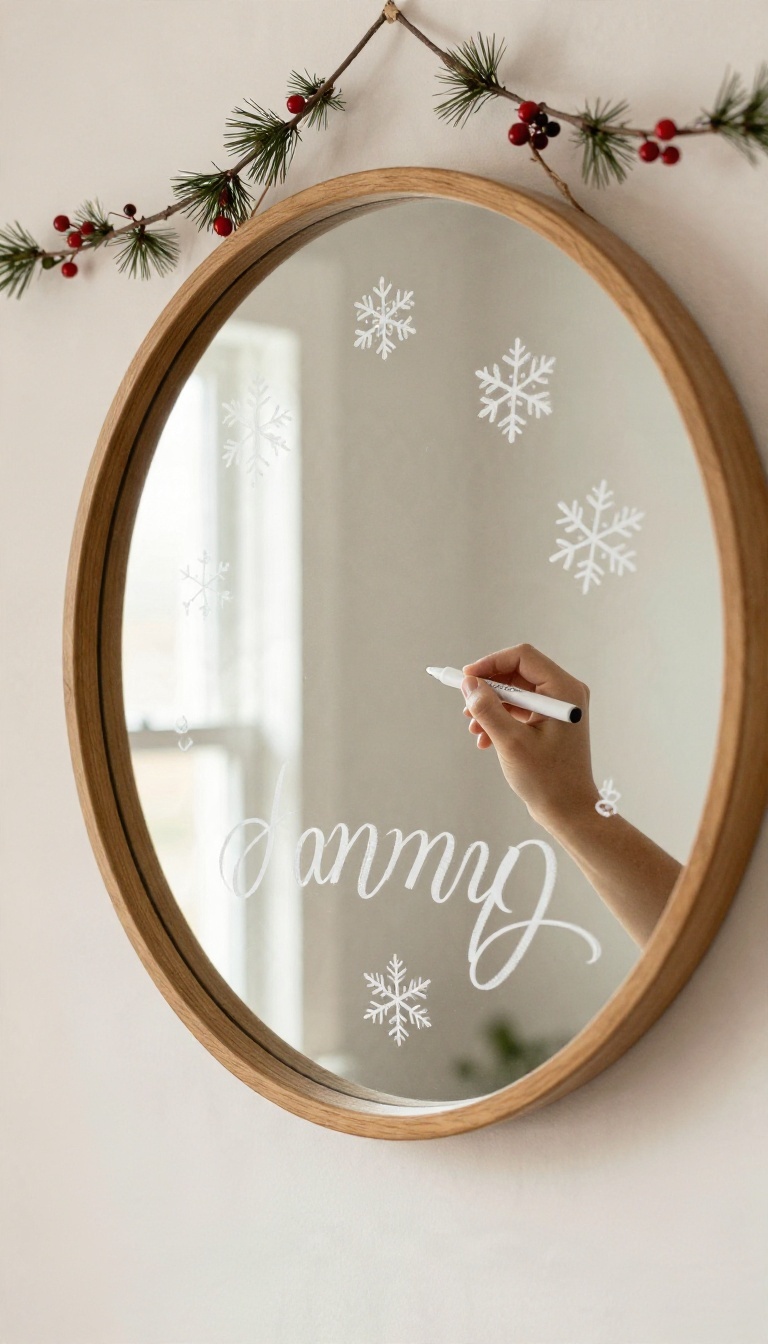
Chalk markers turn the glass itself into the decoration. A quick greeting, a date, or a few hand-drawn snowflakes give a mirror a personal touch that no store-bought garland can match. It takes about five minutes, and you can change it whenever the mood strikes.
The trick is choosing markers that wipe away cleanly and testing them somewhere hidden before you commit to the middle of the glass. Do that and you get all the charm with none of the regret.
Pick Markers That Actually Wipe Off
Liquid chalk markers made for glass and whiteboards are the safe bet. Look for labels that say "erasable" or "for glass, " and lean toward water-based formulas over anything permanent. A fine-tip marker handles lettering and small snowflakes, while a thicker chisel tip works better for bold strokes and quick flourishes.
Skip regular dry-erase markers if the mirror sits in a steamy bathroom, since the ink can smear. And avoid anything labeled permanent or oil-based, no matter how pretty the color looks on the cap.
Test A Corner First
Before you write anything you care about, draw a small line in an out-of-the-way corner, like the bottom edge or behind the frame. Let it sit for a day, then wipe it with a dry paper towel. If it comes off clean, you're good to go.
If it leaves a ghost mark, try a damp cloth with a drop of dish soap. Still stubborn? That marker belongs on a chalkboard, not your mirror.
Write Something Short And Sweet
Keep the message brief so it reads at a glance. "Merry Christmas, " a family name, or a simple "Joy" works better than a full paragraph. Center it in the upper third of the glass where it won't fight with your reflection.
For snowflakes, draw a small asterisk shape and add tiny dots around it. A few scattered down one side looks intentional and festive without feeling cluttered. Wipe and redraw whenever you want a fresh look, maybe swapping the greeting for a countdown to the big day.
7. Layer a Mirror Behind a Holiday Vignette

A mirror doesn't have to be the star of the show. Sometimes it works harder as a backdrop, sitting quietly behind a small cluster of holiday things and doubling everything you place in front of it. The trick is treating the glass like a stage set rather than the main act.
You get twice the glow from a single candle, twice the greenery, twice the little figurine. It's one of the least expensive ways to make a surface look styled instead of cluttered, and you can pull it together in about ten minutes with things you already have.
The setup is simple: a mirror leaning against the wall, a small arrangement in front of it, and enough breathing room that nothing feels crowded. The reflection does the heavy lifting, so you don't need much on the surface itself.
Build The Vignette In Layers
Start with the mirror itself. Lean it against the wall on a console, mantel, or sideboard, or hang it low enough that the bottom edge sits close to the surface. A mirror that floats too high won't catch what's in front of it.
Next comes greenery. A short garland, a few sprigs in a small vase, or a clipped branch laid along the base gives the arrangement some softness. Keep it low so it doesn't block the reflection.
Then add height with a figurine, a small nutcracker, a ceramic tree, or a single taper holder. Place it slightly off-center so the reflection feels natural rather than staged. Finish with one or two candles in front, and you're done.
Resist the urge to fill every inch. A vignette works because it looks intentional, and empty space on the mirror surface is part of that.
Keep Candles Safe Around Glass
Glass and open flame need a little respect. Always use a candle that sits in a proper holder, and keep the flame at least a few inches from the mirror surface. A flame too close to glass can leave a scorch mark or crack it over time.
Skip tall tapers directly in front of the mirror if the surface is low. The flame ends up right at eye level with the glass. Pillars and votives in glass cups are safer and reflect just as nicely.
Never leave candles burning unattended, and blow them out before you leave the room or head to bed. If you want the glow without the worry, flameless LED candles look convincing in a reflection and cost very little.
Style The Surface Without Clutter
Give the mirror a base to sit on. A small tray or a stack of two books under the greenery keeps things from sliding and makes the whole arrangement look deliberate. Vary the heights.
One tall piece, one medium, and a couple of low candles create a triangle the eye likes. Grouping everything at the same height flattens the look. Finally, check the reflection from where people actually stand.
Sit or walk to the spot you'll view it from most, and adjust until the mirror shows the best version of the vignette. A quick shift of an inch or two makes a real difference.
8. String a Bead or Tassel Garland for a Softer Look
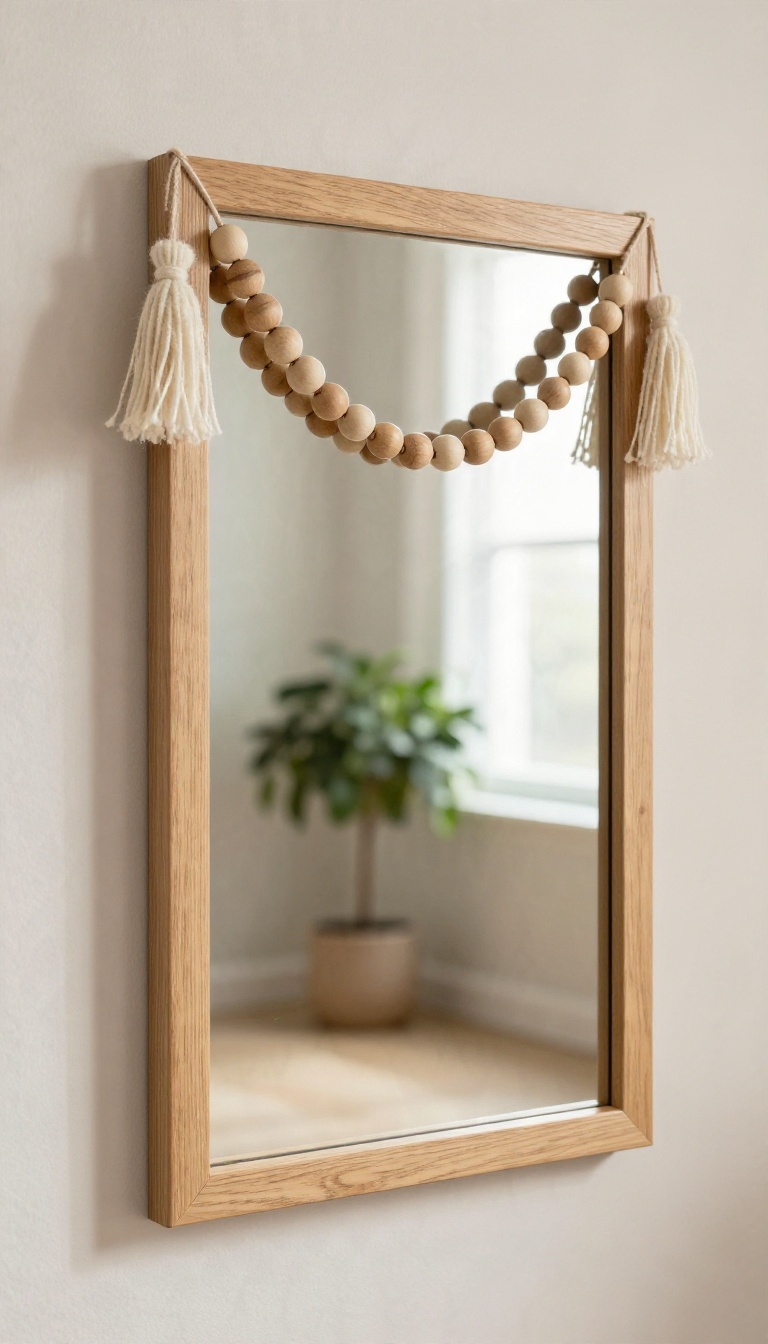
Evergreen garlands are gorgeous, but they can feel heavy and a little predictable. A strand of wooden beads or felt tassels gives you that draped, festive feel without the bulk or the needle drop. It's also one of the fastest DIYs on this list, and you can make one while watching a movie.
The texture does most of the work here. Beads catch the light in a subtle way, and tassels add a soft, cozy movement that plain ribbon just can't match.
The nice thing about a bead or tassel strand is that it plays well with almost any decor style. It reads boho, farmhouse, or modern depending on the colors you pick, so it fits whatever else you've got going on. And because it's lightweight, it won't pull at your frame or leave marks.
Make A Quick Diy Strand
Grab a spool of twine or thin cord, a bag of wooden beads, and a pair of scissors. Cut your cord a little longer than you think you need, tie a knot at one end, and start threading. Mix in a few larger beads or a pop of color every so often to break up the pattern.
For a tassel version, buy pre-made felt tassels or cut your own from felt squares. Fold each one over the cord and secure with a small knot or a dot of hot glue. Space them evenly so the strand hangs nicely.
The whole thing takes maybe twenty minutes.
Where It Reads Best
Drape a bead garland across the top corner of a mirror for an easy, asymmetrical look. It softens a rectangular frame and draws the eye up without blocking the reflection. Tassel strands work beautifully on a bathroom or entryway mirror, where you want a hint of holiday without a full production.
You can also loop one around a round mirror and let the ends hang down the side for a relaxed, lived-in feel.
Keep It Looking Good
Hang the strand so the beads or tassels don't press against the glass. A little breathing room keeps the reflection clean and stops the cord from leaving smudges. If your mirror sits in a steamy bathroom, check the strand now and then for moisture and dry it off if needed.
9. Swap in a Festive Ribbon Border

A ribbon wrapped around a mirror frame reads instantly as a wrapped gift, and that's exactly the charm. One wide band of satin or velvet turns a plain rectangle into something that looks intentionally styled, not just decorated. The whole swap takes about ten minutes, and you can undo it on January 2nd without a single mark left behind.
The trick is treating the ribbon like the frame's new edge. You're not tying a bow around a box and hoping for the best; you're creating a clean border that follows the shape of the mirror. Pick a ribbon wide enough to actually register from across the room, then decide whether it sits flat against the glass edge or wraps around the outer frame.
Either look works, but they photograph and feel different. A border set just inside the frame keeps the mirror's own lines visible. A wrap around the outside softens a hard-edged frame and makes the whole thing feel cozier.
Try one, step back, and trust your gut.
Choosing The Right Ribbon Width
Go wider than feels normal. A 1. 5- to 2-inch ribbon holds its own next to a chunky frame, while thin ribbon disappears and looks like leftover gift wrap.
Satin gives you a glossy, polished finish; velvet or grosgrain adds texture and a slightly more traditional feel. For patterned frames, pick a solid ribbon so the two don't fight each other.
Where The Bow Belongs
Centered on top is the safe, classic choice and it reads clearly as a gift. Off to one corner feels a little more relaxed and less symmetrical. A bow at the bottom can work on tall mirrors, but it tends to get bumped.
Keep the tails short and trim them at an angle so they look finished rather than frayed.
Keeping It Removable
Command strips or double-sided tape hold a flat border in place without damage, and they peel off cleanly when the season ends. For a wrap-around look, tie the ribbon at the back of the frame or use small clips hidden behind it. Skip anything that touches the glass with adhesive, since residue on a mirror is a pain to remove.
10. Cluster Small Mirrors Into a Christmas Gallery
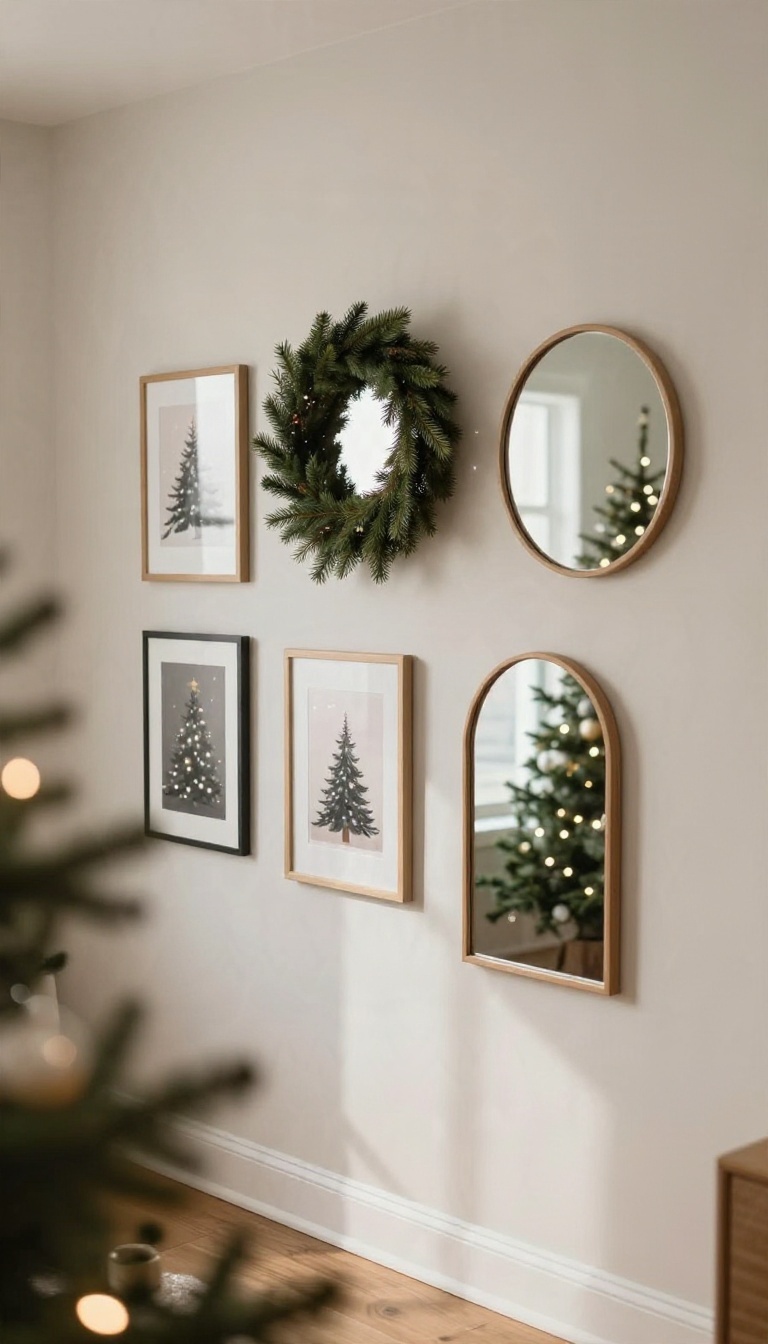
A blank stretch of wall can feel like a missed opportunity during the holidays, especially when every other surface is dressed up. Gathering a handful of small mirrors into one tight group fixes that fast. The mirrors bounce light and add sparkle, while a few holiday prints and a wreath tie the whole cluster to the season.
It reads like a curated gallery wall, but it costs almost nothing if you already have mirrors tucked away in closets.
The trick is treating the group as one single shape rather than a bunch of separate pieces. Start by laying everything on the floor or a large table so you can shuffle the arrangement before anything touches the wall. Once the layout clicks, the hanging part goes quickly.
Mix sizes and shapes so the cluster feels collected rather than matchy. A round mirror next to a small arch and a couple of rectangles gives the eye somewhere to travel. Keep the spacing tight, roughly two to three inches between frames, so it reads as one unit instead of scattered dots.
Plan The Layout On The Floor First
Spread your mirrors, prints, and wreath on the floor and snap a photo once you like the arrangement. That photo becomes your map when you're standing on a ladder. Start with the largest piece slightly off-center, then build outward with smaller items until the edges feel balanced.
Aim for a loose outline, not a perfect rectangle. Let one or two pieces break the border so the cluster looks organic. If something feels off, swap two pieces and check again before you commit.
Mix Shapes Without The Mess
Two or three shapes work best: round, arched, and rectangular. Repeating one shape three times gives rhythm, while a single odd shape adds interest. Skip anything with heavy ornate frames if the rest of your wall is busy, since small mirrors already carry a lot of visual weight.
Holiday prints should stay small and simple. A vintage Santa, a snowy scene, or a few botanical sprigs in thin frames keep the focus on the mirrors. Tuck a small wreath into the cluster as the anchor piece and let the mirrors frame it.
Hang It With Fewer Holes
Paper templates save your walls. Trace each frame onto paper, cut it out, and tape the shapes to the wall until the layout matches your floor plan. Then hammer right through the paper and peel it away.
Command strips handle most small mirrors and prints without any nails at all, which renters will appreciate. For heavier pieces, use one hook per item and lean on the template so you drill once. A level app on your phone keeps the rows honest without extra tools.
11. Reflect Your Tree or Tablescape on Purpose
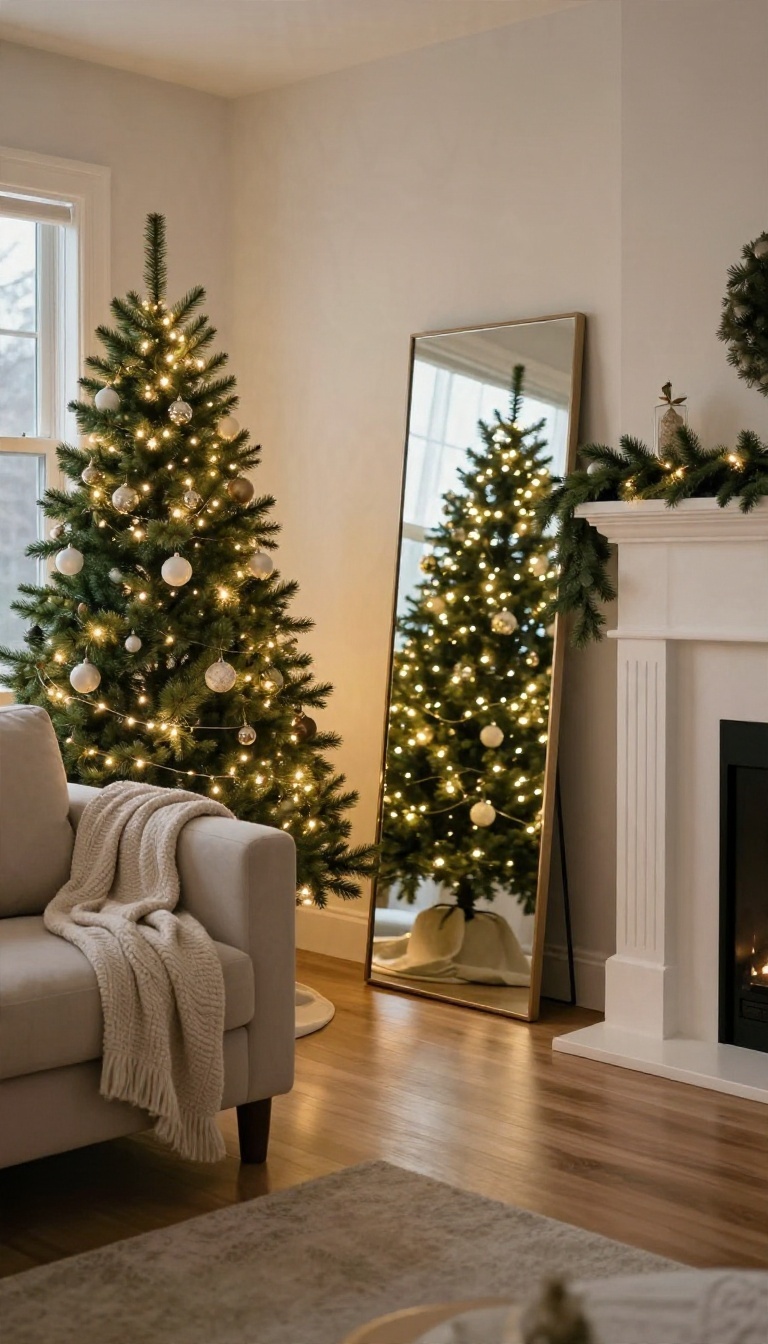
Most people hang a mirror and let it do whatever it does. At Christmas, you can point it at something worth doubling. Angle a mirror toward your tree, your mantel, or a dressed-up table and you get twice the glow from half the effort.
The trick is placement, not more decorations. A few inches of tilt can change the whole mood of a room.
Think of the mirror as a second window into your holiday setup. Whatever it catches, it repeats back at you, softer and slightly shifted. That's why a mirror angled at a lit tree reads as magic instead of clutter.
The reflection adds depth without adding stuff. You just have to aim it.
Aim It At The Tree
Stand where you'll actually sit or walk, then tilt the mirror until the tree lands in the glass. A floor mirror across the room works well, especially in a corner where it can catch the whole silhouette. In a narrow hallway, a smaller mirror angled toward the tree pulls a warm glow down the hall.
Check it at night with the lights on, since daytime angles often lie. If the tree only half-fits, that's fine. A partial reflection still doubles the sparkle.
Catch The Mantel Or Table
A mirror above a sideboard or bar cart can bounce your tablescape right back at guests. Angle it slightly downward so it picks up candles, greenery, and glassware instead of the ceiling. On a dining room wall, position it to reflect the centerpiece from across the table.
The effect makes a simple setup feel layered and intentional. Just keep tall candles out of the direct reflection line if the flame worries you.
Lean It Without The Worry
Leaning mirrors look relaxed, but they need a little respect. Push the base against a wall or tuck it behind furniture so it can't slide. Use museum putty or a small non-slip pad under the bottom edge to stop creeping on hard floors.
Keep leaning mirrors out of walkways and away from doors that swing. If kids or pets are in the house, a safety strap anchored to the wall is cheap insurance.
Rooms Where It Works Best
Living rooms and entryways are the easy wins, since that's where the tree usually lives. Bedrooms benefit too, with a mirror catching a small lit tree or a glowing window. Skip tight bathrooms and busy kitchens, where reflections of clutter can feel chaotic.
The best spot is wherever you already pause to enjoy the decorations. Put the mirror there and let it join in.
FAQ
Do I need to buy special Christmas decor for my mirrors?
Not at all. Most of these ideas use garlands, ornaments, ribbon, and lights you likely already have. A quick look through your holiday box usually turns up enough to dress two or three mirrors.
Will tape or hooks damage my mirror frame?
It depends on the finish. Test any tape or adhesive hook on a hidden spot first, and lean toward removable products labeled safe for painted or finished surfaces. Ribbon tied around a frame is the safest option.
Can I decorate a bathroom mirror for Christmas?
Yes, and it's one of the easiest spots. Keep it simple with a small wreath, a short garland, or a ribbon border, and skip anything that could get damp or hang into the sink.
How do I keep lights on a mirror from looking messy?
Run the wire along the back of the frame where possible and tuck the battery pack behind the mirror or under a nearby object. Fewer, well-placed strands usually look better than a tangled bunch.
What's the fastest option if I'm short on time?
Hang a single wreath or drape one garland over a corner. Either takes a couple of minutes and still reads as festive, especially in a hallway or entryway mirror.
Conclusion
Mirrors give you a lot of festive impact for very little effort. A garland here, a few lights there, and a plain reflection turns into something worth stopping for. You don't need to try all eleven ideas, and you definitely don't need to buy anything new.
Pick two or three that suit your space and your schedule, then let the reflections do the rest. Start with what you already own, add slowly, and see how it feels before committing to more. A mirror that catches a little holiday glow is one of the easiest wins of the season.