15 Dining Table Christmas Decor Ideas for Festive Meals
A bare table can become the warmest spot in the house with a few deliberate moves. You don't need a designer's budget or a truckload of ornaments to pull it off. The trick is layering a handful of simple pieces so the whole room shifts into holiday mode.
Start with one anchor, like a runner or a centerpiece, then build outward. Small touches around each plate do most of the heavy lifting. The goal is a table that looks put-together but still leaves room for actual food.
These ideas work whether you're hosting a crowd or setting a quiet dinner for two. Pick a few that fit your space, your dishes, and how much time you want to spend.
1. Start With a Statement Table Runner
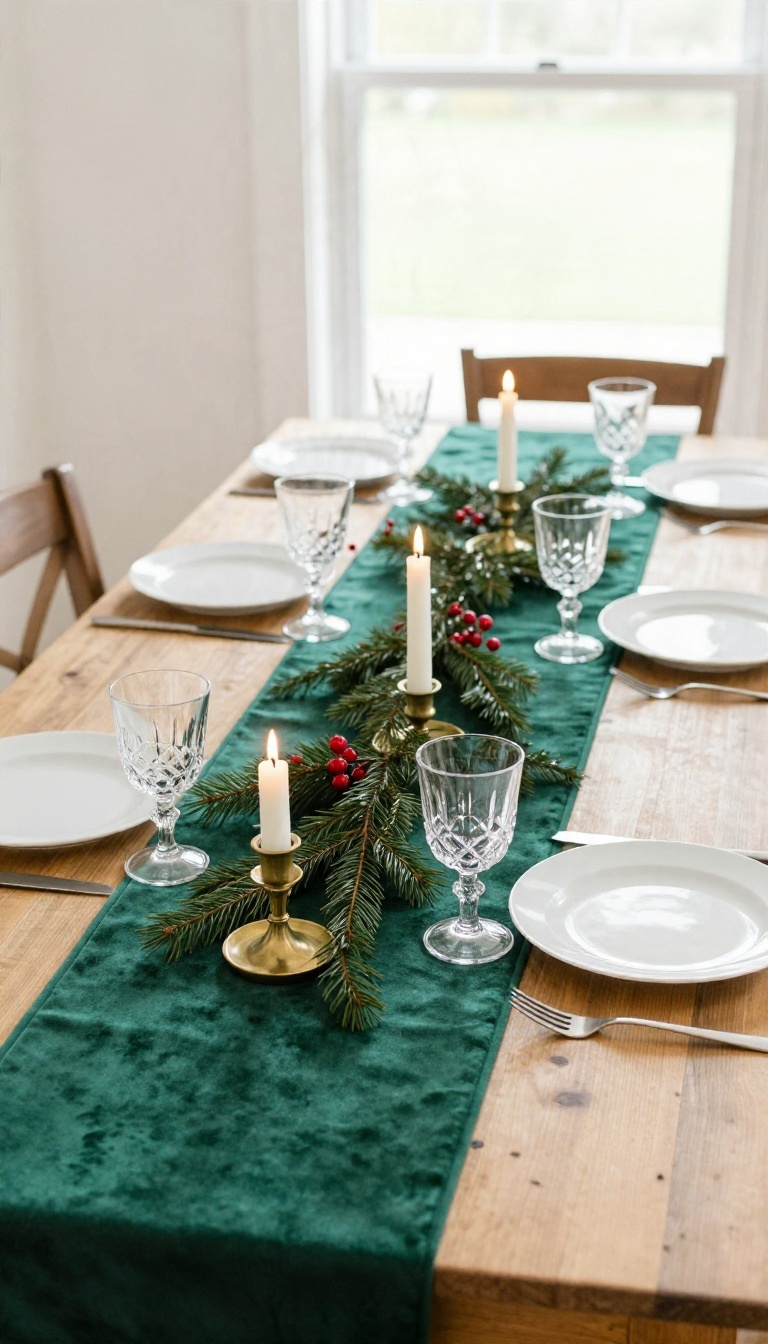
A table runner does more work than most people give it credit for. It creates a visual line down the middle of the table, gives your centerpiece something to sit on, and quietly sets the color story for everything else. Pick the runner first and the rest of the table gets easier to plan.
The material matters as much as the color. Plaid feels classic and a little cozy, velvet brings a soft glow under candlelight, and burlap keeps things rustic and relaxed. Each one nudges the table in a different direction, so choose the mood you want before you shop.
Once the runner is down, you have a base layer that ties plates, glassware, and greenery together. It also protects the table from hot dishes and stray wax, which is a practical bonus most people forget about until dessert. A runner that's too short looks accidental, and one that's too wide crowds the place settings.
Measure before you buy so the proportions feel right.
Pick A Material That Sets The Mood
Plaid cotton reads farmhouse and pairs well with reds, greens, and natural wood. Velvet adds richness and works beautifully with gold or brass accents and low lighting. Burlap suits a rustic table with pinecones, twine, and simple white dishes.
Think about how the table will be lit. Velvet looks best with candles, while plaid and burlap hold up fine under bright overhead light.
Let The Runner Choose Your Colors
A runner with multiple colors gives you a palette to pull from. Match napkins to one shade and greenery to another, and the table looks planned without feeling matchy. If you want a calmer table, go with a solid runner and let the centerpiece carry the color.
Either way, decide this early so you're not guessing later.
Get The Length And Width Right
Aim for a runner that hangs about six to twelve inches over each end of the table. That overhang looks intentional and frames the table nicely. Leave enough bare table on each side for plates and elbows.
A runner around fourteen to sixteen inches wide usually leaves comfortable room for place settings.
2. Build a Low Centerpiece That Won't Block Conversation
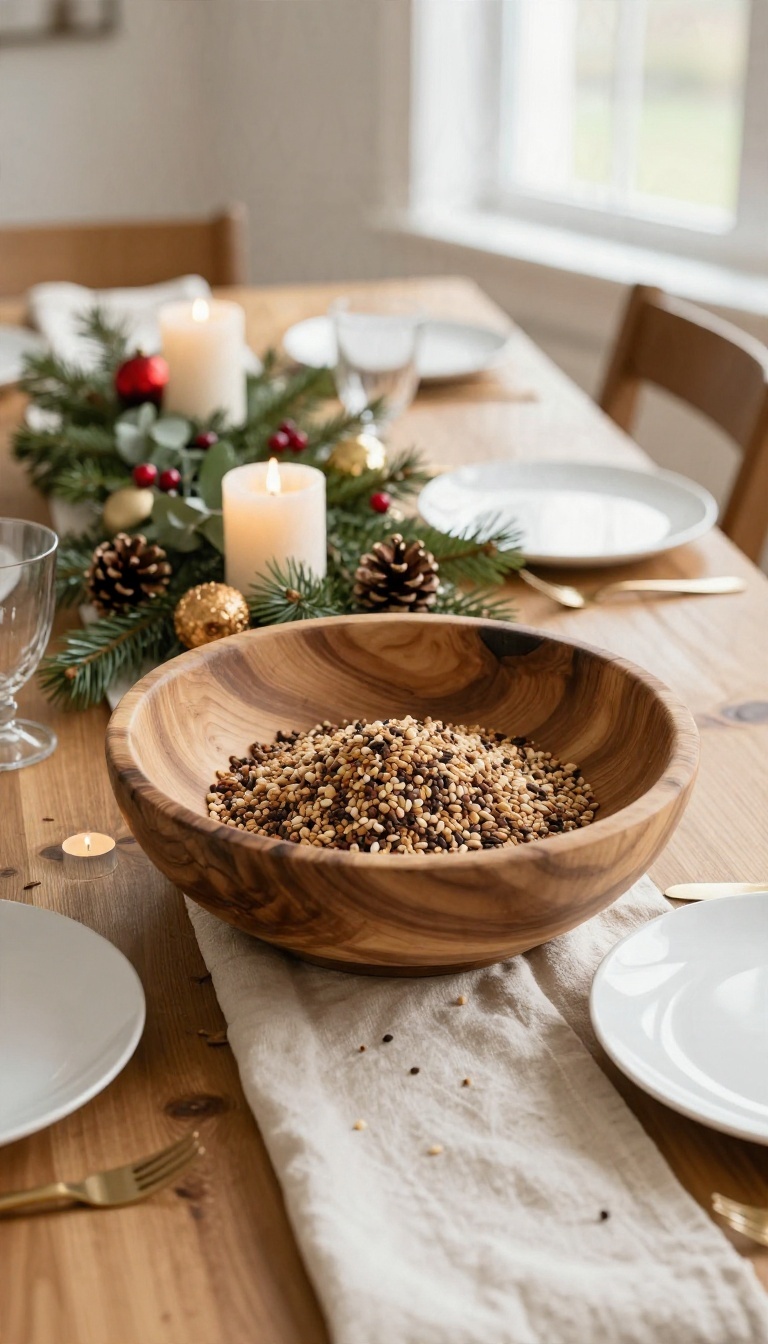
Tall centerpieces look dramatic in photos, but at a real dinner they turn into a wall between you and your mother-in-law. Nobody wants to lean sideways all night just to ask for the gravy. The fix is simple: keep the arrangement low and wide, and let it spread across the table instead of climbing up into sightlines.
Think of your centerpiece as a horizontal layer, not a vertical one. Aim for something under about eight inches tall so people can see over it from a normal chair. A wide, shallow vessel gives you plenty of room to work without adding height.
Greenery does most of the visual work here, and it's forgiving if you're not a florist. Candles add warmth, and a few small ornaments tie it to the season. The whole thing reads festive without ever getting in the way.
Start With A Wide, Shallow Base
A long dough bowl, a low ceramic planter, or a simple tray all work well. Line the bottom with a little floral foam or just crumpled paper to hold stems in place. Keep the footprint long and narrow so there's still room for serving dishes on either side.
Layer Greenery Before Anything Else
Lay down cedar, pine, or eucalyptus first and let it spill slightly past the edges of the container. Tuck in a few sprigs of something with texture, like seeded eucalyptus or rosemary, for depth. Skip anything that grows tall and spiky, since that's exactly what blocks the view.
Add Candles And Small Ornaments
Nestle a few short pillar candles or tea lights into the greenery at different heights, all staying low. Scatter tiny ornaments, pinecones, or cranberries in the gaps for pops of color. Keep the pieces small so the arrangement stays flat and readable from across the table.
Check The Sightline Before Guests Arrive
Sit in a chair at one end and look toward the other. If you can see the far seat clearly, you're in good shape. Slide the whole arrangement a little toward the middle or trim a stray stem if anything pokes up too high.
3. Layer Fresh Greenery Down the Middle
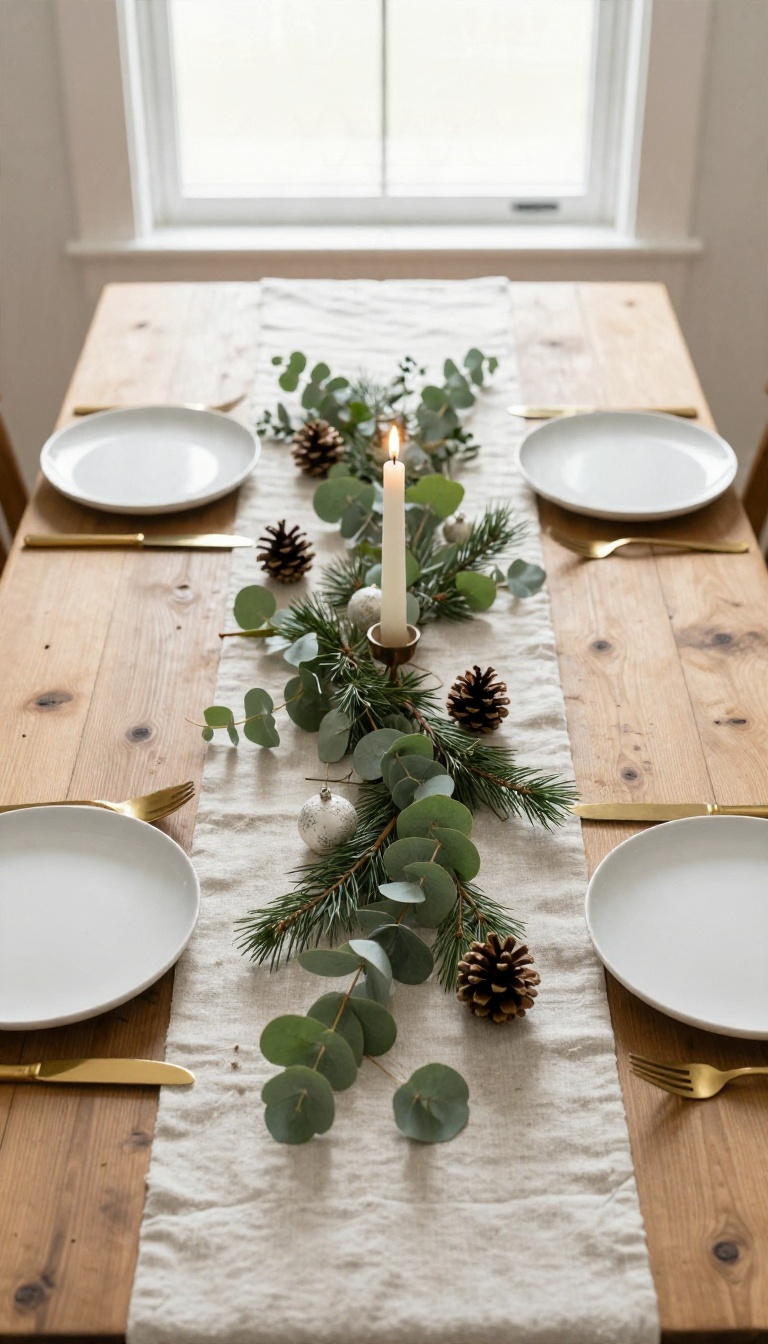
Fresh greenery brings a Christmas table to life in a way that fake garlands just can't match. Instead of one big centerpiece, you scatter sprigs of eucalyptus, pine, or cedar along the runner. It fills the space with color and texture without blocking anyone's view or leaving room for clutter.
The best part? You can make it as full or as minimal as you like. A few loose branches look just as good as an overflowing forest.
And since you're laying everything flat, there's no risk of a tall arrangement toppling over when someone reaches for the potatoes.
Start with a base layer. A linen runner in a neutral tone gives the greenery something to sit against. If you don't have a runner, a wide strip of burlap or even a folded tablecloth works fine.
The point is to create a defined path down the center so the greenery doesn't wander onto plates. Then gather your greens. You don't need a florist's worth of material.
A single bunch of eucalyptus, a few pine branches from the yard, or a mix of cedar and fir will do. Cut them into shorter sprigs, about 6 to 10 inches long, so they're easy to arrange. Lay them loosely, overlapping in a natural, organic way.
Don't try to make it perfect. The charm comes from the slightly messy, just-gathered look. Tuck in a few small ornaments or pinecones if you want a little sparkle, but keep it sparse so the greenery stays the star.
One thing to watch: fresh greens can leave sap or moisture on your table. If your table is wood, put down a protective cloth or use a runner with a backing. Also, keep the greenery away from candles.
A few inches of clearance is smart. If you want the look to last through several meals, spritz the greens with water every day or two. You can also use a mix of fresh and faux greens—nobody will notice the difference once it's all laid out.
Pick Your Greens
Eucalyptus has a soft, silvery look that feels modern. Pine and cedar bring a classic Christmas scent and a deeper green. You can mix them for contrast, or stick to one type for a cleaner look.
Just make sure the branches are flexible enough to lay flat.
Arrange For Balance
Work from the center outward. Place a few longer branches first, then fill in with shorter sprigs. Step back every few minutes to check the overall shape.
You want it to look even, not lopsided, but still relaxed.
Keep It Practical
Leave a gap near each place setting so glasses and plates have room. If you're serving family-style, make sure the greenery doesn't crowd the serving dishes. And if you have pets or kids, choose greenery that isn't toxic—cedar and pine are safer than some other options.
4. Add Candles in Mixed Heights
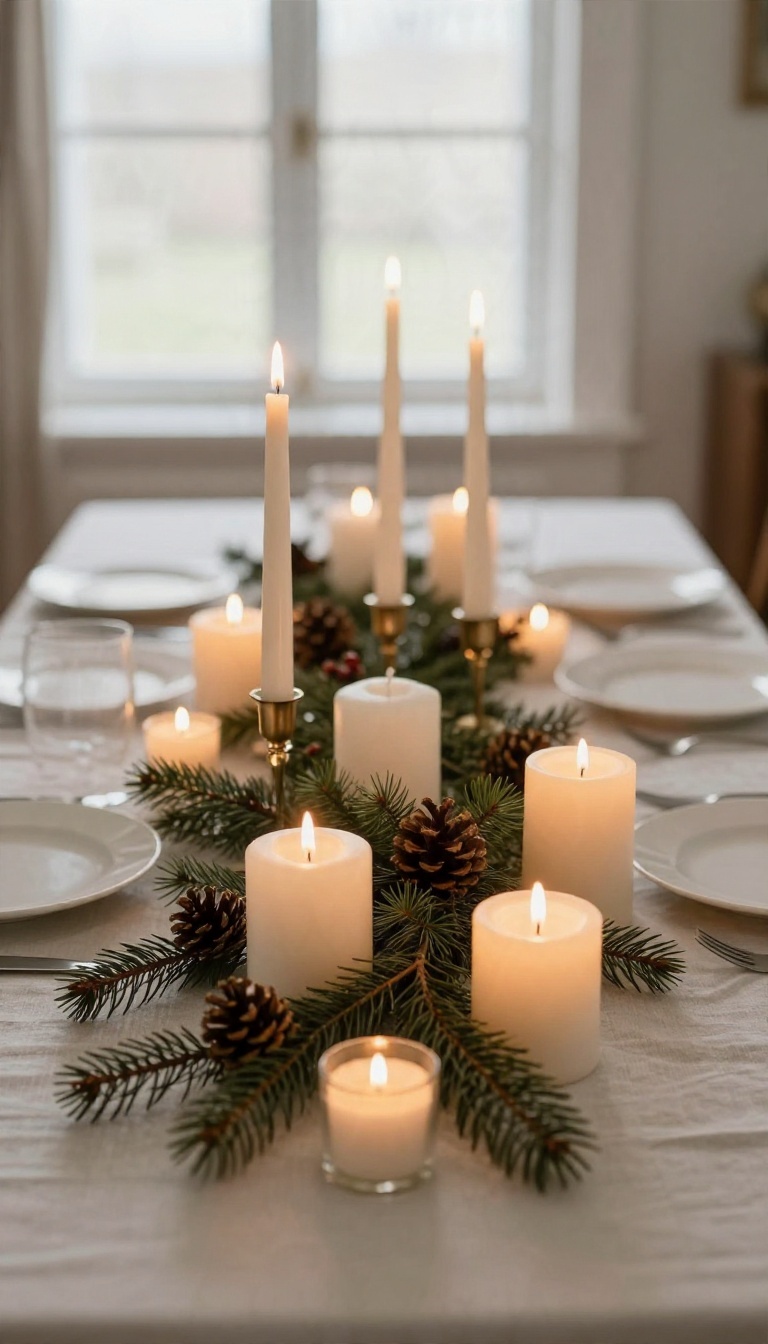
Candlelight does something no overhead fixture can. It softens faces, warms up the room, and makes an ordinary Tuesday dinner feel like an occasion. The catch is that a single row of matching candles looks flat and a little boring.
Mix your heights instead. Pair short votives with medium pillars and a few tall tapers, and suddenly the light has depth. It flickers at different levels, which is exactly what makes an evening meal feel cozy instead of staged.
The goal here is a gentle glow that reaches across the table without blocking anyone's view. Think of your candles as a small skyline: some low, some mid, one or two reaching up. That variation keeps the eye moving and the light interesting.
You also want to keep flames away from anything that can catch. That means being a little choosy about where each candle lands.
Build A Simple Height Mix
Start with a few votives or tealights scattered near the center. They sit low, so they never get in the way of conversation or passing plates. Add two or three pillar candles of different sizes for the middle layer.
A short fat one next to a taller slim one gives you contrast without clutter. Finish with a pair of tapers in holders if you have the room. Keep them toward the ends or slightly off-center so nobody has to lean around them to see across the table.
Pick Warm, Flattering Light
Skip anything labeled bright white or cool. Warm white and amber candles cast the soft, golden light that makes everyone look good in photos and in person. Unscented is the safer call at the dinner table.
Strong fragrances fight with the food, and nobody wants their roast to smell like sea breeze. If you love scent, save it for a candle in the next room.
Keep It Safe And Practical
Use holders or a heatproof tray so wax drips don't wreck your tablecloth. Tapers especially need a proper holder, or they'll tip the moment someone bumps the table. Trim wicks before lighting and keep flames clear of napkins, runners, and greenery.
If kids or a breezy room are in the mix, battery-powered candles give you the same warm glow with zero worry.
5. Use Ornaments as Scattered Table Confetti
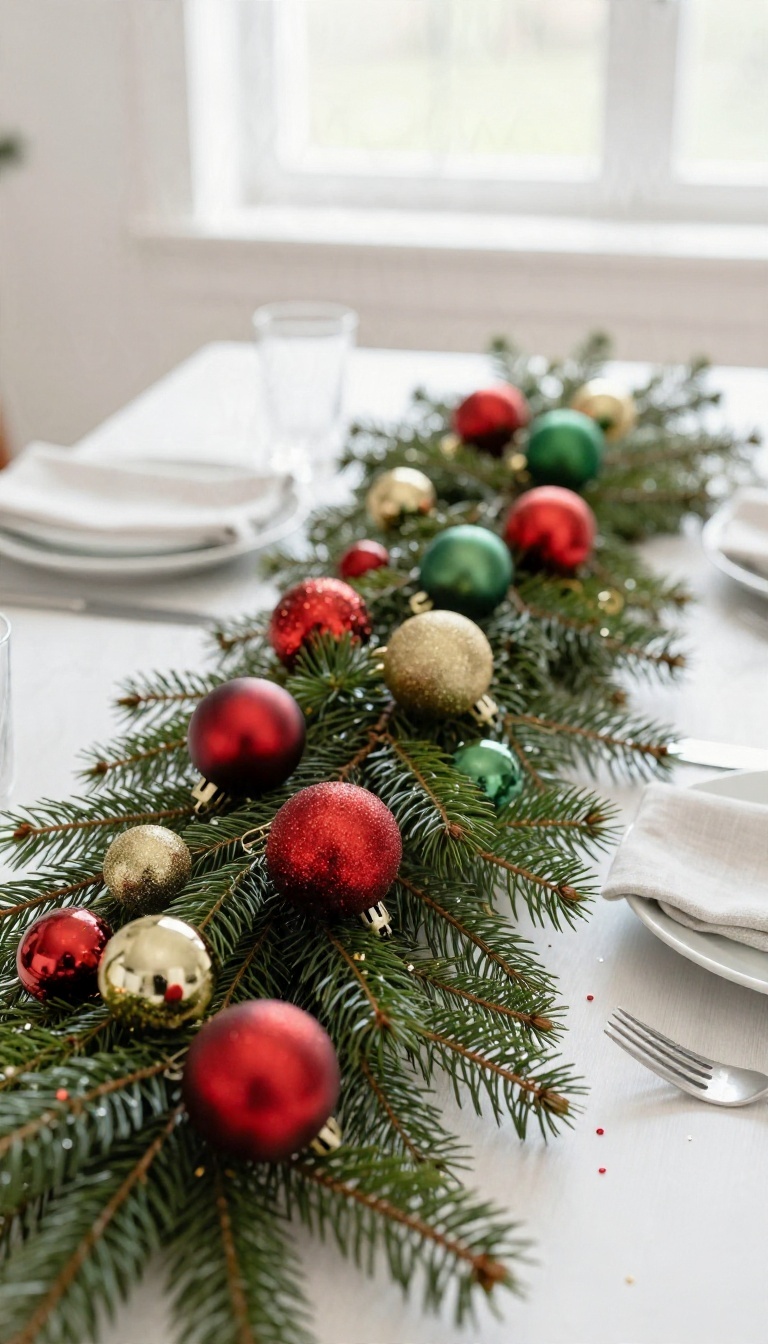
Ornaments don't have to live on the tree. Grab a handful of small shatterproof ones and scatter them across the table like confetti, and you get instant color with almost zero effort. The best part is the cost.
A tube of mini ornaments runs a few dollars, and you probably already own some you forgot about in the basement bin. Tuck them between greenery, around plates, and along the runner, and the table looks styled without looking fussy.
The trick is restraint. A scattered look works because it feels casual, so resist the urge to line them up in neat rows. Let them land where they land, then nudge a few into place so nothing blocks a plate or rolls off the edge.
Mix sizes and finishes for depth. A couple of larger baubles anchor the scatter, while tiny ones fill the gaps. Matte, shiny, and glittery finishes catch the light differently, which keeps the whole thing from reading flat.
Pick The Right Ornaments
Shatterproof is non-negotiable here. Glass ornaments near plates and elbows are an accident waiting to happen, especially with kids or a crowded table. Plastic and fabric baubles look just as good and survive a knock or two.
Stick to two or three colors that match your dishes or linens. A tight palette looks intentional, while a random mix can read like clutter. Metallics, deep reds, and soft greens are safe bets that work with almost any table.
Where To Tuck Them
Drop a few into the greenery runner so they peek out between branches. Nestle one beside each plate, near the napkin or charger, so every seat gets a small pop of color. Cluster a small pile in the center around the candles, then thin out toward the edges.
That gives the table a natural focal point without covering the whole surface.
Keep It Practical
Leave a clear zone around each plate so glasses and serving dishes have room. Ornaments should decorate the table, not crowd it. If you have a runner, tuck ornaments along its edges so they stay put when someone reaches across.
A few small ones near the centerpiece also hide any gaps in the greenery. When dinner is done, scoop them into a bowl and you're cleaned up in seconds.
6. Set a Layered Place Setting With Chargers

A charger is that big, flat plate that sits under everything and never actually holds food. It sounds fussy, but it's one of the fastest ways to make a plain table look dressed. Stack one under your regular dishes and each seat instantly reads as intentional.
The best part is you probably already own everything else you need. This is less about buying new stuff and more about how you arrange what's in the cabinet. A little height and contrast go a long way.
Start with the charger flat on the table, then build up. The stacking order does the visual work, so keep it consistent from seat to seat. That repetition is what makes the whole table feel pulled together instead of haphazard.
You can keep it simple with three layers or go fuller with a napkin and a small favor on top. Either way, the goal is a setting that looks deliberate without being a pain to clear when dessert comes out.
Get The Stack Right
The classic order is charger, dinner plate, then salad plate. Add a bowl on top if you're serving soup or a starter, and it still looks clean. Keep the charger slightly larger than the dinner plate so a rim of color peeks out.
That thin border is what sells the layered look. If your plates are all the same size, skip the salad plate and let the charger do the framing.
Pick A Charger That Plays Nice
Woven, rattan, or metallic chargers bring texture without competing with your Christmas colors. A matte gold or deep red works with almost any holiday scheme. If your plates are busy or patterned, go with a plain charger in a solid tone.
If your dishes are simple white, a textured or metallic charger adds the interest. Match the charger to your runner or napkin color and the whole table ties together.
Finish The Seat With Small Touches
A folded napkin on top of the stack, a sprig of greenery, or a tiny ornament at each place finishes the look. Keep it small so it doesn't crowd the plate. Place cards are optional but handy for a crowd.
Even a simple handwritten name on a card tucked into the napkin makes guests feel thought about. Just don't overdo it, since the stack is already doing a lot of the work.
7. Fold Napkins Into Simple Holiday Shapes
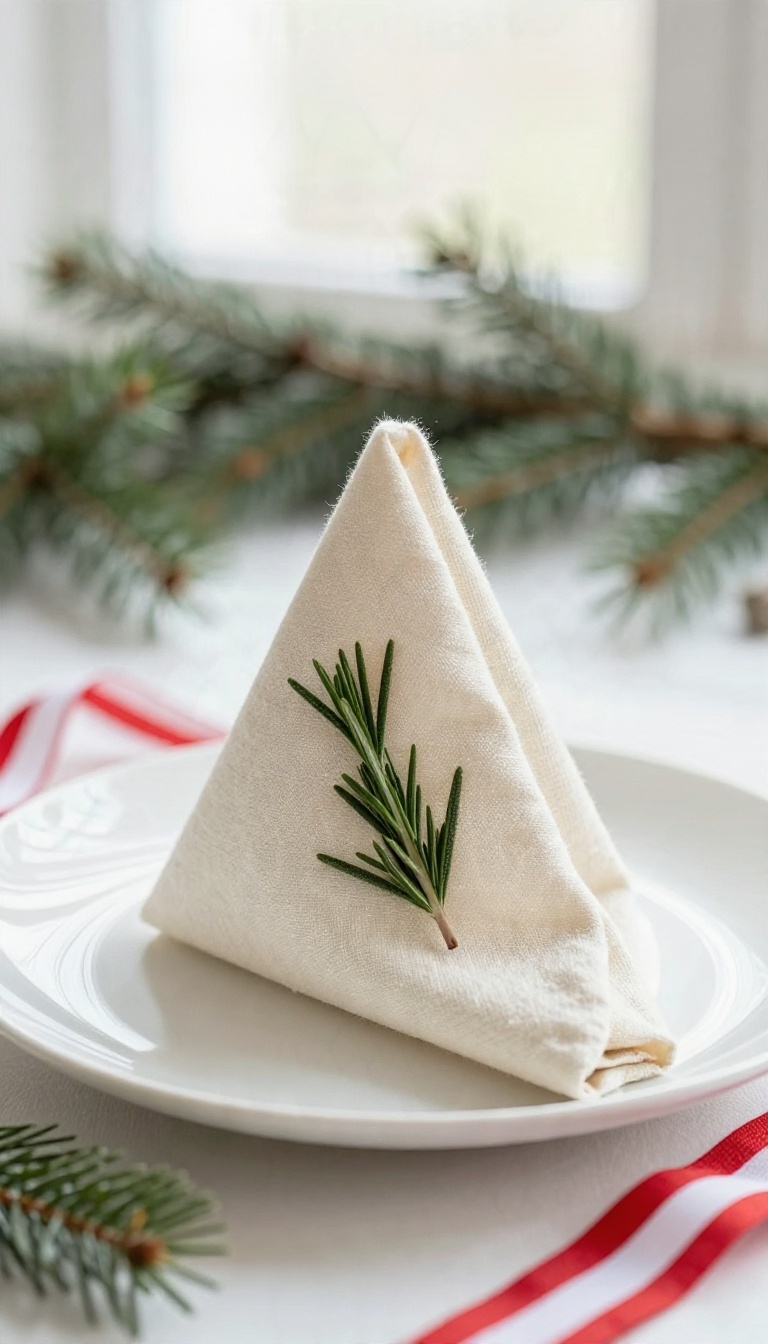
Napkins are the one thing every place setting already has, so they're the easiest spot to add a little holiday personality. A quick fold turns a plain square of cloth into something that looks intentional, and you probably already know the moves. Pick a shape, tuck in a small sprig or ribbon, and each seat gets its own tiny moment.
Best of all, this costs next to nothing and takes a few minutes per napkin once you get the rhythm down.
You don't need origami skills for any of these. Three shapes cover almost every table, and each one works with cloth or a sturdy paper napkin. Practice one fold on a spare napkin first, then run through the rest while you're waiting for the oven to finish.
The Simple Tree
Fold the napkin in half into a triangle, then fold it again into a smaller triangle. Starting at the long open edge, fold the layers up in a loose accordion so it fans out like branches. Stand it upright against the plate and tuck a tiny star-shaped ornament or a sprig of rosemary at the top.
It reads as a tree from across the table without blocking anyone's view.
The Pocket Fold
Fold the napkin into thirds so you get a long rectangle, then fold it in half and tuck one end into the other to create a little pocket. Slide a place card, a candy cane, or a small cookie inside. This one is the most forgiving, so it's great if you're folding a dozen of them the night before.
It also keeps silverware neatly bundled if you'd rather skip a charger.
The Candy Cane
Roll the napkin into a tight tube from one corner to the opposite corner, then bend the top third into a hook. Tie a thin red ribbon around the curve to hold the shape and sell the look. A cloth napkin holds the bend better than paper, so save this one for your nicer set.
Line them up along a runner for a sweet, low centerpiece that doubles as table decor.
Finishing Touches
Whatever shape you choose, one small accent finishes it off. A sprig of greenery, a length of baker's twine, or a single jingle bell all work. Keep the accent the same across every setting so the table feels cohesive rather than busy.
If you're short on time, fold plain napkins and just add the accent, which still looks polished.
8. Add a Personal Place Card at Every Seat
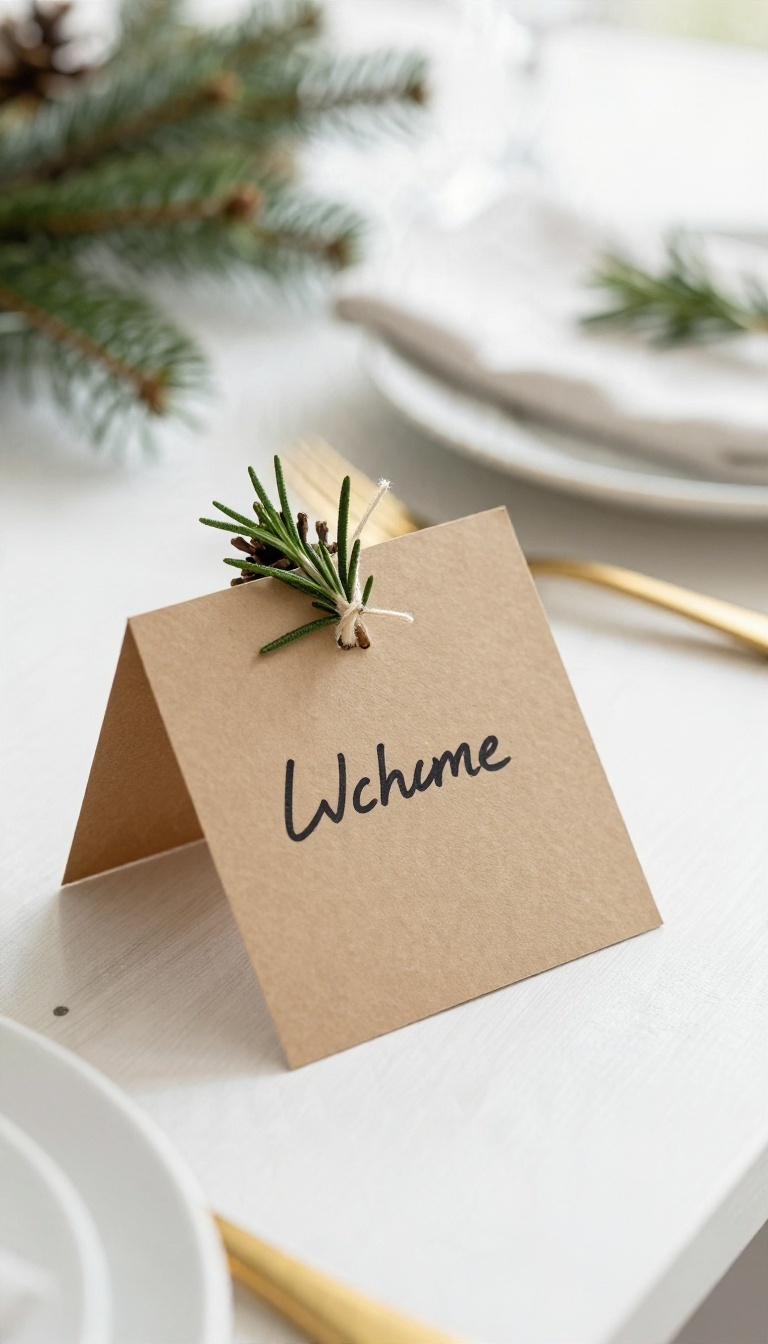
A tiny card with a name on it does more than tell people where to sit. It signals that you thought about them before they walked in the door. And when the meal ends, it often goes home in someone's pocket.
Place cards don't need to be fancy to work. A folded index card with a name in marker can feel just as warm as a letterpress version. The point is the personal touch, not the price tag.
Ways To Make Them Feel Special
Handwrite names if your penmanship cooperates. If not, print them on cardstock and add a small doodle or sticker. You can also tie a card to a napkin ring or perch it on a mini pinecone.
A little ribbon or a sprig of rosemary turns a simple card into a tiny gift.
Materials That Fit Your Table
Match the card to your existing decor. Kraft paper and twine suit a rustic table, while metallic ink on white card looks crisp with fancy china. Use what you already have: leftover wrapping paper, old book pages, or shipping tags.
Just make sure the name is easy to read.
A Keepsake Guests Will Actually Keep
People tend to hold onto things with their name on them. A place card can become a bookmark, a tree ornament, or a reminder of the evening. Write the date on the back so it doubles as a memento.
It's a small effort that leaves a lasting impression.
9. Hang a Mini Wreath on Each Chair

Chair backs are prime real estate for holiday charm, and they often go ignored. A mini wreath or a small bundle of greenery tied to each one frames the table and carries the festive feel around the whole room. It's a simple move that makes every seat feel like the best one in the house.
You don't need fancy supplies. A few small wreaths, some ribbon, and a way to attach them will do the trick. The result is a cohesive look that ties the table to the rest of your decor without much effort.
Hanging mini wreaths on chairs is one of those ideas that looks like you planned it for weeks. In reality, it takes about ten minutes. The key is keeping it lightweight and secure so nothing ends up on the floor mid-meal.
Start by choosing wreaths that match your table's vibe. Then attach them in a way that won't damage your chairs. Finally, make sure they don't get in the way when people sit down.
A little forethought goes a long way.
Pick The Right Wreaths
Size matters here. A wreath that's too big will overwhelm the chair and bump into guests. Look for mini wreaths around 4 to 6 inches in diameter.
Faux cedar, boxwood, or eucalyptus are great because they hold up all season and don't shed. If you want a pop of color, add a small bow or a few berries. Keep it simple so it doesn't compete with your centerpiece.
A monochrome look with a single accent works well for a modern table, while mixed greens feel more traditional.
Attach Without Damage
You don't want to ruin your chair fabric or wood. Use ribbon, twine, or command hooks that remove cleanly. Tie the wreath to the top corner of the chair back with a loose loop.
That way, it stays put but won't leave a mark. For upholstered chairs, a pretty ribbon tied in a bow looks intentional and adds charm. For wooden chairs, a simple hook or a bit of floral wire works.
Just test it before the big day to make sure it's secure.
Keep It Practical
Remember that people will be sitting in these chairs. Make sure the wreath hangs flat against the back and doesn't stick out too far. You don't want guests leaning into a prickly branch.
Also, consider the height. Hang it high enough that it doesn't get squished when someone leans back. A quick test sit will tell you if it's in the right spot.
And if you have kids, skip the fragile ornaments and stick with soft greens.
10. Choose a Cohesive Color Palette

A table with too many colors competing for attention can feel busy instead of festive. Narrowing down to two or three shades gives everything a shared purpose, and suddenly the random ornaments and dishes you already own start looking intentional. Pick a combo you love, then repeat it everywhere you can.
The palette doesn't need to be complicated. Red and cream feels classic and warm, green and gold leans elegant, and a soft mix of white, silver, and blush reads modern and calm. Once you settle on your colors, treat them like a rule for the whole table.
That means your linens, plates, glassware, and small decor all pull from the same short list. You don't have to match everything perfectly, but staying inside the palette keeps the table from feeling scattered. It also makes shopping easier, because you know exactly what you're looking for.
Anchor The Palette With Linens
Your tablecloth, runner, or placemats set the base tone, so start there. A cream linen with red accents gives you flexibility, while a deep green cloth with gold details makes a bolder statement. Keep the fabric simple and let the color do the talking.
Repeat The Colors In Small Doses
You don't need to buy new dishes to tie things together. A few colored napkins, ribbon around the glasses, or ornaments scattered down the center carry the palette without overwhelming the food. Repetition is what makes it look deliberate.
Leave Room For Neutrals
White plates, clear glass, and plain candles give your two or three colors space to breathe. If every single item is saturated, the table gets loud fast. Neutrals act like a pause button between the festive touches.
11. Mix Metals for a Warm Glow
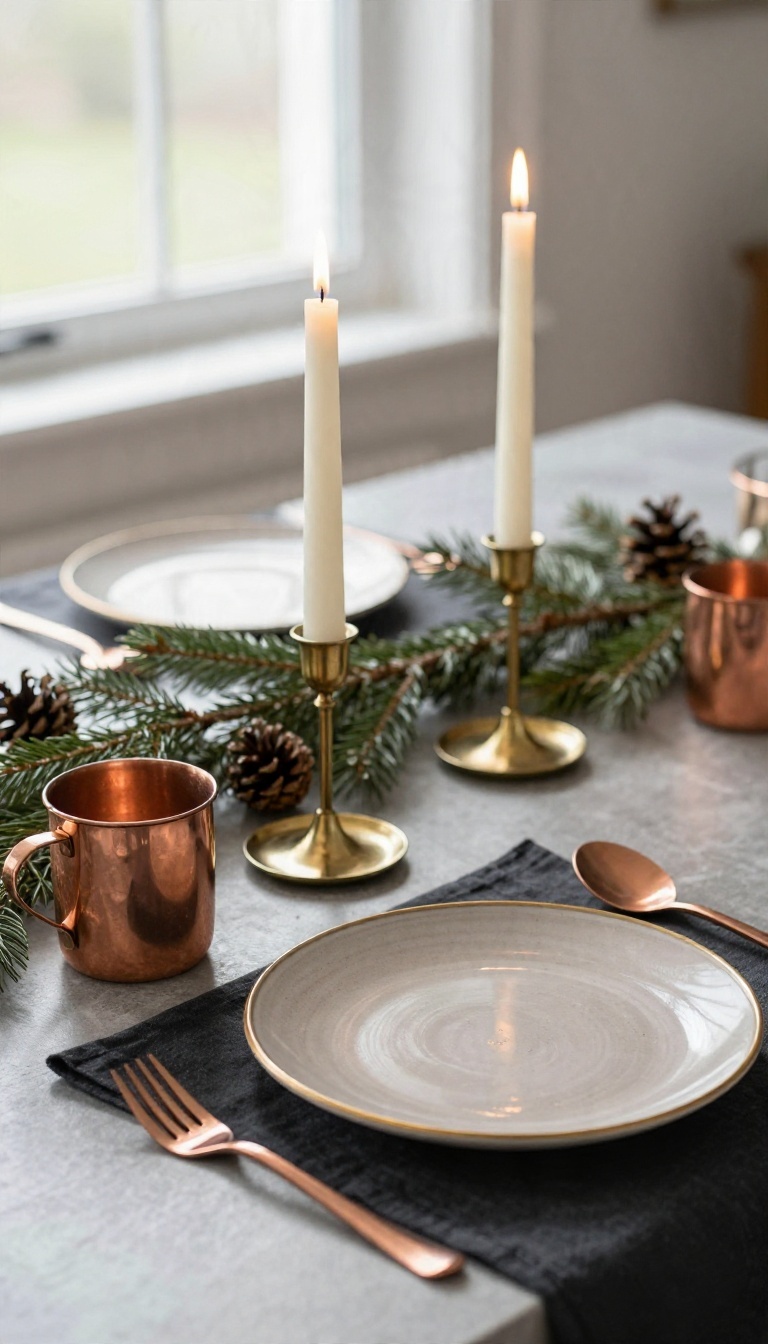
Matching every piece on your table can actually work against you. When brass, copper, and gold all show up in the same place, the mix reads as collected rather than bought as a set. The key is balancing those warm, shiny metals with something matte so the whole thing doesn't turn into a glare fest.
You probably already own a few of these pieces without realizing they count. A copper mug, a brass candlestick, a gold-rimmed plate — they all pull their weight here. Pull them out, spread them around, and let them talk to each other.
The trick with mixed metals is contrast, not chaos. Warm tones like brass and copper bounce light around and make the table feel cozy, especially once the candles are lit. Matte finishes act like a soft landing spot so the shine doesn't overwhelm the food or the plates.
You don't need a lot of metal to make this work. A few well-placed pieces go further than a full matching set ever will.
Pick A Dominant Metal
Choose one metal to lead and let the others play backup. Maybe brass candlesticks anchor the centerpiece while copper flatware and a gold-rimmed plate fill in around them. That ratio keeps the table looking intentional instead of scattered.
Aim for roughly two-thirds of one metal and one-third of the rest. Your eye needs a home base, and the dominant tone gives it one.
Add Something Matte
Shiny metals need a break, and matte pieces provide it. Think matte black flatware, a linen runner in an earthy tone, or ceramic plates with a flat finish. These absorb light so the metallic accents pop without shouting.
Wood works well here too. A raw wood charger or a simple wooden bowl brings warmth that reads as natural next to copper and brass.
Let Candles Do The Rest
Warm metals look best by candlelight, so lean into it. Taper candles in brass holders, a copper pillar candle, or a mix of heights across the table all throw a soft glow that flatters everything nearby. Keep the candle colors simple — ivory, cream, or deep burgundy — so the metals stay the star.
Too many colors and the glow gets muddy.
12. Use a Cake Stand as a Centerpiece Pedestal

A cake stand does more than hold dessert. Put one in the middle of your table and it lifts whatever sits on top into view, so the centerpiece reads from every seat. It's a small move that adds height without crowding the plates.
Most centerpieces stay flat because everything rests on the same plane. A stand breaks that up. The eye travels up to the top, then down to the table, which makes the whole setup feel intentional.
You probably already own one, and it doesn't need to match your dishes. A plain white ceramic or a glass footed stand works with almost any holiday palette. Pull it out, set it in the middle, and see how much taller the table feels.
What To Stack On Top
Candles are the easiest win. A cluster of three short pillars or a single chunky one on a stand gives you glow at eye level, which beats candles lost among the plates. Ornaments work too.
Pile a few shatterproof baubles in a small bowl on the stand, or let them sit loose for a casual look. A tiny floral arrangement is another option, and it keeps the middle of the table from feeling heavy.
Keep It Stable And Low-maintenance
Check that the stand sits flat before you load it up. A wobbly pedestal plus a lit candle is a bad combination, so give it a gentle nudge first. Skip anything tall and top-heavy.
You want height, not a tower that blocks the person across from you. If kids or a busy serving dish will pass nearby, keep the arrangement compact and push the stand slightly off-center.
Match The Stand To The Meal
For a formal dinner, a glass stand with a few white candles looks clean and classic. For a relaxed brunch, stack a bowl of ornaments or a small pot of greenery and call it done. You can also swap the topper between courses.
Clear the candles before dessert and set a small plate of treats on the stand instead. Same pedestal, new job.
13. Bring in Natural Elements Like Pinecones and Cinnamon Sticks
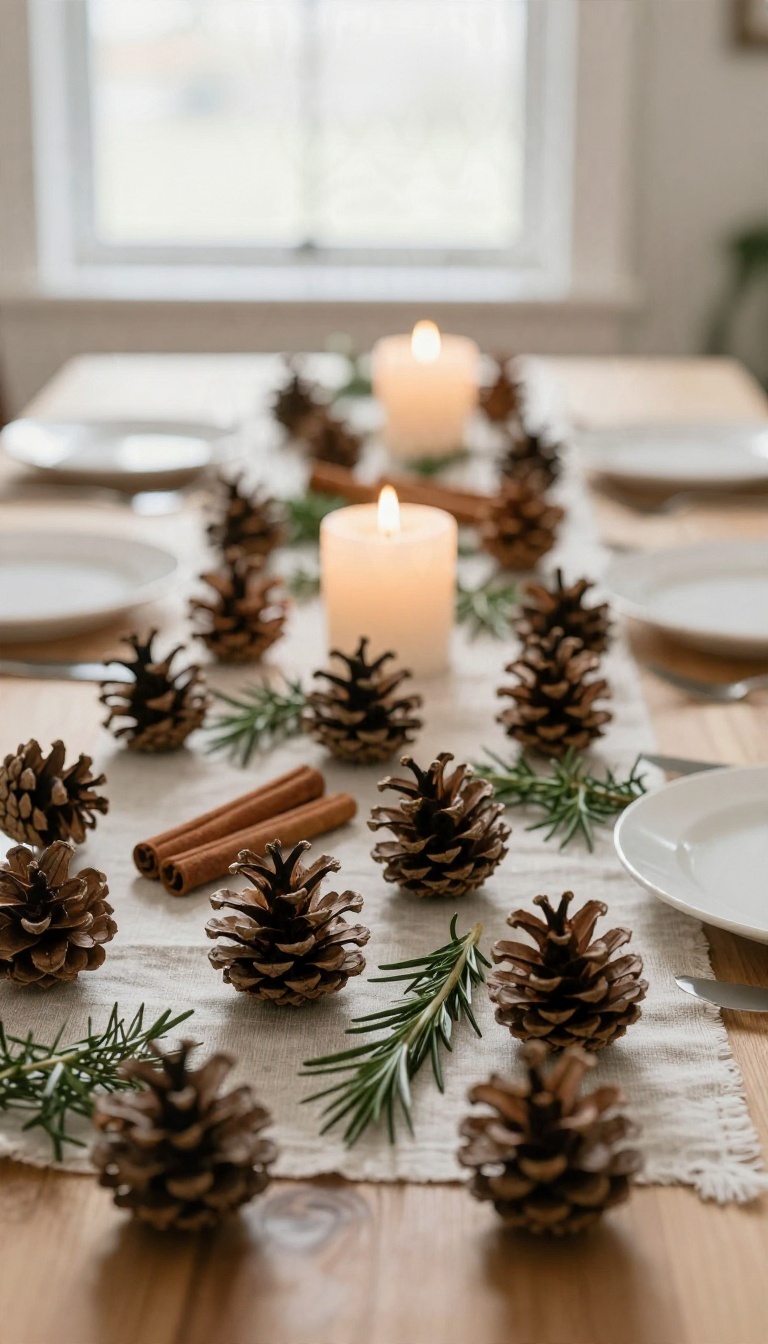
Natural elements add texture and a subtle seasonal scent that makes your table feel festive without trying too hard. Pinecones and cinnamon sticks are easy to find, affordable, and work with almost any decor style. Scatter them loosely or bundle them together for a look that's both rustic and refined.
Pinecones and cinnamon sticks bring a touch of the outdoors to your holiday table. They add visual interest and a warm, inviting aroma that complements the meal. You can use them in various ways, from simple scatterings to more structured arrangements.
The key is to keep it natural and unforced, letting the textures and scents speak for themselves.
Scatter For An Easy, Organic Look
Scattering pinecones and cinnamon sticks along the center of the table creates a relaxed, organic feel. Mix different sizes of pinecones with a handful of cinnamon sticks for contrast. Place them around candles or a centerpiece to tie the look together.
This approach works especially well on a bare wood table or over a simple runner.
Bundle For A Polished Touch
For a more polished look, bundle a few cinnamon sticks together with twine and place one at each place setting. You can also create small bundles of pinecones and cinnamon sticks to use as napkin rings or favors. These bundles add a personal touch and double as a subtle air freshener.
They're quick to make and look thoughtful without much effort.
Add Greenery For Contrast
Incorporate small sprigs of fresh greenery like rosemary or cedar to break up the brown tones. Tuck them among the pinecones and cinnamon sticks for a pop of color and a fresh scent. This combination creates a balanced look that feels both natural and festive.
Just be sure to keep the greenery away from open flames if you're using candles.
14. Add a Kids' Table With Its Own Mini Decor

A kids' table can be a lifesaver during holiday meals, giving younger guests their own space to eat, play, and make a little mess without disrupting the main table. With a few simple decorations, you can make their spot feel special and keep them entertained while the adults enjoy their meal. It doesn't take much—just a little creativity and a few kid-friendly touches.
Set up a smaller table or a low folding table near the main dining area so kids feel included but still have their own zone. Cover it with a paper tablecloth or a roll of kraft paper, and let them go wild with crayons. Add a few simple ornaments, like paper snowflakes or felt trees, that they can help make or hang themselves.
The goal is to make their table feel like a fun, creative space that's all theirs.
Keep It Simple And Kid-proof
Skip the fancy china and glass—use melamine plates, plastic cups, and utensils that can handle a little roughhousing. A paper runner down the center gives them a designated spot for crayons and small toys. Add a few unbreakable ornaments, like wooden or felt shapes, that they can rearrange without worry.
Add Activities To Keep Little Hands Busy
Place a small basket of crayons and a stack of coloring pages or blank paper at each seat. You can also include simple craft kits, like sticker sheets or pipe cleaners, to keep them occupied between bites. A mini puzzle or a deck of cards works well for older kids who finish eating early.
Make It Feel Festive Without The Fuss
Drape a small garland or a string of battery-operated fairy lights along the edge of the table for a cozy glow. Add a tiny centerpiece, like a small vase with a few sprigs of greenery or a mini tree, that won't block their view. Personalized name tags or place cards with stickers make them feel extra special.
15. Finish With a Festive Drink Station Nearby

Dinner plates already fight for every inch of a holiday table. Adding a pitcher, a stack of mugs, and a bowl of garnishes to the mix usually ends in a spill. A small side table solves that problem fast.
Park it within arm's reach and let drinks live there instead of squeezed between the serving dishes.
The setup doesn't need to be fancy. A tray, a few cups, and something warm to pour covers most of it. Guests help themselves, the main spread stays clear, and nobody has to get up mid-meal to hunt for a refill.
Keep the station low and easy to reach from the table. Think of it as an extension of the meal rather than a separate party setup.
Pick The Right Side Table
A small console, a folding tray table, or even a sturdy stool works here. What matters is height and distance. You want it close enough that someone can grab a mug without leaving their chair, but far enough that it doesn't block the walkway to the kitchen.
Clear off whatever normally lives there first. A cluttered side table under a drink tray looks messy in photos and gets in the way in real life. Give the station its own clean surface and it reads as intentional.
Build A Simple Tray Setup
Group everything on one tray so the station looks like a single piece instead of scattered items. A pitcher of something warm, a stack of mugs, and a small bowl for garnishes covers the basics. Add a spoon rest and a few napkins and you're done.
If you're serving something cold too, keep it in a separate pitcher or a small ice bucket on the same tray. Two drinks are plenty. More than that turns a helpful station into another thing to manage.
Keep Garnishes Small And Tidy
Cinnamon sticks, orange slices, and a little dish of sugar cubes make drinks feel special without much effort. Use small bowls or ramekins so they don't take over the tray. A tiny spoon in each one keeps things neat.
Skip anything that needs last-minute prep. The point is to make refills easy, not to create a second cooking project while dinner is on the table.
FAQ
How do I decorate a dining table without spending much?
Use what you already own, like ornaments, jars, and greenery from the yard. A runner, a few candles, and scattered sprigs go a long way for very little money.
Should the centerpiece be tall or low?
Keep it low and wide for seated meals so people can talk across the table. Save taller arrangements for buffets or side tables.
How do I stop decor from crowding the food?
Leave the center third of the table mostly clear and keep decor near the edges. Move serving dishes to a sideboard if space gets tight.
Can I use real candles around food?
Yes, but keep flames away from linens, greenery, and anything flammable. Battery-powered candles are a safer option if kids or pets are around.
How early should I set the table before dinner?
Set it a day ahead for the base layers, then add fresh greenery and candles a few hours before guests arrive so everything looks crisp.
Conclusion
A bare table turns into the heart of the holiday with a few well-chosen touches. Pick two or three ideas that suit your space, your crowd, and how much time you actually have. Layer in candles, greenery, and a little sparkle, then let the food and the people do the rest.
Don't chase a magazine-perfect setup.
A table that feels warm and welcoming beats one that looks staged every time. Start simple, add as you go, and enjoy the meal without fussing over every plate. That's the whole point of gathering anyway.