How to Deep Clean a Bathroom in 13 Smart Steps Today
You walk into your bathroom and notice the grout has gone gray, the shower door is cloudy, and the mirror has toothpaste splatters. A deep clean sounds like a weekend project, but it doesn't have to be. With a smart sequence, you can tackle every surface in one focused session.
The secret is working from top to bottom and letting cleaning products do the heavy lifting. You don't need a dozen specialty sprays—just a few key tools and a plan. This 13-step system turns a dreaded chore into a satisfying transformation.
Ready to make your bathroom look like new? Grab your supplies, clear the counters, and let's get started.
1. Clear Everything Out and Dry the Surfaces
Before you spray a single cleaner, you need a blank slate. That means removing every bottle, bar of soap, toothbrush, and decorative item from counters, shelves, and the shower. All that clutter just gets in the way and can trap moisture, making your cleaning less effective.
Once everything is out, grab a dry microfiber cloth and wipe down all surfaces. This step ensures your cleaners hit the grime directly instead of being absorbed by a layer of water or dust.
Why Drying Matters More Than You Think
Most bathroom cleaners are designed to break down soap scum and mineral deposits, but they work best on dry surfaces. If you spray a cleaner onto a wet counter, it dilutes the solution and reduces its effectiveness. A quick dry wipe removes loose debris and moisture, so the cleaner can penetrate and lift the gunk.
Plus, dry surfaces show you exactly where the dirt is hiding, so you don't miss spots.
Where To Stash Your Stuff Temporarily
You don't need to haul everything to another room. A small basket or tray works perfectly for corralling bottles, jars, and accessories. Set it on the floor outside the bathroom or on a nearby table.
For shower items like shampoo and conditioner, place them in a caddy or on a towel just outside the shower door. This keeps things organized and makes it easy to wipe down shelves and corners without moving items one by one.
2. Spray Cleaner on Grout and Let It Sit
Grout is porous and traps dirt, soap scum, and mildew easily. Scrubbing it dry just smears the grime around. Instead, apply a cleaner and give it time to break down the buildup before you even touch a brush.
Choose a commercial grout cleaner or make a paste from baking soda and water. Apply it generously along the grout lines using a squeeze bottle or an old toothbrush. Let it dwell for 10 minutes—that's enough time to loosen stubborn stains while you move to another task.
Why Dwell Time Matters
Cleaning chemicals need time to react with dirt and soap scum. Rushing to scrub immediately means you work harder for worse results. Ten minutes lets the cleaner penetrate porous grout, so the grime lifts away with minimal effort.
What To Use On Different Grout Colors
White grout can handle oxygen bleach or hydrogen peroxide. Dark grout needs a non-bleach cleaner to avoid lightening. Always test a small hidden area first to make sure the color stays put.
Don't Let It Dry Out
If the paste or spray dries during the 10 minutes, it loses effectiveness. Keep a spray bottle of water handy to mist the area if needed. A damp surface is what makes the cleaner work best.
3. Scrub the Grout with a Stiff Brush

Grout is porous and traps dirt, soap scum, and mildew easily. A quick wipe won't cut it—you need to physically scrub the lines to lift the grime. Grab a stiff brush and get ready to restore that tile.
Apply your chosen cleaner directly onto the grout lines and let it sit for a few minutes to break down buildup. Use a grout brush or an old toothbrush to work the cleaner into the lines with firm, circular motions. Focus on one small section at a time so the cleaner doesn't dry out.
Rinse with a damp sponge and wipe away residue, then dry with a towel to prevent streaks or new stains.
Pick The Right Brush
A dedicated grout brush with stiff, angled bristles makes the job faster and easier. If you don't have one, an old toothbrush works well for tight spots. Avoid wire brushes—they can scratch the tile surface.
Use A Paste For Stubborn Stains
For grout that's really dark or stained, make a paste of baking soda and water or baking soda and hydrogen peroxide. Apply it to the grout, let it sit for 10 minutes, then scrub. The mild abrasion lifts deep-set dirt without damaging the grout.
Rinse And Dry Thoroughly
After scrubbing, use a damp sponge to remove all cleaner residue. Follow with a dry microfiber towel to absorb moisture. This step prevents new dirt from sticking and helps the grout stay clean longer.
4. Tackle the Shower Head and Faucets
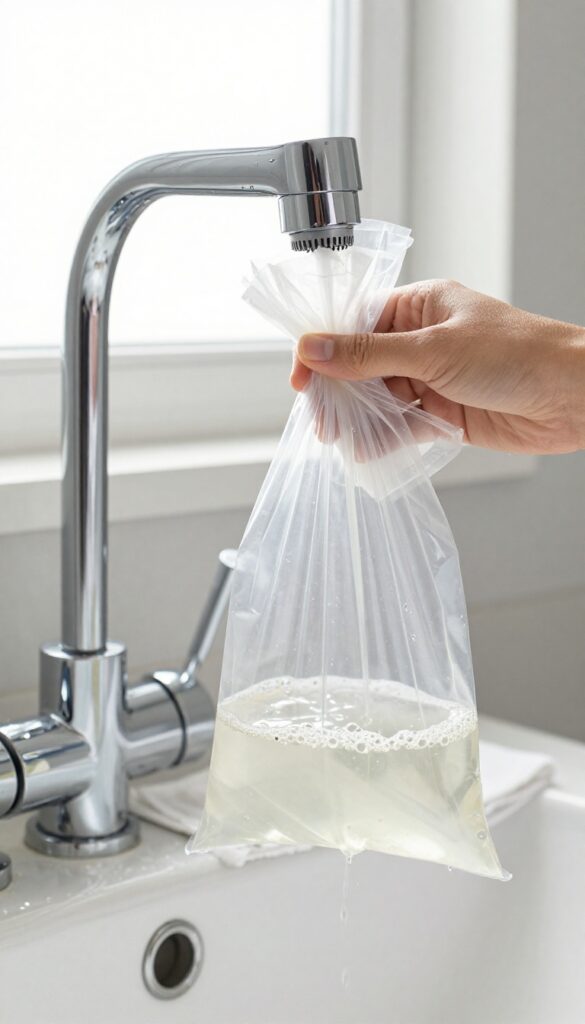
Mineral deposits and grime build up on shower heads and faucets, reducing water flow and dulling the shine. A simple vinegar soak breaks down the crust without scrubbing. This step takes minimal effort but makes a big visual difference.
Soak The Shower Head
Fill a plastic bag with enough white vinegar to submerge the shower head. Secure it with a rubber band or twist tie, making sure the bag doesn't leak. Leave it for 30 minutes—longer if the buildup is heavy.
Remove the bag, then run the shower for a minute to flush out loosened deposits. Wipe away any remaining residue with a cloth.
Wipe Down Faucets
Dampen a microfiber cloth with white vinegar and wipe all faucet surfaces, including handles and the base. For stubborn spots, let the vinegar sit for a few minutes before wiping. Rinse with a wet cloth and dry with a clean towel to prevent water spots.
Avoid abrasive cleaners that can scratch chrome or brushed nickel finishes.
Don't Forget The Aerators
Unscrew the faucet aerator (the small screen at the tip) and soak it in vinegar for 15 minutes. Use an old toothbrush to scrub away any remaining grit. Reattach it firmly.
This improves water pressure and prevents splashing.
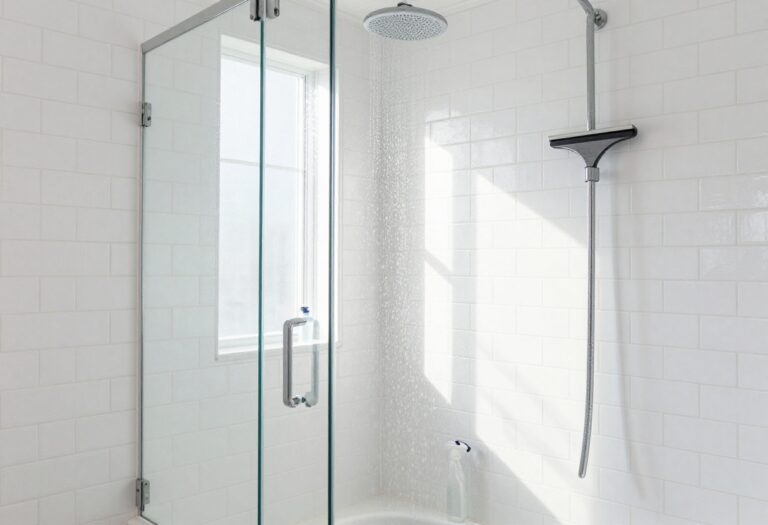
5. Clean the Shower Door or Curtain
Your shower door or curtain takes a beating every day. Soap scum, hard water spots, and mildew can turn a clear glass door foggy or make a fabric curtain look dingy. The good news?
Both are easy to refresh with the right approach.
For glass doors, a simple vinegar-water solution cuts through mineral deposits without harsh chemicals. Spray it on, let it sit for a few minutes, then scrub with a non-abrasive pad. For stubborn spots, a paste of baking soda and vinegar works wonders.
Rinse thoroughly and squeegee dry to prevent new spots. Fabric curtains can go right in the washing machine with a bit of bleach or oxygen cleaner. Plastic liners just need a wipe-down with a bleach solution.
Always check the care label, but most curtains are machine-washable on a gentle cycle.
Glass Doors: Vinegar And Squeegee
Mix equal parts white vinegar and water in a spray bottle. Spray the entire door, let it sit for 3–5 minutes, then scrub with a non-abrasive pad or sponge. Rinse with warm water and use a squeegee to remove water.
For extra shine, buff with a microfiber cloth.
Fabric Curtains: Machine Wash
Remove the curtain and toss it in the washing machine with a capful of bleach or oxygen-based cleaner. Add a few towels to balance the load. Use warm water and a gentle cycle.
Hang it back up to dry—don't put it in the dryer unless the label says it's safe.
Plastic Liners: Bleach Wipe
For plastic or vinyl liners, mix 1 part bleach with 4 parts water. Wipe down the liner with a sponge or cloth, focusing on mildewed areas. Let it sit for 5 minutes, then rinse thoroughly with warm water.
Hang to dry completely before folding or storing.
6. Degrease and Disinfect the Toilet
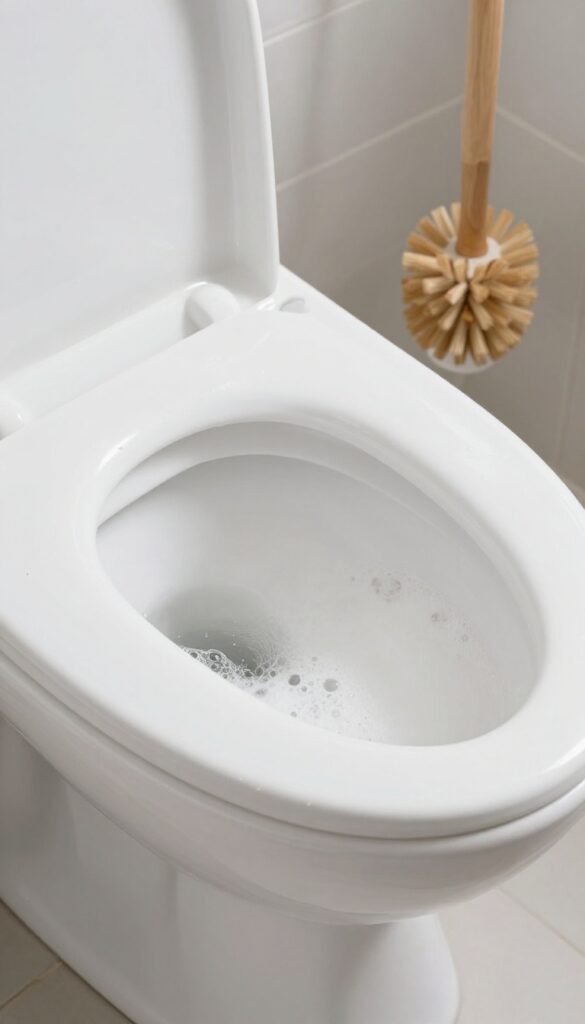
The toilet is often the most dreaded part of bathroom cleaning, but it doesn't have to be a battle. With a simple two-step process, you can remove stains, kill germs, and leave it sparkling. The key is using natural ingredients that work together to break down grime without harsh fumes.
The Fizzing Cleanse
Start by pouring one cup of baking soda into the toilet bowl, followed by one cup of white vinegar. The mixture will fizz vigorously, helping to lift stains and loosen debris. Let it sit for 10 minutes while you clean other areas.
This chemical reaction is gentle on porcelain but tough on grime.
Scrub And Flush
After the fizzing subsides, use a toilet brush to scrub the entire bowl, paying extra attention under the rim and around the drain. The baking soda acts as a mild abrasive, so you don't need a separate cleaner. Flush to rinse, and repeat if necessary for stubborn rings.
Exterior Disinfection
Don't forget the outside. Spray a disinfectant cleaner on the lid, seat, handle, and base. Let it sit for the recommended dwell time (usually 5-10 minutes) to kill bacteria and viruses.
Wipe dry with a clean cloth. This step ensures every surface is hygienic.
7. Wipe Down All Surfaces with All-Purpose Cleaner

Once the heavy-duty scrubbing is done, it's time to refresh every reachable surface. An all-purpose cleaner is your best friend here—it cuts through everyday grime, fingerprints, and water spots without harsh chemicals. Spray generously, give it a minute to work, then wipe away the mess.
Starting with the highest surfaces helps you avoid re-cleaning. Work your way down from shelves to countertops to the sink. Don't forget light switches, doorknobs, and the back of the toilet tank—they collect dust and oils too.
Let The Cleaner Do The Work
Spray the cleaner onto the surface, not the cloth, for even coverage. Wait 30 to 60 seconds so the solution can break down soap scum and grease. This short pause makes wiping effortless and streak-free.
Choose The Right Cloth
Microfiber cloths are ideal because they trap dirt and absorb liquid without leaving lint. Use a fresh section for each surface to avoid spreading grime. For glass or mirrors, follow up with a dry microfiber cloth for a crystal-clear finish.
Don't Skip The Details
Pay attention to edges, corners, and around the faucet base. These spots often hide dried toothpaste and soap residue. A quick wipe with an all-purpose cleaner keeps them looking fresh and prevents buildup.
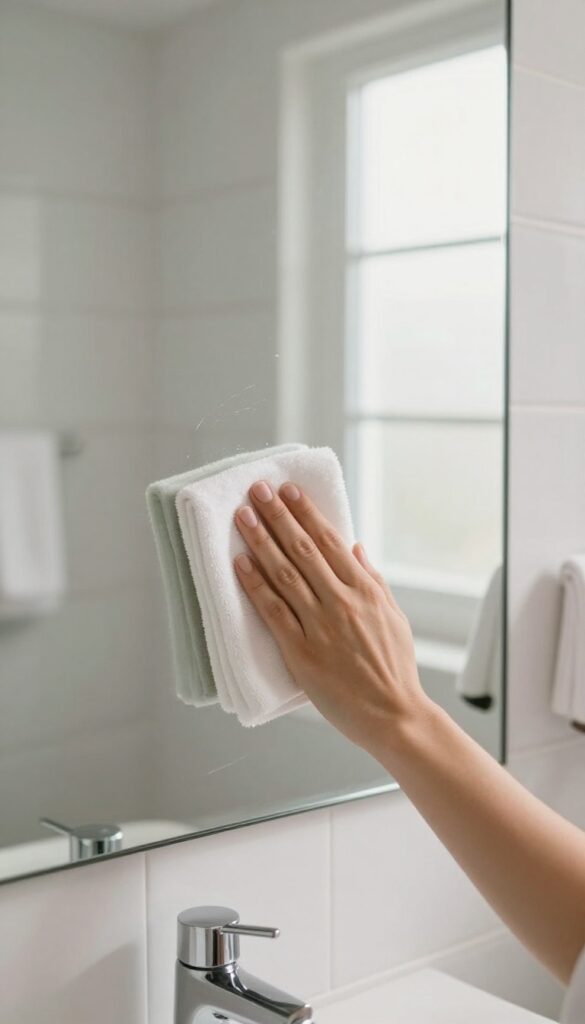
8. Polish the Mirror and Glass
A streaky mirror can undo all your hard work. Glass surfaces show every smudge, so a proper technique makes the difference between a gleaming finish and a frustrating haze. You don't need fancy products—just the right cloth and a simple pattern.
Start with a clean, dry microfiber cloth. Spray your glass cleaner directly onto the cloth rather than the mirror to avoid drips. Wipe in a consistent S-pattern from top to bottom, overlapping each stroke slightly.
This prevents streaks and ensures even coverage. Flip the cloth to a dry side and buff the entire surface in a circular motion. For stubborn spots, a dab of rubbing alcohol on a cotton ball works wonders.
Choose The Right Cloth
Lint-free microfiber cloths are your best friend. Paper towels leave fibers and can scratch. Wash cloths without fabric softener to maintain absorbency.
A fresh cloth for each glass surface avoids cross-contamination.
Master The S-pattern
Starting at the top left, wipe horizontally across, then drop down and go back. This pattern ensures you don't miss spots and prevents drips from running into already-clean areas. Overlap each pass by an inch for full coverage.
Buff For Brilliance
After the initial wipe, switch to a dry section of the cloth. Buff in small circles to remove any remaining moisture. This step is key for a crystal-clear finish.
If you see streaks, a second buff with a fresh cloth usually fixes it.
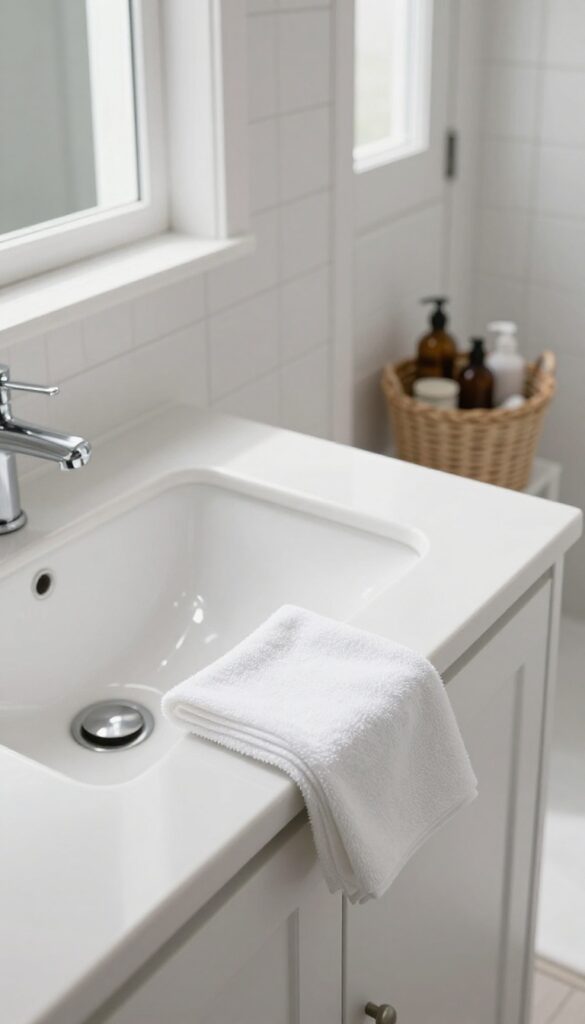
9. Deep Clean the Sink and Faucet
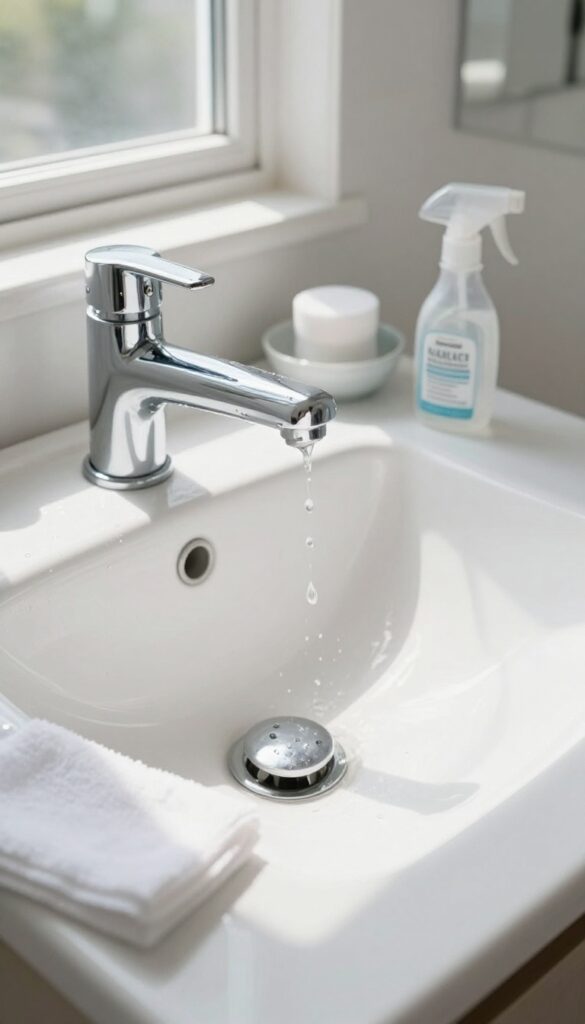
The sink and faucet see a lot of action—toothpaste splatters, soap scum, and hard water spots. But they're often rushed during a quick wipe-down. Give them the attention they deserve with a targeted scrub that leaves them gleaming.
Start by clearing the counter and removing any items from the sink. Sprinkle baking soda over the basin, then scrub with a damp sponge in circular motions. The mild abrasive lifts stains and deodorizes without scratching.
Rinse thoroughly with warm water and dry with a microfiber cloth to prevent water spots.
Faucet And Handles
Use an old toothbrush dipped in a 50/50 vinegar-water solution to scrub around the base of the faucet, handles, and any crevices. For stubborn mineral deposits, wrap a vinegar-soaked cloth around the spout and let it sit for 10 minutes before scrubbing. Rinse and buff dry with a soft cloth.
Drain And Overflow Plate
Remove the drain stopper if possible and clean out any hair or gunk. Use the toothbrush to scrub around the drain opening and the overflow plate. A paste of baking soda and vinegar can help break down grime.
Rinse well and replace the stopper.
Final Shine
Wipe down the entire sink area with a glass cleaner or a vinegar-water spray for a streak-free finish. Don't forget the backsplash and any soap dispensers. A dry microfiber cloth gives the best shine without lint.
10. Organize and Restock Essentials
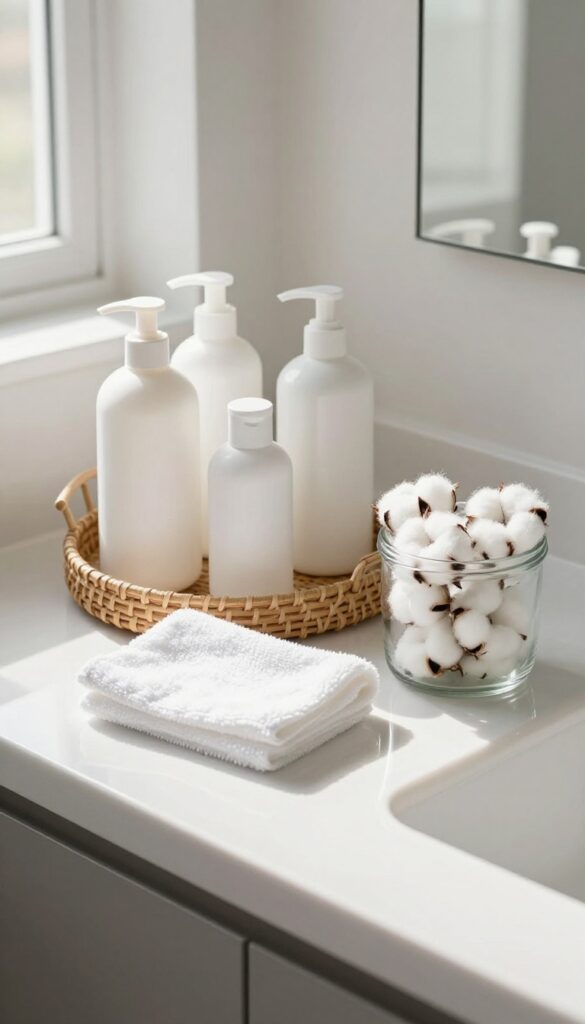
After all that scrubbing and wiping, it's tempting to just toss everything back on the counter. But taking a few extra minutes to organize your bathroom essentials makes the space feel cleaner and more functional. Plus, it's the perfect time to ditch expired products and give bottles a quick wipe-down.
Wipe Down Bottles And Containers
Before you return shampoo, lotion, or makeup to their spots, give each container a quick wipe with a damp cloth or disinfecting wipe. Bottles collect dust, grime, and sticky residue over time. A fast pass keeps them from dirtying your newly cleaned surfaces.
Toss Expired Products
Check expiration dates on medications, sunscreen, and skincare. If it's past its prime or smells off, toss it. Old makeup, razors, and toothbrushes should go too.
Clearing out the clutter instantly makes your bathroom feel more spacious and hygienic.
Arrange Neatly And Restock
Group like items together—hair products, oral care, first aid—and use small bins or trays to keep them corralled. Refill soap dispensers, replace empty toilet paper rolls, and put out fresh towels. A tidy arrangement makes your morning routine smoother.
11. Sweep and Mop the Floor
After scrubbing every surface, the floor has collected all the dust, hair, and splashes that fell during your cleaning. Sweeping first prevents you from pushing debris around with a mop. Then, a thorough mopping leaves the whole room feeling fresh and finished.
Don't rush this step—it's the final touch that makes the bathroom truly clean.
Start With A Dry Sweep
Use a broom or a dry microfiber mop to collect hair, dust bunnies, and debris. Pay special attention to corners and behind the toilet where dirt hides. A dustpan with a long handle makes it easier to scoop up everything without bending.
If you have a vacuum with a hard floor attachment, that works even better—it captures fine dust that a broom might miss.
Choose The Right Mop And Cleaner
A microfiber flat mop is ideal because it doesn't leave streaks or soak the floor. For cleaner, use a pH-neutral floor cleaner or a mix of warm water and a few drops of dish soap. Avoid harsh chemicals that can damage tile or grout.
If your floor is especially grimy, let the cleaner sit for a minute before mopping.
Mop In Sections For Best Results
Start at the farthest corner and work your way toward the door so you don't walk on wet spots. Use a figure-eight motion to pick up dirt, and rinse the mop head frequently in clean water. For stubborn spots near the toilet base or under the sink, give them an extra scrub with a sponge.
Let the floor air-dry completely before putting the bath mat back.
12. Freshen the Air and Linens
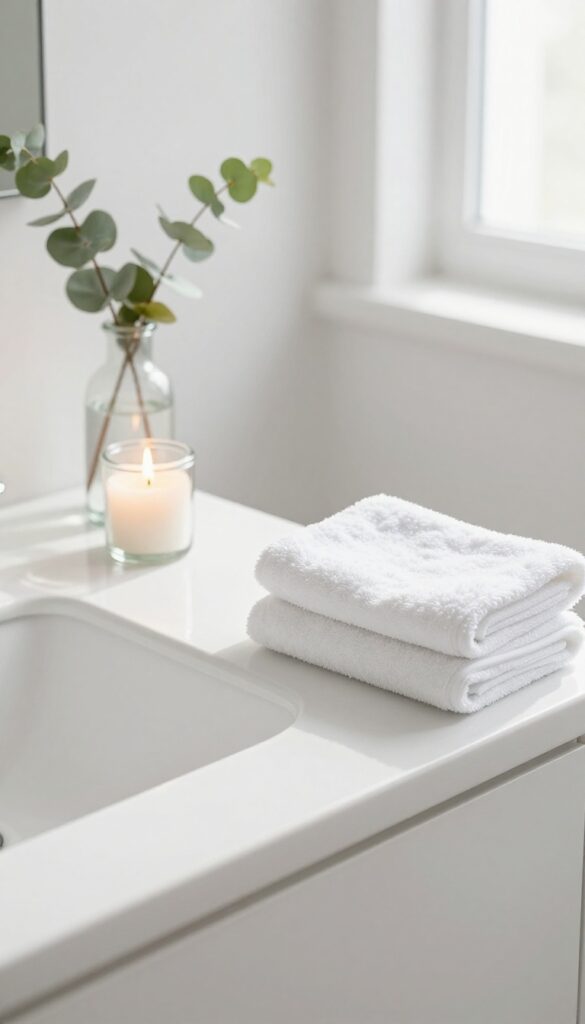
After all the scrubbing, wiping, and polishing, your bathroom might still carry lingering odors from cleaning products or mustiness. The final step is to make the space smell as clean as it looks. A few small touches—like lighting a candle or swapping out linens—can transform the atmosphere from functional to inviting.
Choose Your Scent Strategy
You have options here. A quick spritz of an air freshener or a natural linen spray works instantly. If you prefer a longer-lasting effect, light a candle or plug in a subtle diffuser.
Stick with light, fresh scents like citrus, eucalyptus, or lavender—nothing too heavy that clashes with the clean bathroom vibe.
Swap Out Towels And Bath Mats
Damp towels and bath mats can harbor mildew and undo your fresh-smelling efforts. Replace them with clean, dry ones. Fold or hang towels neatly—this simple act makes the whole room look tidier.
If you have a bath mat, make sure it’s completely dry before putting it back down.
Don’t Forget The Little Things
A fresh bar of soap, a new loofah, or even a small plant can elevate the space. Wipe down the inside of the trash can if it needs it, and empty the bin. These final details ensure your deep clean feels complete from top to bottom.
13. Do a Final Walk-Through and Touch-Ups
You've scrubbed, wiped, and polished every surface. But before you call it done, take a few minutes to review your work. A quick walk-through helps you spot any missed spots, streaks, or clutter you might have overlooked during the cleaning frenzy.
Check For Missed Spots
Start at the top and work your way down again. Look at corners, behind the toilet, and along baseboards. Use a flashlight to catch soap scum or grime in shadows.
If you see any residue, grab a microfiber cloth and give it a quick wipe.
Buff Out Streaks And Smudges
Mirrors and glass shower doors often show streaks after drying. Use a dry microfiber cloth to buff them to a crystal-clear finish. Also check faucets and stainless steel for water spots—a quick polish with a dedicated cleaner makes them shine.
Tidy Up And Declutter
Return items to their places, but take a moment to assess if everything belongs. Toss empty bottles, organize toiletries, and straighten towels. A clutter-free bathroom feels cleaner and more inviting.
FAQ
How often should I deep clean my bathroom?
Aim for a deep clean every 1 to 2 weeks, depending on usage. High-traffic bathrooms may need it weekly.
What's the best cleaner for soap scum?
White vinegar mixed with dish soap works well. For tough buildup, use a commercial bathroom cleaner with citric acid.
Can I use bleach on grout?
Yes, but dilute it with water (1: 10 ratio) and rinse thoroughly. Avoid bleach on colored grout as it may discolor.
How do I prevent mold in the shower?
Keep the bathroom ventilated, use a squeegee after showers, and spray a vinegar solution weekly.
What order should I clean a bathroom?
Always work top to bottom: start with ceilings and walls, then fixtures, then floors. This prevents dirt from falling on already-cleaned areas.
Conclusion
Deep cleaning a bathroom doesn't have to be a dreaded all-day affair. By following these 13 steps in order, you work smarter, not harder. Each task flows into the next, so you never waste time backtracking.
Your reward?
A bathroom that feels fresh, looks spotless, and smells clean. Stick with this routine, and you'll keep the grime at bay with less effort every time. Now go enjoy that sparkling space.