11 Paver Patio Ideas on a Budget With High-End Appeal
A paver patio doesn’t have to drain your savings to look like a high-end outdoor retreat. With smart material choices and a few layout tricks, you can create a space that feels custom, polished, and inviting—without the designer price tag.
These 11 ideas focus on practical upgrades that deliver maximum visual impact, whether you’re starting from scratch or refreshing an existing surface. From clever patterns to simple lighting additions, each approach is budget-conscious and easy to adapt to your yard.
Pick a few that match your style, and you’ll turn an ordinary patio into a standout feature that feels far more expensive than it really is.
1. Mix Concrete and Brick Pavers for a Custom Look
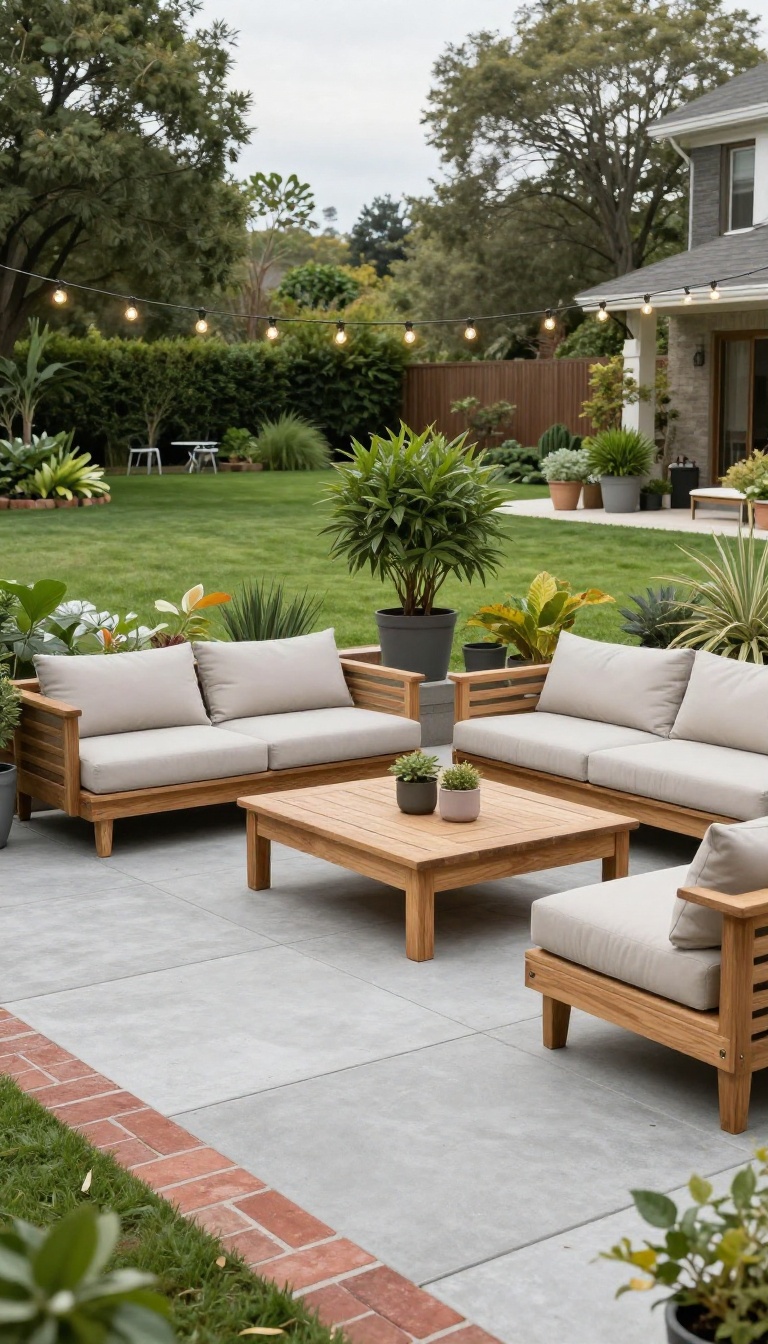
Concrete pavers are a budget-friendly workhorse, but they can look a little plain on their own. Adding brick pavers into the mix changes the whole vibe—suddenly, your patio has depth, contrast, and that handcrafted feel you usually only see in expensive installations. The trick is using brick sparingly, as a border or accent, so it frames the larger concrete field without blowing your budget.
Start by laying a main field of large concrete pavers in a neutral tone like gray or tan. Then, outline the patio with a single row of red or brown brick pavers. The color contrast instantly makes the space feel more intentional and upscale.
You can also create subtle patterns by alternating brick and concrete in a checkerboard or herringbone layout for a more dramatic effect. Since brick is typically cheaper than premium concrete, you get the high-end look without the high-end cost.
Why This Combo Works
Concrete pavers offer clean lines and a modern base, while brick adds warmth and texture. The two materials complement each other—concrete keeps the look grounded, and brick brings a touch of classic charm. This mix also hides wear better than a single material, so your patio stays looking fresh for years.
Budget-friendly Ways To Source Materials
Check local salvage yards or online marketplaces for surplus brick—often available at a fraction of retail price. Concrete pavers are already inexpensive, but buying in bulk or during off-season sales can save even more. You can also mix different shades of concrete pavers to mimic a more expensive blended look.
Pattern Ideas That Add Instant Appeal
For a simple upgrade, run a brick border around the entire patio. If you want more visual interest, try a basket-weave pattern in a small section or use brick to create a diamond or square motif in the center. These small touches break up the monotony and make the patio feel designed rather than just laid down.
2. Go for a Herringbone Pattern to Add Visual Interest
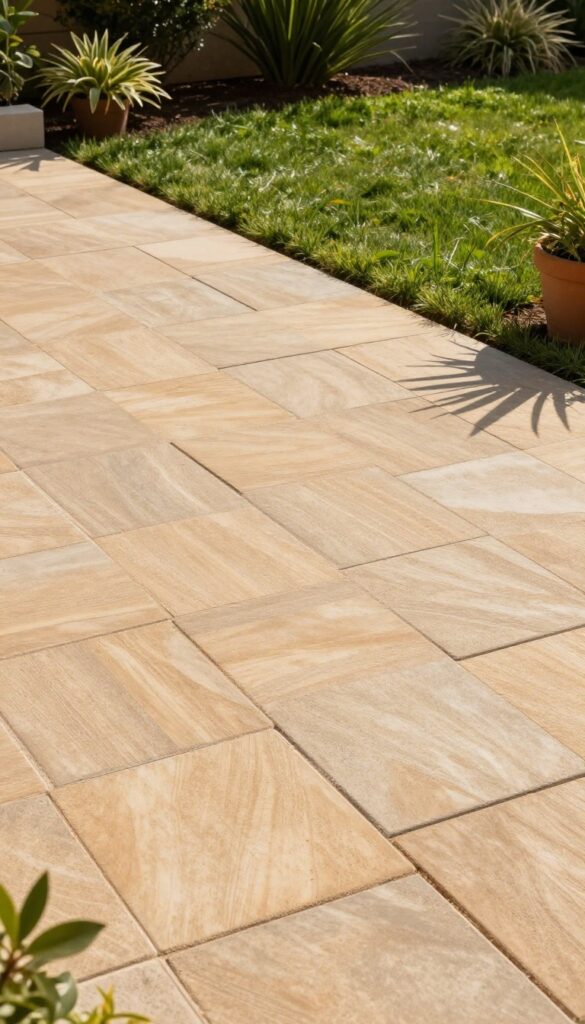
A herringbone layout instantly elevates the look of standard pavers, giving them a high-end feel. It's a classic pattern that works well with both rectangular and square pavers. The zigzag arrangement catches the eye and adds texture without costing extra.
Herringbone is a timeless choice that makes a patio feel intentional and upscale. The pattern’s diagonal lines create a sense of movement, drawing the eye across the space and making it appear larger. Best of all, it requires no additional materials—just a bit more planning during installation.
Why Herringbone Looks Expensive
The herringbone pattern mimics the look of traditional brickwork, which is often associated with high-end architecture. Its geometric precision gives a custom feel that plain running bond or stack patterns lack. The visual complexity tricks the eye into thinking the patio was a premium installation, even when you used budget-friendly pavers.
Choosing The Right Paver Shape
Rectangular pavers are the classic choice for herringbone, as their long, narrow shape creates a crisp, defined zigzag. Square pavers can also work, but they produce a more subtle, basket-weave effect. For a true herringbone look, stick with rectangles—they’re easier to lay and give that high-end vibe you’re after.
Installation Tips For A Flawless Finish
Start by laying a solid base of compacted gravel and sand to keep the pattern stable. Use string lines to keep the angles consistent, and cut pavers at the edges carefully to maintain the pattern’s integrity. If you’re not confident in your DIY skills, consider hiring a pro for the layout—the labor cost is still less than upgrading to premium pavers.
3. Use Large-Format Pavers to Minimize Grout Lines
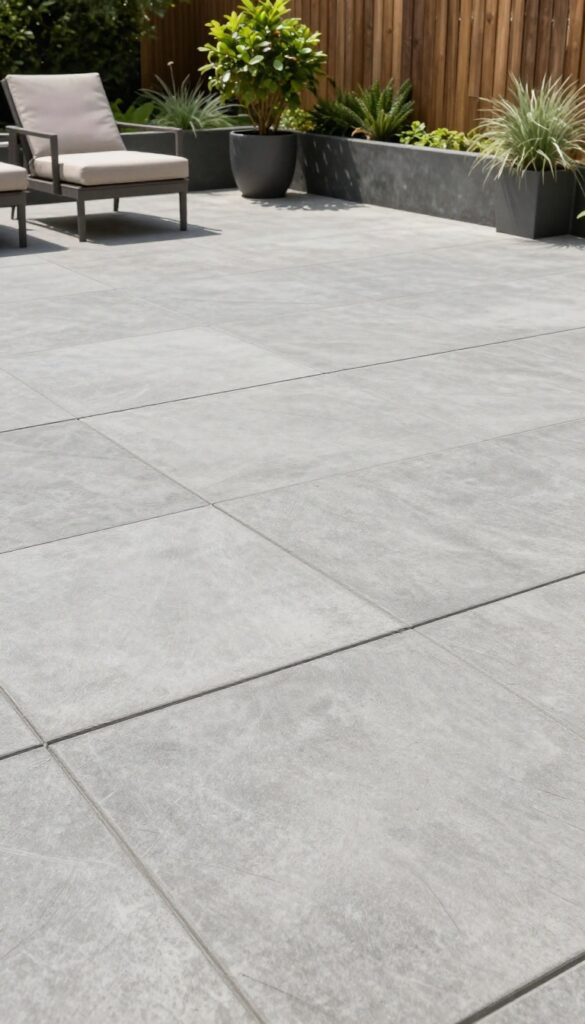
Swapping standard-size pavers for oversized ones is one of the quickest ways to give your patio a sleek, expensive look. Fewer joints mean a cleaner surface that feels more like a high-end stone slab than a typical paver installation. Plus, larger units cover more ground per piece, which can cut down on installation time and labor costs.
Large-format pavers, typically 24×24 inches or bigger, create a seamless, modern aesthetic that instantly elevates your outdoor space. Because there are fewer grout lines, the eye isn't interrupted by busy patterns—just smooth, expansive stone. This style works especially well in contemporary or minimalist yards, but it can also complement traditional homes when paired with the right textures and colors.
And since you'll need fewer pieces to cover the same area, you might save on materials and installation, making it a budget-friendly choice that doesn't skimp on style.
Why Size Matters For A High-end Look
Oversized pavers visually expand the patio, making it feel larger and more open. The reduced number of joints creates a smoother, more continuous surface that mimics natural stone slabs. This simplicity is a hallmark of luxury design, and it's an easy way to upgrade your patio without a full renovation.
Cost Savings Beyond Materials
While the per-square-foot cost of large pavers might be slightly higher, you'll likely save on installation. Fewer pieces mean less cutting, faster laying, and reduced labor hours. Plus, with fewer joints, you'll spend less on joint sand and sealant over time, making it a smart long-term investment.
Choosing The Right Large Paver
Look for pavers with a smooth, consistent finish and subtle color variation to avoid a flat, boring look. Textured surfaces can add grip and visual interest. Consider the scale of your patio—larger areas can handle bigger formats, while smaller spaces benefit from slightly smaller large-format pavers to maintain proportion.
4. Incorporate a Paver Border to Frame the Space
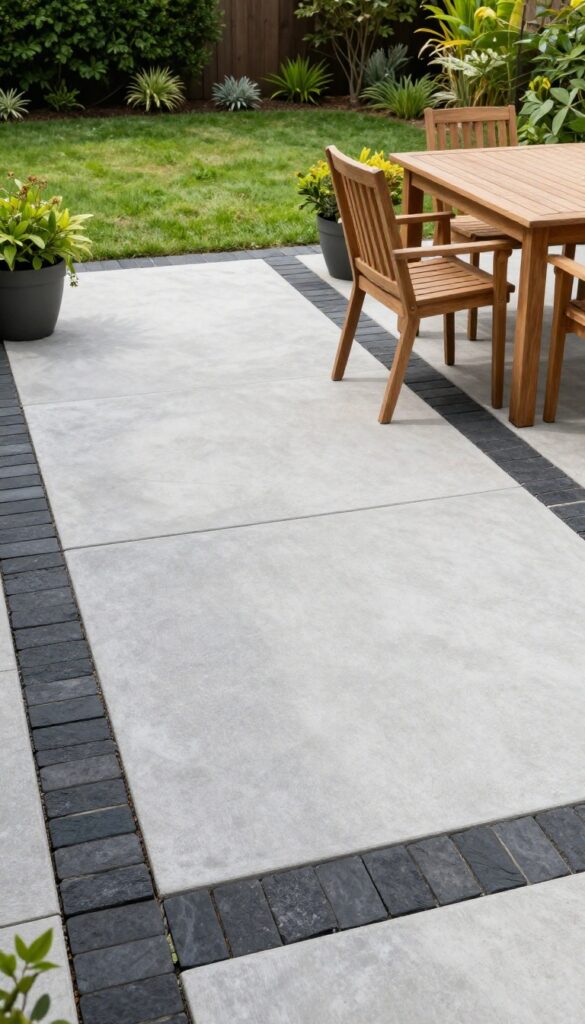
A contrasting border does more than just mark the edge of your patio—it gives the whole area a deliberate, finished look. Think of it like a frame on a painting: it draws the eye inward and makes the design feel intentional. Best of all, this upgrade is one of the most affordable ways to add a custom touch, since you only need a few extra pavers in a different color or size.
Whether you're installing a new patio or upgrading an existing one, a border can tie together the entire layout. It also helps define the space, making it feel more like a room outdoors. With a little planning, you can create a border that looks like it was part of the original design.
A paver border is a simple yet powerful design element. By using a contrasting color or a different paver size, you create a visual boundary that adds structure and polish. This trick works with almost any paver style, from concrete to brick to natural stone, and it’s a budget-friendly way to make your patio look custom.
Start by choosing a paver that complements your main field. For example, if your patio uses large gray concrete pavers, a border of dark charcoal or warm brown bricks can add depth. You can also use a soldier course—pavers laid side by side in a straight line—for a clean, classic edge.
Or, if you prefer a more intricate look, a running bond border adds subtle texture. When planning, measure your patio perimeter and calculate how many border pavers you’ll need. Remember to account for cuts at corners.
If you’re working with an existing patio, you can add a border by digging a shallow trench around the edge and setting the pavers in place. For a new installation, simply lay the border first and then fill the interior with your main pattern.
Choose The Right Contrast
The key to a striking border is contrast. Pick a paver color that stands out from the main field—dark against light, or warm against cool. For a subtle look, choose a shade that’s just a bit darker or lighter.
For a bolder statement, go with a completely different color, like red brick against gray concrete. Also consider texture: a smooth border against a textured field adds interest without being overwhelming.
Play With Paver Size And Layout
Using a different paver size is another way to create a border. For example, if your patio uses 12×12 pavers, a border of 4×8 bricks can make the edge feel more defined. You can also lay border pavers in a herringbone or basketweave pattern for extra flair.
Just keep the border width proportional to the patio—usually 12 to 18 inches—so it doesn’t overpower the space.
Installation Tips For A Clean Edge
A crisp border requires a solid base. Dig a trench about 6 inches deep, fill it with compacted gravel, and then add a layer of sand. Set the border pavers in place, using a rubber mallet to level them.
Use a string line to keep the edge straight. For curves, you can cut pavers or use flexible edging. Finally, fill the joints with polymeric sand and seal the border to protect it from weathering.
5. Create a Fire Pit Area With Pavers
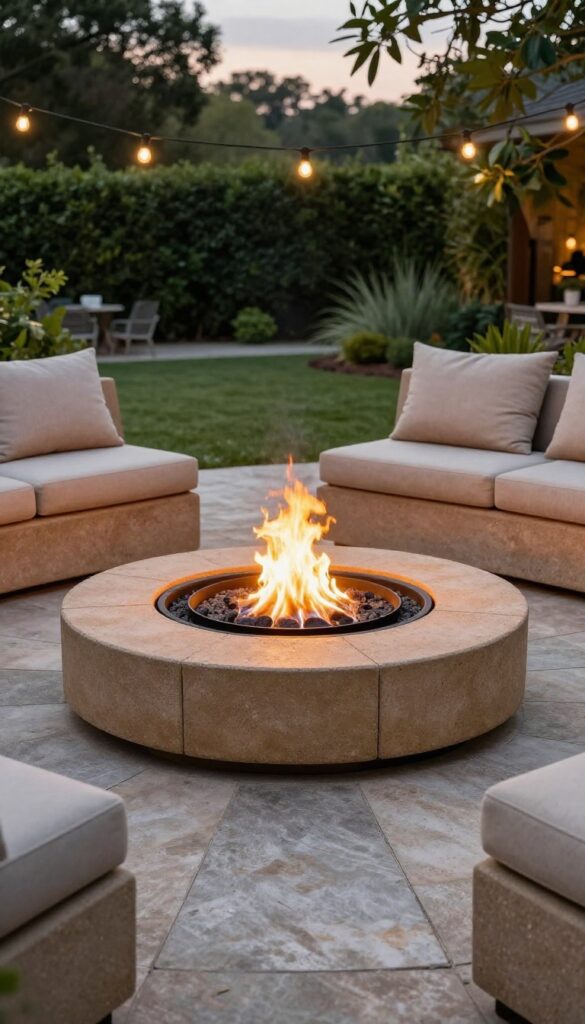
A fire pit is the ultimate gathering spot, and you can build one with pavers for a fraction of the cost of a prefab unit. It’s a DIY-friendly project that instantly gives your patio a resort-like vibe. The best part?
You can customize the size and shape to fit your space perfectly.
Start by choosing a location that’s at least 10 feet away from structures and overhanging branches. Mark out a circle or square, then dig down about 6 inches. Fill the base with gravel and compact it.
Lay your pavers in a ring pattern, using adhesive to secure them. For the interior, fill with sand and gravel, then top with a metal fire ring or use paver blocks to create a raised wall. This simple setup provides a safe, stylish fire feature that looks custom.
Choosing The Right Pavers
Opt for concrete pavers in a warm tone like tan or charcoal to blend with your patio. For a more natural look, consider travertine or flagstone—they handle heat well and add texture. If you’re on a tight budget, standard concrete pavers work just fine and can be painted with heat-resistant paint for a custom color.
Safety And Placement Tips
Always check local fire codes before building. Keep the fire pit on a level, non-combustible surface. Use a spark screen and keep a hose or extinguisher nearby.
Position seating around the pit at a safe distance—about 2 feet from the edge—to keep everyone comfortable and safe.
Adding Seating And Ambiance
Surround your fire pit with a ring of matching pavers or gravel to create a stable seating area. Add a few outdoor cushions or benches for comfort. String lights overhead or place a few lanterns around to enhance the cozy atmosphere.
This turns your patio into a year-round hangout spot without breaking the bank.
6. Add a Paver Walkway to Connect Spaces
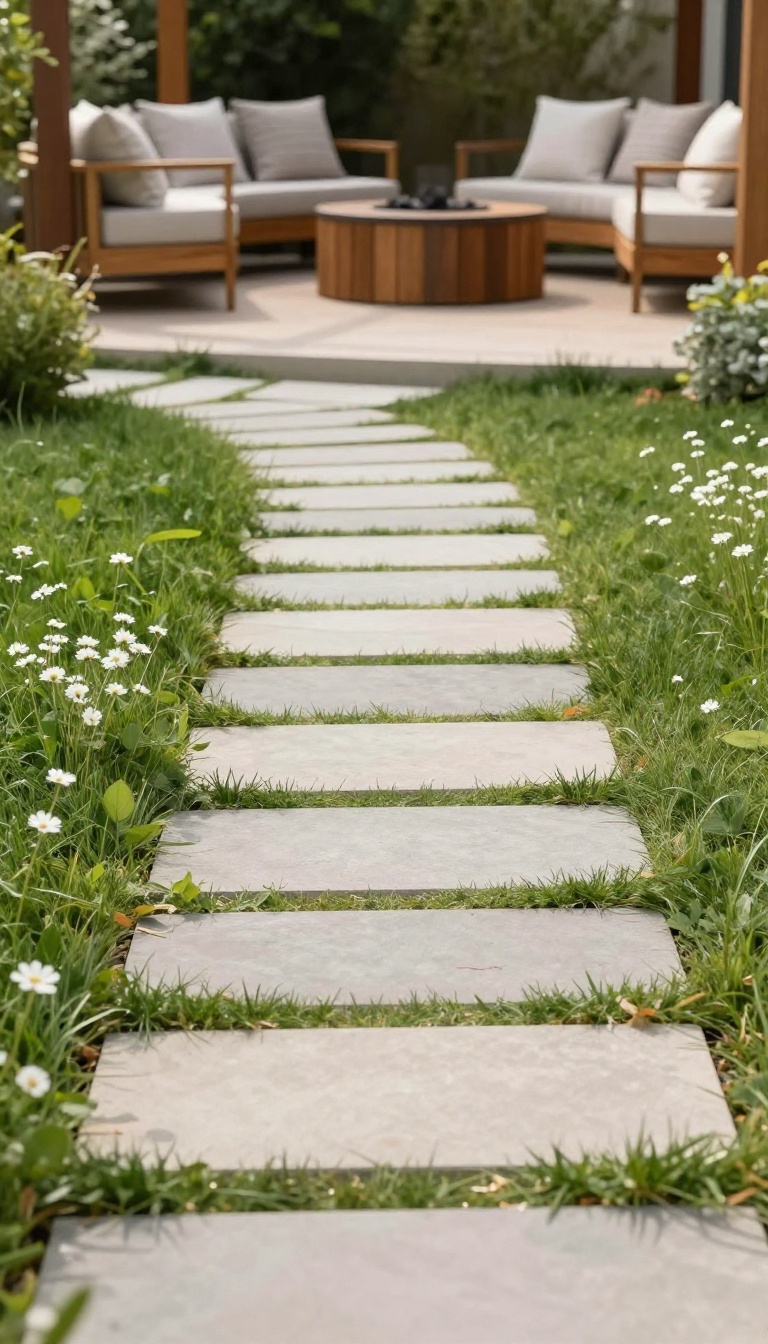
A paver walkway is one of those upgrades that does double duty: it links your patio to other parts of the yard and adds a sense of purpose to the whole layout. Instead of a lonely island of pavers, you get a cohesive outdoor space that feels planned and polished. Best of all, you can create a simple path with leftover pavers or budget-friendly concrete squares, so it won't break the bank.
Start by mapping out the route you naturally take between your patio and other spots—like the gate, garden, or grill area. A straight path feels formal, while a gentle curve adds a relaxed, organic vibe. Use the same paver style as your patio for a seamless look, or mix in a contrasting color for a subtle border effect.
Keep the walkway width generous (at least 36 inches) so it feels inviting and easy to walk on.
Plan The Path For Natural Flow
Before you buy anything, walk the route you want to connect. Mark the edges with spray paint or a garden hose to visualize the shape. A straight line works well for a modern or formal setting, but a slight curve can soften the look and make the yard feel larger.
Consider how the path will meet the patio—flush edges look cleaner, while a step down can add dimension.
Choose Budget-friendly Materials
You don't need expensive natural stone to get a high-end look. Concrete pavers in a neutral tone are affordable and come in various shapes. If you have leftover pavers from your patio, use those to keep costs down.
For a more upscale feel, mix in a few larger pavers or add a border of contrasting color. Gravel or stepping stones are even cheaper alternatives that still define the path.
Install On A Solid Base
A walkway only looks good if it stays level and doesn't shift. Dig down about 4-6 inches, fill with crushed stone or paver base, and compact it well. Then add a layer of sand for leveling.
This might sound like extra work, but it's essential for durability. If you're on a tight budget, you can skip the sand and use polymeric sand between the pavers to lock them in place.
Add Lighting For Evening Appeal
Once your walkway is in, add low-voltage landscape lights along the edges. This not only improves safety but also creates a warm, inviting glow that makes your outdoor space feel upscale after dark. Solar lights are an even cheaper option—just push them into the ground and let them charge during the day.
The result is a path that looks intentional and polished, day or night.
7. Opt for a Mixed-Material Patio With Pavers and Gravel
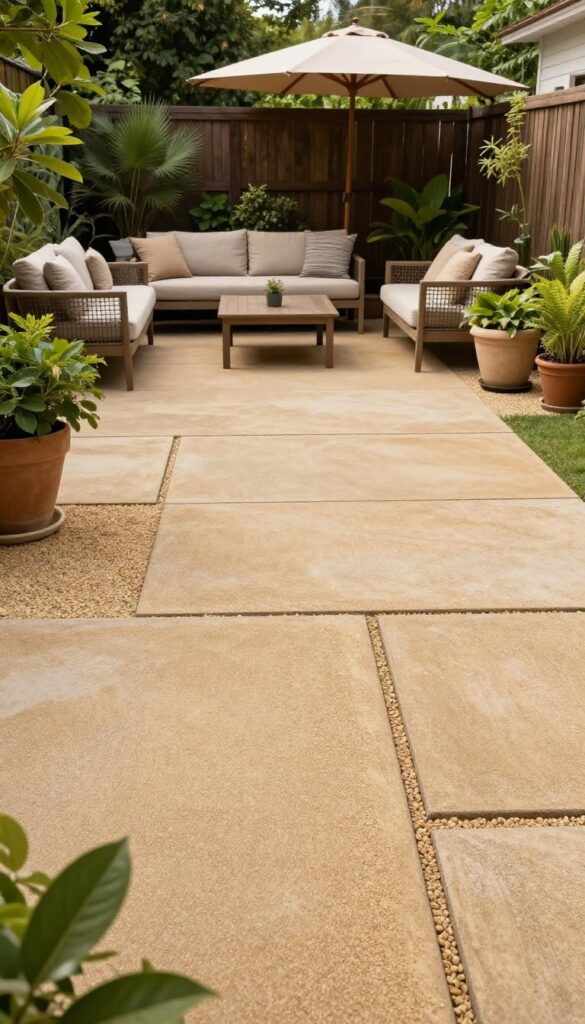
Mixing pavers with gravel or decomposed granite is a clever way to stretch your budget while adding texture and visual interest. The contrast between solid stepping stones and loose aggregate creates a relaxed, resort-like feel that looks intentionally designed. This approach also cuts costs because you need fewer pavers, and the gravel fills in the gaps cheaply.
This patio style works particularly well for irregular or sloping areas where a full paver base would be tricky. You can lay pavers in a staggered pattern, leaving gaps for gravel, or create defined pathways with gravel borders. The key is to choose materials that complement each other—like warm-toned pavers with buff-colored gravel—to keep the look cohesive.
Plan The Layout
Decide on a pattern before you start. A grid with wide gravel gaps feels modern, while a random scatter of pavers looks more organic. Mark the area with stakes and string to visualize the spacing.
Keep gaps consistent—usually 2 to 4 inches—so the gravel stays put and the surface is easy to walk on.
Pick The Right Gravel
Choose gravel or decomposed granite that compacts well, like crushed stone or DG. Pea gravel is prettier but shifts underfoot, so it’s better for borders than main walking areas. Match the color to your pavers or go for a contrasting tone to make the pattern pop.
A stabilizer or edging helps keep the gravel in place.
Install Like A Pro
Start with a compacted base of crushed rock, then add a layer of sand for the pavers. Set the pavers in place, leaving your planned gaps. Sweep the gravel into the gaps and compact the whole surface.
Wet it down to settle the gravel, then add more if needed. Finish with edging to lock everything in.
8. Use Pavers to Create a Dining or Lounge Zone
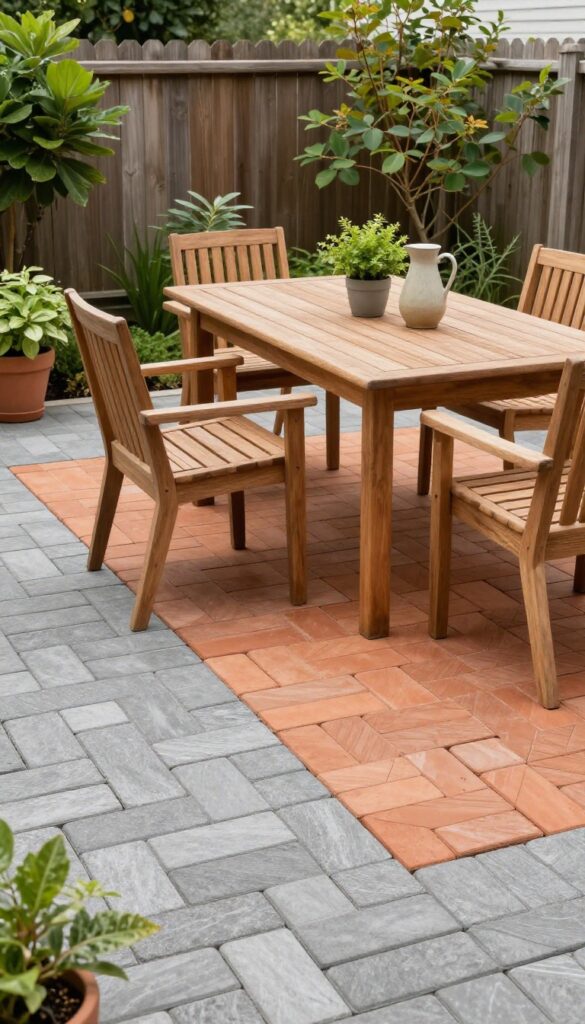
Sometimes the easiest way to make a patio feel high-end is to give it a clear purpose. Instead of one big open slab, carve out a dedicated spot for meals or relaxation. A simple shift in paver color or pattern does the trick, and it instantly turns the space into an outdoor room.
Designating a dining or lounge area with different pavers is a budget-friendly trick that adds structure and style. You don’t need to build walls or add expensive furniture—just change the flooring. The contrast in texture or tone creates a visual boundary that feels intentional, not accidental.
It’s a smart way to break up a large patio and make it more functional.
Choose A Contrasting Paver Color
Pick a paver color that stands out from the main patio, like a warm terracotta against cool gray. This subtle shift defines the zone without being loud. You can also use the same paver in a different finish, like tumbled versus smooth, to add depth without extra cost.
Play With Laying Patterns
Switch from a running bond to a herringbone or basketweave pattern in the dining area. The change in pattern catches the eye and signals that this is a special spot. It’s a simple way to add visual interest without buying new materials.
Add A Border Or Inset Strip
Use a row of contrasting pavers or a narrow strip of gravel to outline the dining zone. This acts like a rug, grounding the furniture and making the space feel cozy. It’s a low-cost detail that adds polish and helps the area read as a distinct room.
9. Install Pavers Over Concrete for a Quick Refresh
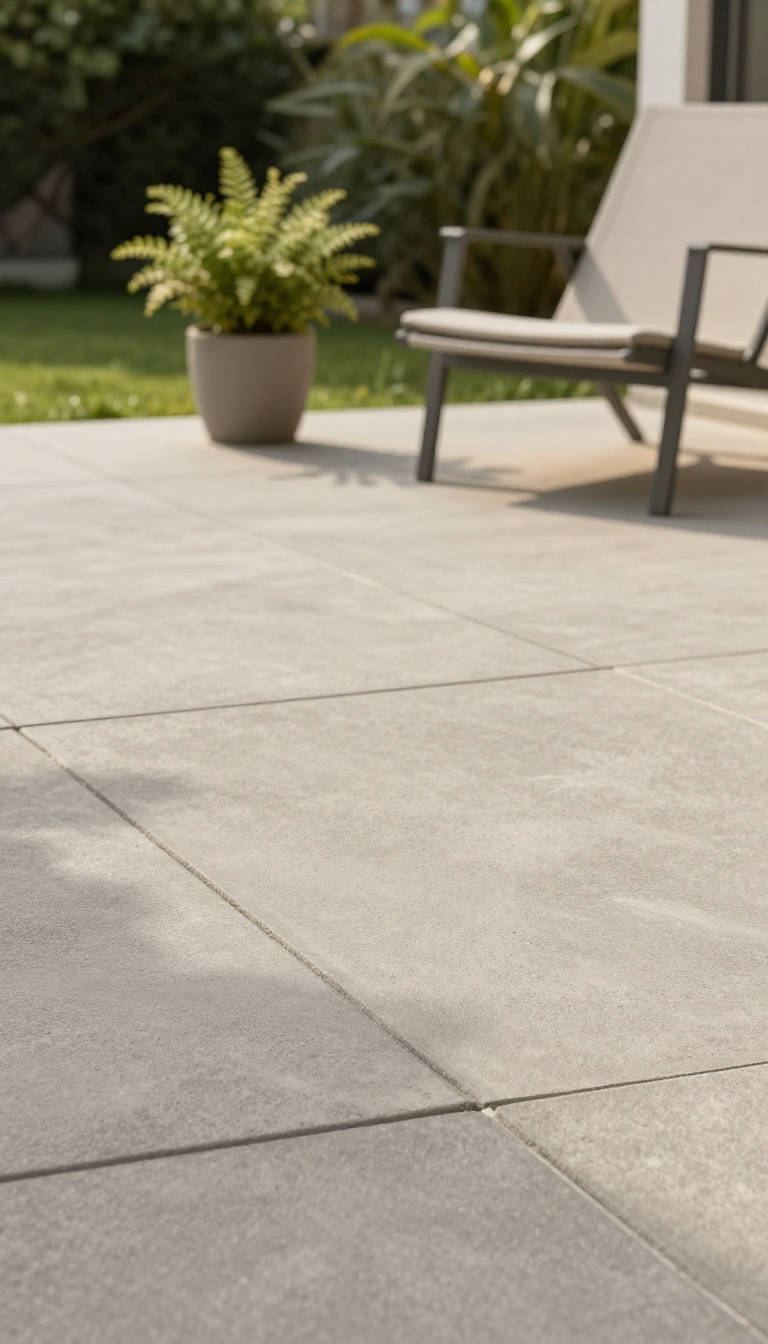
Got an old concrete slab that’s cracked, stained, or just plain boring? You don’t have to tear it out and start from scratch. Laying pavers directly over concrete is a budget-friendly trick that saves you the cost and hassle of demolition, while giving your patio a whole new personality.
Before you start, make sure the concrete is in decent shape—no major sinking or huge cracks. If it’s structurally sound, you can move forward. Clean the surface thoroughly, apply a layer of sand or a paver base, and then set your pavers.
This method works best with thinner pavers (around 1 inch thick) to keep the height manageable. The result is a fresh, updated look that feels intentional and high-end, without the heavy equipment or disposal fees.
Prep The Concrete Properly
Start by sweeping and power-washing the concrete to remove dirt and debris. Fill any small cracks with a concrete patch and let it dry. If the slab has a slight slope for drainage, that’s fine—just make sure it’s even enough for a stable paver base.
A smooth, clean surface is key to preventing future shifting.
Choose The Right Pavers
Thin pavers (about 1 inch thick) are ideal for overlaying because they don’t add too much height. Look for concrete or porcelain pavers that mimic natural stone or wood for a high-end look. Stick to a simple pattern like running bond or herringbone to keep installation easy and cost-effective.
Lay And Finish
Spread a 1/2-inch layer of paver sand over the concrete, then lay your pavers in your chosen pattern. Use a rubber mallet to tap them into place and a level to check for evenness. Once all pavers are down, sweep polymeric sand into the joints and mist with water to activate it.
This locks everything together and keeps weeds out.
10. Choose a Simple Running Bond Pattern for a Clean Look
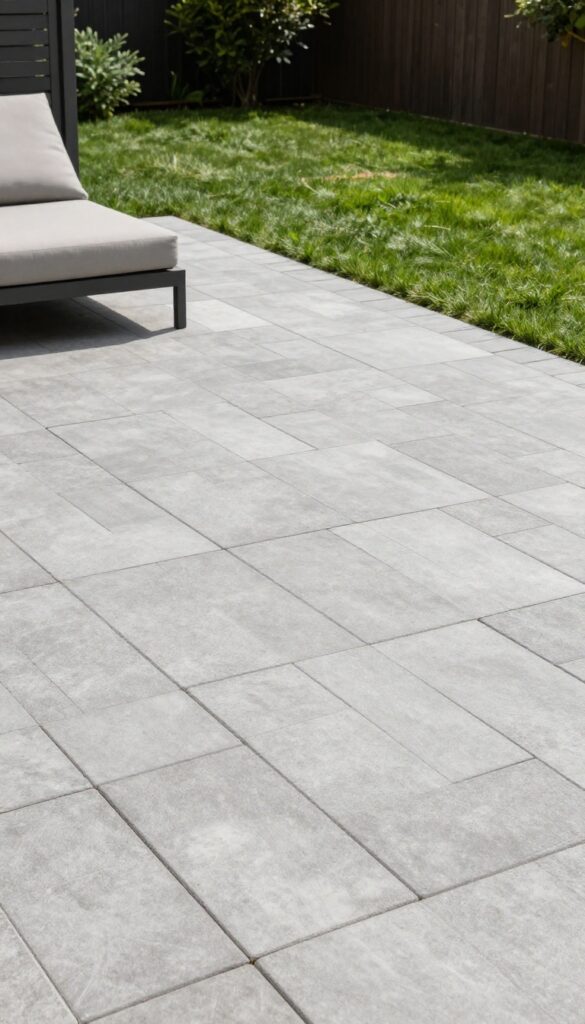
Sometimes the most elegant designs are the simplest. A running bond pattern—where each paver is laid end to end with staggered joints—creates a clean, classic look that never goes out of style. It's also one of the easiest and most affordable patterns to install, making it a smart choice for budget-conscious DIYers.
The running bond pattern is essentially a brick-like layout. It’s straightforward to lay, which means less cutting and less waste. That translates to lower material costs and a quicker installation.
Plus, the clean lines give your patio a timeless, upscale feel that fits almost any home style.
Why It Looks High-end
The secret to the running bond’s high-end appeal is its simplicity. Without busy patterns or complex designs, the eye focuses on the texture and color of the pavers themselves. This minimalist approach is a hallmark of modern luxury outdoor spaces.
Installation Tips For A Flawless Finish
To get the best results, start with a solid base of compacted gravel and sand. Use spacers to keep joints consistent, and consider a soldier course—a border of pavers laid perpendicular—to frame the patio and give it a polished edge. This small addition adds a custom touch without much extra cost.
Best Paver Choices For This Pattern
Long, rectangular pavers work best for a running bond. Concrete pavers in neutral tones like gray, tan, or charcoal mimic the look of natural stone at a fraction of the price. For a more organic feel, choose pavers with slight color variations—they hide dirt and wear while adding depth.
11. Add Lighting to Highlight Your Paver Patio
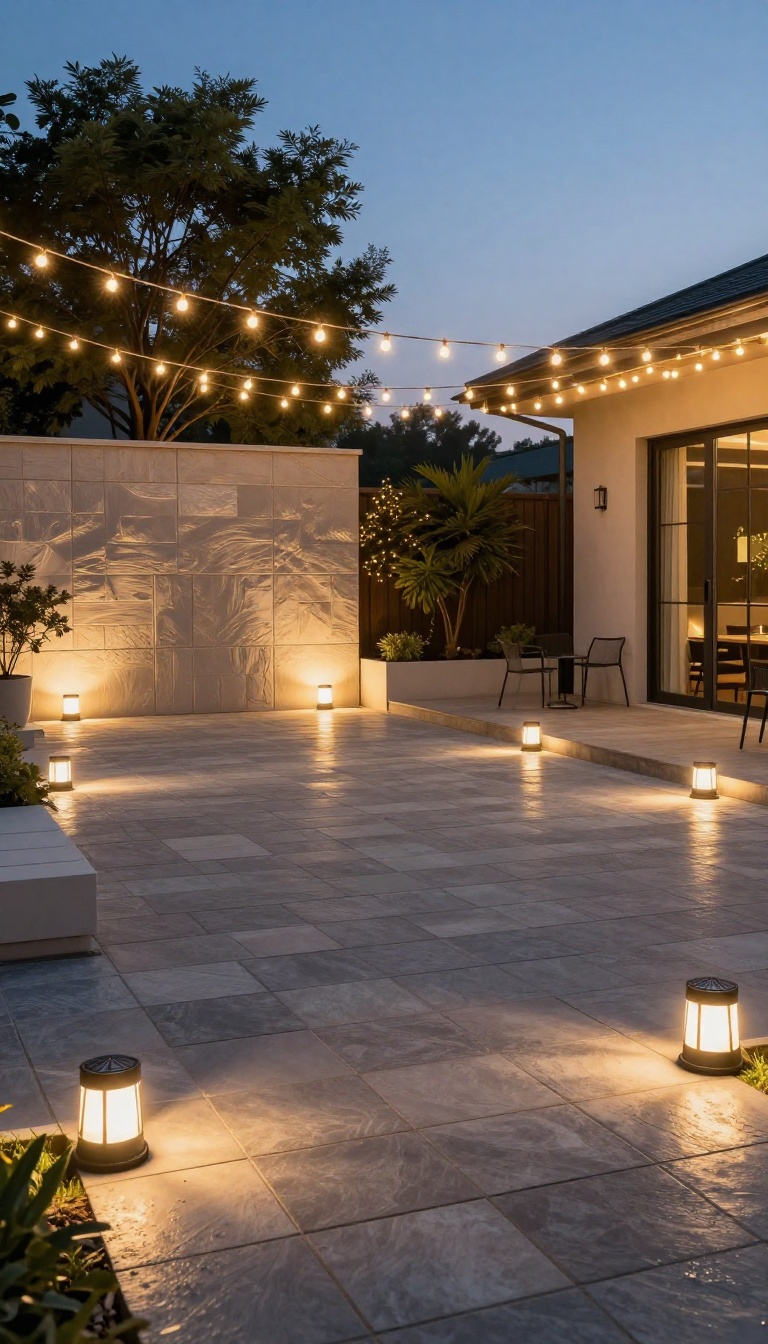
The sun goes down, and your patio disappears into the dark. That’s a missed opportunity, especially when a few well-placed lights can turn the same pavers into a glowing, inviting space. Lighting is one of the most affordable upgrades you can make, and it instantly adds a layer of sophistication that feels custom and expensive.
Start by thinking about what you want to highlight. Path lights along the edges guide the eye and create a sense of flow. Uplights aimed at a nearby tree or a feature wall add depth and drama.
Even simple string lights overhead can make the whole area feel festive and welcoming. The key is to layer different types of lighting for a balanced effect.
Choose The Right Fixtures
You don’t need to spend a fortune on designer fixtures. Solar path lights are affordable and easy to install—just stake them in and let the sun do the work. For a more polished look, consider low-voltage LED lights, which are energy-efficient and cast a warm, even glow.
Look for fixtures with a matte black or bronze finish to blend seamlessly with your pavers.
Placement Tips For Maximum Impact
Place path lights every 6 to 8 feet along walkways, and use uplights to highlight vertical elements like trees, columns, or a pergola. Aim lights at an angle rather than straight on to create interesting shadows. If you have a seating area, add a dimmer switch or use lanterns to control the mood.
The goal is to create layers of light that draw the eye and make the space feel larger.
Budget-friendly Lighting Ideas
String lights are a classic choice and can be draped overhead or along a fence for instant charm. For a more permanent feel, install low-voltage deck lights that fit between pavers—they’re surprisingly affordable and give a custom, built-in look. Another trick: use solar stake lights with a warm white LED to mimic the glow of traditional landscape lighting without the wiring.
FAQ
What is the most budget-friendly paver material?
Concrete pavers are typically the most affordable, especially when bought in bulk. They come in many styles and colors, making them a versatile and cost-effective choice.
Can I install pavers myself to save money?
Yes, DIY installation can save you a significant amount on labor costs. However, it requires time, effort, and some knowledge of base preparation and leveling. For large areas, professional installation might be worth the investment.
How do I maintain a paver patio on a budget?
Regular sweeping and occasional rinsing with a hose are usually enough. For weeds, use polymeric sand in the joints and pull weeds as they appear. Sealing every few years can help protect the pavers and extend their life.
What is the cheapest paver pattern to install?
The running bond pattern is one of the simplest and most cost-effective because it requires minimal cutting and is straightforward to lay. It also looks clean and modern.
Can I use pavers over an existing concrete patio?
Yes, you can install pavers over concrete if the surface is in good condition. You'll need to add a layer of sand or a paver base, and ensure proper drainage. This can save on demolition costs.
Conclusion
You don't need a big budget to get a high-end patio—just smart choices that do the heavy lifting. Start with one or two ideas that fit your space and skill level, then build from there as you see what works.
Whether it's a clever pattern, a focal point, or a simple upgrade, small steps can make your outdoor area feel custom and polished. Pick your favorite, get started this weekend, and enjoy the transformation.