10 Concrete Patio Ideas With a Clean Modern Finish
A concrete patio doesn't have to feel cold or utilitarian. With the right finish, color, or layout, it can become the clean, modern centerpiece your backyard deserves.
Whether you're pouring fresh concrete or upgrading an existing slab, these ten ideas offer a range of textures, tones, and built-in features that keep things sleek without sacrificing practicality. From subtle stains to integrated seating, each option brings a distinct look that still holds up to weather and foot traffic.
Pick one that matches your style, and you'll turn a plain surface into a polished outdoor living area.
1. Polished Concrete for a Sleek, Indoor-Outdoor Flow
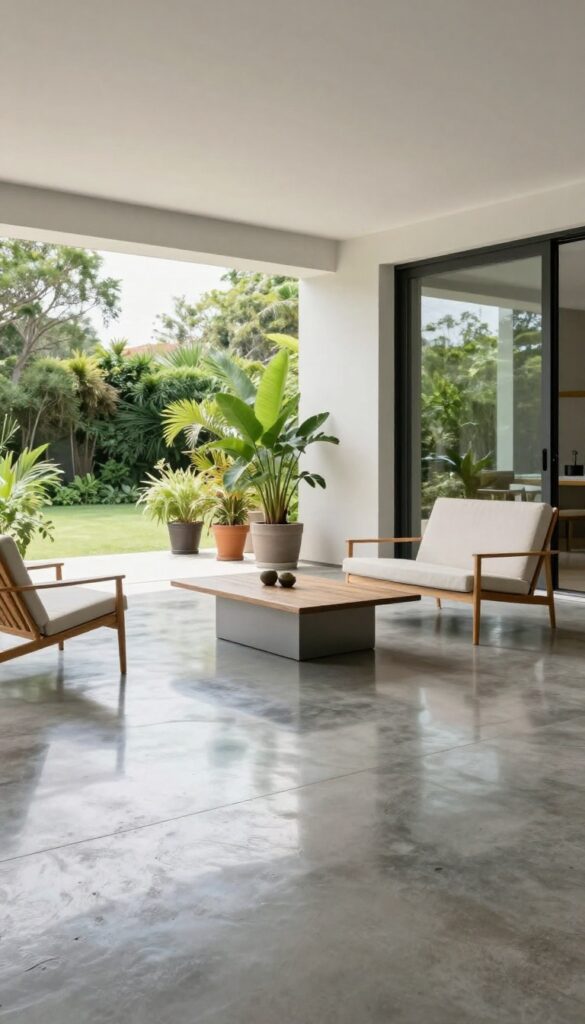
Polished concrete is a standout choice for modern patios because it delivers a high-end, glossy look that rivals natural stone. The reflective surface catches light beautifully, making your outdoor space feel larger and more open. Plus, it creates a seamless visual connection with interior floors when you use the same finish both inside and out.
Polished concrete is achieved by grinding the surface with progressively finer diamond pads until it reaches a smooth, glass-like sheen. The process can be customized with different levels of gloss, from a subtle satin to a mirror finish. This versatility makes it easy to match your patio to the overall aesthetic of your home.
Why Polished Concrete Works For Patios
The dense, smooth surface resists stains from food, drinks, and even oil spills, making cleanup a breeze. It's also incredibly durable, standing up to heavy foot traffic and weather without cracking or chipping. Unlike porous materials, polished concrete doesn't harbor mold or mildew, so it stays fresh and clean with minimal effort.
How To Achieve The Look
You can polish an existing concrete slab or pour a new one specifically for polishing. The process requires special equipment, so it's best to hire a professional unless you have experience. For a DIY approach, you can use a concrete grinder with diamond pads, but be prepared for a time-consuming project.
Consider adding a densifier to strengthen the surface and enhance the shine.
Styling Tips For A Cohesive Look
Pair polished concrete with minimalist furniture in natural materials like teak or aluminum to keep the focus on the floor. Add an outdoor rug in a neutral tone to soften the space and define seating areas. Use potted plants and subtle lighting to bring warmth without overwhelming the sleek aesthetic.
2. Stained Concrete to Add Warmth and Depth
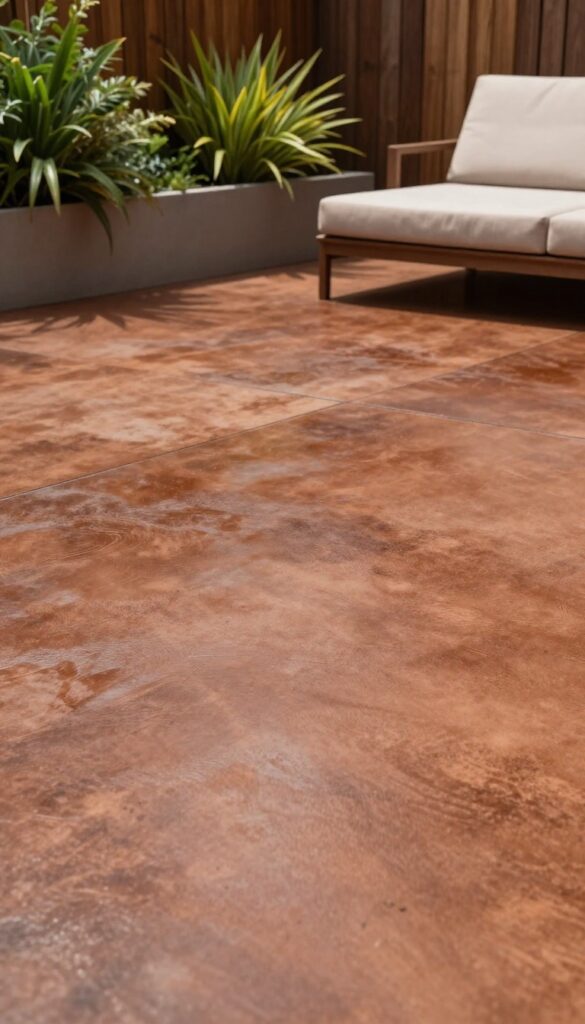
If plain gray concrete feels a bit too stark for your taste, staining is a game-changer. It transforms the surface into a rich, earthy canvas that adds warmth without covering up the material's natural durability. Whether you go for terracotta, cool gray, or deep brown, the color seeps into the concrete, creating a finish that won't peel or fade like paint.
Staining is a straightforward upgrade that works on both new and existing patios. The key is choosing the right type of stain and applying it properly. Acid stains react with the concrete to create mottled, translucent tones, while water-based stains offer a wider range of colors and more even coverage.
Both penetrate deeply, so the color is built into the surface itself.
Choosing The Right Stain
Acid stains give a natural, variegated look that mimics stone or leather, with colors like terra cotta, bronze, and deep walnut. Water-based stains are more predictable and come in a broader palette, including soft grays and muted blues. Consider your home's exterior and landscaping when picking a tone—warm stains complement brick or wood, while cool grays suit modern stucco or metal accents.
Prep And Application Tips
Start with a clean, dry surface. Remove any sealers or coatings, and patch cracks. Apply the stain with a sprayer or brush, working in sections to avoid lap marks.
For a more organic look, use overlapping strokes and let the stain react naturally. After it dries, neutralize acid stains with a baking soda solution, then rinse thoroughly. Always test on a small area first to see how the concrete reacts.
Sealing And Maintenance
A good sealer is essential to protect the color from UV rays and moisture. Choose a matte or satin finish for a modern look, or go glossy if you want extra shine. Reapply sealer every two to three years, depending on weather and foot traffic.
Cleaning is simple—just sweep and occasionally rinse with a hose. Avoid harsh chemicals that could strip the sealer.
3. Broom Finish for Subtle Texture and Slip Resistance
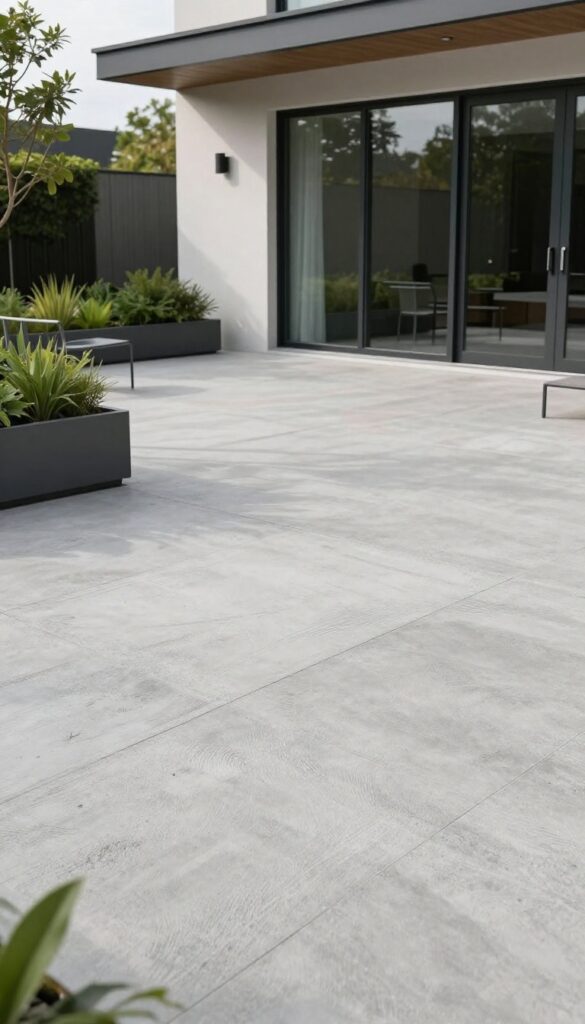
If you want a patio that feels safe underfoot without sacrificing style, a broom finish is a smart, understated choice. The fine lines created by dragging a broom across the surface add just enough texture to prevent slips when wet, making it a favorite for pool areas and rainy climates. It's a budget-friendly option that still delivers that clean, modern look you're after.
A broom finish is achieved by sweeping a stiff-bristled broom over freshly troweled concrete, leaving behind delicate ridges. These lines are subtle—almost like a fine linen texture—so they don't compete with your furniture or landscaping. The result is a surface that's both practical and visually quiet, perfect for minimalist outdoor spaces.
Plus, the process is simple enough that it won't add much to your contractor's bill, and it's also a doable DIY project if you're comfortable pouring your own slab.
Why Broom Finish Works For Modern Patios
Modern design often leans on clean lines and neutral tones, and a broom finish fits right in. The texture is uniform and low-profile, so it doesn't introduce visual noise. It also pairs beautifully with other modern elements like sleek metal furniture, large planters, and outdoor rugs.
And because the finish is subtle, it won't date your patio the way some heavier textures might.
Best Spots For Broom Finish
While a broom finish works anywhere, it truly shines in areas that get wet. Around pools, hot tubs, or in regions with frequent rain, the added slip resistance is a game-changer. It's also a great choice for patios that double as walkways, since it provides secure footing even when leaves or morning dew make things slick.
How To Get The Broom Finish Look
If you're hiring a pro, just ask for a broom finish and they'll handle it. For DIYers, the trick is timing: you need to broom the concrete after it's troweled but before it sets too hard. Use a wide broom with stiff bristles and pull it in straight, even passes.
Overlap slightly to avoid gaps, and keep the direction consistent—usually parallel to the house or the patio's longest edge—for a clean, intentional look.
4. Exposed Aggregate for a Durable, Pebbled Look
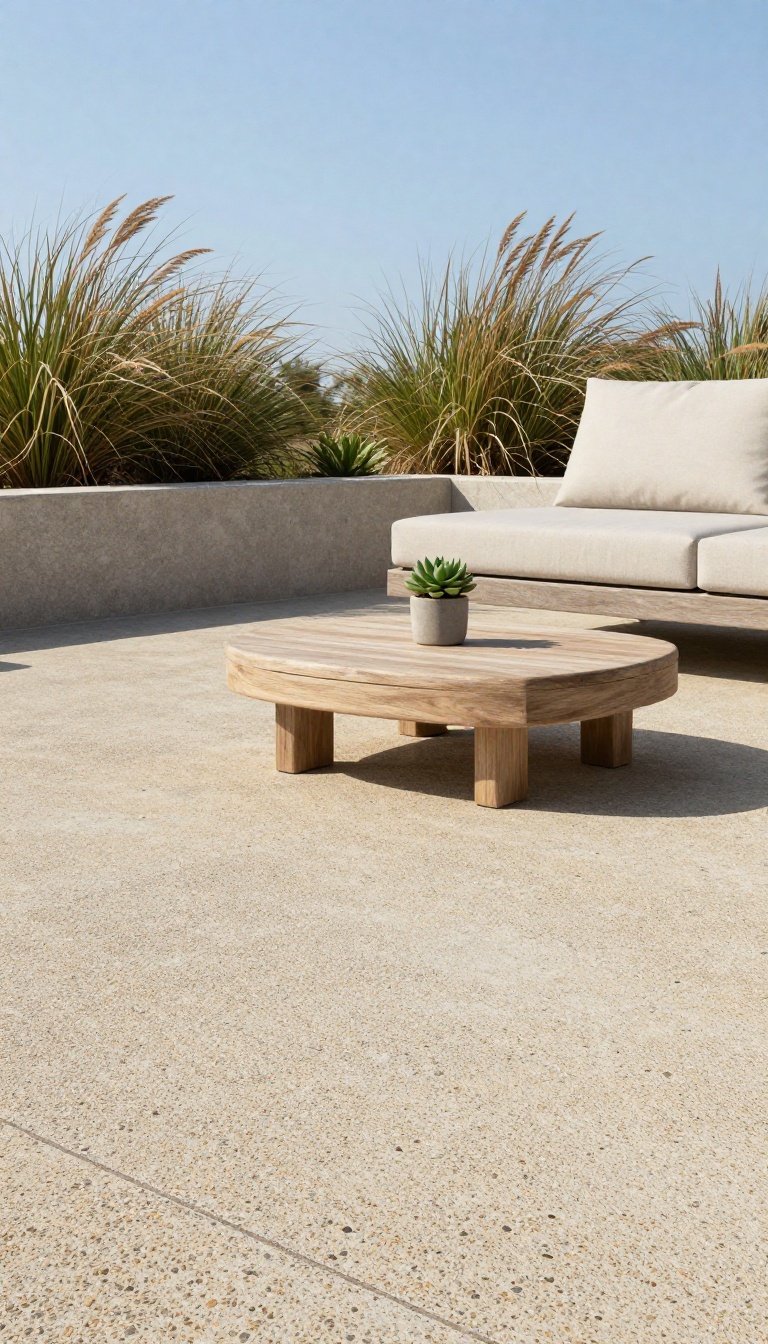
If you want a patio surface that’s tough, slip-resistant, and visually interesting all at once, exposed aggregate is a fantastic route. This technique reveals the natural stones mixed into the concrete, creating a textured, pebbled finish that feels more organic than plain concrete. It’s a practical choice for busy backyards, especially if you have kids or pets running around, because the surface provides excellent traction even when wet.
Exposed aggregate isn’t just about looks—it’s built to last. The exposed stones are harder than the surrounding cement, making the surface more resistant to wear and tear. It’s a popular option for driveways and patios that see heavy foot traffic, and it requires minimal maintenance beyond occasional cleaning.
The texture also hides minor imperfections and stains better than smooth concrete, so it stays looking sharp for years.
How It’s Done
The process involves pouring concrete with small pebbles or crushed stone mixed in, then washing away the top layer of cement before it fully sets. This exposes the aggregate beneath, creating that distinctive bumpy surface. You can choose the size and color of the stones to match your style—from fine, sandy textures to larger, more dramatic gravel.
A professional can help you get the timing just right, as the wash must happen at the perfect moment.
Design Flexibility
Exposed aggregate isn’t limited to gray. You can use a variety of aggregates, including river rock, granite, or even recycled glass, to introduce subtle color variations. The pebbled surface pairs beautifully with modern landscaping, like ornamental grasses or sleek outdoor furniture.
It also works well with geometric patio shapes, as the texture softens the hard lines and adds a natural touch.
Care And Longevity
Maintaining exposed aggregate is straightforward: a periodic rinse with a hose and a mild cleaner keeps it fresh. Sealing the surface every few years helps protect the stones and makes cleaning easier. With proper care, an exposed aggregate patio can last decades, making it a smart investment.
Just avoid using harsh chemicals or power washing too aggressively, as that could dislodge the stones.
5. Concrete Pavers with a Modern Grid Pattern
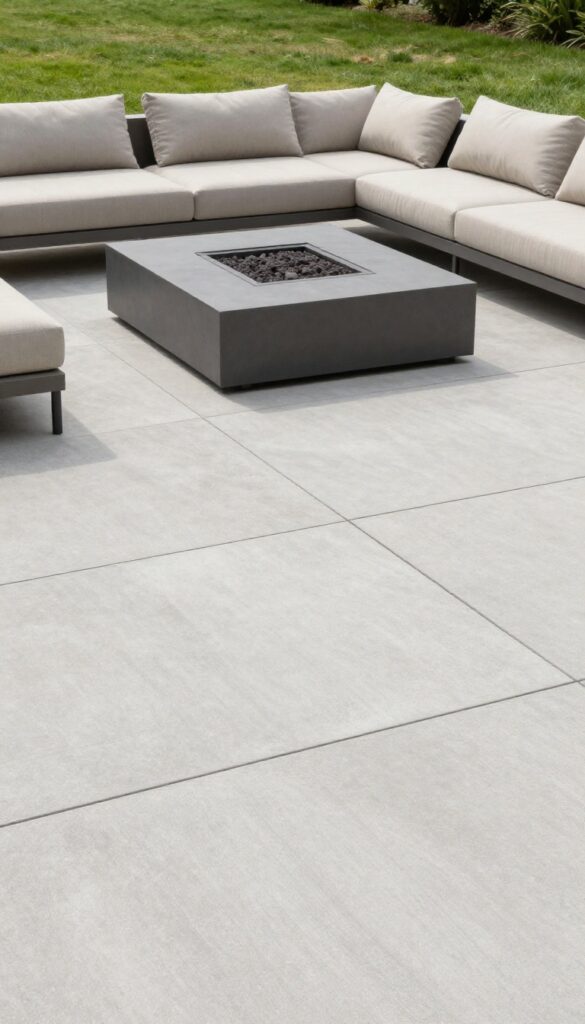
If you want the look of natural stone without the inconsistency, large-format concrete pavers in a clean grid are a smart move. The uniform size and smooth surface create a crisp, contemporary foundation that feels both polished and grounded. It’s a style that works just as well around a minimalist fire pit as it does leading up to a modern front door.
The key is choosing pavers that are large and square, with a tight joint spacing. This creates a seamless, almost monolithic appearance that reads as high-end. When you lay them in a simple running bond or a straight grid, the pattern stays quiet, letting the texture and color do the talking.
Neutral shades like warm gray, beige, or charcoal keep the look versatile and easy to pair with outdoor furniture.
Choosing The Right Paver Size And Color
Go for pavers that are at least 24 inches square, or even larger like 36-inch slabs. The bigger the paver, the fewer joints you see, which makes the patio feel more expansive. Stick to a single color or subtle tonal variations—too much contrast can break the clean line you’re after.
Light gray or sand tones reflect heat and keep the surface cooler underfoot, while darker shades add drama but absorb more sun.
Joint Options: Sand, Grass, Or Gravel
The joints between pavers are more than just gaps—they set the mood. Filling them with polymeric sand gives a tidy, low-maintenance finish that locks out weeds and ants. For a softer, more organic feel, you can plant creeping thyme or low-growing grass between the pavers.
That adds a touch of greenery and a bit of give underfoot, but it needs occasional trimming and watering. Gravel or pebbles are another option, but they can shift over time and need a stable edge to stay put.
Installation Tips For A Flawless Finish
A solid base is non-negotiable. Start with a compacted gravel sub-base, then a layer of sand or stone dust to level the pavers. Use spacers to keep the joints even, and a rubber mallet to tap each paver into place.
Check for level frequently with a long straightedge. Once everything is set, sweep sand into the joints and compact the surface again. This prevents shifting and keeps the patio looking sharp for years.
6. Stamped Concrete That Mimics Stone or Wood
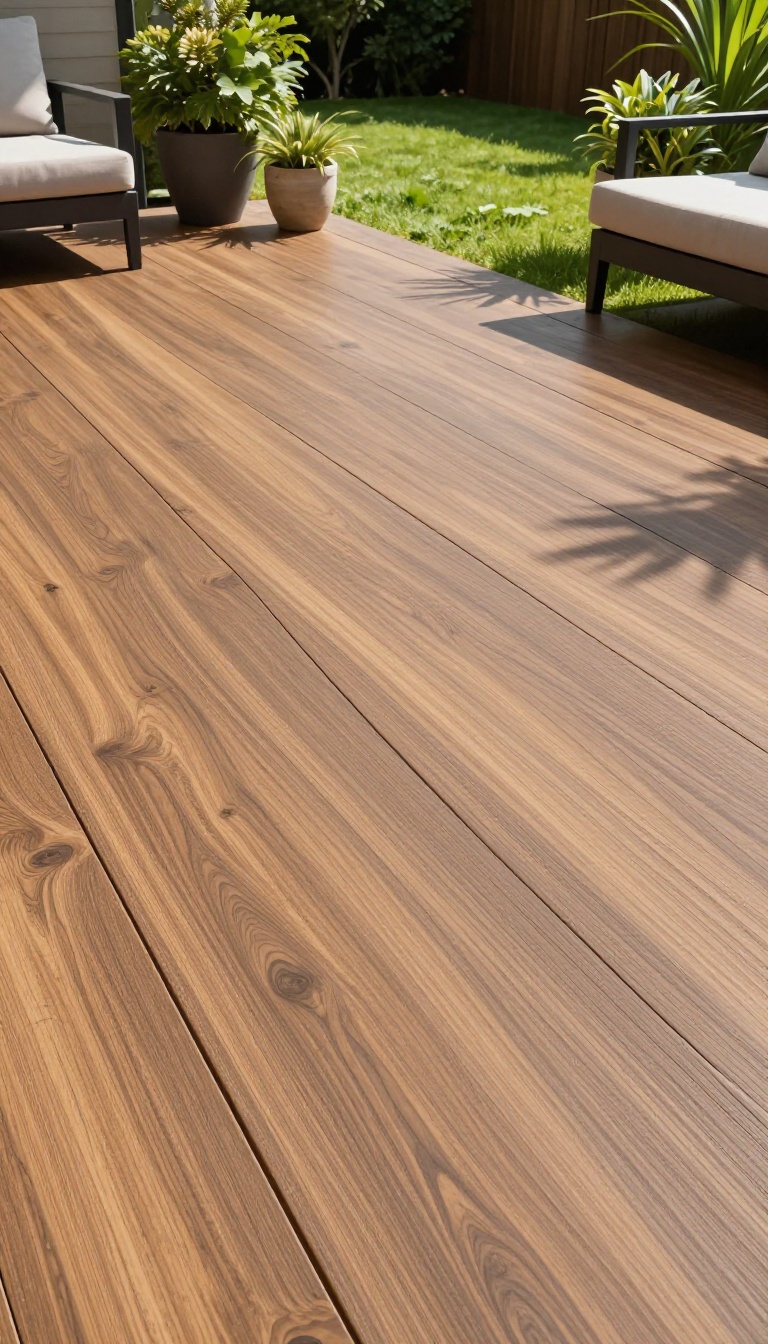
Stamped concrete is a clever way to get the upscale look of natural stone or wood without the hefty price tag or upkeep. Modern stamping techniques can replicate everything from slate and travertine to warm wood planks, and the results are surprisingly realistic. It's a durable, low-maintenance option that keeps your patio looking sharp for years.
Stamped concrete gives you the freedom to choose a pattern that fits your home's style, whether you prefer the rustic charm of wood or the elegance of stone. The process involves pressing textured mats into freshly poured concrete, creating a seamless surface that's both beautiful and tough. Plus, you can customize the color to match your outdoor palette, making it a versatile choice for any modern backyard.
Why Choose Stamped Concrete?
Stamped concrete offers the aesthetic appeal of premium materials without the maintenance. Unlike natural stone, it won't shift or require re-sanding, and it's more resistant to cracking than individual pavers. It's also a budget-friendly alternative, often costing less than half of what you'd pay for real stone or wood decking.
Popular Patterns And Finishes
You can choose from a wide range of patterns, including ashlar slate, cobblestone, and wood plank. For a clean, modern look, go with large-format slate or a subtle wood grain. The texture can be smooth or slightly textured for slip resistance, and you can add a matte or glossy sealer to enhance the color and protect the surface.
Installation And Maintenance Tips
Hiring a professional is recommended for stamping, as it requires precise timing and technique. Once installed, maintenance is simple: just seal it every few years to keep it looking fresh and protect against stains. Avoid using de-icing salts in winter, as they can damage the surface.
7. Concrete with a Smooth, Troweled Finish
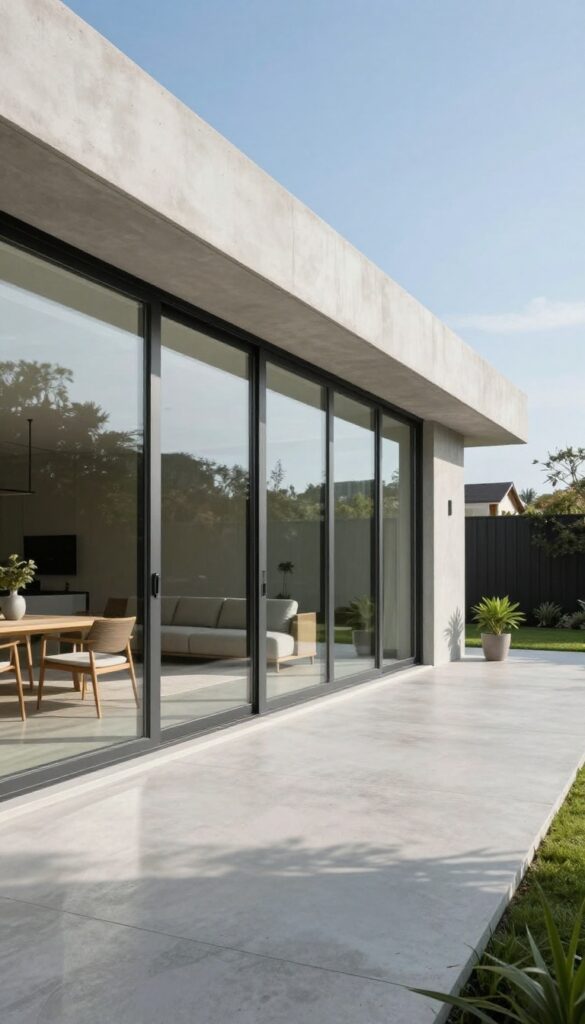
A smooth, troweled finish gives concrete a sleek, almost liquid appearance. It's ideal for minimalist designs where you want the patio to feel like an extension of the interior. This finish requires a bit more care to avoid staining, but it's stunning when sealed properly.
A troweled finish is all about that glass-like surface that catches light and looks incredibly refined. Unlike rougher textures, it offers a seamless, continuous look that pairs beautifully with modern furniture and clean landscaping. The key is in the sealing: a high-quality sealer not only protects against stains but also deepens the color and adds a subtle sheen.
While it may require a bit more upkeep than other finishes, the payoff is a patio that feels both luxurious and understated. If you're after that 'indoor-outdoor' flow, this is the way to go.
Why Choose A Troweled Finish?
A troweled finish creates a surface that's not only smooth but also incredibly durable. It's perfect for entertaining because it's easy to clean and doesn't trap dirt in crevices. The seamless look makes small spaces feel larger, and it complements any modern aesthetic, from minimalist to industrial.
Sealing And Maintenance Tips
To keep that smooth surface looking its best, seal it with a penetrating sealer or a topical acrylic. Reapply every couple of years, and clean with a mild detergent and soft brush. Avoid harsh chemicals or deicers that can etch the surface.
A little regular care goes a long way in preserving that pristine finish.
Design Ideas To Pair With It
Pair a troweled finish with outdoor area rugs, sleek lounge chairs, and a fire pit for a cozy yet modern vibe. Add built-in planters with ornamental grasses to soften the edges. For a truly integrated look, consider extending the same finish into an indoor living area for a seamless transition.
8. Concrete with a Geometric Border or Inlay
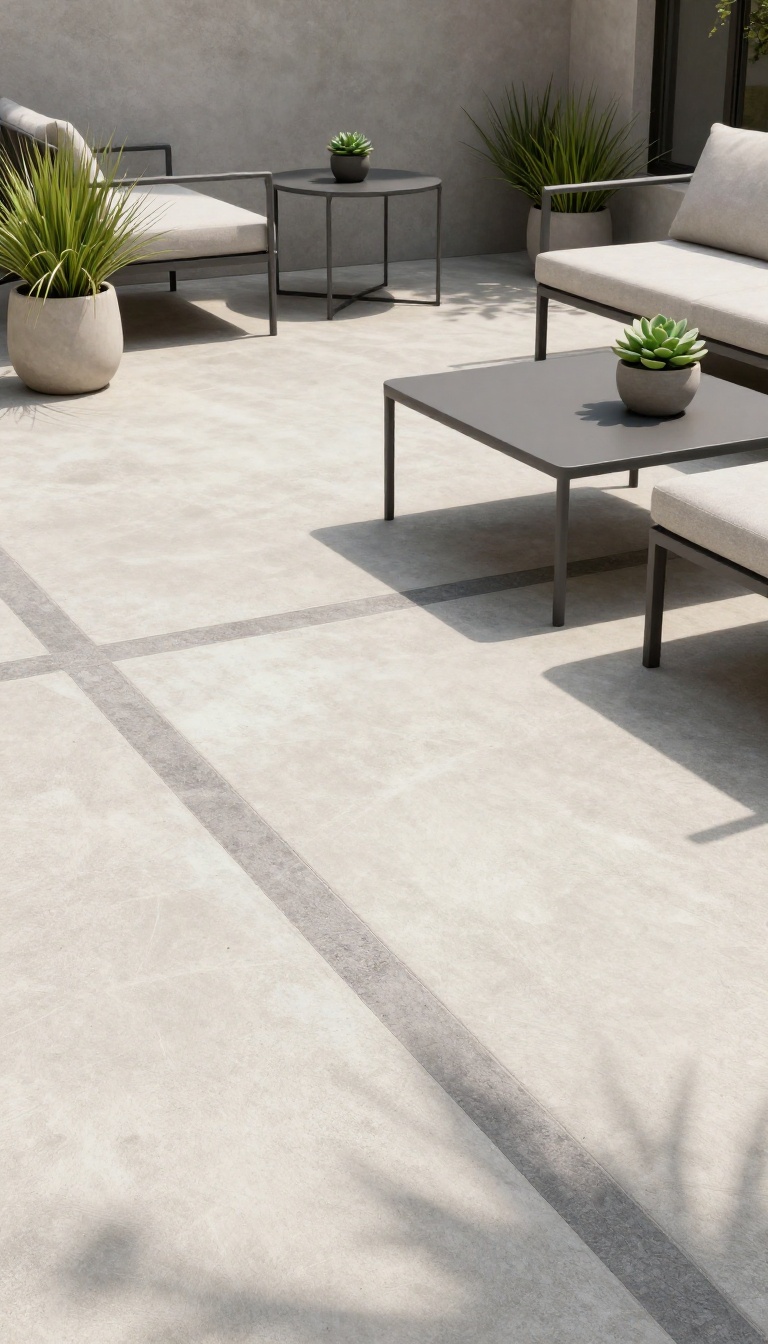
If you’re after a custom look that still feels clean and modern, a geometric border or inlay is a subtle way to add personality. You can frame the patio with a contrasting color or texture, or drop in a pattern that ties the space together. It’s a design detail that catches the eye without shouting.
A border or inlay gives your concrete patio a deliberate, tailored feel. It can define the seating area, create a visual path, or simply break up a large slab. The trick is to keep the geometry simple and the palette restrained—think one accent color or a single repeating shape.
Choosing The Right Contrast
The contrast can come from a different concrete color, a polished vs. brushed finish, or even embedded materials like tiles or stones. For a modern look, stick to two tones that complement each other—like warm gray with a charcoal border, or a light cream with a deep slate inlay. Avoid too many colors; that can get busy.
Simple Patterns That Work
Straight lines, rectangles, or a classic checkerboard are easy to execute and read as intentional. A diagonal border can add a bit of movement, while a central medallion works well for larger patios. If you’re feeling bolder, a herringbone or chevron inlay made from concrete pavers or tiles can make a strong statement.
Installation Tips And Considerations
Plan the layout before pouring, and use stakes and string to mark the lines. For a colored border, you can pour the main slab first, then add a separate strip with a different mix. Or, after the concrete cures, cut grooves and fill them with a contrasting mortar or epoxy.
Keep expansion joints in mind so the design doesn’t crack.
9. Concrete with a Matte Sealer for a Soft Sheen
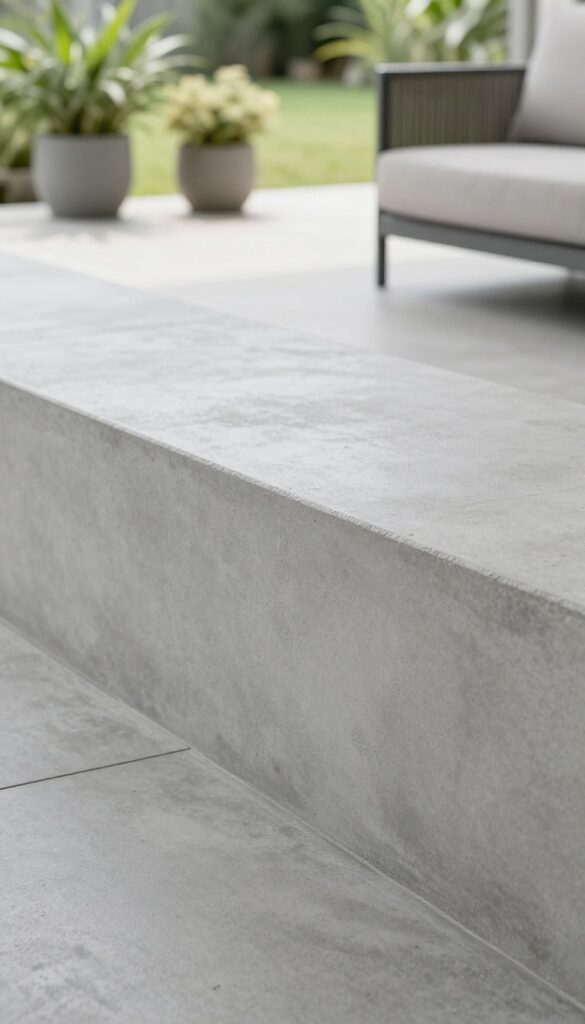
A matte sealer is the quiet achiever of concrete finishes. It gives your patio a smooth, modern look without the glossy glare that can feel a bit much in direct sunlight. If you want a surface that feels understated and refined, this is a simple upgrade that makes a big difference.
Matte sealers work by penetrating the concrete and leaving a low-luster protective layer. Unlike high-gloss options that reflect light sharply, a matte finish diffuses it, creating a soft, natural sheen. This not only looks more subtle but also helps keep the surface cooler under hot sun, which is a real bonus for barefoot summer evenings.
Why Choose Matte Over Gloss?
Glossy sealers can look slick and even slippery when wet, and they tend to show every little scratch or smudge. Matte finishes hide minor imperfections better and offer a more slip-resistant surface, especially when you choose a product with added texture. Plus, the muted look pairs beautifully with modern furniture and greenery, letting the concrete blend in rather than stand out.
Application And Maintenance Tips
Applying a matte sealer is a straightforward DIY job. Clean the concrete thoroughly, let it dry completely, then roll or spray on a thin, even coat. Two coats usually give the best protection.
Reapply every two to three years, depending on weather exposure. For cleaning, just use mild soap and water—avoid harsh chemicals that can strip the sealer.
Best Scenarios For A Matte Finish
This finish shines on patios that get full sun, where glare can be annoying, and on surfaces that see a lot of foot traffic. It's also a great choice for minimalist designs where you want the concrete to feel like a natural extension of the indoor space. If you have a pool deck, matte is a safer, more comfortable option than glossy.
10. Concrete with a Built-In Fire Pit or Seating
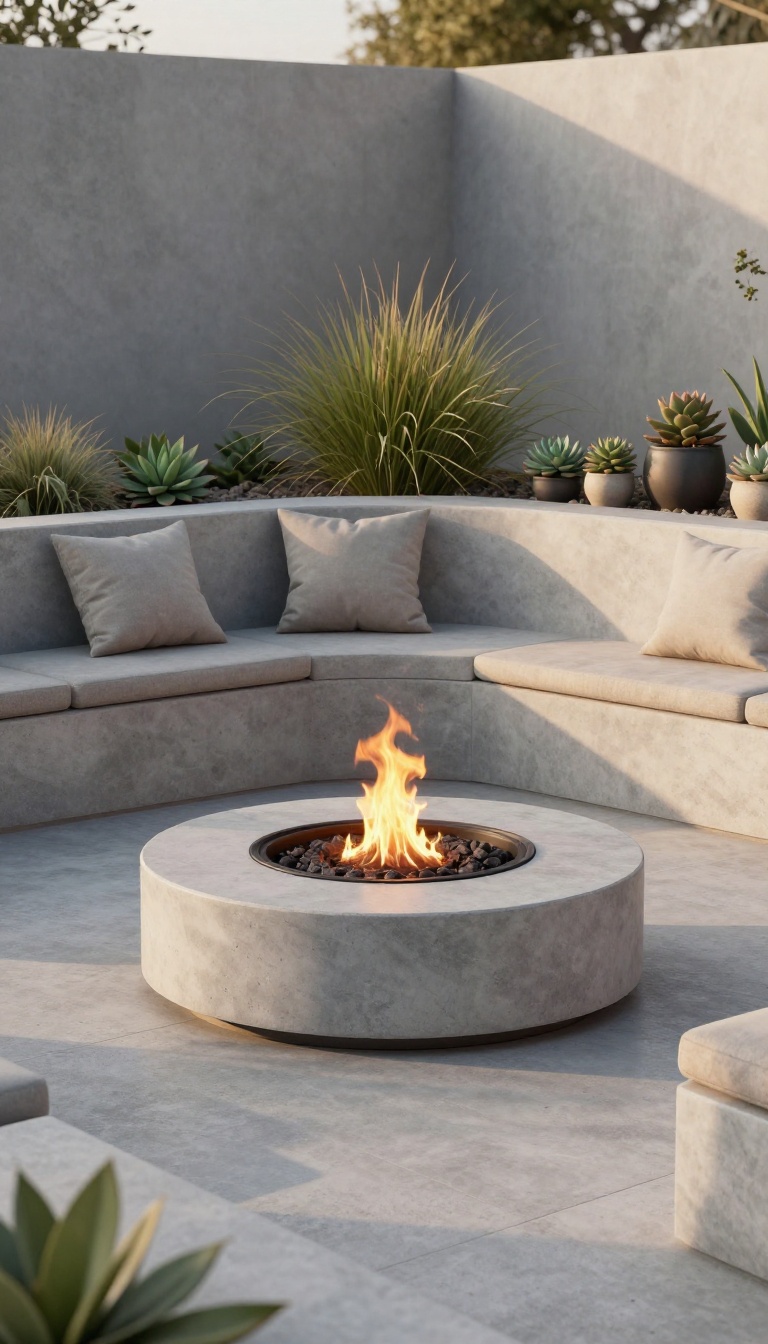
When you pour concrete, you're not stuck with a flat slab. You can shape it into built-in seating or a fire pit that rises straight from the ground. This approach gives your patio a seamless, architectural feel that's hard to achieve with separate pieces.
Integrating a fire pit or low seating walls directly into the concrete pour creates a cohesive outdoor living space. You can form the concrete into gentle curves for a soft, organic look or sharp angles for a more modern, geometric vibe. The result is a patio that feels intentional and custom, not just a random slab with furniture plopped on top.
Design Considerations
Before you pour, think about the layout. A fire pit in the center with low walls radiating outward creates a natural gathering spot. Or you might prefer a long, low wall that doubles as seating and a planter.
The concrete can be tinted or stained to match the rest of the patio, and you can add a contrasting color for the seating or fire pit to make it pop.
Construction Tips
This is a job best left to pros, but if you're DIYing, make sure you use proper forms and rebar for structural support. The concrete needs to be thick enough to handle the weight of people sitting or standing on it. Also, plan for drainage so water doesn't pool around the fire pit.
A slight slope away from the pit is a good idea.
Finishing Touches
Once the concrete is cured, you can add cushions for the seating walls to make them more comfortable. For the fire pit, you can install a gas burner or keep it wood-burning. A smooth, sealed finish will protect the concrete and make it easy to clean.
You can also add a contrasting aggregate or exposed stone for extra texture.
FAQ
How long does a concrete patio last?
With proper installation and maintenance, a concrete patio can last 30 to 40 years or more. Sealing it every few years helps protect against stains, weathering, and cracks.
Can I stain existing concrete?
Yes, you can stain existing concrete, but the results depend on the condition of the surface. Cracks and imperfections may show through, so it's best to repair and clean the concrete thoroughly before staining.
Is stamped concrete slippery when wet?
Stamped concrete can be slippery, especially if it has a smooth finish. To improve traction, choose a stamp pattern with more texture or apply a non-slip sealer.
What is the cost difference between stamped and plain concrete?
Stamped concrete typically costs 30% to 50% more than plain concrete due to the extra labor and materials. However, it's still often cheaper than natural stone or pavers.
How do I clean and maintain a concrete patio?
Regular sweeping and occasional washing with a mild detergent and water are usually enough. Avoid using harsh chemicals or de-icing salts, and reseal the surface every 2-3 years to keep it looking fresh.
Conclusion
A clean modern patio doesn’t have to mean a total overhaul. Start with one idea that fits your space and budget, then layer in the rest as you go.
The goal is a finished look that feels intentional and easy to live with. Pick the approach that speaks to you, and get started—your patio will thank you.