17 Grill Cleaning Hacks for Grease Grates and Outdoor Cooking
Grill grates caked with grease and char aren't just unsightly—they can ruin the flavor of your next cookout. Scraping and scrubbing for hours isn't the only way to get them spotless.
These 17 clever hacks use everyday items like vinegar, onions, and even coffee grounds to cut through stubborn grime with minimal effort. From steam cleaning with beer to polishing with ketchup, each method targets a specific mess or material.
Whether your grates are cast iron, stainless steel, or ceramic, you'll find a quick solution that saves time and keeps your outdoor cooking tasting fresh. Let's fire up these tricks and make cleanup as satisfying as the meal.
1. Steam Clean with Vinegar and Water
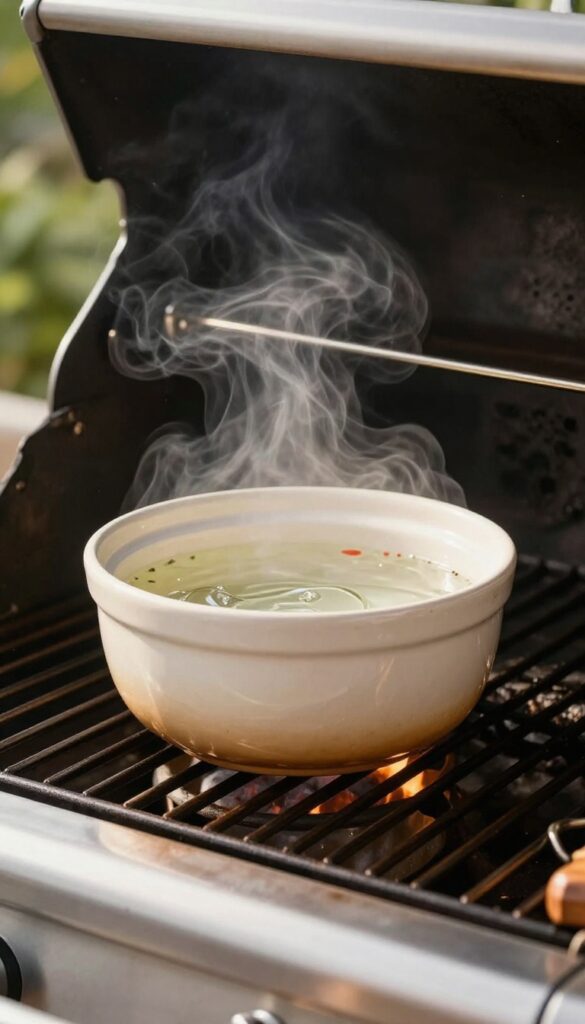
Steam is a powerful ally when it comes to loosening stubborn grease. This hack uses simple pantry staples to create a deep-cleaning steam bath inside your grill. No harsh chemicals, no elbow grease—just heat and vapor doing the hard work for you.
Place a heat-safe bowl filled with equal parts vinegar and water directly on the hot grill grates. Close the lid and let the mixture come to a simmer. The steam will soften baked-on grease and food residue in about 10 minutes.
After that, simply wipe the grates clean with a damp cloth or paper towel. This method works especially well for stainless steel and porcelain-coated grates.
Why Vinegar Works
Vinegar is mildly acidic, which helps break down grease and grime without damaging the metal. When heated, the acetic acid vaporizes and penetrates tough deposits, making them easy to wipe away. Plus, it's non-toxic and leaves no chemical aftertaste.
Best Practices For Safety
Use a metal or ceramic bowl that can withstand high heat. Avoid glass, as it may shatter. Keep the grill temperature medium-low to prevent the liquid from boiling over.
Always wear oven mitts when handling the bowl after steaming.
When To Use This Method
This hack is ideal for regular maintenance after a few cooking sessions. For heavily charred grates, you may need to repeat the process or combine it with a gentle scrub. It's also a great way to freshen up your grill before a big cookout.
2. Onion Half for a Natural Scrub
You might not think of an onion as a cleaning tool, but this kitchen staple works wonders on hot grill grates. The natural juices and mild acidity help break down grease without harsh chemicals, while the heat activates the onion's compounds for a gentle scrub. Plus, it leaves behind a subtle non-stick layer that makes future cleanup easier.
How It Works
Cut a large onion in half crosswise (not root to tip) and stick a fork into the flat side for a handle. Heat your grill to medium-high, then rub the cut side of the onion directly over the hot grates. The sizzling juices steam away stuck-on bits while the onion's natural sulfur compounds break down grease.
Let the onion work for a minute or two, then flip and use the other half if needed.
Best For Light To Moderate Grime
This hack shines on grates that have a decent layer of baked-on grease but aren't caked with thick carbon. For heavy buildup, scrape off loose debris first with a grill brush, then follow up with the onion for a deeper clean. It's also great for a quick mid-cookout refresh between batches of food.
Bonus: Adds Flavor And Non-stick Properties
Besides cleaning, the onion leaves a faint, pleasant aroma and a thin layer of natural oils that help prevent sticking during your next cook. Just be sure to rinse the grates with water afterward if you don't want onion-flavored burgers. For cast iron, a quick re-seasoning with oil after the onion scrub keeps the surface in top shape.
3. Aluminum Foil Ball for Stubborn Grime
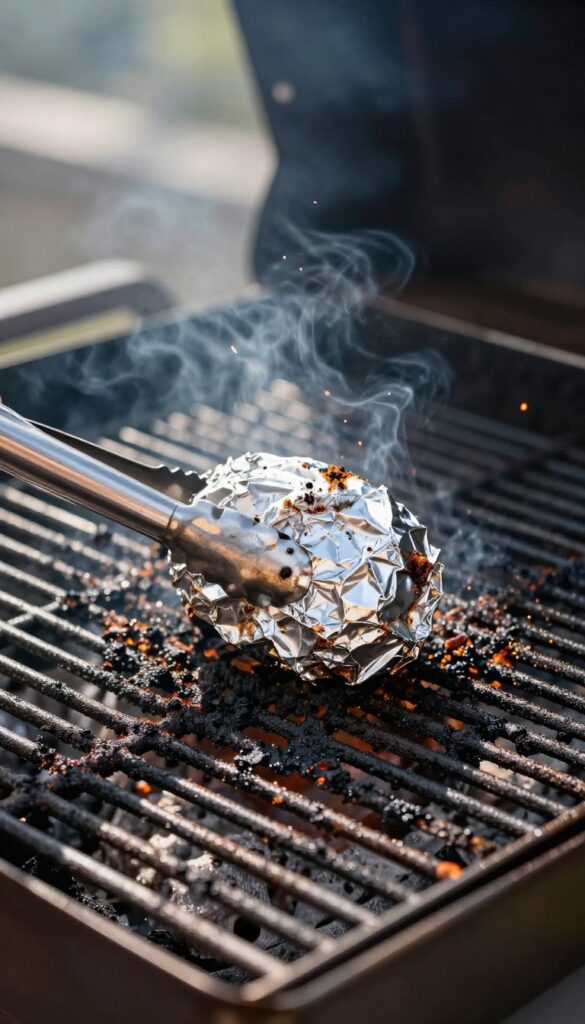
Sometimes the best tool is already in your kitchen drawer. A crumpled sheet of aluminum foil turns into a surprisingly effective scrubber that tackles baked-on char without scratching your grates. It's cheap, disposable, and works best when the grates are still hot.
This hack is perfect for those tough, crusty spots that resist your regular brush. The foil ball conforms to the grate's shape, getting into grooves that bristles miss. Plus, you don't have to worry about leftover bristles in your food.
Why It Works On Hot Grates
Heat softens the grime, making it easier to dislodge. The foil's abrasive texture provides just enough friction to scrape away carbonized grease and food residue without damaging the metal. Unlike steel wool, it won't leave rust-prone particles on cast iron.
How To Make And Use The Foil Ball
Tear off a sheet of heavy-duty aluminum foil about 12 inches long. Crumple it into a tight ball roughly the size of a golf ball. Use long-handled tongs to grip the ball and scrub the hot grates in a back-and-forth motion.
Let the grates cool slightly first to avoid burning yourself.
When To Skip This Method
Avoid using foil on ceramic or porcelain-coated grates, as the abrasiveness can scratch the finish. Stick to nylon brushes or gentle cleaners for those surfaces. Also, don't use this on non-stick grill mats or very thin, delicate grates.
4. Coffee Grounds Paste for Rusty Grates
Before you toss those used coffee grounds into the compost, consider giving them a second life as a gentle abrasive cleaner. The fine texture of coffee grounds is perfect for lifting rust and baked-on grime without scratching your grates. Mixed with a little water, they form a paste that works like a mild scrub, making it a safe option for cast iron, stainless steel, and ceramic surfaces.
This hack is especially handy when you notice small rust spots starting to form. Coffee grounds contain natural oils and mild acidity that help break down corrosion while polishing the metal. The result is a cleaner, smoother surface that's ready for cooking.
How To Make And Apply The Paste
Start with about half a cup of used coffee grounds—fresh ones work too, but used are less acidic and easier on your hands. Add water a teaspoon at a time until you get a thick, spreadable paste. Make sure your grill grates are cool, then apply the paste evenly over the rusty areas.
Let it sit for 15 minutes so the grounds can work on the rust. After that, grab a stiff-bristled brush and scrub in circular motions. The grounds act as a gentle abrasive, lifting rust and grime without damaging the metal.
Rinse thoroughly with water and dry the grates completely to prevent new rust from forming.
Best Grates For This Method
Coffee grounds paste is safe for most grate materials, including cast iron, stainless steel, and porcelain-coated grates. It's gentle enough for ceramic grates too, but avoid using it on non-stick coatings, as the abrasive texture could wear them down. For heavy rust, you might need to repeat the process a couple of times, but for light surface rust, one treatment usually does the trick.
Pro Tips For Maximum Effectiveness
For extra cleaning power, add a splash of white vinegar or lemon juice to the paste instead of water. The mild acid helps dissolve rust faster. If the paste dries out while sitting, spritz it with a little water to keep it moist.
After scrubbing, rinse well and apply a thin layer of cooking oil to the grates to protect them from moisture and future rust. Store any leftover paste in the fridge for up to a week—but it's best to use it fresh.
5. Baking Soda and Hydrogen Peroxide for Tough Spots
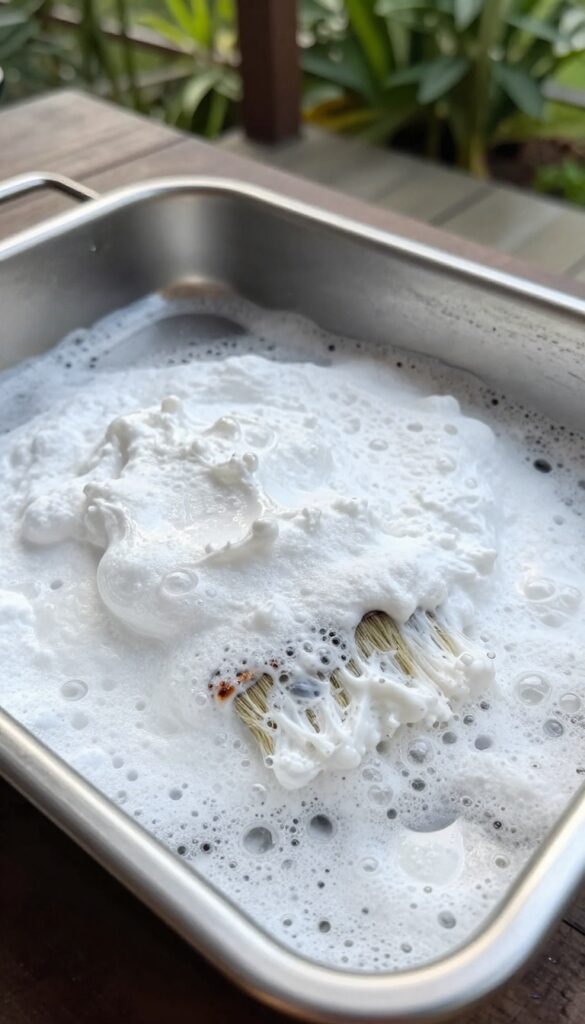
Sometimes a little chemistry is all you need to break down baked-on grease. Baking soda and hydrogen peroxide team up to create a fizzing paste that lifts grime without harsh scrubbing. This combo is especially handy for drip trays and hard-to-reach corners where grease likes to hide.
Why This Paste Works
Hydrogen peroxide acts as a mild oxidizer, helping to dissolve carbonized grease, while baking soda provides gentle abrasion. Together, they form a paste that clings to vertical surfaces and crevices, giving the chemicals time to work. It's non-toxic and safe for most grill parts, though avoid prolonged contact with aluminum.
How To Apply It
Mix three parts baking soda with one part hydrogen peroxide until you get a thick, spreadable paste. Use a brush or spatula to coat the greasy areas—don't be shy. Let it sit for 20 minutes; you'll see the paste start to bubble and loosen debris.
Then wipe off with a damp cloth or rinse with water. For extra-stubborn spots, scrub gently with a non-abrasive pad.
Best Uses On Your Grill
This paste is ideal for drip trays, grease cups, and the inside of the grill lid where smoke and oil condense. It also works well on porcelain-coated grates, but avoid using it on seasoned cast iron as it can strip the seasoning. For cast iron, stick to a simple scrub with salt and oil.
6. Dishwasher Pod Soak for Removable Grates
If your grill grates are removable, you have an easy shortcut that requires almost no scrubbing. Dishwasher pods aren't just for dishes—they're packed with grease-cutting enzymes and surfactants that break down charred residue fast. Drop one pod into a sink or bucket of hot water, submerge the grates, and walk away for 30 minutes.
When you come back, most of the grease will have loosened or floated off. A quick rinse and dry, and you're done.
This method works best for stainless steel or porcelain-coated grates. Cast iron can rust if left soaking too long, so limit the soak to 20 minutes and dry immediately. Avoid using this on aluminum grates, as the chemicals may cause discoloration.
For extra heavy buildup, scrub gently with a soft brush after the soak. The pod does the heavy lifting, so you won't need harsh chemicals or elbow grease.
Why Dishwasher Pods Work
Dishwasher pods contain powerful degreasers and enzymes that target baked-on food and grease. When dissolved in hot water, they create a deep-cleaning solution that penetrates grime without scrubbing. The heat activates the cleaning agents, making them even more effective.
Step-by-step Soak Instructions
Fill a large sink or plastic tub with the hottest tap water you can handle. Drop in one dishwasher pod and stir to dissolve. Submerge the grates completely, ensuring no parts stick out.
Let them soak for 30 minutes (20 for cast iron). Remove, rinse with water, and dry thoroughly with a towel or let air dry.
Tips For Best Results
Use a single pod per sink of water—more isn't better and can leave residue. For extra-stubborn spots, use a nylon brush after soaking. Never soak grates overnight, as prolonged exposure can damage coatings.
Rinse well to remove any soap film before cooking.
7. Lemon and Salt Scrub for Stainless Steel
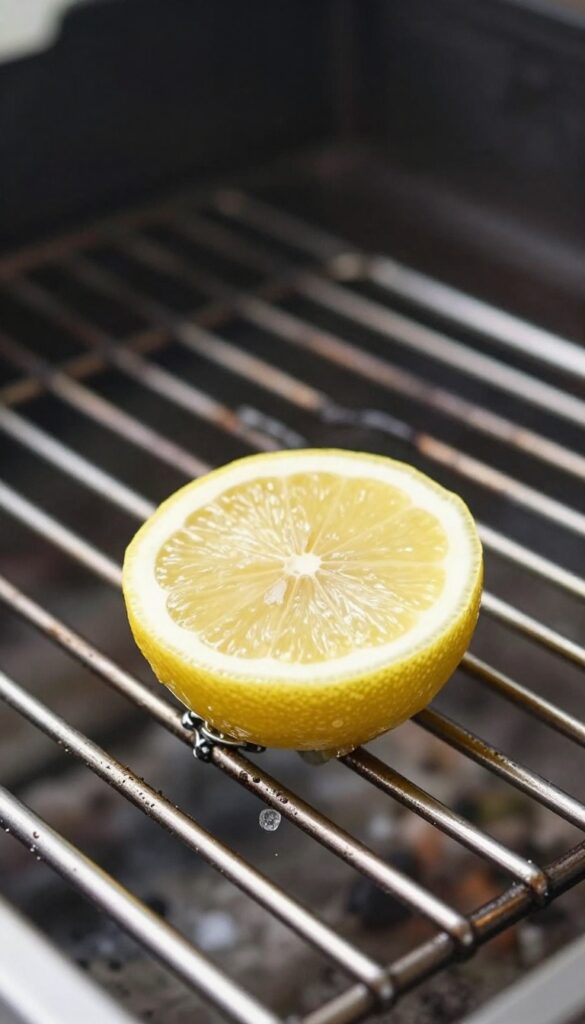
Stainless steel grill grates look great when they're shiny, but grease and grime can dull them fast. A simple lemon and salt scrub brings back the sparkle without harsh chemicals. The citric acid in lemon cuts through grease while coarse salt provides gentle abrasion to lift stubborn bits.
This hack is especially good for stainless steel because it's non-abrasive enough to avoid scratching, yet effective enough to remove baked-on residue. Plus, it leaves a fresh citrus scent behind.
Why It Works
Lemon juice contains citric acid, a natural degreaser that breaks down oil and fat. Coarse salt acts as a mild scouring agent, helping to physically lift grime without damaging the metal surface. Together, they create a paste-like scrub that's both gentle and powerful.
How To Do It
Cut a lemon in half and sprinkle coarse salt (like kosher or sea salt) over the cut side. Scrub the grates firmly, using the lemon as your scrubber. Focus on greasy spots and let the juice sit for a minute before rinsing with water.
For extra tough areas, reapply salt and scrub again.
Pro Tips
Warm the grates slightly before scrubbing—this helps the lemon juice penetrate better. Always rinse thoroughly and dry immediately to prevent water spots. If you don't have a lemon, lime works just as well.
8. Dryer Sheet for Ash and Residue
Used dryer sheets are great for more than just softening laundry. Their anti-static properties make them surprisingly effective at picking up ash and light residue from cool grill grates. Plus, they leave behind a thin layer that can help repel future buildup.
After grilling, let the grates cool completely. Grab a used dryer sheet (new ones work too, but used are less wasteful) and gently wipe the grates. The sheet grabs loose ash and char without scratching.
For heavier residue, lightly dampen the sheet first. This method works best on stainless steel or porcelain-coated grates. Avoid using it on cast iron, as the chemicals can strip seasoning.
Why Dryer Sheets Work
Dryer sheets contain fabric softeners and anti-static agents that reduce cling. When you rub them over grates, they attract and hold onto fine particles like ash and dust. The static charge also helps prevent new debris from sticking as easily.
Best Practices For Different Grates
For stainless steel grates, a used dryer sheet is perfect for a quick wipe-down between deep cleans. On porcelain-coated grates, it's gentle enough not to chip the surface. For cast iron, skip this hack—the chemicals can interfere with the seasoning.
Stick to a stiff brush and hot water instead.
When To Use This Hack
Use dryer sheets after every few grilling sessions to maintain clean grates with minimal effort. They're ideal for removing light ash and dust before they turn into baked-on grime. For heavy grease or burnt-on food, pair this with a deeper cleaning method first.
9. Ketchup for Copper and Brass Accents
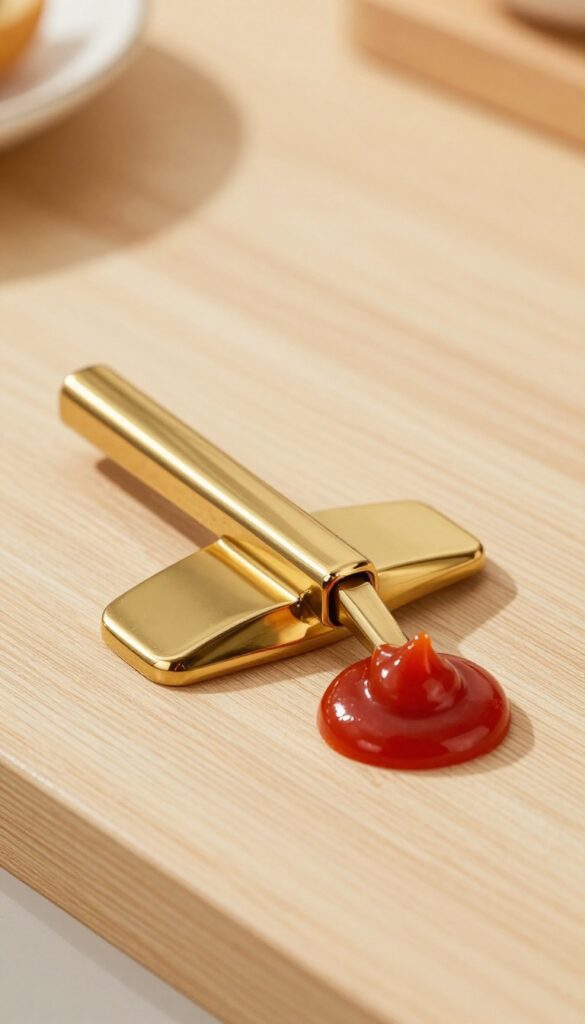
Copper and brass grill accents—like vents, handles, or trim—add a touch of class, but they tarnish fast. Before you reach for harsh chemical polishes, check your fridge. Ketchup contains vinegar and citric acid, which gently dissolve oxidation.
It's a cheap, non-toxic way to restore shine without scratching.
Ketchup works because its acidity breaks down the copper oxide or tarnish on brass and copper surfaces. The thick texture clings to vertical parts, so it won't drip off. This hack is ideal for small decorative pieces rather than entire grills, but it's surprisingly effective.
How To Apply It
Squeeze a thin layer of ketchup directly onto the tarnished area. Use a soft cloth or your finger to spread it evenly. Let it sit for 10 minutes—longer for heavy tarnish.
Then wipe off with a damp cloth. Buff dry with a clean towel for extra shine.
What To Avoid
Don't use ketchup on lacquered brass or copper, as the acid can damage the coating. Test on a hidden spot first. Also avoid letting ketchup sit too long (over 20 minutes) on any surface, as it could etch the metal.
Rinse thoroughly with water afterward.
When To Use This Hack
This method works best for light to moderate tarnish on solid brass or copper parts. For heavy buildup, repeat the process or follow up with a baking soda paste. It's a quick fix before a cookout when you want your grill looking its best.
10. Beer Can Steam for Flavor and Cleanup
Beer isn't just for drinking while you grill—it can also help clean your grates. The steam from a heated can of beer loosens stubborn grease and char, making scrubbing almost effortless. Plus, it leaves a subtle malty aroma that adds a hint of flavor to your next cookout.
This hack works best when your grill is still warm but not scorching hot. Place an open beer can directly on the grates, close the lid, and let the steam work for about 15 minutes. The moisture softens baked-on residue, so you can wipe it away with a grill brush or cloth.
Any cheap lager or ale will do—save the craft brews for drinking.
Why Steam Works
Steam penetrates grease and carbon deposits better than dry heat. As the beer heats up, the liquid turns to vapor and rises, loosening grime from the metal surface. This method is especially gentle on porcelain-coated grates, which can chip under aggressive scrubbing.
Choosing The Right Beer
You don't need an expensive IPA. A light lager or pilsner works fine because the steam carries subtle flavor compounds. Darker beers like stouts can leave a slightly roasted note, which pairs well with beef or burgers.
Avoid fruity or sour beers—they may impart unwanted tang.
Step-by-step Quick Guide
- Preheat your grill to medium-low (about 300°F). 2.
Open a beer can and place it upright on the grates. 3. Close the lid and let it steam for 15 minutes.
- Turn off the grill, remove the can carefully (it's hot! ), and wipe the grates with a damp cloth or brush. That's it—no harsh chemicals needed.
11. Pumice Stone for Ceramic Grates
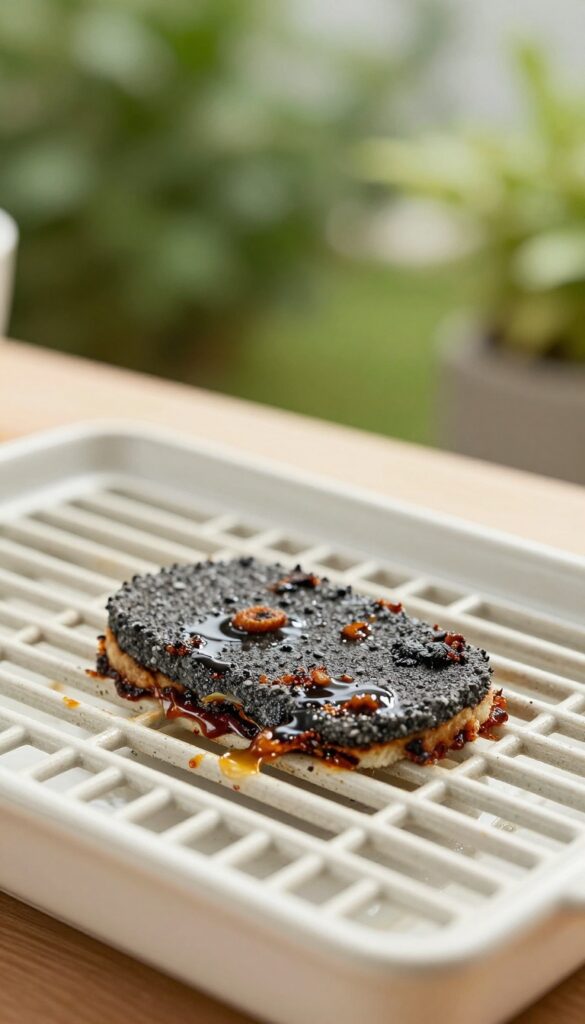
Ceramic grill grates are prized for their non-stick surface and even heat distribution, but they can be tricky to clean. Harsh scrubbers or metal brushes can scratch or chip the coating, leaving you with damaged grates. A pumice stone offers a gentle yet effective alternative that lifts baked-on residue without harming the ceramic finish.
A pumice stone is a natural volcanic rock that's soft enough to use on delicate surfaces when wet. For ceramic grates, it's a game-changer. The stone's abrasive texture breaks down carbonized grease and food particles, while water keeps it from being too harsh.
You'll get clean grates without the risk of scratches or wear.
How To Use A Pumice Stone On Ceramic Grates
Start by soaking the pumice stone in water for a few minutes—it needs to be thoroughly wet to work safely. While the grates are still warm (but not hot), gently rub the stone over the residue using light pressure. The baked-on grime will start to crumble away.
Rinse the stone occasionally to remove debris and keep it moist. Once the grates are clean, wipe them down with a damp cloth and dry thoroughly.
Why Pumice Works Better Than Abrasive Pads
Unlike steel wool or stiff-bristle brushes, a pumice stone doesn't gouge or scratch ceramic coatings. Its fine, porous structure wears down gradually, conforming to the grate's surface. This makes it ideal for removing stubborn, burnt-on food without damaging the non-stick layer.
Plus, pumice stones are inexpensive and last through many cleaning sessions.
Tips For Best Results
Always use the stone wet—dry pumice is too abrasive and can scratch. Work in small sections and rinse the stone often. If the residue is extra stubborn, let the stone soak longer or apply a bit of dish soap to the grate first.
After cleaning, season ceramic grates with a light coat of oil to maintain their non-stick properties.
12. Vinegar and Baking Soda Fizz for Drip Pans
Drip pans catch all the grease and drippings, but they can become a sticky mess. Instead of scrubbing with harsh chemicals, try a simple kitchen duo: vinegar and baking soda. The fizzy reaction lifts baked-on grease, making cleanup a breeze.
Remove the drip pan from your grill and place it on a flat surface. Sprinkle a generous layer of baking soda over the entire surface, covering any greasy spots. Fill a spray bottle with white vinegar and spritz it over the baking soda until it starts to fizz.
Let the mixture sit for about 5 minutes—the bubbles will break down the grease. After the fizzing stops, wipe the pan with a damp cloth or sponge. For stubborn residue, scrub gently with a non-abrasive pad.
Rinse with water and dry thoroughly before placing it back in the grill.
Why This Works So Well
Baking soda is a mild abrasive that helps scrub away grime, while vinegar's acidity cuts through grease. When combined, they create carbon dioxide bubbles that lift dirt from the surface. This chemical reaction is gentle enough for most drip pans but tough on buildup.
Tips For Best Results
Use white vinegar for the strongest fizz—avoid apple cider or balsamic varieties. If the pan is heavily soiled, let the mixture sit for up to 10 minutes. For extra scrubbing power, add a pinch of salt to the baking soda before spraying.
Always rinse thoroughly to remove any residue that could affect the taste of your food.
13. Potato Half for Non-Stick Surface
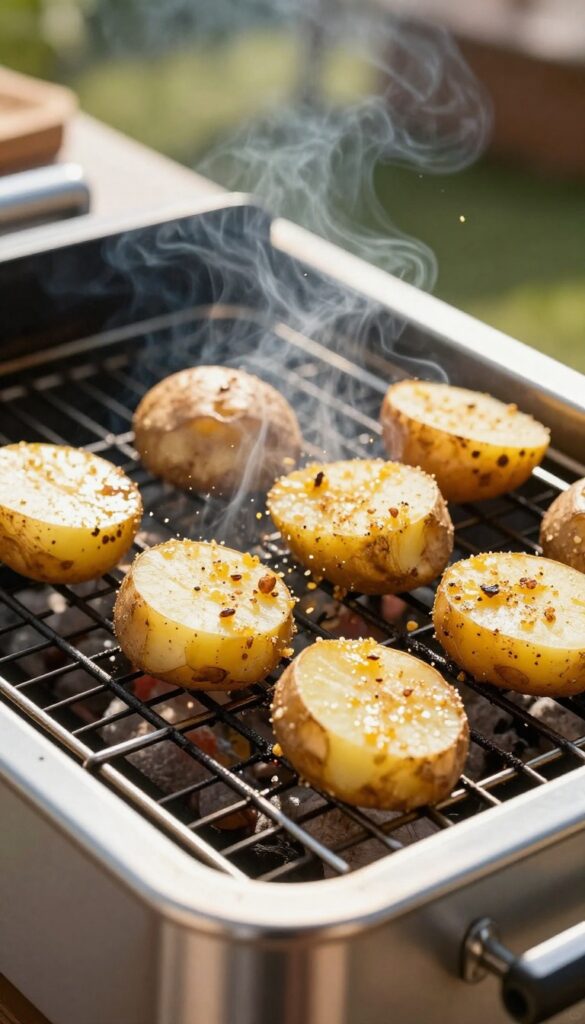
Potatoes aren't just for fries or baked potatoes—they can also rescue your grill grates. A cut potato half, rubbed over hot grates, releases starch that creates a temporary non-stick layer and helps lift stuck-on food. It's a simple, chemical-free trick that works especially well on cast iron and stainless steel grates.
This hack is perfect for those times when you've finished grilling and the grates are still hot but not screaming hot. The starch from the potato reacts with the heat to form a protective barrier that makes future cleanup easier and helps prevent food from sticking during your next cookout. Plus, it's a great way to use up that sprouting potato you were about to toss.
Why It Works
Potatoes are rich in starch, which when heated, creates a slick surface that repels grease and food particles. The moisture from the potato also helps steam away stubborn char, making it easier to wipe clean. It's a natural, non-toxic alternative to chemical sprays.
How To Do It
After grilling, let the grates cool slightly so they're hot but not scorching. Cut a potato in half and stab the cut side with a fork for a handle. Rub the cut side firmly over the grates, using a pair of tongs if needed.
The starch will sizzle and lift grime. Let it sit for a minute, then wipe with a paper towel or brush.
Best For Which Grates
This method works wonders on cast iron and stainless steel grates. Avoid using it on ceramic or porcelain-coated grates, as the abrasive texture of the potato skin could scratch the surface. Stick to the cut side only and don't press too hard.
14. Ammonia Bag Trick for Heavy Grease
When your grill grates are caked with layers of baked-on grease that won't budge with scrubbing, it's time to bring out the big guns. The ammonia bag trick uses chemical fumes to break down tough grease without you having to lift a finger—just a trash bag, some ammonia, and a few hours of sun.
Place your grates inside a heavy-duty trash bag. Pour about 1/2 cup of household ammonia into the bag, then seal it tightly. Set the bag in direct sunlight for 4 hours.
The ammonia fumes will react with the grease, turning it into a soapy substance that rinses off easily. After the time is up, remove the grates and rinse them thoroughly with water. Make sure to wear gloves and work in a well-ventilated area, as ammonia fumes are strong.
Why It Works So Well
Ammonia is alkaline, which means it reacts with the fatty acids in grease to form soap—a process called saponification. The heat from the sun speeds up the reaction, making the fumes more effective. This method is especially good for stainless steel and porcelain-coated grates.
Avoid using it on aluminum or cast iron, as ammonia can cause discoloration or damage.
Safety First
Always handle ammonia outdoors or in a well-ventilated space. Wear rubber gloves and avoid breathing in the fumes. Keep the bag away from kids and pets.
After the soak, rinse the grates with a hose and then wash them with dish soap to remove any residue. Never mix ammonia with bleach or other cleaners.
15. WD-40 for Stubborn Grease Spots
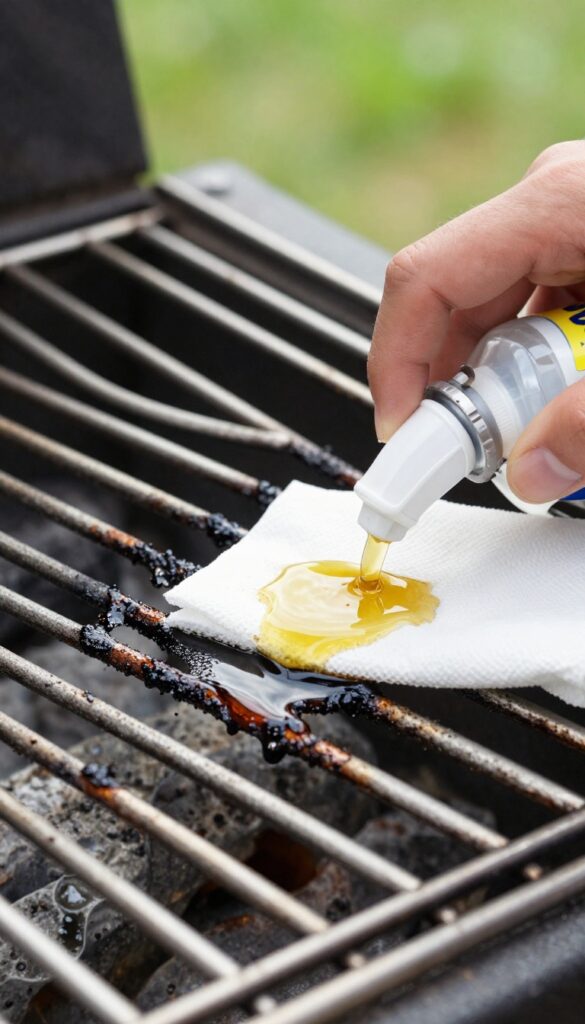
You probably have a can of WD-40 in your garage for squeaky hinges or rusty bolts. But it also works wonders on grill grates caked with sticky, burnt-on grease. The solvent in WD-40 breaks down the bond between grease and metal, making it easy to wipe away without endless scrubbing.
Start with a cool grill—never spray WD-40 on a hot surface. Generously coat the greasy areas and let it sit for five minutes. The solvent will penetrate and soften the residue.
Then wipe with a clean cloth or paper towel. For thick buildup, repeat the process. Afterward, wash the grates thoroughly with warm soapy water and rinse well.
WD-40 is not food-safe, so removing every trace is essential before cooking again.
Why It Works
WD-40 is a penetrating oil and solvent that dissolves grease, tar, and adhesives. It loosens the carbonized grease that normal cleaners can't touch, saving you from heavy scrubbing.
Safety First
Always apply WD-40 to a cold grill to avoid flare-ups or harmful fumes. After cleaning, rinse with hot, soapy water and dry completely. Never skip the final wash—any leftover residue can ruin your food.
Pro Tip
For extra-stubborn spots, spray WD-40 and cover with plastic wrap for 10 minutes. The wrap keeps the solvent from evaporating, giving it more time to break down the grime.
16. Grill Brick for Quick Touch-Ups
Sometimes you don't need a full deep-clean—just a quick polish to knock off the worst of the char. A grill brick is the perfect tool for that. It's a pumice-like block that works on hot grates, using heat and friction to lift carbon deposits without any soap or chemicals.
Grill bricks are reusable, inexpensive, and surprisingly effective. They're especially handy when you're cooking multiple batches and want a clean surface between rounds. Just rub the brick over the hot grates, and watch the gunk fall away.
No scrubbing, no soaking, no waiting.
How To Use A Grill Brick
Make sure your grill is hot—around 350-400°F works best. Hold the brick with tongs or a grill brick holder (it gets hot). Gently rub it across the grate bars in a back-and-forth motion.
The brick will crumble slightly, so expect some dust. Let the debris burn off or brush it away with a wire brush.
When To Reach For A Grill Brick
Use it for quick touch-ups between cooking sessions, not for a deep clean. It's ideal for removing stuck-on bits after grilling burgers or chicken. If your grates are heavily caked, start with a scraper first, then finish with the brick.
It also works well on porcelain-coated grates—just be gentle to avoid chipping.
Caring For Your Grill Brick
Grill bricks are porous, so they can absorb grease over time. After each use, let the brick cool completely, then scrape off the dirty surface layer with a knife or the edge of a spatula. Store it in a dry place.
A single brick can last for dozens of cleanings if maintained properly.
17. Regular High-Heat Burn-Off
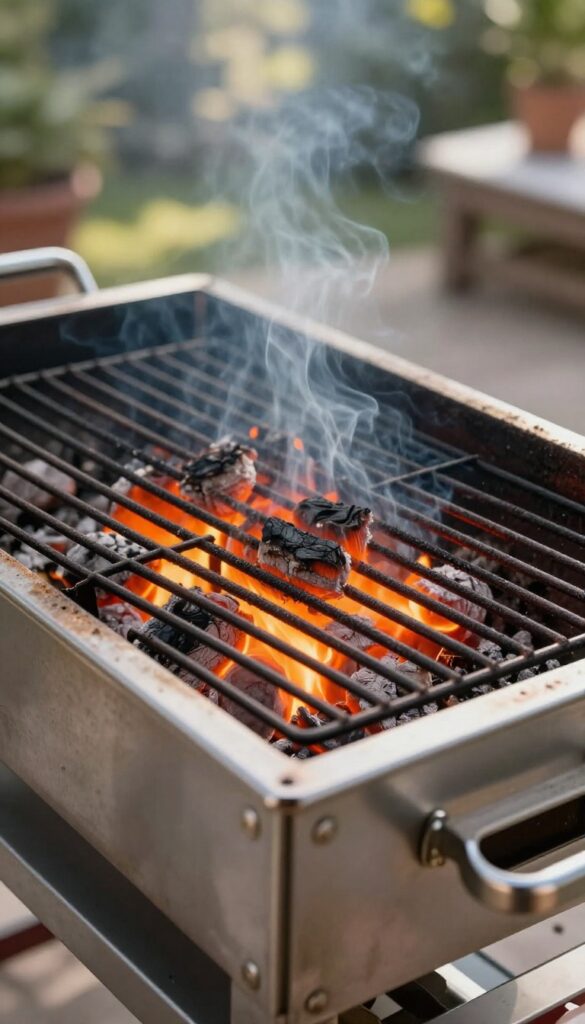
A clean grill doesn't always require scrubbing or soaking. Sometimes the best tool is already built into your grill: the heat. By running a high-temperature burn-off after each use, you can dramatically reduce the buildup of grease and food residue without lifting a brush.
This method is especially effective for stainless steel and porcelain-coated grates, where aggressive scrubbing can cause damage over time.
The high-heat burn-off works by carbonizing leftover food particles and turning them into ash. Once the grill has cooled slightly, a quick brush sweep removes the ash easily. This technique not only saves time but also helps prevent flare-ups during your next cookout by keeping grease levels low.
For best results, make this a habit after every grilling session—just close the lid, crank the heat, and let the grill do the work.
How Long To Burn
Set your grill to its highest setting and close the lid. Let it run for 15 to 20 minutes. You'll see smoke as the residue burns off.
After that, turn off the heat and let the grates cool for a few minutes. The charred bits should brush off easily with a stiff wire brush.
When To Skip This Hack
Avoid this method on grills with thin or low-quality grates that might warp under extreme heat. Also, if your grill has a lot of built-up grease, burn it off in short bursts to avoid a grease fire. Always keep a fire extinguisher nearby as a precaution.
Bonus Tip: Oil After Burn-off
After brushing off the ash, lightly oil the grates with a high-smoke-point oil like canola or avocado oil. This prevents rust and creates a non-stick surface for your next cook. Just dip a paper towel in oil and use tongs to rub it over the warm grates.
FAQ
How often should I clean my grill grates?
After every use, do a quick brush while the grates are warm. A deep clean using one of these hacks should happen every 1-2 months, depending on usage.
Can I use oven cleaner on my grill?
It's not recommended for grates because the chemicals can leave toxic residues. Stick to natural hacks like vinegar, baking soda, or dishwasher pods.
Is it safe to use ammonia on grill grates?
Yes, if you rinse thoroughly. The ammonia bag trick is effective for heavy grease, but always wash grates with soap and water afterward to remove any fumes.
Will these hacks work on porcelain-coated grates?
Most will, but avoid abrasive tools like steel wool or pumice stones on porcelain. Stick to softer methods like onion, vinegar steam, or baking soda paste.
What's the best way to prevent grease buildup?
Regular high-heat burn-offs after cooking and a quick brush while warm. Also, line drip trays with aluminum foil for easy replacement.
Conclusion
Keeping your grill grates clean doesn't have to be a chore. With these 17 hacks, you can tackle grease and grime using everyday items you probably already have. Pick a couple of methods that fit your routine and stick with them.
Your grill will perform better, and your food will taste even better. Happy grilling!