13 Patio Lighting Ideas to Create a Warm Evening Glow
Evenings on the patio should feel like a retreat, but often they end in frustration when the lighting falls short. Harsh overhead lights kill the mood, while dark corners make the space feel unwelcoming.
The right lighting solves these problems by layering soft, warm light where you need it most. String lights, lanterns, and path lights each serve a different purpose, and combining them creates depth and ambiance.
You don't need a professional electrician or a big budget to make a dramatic difference. Simple, thoughtful choices can turn your patio into the favorite spot in your home.
1. String Lights Overhead for Instant Warmth
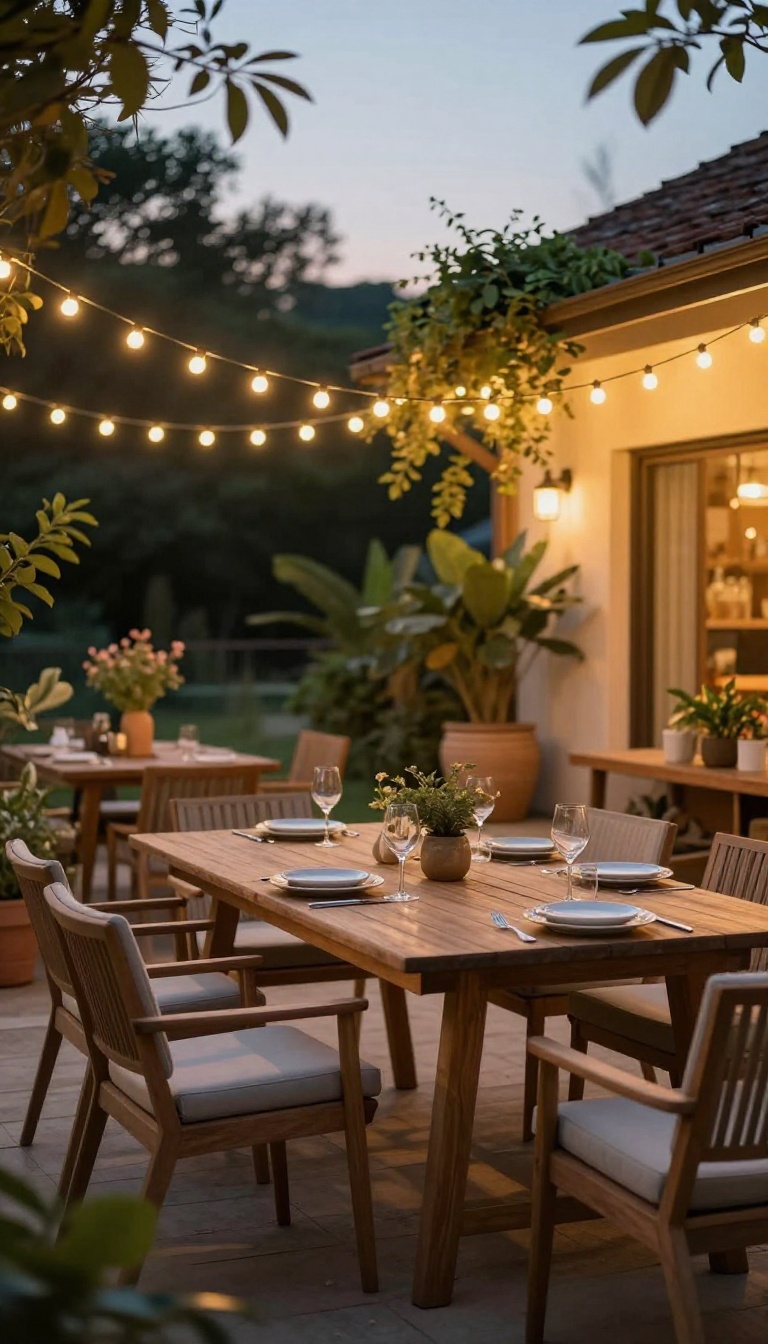
There’s a reason string lights show up in almost every patio makeover—they work. Draped overhead, they cast a soft, diffused glow that flatters faces and softens edges. Unlike a single bright fixture, they spread light evenly, so you don’t get harsh shadows or that sterile, parking-lot feel.
The best part? They’re forgiving. You can hang them in straight lines, zigzags, or gentle curves, and they still look intentional.
String lights are the quickest way to change the entire mood of your patio. They create a canopy of light that feels intimate and inviting, perfect for dinner parties or quiet evenings alone. The warm glow makes the space feel larger and more welcoming, and it instantly signals that this is a place to relax.
Plus, they’re affordable and easy to install, making them a great first step in any lighting plan.
Choosing The Right Bulb Style
Not all string lights are created equal. For a classic, warm look, go with Edison bulbs—they give off a golden, vintage glow that’s flattering and cozy. If you want something more subtle, small globe lights offer a softer, more uniform light.
Consider the spacing between bulbs too; closer spacing means more light, while wider spacing creates a more delicate, twinkly effect. Think about the vibe you want: romantic, festive, or minimalist.
Hanging And Securing Them Safely
Before you start, check that your outdoor outlets are GFCI-protected and rated for wet locations. Use outdoor-rated extension cords and secure the lights with hooks or clips designed for outdoor use—avoid nails or staples that can damage the wiring. For a clean look, attach hooks to the underside of your patio roof or along the fence line.
If you’re hanging them between posts, make sure the line is taut but not overly tight, and leave a little slack to accommodate wind and temperature changes.
Layering With Other Light Sources
String lights work best when they’re part of a layered lighting scheme. Pair them with path lights to define walkways, or add a few lanterns on tables for task lighting. The combination of overhead glow and lower-level accents creates depth and makes the space feel more dynamic.
You can also use dimmers or smart plugs to adjust the brightness, so you can go from bright and lively to soft and intimate with a tap on your phone.
2. Solar Path Lights to Guide the Way
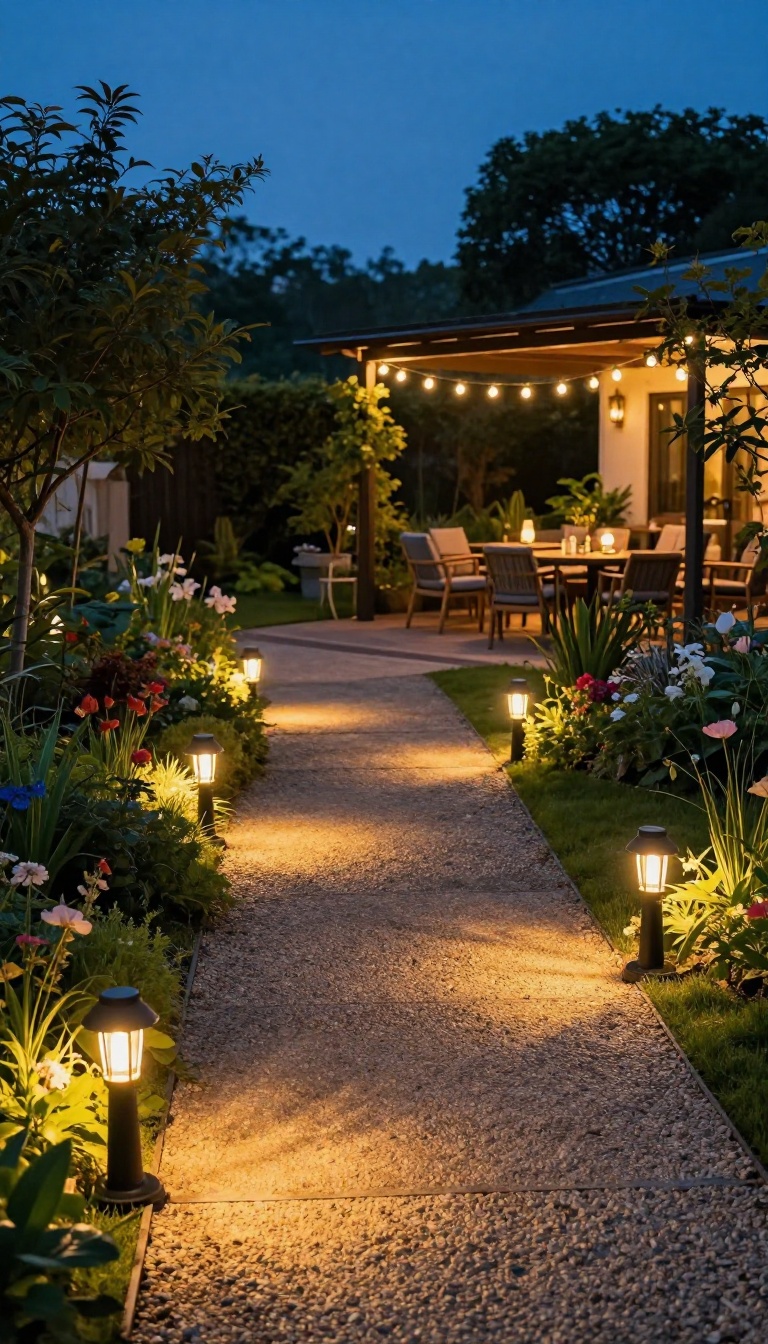
Walkways and garden edges often get ignored when planning patio lighting, but they play a big role in how the whole space feels. Adding solar path lights is an easy way to improve safety and guide guests naturally from one area to another. These small fixtures cast a gentle, warm glow that outlines your paths without stealing attention from the main seating area.
They also help define the boundaries of your outdoor space, making it feel more structured and inviting after dark.
Solar path lights are a practical, low-maintenance option that works well in most yards. They charge during the day and turn on automatically at dusk, so you don't have to fiddle with timers or wiring. Because they're wireless, you can place them exactly where needed and move them around as your garden evolves.
When choosing solar path lights, look for models with warm LED bulbs rather than cool white ones. Warm light feels cozier and blends better with other patio lighting like string lights or lanterns. Also, consider the height and style—stake lights around 12 to 20 inches tall work well for most paths, while shorter mushroom or dome lights are great for borders and flower beds.
Placement matters more than you might think. Space lights evenly along the edges of walkways, about 6 to 8 feet apart, to create a continuous line of light. For garden paths, stagger them on alternating sides to avoid a rigid, runway-like effect.
If you have steps or changes in elevation, add extra lights to highlight those areas for safety. One thing to keep in mind is solar exposure. For the lights to work properly, they need direct sunlight for most of the day.
If your path is heavily shaded, consider using lights with a separate solar panel that you can mount in a sunnier spot. This way, you get the same effect without sacrificing performance.
Choosing The Right Solar Path Lights
Not all solar path lights are created equal. Look for durable materials like aluminum or stainless steel that can withstand weather. Check the IP rating for water resistance—IP65 or higher is ideal.
Also, pay attention to the battery capacity and LED brightness. Brighter isn't always better; you want a soft glow that's visible but not glaring.
Placement Tips For Maximum Effect
Start by mapping out your walkways and garden edges. Place lights at regular intervals, but adjust for curves and corners. For a natural look, avoid perfectly straight lines on curving paths.
Instead, follow the bend and let the lights guide the eye. Highlight any focal points like a tree or a garden ornament with a couple of extra lights.
Maintenance And Longevity
Solar lights require minimal upkeep, but a little care goes a long way. Clean the solar panels occasionally to remove dust and debris that can block sunlight. Replace rechargeable batteries every year or two to keep performance steady.
During harsh winters, you can store them indoors to extend their lifespan.
3. Lanterns for a Portable, Cozy Touch
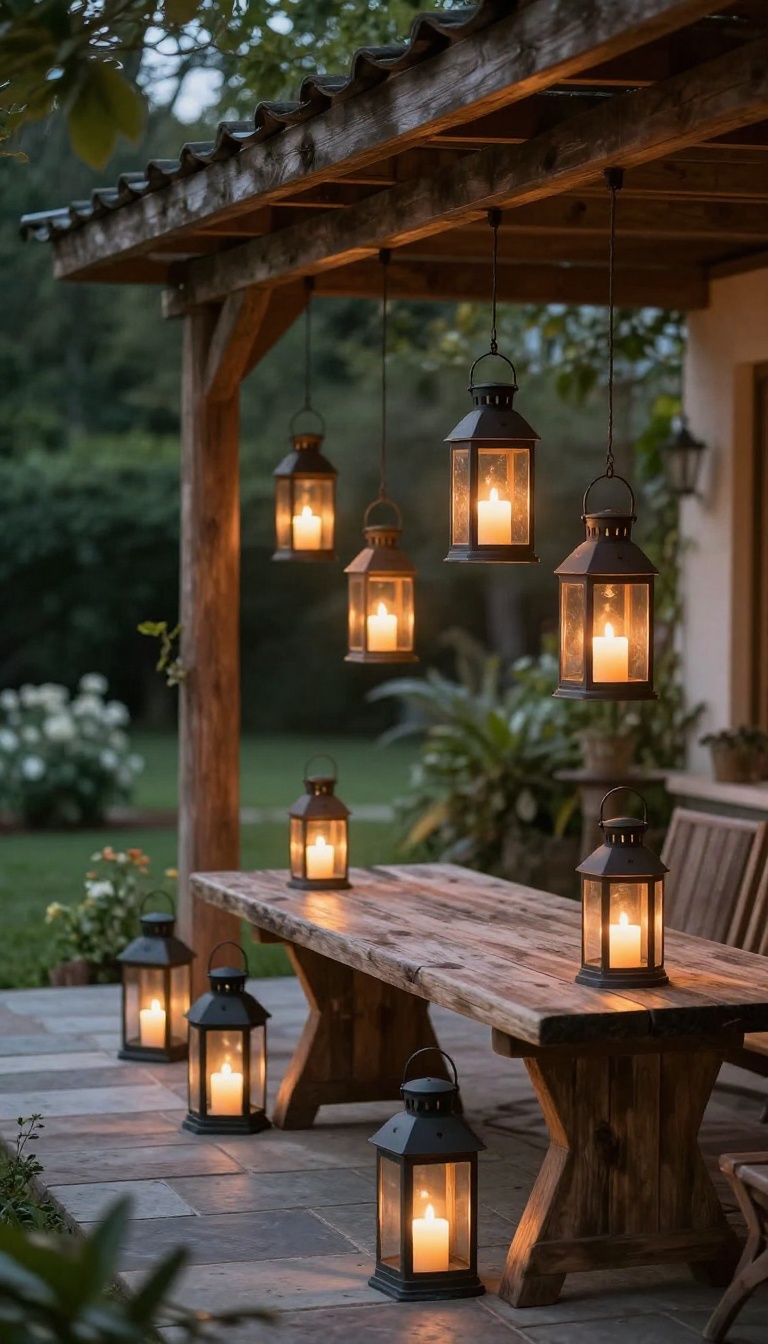
Lanterns are the chameleons of patio lighting—they can hang from a hook, sit on a table, or line a walkway, and they always bring a soft, inviting glow. Unlike fixed fixtures, they let you shift the light to wherever you're sitting, so you can follow the conversation or the breeze. Plus, their classic shapes and materials add a charming, rustic element that feels right at home in any outdoor space.
Mixing hanging and tabletop lanterns creates a layered effect that’s both practical and pretty. Hanging lanterns from a pergola or tree branch draws the eye upward and sets a warm overhead glow, while tabletop versions bring light down to eye level for intimate chats. Because they’re portable, you can cluster them for a dinner party or spread them out for a quiet evening alone.
The key is to vary their heights and sizes to keep the scene visually interesting.
Choose The Right Materials
For outdoor use, look for lanterns made from weather-resistant materials like powder-coated metal, stainless steel, or treated wood. Glass panels are a must to protect the flame or bulb from wind and rain. If you prefer a rustic vibe, go for dark iron or bronze finishes; for a coastal feel, try white or weathered gray.
Avoid anything that looks too delicate or that might rust quickly.
Mix Sizes And Heights
Don’t settle for a single style or size. Combine a few large floor lanterns with smaller tabletop ones, and hang some at different heights from hooks or branches. This variation creates a dynamic, layered look that feels curated rather than store-bought.
As a rule, place taller lanterns near seating or entry points, and keep shorter ones on tables or ledges where they won’t block sightlines.
Use Candles Or Led Inserts
Real candles offer the most authentic flicker, but they need supervision and can blow out. LED candles with a warm, flickering effect give you the same ambiance without the hassle—and they’re safer around kids and pets. For a more modern twist, choose rechargeable lanterns with adjustable brightness, so you can dial in the perfect glow for any occasion.
4. Wall Sconces to Eliminate Dark Corners
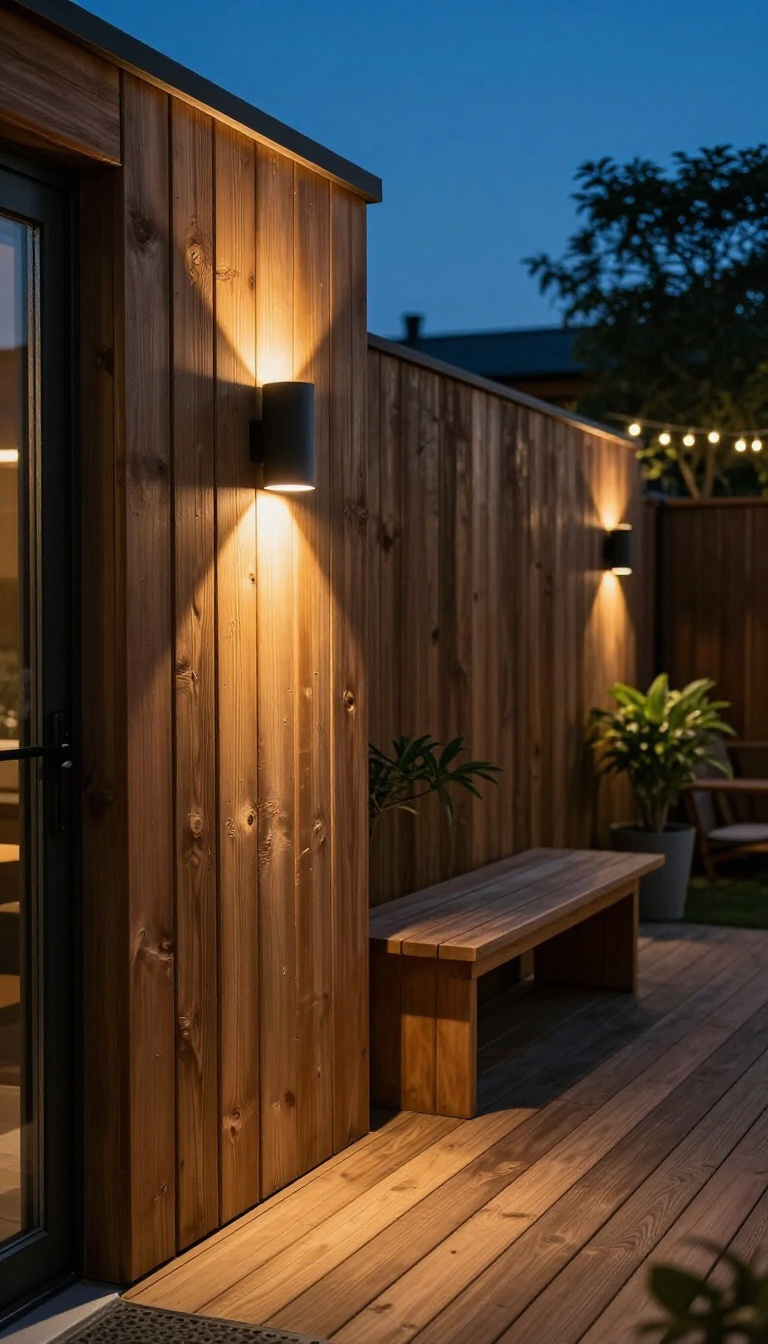
Even with a good mix of string lights and path lights, some patios still have stubborn shadowy spots—especially near walls, fences, or under eaves. A single overhead fixture can leave those areas feeling closed off, which is exactly where wall sconces step in. They mount directly on vertical surfaces to cast a soft, directed glow that fills in the gaps without washing out the whole space.
Sconces are also a great way to add architectural interest. Whether you choose sleek modern cylinders or classic lantern-style fixtures, they bring a finished look to your patio while making every corner feel intentional. And because they're installed at eye level or slightly above, they create a warm, welcoming ambiance that overhead lights just can't match.
Wall sconces work best when you place them strategically. Think about the areas that feel dark or unused—like a seating nook, a grill station, or the side of the house where you usually walk. Mounting sconces on adjacent walls helps balance the light and eliminates harsh shadows.
You'll notice the space instantly feels larger and more inviting. Another advantage is that sconces don't compete with your other lighting layers. They add a gentle glow that complements string lights or lanterns instead of overpowering them.
Plus, with so many styles available, you can match them to your patio's vibe—rustic, modern, coastal, or anything in between.
Placement Tips For Maximum Effect
Aim for sconces at around 60 to 66 inches from the ground, which puts the light at a comfortable height for most people. If you're lighting a seating area, place them on either side of a bench or a door to frame the space. For a long wall, space them evenly to avoid pools of light and dark.
And don't forget to consider the direction of the light—upward-facing sconces create a softer, more diffused glow, while downward-facing ones are better for task areas like a reading nook or a grill prep station.
Choosing The Right Style And Bulb
The style of your sconce should complement your patio's overall look, but the bulb matters just as much. Warm white bulbs (2700K–3000K) are ideal for that cozy evening glow. LED options are energy-efficient and last longer, but make sure they're rated for outdoor use.
If you want extra control, opt for sconces with a dimmer switch or smart compatibility so you can adjust the brightness as the night goes on. Also, consider the finish—matte black or bronze adds a classic touch, while brushed nickel or white feels more contemporary.
Hardwired Vs. Solar-powered Sconces
If you have existing wiring near your patio, hardwired sconces are a reliable choice and often look more polished. But if you'd rather avoid an electrical project, solar-powered sconces have come a long way. They're easy to install, require no wiring, and still provide a warm glow—just make sure they get enough direct sunlight during the day to charge.
There are also battery-operated options with motion sensors, which are great for dark corners that you only need lit occasionally.
5. LED Candles for Safe, Flickering Ambiance
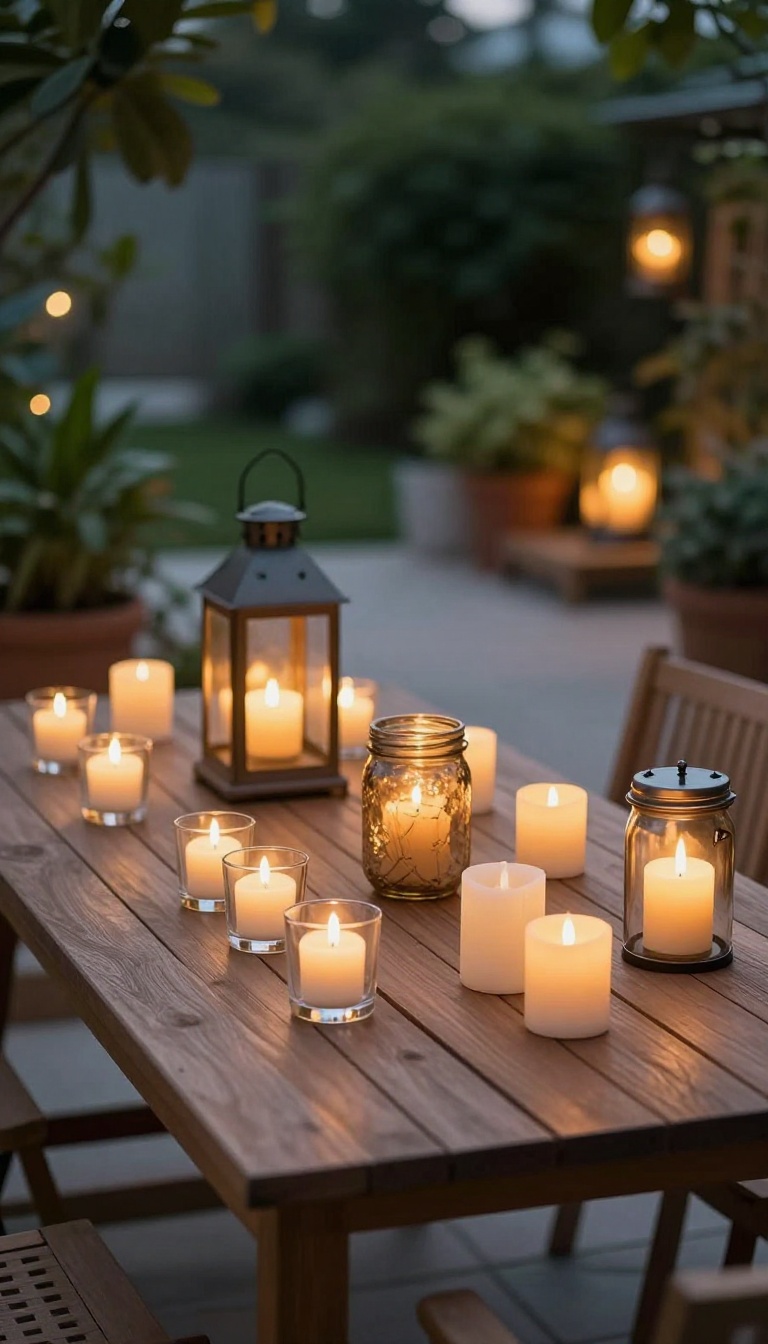
Real candles bring a lovely glow, but they also bring worries—especially when a breeze kicks up or kids and pets are around. LED candles give you that same warm, dancing light without any of the risk. They've gotten surprisingly realistic, with flickering flames and a soft glow that's hard to tell from the real thing at a distance.
Flameless candles are a patio lighting staple because they're practical and pretty. They come in all shapes and sizes, from slim tapers to chunky pillars, so you can mix and match to fit your table or shelf. Since they don't produce heat, you can place them in glass holders, on wooden tables, or even in hanging lanterns without a second thought.
Plus, they're perfect for windy evenings that would blow out a real flame in seconds.
Pick The Right Style For Your Space
Look for LED candles with a warm white or amber LED, not the cool blue-white ones that feel more like a flashlight. The best ones have a flickering mode that mimics a real flame's random dance. For a rustic look, go for pillar candles in mason jars or metal lanterns.
For a more elegant vibe, choose taper candles in slim glass holders. You can also find floating LED candles for a small water feature or bowl centerpiece.
Place Them Where Real Candles Can't Go
Because they're safe, LED candles open up placement options that real candles don't. Set them on the edge of a planter, on a stack of books, or directly on the patio floor to line a walkway. You can hang them from tree branches in small lanterns or place them on a windowsill.
They're also great for tables where a real candle might tip over or get knocked by a passing elbow.
Add A Timer Or Remote For Effortless Ambiance
Many LED candles come with timers that turn them on at dusk and off after a few hours. That means you can set the mood without even thinking about it. Some even have remote controls, so you can adjust brightness or switch between steady and flickering modes from your chair.
It's a small convenience that makes a big difference in how often you actually use them.
6. Under-Rail Lighting for a Modern Edge
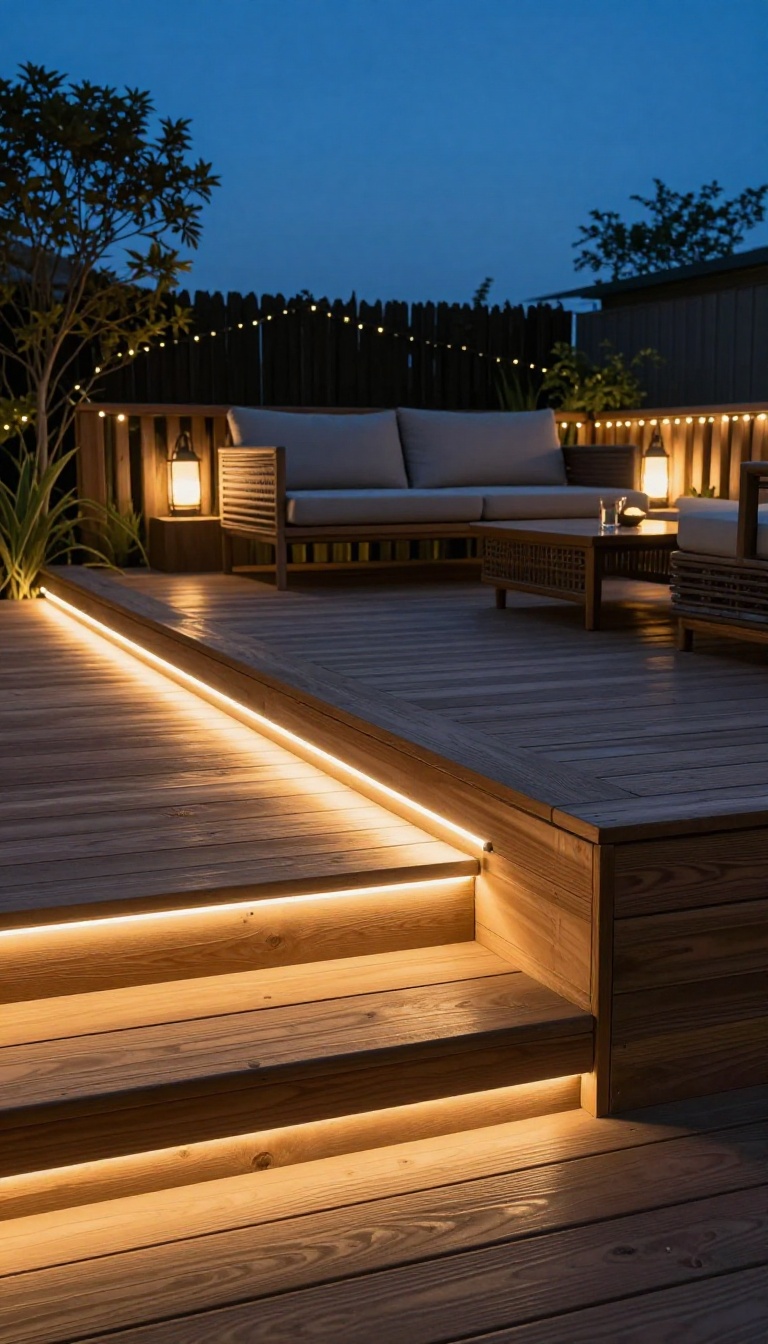
Railings and steps often get overlooked when planning patio lighting, but they’re prime spots for a sleek, contemporary touch. Under-rail lighting uses low-voltage LED strips mounted beneath handrails or stair treads to cast a soft, downward glow. It’s subtle, practical, and instantly upgrades the look of your outdoor space.
This type of lighting does double duty: it adds a modern design element while improving safety by illuminating potential tripping hazards. The light is directed downward, so it doesn’t glare into your eyes or bother neighbors. Plus, LED strips are energy-efficient and can last for years with minimal maintenance.
Why It Works So Well
Under-rail lighting creates a clean, architectural line that highlights the structure of your deck or patio. It’s especially effective on raised decks, balconies, or any area with visible railings. The downward light also defines the edge of the space, making it feel more polished and intentional.
Installation Tips
You can install these LED strips yourself with adhesive backing and a low-voltage transformer. Just make sure to choose weatherproof strips rated for outdoor use. If you’re not comfortable with wiring, a simple plug-in option works well for many setups.
Position the strips so they’re hidden from direct view when you’re sitting down.
Placement Ideas
Think beyond just the railing top. You can also run strips under stair treads, along the base of a bench, or even under a pergola beam. The key is to keep the light focused downward and avoid overdoing it—a little goes a long way.
Warm white or soft amber tones work best for that cozy evening vibe.
7. Pendant Lights Over Dining Areas
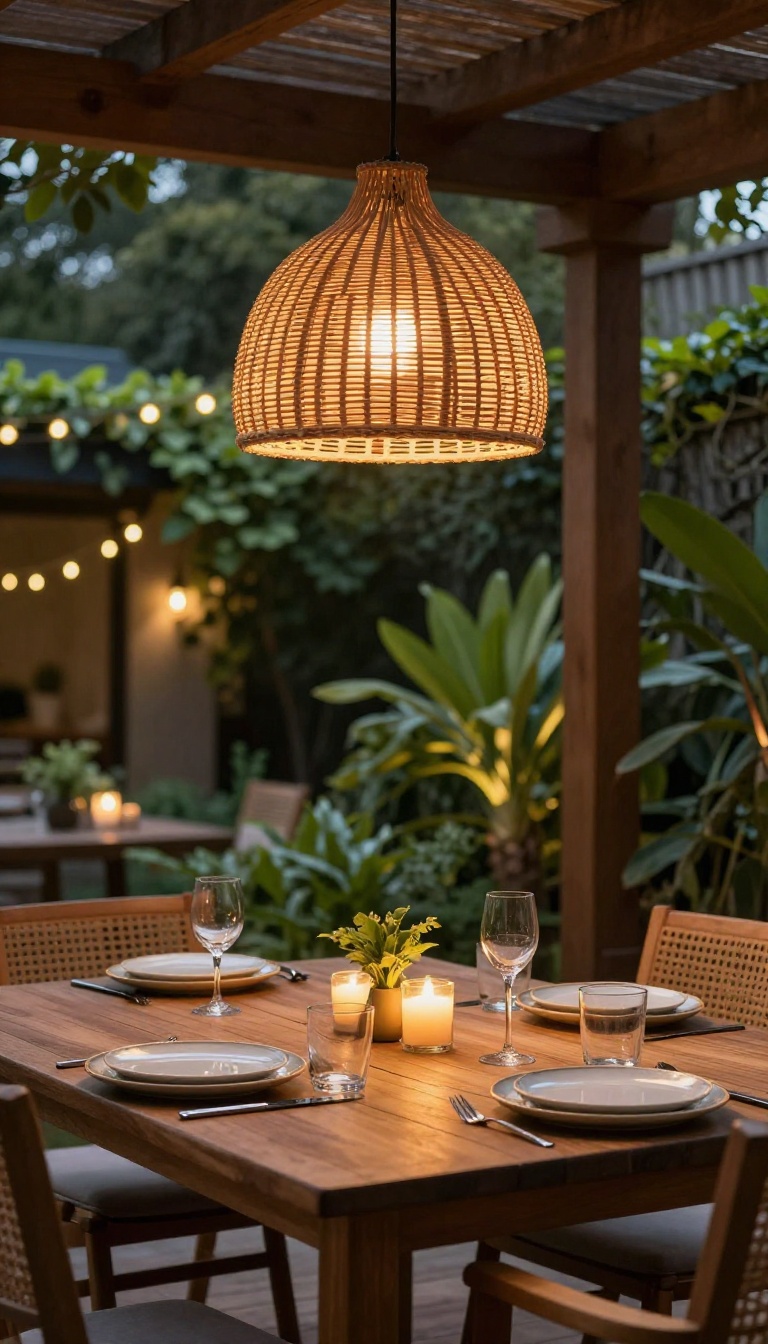
When you eat outside, the light above the table matters more than you might think. A single overhead fixture can make the whole meal feel cozier and more intentional. Pendant lights are perfect for this because they hang low enough to cast light exactly where you need it, without flooding the entire patio.
Pendant lights bring a focused, warm glow to outdoor dining, making every meal feel a little special. They also add a stylish architectural element that draws the eye upward. Whether you have a permanent pergola or a simple hook, a pendant light can transform your table into the heart of the evening.
Choosing The Right Height
Hang pendants about 30 to 36 inches above the table surface. This keeps the light close enough to illuminate plates and faces, but high enough to avoid bumping heads. If you have a low ceiling or a tall table, adjust accordingly.
A quick test: sit down and make sure the light doesn't block your view across the table.
Weatherproofing And Safety
Outdoor-rated fixtures are a must. Look for IP65 or higher to handle rain and dust. If you're wiring a new fixture, hire a licensed electrician to ensure proper grounding and weatherproof connections.
For a simpler option, use plug-in pendant lights with a GFCI outlet and a weather-resistant cord.
Style And Material Ideas
Choose materials that match your patio's vibe. Woven rattan or bamboo shades add a natural, bohemian feel. Metal and glass pendants give a sleek, modern look.
For a rustic touch, try a galvanized metal cone or a wooden pendant. The shade color affects the light—darker shades cast a softer glow, while lighter ones reflect more light.
Powering Without Hardwiring
If you don't want to deal with wiring, consider battery-operated or solar pendant lights. Many modern options provide warm light for hours and can be charged via USB. Another trick: run an extension cord from an indoor outlet and use a plug-in pendant with a remote control.
Just make sure the cord is rated for outdoor use and doesn't create a trip hazard.
8. Fairy Lights in Glass Jars for Whimsy
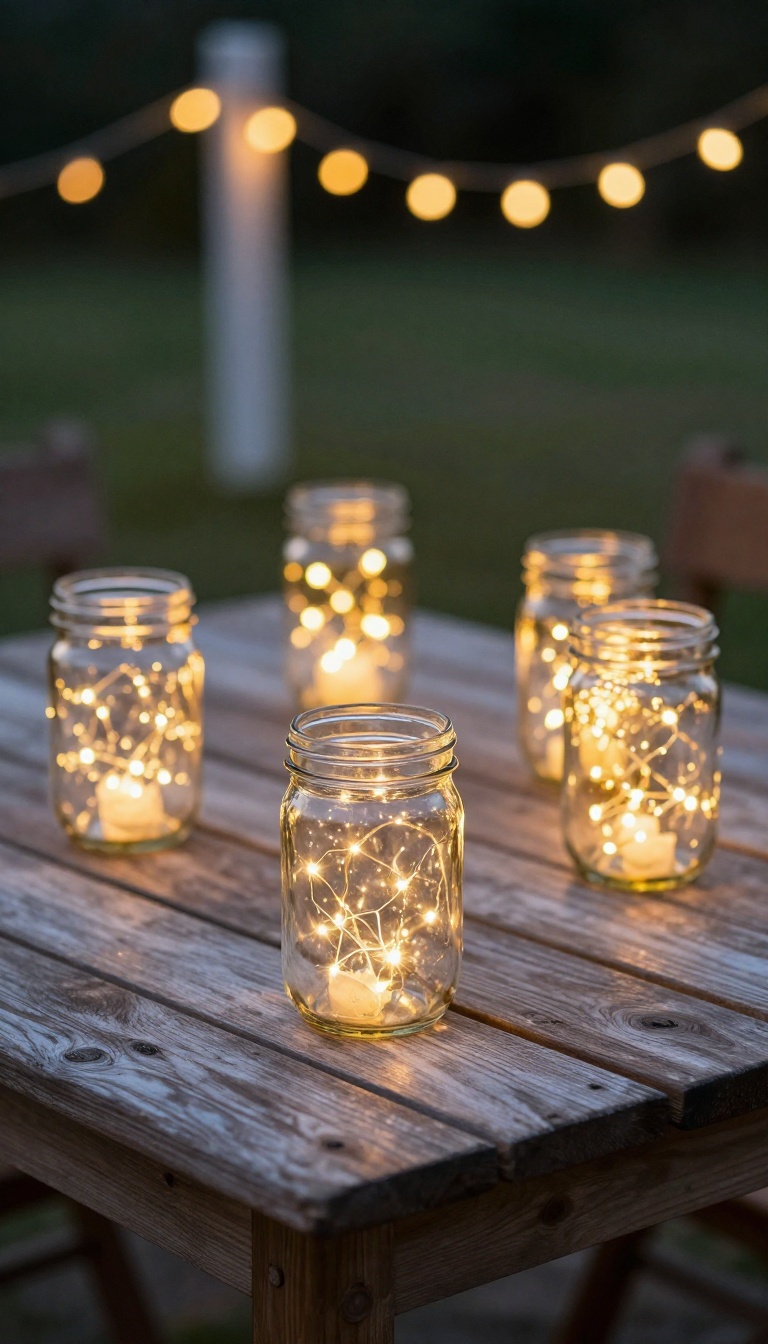
Fairy lights are the easiest way to add a little magic to your patio, and when you tuck them inside glass jars, they become something special. The glass diffuses the light into a soft, warm glow that feels straight out of a storybook. It’s a simple trick that works on tables, shelves, or even hanging from a tree branch.
One of the best things about this idea is that it’s completely portable. You can move the jars around to match the mood, from a dinner party to a quiet evening with a book. And because the lights are battery-operated, you don’t have to worry about cords or outlets.
Just switch them on and let the jars do their thing.
Choosing The Right Jars
Mason jars are the classic choice, but you can use any glass container you have on hand. Apothecary jars, old pasta sauce jars, or even fishbowls work great. The key is to pick something with a wide enough opening to easily drop the lights in and take them out.
You can also mix sizes and shapes for a more eclectic look.
Placement Ideas
Set a few jars in the center of your outdoor table for a cozy dinner setting. Line them along a shelf or windowsill for a gentle glow. You can also hang them from shepherd’s hooks or tree branches using wire or twine.
For a more dramatic effect, group several jars together on a side table or the ground.
Customizing The Glow
To change the vibe, you can add a few drops of food coloring to the bottom of the jar before placing the lights in, or use colored fairy lights for a festive touch. For a more natural look, add a layer of sand, pebbles, or dried flowers around the lights. This also helps keep the lights in place and adds a bit of texture.
9. Uplighting Trees for Depth and Drama
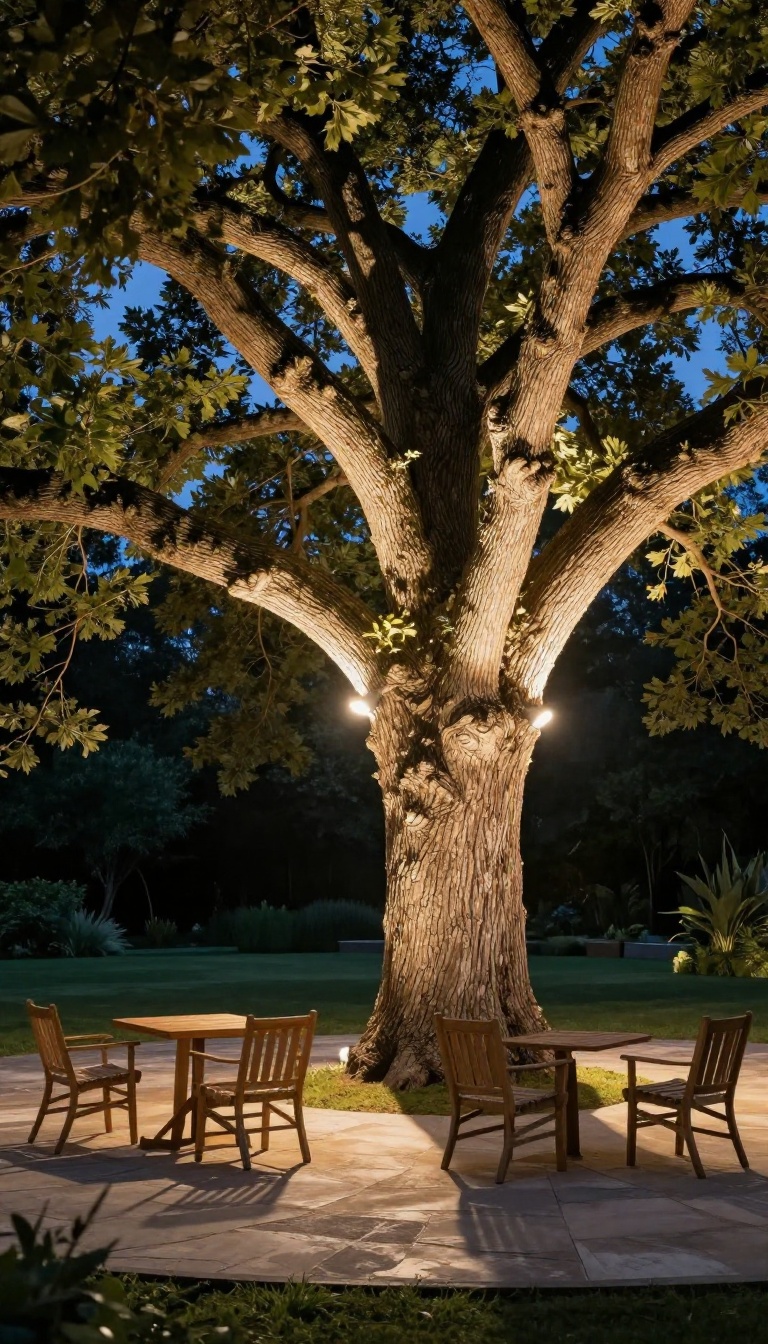
Trees and large plants often disappear into the night, leaving your patio feeling flat and closed in. Uplighting changes that by casting light upward from the base, which draws the eye up and adds a sense of height and openness. It’s a simple trick that makes the whole space feel bigger and more inviting.
Uplighting is one of those techniques that looks professional but is surprisingly easy to pull off. You just need a few spotlights or well lights aimed at the trunks or canopies of your trees. The effect is dramatic—shadows dance on the leaves, and the patio gains a new layer of depth that string lights alone can’t achieve.
Choosing The Right Fixtures
For uplighting, you want fixtures that are weatherproof and easy to position. In-ground well lights are great for a clean, flush look, while adjustable spotlights on stakes give you more flexibility. LED options are energy-efficient and last for years, so you can leave them on all evening without worrying about the bill.
Placement Tips For Best Effect
The angle of the light matters a lot. Aim the beam at the trunk or the lower branches, not straight up into the sky, to avoid harsh glare. For a single tree, place the light about a foot away from the base and angle it upward.
For a group of trees, use multiple lights to create a layered effect that adds depth to the entire patio.
Warmth And Color Temperature
Stick with warm white bulbs (around 2700K to 3000K) to keep the glow cozy and inviting. Cool white or blue-toned lights can feel harsh and clinical, which is the opposite of what you want for an evening retreat. Warm light also complements the natural colors of foliage, making everything look richer and more welcoming.
10. Tiki Torches for a Tropical Vibe

Tiki torches bring more than light; they bring a whole mood. The soft, dancing flames and the subtle scent of citronella or other tropical oils instantly make your patio feel like a getaway. You don't need a beach to enjoy that relaxed, vacation-like atmosphere—just a few torches placed around your outdoor space.
Tiki torches are an easy, affordable way to add warm, flickering light and a touch of the tropics. They come in various styles, from bamboo to metal, and can be fueled with torch fuel or citronella oil to keep bugs at bay. Place them strategically to create a cozy perimeter and define your outdoor living area.
Placement Tips For Maximum Effect
For a balanced glow, space torches about 6 to 8 feet apart around the edges of your patio or along a walkway. Avoid placing them too close to seating or flammable materials. If you have a pool, line the perimeter for a resort-like feel.
You can also mix heights by using torches of different lengths to add visual interest.
Choosing The Right Fuel
Most tiki torches burn either citronella oil or a standard torch fuel. Citronella naturally repels mosquitoes, making it a practical choice for summer evenings. Standard torch fuel burns cleaner and may have less scent.
Whichever you choose, always use a funnel to fill the torch and never overfill. Keep a fire extinguisher or water source nearby just in case.
Safety And Maintenance
Always place torches on a stable, level surface and away from overhanging branches or eaves. Never leave them unattended while lit. After each use, extinguish flames by blowing them out or using a snuffer.
Store torches safely when not in use, and replace wicks regularly for a consistent flame. With a little care, your tiki torches will last for many seasons.
11. Step Lights for Safety and Style
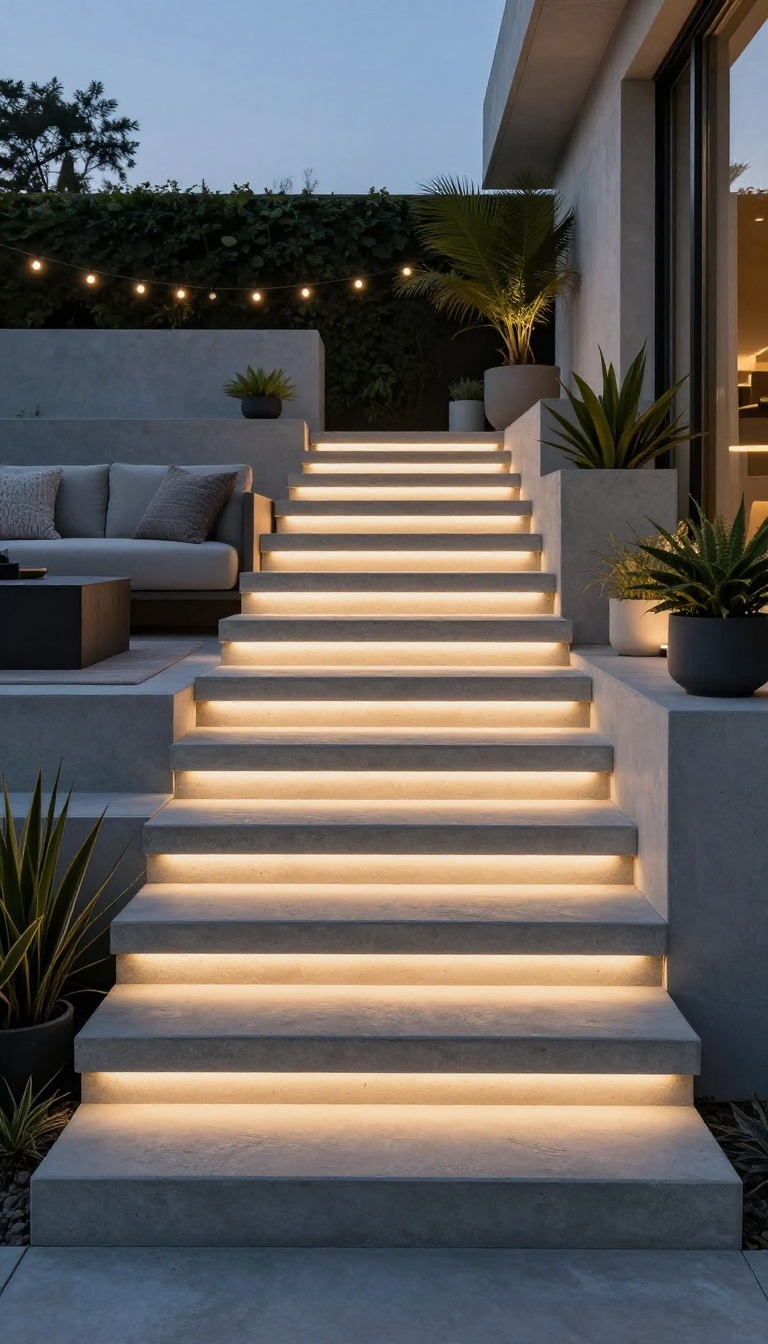
Stairs and changes in elevation can be a real hazard after dark, but they also offer a chance to add a sleek, modern touch. Recessed step lights are a smart way to prevent trips while giving your patio a polished, architectural look. These small fixtures blend into the steps themselves, casting a soft glow that defines each tread without blinding you.
Step lights are more than just a safety feature—they're a design element that can make your patio feel upscale and intentional. When placed correctly, they create a gentle wash of light that guides your feet and adds depth to the space. You can choose from a variety of styles, from minimalist round pucks to slim linear strips, to match your patio's aesthetic.
The key is to install them flush with the surface so they don't create a tripping hazard themselves. LED options are energy-efficient and last for years, so you can set them and forget them. Plus, they're often low-voltage, which means you can install them without complicated wiring if you're comfortable with a little DIY.
Where To Place Step Lights
The most obvious spots are on the risers of stairs, but don't stop there. Use them along the edges of raised patios, garden walls, or any place where the ground level changes. If you have a path with a slight incline, consider placing a few lights along the side to outline the route.
The goal is to highlight the transition so your eyes naturally register the change in elevation.
Choosing The Right Fixture
For a seamless look, pick fixtures that match the material of your steps—whether that's concrete, wood, or stone. Recessed lights come in round, square, or rectangular shapes, and some even have adjustable heads so you can direct the beam exactly where you need it. If you want a softer effect, go for a frosted lens; if you need more visibility, a clear lens with a wider beam works better.
Installation Tips
If you're handy, you can install recessed step lights yourself using a low-voltage transformer and waterproof wiring. Make sure to cut the holes carefully and seal any gaps to keep moisture out. If you're not confident, hiring a professional is worth the investment—proper installation ensures safety and longevity.
Always check local codes and use fixtures rated for outdoor use.
12. Smart Bulbs for Color and Control
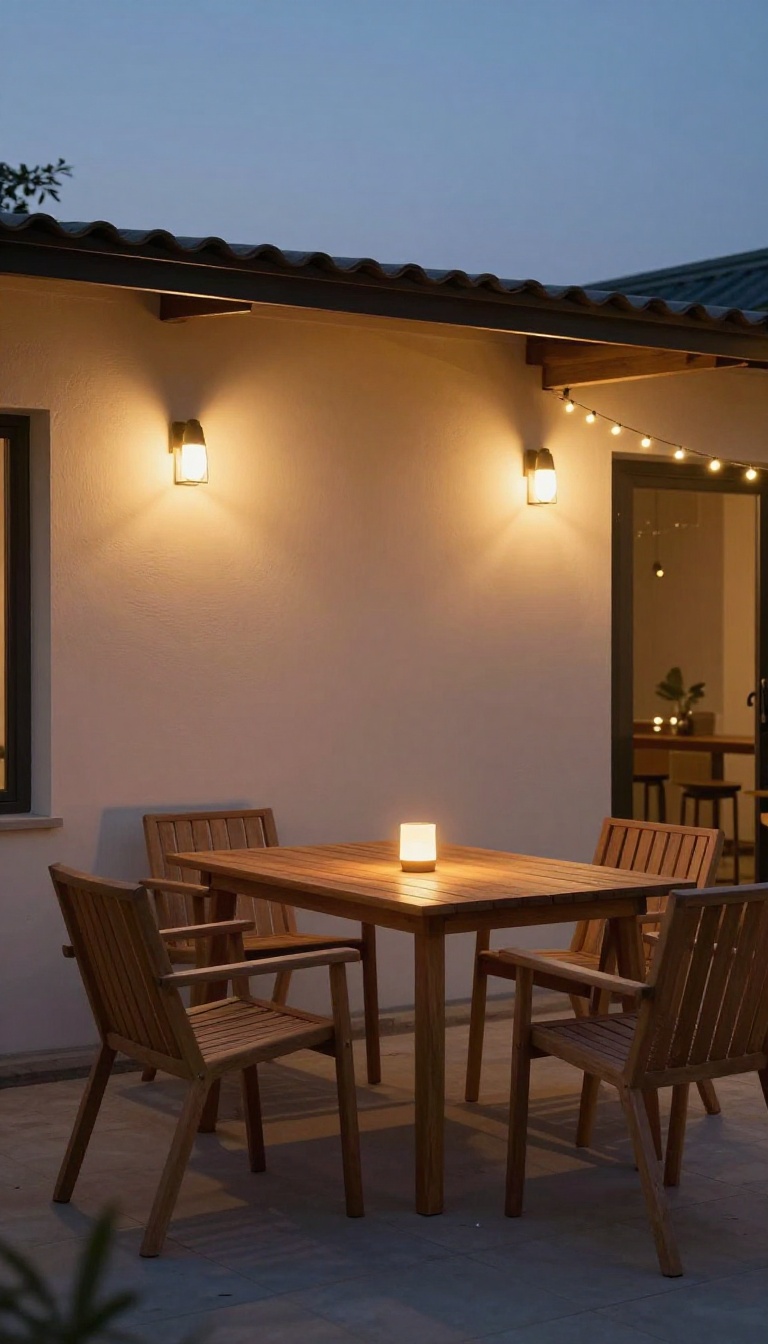
Your existing patio fixtures might already be capable of more than you think. Swapping in smart bulbs gives you instant control over brightness and color temperature without rewiring anything. With a few taps on your phone, you can shift from a bright, functional setting for dinner prep to a soft, amber glow for late-night conversation.
It's the easiest way to make your lighting adapt to the moment.
Smart bulbs are a simple upgrade that pays off every evening. They fit into standard sockets, so you can use them in wall sconces, post lights, or string light sockets. The real magic is in the app: you can set schedules, adjust warmth, and even sync lights with music or movies.
Color temperature matters more than you'd expect. Cool white light feels clinical and harsh, while warm white (around 2700K) mimics the cozy glow of candlelight. Smart bulbs let you dial in that exact warmth and change it whenever you like.
You can also create scenes. Maybe a 'Dinner' scene brightens the table area, while a 'Sunset' scene dims everything to a gentle flicker. With voice assistants like Alexa or Google Home, you don't even need to pull out your phone—just say the word.
Pick The Right Bulb Type
Look for smart bulbs that are rated for outdoor use. They'll have an IP rating (like IP65) to handle moisture and temperature swings. Also, check the lumen output—you want enough brightness for tasks, but dimmable down to a soft glow.
Wi-Fi bulbs are the easiest to set up, but they can be slower to respond. Zigbee or Z-Wave bulbs need a hub but are more reliable. Choose what fits your existing smart home setup.
Set Scenes And Schedules
Most smart bulb apps let you create custom scenes. Set a 'Movie Night' scene that dims the lights to 20% with a warm tint, or a 'Party' scene that cycles through colors. Schedules are handy too—have the lights turn on automatically at dusk so your patio always feels welcoming.
You can also use geofencing: when you arrive home, the lights switch to your preferred evening setting. It's a small touch that makes the space feel responsive to your life.
Control With Voice Or App
Voice assistants make it hands-free. Say 'Hey Google, set the patio lights to warm' and the whole mood changes. If you prefer the app, you can adjust individual bulbs or groups from anywhere.
For outdoor entertaining, you can even let guests control the lights with a QR code—though that might be a bit much for a quiet evening.
13. DIY Mason Jar Chandeliers for a Personal Touch
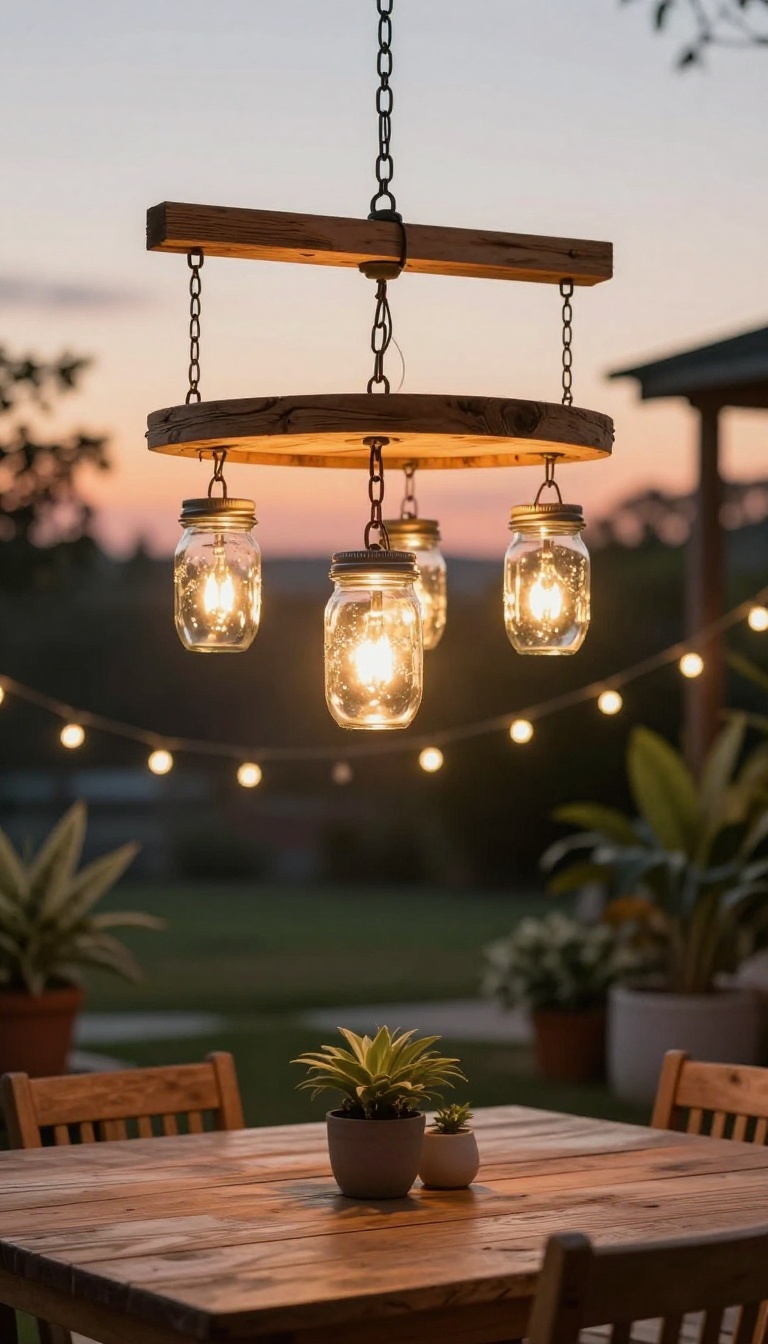
Mason jars have a way of making everything feel cozier, and when you turn them into a chandelier, they become the centerpiece of your patio. This project is simpler than it looks, and it gives you a chance to add your own style to the space. Whether you hang it over a dining table or in a seating area, it will draw people in and start conversations.
Building your own mason jar chandelier is a rewarding weekend project that adds a warm, rustic glow to your patio. With just a few materials and some basic tools, you can create a lighting fixture that feels custom-made and adds a personal touch to your outdoor space.
Gather Your Materials
You'll need a piece of reclaimed wood or a sturdy board, several mason jars (quart-size works well), LED bulbs or candle inserts, and some chain or rope for hanging. You can find most of these at a hardware store or salvage yard, and the beauty is that you can mix and match jar sizes for a more eclectic look.
Assemble The Chandelier
Start by drilling holes in the wood board where you want the jars to hang. Then, attach the jars using mason jar lids that have been screwed into the underside of the board, or use wire to suspend them. For a safer, low-maintenance option, use LED bulbs that don't heat up, and run the wiring along the top of the board, hidden from view.
Hang And Enjoy
Once your chandelier is assembled, hang it securely from a sturdy beam or pergola using chains or rope. Make sure it's at a height where it won't obstruct movement but low enough to cast a warm, inviting light. When you switch it on, the glow through the glass jars will create a magical atmosphere that feels both rustic and refined.
FAQ
What is the best type of lighting for a patio?
The best type combines layers: ambient lighting like string lights or sconces for overall glow, task lighting like pendants for dining areas, and accent lighting like uplights or lanterns for highlights. This mix creates a warm, functional space.
How can I light my patio without electricity?
Use solar-powered lights, battery-operated LED candles, or rechargeable lanterns. These options are easy to install, portable, and provide ample light for most patio activities.
What color temperature is best for outdoor lighting?
Warm white (2700K-3000K) is ideal for creating a cozy, inviting atmosphere. Avoid cool white or blue-toned lights, which can feel harsh and clinical.
How do I avoid glare from patio lights?
Use fixtures with shades or diffusers, position lights at eye level or lower, and opt for multiple low-intensity sources instead of one bright light. Also, direct lights downward or upward rather than into seating areas.
Are solar patio lights reliable?
Modern solar lights are quite reliable if they receive adequate sunlight during the day. Choose high-quality ones with good battery capacity and place them in sunny spots for best performance.
Conclusion
Lighting your patio doesn't have to be complicated or expensive. By mixing a few of these ideas, you can solve common problems like glare and dark corners while creating a warm, welcoming glow that invites you outside every evening.
Start with one or two changes that fit your space and budget, then build from there. The goal is to make your patio a place you look forward to, whether you're hosting friends or enjoying a quiet night alone.