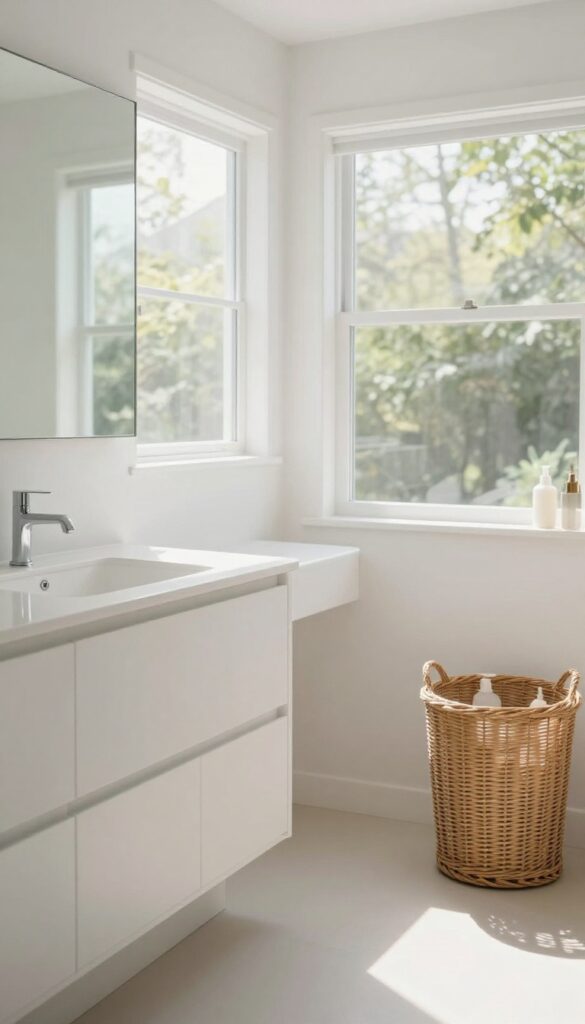
23 Bathroom Cleaning List Tasks for a Spotless Reset
Walking into a bathroom that looks and smells like a spa isn't a fantasy—it's the result of a smart, systematic cleaning routine. Most of us scrub the obvious spots but miss the hidden grime that builds up over time. That's where this list comes in.
These 23 tasks are designed to take your bathroom from everyday clean to truly spotless. Think of it as a reset button for your space, tackling everything from shower doors to toilet bases. No fluff, no filler—just a practical, room-by-room approach that makes the job feel manageable.
Ready to transform your bathroom? Let's get started.
1. Clear the Clutter First
Before you even think about spraying or scrubbing, take a few minutes to strip the space down. Every bottle, bar, and brush sitting on your counters or shower ledge is just an obstacle. Removing them gives you full access to every surface and prevents cleaning products from getting blocked or diluted.
Why A Blank Slate Matters
When products are in the way, you tend to clean around them. That leaves hidden grime and soap scum behind. By clearing everything out, you can actually see the dirt you need to tackle.
Plus, it’s a great chance to toss empty bottles and expired products you’ve been ignoring.
Where To Put Everything Temporarily
A laundry basket or a large tote works perfectly for hauling items out of the bathroom. Group them by category—hair products, skincare, cleaning supplies—so it’s easy to wipe them down before returning. If you have a second bathroom, stash things there temporarily to keep your workspace clear.
Quick Declutter While You’re At It
Use this moment to do a mini purge. Toss anything that’s empty, dried out, or past its expiration date. Wipe down bottles with a damp cloth before putting them back.
This step alone makes your bathroom feel instantly cleaner and more organized.
2. Dust Light Fixtures and Vents
Light fixtures and vents are easy to overlook, but they collect a surprising amount of dust and grime. That buildup can dim your lighting and circulate stale air. Taking a few minutes to dust them makes your bathroom feel brighter and fresher.
Start by turning off the light switch and letting bulbs cool if they were on. Use a microfiber duster or a vacuum with a brush attachment to gently remove dust from ceiling fixtures, sconces, and exhaust fan grilles. For stubborn buildup, a slightly damp cloth works well—just make sure everything is dry before turning the lights back on.
Don't forget air vents: remove the cover if possible, wash it with soap and water, and vacuum inside the duct opening. This simple task improves both air quality and illumination.
Why It Matters
Dust on light fixtures can reduce brightness by up to 30%. Dirty vents recirculate allergens and mold spores. Cleaning them regularly helps your bathroom feel cleaner and more inviting.
Tools You'll Need
Microfiber duster, vacuum with brush attachment, step stool, damp cloth, and mild soap for vent covers. That's it—no harsh chemicals required.
Pro Tips
Clean fixtures and vents monthly to prevent heavy buildup. For exhaust fans, use a can of compressed air to blow dust out of the motor housing. Always let fixtures dry completely before restoring power.
3. Wipe Down Cabinet Exteriors
Cabinet doors and drawers see a lot of action, but they rarely get the attention they deserve. Fingerprints, toothpaste splatters, and dust build up on surfaces you touch daily. A quick wipe-down makes a big difference in how clean the whole bathroom feels.
Start by clearing off the countertops so you can access all cabinet fronts easily. Use a gentle all-purpose cleaner or a mix of warm water and mild dish soap. Avoid harsh abrasives that can damage the finish.
Spray onto a microfiber cloth rather than directly onto the cabinet to prevent moisture from seeping into seams. Wipe each door in a consistent pattern, top to bottom, and pay extra attention to areas around handles where grime collects. For sticky spots, let the cleaner sit for a minute before wiping.
Don't forget the underside of cabinet edges and the tops of drawers, which can trap dust. Finish by drying with a clean cloth to prevent water spots. This simple task takes just a few minutes but instantly refreshes the space.
Choose The Right Cleaner
Not all cabinet materials are the same. For wood cabinets, use a wood-safe cleaner or a vinegar-and-water solution (1: 4 ratio). For laminate or painted surfaces, a mild all-purpose spray works fine.
Always test on an inconspicuous area first. Avoid bleach or ammonia-based products that can discolor or dull the finish.
Tackle Stubborn Grime
Handles and knobs attract oils from hands, creating sticky residue. For built-up grime, make a paste of baking soda and water, apply gently with a soft cloth, then wipe clean. For metal handles, a bit of rubbing alcohol on a cotton ball can remove sticky buildup without damaging the finish.
Don't Skip The Hardware
Cabinet pulls and knobs need their own cleaning. Remove them if possible, soak in warm soapy water for a few minutes, then scrub with an old toothbrush. Rinse and dry thoroughly before reattaching.
This step eliminates hidden bacteria and makes the hardware shine.
4. Clean the Mirror Streak-Free
A smudged mirror can ruin the whole clean-bathroom feeling. But getting it truly streak-free isn't about elbow grease—it's about technique. With the right method, you'll have a mirror so clear you'll forget it's there.
The secret to a streak-free mirror is all in how you apply the cleaner and the pattern you wipe. Spraying directly onto the glass causes drips and uneven coverage, which leads to streaks. Instead, spray your cleaner onto a microfiber cloth—just enough to dampen it, not soak it.
Then wipe in a consistent S-pattern from top to bottom. This prevents re-depositing dirt and leaves a flawless finish.
Choose The Right Cleaner
You don't need a fancy store-bought spray. A simple mix of equal parts white vinegar and water works wonders. If you prefer something with a scent, add a few drops of essential oil.
Avoid ammonia-based cleaners—they can damage mirror backing over time. For tough spots like toothpaste splatters, a dab of rubbing alcohol on your cloth will cut through without residue.
The Right Cloth Matters
Microfiber is your best friend here. It traps dust and absorbs liquid without leaving lint behind. Paper towels might seem convenient, but they often leave tiny fibers and streaks.
If you don't have microfiber, a clean, soft cotton cloth (like an old t-shirt) is a decent backup. Just make sure it's completely lint-free.
Master The S-pattern
Start at the top left corner and wipe in a continuous S-curve across the mirror, moving downward. Overlap each pass slightly to avoid missed spots. This pattern ensures that any residue is pushed to the bottom edge, not smeared back onto the glass.
Finish by wiping the bottom edge with a dry section of the cloth to catch drips.
5. Scrub the Sink and Faucet
The sink and faucet see daily use, but they often get a quick rinse instead of a thorough clean. Over time, toothpaste splatters, soap scum, and hard water spots build up, making them look dull. A proper scrub restores their shine and keeps the area hygienic.
Choose The Right Cleaner
Avoid harsh abrasives that can scratch the sink or faucet finish. A mild all-purpose cleaner or a mix of baking soda and vinegar works well for most surfaces. For stubborn hard water stains, use a dedicated bathroom cleaner with citric acid or a vinegar soak.
Scrub The Basin And Drain
Start by wetting the sink surface, then apply your cleaner and let it sit for a minute. Use a soft sponge or cloth to scrub the entire basin, paying extra attention to the area around the drain. For the drain itself, use an old toothbrush to clean the rim and remove any gunk.
Polish The Faucet And Handles
Wipe the faucet with a damp cloth to remove cleaner residue, then dry it with a soft, lint-free cloth to prevent water spots. For a streak-free shine, use a microfiber cloth and a dab of white vinegar or a commercial polish. Don't forget the handles and the base where grime often hides.
6. Tackle the Countertops
Countertops are the workhorses of any bathroom. They hold toothbrushes, soap dispensers, makeup bags, and the occasional coffee cup. Over time, they collect toothpaste splatter, hair product residue, and invisible bacteria.
Giving them a proper wipe-down isn't just about looks—it's about hygiene.
Clear The Clutter First
Before you spray anything, move everything off the counter. Place toothbrushes, soap pumps, and other items in a temporary bin or on a towel. This gives you full access to the surface and prevents you from just cleaning around objects.
Spray And Let It Sit
Use an all-purpose cleaner or a disinfectant spray suitable for your countertop material. Spray generously, especially around the sink rim and near the backsplash. Let the cleaner sit for at least 30 seconds to break down grime and kill germs.
Wipe In A Pattern
Start from the farthest corner and work your way toward the sink. Use a microfiber cloth for streak-free results. Pay extra attention to the area around the faucet base and any corners where gunk tends to hide.
Don't Forget The Details
Once the main surface is clean, wipe down the soap dispenser, toothbrush holder, and any other items before putting them back. Disinfect the area where your toothbrush sits—it's a prime spot for bacteria growth.
7. Clean the Soap Dispensers and Accessories
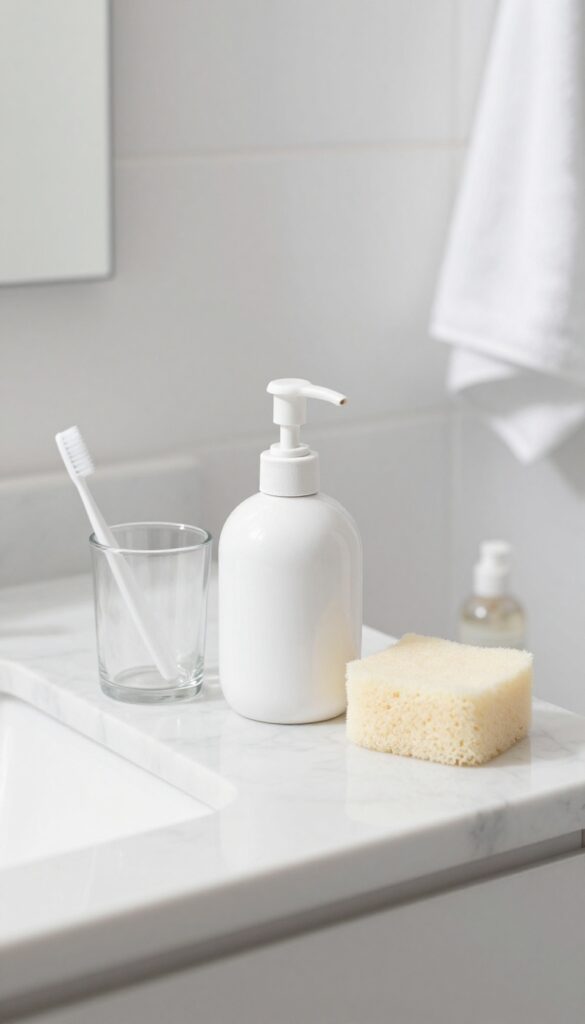
Soap dispensers, toothbrush holders, and other countertop accessories are touched daily but cleaned rarely. They collect soap scum, toothpaste splatter, and bacteria that can transfer back to your hands or mouth. Giving them a proper wash is a small step that makes a big difference in hygiene and appearance.
Remove And Disassemble
Start by taking everything off the counter: soap pumps, lotion bottles, toothbrush holders, and any decorative jars. If the soap dispenser has a pump, unscrew it and remove the tube. For toothbrush holders, dump out any standing water and remove the insert if it has one.
This allows you to clean every nook and cranny.
Wash Thoroughly
Fill your sink with warm water and a few drops of dish soap. Submerge the accessories and scrub them with a soft sponge or bottle brush. Pay special attention to the pump nozzle and the inside of the toothbrush holder—these areas harbor the most grime.
Rinse well with clean water and let them air dry on a towel.
Disinfect And Dry
For an extra layer of cleanliness, spray the accessories with a disinfectant or wipe them down with rubbing alcohol. This kills any lingering bacteria. Let them air dry completely before reassembling.
Make sure the pump tube is dry inside to prevent mold growth. Once dry, put everything back in place.
8. Deep Clean the Toilet Exterior
The toilet exterior is a magnet for dust, splashes, and fingerprints, yet it's often neglected in favor of the bowl. A thorough wipe-down of every surface—tank, lid, seat, and base—makes a huge difference in both appearance and hygiene. Grab a disinfectant cleaner and a microfiber cloth to get started.
Start by spraying the entire exterior with a disinfectant cleaner, focusing on high-touch areas like the flush handle and seat lid. Wipe down the tank, lid, and seat with a damp microfiber cloth, then dry with a separate cloth to prevent streaks. For the base, get down on your hands and knees and wipe around the floor where the toilet meets the tile—this area collects dust and urine splatter.
Use a small brush or an old toothbrush to scrub crevices around the seat hinges and under the rim where grime hides. Finish by wiping the flush handle one more time to ensure it's germ-free.
Target High-touch Zones
The flush handle, seat lid, and toilet paper holder are touched multiple times a day. Give them extra attention with a disinfectant wipe or spray. Don't forget the small crevices where the seat attaches to the bowl—dirt and bacteria love to hide there.
Don't Skip The Base And Behind
The area around the base and behind the toilet is often overlooked. Move the toilet brush holder and any other items, then wipe the floor thoroughly. Use a long-handled duster or a cloth wrapped around a ruler to reach tight spaces behind the toilet.
9. Disinfect the Toilet Bowl
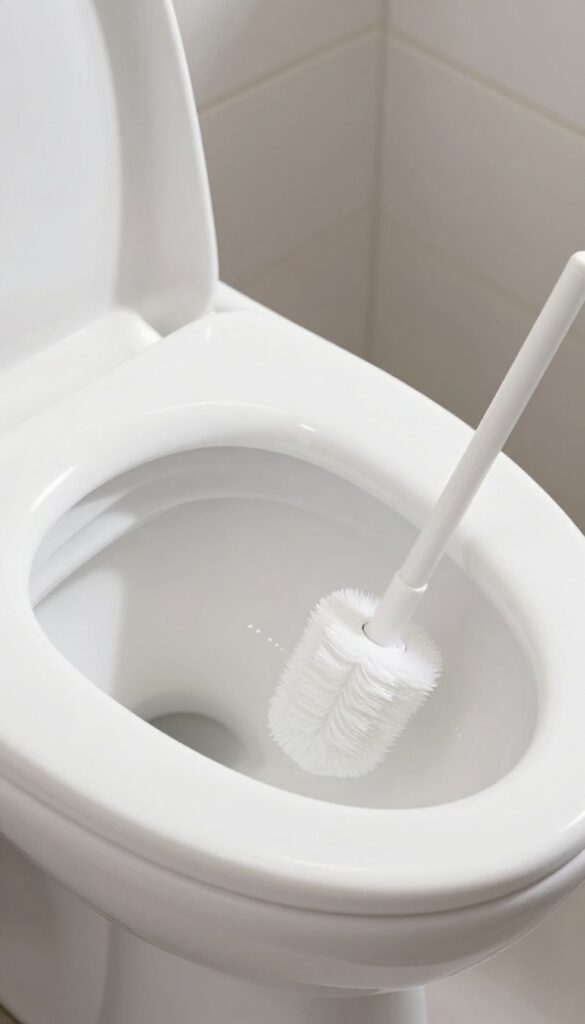
The toilet bowl is one of the most important areas to disinfect, but it's often rushed. A proper deep clean removes stains, kills germs, and prevents odors. This task is simple when you have the right tools and a little patience.
Apply And Let It Sit
Squeeze a generous amount of toilet bowl cleaner under the rim, making sure it coats the entire bowl. Let it sit for at least 10 minutes—this gives the chemicals time to break down stains and kill bacteria. For extra stubborn grime, leave it longer.
Scrub And Flush
Use a dedicated toilet brush to scrub the entire bowl, paying extra attention under the rim and around the waterline. Flush to rinse away the cleaner and loosened dirt. For a final polish, give the bowl a quick second scrub with clean water.
Tackle Tough Stains With A Pumice Stone
If you still see mineral deposits or rust rings, a pumice stone is your best friend. Wet the stone and gently rub the stain—it will wear away without scratching the porcelain. Rinse and flush afterward.
Always use a stone specifically labeled for toilets.
10. Wash the Shower Curtain or Door
Shower curtains and glass doors take the brunt of daily showers, collecting soap scum, mildew, and hard water stains. A quick rinse isn't enough—they need regular deep cleaning to stay fresh and clear. Let's get them looking like new again.
Fabric shower curtains can go right in the washing machine with a couple of towels and a cup of white vinegar. Run a warm cycle, then hang them back up to air dry. For plastic liners, wipe them down with a vinegar solution or toss them in the wash if the care label allows.
Glass doors need a different approach: spray with a 50/50 white vinegar and water mix, let it sit for a few minutes, then squeegee off. For stubborn soap scum, make a paste of baking soda and water, scrub gently with a non-abrasive sponge, and rinse thoroughly. Dry the glass with a microfiber cloth to prevent streaks.
Do this weekly to keep buildup at bay.
Machine-wash Fabric Curtains
Remove the curtain and any plastic rings or hooks. Add a couple of bath towels to the load to help scrub the fabric. Pour in 1/2 cup of white vinegar instead of detergent—it kills mildew and breaks down soap residue.
Run a warm cycle, then hang the curtain back up immediately to prevent wrinkles. Never put a fabric curtain in the dryer unless the label says it's safe.
Wipe Down Glass Doors
Mix equal parts white vinegar and warm water in a spray bottle. Spray the entire door surface and let it sit for 3–5 minutes. Use a squeegee in long, overlapping strokes to remove the solution.
For corners and edges, wipe with a microfiber cloth. If you see white buildup, scrub with a baking soda paste (3 parts baking soda to 1 part water) using a soft sponge. Rinse well and squeegee dry.
Prevent Future Soap Scum
After every shower, use a squeegee on glass doors to remove water droplets. For fabric curtains, pull them closed after showering so they dry evenly and don't cling to the tub. Once a week, spray the curtain or door with a vinegar solution as a maintenance step.
This simple habit cuts down on scrubbing time later.
11. Scrub the Shower Walls and Floor
Shower walls and floors take a beating from soap, body oils, and hard water. Over time, that buildup turns into a slimy film or stubborn scum that regular rinsing won't touch. A dedicated scrub session is the only way to restore that just-installed look.
Choose Your Cleaner Wisely
For daily maintenance, a simple spray-on daily shower cleaner works fine. But for a deep reset, you need something stronger. A commercial mildew cleaner is great for killing mold and lifting soap scum.
If you prefer natural options, mix equal parts baking soda and white vinegar into a paste. Apply it to the walls and floor, let it sit for 10 minutes, then scrub with a non-abrasive sponge or brush.
Focus On Grout And Corners
Grout lines are where grime hides best. Use a stiff grout brush or an old toothbrush to work the cleaner into the lines. Pay extra attention to corners where walls meet the floor or each other—those spots collect moisture and mildew quickly.
For tough stains, let the cleaner sit longer or use a grout-specific cleaner.
Don't Forget The Shower Floor
The shower floor is often overlooked, but it's a breeding ground for soap scum and mildew. Use a scrub brush with a long handle to reach every corner without straining your back. Rinse thoroughly with hot water to remove all residue.
If you have a textured or pebble floor, make sure to scrub in multiple directions to get into all the crevices.
12. Clean the Showerhead
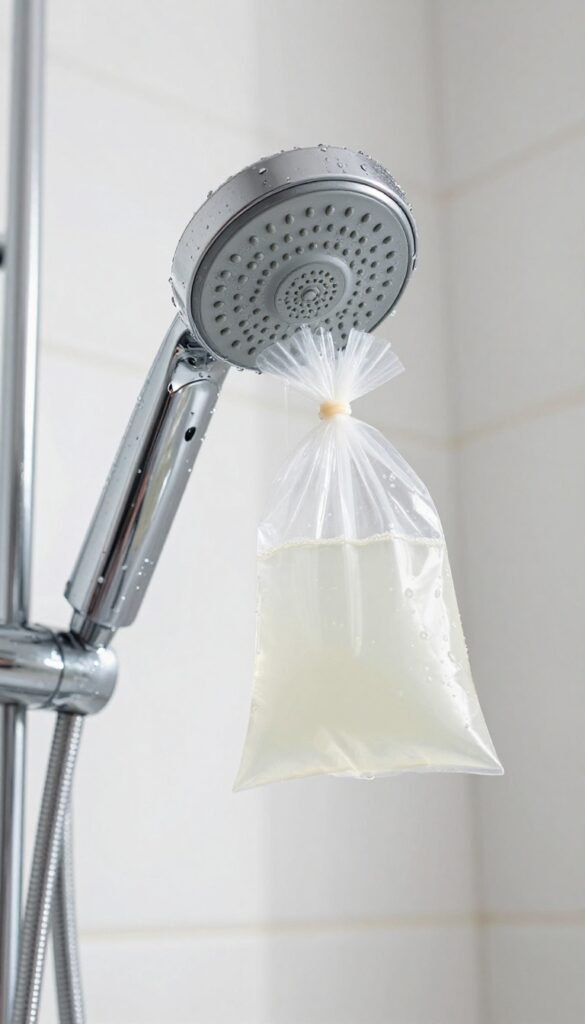
A clogged showerhead doesn't just look bad—it can mess with water pressure and even spray bacteria into your face. Mineral deposits from hard water build up inside the nozzles over time, creating a crusty layer that's tough to remove. Luckily, you don't need harsh chemicals or a plumber to fix it.
Vinegar is your best friend here because its acidity dissolves mineral deposits without scrubbing. The bag method is the most effective way to reach every nozzle without disassembling anything. For stubborn buildup, you can extend the soak time or use a toothpick to gently dislodge debris after soaking.
What You'll Need
Grab a sturdy plastic bag (a quart-size zip-top works well), white vinegar, a rubber band or twist tie, and a soft cloth. If your showerhead is brass or has a special finish, check the manufacturer's recommendations—vinegar can damage some coatings.
The Soaking Process
Fill the bag about halfway with vinegar. Slip it over the showerhead so the nozzles are submerged, then secure the bag with a rubber band above the connection point. Let it soak for at least an hour—overnight is even better for heavy buildup.
After soaking, remove the bag and turn on the hot water for a few minutes to flush out loosened deposits.
Final Rinse And Wipe
Once the water runs clear, wipe down the showerhead with a damp cloth to remove any remaining residue. For a polished look, buff with a dry microfiber cloth. Repeat this every few months to keep your showerhead spraying strong and clean.
13. Remove Grout Mildew
Grout lines are notorious for trapping moisture and turning into a breeding ground for black or green mildew. Even if you clean the tiles regularly, that discoloration can linger and make the whole shower look dingy. The fix is simpler than you think—just a targeted treatment and a little elbow grease.
Mildew in grout not only looks unpleasant but can also lead to musty odors and even damage the grout over time. By using a bleach gel or hydrogen peroxide paste, you can lift the stain without harsh scrubbing. Let the solution sit for about 10 minutes to penetrate the pores, then scrub with a small brush and rinse thoroughly.
For stubborn spots, repeat the process or use an old toothbrush for precision.
Choose Your Weapon
Bleach gel works great for white grout, but if you have colored grout, hydrogen peroxide paste is safer to avoid bleaching. Mix baking soda with hydrogen peroxide to form a thick paste—it’s gentle yet effective. Apply it directly to the grout lines using a small brush or your finger (wear gloves).
The Waiting Game
Let the solution sit undisturbed for 10 minutes. This dwell time is crucial because it allows the active ingredients to break down the mildew at the root. Don’t rush this step—if you scrub too soon, you’ll just spread the mildew around.
Scrub And Rinse
Use a stiff-bristled brush (like a grout brush or an old toothbrush) to scrub the grout lines in a circular motion. Focus on the darkest areas. After scrubbing, rinse thoroughly with warm water.
Wipe away any residue with a damp cloth, and open the bathroom door or window to speed up drying.
14. Wipe Down the Tub
Your bathtub takes a lot of abuse—soap residue, body oils, and hard water stains all build up over time. A quick rinse isn't enough to keep it looking fresh. A thorough wipe-down with the right cleaner makes a huge difference.
Start by choosing a non-abrasive cleaner to avoid scratching the surface. Spray it generously over the entire tub, focusing on the rim and corners where grime likes to hide. Let it sit for a few minutes to break down residue, then scrub with a soft sponge or cloth.
Rinse thoroughly with warm water to remove all cleaner, and dry with a microfiber towel to prevent water spots.
Don't Forget The Rim
The rim of the tub is a magnet for dust, soap scum, and mildew. Run your finger along it—if it feels gritty, it's time to clean. Use an old toothbrush or a small scrub brush to get into the crevices.
Wipe it down with a damp cloth afterward to remove any loosened debris.
Tackle Stubborn Stains
For hard water stains or yellowing, try a paste of baking soda and water. Apply it to the stain, let it sit for 10 minutes, then scrub gently. Avoid bleach on acrylic or fiberglass tubs, as it can cause discoloration.
Always test a small area first.
Rinse And Dry
Leaving cleaner residue on the tub can dull the finish and even cause skin irritation. Rinse thoroughly with hot water, then dry with a clean towel. This step also prevents new water spots from forming, keeping your tub sparkling longer.
15. Clean the Drain Covers
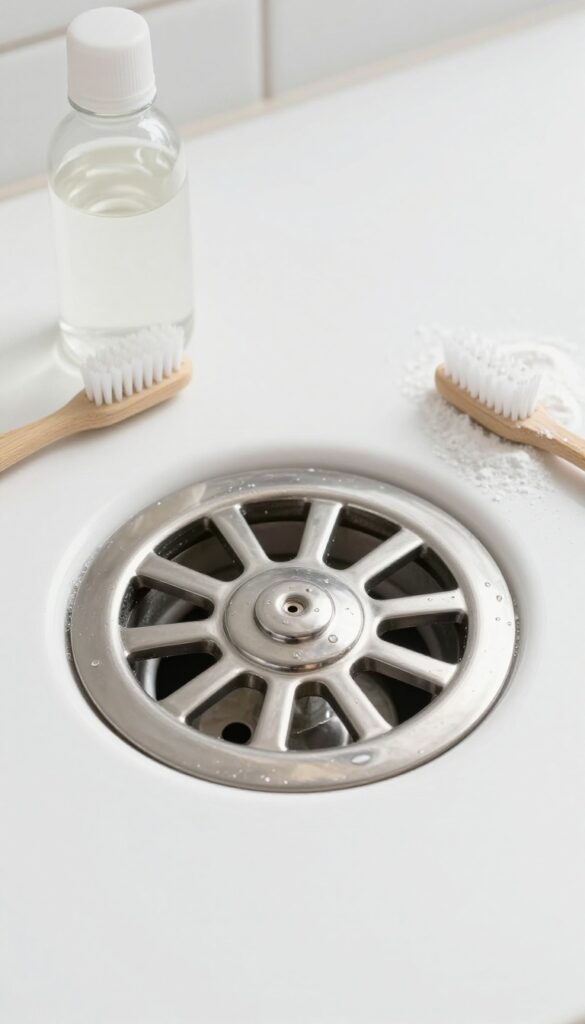
Drain covers are easy to overlook, but they trap hair, soap scum, and gunk that can slow drainage and cause odors. A quick clean makes a big difference in both function and freshness.
Start by removing the drain cover—most just pop off with a flathead screwdriver or a gentle pry. Pull out any visible hair and debris from the opening and the underside of the cover. Then soak the cover in a bowl of white vinegar for at least 30 minutes to dissolve mineral buildup and kill bacteria.
Scrub with an old toothbrush to get into the crevices, rinse well, and snap it back into place. For stubborn buildup, sprinkle baking soda on the cover before the vinegar soak for extra fizzing action.
Why Drain Covers Get So Gross
Every shower sends hair, skin cells, and soap residue down the drain. The cover catches most of it, but that gunk accumulates fast. Over time, it can trap moisture and create a breeding ground for mildew and bacteria, leading to that musty bathroom smell.
Tools You'll Need
You don't need much: a flathead screwdriver (or even a butter knife), an old toothbrush or small scrub brush, white vinegar, baking soda (optional), and a bowl big enough to hold the cover. That's it—no harsh chemicals required.
How Often To Do This
Aim to clean drain covers every two to four weeks, depending on how many people use the shower and how much hair is shed. If you notice water pooling or a slow drain, it's definitely time. A quick weekly rinse can help extend the time between deep cleans.
16. Disinfect the Trash Can
The trash can is one of the germiest spots in any bathroom, yet it rarely gets a proper cleaning. Tossing used tissues, cotton swabs, and empty bottles into a bin that hasn't been disinfected in months is a recipe for lingering odors and bacteria buildup. Giving it a thorough scrub is quick and makes a noticeable difference.
Empty And Prep
Start by taking out the liner and tossing any loose debris. If there's sticky residue or leaked liquid, use a paper towel to wipe it up before spraying anything. Work in a well-ventilated area or take the can outside if possible—this keeps fumes from lingering in your bathroom.
Spray And Scrub
Use a disinfectant spray or a mixture of bleach and water (1: 10 ratio) to coat the entire inside and outside of the can. Pay special attention to the bottom and the rim where grime collects. Let the solution sit for at least five minutes to kill germs, then scrub with a brush or sponge.
Rinse thoroughly with water and wipe dry with a clean cloth.
Finish With A Fresh Liner
Once the can is completely dry, place a new liner inside. For extra odor control, drop a dryer sheet or a few drops of essential oil on a cotton ball at the bottom before inserting the bag. This small step keeps the can smelling fresh between deep cleans.
17. Wipe Baseboards and Trim
Baseboards and trim are silent grime magnets. Every time you clean the floor or splash water around, dust and soap residue settle on these surfaces. They often get ignored because they're low and blend into the background, but once you notice the difference, you'll never skip them again.
Grab a damp microfiber cloth or a sponge and run it along the top edge of the baseboards, then wipe down the face. Pay extra attention to corners and areas near the toilet or shower where moisture lingers. For stubborn spots, a drop of dish soap in warm water works wonders.
Don't forget door frames and window sills—they collect the same dust and grime. This quick pass takes under five minutes and instantly makes the room feel fresher.
Why Baseboards Get So Dirty
Bathrooms are humid, and dust particles stick to moisture like glue. Every time you flush or run the shower, tiny droplets land on the baseboards. Over time, that film turns into a visible layer of grime.
Cleaning them weekly prevents buildup and keeps the room looking sharp.
The Right Tool For The Job
A microfiber cloth is ideal because it traps dust instead of pushing it around. For tight corners, an old toothbrush or a small detailing brush works perfectly. Avoid abrasive sponges that could scratch painted surfaces.
If you have textured trim, use a soft-bristled brush to dislodge dirt from crevices.
Don't Forget The Top Edge
The top of the baseboard is where dust bunnies hide. Run your finger along it—if you feel grit, it's time to clean. A quick swipe with a damp cloth or a vacuum attachment removes the dust before it falls back onto the floor.
This small extra step makes a big visual difference.
18. Clean the Floor Thoroughly
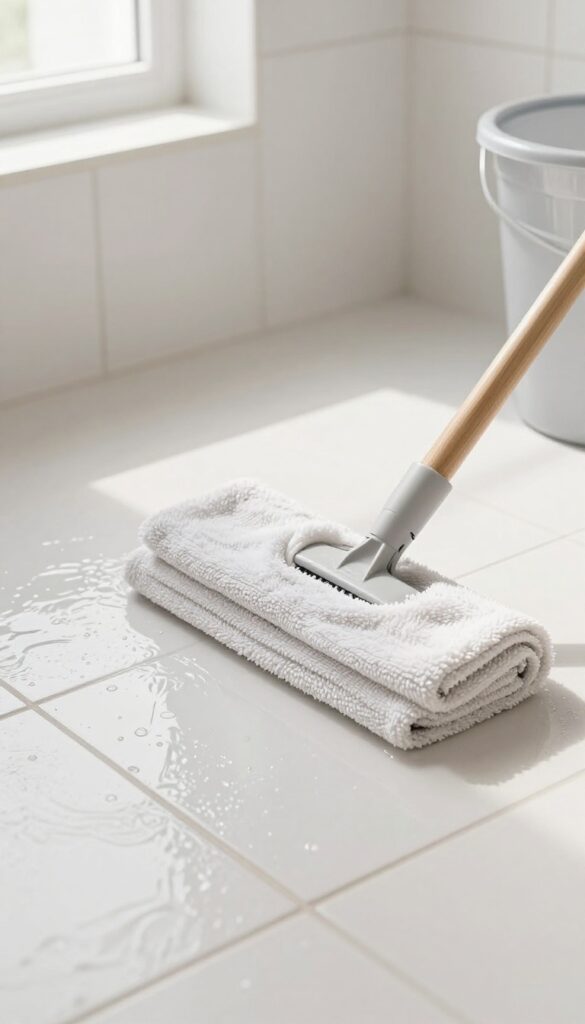
The floor is the largest surface in the bathroom, and it takes a beating from splashes, drips, and foot traffic. A quick once-over with a dry mop won't cut it if you want a truly spotless reset. This step is about going deep into corners and around fixtures where grime likes to hide.
Start by clearing the floor of any rugs, bath mats, or small items. Sweep or vacuum thoroughly, paying extra attention to corners and the area behind the toilet where dust bunnies collect. Then, mop with a cleaner suited to your floor type—avoid harsh chemicals on natural stone.
For a streak-free finish, use a microfiber mop and change the water when it gets dirty.
Prep And Dry Sweep
Remove everything from the floor, including toilet brush holders and small trash cans. Sweep or vacuum to pick up hair, dust, and debris. Use a crevice tool to get into tight spots like the gap between the vanity and the wall.
Choose The Right Cleaner
Match your cleaner to your flooring. For tile and grout, a mild detergent or vinegar solution works well. For vinyl or laminate, avoid excess water and use a pH-neutral cleaner.
Always test a small area first if you're using something new.
Mop With Technique
Dip your mop, wring it well so it's damp not soaking, and start from the farthest corner, working your way to the door. Pay extra attention to corners and behind the toilet—use a small scrub brush if needed. Rinse the mop head frequently to avoid spreading dirty water.
19. Refresh the Towels and Rugs
Towels and bath mats are in constant contact with moisture, skin cells, and bacteria. Even if they look clean, they can harbor odors and mildew. Giving them a proper refresh not only makes your bathroom feel more inviting but also extends their lifespan.
Swap And Wash
Pull out all used towels, hand towels, and bath mats. Replace them with fresh, clean ones so your bathroom instantly feels renewed. Wash the dirty linens in hot water with a cup of white vinegar added to the rinse cycle—this kills bacteria and removes musty smells without harsh chemicals.
Dry Them Thoroughly
After washing, dry towels and rugs on high heat until completely bone-dry. If you can, toss in a dryer sheet or wool dryer balls to keep them fluffy. Avoid leaving damp laundry in the machine, as that invites mildew growth.
Rotate And Store
Keep a set of backup towels and mats so you can rotate them weekly. Store extras in a dry, ventilated closet—never in a damp bathroom cabinet. This simple habit keeps your linens fresher for longer.
20. Organize the Medicine Cabinet
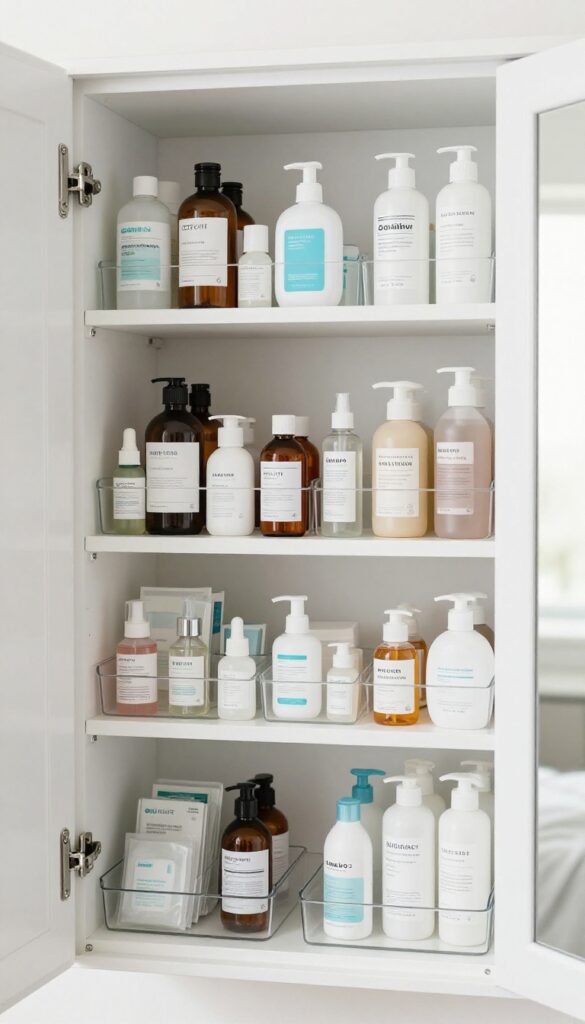
Your medicine cabinet might look tidy from the outside, but open it up and you'll likely find a jumble of half-used tubes, expired bottles, and random samples. Sorting it out not only makes your morning routine smoother but also ensures you're not keeping products past their prime. A quick declutter and wipe-down can turn this small space into a functional, stress-free zone.
Toss The Expired And Unused
Start by pulling everything out and checking expiration dates. Medications, ointments, and even sunscreen lose effectiveness over time. Dispose of anything expired or that you haven't touched in a year.
Check with your local pharmacy for proper disposal of old prescriptions.
Wipe Down Shelves And Doors
With the cabinet empty, spray a gentle cleaner on the shelves and interior walls. Wipe away dust, sticky residue, and any spills. Don't forget the door hinges and the mirror—clean glass makes the whole cabinet feel brighter.
Group And Arrange Neatly
Sort the keepers into categories: daily toiletries, first aid, hair products, and backups. Use small bins or trays to corral like items. Place frequently used items at eye level, and store backups on higher or lower shelves.
A tidy arrangement means you can grab what you need without rummaging.
21. Clean the Exhaust Fan Cover
The exhaust fan works hard to pull out moisture and odors, but when its cover gets caked with dust, it can't do its job. A dirty fan not only looks bad but also strains the motor and recirculates stale air. Here's how to give it a proper refresh.
Start by turning off the fan at the switch and, if possible, flipping the circuit breaker for safety. Use a step stool to reach the cover—most are held in place by clips or a single screw. Gently pop it off or unscrew it, then set the hardware aside in a safe spot.
Wash The Cover
Fill your sink with warm water and a few drops of dish soap. Submerge the cover and let it soak for five minutes to loosen the dust. Use a soft sponge or cloth to wipe away grime, then rinse thoroughly and dry with a clean towel.
Avoid abrasive scrubbers that could scratch the plastic.
Vacuum The Interior
With the cover off, you'll see the fan blades and housing. Attach a brush nozzle to your vacuum and gently suction away the dust from the blades, motor area, and surrounding ceiling. Be careful not to bend the blades—they're delicate.
If there's stubborn buildup, use a can of compressed air or a dry microfiber cloth.
Reassemble And Test
Once everything is dry, snap or screw the cover back into place. Turn the fan back on and listen for any unusual noises—a quiet hum means it's working efficiently. Run the fan for about 15 minutes after a shower to keep moisture at bay.
22. Polish Hardware and Fixtures
Faucets, handles, and towel bars are touched daily, so they collect fingerprints, water spots, and toothpaste splatters. When they're dull or streaky, the whole bathroom feels grimy. A quick polish brings back the shine and makes everything look well cared for.
Choose The Right Cloth
Microfiber is your best friend here. It picks up oils and residue without scratching chrome, brushed nickel, or brass. Avoid paper towels or abrasive sponges—they can leave tiny scratches that trap more grime over time.
Tackle Water Spots Naturally
Hard water leaves cloudy white spots on faucets and showerheads. Dampen a cloth with white vinegar and wipe the affected areas. Let it sit for a minute, then buff dry with a clean microfiber cloth.
For stubborn spots, a soft toothbrush dipped in vinegar works into crevices.
Don't Forget The Little Details
Polish the base of the faucet where it meets the counter, the back of handles, and the hinges of towel bars. These spots collect hidden grime. A quick once-over with a dry microfiber cloth after each use keeps them shining longer.
23. Final Touch: Scent and Air Out
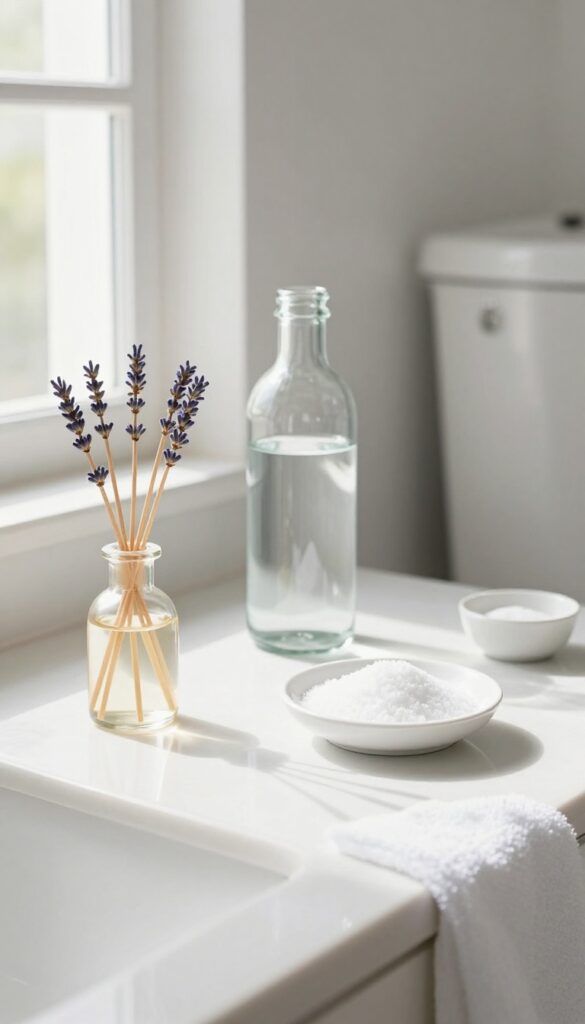
After all that scrubbing and polishing, the bathroom should look pristine. But the job isn't done until the air matches the fresh feel. Lingering chemical smells or musty odors can undo the clean vibe you've worked for.
A simple air-out and a subtle scent finish the transformation.
Open The Window Or Run The Fan
Before adding any fragrance, let the room breathe. Open the window wide or switch on the exhaust fan for at least 10 minutes. This clears out fumes from cleaning products and any trapped humidity.
Fresh air also helps surfaces dry completely, preventing mildew from forming in corners.
Choose A Subtle Scent
You don't need a heavy spray that overpowers the room. A few drops of eucalyptus or lavender essential oil on a cotton ball placed near the vent works wonders. Or use a reed diffuser on the counter for a constant, gentle aroma.
Avoid aerosol sprays that leave residue on mirrors and fixtures.
Maintain The Freshness
To keep that just-cleaned smell longer, place a small bowl of baking soda behind the toilet or under the sink. It absorbs odors silently. You can also refresh the scent daily by spritzing a mix of water and a few drops of your favorite oil onto the shower curtain or bath mat.
FAQ
How often should I do a deep bathroom clean?
Aim for a deep clean like this list once a week or every two weeks, depending on usage. Daily quick wipes can help maintain it.
What's the best cleaner for soap scum?
A mixture of equal parts white vinegar and dish soap works well. Spray it on, let it sit for 10 minutes, then scrub and rinse.
How do I remove hard water stains from glass?
Use a paste of baking soda and vinegar, scrub gently, then rinse. For stubborn stains, a commercial glass cleaner with a razor blade can help.
Can I use bleach on colored grout?
Bleach can discolor colored grout. Instead, use a hydrogen peroxide-based cleaner or a baking soda paste.
How do I keep my bathroom smelling fresh?
Regular cleaning, good ventilation, and a bowl of baking soda or an essential oil diffuser can keep odors at bay.
Conclusion
A spotless bathroom isn't about perfection—it's about creating a space that feels fresh and inviting every day. Work through these 23 tasks at your own pace, maybe tackling a few each weekend until everything shines.
Once you've got a system down, maintenance becomes second nature. Your bathroom will reward you with that clean, calm feeling that makes your whole day start better.