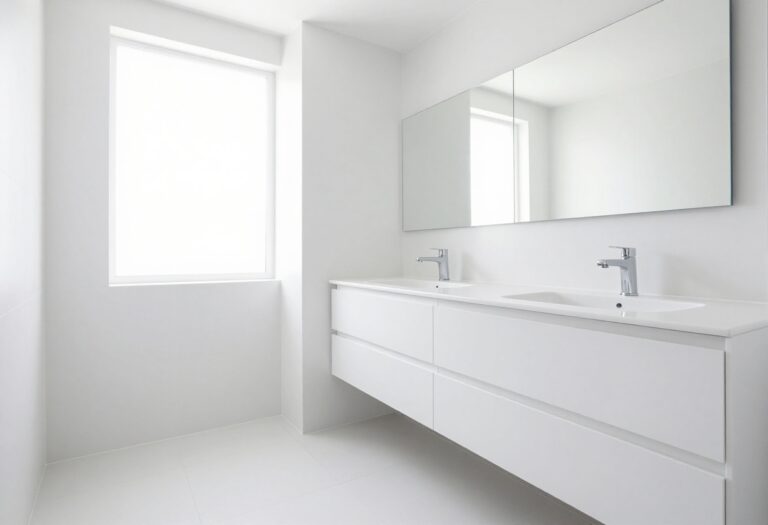
How to Clean a Toilet in 10 Fresh Bathroom Bowl Steps
A gleaming toilet bowl makes the whole bathroom feel cleaner. But scrubbing without a plan just wastes time and elbow grease. These 10 fresh steps turn a dreaded chore into a quick, satisfying win.
Forget harsh fumes and endless scrubbing. You'll learn exactly where to focus your effort—from the rim holes to the exterior—for visible results in minutes. Each step builds on the last, so you never double back.
Ready to see your reflection in that porcelain? Let's make your toilet sparkle with less work and more payoff.
1. Gather Your Supplies Without Overthinking It
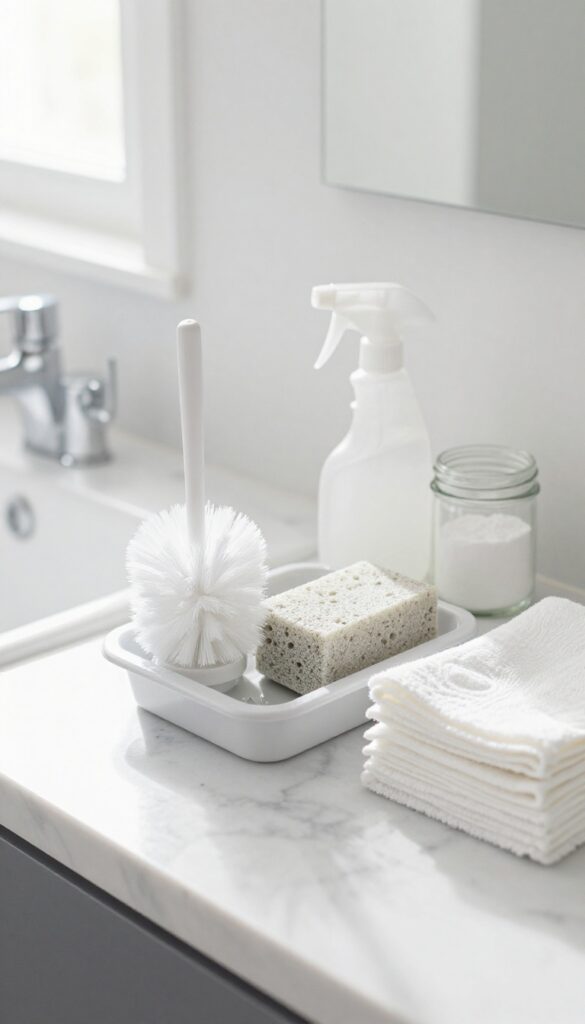
The secret to a fast toilet clean starts before you even touch the bowl. You don't need a dozen products or a complicated system. A simple caddy with the right basics saves you from running back and forth mid-scrub.
Keep your cleaning kit minimal but effective. A good toilet brush with stiff bristles handles the bowl. A pumice stone works wonders on stubborn mineral rings without scratching porcelain.
White vinegar and baking soda tackle odors and stains naturally. A microfiber cloth picks up dust and dries surfaces streak-free. Store everything in a small caddy under the sink or in a nearby cabinet so you can grab it and go.
The Must-have Brush And Stone
Invest in a toilet brush with a sturdy handle and angled bristles to reach under the rim. Replace it every few months when bristles start to fray. For hard water stains or rust rings, a wet pumice stone is your best friend.
Gently rub the stain—no need to scrub hard. The stone wears down slightly, leaving porcelain smooth.
Natural Cleaners That Work
White vinegar cuts through grime and disinfects without harsh fumes. Baking soda adds gentle abrasion for scrubbing. Mix them to create a fizzy paste for tough spots.
Skip bleach-based products if you have a septic system—they kill beneficial bacteria. Vinegar and baking soda are safer for pipes and the planet.
Keep A Dedicated Caddy
A small plastic caddy keeps everything together. Include your brush, stone, vinegar spray bottle, baking soda shaker, and a few microfiber cloths. Restock supplies after each deep clean so you're never caught empty-handed.
This simple habit cuts prep time to zero.
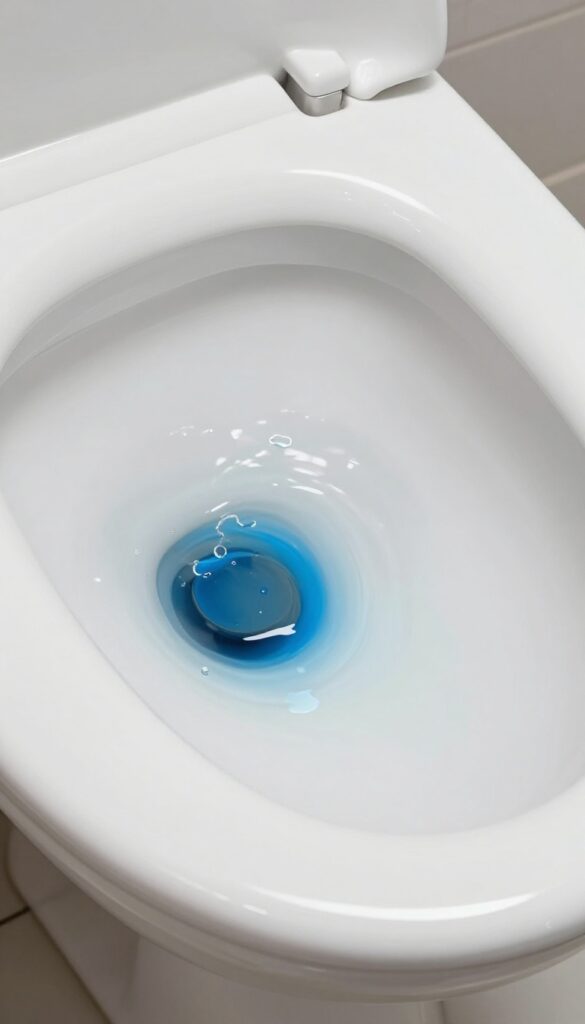
2. Flush and Add Your Cleaner of Choice

Before you pour anything into the bowl, give it a quick flush. This lowers the water level so your cleaner hits the stains directly instead of getting diluted. Then add your chosen cleaner—either a natural mix of vinegar and baking soda or a commercial gel—and let it sit for 10 minutes to break down grime.
Why Flush First?
A full bowl of water dilutes your cleaner, making it less effective. By flushing, you drop the water level below the rim holes, exposing the stained areas. This simple step ensures your cleaner works directly on the buildup, not the water.
Natural Vs. Commercial Cleaners
For a non-toxic option, sprinkle 1/2 cup of baking soda around the bowl, then pour in 1 cup of white vinegar. The fizzing action helps loosen deposits. If you prefer a commercial cleaner, choose a thick gel that clings to the porcelain.
Both work well—just pick what suits your preference.
Let It Sit
After applying the cleaner, close the lid and wait 10 minutes. This dwell time allows the ingredients to break down mineral deposits, stains, and bacteria. Use this time to clean other parts of the bathroom or just take a quick break.
3. Scrub the Bowl with a Purpose
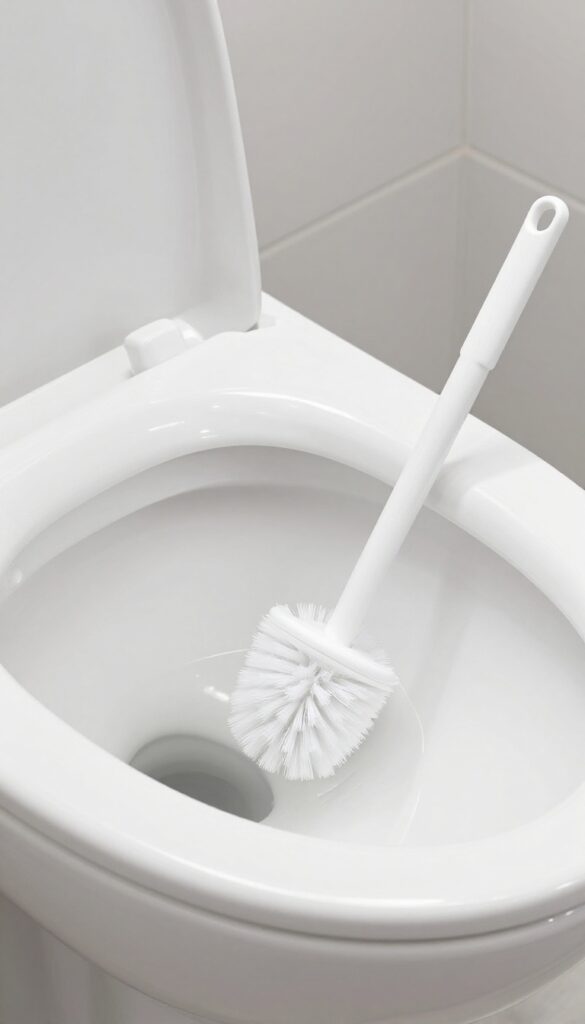
Scrubbing without direction is just moving dirt around. A targeted approach tackles the grime that actually builds up, especially under the rim and at the waterline. With the right technique, you can erase stains and prevent future rings in less than a minute.
Start Under The Rim
The rim holes are where most of the hidden grime lives. Angle your toilet brush upward and scrub firmly along the underside of the rim. This dislodges mineral deposits and bacteria that cause odors.
Don't forget the front area near the hinges—it's often neglected.
Work Down To The Waterline
After the rim, move the brush down the sides of the bowl in a circular motion. Focus on the waterline where calcium and rust rings form. Apply a bit of pressure to break up stubborn stains.
A few firm circles here make a big difference.
Reach The Trap
The trap is the curved passage at the bottom of the bowl. Use the brush's stiff bristles to scrub inside it as far as you can reach. This area collects debris and can cause lingering smells.
A quick scrub prevents buildup and keeps the bowl fresh longer.
4. Tackle Stubborn Hard Water Rings
Hard water rings can make a clean toilet look dirty. These mineral deposits cling to the bowl above the waterline and resist regular scrubbing. But you don't need harsh chemicals to remove them—just the right tool and a little patience.
Why Pumice Works Best
Pumice stone is a natural volcanic rock that's softer than porcelain but harder than mineral deposits. When wet, it gently abrades the ring without scratching the bowl. The stone itself wears down during use, so you're not damaging your toilet.
How To Use It Safely
First, wet both the pumice stone and the toilet bowl surface. Then, gently rub the hard water ring with light pressure. Let the stone do the work—don't scrub aggressively.
Rinse the area periodically to check progress and remove debris.
Repeat If Necessary
For thick or old rings, you may need multiple passes. Rinse the stone clean between attempts. Once the ring is gone, flush to clear any residue.
Your bowl will look like new without any chemical smell.
5. Don't Forget the Rim Holes
Most people scrub the bowl and call it done. But the real grime hideout is under the rim—those tiny holes where water enters during a flush. Over time, mineral deposits and bacteria build up, which can weaken the flush and cause odors.
A quick scrub of the rim holes keeps your toilet performing well and smelling fresh.
Grab a small brush—a dedicated toilet brush with a narrow head works, or an old toothbrush for precision. Lift the toilet seat and lid, then tilt the brush upward to reach under the rim. Scrub each hole in a circular motion, paying extra attention to the front where buildup is worst.
Do this every few cleans, and you'll prevent stubborn stains from forming deep inside the rim.
Why Rim Holes Matter
The rim holes are the gateway for water to swirl and clean the bowl. When they get clogged with grime, the flush loses power and leaves streaks. Worse, bacteria can thrive in those dark, damp crevices.
Cleaning them isn't just cosmetic—it's about keeping your toilet working efficiently.
Tools That Reach Best
A standard toilet brush often can't angle upward into the rim. A rim brush—curved and slim—is ideal. If you don't have one, an old toothbrush works perfectly.
For extra stubborn deposits, dip the brush in vinegar or a mild cleaner before scrubbing. Avoid abrasive tools that could scratch the porcelain.
How Often To Clean Under The Rim
Make rim hole cleaning part of your deep-clean routine, about once a month. If you have hard water, you might need to do it every two weeks. A quick check: run your finger under the rim (wear gloves).
If you feel slime or grit, it's time to scrub.
6. Clean the Exterior from Top to Bottom
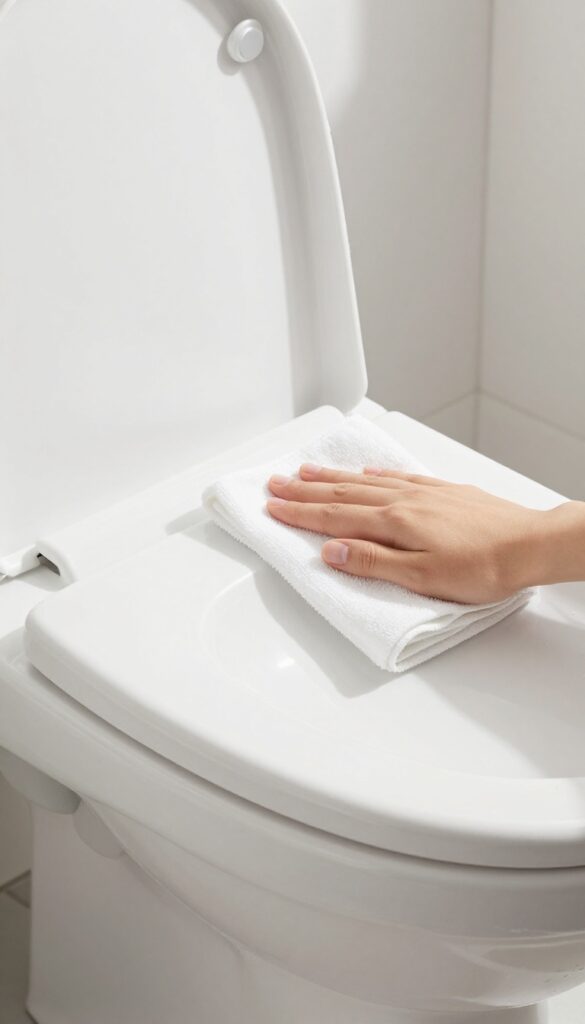
The outside of your toilet gets just as grimy as the inside, but it's often overlooked. Dust settles on the tank lid, splashes hit the base, and the flush handle gets touched by every hand in the house. A quick exterior wipe-down makes the whole toilet look brand new.
Start at the top and work your way down so you don't drip dirty water onto already-clean surfaces. Spray the tank lid, then the flush handle, then the sides of the tank and bowl. Finally, wipe the base and the floor around it.
Use a microfiber cloth—it traps grime better than paper towels and won't leave lint behind.
Work Top-down
Always start with the tank lid and work downward. That way, any drips or dust that fall land on surfaces you haven't cleaned yet. Wipe the lid first, then the flush handle, then the sides of the tank, then the bowl exterior, and finally the base and pedestal.
Don't Forget The Flush Handle
The flush handle is one of the germiest spots in the bathroom. Give it a good spray and wipe it thoroughly. If yours is a push-button, clean around the buttons too.
A quick disinfect here helps reduce the spread of germs.
Get The Base And Floor
Splashes and dust collect around the base of the toilet. Spray the base and the floor area around it, then wipe with a microfiber cloth. If you have a pedestal-style toilet, get into the crevices where the bowl meets the floor.
7. Disinfect the Seat and Lid

The seat and lid are the parts you touch every single time you use the toilet, but they rarely get a thorough cleaning. Spraying a disinfectant on the top surface is a good start, but the real grime hides on the underside and around the hinges. This step ensures every inch is sanitized, so you're not transferring bacteria back to your hands or the floor.
Start by lifting the lid and seat to expose the hinges and the bottom of the seat. Spray a generous amount of disinfectant on the top of the lid, the top and bottom of the seat, and the hinge area. Let it sit for at least a minute to kill germs.
Then wipe everything down with a clean cloth or paper towel. Don't forget to wipe the rubber bumpers on the underside of the seat—they collect grime too.
Don't Skip The Hinges
Hinges are a magnet for urine splatter and dust. Spray them directly and let the disinfectant soak in. Use an old toothbrush or a small detail brush to scrub around the hinge pins if they look crusty.
Wipe away any loosened gunk before moving on.
The Underside Matters
Most people only wipe the top of the seat, but the underside is where bacteria really build up. When you lift the seat, you're exposing that surface to the air—and to your hands. A quick spray and wipe here makes a big difference in overall hygiene.
Let It Air Dry For Best Results
After wiping, leave the seat and lid up for a few minutes to air dry completely. This gives the disinfectant extra time to work and prevents moisture from getting trapped under the seat. A dry surface is less hospitable to germs.
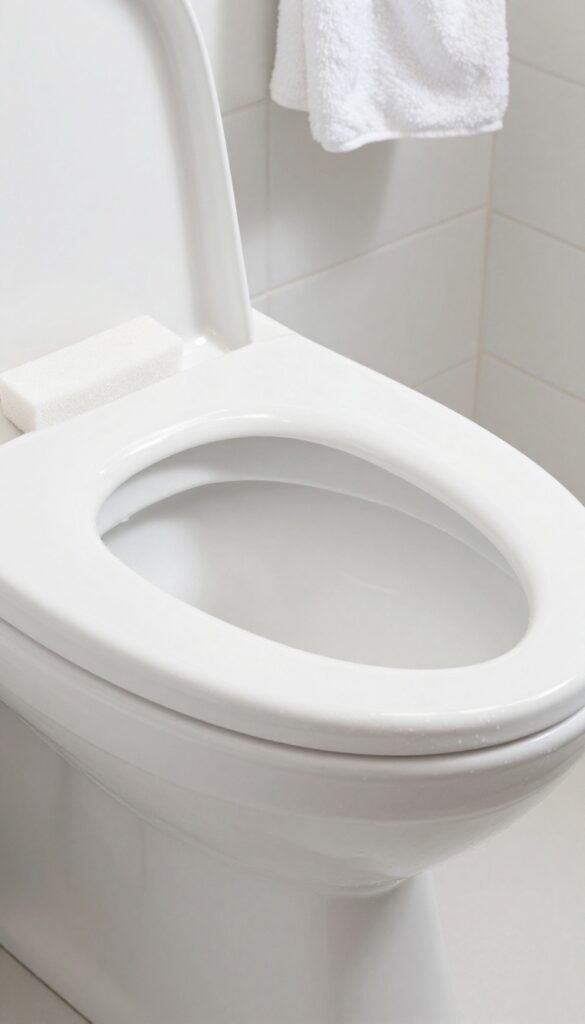
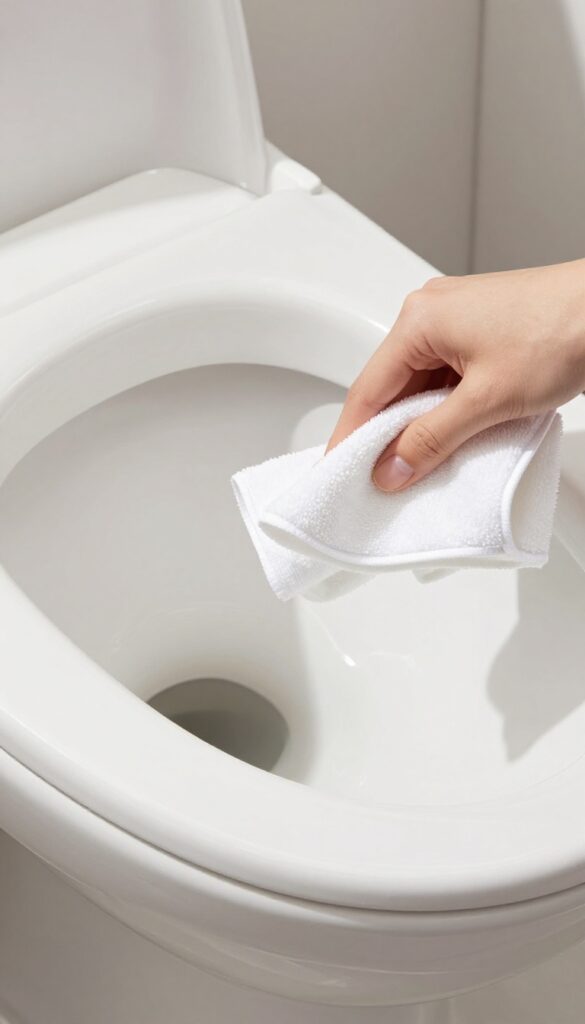
8. Freshen the Bowl with a Final Rinse
That last flush isn't just for show—it's your chance to wash away all the cleaner and loosened grime. A thorough rinse reveals any spots you missed while the bowl was still soapy. Catching them now saves you from starting over later.
Flush And Inspect
Give the handle a firm push and watch the water swirl away. As the bowl refills, take a close look at the waterline, under the rim, and around the siphon jet. Clean water makes missed spots obvious.
Touch Up Stubborn Marks
If you spot a lingering ring or a fleck of grime, don't ignore it. Grab your toilet brush and give that area a quick scrub while the bowl is still wet. The remaining water helps the bristles work without splashing.
A few seconds now beats a full re-scrub later.
One Last Swish For Freshness
For an extra-fresh finish, add a small squirt of cleaner or a drop of essential oil to the bowl after your touch-up. Swish it around with the brush, then flush one more time. This leaves the bowl smelling clean and looking streak-free.
9. Dry and Polish for a Streak-Free Finish
Once the toilet is clean and flushed, a quick dry and polish makes all the difference. Water spots and lingering moisture can dull the shine you just worked for. A dry microfiber cloth is your best friend here—it lifts every trace of water and leaves a mirror-like finish.
Grab a clean, dry microfiber cloth and start buffing the inside of the bowl first. Work from the rim down to the waterline, using circular motions. Then move to the outside, including the tank, lid, and base.
Pay extra attention to the hinge area and behind the seat where water often hides.
Why Microfiber Works Best
Microfiber cloths have tiny fibers that trap dust and moisture without scratching porcelain. They absorb more water than cotton rags and leave no lint behind. For best results, use a dedicated cloth that hasn't been washed with fabric softener.
The Buffing Technique
Start at the top and work your way down. Use a firm, circular motion to buff the porcelain until it shines. For the inside, wrap the cloth around your hand and reach into the bowl, getting every curve.
Flip the cloth often to avoid redepositing moisture.
Don't Forget The Exterior
The tank, lid, and base need the same attention. Wipe the tank top and lid, then the sides, and finally the base where it meets the floor. A dry surface resists new stains and keeps the toilet looking clean longer.
10. Maintain with a Weekly Quick Clean
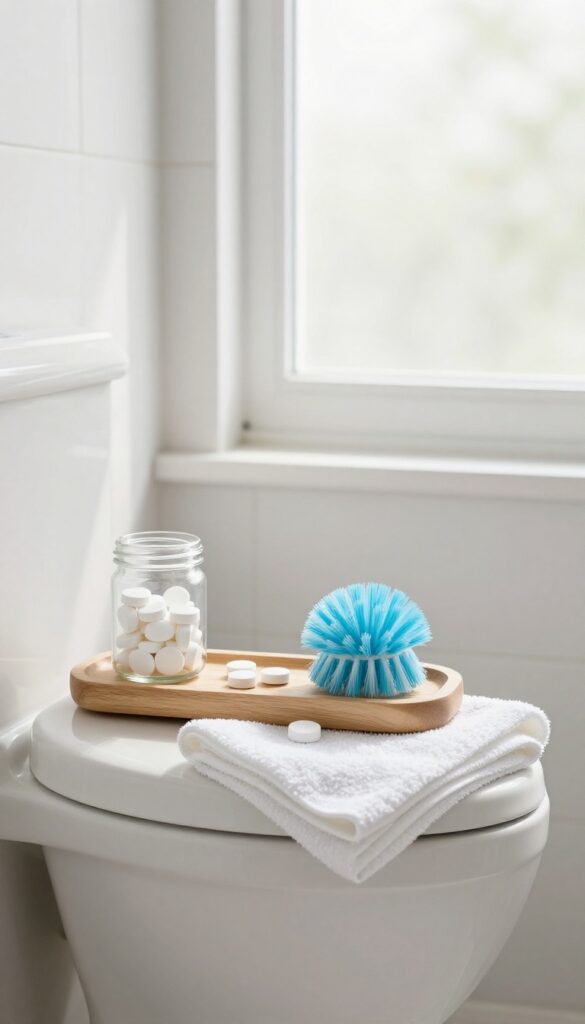
Consistency is the secret weapon against toilet grime. A quick daily swish and a weekly deep clean prevent buildup, so you never face a stubborn stain again. Drop a vinegar tablet in the tank monthly to keep mineral deposits at bay.
This routine saves you time and effort in the long run.
Daily Swish
After each use, give the bowl a quick swirl with the toilet brush. This dislodges any debris before it settles. A 2-second habit keeps the bowl fresh and reduces the need for heavy scrubbing.
Weekly Deep Clean
Once a week, do a thorough scrub with a toilet cleaner. Focus on under the rim, the siphon jet, and the waterline. Let the cleaner sit for 10 minutes before scrubbing and flushing.
This prevents hard water rings and stains.
Monthly Tank Treatment
Drop a vinegar tablet or a cup of white vinegar into the overflow tube once a month. Let it sit for 30 minutes, then flush. This dissolves mineral buildup inside the tank and keeps the flush mechanism working smoothly.
FAQ
How often should I clean my toilet?
For most households, a weekly deep clean is enough. Quick daily swishes with a brush help prevent stains and odors.
Can I use bleach to clean my toilet?
Yes, but avoid mixing bleach with other cleaners, especially ammonia or vinegar. Use it sparingly to protect the rubber seals.
What's the best natural cleaner for toilet bowls?
White vinegar and baking soda are effective and safe. Pour 1 cup of vinegar and 1/2 cup of baking soda into the bowl, let it fizz, then scrub.
How do I remove black mold under the rim?
Use a small brush or toothbrush with a bleach-based cleaner or vinegar. Scrub the rim holes thoroughly and flush. Repeat if needed.
Why does my toilet bowl get stains so quickly?
Hard water minerals or high iron content can cause rapid staining. A pumice stone or a commercial hard water remover helps. Consider a water softener for long-term prevention.
Conclusion
Once you've worked through these 10 steps, your toilet will look and smell noticeably fresher without requiring harsh chemicals or endless scrubbing. The key is to establish a simple routine—a quick daily wipe and a weekly deep clean using the methods that fit your schedule best. Consistency is what keeps that just-cleaned feeling lasting longer.
Pick the tools and techniques that work for you, and you'll find that maintaining a sparkling toilet bowl becomes almost effortless. Your bathroom will feel cleaner, and you'll save time and effort in the long run.