17 Fridge Cleaning Ideas for Fresh Organized Food Storage
Opening your fridge to find sticky shelves, forgotten leftovers, and a mysterious smell is never a good start to the day. A messy refrigerator doesn't just look bad—it can actually make your food spoil faster and lead to unnecessary waste.
The good news is that keeping your fridge fresh and organized doesn't require a deep clean every week. With a few smart habits and simple tricks, you can turn your refrigerator into a space where food stays crisp, visible, and easy to grab.
These 17 ideas will help you clean smarter, not harder, so your fridge works for you instead of against you.
1. Start with a Full Empty and Shelf Removal
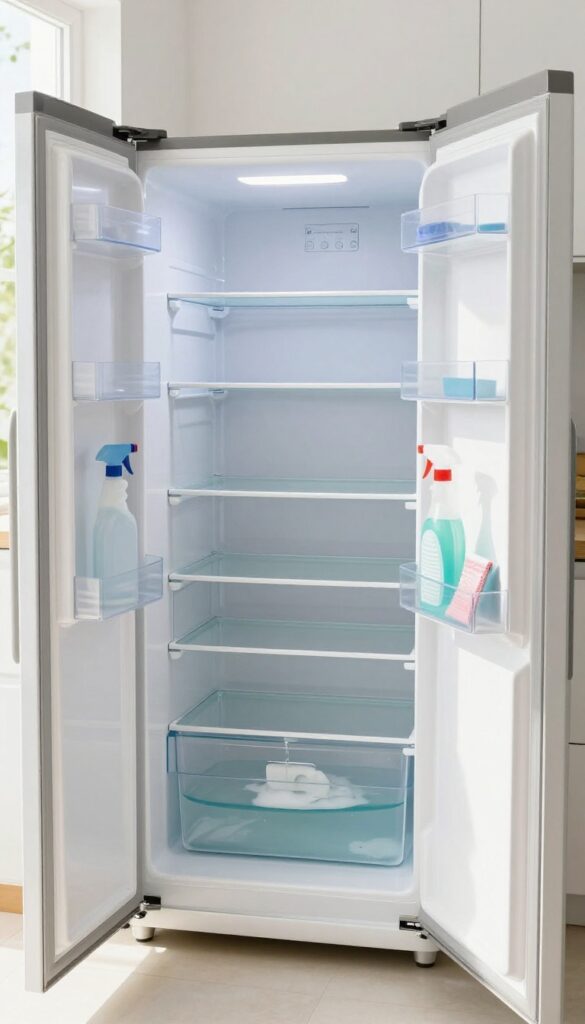
You might be tempted to just wipe down the shelves while everything is still inside, but that only cleans the easy parts. To truly get your fridge spotless, you need to empty it completely and take out all removable shelves and drawers. This gives you full access to every corner, nook, and cranny where crumbs and spills love to hide.
Once everything is out, you can see exactly what needs attention. You'll also be able to inspect the shelves individually, making it easier to scrub them without awkward angles. Plus, an empty fridge lets you check for expired items you might have overlooked.
Clear The Decks
Start by removing all food items and placing them in a cooler or insulated bag to keep them cold. Then, take out every removable shelf, drawer, and bin. This step is crucial because it exposes the back wall, floor, and sides of the fridge where spills often drip down and harden.
Soak And Scrub Separately
Wash removable parts in warm, soapy water in your sink. Use a gentle sponge or cloth to avoid scratching. Let them air dry completely before putting them back.
Meanwhile, you can focus on the empty interior without worrying about getting the shelves wet again.
Don't Forget The Gaskets
While the fridge is empty, take a moment to wipe down the rubber door gaskets. These seals can collect grime and mold, which affects the fridge's efficiency. A quick wipe with a mild cleaner keeps them flexible and airtight.
2. Use Baking Soda Paste for Stubborn Stains
Some spills just won't budge with a simple wipe. Dried ketchup, sticky jam, or crusty sauce can laugh at plain water. That's where baking soda comes in.
It's gentle enough not to scratch your shelves but tough enough to lift even the most stubborn messes.
How To Make The Paste
Mix about three parts baking soda with one part water in a small bowl. Stir until it forms a thick, spreadable paste. You want it to be like toothpaste—not too runny, not too dry.
Add a drop of dish soap if you're dealing with greasy stains.
Apply And Let It Sit
Use a soft cloth or your fingers to spread the paste over the stain. Cover it completely and let it sit for 5 to 10 minutes. This gives the baking soda time to break down the grime without you having to scrub hard.
Wipe Away Without Scratching
After the wait, dampen a microfiber cloth with warm water and wipe the area in circular motions. The paste should come off easily, taking the stain with it. Rinse the cloth and do a final pass to remove any residue.
Your shelf will look like new.
3. Line Shelves with Easy-Clean Mats
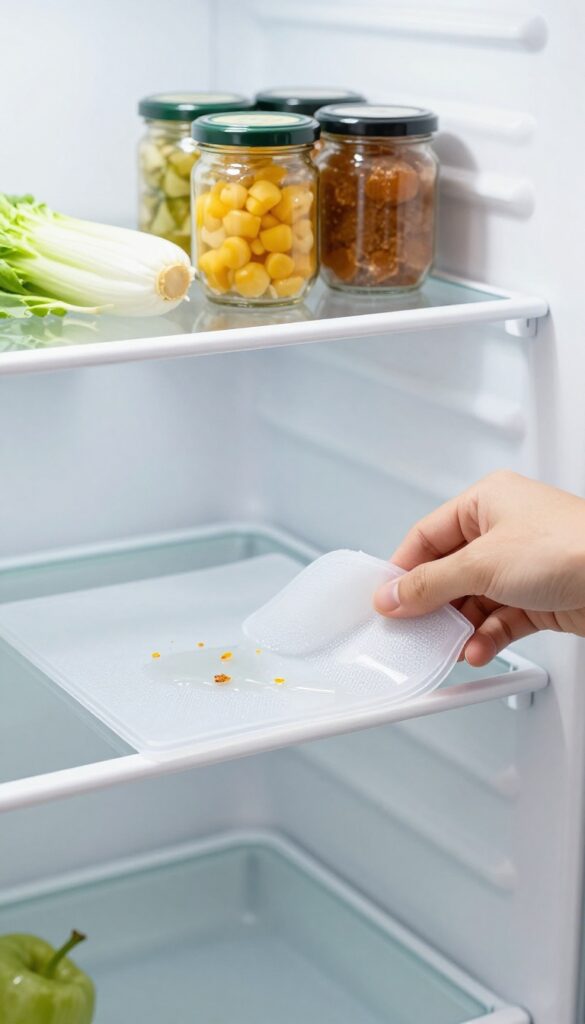
Shelf liners are one of those small upgrades that make a huge difference in daily maintenance. A clear, washable mat catches every drip and crumb before they hit the glass, so you're not scrubbing dried-on spills later. When it gets dirty, just pull it out, rinse it off, and put it back—no scraping or soaking required.
Shelf liners are one of those small upgrades that make a huge difference in daily maintenance. A clear, washable mat catches every drip and crumb before they hit the glass, so you're not scrubbing dried-on spills later. When it gets dirty, just pull it out, rinse it off, and put it back—no scraping or soaking required.
Choose The Right Material
Look for non-slip, food-grade silicone or PVC mats that are dishwasher safe. Avoid paper or fabric liners—they absorb moisture and can get moldy. Clear mats let you see the shelf underneath, keeping your fridge looking neat.
Cut To Fit Perfectly
Measure each shelf before cutting the liner. Leave a small gap around the edges so air can circulate. A snug fit prevents the mat from bunching up when you slide items around.
Replace When Worn
Even the best liners wear out over time. If you notice cracks, sticky spots, or discoloration, swap in a fresh one. It's a cheap fix that keeps your fridge looking clean without extra effort.
4. Store Condiments in a Lazy Susan
Condiment bottles are notorious for getting pushed to the back of the fridge and forgotten until they expire. A lazy Susan solves that problem by making every bottle easy to spin into view. This simple turntable keeps your ketchup, mustard, hot sauce, and dressings organized and accessible.
A lazy Susan is a rotating tray that sits on a shelf. You load it with jars and bottles, then give it a spin to find what you need. No more digging or knocking things over.
It works best for items of similar height, so group tall bottles together on one turntable and shorter jars on another. This idea is especially helpful if you have deep shelves where things tend to hide.
Choose The Right Size
Measure your fridge shelf depth and width before buying a lazy Susan. A 10- to 12-inch diameter turntable fits most standard shelves. For narrow spaces, look for a rectangular or half-moon shaped lazy Susan that fits snugly against the side.
Group By Use
Keep everyday condiments like ketchup and mustard on one turntable near the front. Reserve a second turntable for less frequently used items like specialty sauces or salad dressings. This way you grab what you need without spinning through everything.
Prevent Spills
Choose a lazy Susan with a raised edge or a non-slip surface to keep bottles from sliding off. If your turntable doesn't have a lip, add a silicone mat underneath for extra grip. Wipe down the tray regularly to avoid sticky residue buildup.
5. Group Similar Items in Clear Bins
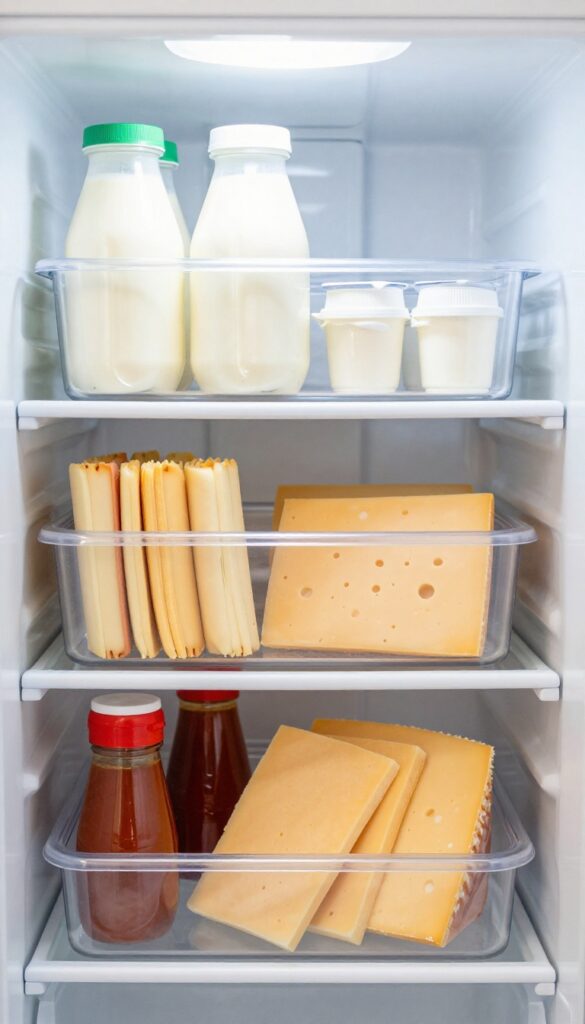
Clear plastic bins are a game-changer for fridge organization. They create designated homes for different food categories, so you can grab a whole section at once for cleaning or cooking. No more digging through shelves to find that yogurt hiding behind a jar of pickles.
Start by measuring your fridge shelves and buying a set of clear, rectangular bins. Look for ones with handles and a low profile so they slide in and out easily. Then group your items logically: dairy in one bin, deli meats in another, and all those condiment bottles in a third.
For produce, use bins with ventilation holes or leave the lid off to allow airflow. This system keeps everything visible and contained, so spills stay inside the bin instead of spreading across the shelf. When it's time to clean, simply lift out the entire bin and wipe down the shelf underneath.
You'll save time and avoid the hassle of moving every single item.
Choose The Right Bins
Not all bins are created equal. Opt for clear, BPA-free plastic so you can see what's inside without opening them. Measure your fridge's depth and width to ensure a snug fit.
Bins with handles make it easier to pull out heavy sections, like a drink bin filled with cans.
Categorize Smartly
Think about how you cook and eat. Keep breakfast items like yogurt, cheese, and eggs together. Group lunch fixings—deli meats, cheeses, and spreads—in another bin.
For produce, separate fruits from vegetables, as some fruits emit ethylene gas that can spoil greens faster.
Label For Quick Access
Add simple labels to the front of each bin using a label maker or chalk marker. This helps everyone in the household find and return items to the right spot. Labels also remind you to check expiration dates and rotate stock when you restock.
6. Keep a Fridge Thermometer for Optimal Temperature
Most refrigerators come with a built-in thermostat, but those readings aren't always accurate. A simple, inexpensive fridge thermometer gives you a real-time look at what's happening inside. Placed on the middle shelf, it helps you catch temperature swings before they affect your food.
Keeping your fridge at the right temperature is the single most important thing you can do to keep food fresh. The sweet spot is between 35°F and 38°F (1. 7°C to 3.
3°C). At this range, bacterial growth slows way down, and your produce, dairy, and meats stay good much longer. A thermometer takes the guesswork out of it.
Why Temperature Matters
Even a few degrees too warm can cut shelf life in half. Milk sours faster, lettuce wilts, and leftovers spoil sooner. On the flip side, if your fridge is too cold, you might freeze your veggies or eggs without realizing it.
A thermometer helps you dial in the perfect balance.
Where To Place It
Put the thermometer on the middle shelf, away from the walls and door. The middle is the most stable zone—not too cold near the back, not too warm near the door. Check it after the fridge has been closed for a few hours for an accurate reading.
How To Adjust
If the thermometer reads above 40°F, turn your fridge's temperature dial down a notch. Wait 24 hours and check again. Repeat until you hit that 35–38°F range.
It's a simple process that makes a huge difference in how long your food lasts.
7. Use a Vinegar-Water Spray for Daily Wipes
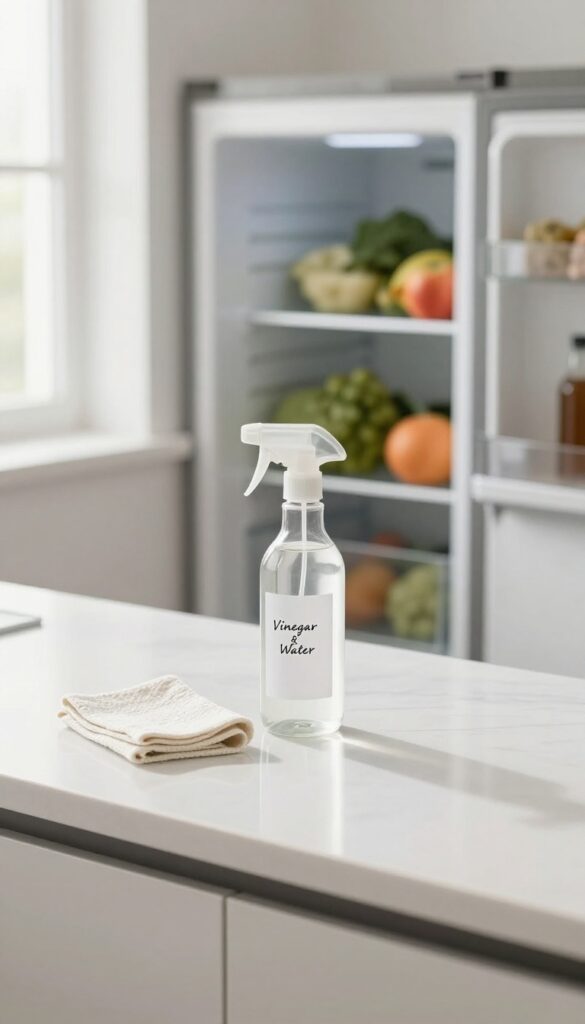
A quick daily wipe can save you from a full-blown scrubbing session later. The secret weapon is a simple vinegar-water spray that cuts through grime and keeps odors at bay without harsh chemicals. Mix equal parts white vinegar and water in a spray bottle, and you've got an all-natural cleaner that's safe for food surfaces.
A few spritzes and a wipe each day prevent sticky spills from hardening and stop smells from taking hold.
The key is consistency. Keep a spray bottle under your sink or in a caddy near the fridge. After cooking or before bed, do a quick scan of shelves and drawers.
Spray any spots, let it sit for a minute, then wipe with a microfiber cloth. This habit takes less than two minutes but keeps your fridge looking and smelling fresh. Vinegar is acidic enough to dissolve light grease and sugar residues, yet gentle on plastic and glass.
It also neutralizes alkaline odors like those from spoiled milk or onions. If you dislike the vinegar smell, add a few drops of lemon essential oil—it fades quickly as it dries.
Where To Keep The Spray
Store your vinegar-water spray in a clearly labeled bottle near the fridge. A small spray bottle tucked into a caddy with a microfiber cloth makes it easy to grab. Avoid keeping it inside the fridge, as cold temperatures can affect the spray mechanism.
Instead, place it on the counter or under the sink.
What To Wipe Daily
Focus on high-touch areas: handles, shelves where you place raw produce, and the door bins where milk and juices often drip. Also wipe the bottom of the crisper drawer if you store loose veggies. Don't forget the rubber gasket around the door—it can trap crumbs and mold.
When To Deep Clean Instead
Daily wipes handle light messes, but you still need a deep clean every few weeks. For stuck-on gunk, use a paste of baking soda and water. And if you notice mold, switch to a stronger solution of 1 part vinegar to 2 parts water.
The daily spray just keeps things manageable between deep cleans.
8. Store Herbs Like Fresh Flowers
Fresh herbs are expensive and tend to wilt within days if you just toss them in the crisper drawer. But there's a simple trick that keeps them perky for up to two weeks: treat them like cut flowers. Trim the stems, pop them in a jar with water, and cover loosely with a plastic bag.
It's that easy.
This method works wonders for hardy herbs like parsley, cilantro, basil, and mint. The water hydrates the stems, while the bag creates a mini greenhouse that locks in humidity. Just change the water every few days and trim the stems again to keep them fresh.
You'll never waste another bunch of herbs.
Which Herbs Work Best?
Soft-stemmed herbs like basil, cilantro, parsley, and dill thrive with this method. Hardier herbs like rosemary, thyme, and oregano also benefit, but they can last even longer if you wrap them in a damp paper towel instead. For basil, keep it at room temperature—it's sensitive to cold.
How To Set It Up
Start by trimming about an inch off the stems at a 45-degree angle. Place the herbs in a clean jar or glass with about an inch of water. Loosely cover the leaves with a plastic bag and secure it with a rubber band or just let it sit loosely.
Store in the fridge, except for basil which stays on the counter.
Pro Tips For Maximum Freshness
Change the water every two days to prevent bacteria from forming. If leaves start to yellow, remove them immediately. For extra longevity, add a teaspoon of sugar to the water—it provides nutrients.
And never overcrowd the jar; give each bunch room to breathe.
9. Designate a 'Eat First' Bin
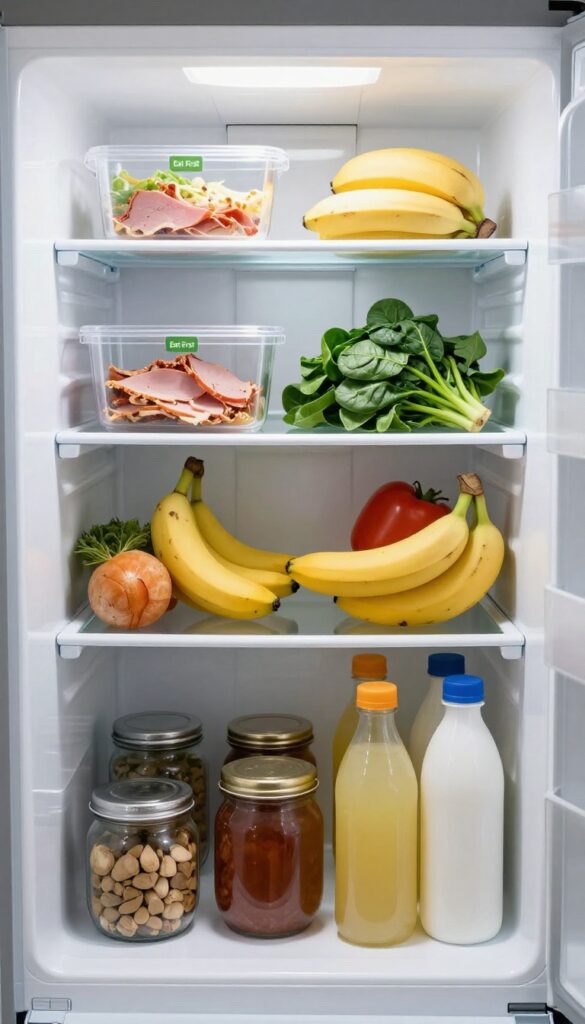
We've all been there: you find a half-used container of yogurt buried behind the ketchup, three weeks past its prime. A simple 'Eat First' bin puts an end to that. It's a dedicated spot for items that need to be used soon, so nothing gets forgotten until it's too late.
This trick works because it makes the soon-to-expire items visible and top of mind. Instead of rummaging through shelves, you just check the bin before cooking or snacking. It's a small change that can dramatically cut down on food waste and save you money.
What Goes In The Bin
Think leftovers from two nights ago, the last few slices of deli meat, or that bag of spinach that's starting to wilt. Also include any fresh fruit or veggies that are on their last leg. The key is to only place items you genuinely intend to eat in the next day or two.
Where To Place It
Put the bin on the top shelf, right at eye level. That's the most visible spot in the fridge, so you'll see it every time you open the door. Avoid the crisper drawers or bottom shelves, where it's easy to overlook.
Make It A Habit
Every time you put away groceries, take a quick look at what's already in the fridge. Move anything that's close to its expiration date into the bin. Also, make a point to check the bin before you plan meals or reach for a snack.
10. Use a Toothbrush for Gaskets and Crevices
The rubber gaskets around your fridge door and the narrow crevices inside might seem like minor spots, but they're prime real estate for mold, grime, and bacteria. A dirty seal can also let cold air escape, making your fridge work harder and raising your energy bill. Luckily, a simple old toothbrush can tackle these tight spaces with ease.
Dip an old toothbrush in soapy water and scrub the rubber gaskets and tight crevices where grime hides. A clean seal helps the fridge run efficiently.
Why Gaskets Matter
The gasket creates an airtight seal that keeps cold air in and warm air out. When dirt builds up, the seal weakens, causing your compressor to cycle more often. A quick toothbrush scrub restores the seal's grip and can lower your energy usage.
How To Do It Right
Mix a few drops of dish soap with warm water. Dip the toothbrush and gently scrub along the entire gasket, paying extra attention to folds and corners. For stubborn grime, use a paste of baking soda and water.
Wipe away residue with a damp cloth.
Don't Forget The Crevices
Shelves and drawers have tiny grooves where crumbs and spills collect. Use the toothbrush to sweep out debris from these narrow gaps. It's also great for cleaning around the crisper drawer slides and the vents at the back of the fridge.
11. Freeze Leftovers in Portion-Sized Containers
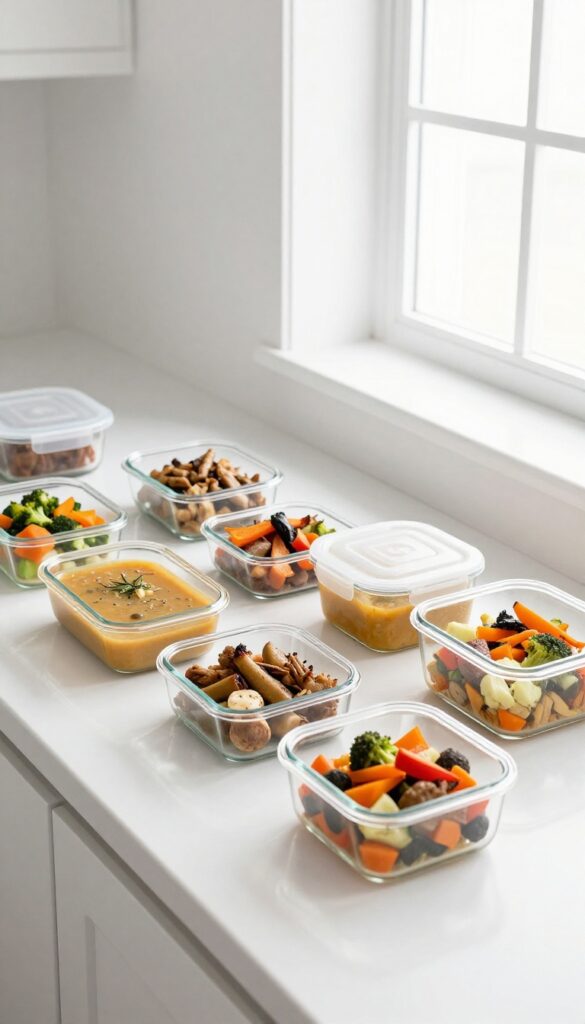
Large containers of leftovers take forever to thaw and often get wasted because you only need a small portion. Freezing in single-serving sizes solves both problems. It’s a simple shift that makes meal prep faster and your fridge more organized.
Faster Thawing, Less Waste
When you freeze leftovers in individual portions, they thaw in minutes instead of hours. You can grab one container for lunch without defrosting an entire casserole. This cuts down on food waste because you only take out what you actually plan to eat.
Plus, smaller portions cool faster in the fridge before freezing, keeping your refrigerator temperature stable.
Best Containers For Portioning
Silicone muffin cups, small glass jars, and divided meal prep containers work great for single servings. For soups and stews, use 1-cup deli containers or freezer-safe bags laid flat. Label each with the date and contents so you can easily identify them later.
Stackable containers save space and keep your freezer tidy.
How To Incorporate Into Your Routine
After dinner, portion leftovers into single servings before refrigerating. Once chilled, move them to the freezer. This habit takes just a few extra minutes but pays off when you need a quick meal.
Keep a few empty containers handy so you’re always ready to portion.
12. Rotate Stock with the FIFO Method
You've probably heard the term FIFO in a warehouse context, but it works just as well in your fridge. First In, First Out means placing newer groceries behind the older ones so you grab the older items first. This simple habit prevents forgotten containers from turning into science experiments at the back of a shelf.
FIFO is a game-changer for reducing food waste and saving money. When you bring home new milk, yogurt, or leftovers, take a second to slide the older version to the front. That way, you'll naturally reach for the one that needs to be eaten soonest.
It takes almost no extra effort but keeps your fridge from becoming a graveyard of expired goods.
Make It A Unpacking Habit
The easiest way to stick with FIFO is to practice it every time you unpack groceries. Before you put anything away, quickly scan the fridge for similar items and move the older ones forward. Once you do it a few times, it becomes automatic.
Label And Date Your Leftovers
FIFO works best when you know how old something is. Use a piece of masking tape and a marker to write the date on containers before you stash them. A quick glance tells you which container needs to be eaten first, no guessing required.
Use Clear Containers For Visibility
Out of sight, out of mind is the enemy of FIFO. Store leftovers and prepped ingredients in clear glass or plastic containers so you can easily see what's inside and how much is left. When you can spot the older container at a glance, rotating stock becomes effortless.
13. Add an Open Box of Baking Soda for Odor Control
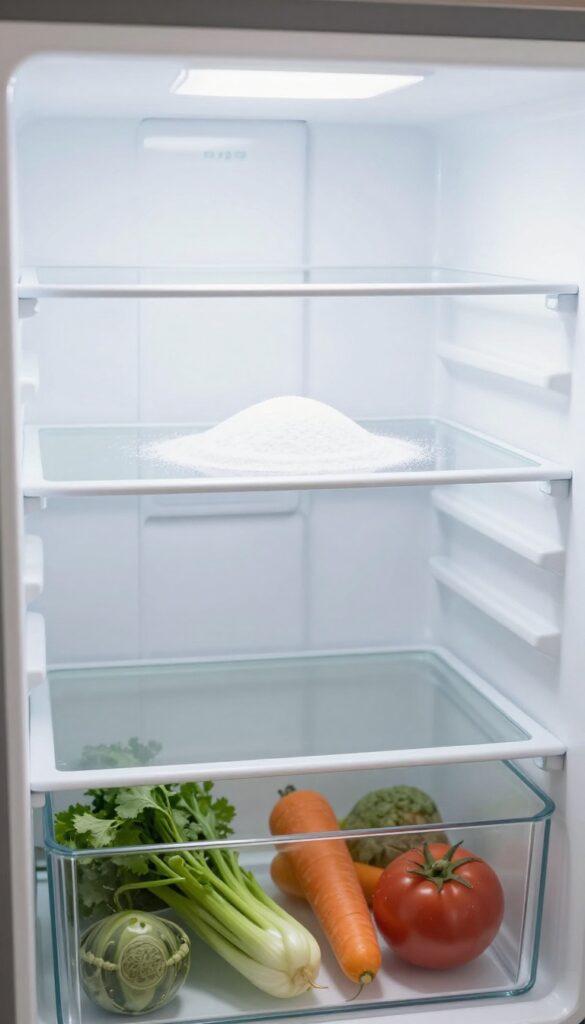
That lingering smell in your fridge isn't just unpleasant—it can transfer to your food and make everything taste a bit off. The simplest fix? A humble box of baking soda.
It's cheap, non-toxic, and surprisingly effective at absorbing odors without adding any chemical scent.
Baking soda works by neutralizing acidic and basic odor molecules, trapping them so they don't float around your fridge. All you need is a fresh box, open it, and place it on a shelf where air can circulate. Replace it every three months to keep odors at bay.
For extra coverage, you can also sprinkle a thin layer in a shallow dish and set it in the crisper drawer.
Where To Place It For Best Results
Position the box on a middle shelf, away from the back wall, so air flows around it. Avoid tucking it behind tall containers. If your fridge has strong smells from fish or onions, place a second box near the source.
Don't Forget The Freezer
Freezers can develop odors too, especially if you store strong-smelling foods like garlic bread or frozen fish. Toss an open box of baking soda in the freezer door or on a shelf. Replace it on the same schedule as the fridge box.
Test If It's Still Working
Not sure if your baking soda is still active? Sprinkle a little into a bowl of vinegar. If it fizzes vigorously, it's still good.
If not, it's time for a fresh box. Mark the date on the box with a marker so you remember when to swap it.
14. Wipe Down Handles and Exterior Weekly
Your fridge handles are among the most touched surfaces in your kitchen, yet they're often overlooked during cleaning. Grease, food residue, and bacteria build up quickly, especially if you handle raw ingredients or have kids grabbing snacks. A quick weekly wipe keeps them sanitary and your fridge looking its best.
Spending just two minutes on the handles and exterior each week prevents grime from hardening and reduces the spread of germs. Use a disinfectant wipe or a cloth with warm soapy water, then dry with a clean towel. Don't forget the top of the fridge, which can collect dust and grease over time.
Choose The Right Cleaner
Stainless steel fridges need a gentle cleaner to avoid streaks. A microfiber cloth with a bit of vinegar and water works well, or use a dedicated stainless steel spray. For painted or plastic exteriors, a mild all-purpose cleaner is fine.
Always test on a small hidden spot first.
Don't Forget The Top And Sides
The top of the fridge collects dust, grease, and even crumbs. Wipe it down with a damp cloth and a degreaser if needed. The sides, especially near the stove, can get splattered with oil, so give them a quick clean too.
Make It A Habit
Tie this task to something you already do weekly, like taking out the trash or cleaning the kitchen counters. A consistent schedule keeps the job quick and prevents buildup. Set a phone reminder if needed.
15. Store Mushrooms in a Paper Bag
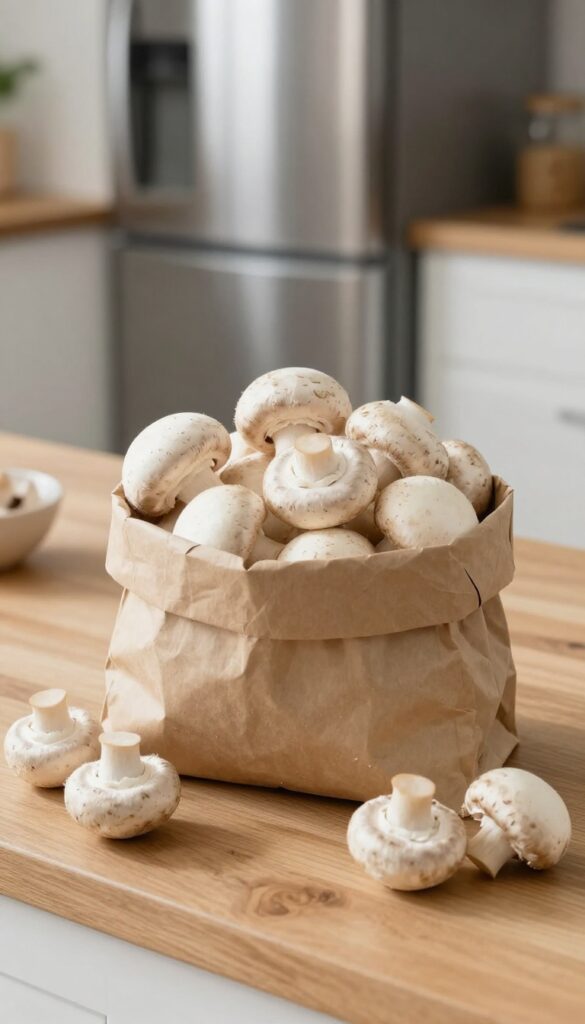
Mushrooms are notoriously finicky in the fridge. Leave them in the plastic container they came in, and you'll often find them slimy or rubbery within days. The culprit is trapped moisture, which speeds up decay and ruins texture.
A simple switch to a paper bag makes all the difference. The porous paper absorbs excess humidity while still letting the mushrooms breathe. This keeps them dry, firm, and fresh for up to a week longer than plastic storage.
Why Paper Beats Plastic
Plastic traps moisture, creating a mini greenhouse that turns mushrooms slimy. Paper, on the other hand, wicks away condensation and allows air circulation. This mimics the natural environment mushrooms prefer—cool, dark, and not too wet.
The result: mushrooms stay firm and earthy instead of turning into a soggy mess.
How To Do It Right
Transfer whole, unwashed mushrooms into a brown paper lunch bag. Fold the top loosely—don't seal it tight. Place the bag in the main compartment of your fridge, not in the crisper drawer where humidity is higher.
Avoid washing until right before cooking; moisture is the enemy of storage.
Bonus Tip For Longer Freshness
If you buy mushrooms in bulk, separate them into two or three smaller paper bags. This prevents them from sitting on top of each other and trapping moisture underneath. You can also add a dry paper towel inside the bag for extra absorption.
Check every few days and remove any that start to soften.
16. Use a Vacuum to Clean the Coils
Your fridge works hard every day, but its most important parts are hidden behind or underneath it. The condenser coils release heat, and when they get caked with dust and pet hair, the compressor has to work overtime. That extra strain means higher energy bills and a shorter lifespan for your appliance.
Every six months, pull the fridge away from the wall and vacuum the condenser coils. This simple task improves efficiency and can extend the life of your appliance. It's one of those maintenance chores that pays for itself in saved energy and fewer repair calls.
Why Coils Matter
Condenser coils are responsible for releasing heat from the refrigerant. When dust builds up, the heat can't escape, so the compressor runs longer and harder. This can lead to premature failure.
A clean set of coils helps your fridge maintain the right temperature without overworking.
How To Do It Right
First, unplug the fridge or turn off the circuit breaker. Pull it out carefully so you don't scratch the floor. Use a vacuum with a brush attachment to gently remove dust from the coils.
If you have a coil brush, even better. Be thorough but gentle to avoid bending the fins.
When To Call A Pro
If your coils are buried deep or the fridge is built in, you might need a professional. Also, if you notice the fridge isn't cooling well even after cleaning, there could be another issue. But for most people, a simple vacuuming twice a year is enough.
17. Schedule a Monthly Deep Clean
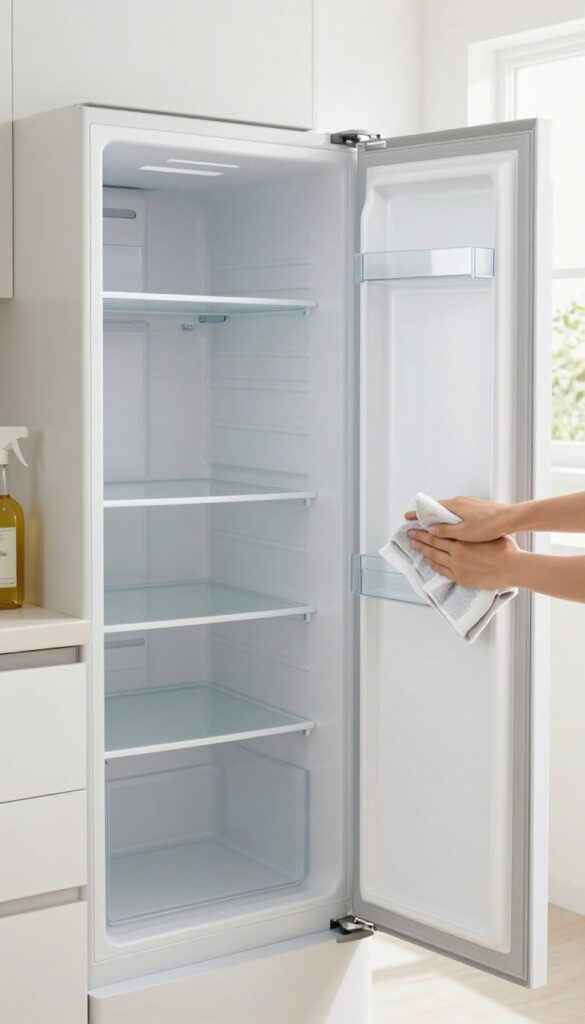
Life gets busy, and it's easy to let fridge cleaning slide until something smells off. But a monthly deep clean is your secret weapon against buildup and bacteria. By setting a recurring reminder, you make fridge maintenance a non-negotiable habit that takes less than an hour and saves you from bigger messes later.
Consistency is key—think of it as a reset button for your refrigerator.
A monthly deep clean keeps your fridge fresh, organized, and efficient. It prevents sticky spills from hardening, stops odors from setting in, and helps you spot expired items before they become science experiments. Plus, a clean fridge runs more efficiently, saving energy and keeping your food at the right temperature.
The best part? Once you get into the rhythm, it becomes a quick, satisfying routine.
Pick A Date And Stick To It
Choose a day that works for you—maybe the first Sunday of every month or the day before your big grocery run. Add it to your calendar with a reminder. Treat it like any other appointment.
When you know it's coming, you're less likely to put it off.
Empty And Sort Everything
Take everything out of the fridge. Yes, everything. This forces you to check expiration dates, wipe down shelves, and reorganize.
Group items by type: dairy, meats, produce, condiments. Toss anything past its prime or that you know you won't use. This step alone makes a huge difference in how your fridge looks and functions.
Wipe Down All Surfaces
Use a mild cleaner or a mix of water and vinegar to wipe shelves, drawers, and walls. Don't forget the door bins and the rubber gasket around the door—crumbs and spills love to hide there. Dry everything with a clean cloth before putting food back.
This prevents mold and keeps surfaces clean longer.
Return Food With A System
As you put items back, place newer items behind older ones so you use up what's about to expire first. Store produce in designated drawers with humidity control, and keep raw meat on the bottom shelf to avoid drips. Use clear bins for small items like cheese packets or yogurt cups so you can see everything at a glance.
FAQ
How often should I clean my refrigerator?
A quick wipe-down of spills and handles should happen weekly, while a full deep clean—emptying shelves and scrubbing all surfaces—is best done every one to three months.
What is the best natural cleaner for fridge interiors?
A mixture of equal parts white vinegar and water works well for most surfaces. For tougher stains, a paste of baking soda and water is effective and safe.
How can I prevent my fridge from smelling bad?
Keep an open box of baking soda on a shelf and replace it every three months. Also, promptly remove spoiled food and wipe up spills as soon as they happen.
Should I clean my fridge coils?
Yes, cleaning the condenser coils every six months helps your fridge run more efficiently and can prevent breakdowns. Use a vacuum or a coil brush.
What temperature should my refrigerator be set to?
The ideal temperature is between 35°F and 38°F (1. 7°C to 3. 3°C).
Use a fridge thermometer to check, as built-in dials are not always accurate.
Conclusion
A well-organized fridge makes meal prep faster and cuts down on food waste. You don't need to overhaul everything at once—just start with one or two ideas that address your biggest frustrations, like drawer chaos or forgotten leftovers. These small changes add up to a fridge that's easier to navigate and keeps food fresher longer.
Pick a couple of methods that fit your routine and try them out this week. Whether it's using clear bins or setting up a FIFO system, you'll quickly notice the difference.