23 Cleaning the Kitchen Steps for a Full Fresh Reset
You walk into your kitchen expecting a fresh start, but the sticky countertops and grimy stovetop tell a different story. A full reset doesn't have to mean spending your entire weekend scrubbing. With a clear plan, you can tackle every surface efficiently and actually enjoy the results.
This guide breaks down the process into 23 manageable steps, each targeting a specific area or task. No fluff, no filler—just practical actions that make your kitchen feel brand new.
Whether you're prepping for a party or just craving order, these steps will get you there. Let's dive into the first step and work our way through the entire kitchen, one zone at a time.
1. Clear Everything Off the Counters
The first step to a truly clean kitchen is stripping the counters bare. All those appliances, jars, and decorative items create hiding spots for crumbs and grime. By removing everything, you expose the full surface and can clean every inch without obstacles.
Start by relocating small appliances like toasters and coffee makers to a temporary spot, such as the dining table. Clear out utensil holders, fruit bowls, and any decorative pieces. As you go, wipe down each item before setting it aside—this saves time later.
Once the counters are empty, you'll see exactly what needs scrubbing and can decide what truly belongs out.
Why Starting Bare Matters
A cluttered counter hides spills and sticky patches that attract bacteria. Starting with a blank slate lets you deep-clean every corner, including the backsplash and edges. Plus, it forces you to evaluate each item's usefulness—anything you don't need can stay off the counter permanently.
Where To Put Everything Temporarily
Designate a staging area like a cleared table or a section of the floor covered with a clean towel. Group similar items together: small appliances in one spot, jars and canisters in another. This makes it easy to wipe them down and decide where they'll go back.
What To Do With The Overflow
As you clear, you'll likely find items that don't belong on the counter at all. Set aside anything that's rarely used, broken, or purely decorative. Consider storing these in cabinets or donating them.
The goal is to keep only daily essentials on the counter after the reset.
2. Degrease Cabinet Fronts and Handles
Cabinet fronts are grease magnets, especially near the stove. Over time, that sticky film traps dust and dulls the finish. A quick degreasing session restores their shine and makes the whole kitchen feel cleaner.
Start by removing any loose dust with a microfiber cloth. Then mix equal parts warm water and white vinegar in a spray bottle, or use a mild degreaser. Spray onto a cloth—not directly on cabinets—to avoid dripping into cracks.
Wipe in the direction of the wood grain for painted or stained cabinets. For handles and knobs, use an old toothbrush dipped in the solution to scrub crevices. Rinse with a damp cloth and dry immediately to prevent water spots.
This step takes about 10–15 minutes and makes a visible difference.
Choose The Right Cleaner
Vinegar works well for most finishes, but avoid it on unsealed wood or waxed surfaces. For those, use a gentle dish soap solution instead. Commercial degreasers are fine for metal or laminate cabinets—just test in an inconspicuous spot first.
Don't Forget The Hardware
Handles and knobs harbor grime from daily use. Remove them if possible and soak in warm soapy water for a few minutes. Scrub with a brush, rinse, and dry before reattaching.
This small extra step prevents sticky buildup from transferring back to your clean cabinets.
Dry Thoroughly To Avoid Damage
Moisture left on cabinet surfaces can cause swelling or peeling over time. After cleaning, go over everything with a dry microfiber cloth. Pay extra attention to edges and corners where water tends to pool.
3. Wipe Down Backsplash and Walls
The backsplash and nearby walls take a beating from daily cooking. Grease splatters, sauce stains, and steam residue build up over time, making them look dull and grimy. A quick wipe-down can restore their shine and make the whole kitchen feel cleaner.
Start by spraying an all-purpose cleaner directly onto a microfiber cloth, not the wall, to avoid drips. Wipe in sections, starting from the top and working your way down. For stubborn spots, let the cleaner sit for a minute before scrubbing gently.
Pay extra attention to areas around the stove and sink, where grime accumulates the most. Finish by buffing with a dry cloth to prevent streaks.
What You'll Need
Grab a microfiber cloth or two, an all-purpose cleaner (or a DIY mix of vinegar and water), and a soft sponge for tough spots. Avoid abrasive scrubbers that can scratch tiles or paint.
Tackling Grease Buildup
If your backsplash has a layer of greasy residue, use a degreasing cleaner or a few drops of dish soap in warm water. Let it sit for a couple of minutes, then wipe with a damp cloth. Rinse with a clean damp cloth to remove any soap film.
Don't Forget The Walls
The wall area above the backsplash and around the stove often collects dust and grease. A quick once-over with the same cleaner keeps everything looking fresh. Use a step stool if needed to reach high spots.
Finishing Touches
After wiping, check for any missed spots or streaks. Use a dry microfiber cloth to buff the surface for a polished look. Step back and admire how much brighter the space looks.
4. Scrub the Sink Until It Shines
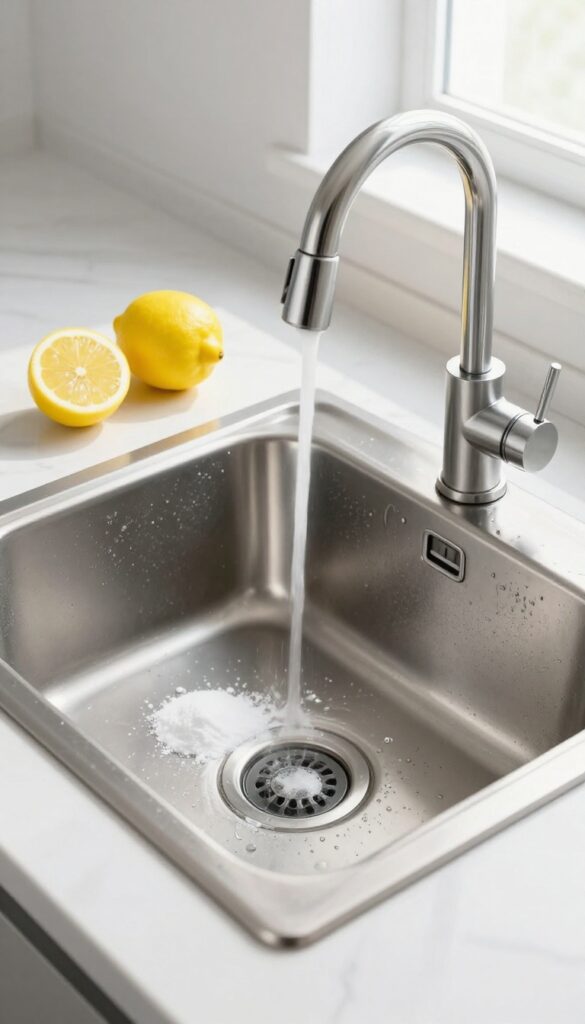
The sink is where food scraps, grease, and grime accumulate, making it a prime spot for bacteria and odors. A deep scrub not only sanitizes but also restores that fresh, clean look. With the right technique, you can make your sink sparkle like new.
Start by removing the drain stopper and any debris. Sprinkle baking soda generously over the wet sink surface, then cut a lemon in half and use it as a scrubber. The citric acid cuts through grease while the baking soda provides gentle abrasion.
For stainless steel sinks, scrub in the direction of the grain to avoid scratches. Rinse thoroughly with hot water and dry with a microfiber cloth to prevent water spots. For porcelain sinks, use a non-abrasive cleaner to avoid damaging the finish.
Finish by running a slice of lemon through the garbage disposal to freshen it up.
Choose The Right Cleaner
Baking soda and lemon work wonders for most sinks, but you can also use a gentle abrasive cleaner like Bar Keepers Friend for tough stains. Avoid harsh chemicals that can damage the finish. For a quick daily refresh, a squirt of dish soap and a scrub with a soft sponge does the trick.
Don't Forget The Faucet And Drain
The faucet handles and spout collect grime and fingerprints. Wipe them down with a vinegar-water solution or a dedicated stainless steel cleaner. For the drain, pour a mixture of baking soda and vinegar down the drain, let it fizz for 5 minutes, then flush with hot water.
This deodorizes and clears minor clogs.
Dry For A Streak-free Shine
After scrubbing and rinsing, dry the sink thoroughly with a clean microfiber cloth. This prevents water spots and mineral deposits. For extra shine, buff the surface with a drop of olive oil on a cloth.
Your sink will look brand new.
5. Deodorize the Garbage Disposal
Your garbage disposal works hard, but over time, food particles can get trapped and start to smell. A quick deodorizing session not only eliminates odors but also keeps the blades sharp and the unit running smoothly. It's a small step that makes a big difference in how your kitchen smells.
Start by running cold water and turning on the disposal. Drop in a handful of ice cubes and a few lemon or orange peels. The ice helps knock off grime while the citrus oils freshen the air.
Let it run until the grinding stops, then continue running cold water for another 30 seconds. For a deeper clean, use a specialized disposal cleaner or a mixture of baking soda and vinegar. Pour half a cup of baking soda down the drain, followed by a cup of white vinegar.
Let it fizz for a few minutes, then flush with hot water.
Why It Works
Ice cubes are abrasive enough to scrub the blades and dislodge stuck particles without damaging the unit. Citrus peels release natural oils that neutralize odors and leave a fresh scent. Baking soda and vinegar create a chemical reaction that breaks down grease and residue.
What To Avoid
Never put fibrous foods like celery or potato peels down the disposal—they can tangle the blades. Also avoid harsh chemical cleaners that can corrode the metal parts. Stick to natural methods for regular maintenance.
How Often To Do It
Aim to deodorize your disposal once a week if you use it daily. If you notice a smell sooner, don't wait—give it a quick clean. Regular care prevents buildup and keeps your kitchen smelling fresh.
6. Clean Inside the Microwave
Microwaves collect splatters and spills that bake onto surfaces over time. Instead of scrubbing stubborn crusts, use steam to loosen everything. A few minutes of heating a bowl of water with lemon slices will soften grime so you can wipe it away effortlessly.
This method also leaves a fresh citrus scent behind.
The Lemon Steam Method
Fill a microwave-safe bowl with 1 cup of water and add 3-4 lemon slices (or a few tablespoons of lemon juice). Microwave on high for 3-5 minutes until the water is boiling and the window steams up. Let it sit for 2 minutes without opening the door to allow the steam to penetrate the grime.
Wipe Down Easily
Carefully remove the bowl (it will be hot). Use a damp microfiber cloth or sponge to wipe the interior walls, ceiling, and floor. The softened food will come off with minimal effort.
For stubborn spots, dip the cloth in the warm lemon water.
Don't Forget The Turntable And Rollers
Remove the glass turntable and wash it with warm soapy water or in the dishwasher if safe. Wipe the roller ring and the microwave floor underneath. This prevents buildup that can cause uneven heating or strange noises.
7. Deep Clean the Oven and Stovetop
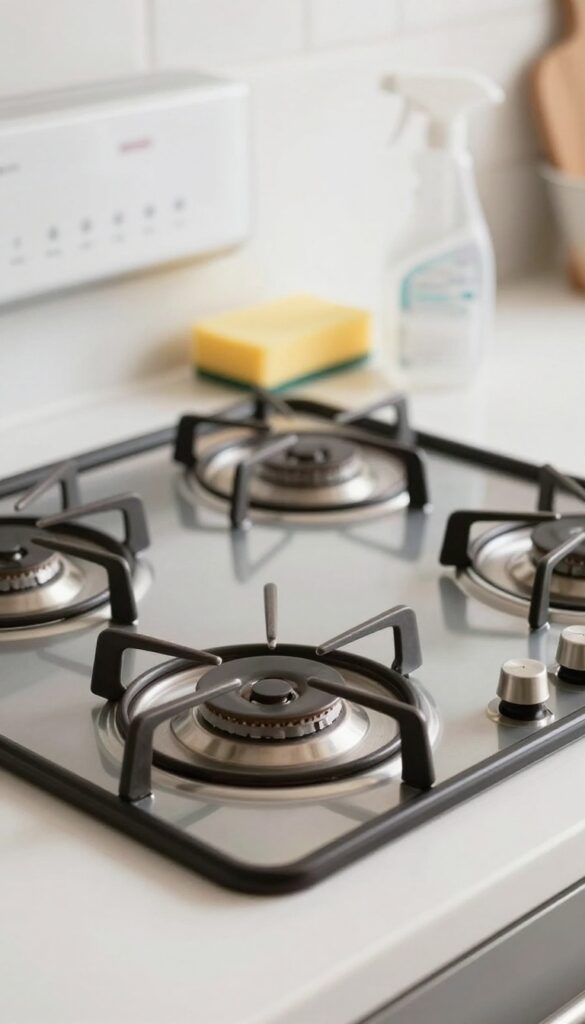
The oven and stovetop are the workhorses of your kitchen, but they also collect the most baked-on grease and burnt food. A deep clean here makes a huge difference in how fresh your kitchen feels. Don't worry—this doesn't have to be a tough job if you break it down into simple steps.
Start by removing oven racks and soaking them in hot, soapy water. While they soak, apply a non-toxic oven cleaner to the interior and let it sit. For the stovetop, lift the burners and drip pans, then wipe away all grease and crumbs.
A little elbow grease now pays off with a sparkling cook surface.
Soak The Racks
Remove the oven racks and place them in a bathtub or large sink filled with hot water and dish soap. Let them soak for at least 30 minutes. For stubborn grime, add a quarter cup of baking soda to the water.
Scrub with a non-abrasive sponge, rinse, and dry before returning them to the oven.
Clean The Oven Interior
While the racks soak, spray the inside of the oven with a non-toxic cleaner (baking soda paste works great). Let it sit for 15–20 minutes, then wipe with a damp cloth. Avoid harsh chemicals that leave fumes.
For tough spots, use a plastic scraper gently. Wipe down the door glass too.
Tackle The Stovetop
Lift the burners and drip pans (if electric) or grates (if gas). Soak them in hot soapy water. Wipe the stovetop surface with a degreasing cleaner.
For gas stoves, clean the burner caps and ports with a toothpick to remove clogs. Dry everything thoroughly before reassembling.
8. Wipe Down Refrigerator Shelves and Drawers
Your fridge works around the clock, but spills and crumbs can turn shelves and drawers into a sticky mess. A deep clean not only removes odors but also helps your food stay fresher longer. This step is easier than you think and makes a huge difference in how your kitchen feels.
Empty the refrigerator completely, tossing any expired or forgotten items. Remove all shelves and drawers that can be taken out. Wash them with warm, soapy water, using a gentle sponge to avoid scratches.
For stubborn stains, a paste of baking soda and water works wonders. Rinse thoroughly and dry completely before reassembling. While the parts are drying, take a damp cloth to the interior walls and seals to wipe away any residue.
Once everything is dry, return the shelves and drawers, and restock your food in an organized way.
Start With A Clean Slate
Before you begin, clear out the fridge completely. Check expiration dates and toss anything that's past its prime. This is also a great time to group similar items together—condiments, dairy, produce—so you can see what you have at a glance.
Wash And Dry Every Part
Remove all removable shelves and drawers. Wash them in the sink with warm water and mild dish soap. Use a non-abrasive sponge to avoid scratching the plastic or glass.
For tough spots, let them soak for a few minutes. Dry each piece thoroughly with a clean towel before putting them back to prevent mold and mildew.
Don't Forget The Interior
While the shelves and drawers are drying, wipe down the inside of the fridge. Use a solution of equal parts water and vinegar or a mild all-purpose cleaner. Pay special attention to the door seals, where crumbs and grime can accumulate.
A clean seal helps the fridge maintain its temperature and run efficiently.
9. Organize the Pantry and Discard Expired Items
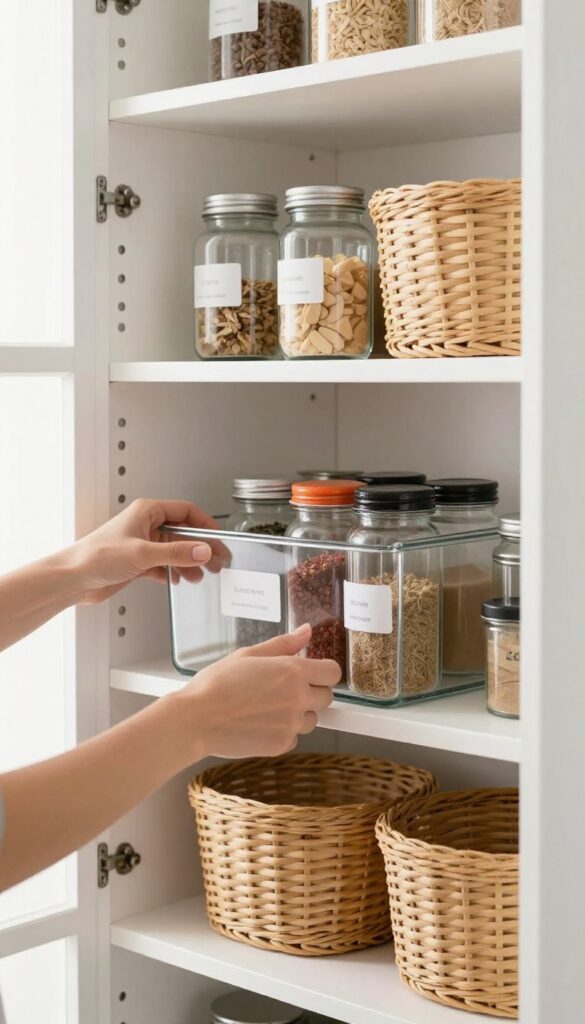
The pantry is often the most neglected zone in the kitchen—a black hole for half-used spice jars and forgotten cans. Taking everything out forces you to face what you actually have and what needs to go. It’s also the perfect moment to wipe down shelves and reset the system so you can find ingredients at a glance.
Empty the pantry completely, item by item. Check expiration dates on every package, and toss anything past its prime—old spices lose flavor, canned goods can degrade, and stale snacks aren’t doing you any favors. Group similar items together: baking supplies, grains, canned vegetables, snacks, and condiments.
This makes meal prep faster and prevents buying duplicates later.
Sort And Declutter
As you pull items out, create three piles: keep, donate (unopened non-perishables you won't use), and trash. Be ruthless—if you haven't touched that jar of anchovy paste in two years, let it go. Wipe down each shelf with a damp cloth and mild cleaner before putting anything back.
Group Like Items Together
Arrange items by category so you can see everything at once. Use clear bins or baskets for small packets, tea bags, and spice envelopes. Label shelves if it helps.
Keep frequently used items at eye level and heavier items on lower shelves to avoid accidents.
Maintain The System
Once everything is back, commit to a quick monthly check. When you buy new groceries, place them behind older ones so nothing gets buried. A tidy pantry stays tidy with just a few minutes of upkeep each week.
10. Clean Small Appliances (Toaster, Coffee Maker, Blender)
Small appliances see daily use but often get ignored during deep cleans. A grimy toaster or a coffee maker with mineral buildup can affect performance and even taste. Giving them some attention takes just minutes and makes your countertops feel truly fresh.
Coffee Maker: Vinegar Cycle
Unplug the machine and remove any water reservoir. Fill the tank with equal parts white vinegar and water, then run a full brew cycle without coffee grounds. Let it sit for 15 minutes, then run two more cycles with fresh water to rinse.
Wipe down the exterior and carafe with a damp cloth. This removes mineral deposits and stale coffee oils.
Toaster: Crumb Tray And Exterior
Always unplug first. Slide out the crumb tray and wash it in warm soapy water, then dry thoroughly. Turn the toaster upside down over the sink and shake out any loose crumbs.
For the exterior, use a damp microfiber cloth—avoid abrasive cleaners that can scratch the finish. If the toaster has a stainless steel surface, polish with a dedicated stainless steel cleaner.
Blender: Deep Clean The Jar And Lid
Fill the blender jar halfway with warm water and add a drop of dish soap. Blend on high for 30 seconds, then rinse thoroughly. Remove the lid and rubber gasket; wash them by hand or in the top rack of the dishwasher.
For stubborn residue, scrub with a bottle brush. Wipe down the base with a damp cloth—never submerge it.
11. Wash Dish Racks and Drying Mats
Dish racks and drying mats are easy to overlook because they live near the sink and see water daily. But that constant moisture makes them a breeding ground for mildew, soap scum, and trapped food particles. Giving them a proper scrub keeps your clean dishes from sitting on a grimy surface.
Start by removing all dishes and utensils from the rack. If your dish rack is dishwasher-safe, place it on the top rack and run a hot cycle with a sanitizing rinse. For racks that aren't dishwasher-safe, fill your sink with hot water and a squirt of dish soap, then scrub with a stiff brush.
Pay extra attention to the prongs and corners where grime hides. Rinse thoroughly and let it air dry completely before putting dishes back. Drying mats collect water and crumbs underneath.
Most are machine-washable—check the care label. Wash them in warm water with a mild detergent, then tumble dry on low or air dry. If your mat is rubber-backed, avoid high heat to prevent cracking.
For stubborn stains or odors, add a splash of white vinegar to the wash cycle.
How To Clean A Dish Rack
Remove all dishes and utensils. If your rack is dishwasher-safe, place it on the top rack and run a hot cycle with a sanitizing rinse. Otherwise, scrub it in the sink with hot soapy water and a stiff brush, focusing on prongs and corners.
Rinse well and let it air dry completely.
How To Wash Drying Mats
Most drying mats are machine-washable. Wash in warm water with mild detergent, then tumble dry on low or air dry. For rubber-backed mats, avoid high heat.
Add white vinegar to the wash if there are stubborn stains or odors.
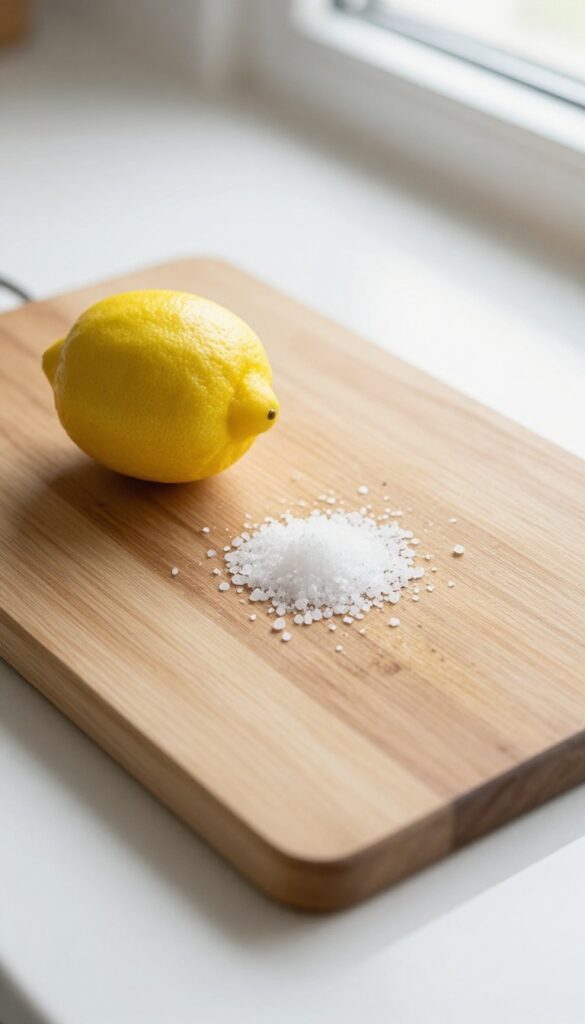
12. Sanitize Cutting Boards
Cutting boards see a lot of action, and they can harbor bacteria if not cleaned properly. Wood and plastic boards each need their own treatment to stay safe and last longer. Here's how to give them a deep clean.
Wood Boards: Salt And Lemon Scrub
For wooden cutting boards, avoid soaking them in water—that can cause warping and cracking. Instead, sprinkle coarse salt over the board, then cut a lemon in half and use it to scrub the salt into the surface. The salt acts as an abrasive, while the lemon's acidity kills bacteria and neutralizes odors.
Let it sit for 5 minutes, then rinse with warm water and dry immediately.
Plastic Boards: Bleach Solution Soak
Plastic boards are non-porous, so they can handle a stronger sanitizer. Mix 1 tablespoon of unscented chlorine bleach with 1 gallon of water. Submerge the board for 2 minutes, then rinse thoroughly with hot water.
This kills most germs without damaging the plastic. Let it air dry completely before storing.
Daily Maintenance Tips
Between deep cleans, wash your cutting boards with hot, soapy water after each use. For extra odor removal, rub the board with a paste of baking soda and water, let it sit for 15 minutes, then rinse. Always dry boards upright to prevent moisture buildup and bacterial growth.
13. Wipe Down Light Fixtures and Switch Plates
Light fixtures and switch plates are like the unsung heroes of your kitchen—they work hard but rarely get noticed. Over time, dust and grease build up on them, dimming the room's brightness. Giving them a quick wipe not only restores light but also makes the whole space feel cleaner.
Start by turning off the lights to avoid any accidents. Use a damp microfiber cloth with a bit of mild cleaner to gently wipe the fixture surfaces and switch plates. For tricky spots like pendant lights or chandeliers, a soft brush attachment on your vacuum can remove loose dust first.
Dry everything with a clean cloth to prevent streaks.
Why Light Fixtures Get Grimy
Kitchen grease rises with steam and settles on every surface, including light fixtures. This layer of grime can reduce light output by up to 30%. Regular cleaning keeps your kitchen bright and welcoming.
How To Clean Different Types
For glass globes, remove them if possible and wash with warm soapy water. Metal fixtures can be wiped with a damp cloth; avoid harsh chemicals that might damage the finish. Switch plates can be unscrewed and washed in the sink for a thorough clean.
Safety First
Always ensure the power is off before cleaning any electrical fixture. Use a sturdy step stool to reach high fixtures safely. Never spray cleaner directly onto a fixture; instead, spray onto the cloth to avoid drips into electrical parts.
14. Clean Windows and Window Sills
Natural light can do wonders for a clean kitchen, but grimy windows and dusty sills kill the vibe. This step focuses on making your windows sparkle so your freshly cleaned space feels bright and airy. It's a quick win that makes a huge difference.
Glass First
Start with the glass. Spray a quality glass cleaner or a DIY mix of vinegar and water onto the window. Wipe using a lint-free microfiber cloth in an S-pattern to avoid streaks.
For stubborn spots, let the cleaner sit for a minute before wiping.
Sills And Tracks
Window sills collect dust, crumbs, and even mold. Vacuum loose debris with a brush attachment, then wipe down with a damp cloth and mild detergent. For tracks, use an old toothbrush or a small scrub brush to dislodge grime.
Rinse with a damp cloth and dry thoroughly to prevent rust or mildew.
Don't Forget The Hardware
If your windows have locks, handles, or blinds, give them a quick wipe. Blinds can be dusted with a microfiber duster or wiped with a damp cloth. This final touch makes the whole window area feel fresh.
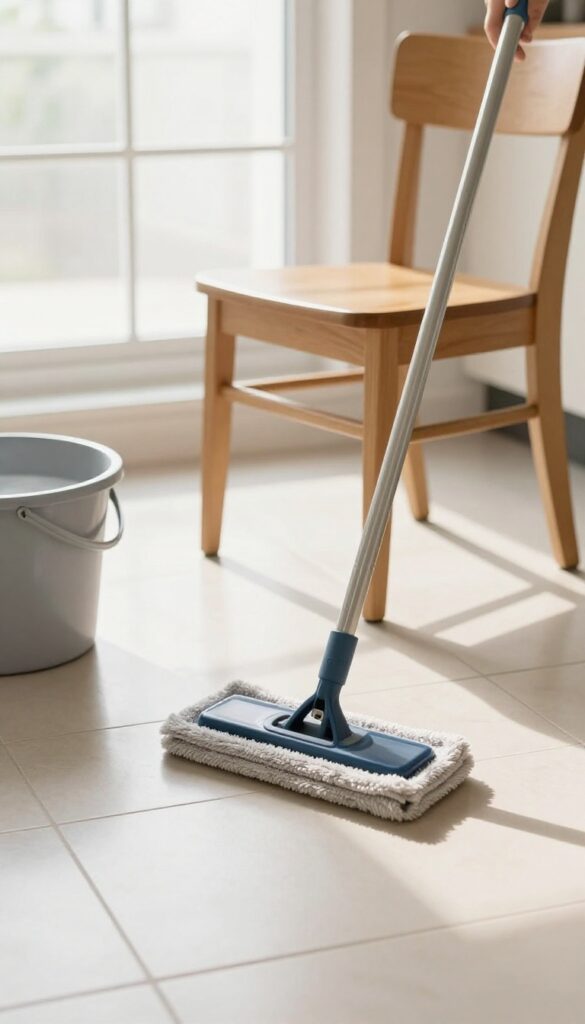
15. Vacuum and Mop the Floor
After tackling counters and cabinets, the floor deserves attention. Crumbs, spills, and grime accumulate quickly, especially in high-traffic areas. A thorough vacuum and mop routine will leave your kitchen feeling fresh from top to bottom.
Clear The Floor First
Move chairs, mats, and any small appliances off the floor. This gives you full access to every corner. Shake out or vacuum any loose debris from mats before setting them aside.
Vacuum Or Sweep Thoroughly
Use a vacuum with a hard floor setting or a broom to remove loose dirt. Pay extra attention under cabinets, around the base of the refrigerator, and along baseboards. A quick pass with a dustpan or vacuum crevice tool gets those hidden crumbs.
Mop With The Right Cleaner
Choose a cleaner suitable for your floor type—whether tile, vinyl, or hardwood. Damp mop in sections, rinsing the mop head frequently. For stubborn spots, let the cleaner sit for a minute before scrubbing.
Finish by drying with a clean cloth or allowing to air dry.
16. Wipe Baseboards and Trim
Baseboards and trim are like the frame of a picture—they can make or break the finished look. When they're dusty or scuffed, the whole kitchen feels dirty no matter how clean the counters are. A quick wipe-down is all it takes to bring that crisp, polished feel back.
Why Baseboards Get So Grimy
Baseboards are magnets for dust, grease, and grime because they sit right at the floor line where mops splash and feet kick. Cooking fumes also settle on them over time, leaving a sticky film that attracts even more dirt. It's easy to overlook them, but once you clean them, you'll notice the difference immediately.
The Best Tools For The Job
A microfiber cloth dampened with warm water and a mild cleaner works wonders for regular dust. For scuff marks and stubborn spots, a magic eraser is your best friend—just wet it slightly and gently rub the marks away. Avoid harsh scrubbers that could damage the paint or finish.
Quick Technique For A Lasting Clean
Start at one corner and work your way around the room, wiping the top edge and the face of the baseboard. Pay extra attention to areas near the stove and sink where grease buildup is worst. Finish by wiping the floor trim where it meets the flooring to catch any leftover dust.
17. Clean Under and Behind Appliances
The spaces under and behind your appliances are prime real estate for crumbs, dust bunnies, and the occasional lost spice jar. Pulling out the refrigerator, stove, and other movable appliances might feel like a hassle, but it’s one of the most impactful steps for a truly fresh kitchen. Not only does it eliminate hidden grime, but it also prevents pest infestations and reduces fire hazards.
Start by unplugging appliances and carefully sliding them away from the wall. Use a vacuum with a crevice tool to suck up loose debris, then wipe down floors and walls with a damp cloth and all-purpose cleaner. Don’t forget to clean the appliance coils (especially on the fridge) to improve efficiency.
Once everything is back in place, you’ll notice a surprising difference in how clean the whole room feels.
Prep And Safety First
Before you start, clear the area around the appliance. Unplug it to avoid electrical hazards, and if it’s heavy, ask for help or use appliance sliders to protect your floors. Have a flashlight handy to spot hidden messes.
The Deep Clean Process
Vacuum all visible dust and debris, then wipe surfaces with a microfiber cloth and a degreasing cleaner. For stubborn grime, use a scrub brush. Pay extra attention to the floor where spills may have dried.
If you have pets, check for fur buildup around vents and coils.
Prevent Future Buildup
To keep these areas cleaner longer, place a tray or mat under appliances to catch spills. Set a reminder to pull them out every three months for a quick sweep. Also, seal gaps around pipes or cords where pests might enter.
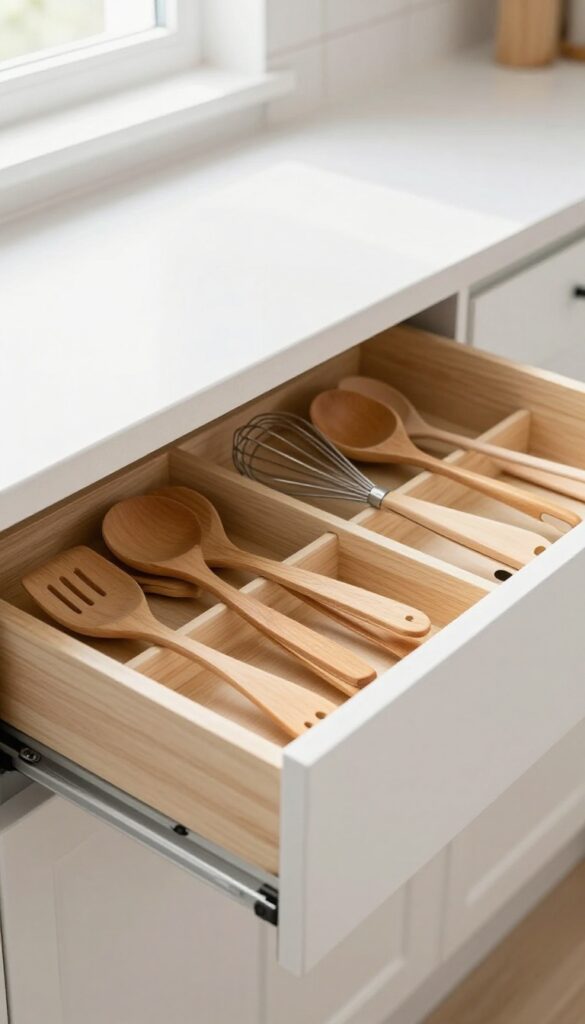
18. Organize Drawers and Utensil Holders
Drawers and utensil holders are the catch-all zones of the kitchen. They collect crumbs, random twist ties, and that one spatula you never use. Once you've cleaned the surfaces, it's time to bring order to these hidden spaces.
Empty And Deep Clean
Pull everything out of every drawer and utensil holder. Vacuum or wipe away crumbs and debris. Use a damp cloth with mild soap to clean the interiors, then dry thoroughly before putting anything back.
Sort And Declutter
Group utensils by function—cooking, baking, serving. Toss broken or worn items. Set aside duplicates and rarely used gadgets for donation.
Be honest: if you haven't touched that avocado slicer in a year, let it go.
Add Dividers And Containers
Use adjustable drawer dividers or small bins to keep categories separate. Utensil holders can be sectioned with mini containers for spatulas, whisks, and tongs. This prevents the dreaded jumble every time you open a drawer.
Maintain The System
After organizing, make it a habit to return each item to its designated spot. A quick weekly check prevents clutter from building up again. Label dividers if it helps family members stay on track.
19. Polish Stainless Steel Surfaces
Stainless steel appliances and sinks are the shiny centerpieces of a clean kitchen, but they show every fingerprint and water spot. A quick polish transforms them from dull and smudged to mirror-like and new. You don't need fancy products—simple household ingredients work just as well.
Start by wiping down the surface with a damp microfiber cloth to remove loose dirt and grease. Then apply a small amount of stainless steel cleaner or a 50/50 mix of white vinegar and olive oil. Use a soft, lint-free cloth and work in the direction of the grain—going against it can leave streaks.
Buff gently until the shine appears, then step back and admire the difference.
Choose The Right Cleaner
Commercial stainless steel sprays are convenient and often leave a protective coating. If you prefer a DIY option, mix equal parts white vinegar and olive oil in a spray bottle. Shake well before each use.
The vinegar cuts grease, while the oil adds a light polish. Avoid using bleach or abrasive cleaners—they can damage the finish.
Master The Grain Direction
Stainless steel has a subtle grain, usually running horizontally or vertically. Always wipe and buff along this grain, not against it. Going against the grain creates visible scratches and makes the surface look uneven.
If you're unsure, test a small spot first to see the direction.
Tackle Tough Spots And Smudges
For stubborn fingerprints or dried-on splatters, dampen a cloth with a little rubbing alcohol or white vinegar and rub gently. Then follow up with your polish. For water spots, a dry microfiber cloth alone can often remove them.
If not, a dab of olive oil on a cloth will lift them right off.
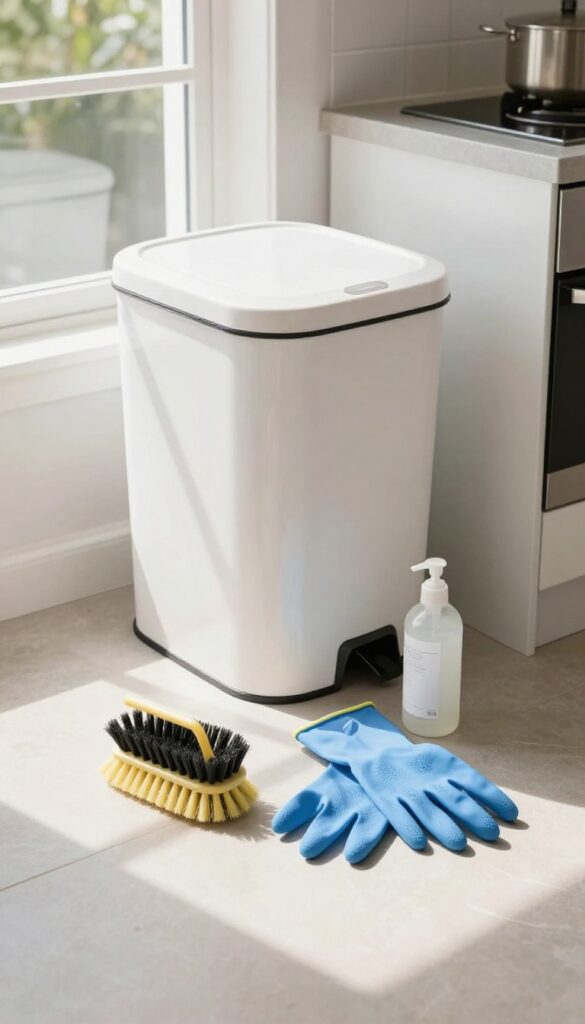
20. Refresh the Trash Can and Recycling Bins
Trash cans and recycling bins are the unsung heroes of the kitchen, quietly handling all the mess. But over time, they can get grimy and start to smell. Giving them a proper clean not only eliminates odors but also keeps your kitchen feeling truly fresh.
Start by taking the bins outside or to a well-ventilated area. Remove any liners and dump out any debris. Use a hose or a bucket of warm, soapy water to scrub the inside and outside of each bin.
Pay extra attention to the bottom and corners where gunk tends to build up. For stubborn stains or odors, add a cup of white vinegar or a splash of bleach to the water. Rinse thoroughly and let them dry completely in the sun if possible—sunlight helps kill bacteria and freshens the plastic.
Once dry, insert new liners and return them to their spots. Your kitchen will smell cleaner instantly.
Why This Step Matters
Even if you always use liners, spills and leaks happen. Over time, residue builds up and can attract pests or cause unpleasant smells. A clean trash can is a small effort that makes a big difference in overall kitchen hygiene.
What You'll Need
Gather dish soap, a scrub brush or sponge, white vinegar or bleach, a hose or large bucket, and rubber gloves. Optional: baking soda for extra odor fighting.
Pro Tips For Best Results
Let the bins air dry upside down so water doesn't pool inside. For recycling bins, check for sticky residues from food containers and scrub those areas well. If your bins are especially smelly, sprinkle baking soda inside before adding a new liner.
21. Clean the Exhaust Fan and Range Hood
The exhaust fan and range hood work hard to pull smoke, grease, and odors out of your kitchen, but they rarely get the attention they deserve. A greasy filter not only looks unpleasant but also makes the fan work harder and less efficiently. Giving this area a deep clean improves air quality and can even extend the life of your appliance.
Start by removing the metal filter—most slide out or have a simple latch. Soak it in hot water mixed with a degreasing dish soap or a dedicated degreaser for about 15–20 minutes. While it soaks, wipe down the hood surface with a damp cloth and a gentle cleaner to remove any loose grime.
After soaking, scrub the filter with a soft brush to dislodge stubborn grease, rinse thoroughly, and let it dry completely before reinstalling. For the fan blades inside, use a narrow brush or a microfiber cloth wrapped around a spatula to reach in and wipe away buildup. A clean fan runs quieter and moves air more effectively.
Soak The Filter Right
Fill your sink or a large basin with very hot water and add a generous squirt of degreasing dish soap. Submerge the filter completely and let it sit for at least 15 minutes. If it's heavily caked, add a quarter cup of baking soda to boost the degreasing power.
After soaking, use a nylon brush to scrub both sides, paying extra attention to the mesh. Rinse with hot water and shake off excess before drying.
Wipe Down The Hood
While the filter soaks, tackle the hood's exterior and interior surfaces. Use a microfiber cloth dampened with warm water and a few drops of dish soap. For stainless steel hoods, wipe with the grain to avoid streaks.
Don't forget the underside and any buttons or controls—those collect greasy fingerprints too. A quick spray of glass cleaner on a separate cloth can polish the surface for a streak-free shine.
Don't Forget The Fan Blades
The fan blades inside the hood accumulate a surprising amount of grease. Use a long-handled brush or wrap a microfiber cloth around a ruler to reach them. Lightly spray the cloth with degreaser and wipe each blade carefully.
If the blades are removable, take them off for a thorough soak. This step makes a noticeable difference in how quietly and efficiently the fan operates.
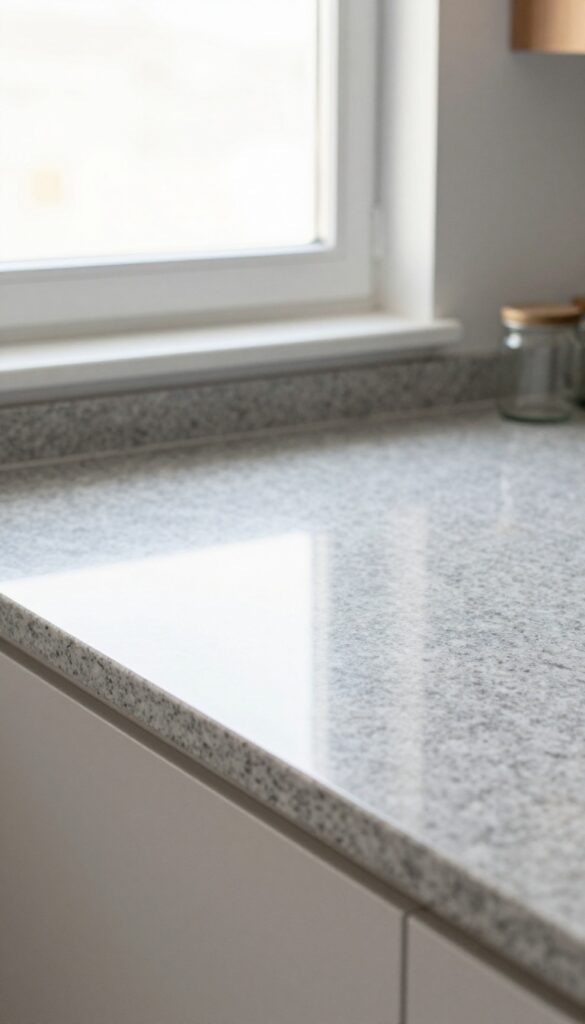
22. Wipe Down Countertops and Seal if Needed
Countertops take a beating during a deep clean—sprays, scrubs, and rearranged clutter. Once everything is back in its place, give them one final wipe to remove any lingering dust or smudges. For natural stone surfaces like granite or marble, this is also the perfect moment to apply a sealer, locking in that fresh look and protecting against future stains.
Final Wipe For A Streak-free Shine
Use a microfiber cloth and a cleaner appropriate for your countertop material. For quartz or laminate, a mild soap-and-water solution works well. For stone, stick to a pH-neutral cleaner to avoid etching.
Wipe in long, overlapping strokes, and dry immediately to prevent water spots.
When And How To Seal Natural Stone
Check if your stone needs sealing by sprinkling a few drops of water on the surface. If they darken and absorb within a few minutes, it's time to seal. Apply a high-quality stone sealer with a soft cloth, following the manufacturer's directions.
Let it penetrate for the recommended time, then buff off any excess. This step adds a protective barrier against spills and daily wear.
Don't Forget The Backsplash And Edges
While you're at it, give the backsplash a quick wipe and inspect the caulk along the countertop edges. If you spot any gaps or discoloration, now's the time to recaulk. A clean, sealed countertop looks polished and stays easier to maintain between deep cleans.
23. Add Finishing Touches (Fresh Towels, Plants, or Organizers)
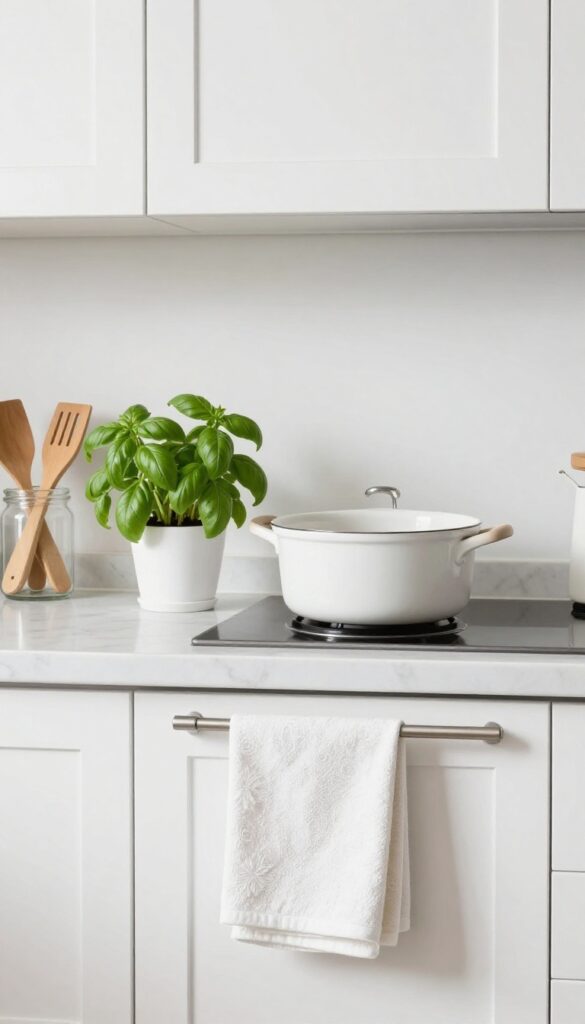
After all that scrubbing and organizing, your kitchen deserves a little personality. The final step is all about those small details that make the space feel complete and welcoming. Think of it as the cherry on top of your cleaning marathon.
Fresh towels, a tiny plant, or a new utensil holder can transform a clean kitchen into an inviting one. These touches don't cost much time or money, but they make a big difference in how the room feels. Plus, they signal that the reset is truly done.
Hang Clean Towels
Swap out any dingy or damp dish towels for fresh, dry ones. Fold them neatly over the oven handle or hang them on a hook. Choose a color that complements your kitchen—it's a simple way to add a pop of brightness.
Add A Small Plant
A small potted herb or a low-maintenance succulent brings life to your countertop. Not only do they look great, but herbs like basil or mint are also handy for cooking. Just make sure the pot has drainage and gets enough light.
Organize With Decorative Containers
Transfer frequently used utensils, spatulas, or wooden spoons into a stylish crock or jar. You can also use a small tray to corral salt, pepper, and oil bottles. It keeps things tidy and adds a curated look.
FAQ
How often should I do a full kitchen reset?
A full deep clean every 3-6 months is ideal, but high-traffic kitchens may benefit from a quarterly reset. Regular maintenance between resets keeps things manageable.
What's the best natural cleaner for kitchen surfaces?
A mixture of equal parts water and white vinegar works well for most surfaces. For grease, add a few drops of dish soap. Avoid vinegar on natural stone.
How do I remove stubborn baked-on grease from cabinets?
Make a paste of baking soda and water, apply it to the grease, let it sit for 15 minutes, then gently scrub with a soft sponge. Rinse with a damp cloth.
Can I use bleach on my kitchen countertops?
Bleach can damage some countertop materials like granite or marble. Use a mild soap or a cleaner specifically designed for your countertop type.
How do I keep my kitchen smelling fresh?
Regularly clean the sink and disposal, take out trash daily, and use an air purifier or open windows. Simmering cinnamon or citrus peels on the stove also adds a natural scent.
Conclusion
A full kitchen reset doesn't happen overnight, but these 23 steps give you a clear path to a space that feels fresh and functional. Focus on one area at a time—maybe start with the fridge or the cabinets—and build from there. You'll notice how much easier meal prep and daily cleanups become when everything has its place and surfaces actually shine.
Pick three or four steps to tackle this weekend, and keep the momentum going. Your kitchen will reward you with a calm, inviting vibe that makes every cooking session more enjoyable.