15 Microwave Cleaning Ideas for Quick Kitchen Shine
A sparkling microwave doesn't have to mean scrubbing for hours. With a few clever tricks using everyday items, you can banish baked-on splatters and lingering odors in minutes.
From steam-cleaning with lemon to tackling tough grease with vinegar, these 15 ideas deliver a quick kitchen shine without harsh chemicals. Ready to make your microwave look like new?
Let's dive into the easiest, most effective methods.
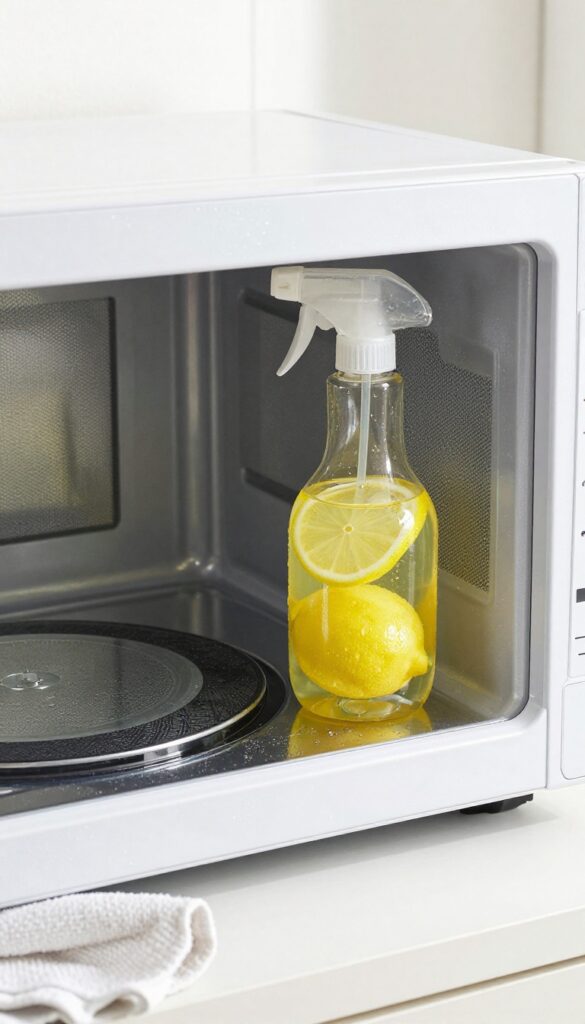
1. Steam-Clean with Lemon Water
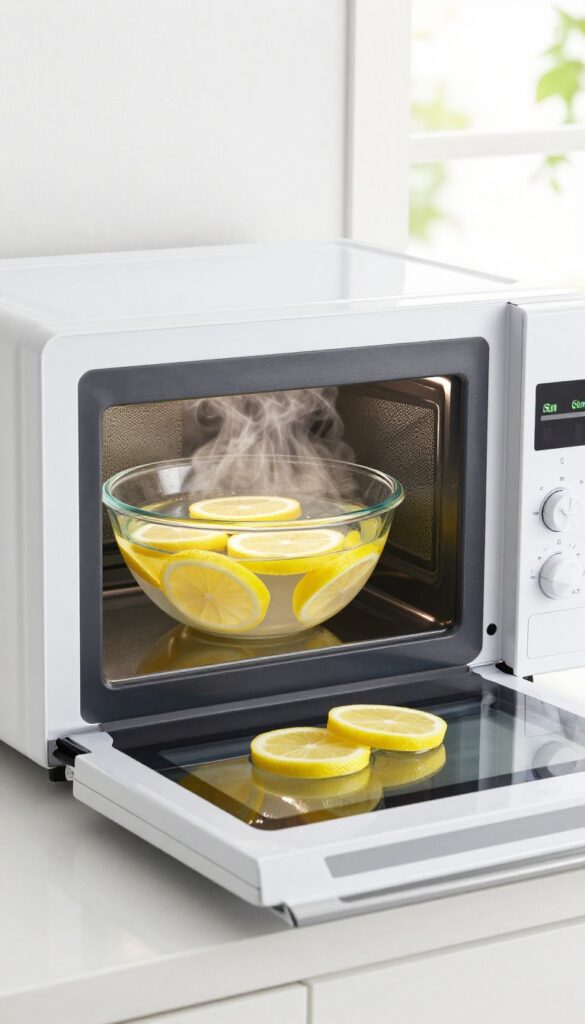
When your microwave is caked with dried sauce and mystery splatters, a lemon can do the heavy lifting. This method harnesses steam to soften grime so you can wipe it away with almost no elbow grease. Plus, the citrus scent neutralizes odors naturally.
Slice one lemon into a microwave-safe bowl filled with about a cup of water. Microwave on high for 3 minutes—watch through the door to ensure the water doesn't boil over. Let it sit for 2 more minutes without opening the door so the steam can work its magic.
Carefully remove the bowl (it will be hot), then wipe down the interior with a damp cloth. Stuck-on food should come off easily. For extra stubborn spots, dip the cloth in the lemon water.
Why Lemon Works So Well
The steam from the hot water loosens dried food particles, while the lemon's citric acid helps break down grease. The fresh scent is a bonus—it leaves your microwave smelling clean instead of like last night's dinner.
Best Practices For Best Results
Use a fresh lemon for maximum steam and acidity. If your microwave is extra dirty, add a splash of white vinegar to the water. After steaming, wipe in one direction to avoid spreading residue.
Don't forget the ceiling and door—steam reaches every surface.
2. Vinegar Steam for Tough Grease
When baked-on grease laughs at your regular sponge, it's time to bring out the big guns. White vinegar is a powerhouse cleaner that cuts through grime without any harsh fumes. The steam method is almost effortless: just heat, wait, and wipe.
This trick works because vinegar is acidic enough to break down grease but gentle on microwave surfaces. The steam loosens stubborn residue, so you don't have to scrub. Plus, it neutralizes odors, leaving your microwave smelling fresh.
How To Do It Right
Fill a microwave-safe bowl with equal parts water and white vinegar—about one cup each. Place it in the microwave and heat on high for 5 minutes. Let it sit inside for 2 minutes after the timer goes off so the steam can work its magic.
Then carefully remove the bowl (it'll be hot) and wipe down the interior with a damp cloth. All the grease should come off with minimal effort.
Why Vinegar Beats Store-bought Cleaners
Vinegar is non-toxic, cheap, and already in your pantry. Unlike commercial sprays, it doesn't leave a chemical residue or strong artificial scent. And it's just as effective—if not more—on tough, baked-on messes.
Safety Tip
Always let the bowl cool for a minute before handling. Use an oven mitt to avoid burns. And never microwave vinegar alone—always dilute it with water to prevent damage to your appliance.
3. Baking Soda Paste for Stubborn Spots
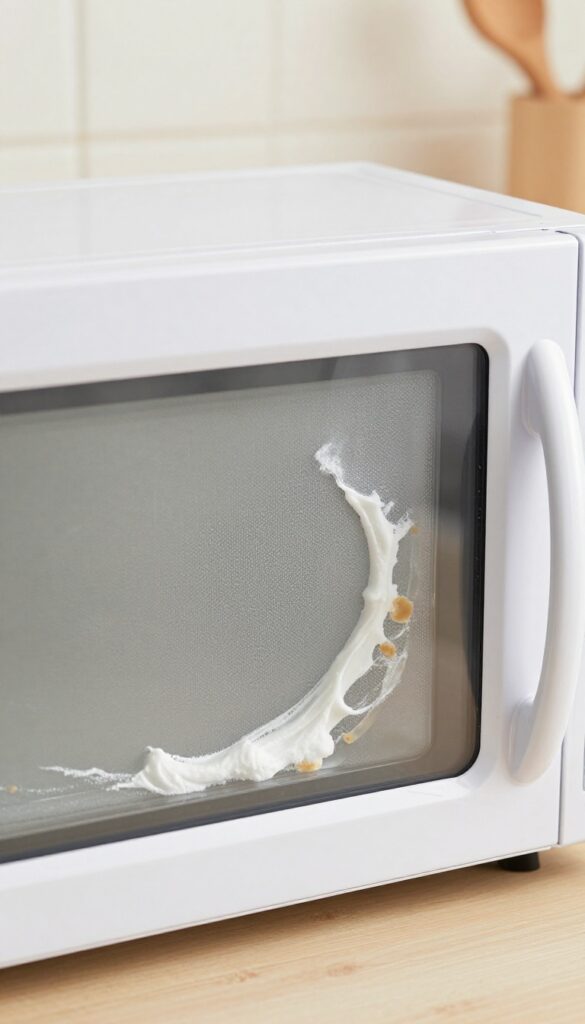
Sometimes a simple wipe-down isn't enough. Dried-on cheese, sauce splatters, or mystery crusts need a little extra muscle. That's where baking soda paste comes in—it's gentle enough not to scratch your microwave's interior but tough on grime.
Mix two tablespoons of baking soda with just enough water to form a thick paste. Spread it over the stubborn spots and let it sit for 10 minutes. The paste loosens the gunk without harsh scrubbing.
After the wait, gently scrub with a soft sponge or cloth, then rinse with a damp cloth. Your microwave will look spotless without any chemical residue.
Why It Works So Well
Baking soda is mildly abrasive, so it physically lifts stuck-on food without scratching. Its alkaline nature also helps break down acidic stains like tomato sauce. Plus, it's odorless and food-safe—perfect for kitchen cleaning.
Best Uses For This Method
Use this paste on any non-metal surface inside the microwave. It's especially effective on dried-on cheese, gravy splatters, and burnt-on sugar. Avoid using it on the microwave's metal mesh or door seal, as it could leave a residue.
Pro Tip For Extra Tough Stains
For really stubborn spots, add a splash of white vinegar to the paste. The fizzing action helps lift grime faster. Just be sure to rinse thoroughly afterward to remove any vinegar smell.
4. Dish Soap and Hot Water Soak
Sometimes the simplest method is the most effective. A bowl of hot water and a squirt of dish soap creates a steam bath that loosens every bit of grime. No scrubbing, no elbow grease—just heat and time.
Fill a microwave-safe bowl with about one cup of water and add a generous squirt of dish soap. Microwave on high for two minutes. Let the bowl sit inside with the door closed for another two to three minutes so the steam can really work.
Then open the door, carefully remove the bowl (it will be hot), and wipe down the interior with a soft cloth or sponge. The steam softens dried-on food, and the soap cuts through grease. This method works especially well for everyday messes and light buildup.
Why It Works So Well
The steam penetrates stuck-on food particles, rehydrating them so they release from the surface. Dish soap's surfactants break down grease and oil, making the wipe-down effortless. The combination of heat and soap creates a powerful cleaning action without any harsh chemicals.
Tips For Best Results
Use a bowl that is wide and shallow to maximize steam surface area. Add a splash of white vinegar for extra degreasing power if needed. Wipe the interior while it's still warm—cooling makes the residue stick again.
For tough spots, let the bowl sit for five minutes before wiping.
Safety Notes
Always use a microwave-safe bowl. Let the bowl cool for a minute before handling to avoid burns. Keep the microwave door closed during the steam cycle to trap heat and moisture.
Never microwave empty bowls or metal objects.
5. Microwave a Wet Sponge
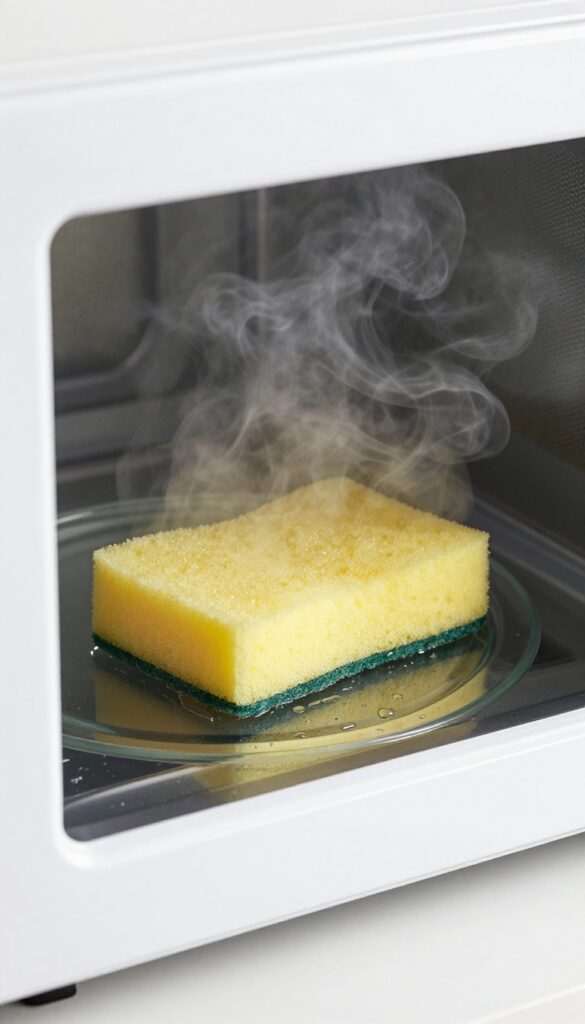
This two-in-one trick softens stubborn grime and sanitizes your sponge at the same time. It’s almost too easy—just wet a clean sponge and let the microwave do the work. The steam loosens dried-on food, and the heat kills bacteria, leaving you with a fresh tool and a cleaner microwave.
Wet a clean sponge thoroughly (it should be damp but not dripping). Place it in the microwave and run it on high for 1 minute. The steam will soften any stuck-on bits inside the microwave.
Carefully remove the hot sponge (use tongs or an oven mitt) and wipe down the interior. The sponge will be hot, so let it cool before handling further. This method works best for light to moderate messes; for heavy buildup, combine with a vinegar wipe first.
Why It Works So Well
The microwave rapidly heats the water in the sponge, creating steam that condenses on the microwave walls. This moisture loosens dried food particles, making them easy to wipe away. At the same time, the high temperature kills most germs living in the sponge, giving you a sanitized cleaning tool.
Safety Tips To Keep In Mind
Never microwave a dry sponge—it can catch fire. Also, avoid sponges with metal scrub pads or any metallic fibers. Let the sponge cool for a minute before removing it to prevent burns.
If your microwave has a metal turntable, place the sponge on a microwave-safe plate.
When To Skip This Method
If your sponge is old, smelly, or has been used to clean raw meat, replace it instead. Microwaving won’t remove all bacteria from heavily soiled sponges. Also, avoid this trick if your microwave interior has metal trim or if the sponge contains synthetic materials that might melt.
6. Use a Glass Bowl with Baking Soda
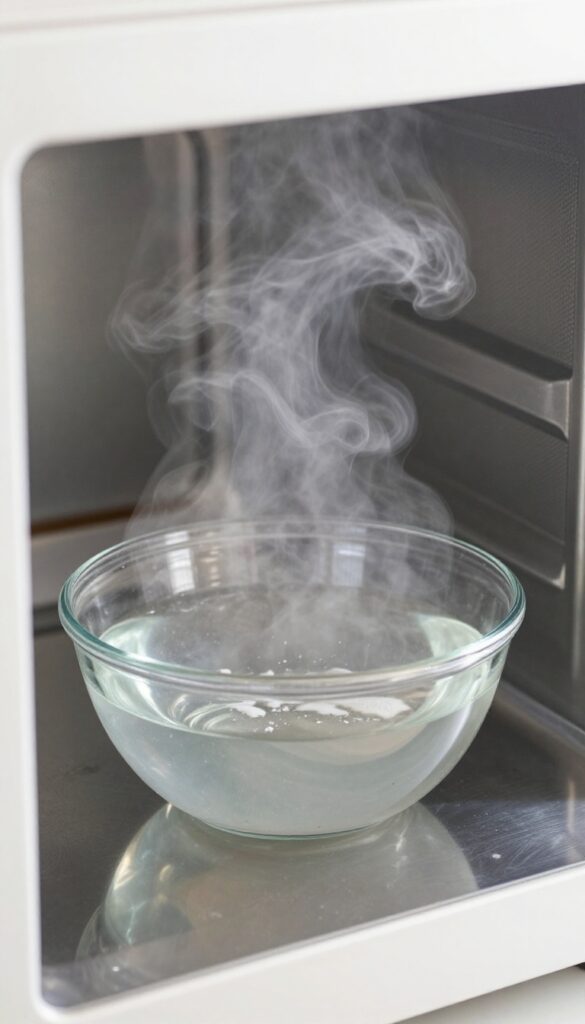
Baking soda isn't just for cookies and deodorizing your fridge. It's also a gentle abrasive that can tackle stuck-on food without scratching your microwave's interior. Pair it with steam, and you have a one-two punch that loosens grime and makes wiping effortless.
For this method, you need a microwave-safe glass bowl, water, and baking soda. The steam softens dried residue while the baking soda provides mild scrubbing power. After microwaving, let it sit for a minute, then wipe with a damp cloth.
The result is a clean, fresh-smelling microwave with minimal effort.
Why It Works
The combination of steam and baking soda creates a gentle cleaning action. Steam loosens baked-on food, while baking soda's fine particles act as a mild abrasive that lifts residue without scratching. It's safe for all microwave interiors, including stainless steel and painted surfaces.
Step-by-step Instructions
Fill a glass bowl with 2 cups of water and stir in 2 tablespoons of baking soda. Place the bowl in the microwave and heat on high for 5 minutes. Let it sit for 2 minutes to allow steam to condense.
Carefully remove the bowl (it will be hot) and wipe the interior with a soft cloth or sponge.
Tips For Best Results
For extra stubborn spots, dip your cloth in the baking soda water and scrub gently. Avoid using metal scrubbers or harsh chemicals that can damage the microwave. This method also neutralizes odors, so your microwave smells fresh after cleaning.
7. Citrus Peel Power
Don't toss those orange or lemon peels after juicing. They hold a secret weapon for microwave cleaning. The natural oils in citrus peels cut through grease like magic, and they leave your kitchen smelling fresh.
Save a handful of peels from oranges, lemons, or even limes. Place them in a microwave-safe bowl filled with about a cup of water. Microwave on high for 3 minutes.
Let the bowl sit inside for another 2 minutes so the steam can loosen any stubborn grime. Then carefully remove the bowl (it will be hot) and wipe down the interior with a damp cloth. The grease wipes away effortlessly, and the citrus scent lingers.
Why It Works
Citrus peels contain d-limonene, a natural solvent that breaks down grease and oils. When heated, the steam carries these compounds into the air, softening baked-on food and neutralizing odors. It's a chemical-free degreaser that smells amazing.
Tips For Best Results
Use thick peels from fresh fruit—dried peels won't release as much oil. If your microwave is extra dirty, add a tablespoon of white vinegar to the water for extra cleaning power. Always let the bowl cool before handling to avoid burns.
8. Coffee Filter Wipe Trick
Grab a standard coffee filter the next time your microwave needs a quick wipe-down. These unbleached paper filters are surprisingly effective for cleaning because they're lint-free and soft enough not to scratch any surface. A quick spritz of water or a 50/50 vinegar solution turns them into a perfect daily cleaning cloth.
Dampen a coffee filter with water or a vinegar solution. Use it to wipe the interior—it's lint-free and gentle on surfaces. Great for a quick daily clean.
Why Coffee Filters Work So Well
Coffee filters are designed to trap fine particles without leaving behind fibers. That means no tiny paper bits stuck to your microwave walls. They're also absorbent enough to pick up spills without falling apart.
Best Liquid To Use
Plain water works for light smudges. For tougher spots or lingering smells, mix equal parts water and white vinegar. The vinegar cuts grease and deodorizes in one pass.
Technique For A Streak-free Finish
Wipe in one direction, starting from the top and working down. Use a dry coffee filter afterward to buff the surface. This prevents streaks and leaves the microwave looking spotless.
9. Toothbrush for Corners and Seals
The microwave door seals, corners, and vent slots are prime hiding spots for grime. A regular sponge can't reach those crevices, but an old toothbrush can. Dip it in vinegar or soapy water and give those tight spaces a targeted scrub.
It's a simple trick that makes a big difference in overall cleanliness.
Grab a toothbrush you no longer use—soft bristles work best to avoid scratching. Dip it in white vinegar or a mild dish soap solution. Scrub along the rubber door seal, paying extra attention to any folds or grooves where food bits get trapped.
Move to the corners inside the microwave and the small vent slots on the exterior. The bristles will dislodge baked-on debris that a cloth can't reach. Finish by wiping the area with a damp cloth to remove any loosened grime and residue.
Your microwave will not only look cleaner but also smell fresher.
Why The Seal Matters
The rubber seal around the door is essential for keeping microwave energy contained. When it's dirty, it can wear out faster and even affect performance. Regular cleaning with a toothbrush helps maintain the seal's integrity and prevents odors from lingering.
Don't Forget The Vents
Vent slots on the back or top of the microwave often collect dust and grease. A dry toothbrush can loosen dust, while a damp one with soap tackles greasy buildup. This simple step improves airflow and prevents overheating.
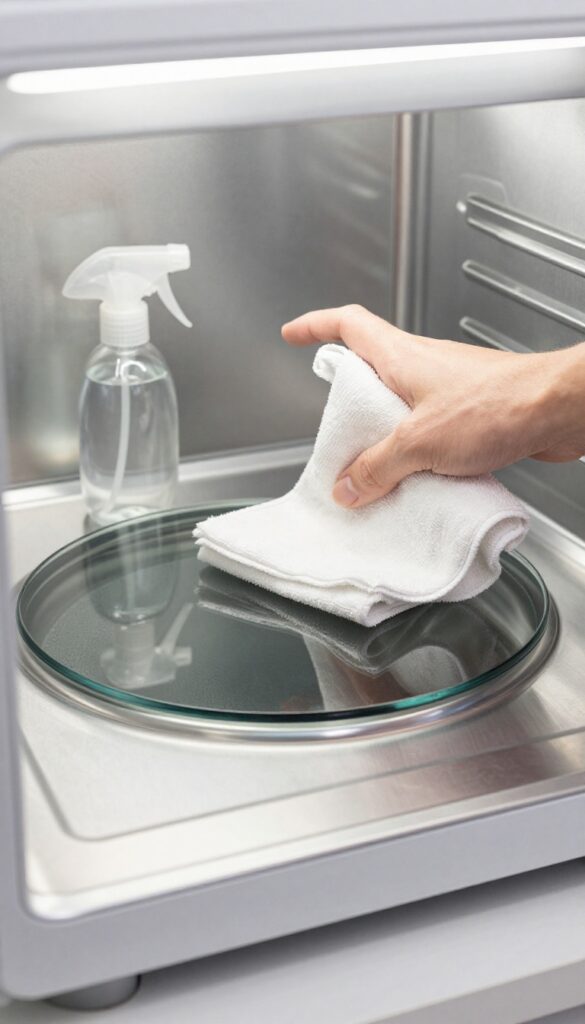
10. Microwave-Safe Steam Cleaner
A dedicated microwave steam cleaner cup, like the one from E-cloth, takes the guesswork out of deep cleaning. Just fill it with water, pop it in the microwave for three minutes, and let the steam do the heavy lifting. The accompanying microfiber cloth lifts baked-on grime effortlessly, leaving your microwave sparkling without harsh scrubbing.
This method is perfect for regular maintenance or when you need a quick refresh. The steam loosens dried food particles and softens grease, so a single wipe removes everything. Plus, the microfiber cloth traps dirt rather than pushing it around, making cleanup faster and more hygienic.
How To Use It
Fill the steam cleaner cup with tap water to the indicated line. Place it in the center of the microwave and run on high for three minutes. Let it sit for a minute after the cycle ends to allow steam to condense.
Then, use the included microfiber cloth to wipe down the interior, turntable, and door. No need for extra sprays or scrubbing.
Why It Works So Well
The steam penetrates and softens dried-on food without soaking your microwave. The microfiber cloth has millions of tiny fibers that grab dirt and grease, trapping them inside the cloth rather than smearing them around. This combo cuts cleaning time in half and leaves a streak-free shine.
Care And Maintenance
After each use, rinse the steam cleaner cup and let it air dry. Wash the microfiber cloth separately with mild detergent and avoid fabric softener, which can clog the fibers. Replace the cloth every few months for best results.
The cup itself is dishwasher-safe for easy cleaning.
11. Baking Soda and Vinegar Fizz
When stubborn food residue won't budge, it's time to bring out the heavy hitters from your pantry. Baking soda and vinegar create a fizzy reaction that loosens grime while staying gentle on surfaces. This dynamic duo works fast and leaves your microwave sparkling without harsh scrubbing.
Start by dampening a soft sponge and sprinkling a generous layer of baking soda over it. Then spray white vinegar directly onto the baking soda – it will bubble up immediately. Quickly wipe the interior walls, ceiling, and turntable, letting the fizz do the heavy lifting.
The combination breaks down grease and lifts stuck-on bits without scratching. Rinse the sponge frequently and wipe away any residue with a clean damp cloth. For extra stubborn spots, let the paste sit for a minute before wiping.
This method is safe for all microwave interiors and leaves no chemical aftertaste.
Why This Combo Works
Baking soda is a mild abrasive that gently scours surfaces, while vinegar's acidity dissolves grease and mineral deposits. When they mix, the carbon dioxide bubbles help physically lift debris away from the surface. This chemical reaction is powerful yet non-toxic, making it ideal for food-contact areas.
Pro Tips For Best Results
Use a sponge with a soft scrubby side – avoid steel wool or abrasive pads. Work in small sections so the fizz stays active. If the mixture dries out, just spray a little more vinegar.
For stuck-on food, make a thicker paste with extra baking soda and let it sit for 5 minutes before wiping.
What To Avoid
Don't use this method on aluminum or bare metal surfaces, as vinegar can cause discoloration. Also avoid getting the mixture into any vents or openings. Always unplug the microwave before cleaning if it's a built-in model to prevent electrical issues.
12. Lemon Juice and Water Spray
A simple lemon juice and water spray can be your go-to for daily microwave maintenance. It's gentle, effective, and leaves your microwave smelling fresh. Just a quick spritz and wipe is all it takes to keep things shiny between deep cleans.
Why It Works So Well
Lemon juice is naturally acidic, which helps break down grease and food residue without harsh scrubbing. The water creates steam that loosens dried-on splatters, making them easy to wipe away. Plus, the fresh citrus scent neutralizes odors left from reheating fish or popcorn.
How To Make And Use The Spray
Mix 2 tablespoons of fresh lemon juice with 1 cup of water in a clean spray bottle. Shake gently to combine. Spray the solution generously on the interior walls, floor, and ceiling of the microwave.
Avoid spraying directly into vents. Let it sit for 5 minutes to let the steam and acid work. Then, wipe everything down with a soft cloth or sponge.
For stubborn spots, give them an extra spritz and a gentle scrub.
Best Practices For Best Results
Use this spray after every few uses to prevent buildup. For a deeper clean, heat the spray in the microwave for 30 seconds before wiping—the extra steam helps even more. Always use a clean, lint-free cloth to avoid leaving fibers behind.
And don't forget to wipe the door seals and corners where grime hides.
13. Microwave a Bowl of Water with Cinnamon
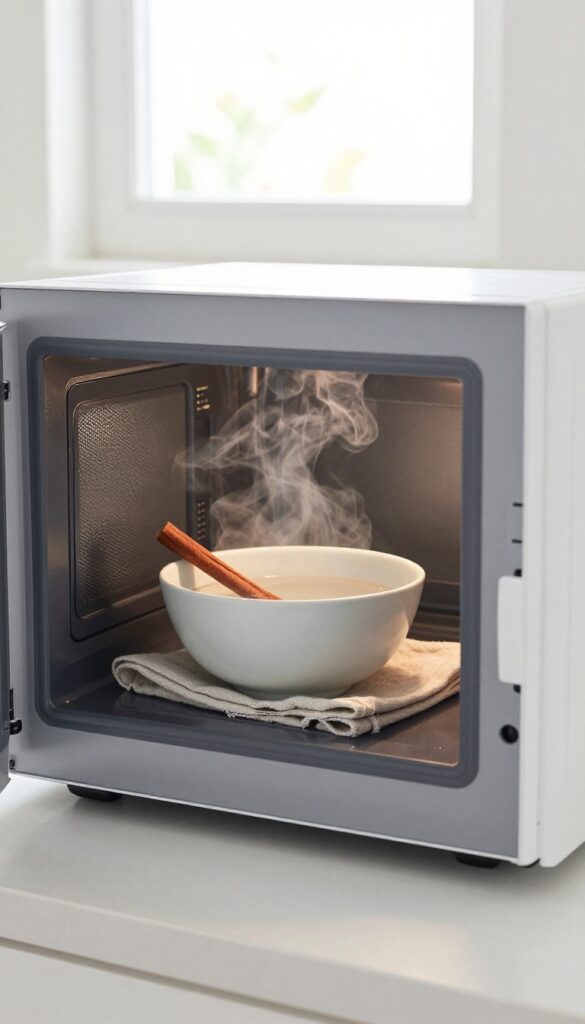
If you love the smell of fresh cinnamon, this cleaning trick is a double win. You’ll get a sparkling microwave and a kitchen that smells like a bakery. All it takes is a bowl of water and a cinnamon stick or powder.
Fill a microwave-safe bowl with 1 cup of water. Add a cinnamon stick or 1 teaspoon of ground cinnamon. Microwave on high for 3 minutes.
Let the bowl sit inside for another 2 minutes so the steam can loosen grime. Then wipe the interior with a soft cloth or sponge. The cinnamon scent will linger, making your kitchen feel cozy and clean.
Why Cinnamon Works
Cinnamon has natural antimicrobial properties that help kill bacteria and mold while deodorizing. The steam from the hot water loosens dried-on food, and the cinnamon leaves a warm, inviting fragrance.
Tips For Best Results
Use a deep bowl to prevent water from boiling over. If using ground cinnamon, stir it in well to avoid clumping. For extra cleaning power, add a squeeze of lemon juice.
Wipe down the turntable and door separately for a thorough clean.
14. Use a Magic Eraser for Baked-On Messes
Some microwave messes just won't quit. You've steamed, sprayed, and scrubbed, but that stubborn baked-on sauce or cheese still clings to the interior walls. That's where a melamine foam eraser—commonly known as a Magic Eraser—comes to the rescue.
It's like a gentle sandpaper that lifts grime without scratching your microwave's surface.
A damp Magic Eraser is your secret weapon against tough, baked-on residue. The foam's micro-abrasive texture breaks down dried food particles with minimal elbow grease. Just wet the eraser, wring it out so it's damp (not dripping), and gently rub the stained areas.
You'll see the grime lift away almost instantly. Rinse the interior thoroughly with a clean damp cloth afterward to remove any foam residue. This method works especially well on the ceiling and back wall of the microwave, where splatters often bake on hardest.
Why It Works So Well
Melamine foam is made of a super-fine network of fibers that act like microscopic sandpaper. When dampened, it creates a gentle abrasive action that can dislodge even the most stubborn food crusts. Unlike harsh scouring pads, it won't scratch glass, ceramic, or plastic surfaces.
That makes it safe for your microwave's interior coating.
How To Use It Safely
Always start with a clean, damp eraser—never dry, as that can be too abrasive. Test on a small hidden area first if you're worried about scratching. Use light pressure and circular motions.
Focus on the baked-on spots, not the entire surface. After scrubbing, wipe down the interior with a wet cloth to remove any eraser particles. Then dry with a soft towel.
When To Avoid It
Skip the Magic Eraser on any surface that's painted, coated with a non-stick finish, or has a metallic sheen. It can dull or remove those coatings. Also avoid using it on the microwave's control panel or any printed graphics.
Stick to the interior walls, ceiling, and floor only.
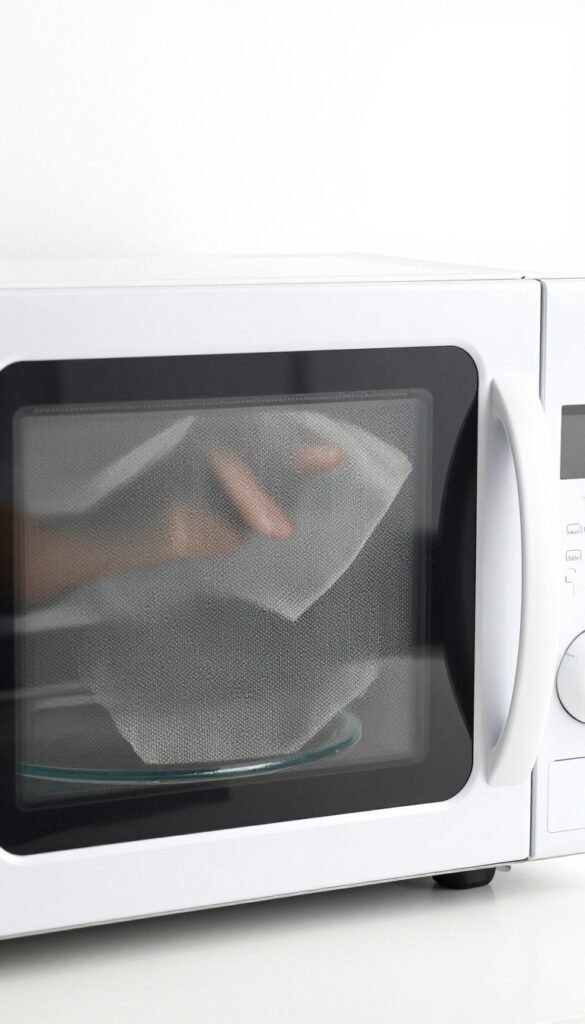
15. Regular Wipe-Down with Rubbing Alcohol
A quick daily wipe can prevent buildup and keep your microwave looking spotless. Rubbing alcohol is a surprisingly effective cleaner that evaporates fast and leaves no residue. It's also a great degreaser and disinfectant in one.
Mix equal parts rubbing alcohol and water in a spray bottle. Lightly mist a soft microfiber cloth, then wipe down the interior surfaces—walls, ceiling, floor, and door. The alcohol cuts through grease and kills germs without leaving streaks.
For stubborn spots, let the solution sit for a minute before wiping. This method is safe for stainless steel and glass turntables, but avoid using it on painted surfaces or decals.
Why Rubbing Alcohol Works So Well
Rubbing alcohol evaporates quickly, so you won't have to dry the surfaces afterward. It's also a powerful solvent that breaks down grease and dried food particles. Plus, it's a disinfectant, killing up to 99.
9% of germs on contact. Unlike vinegar, it leaves no lingering smell.
How To Use It Safely
Always dilute rubbing alcohol with water to avoid damaging the microwave's interior coating. Use a 1: 1 ratio. Never spray directly into the microwave—spray onto a cloth first.
Avoid using it on the control panel or any plastic parts that might be sensitive. Test a small hidden area first if you're unsure.
FAQ
How often should I clean my microwave?
For best results, wipe down the interior after each use with a damp cloth. Do a deeper steam clean once a week to prevent buildup and odors.
Can I use bleach to clean my microwave?
It's not recommended. Bleach can damage the interior coating and leave harmful residues. Stick to mild cleaners like vinegar, lemon, or baking soda.
Why does my microwave smell even after cleaning?
Odors can linger in the vent or seals. Try steaming with lemon or vinegar, and wipe the door seals thoroughly. If the smell persists, check the charcoal filter if your microwave has one.
Is it safe to microwave a sponge to clean?
Yes, but only if the sponge is damp and free of metal scrubbers. Microwaving a wet sponge for 1 minute kills bacteria. Let it cool before handling.
What should I avoid putting in the microwave when cleaning?
Avoid metal bowls, aluminum foil, or anything with metallic trim. Also, never microwave empty containers or sealed jars—they can explode.
Conclusion
A clean microwave makes meal prep faster and your kitchen feel fresher. These 15 ideas prove you don't need harsh chemicals or expensive gadgets—just a few minutes and common household items. Pick two or three methods that fit your routine and stick with them.
Your microwave will stay sparkling with less effort over time. Try one of these hacks today and see the difference a quick steam or wipe can make. You'll wonder why you didn't start sooner.