13 Practical Kitchen Island Paneling Ideas That Add Function and Style
Kitchen islands are the workhorses of modern kitchens, but they often get the short end of the design stick. While the countertop gets all the attention, the sides are prime real estate for adding character and utility.
Paneling is a smart way to upgrade that space without a full renovation. Whether you're after a cozy farmhouse vibe or a sleek, modern feel, the right paneling can tie your whole kitchen together.
Plus, it's a practical move—many options add durability, hide wear and tear, or even create extra storage. Here are 13 ideas that balance looks with real-world function.
1. Classic Shiplap for a Timeless Farmhouse Look
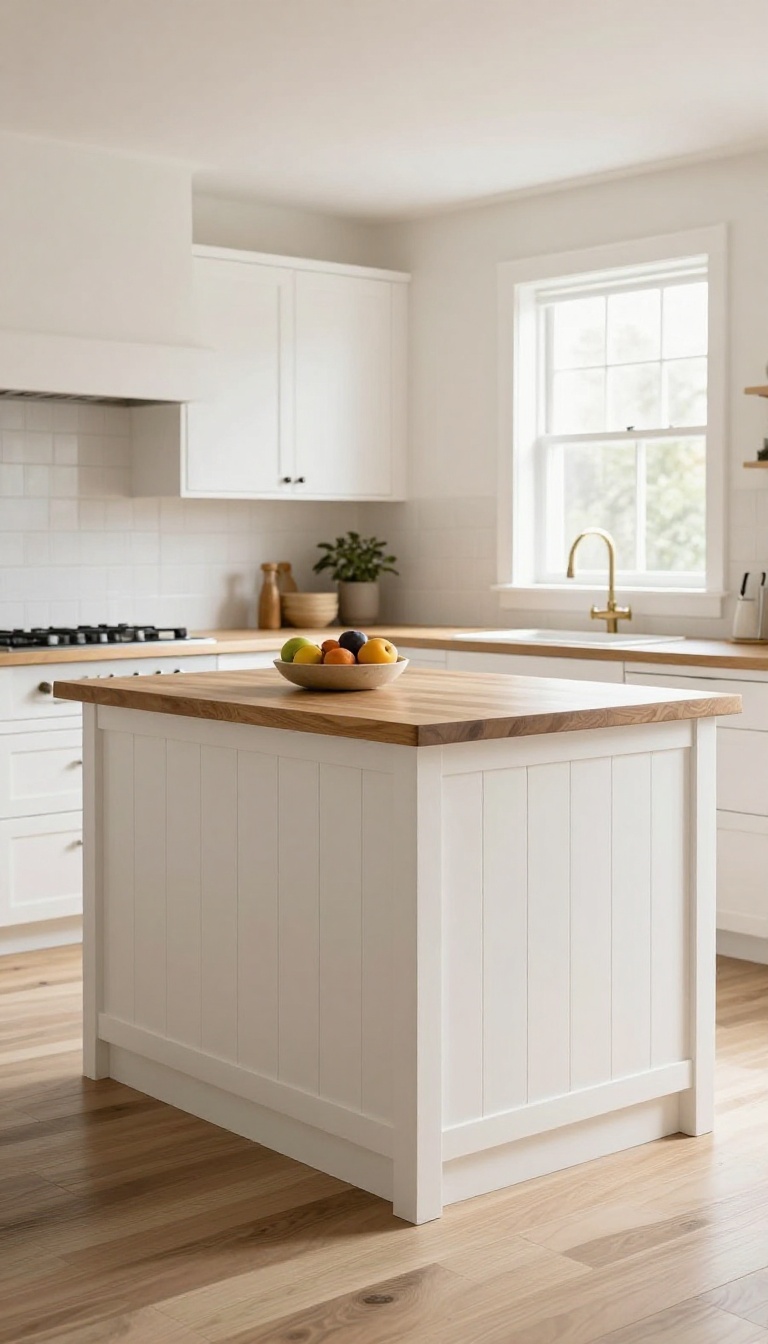
Shiplap is a go-to for a reason. It’s affordable, easy to install, and instantly adds texture. Use moisture-resistant MDF or pine boards, and seal well to protect against splashes.
Pair with a butcher block top for that cozy, rustic feel.
Shiplap brings that warm, inviting farmhouse vibe without trying too hard. The horizontal lines make the island feel grounded and sturdy, and it works with a range of countertop materials. Plus, it’s a budget-friendly upgrade that you can tackle in a weekend.
To keep it practical, choose boards that handle moisture well. Seal them properly so they don’t warp or stain near the sink. You’ll get a look that feels timeless and still holds up to daily use.
Why Shiplap Works In Kitchens
Shiplap’s overlapping joints create a tight seal that resists moisture better than flat panels. That makes it a smart choice for a kitchen island, where splashes and spills are part of the routine. The texture also hides minor dings and scuffs, so it stays looking fresh longer.
Best Materials For Shiplap Paneling
MDF is a solid pick because it’s smooth, stable, and less prone to swelling than raw wood. Pine boards add more grain and character, but they need a good primer and paint. For extra durability, consider PVC shiplap—it’s completely waterproof and easy to clean.
Installation Tips For A Flawless Finish
Start with a level base and use spacers to keep the gaps even. Nail or glue each board, then fill the nail holes before painting. If you’re going for a true farmhouse look, paint it white or a soft off-white.
Seal the edges with caulk to keep moisture out.
Styling Your Shiplap Island
Let the shiplap be the star by keeping the rest of the island simple. A butcher block top adds warmth, while a quartz top keeps it bright and modern. Add open shelving on the ends or a towel bar for extra function without covering up the texture.
2. Beadboard Panels for Subtle Texture and Charm
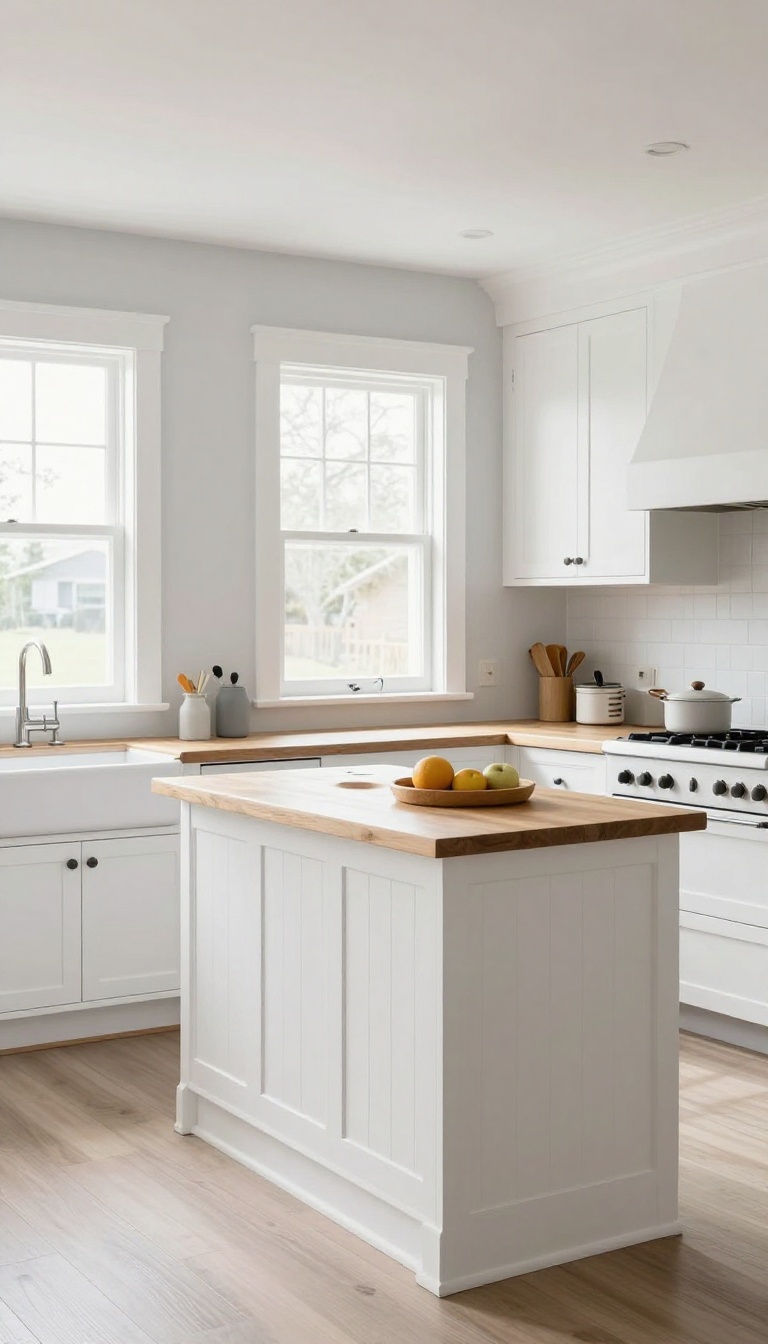
Beadboard brings a finer, more delicate texture than shiplap, making it a favorite for cottage or coastal kitchens. Its narrow vertical grooves add visual interest without overwhelming the space. Plus, it’s a budget-friendly option that does a great job hiding imperfections on your island’s sides.
Installing beadboard is a straightforward DIY project that can transform the look of your kitchen island. Whether you choose a classic vertical orientation or a more modern horizontal one, this paneling adds depth and character. It also pairs beautifully with painted finishes, allowing you to match your island to your kitchen’s color scheme effortlessly.
Classic Vertical Beadboard
Vertical beadboard is the traditional choice, often seen in farmhouse and coastal designs. It draws the eye upward, making your kitchen feel taller and more open. This style works well with shaker cabinets and butcher-block countertops, creating a cohesive, timeless look.
Modern Horizontal Beadboard
For a contemporary twist, install beadboard horizontally. This unexpected direction adds a fresh, updated feel while still offering the same texture and charm. It’s a great way to blend traditional material with modern design, especially in transitional kitchens.
Painting And Finishing Tips
Beadboard takes paint beautifully. Use a high-quality primer and a semi-gloss or satin finish for durability and easy cleaning. Light colors like white or soft gray keep the space airy, while deeper tones like navy or forest green add drama.
Don’t forget to seal the edges to prevent moisture damage.
3. Reclaimed Wood Planks for Rustic Warmth
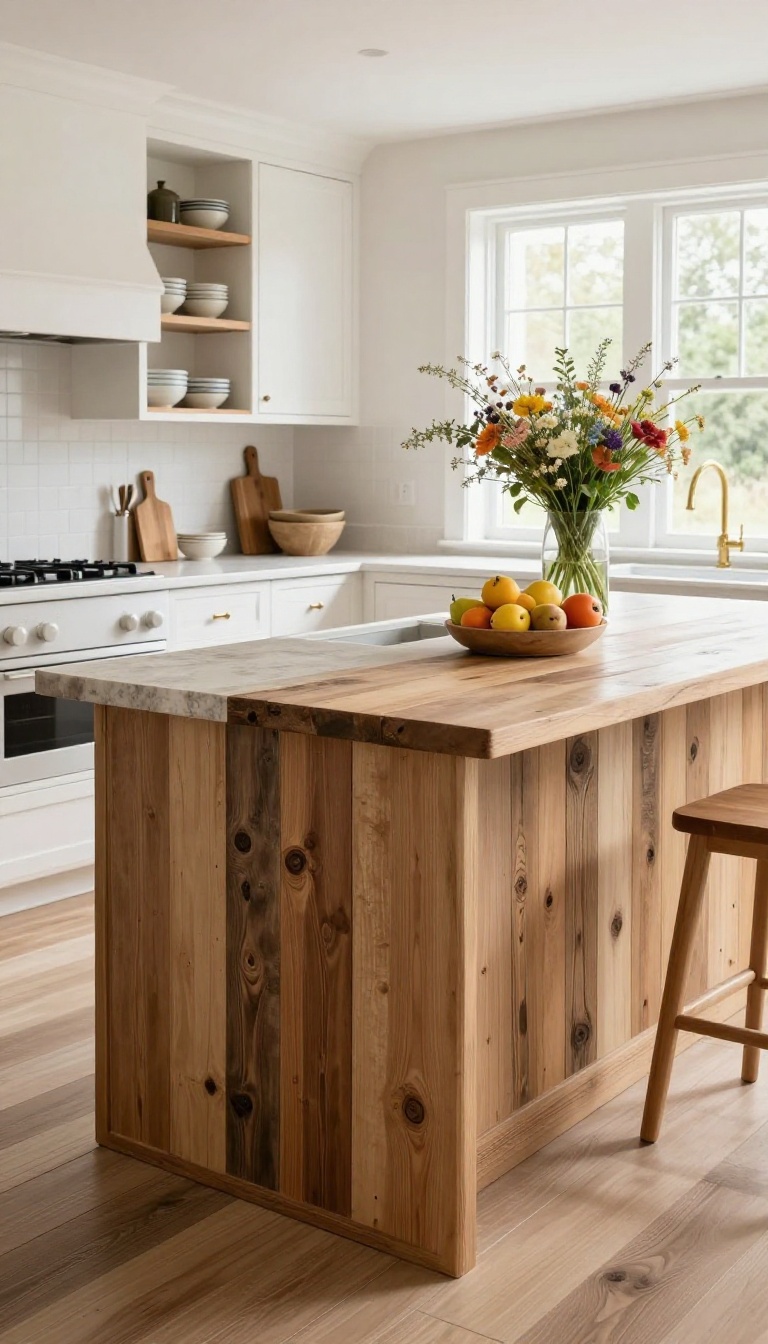
Reclaimed wood brings a sense of history and warmth that new materials just can't match. Each plank carries its own story, with unique knots, grain patterns, and weathered textures. Using it on your kitchen island is an easy way to add character without overwhelming the space.
You can apply reclaimed wood to just one side of the island for a subtle accent, or wrap the entire base for a bold, rustic statement. It's also an eco-friendly choice, giving old wood a second life and reducing demand for new lumber. Plus, it's a natural conversation starter—guests will want to know where it came from.
Reclaimed wood planks are versatile and forgiving. They hide dings and scratches better than smooth painted surfaces, making them practical for busy kitchens. The wood's natural variations mean no two islands look exactly alike, so your kitchen gets a one-of-a-kind focal point.
Installation is straightforward: attach the planks to the island base with adhesive and finishing nails. You can leave them unfinished for a raw look, or apply a clear matte sealer to protect against moisture and grease. If you're worried about matching your existing decor, remember that reclaimed wood comes in a range of tones—from grayish barn wood to rich amber—so you can find a shade that blends or contrasts as you like.
Where To Source Reclaimed Wood
Look for reclaimed wood at architectural salvage yards, online marketplaces, or local deconstruction companies. You can also repurpose old pallets, barn siding, or even flooring from a renovation. Just make sure the wood is dry, free of pests, and safe for indoor use.
Ask for a certificate of origin if you want to ensure it's truly reclaimed.
Mixing Finishes And Textures
For a more refined rustic look, pair reclaimed wood with sleek countertops like quartz or concrete. The contrast between rough wood and smooth stone creates visual interest. You can also mix wood tones—use lighter planks on the island and darker ones on nearby shelving to tie the room together.
Caring For Your Reclaimed Wood
Reclaimed wood is durable but still needs some care. Clean it with a soft cloth and mild soap, avoiding harsh chemicals that can strip the finish. Every few years, reapply a protective oil or wax to keep the wood hydrated and prevent cracks.
If you notice any loose planks, simply nail them back down—it's part of the charm.
4. Vertical Board and Batten for Height and Drama
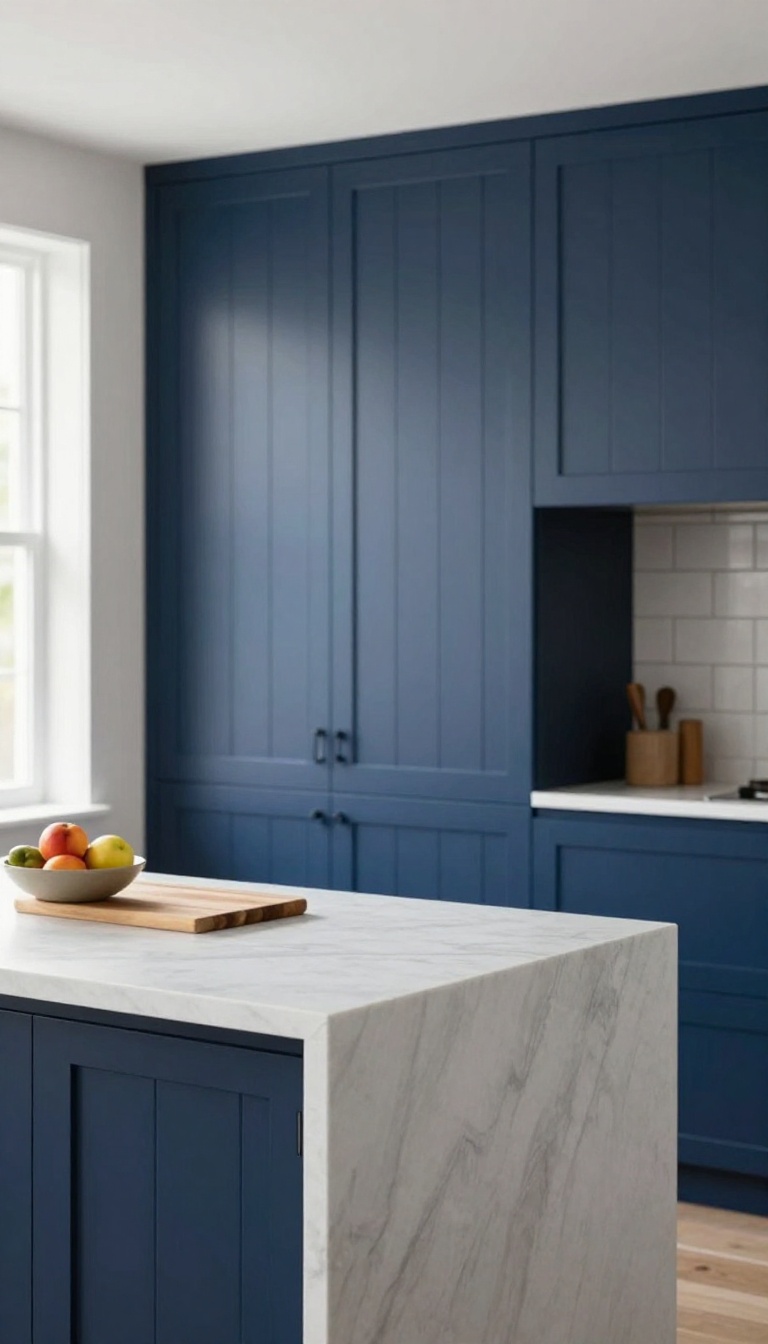
If your kitchen feels a bit boxy or the ceiling seems lower than you'd like, vertical board and batten can work wonders. The upward lines draw the eye, creating the illusion of more height and a touch of architectural drama. It's a timeless look that fits both traditional and contemporary kitchens, especially when you keep the boards wide and the battens narrow for a clean, tailored finish.
Board and batten is more than just a pretty face—it also adds a layer of protection to your island. The vertical slats can hide dings and scratches that come with daily use, and they're easy to clean with a damp cloth. Plus, the recessed panels give you a natural spot to add hooks for towels or small utensils, blending style with function.
When it comes to color, don't be afraid to go bold. A deep navy or forest green makes the island a statement piece, while a crisp white keeps things airy and bright. If you're feeling adventurous, try a two-tone approach: paint the boards one shade and the battens a slightly darker or lighter tone for extra depth.
Choosing The Right Proportions
The key to a polished board and batten look lies in the proportions. For most kitchen islands, boards that are 6 to 8 inches wide with battens around 2 to 3 inches wide strike a nice balance. If your island is on the smaller side, go with narrower boards to avoid overwhelming the space.
On a larger island, you can afford wider boards for a more dramatic effect.
Installation Tips For A Flawless Finish
Start by measuring your island's sides and cutting the boards to fit. Use construction adhesive and finish nails to secure them, then fill the nail holes with wood filler. Sand everything smooth before painting.
For a truly seamless look, caulk the seams between the boards and the countertop or floor. If you're working with MDF, prime it first to prevent moisture damage.
Styling Your Board And Batten Island
Once your paneling is up, style the island to complement the vertical lines. Hang a couple of pot racks or a utensil holder on the side, or place a wooden cutting board and a bowl of fruit on the countertop. In a modern kitchen, pair it with sleek bar stools and minimalist decor.
For a farmhouse feel, add some open shelving below or a vintage rug in front.
5. Horizontal Slat Wall for a Modern, Sleek Vibe
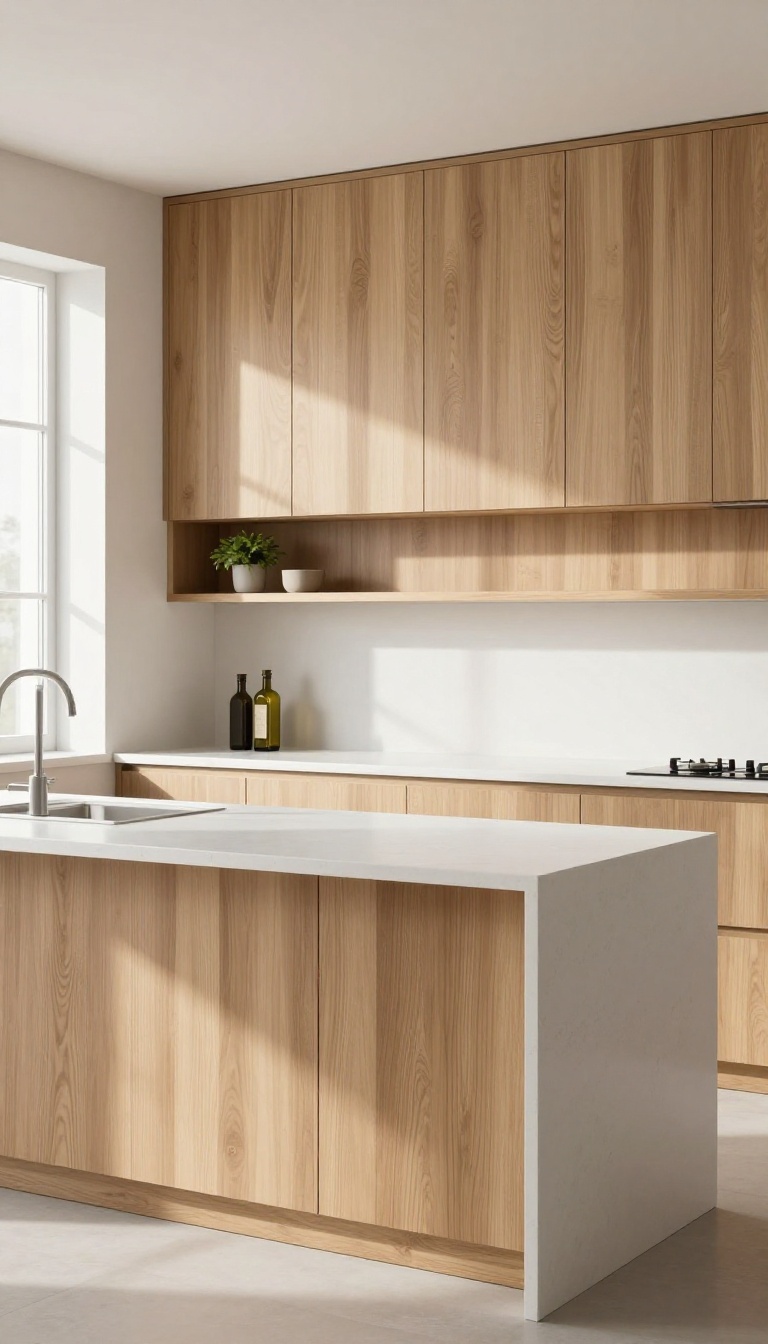
Horizontal slats bring a clean, contemporary rhythm to your island that feels both polished and understated. The even lines draw the eye across the space, making the island feel wider and more grounded. It’s a favorite for minimalist kitchens because it adds texture without visual clutter.
Plus, it’s a clever way to hide the seam between the countertop and the base, giving everything a seamless, built-in look.
Choose wood slats for warmth or MDF for a crisp, uniform finish. Space them evenly—usually 1/2 to 1 inch apart—to create that rhythmic pattern. You can mount them directly over a plywood base or use a slat panel system for easier installation.
The key is keeping the gaps consistent so the wall looks intentional. And if you want to add function, a floating shelf on top gives you a spot for everyday items without breaking the clean lines.
Why Horizontal Lines Work
Horizontal lines naturally make a surface feel wider and more relaxed. In a kitchen, that can balance out tall cabinets or a high ceiling. The slats also add a subtle shadow play as light hits them, which gives the island depth without making the room feel busy.
Material Choices: Wood Vs. Mdf
Solid wood like oak or walnut brings warmth and natural grain, perfect for a Scandinavian or Japandi style. MDF is smoother and more uniform, ideal for a high-gloss or painted finish. Both are durable, but wood may need occasional sealing, while MDF is easier to wipe down.
Adding A Floating Shelf
Mount a slim floating shelf just above the slats to hold oils, spices, or a small plant. Use the same wood tone for a seamless look, or contrast with black metal for an industrial edge. Keep it shallow—about 6 inches deep—so it doesn't stick out too far and interrupt the clean silhouette.
Installation Tips
Start with a flat, sturdy base. If you're covering an existing island, sand and prime it first. Use construction adhesive and finishing nails to attach each slat, and a spacer block to keep gaps even.
For a flawless finish, fill nail holes and paint or stain before sealing.
6. Tongue and Groove for a Seamless, Polished Finish
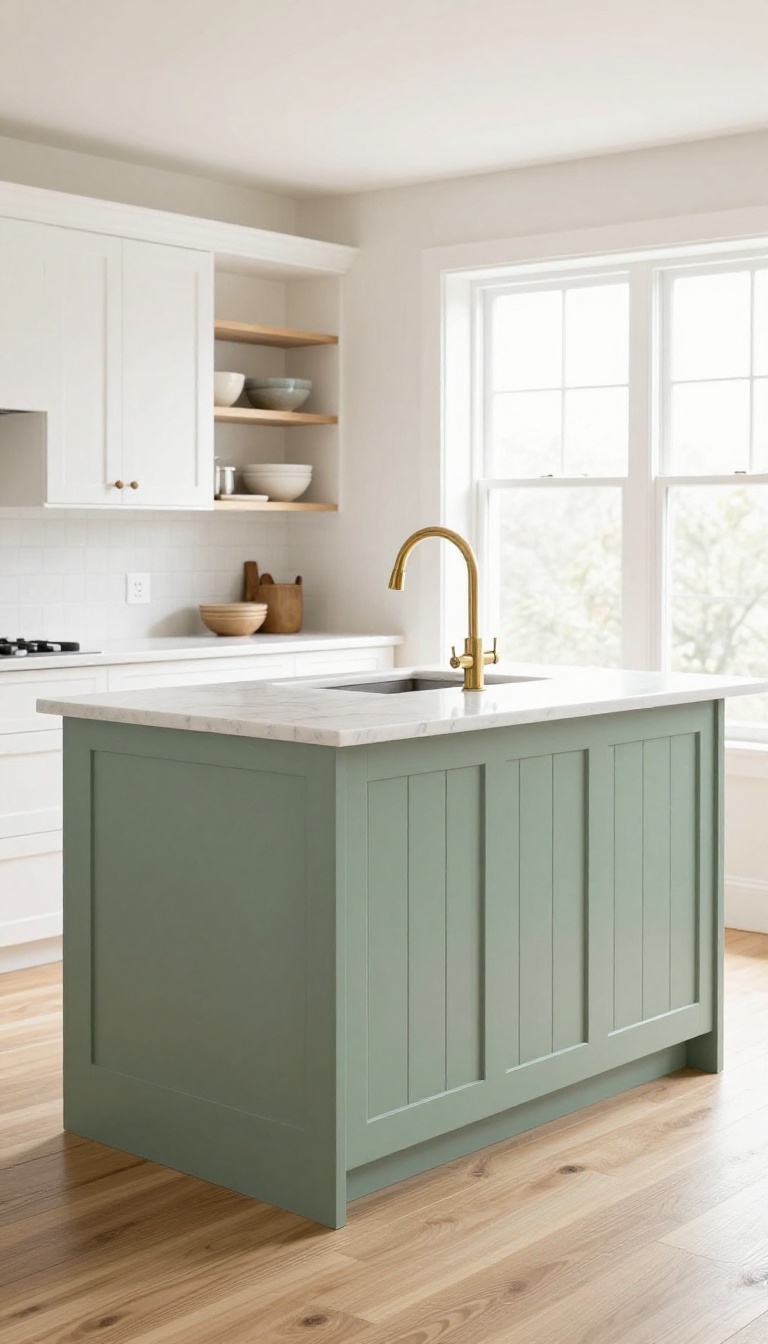
If you want a kitchen island that looks like it was built by a master carpenter, tongue and groove paneling is the way to go. The boards lock together tightly, creating a smooth, continuous surface with no visible gaps. It's a classic choice that works in both traditional and modern kitchens, and it's surprisingly durable.
Tongue and groove paneling is all about that clean, seamless look. Because the boards fit into each other, there are no cracks for dirt or grime to sneak into, which makes it a practical pick for a busy kitchen. Plus, the tight joints add extra strength, so it holds up well against everyday bumps and knocks.
You can paint it any color to match your cabinetry, or stain it to show off the natural wood grain. For a truly polished finish, consider using it on all sides of the island, including the back, so it looks great from every angle.
Why Tongue And Groove Works In Kitchens
The main advantage of tongue and groove is its durability. The interlocking design prevents warping and shifting, even in areas with high humidity. It also creates a solid barrier that's easy to wipe down—no grooves for crumbs to hide in.
If you're worried about maintenance, this is a low-fuss option that still delivers a high-end look.
How To Install Tongue And Groove Paneling
Installation is straightforward if you're handy. You'll need to cut the boards to length, then fit the tongue of each board into the groove of the previous one. Use finishing nails and wood glue for a secure hold.
Start from the bottom and work your way up, using a level to keep everything straight. For a truly seamless look, fill the nail holes with wood filler and sand smooth before painting or staining.
Styling Ideas For Tongue And Groove Islands
This paneling style is versatile. Paint it white for a crisp, coastal feel, or go with a deep navy for a dramatic statement. You can also leave it natural with a clear sealer to highlight the wood's grain.
Pair it with a contrasting countertop and simple hardware to let the paneling shine. Add open shelving on one end to break up the surface and add storage.
7. Metal Panels for an Industrial Edge
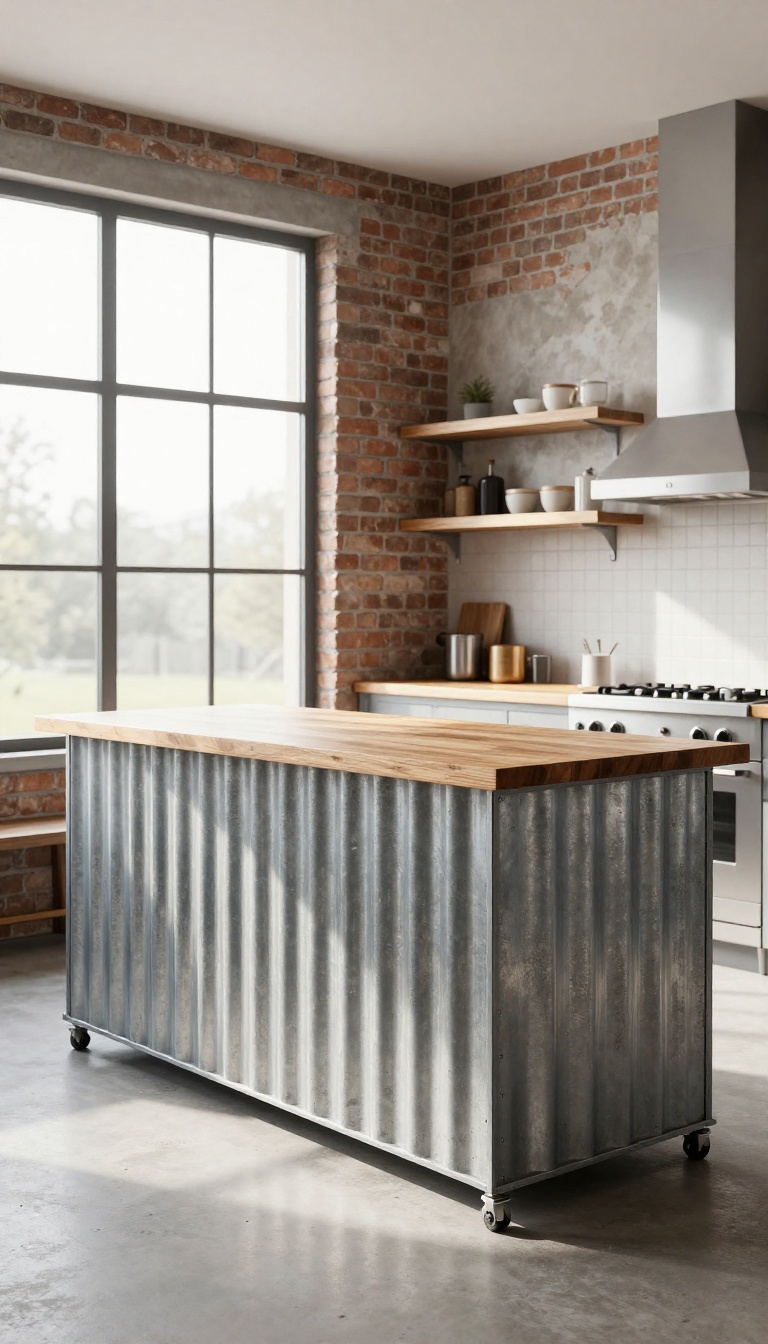
Metal paneling, like corrugated steel or tin tiles, adds an industrial, edgy vibe. It’s incredibly durable and easy to clean—just wipe it down. Use it on a rolling island or as a backsplash behind a stove.
It’s a bold choice that’s sure to stand out.
Metal panels bring a raw, utilitarian charm that instantly shifts the mood of your kitchen. They’re not just about looks—the durability factor is a huge win for busy spaces. You can choose from a range of finishes, from shiny stainless to weathered copper, to match your style.
And because metal is non-porous, it resists stains and moisture better than most other materials.
Choosing The Right Metal
Think about the overall vibe you want. Corrugated steel is the classic industrial pick, with its wavy texture and rugged feel. Tin tiles offer a more decorative option, with patterns that can add a vintage touch.
For a sleeker look, consider brushed stainless steel panels—they’re modern and reflect light beautifully. Whatever you choose, make sure it’s properly sealed to prevent rust, especially in humid areas.
Installation Tips
You can attach metal panels directly to your island’s base using adhesive and finishing nails. If you’re covering a large area, it’s smart to cut the panels with tin snips or a circular saw fitted with a metal-cutting blade. For a rolling island, keep the weight in mind—lighter gauge metal is easier to move.
Don’t forget to wear gloves; metal edges can be sharp.
Mixing With Other Materials
Metal pairs well with wood, concrete, and even glass. Try combining a metal paneled island base with a butcher block countertop for a warm contrast. Or, use metal panels on one side and open shelving on the other to break up the texture.
This mix keeps the industrial edge from feeling too cold or sterile.
8. Glass-Front Panels to Display Collectibles
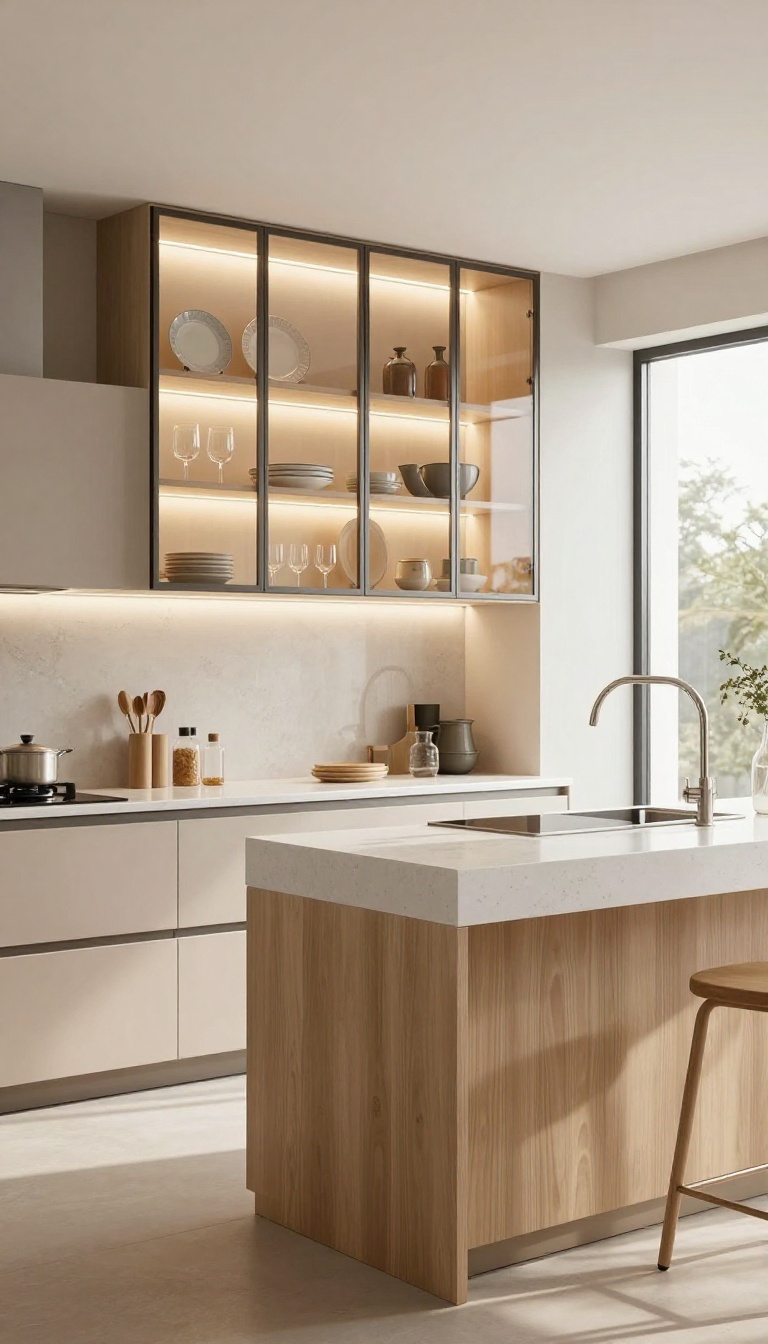
Glass-front panels turn your kitchen island into a display case for the things you love. Instead of hiding everything behind solid wood, you can show off your favorite dishes, glassware, or even vintage finds. It feels personal and makes the island stand out as a piece of furniture, not just a work surface.
Glass-front panels are a stylish way to break up solid paneling and add a layer of depth. They work especially well if you have a collection of items that are too pretty to keep hidden. Plus, they can make a small kitchen feel a bit more open because your eye can travel beyond the surface.
When you choose glass, safety matters. Tempered glass is a must—it's stronger and shatters into small, less dangerous pieces if it breaks. You'll also want to think about what's behind the glass.
A simple shelf or a few open cubbies can give you a place to arrange your items neatly. One of the best parts is adding interior lighting. A strip of LED lights inside the display area creates a warm glow that highlights your pieces and makes the island feel almost like a built-in nightlight.
It's a small touch that adds a lot of charm, especially in the evening.
Choosing The Right Glass And Frame
For the glass itself, tempered glass is non-negotiable for safety. You can also opt for frosted or tinted glass if you want a bit of privacy while still showing off shapes and colors. The frame matters too—a slim metal frame keeps the look modern, while a wooden frame blends with traditional kitchens.
Make sure the frame is sturdy enough to hold the glass securely.
Styling The Display Inside
What you put behind the glass is just as important as the glass itself. Stick to a theme, like all white dishes or a collection of colored glass bottles. Use risers or small shelves to add height variation.
Don't overcrowd—leave breathing room so each piece can shine. It's also a good idea to switch things out seasonally or when you find new treasures.
Adding Interior Lighting For Effect
A simple LED strip light inside the display area can make a huge difference. It draws the eye to your items and creates a cozy ambiance. You can install a dimmer or a motion sensor so the light comes on when you walk by.
Just make sure the wiring is done safely, and consider using low-voltage lights to keep heat down.
9. Chalkboard Panels for a Fun, Functional Twist
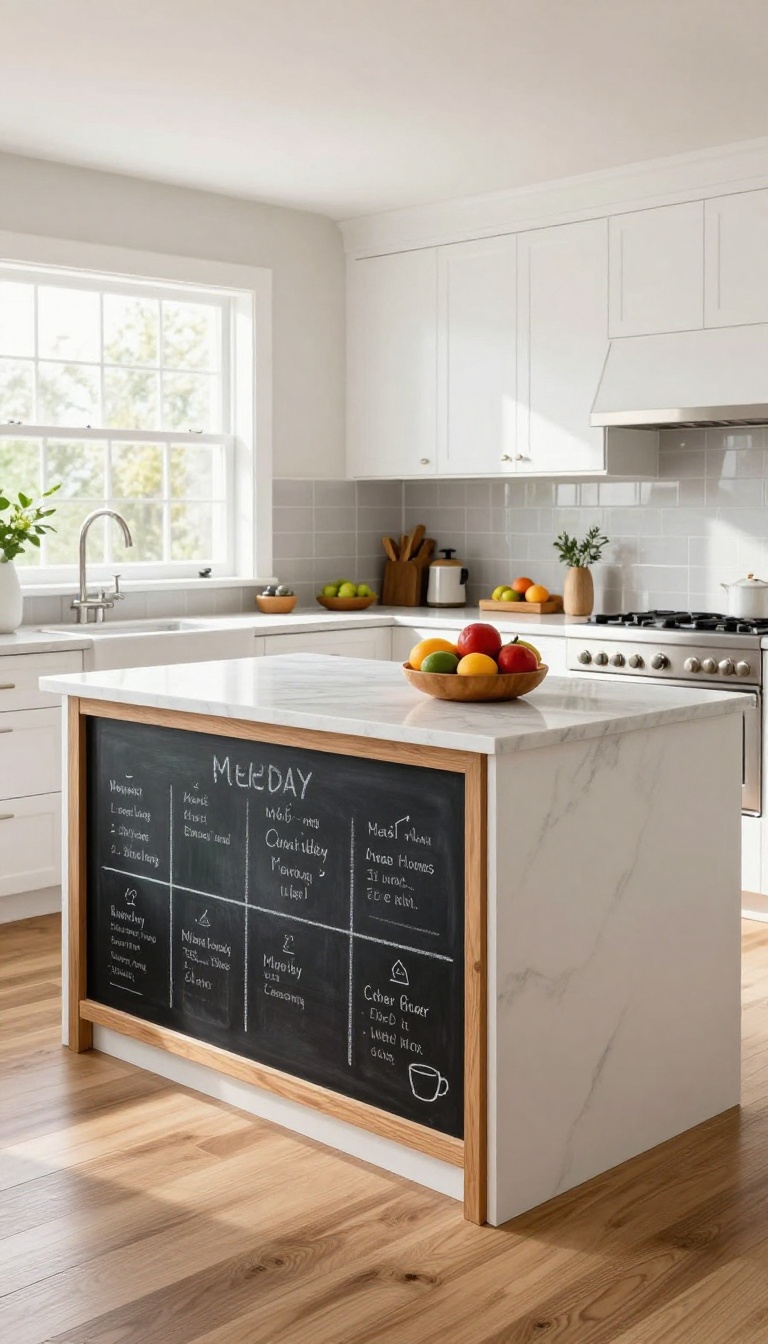
Chalkboard paint isn't just for kids' rooms anymore. It can turn your kitchen island into a dynamic hub for notes, menus, or doodles. This idea adds a playful touch while keeping things practical—perfect for busy families or anyone who loves a bit of whimsy in their kitchen.
Applying chalkboard paint to your island's panels is a straightforward DIY project. You can cover the entire side or just a section, depending on your style. It's a great way to keep grocery lists visible, jot down meal plans, or leave sweet messages for the family.
The best part? It's easy to update and wipe clean, so you can change it as often as you like.
Where To Apply It
Think about how you use your island. If it's a gathering spot, a chalkboard panel on the side facing the living area makes sense. For a more subtle look, use it on the back side or a small inset.
You can also frame the chalkboard with wood trim to make it look intentional and polished.
Choosing The Right Paint
Not all chalkboard paint is the same. Look for a low-VOC option to keep your kitchen air fresh. Some paints are magnetic too, letting you hang notes with magnets.
If you want a smoother writing surface, consider a chalkboard paint that's designed for a fine finish.
Maintenance And Upkeep
To keep your chalkboard looking sharp, season it before first use by rubbing chalk over the entire surface and wiping it off. Use a damp cloth for regular cleaning, and avoid abrasive cleaners. Chalk markers are a great alternative to traditional chalk—they're cleaner and come in fun colors.
10. Tile Panels for Easy Cleanup and Color
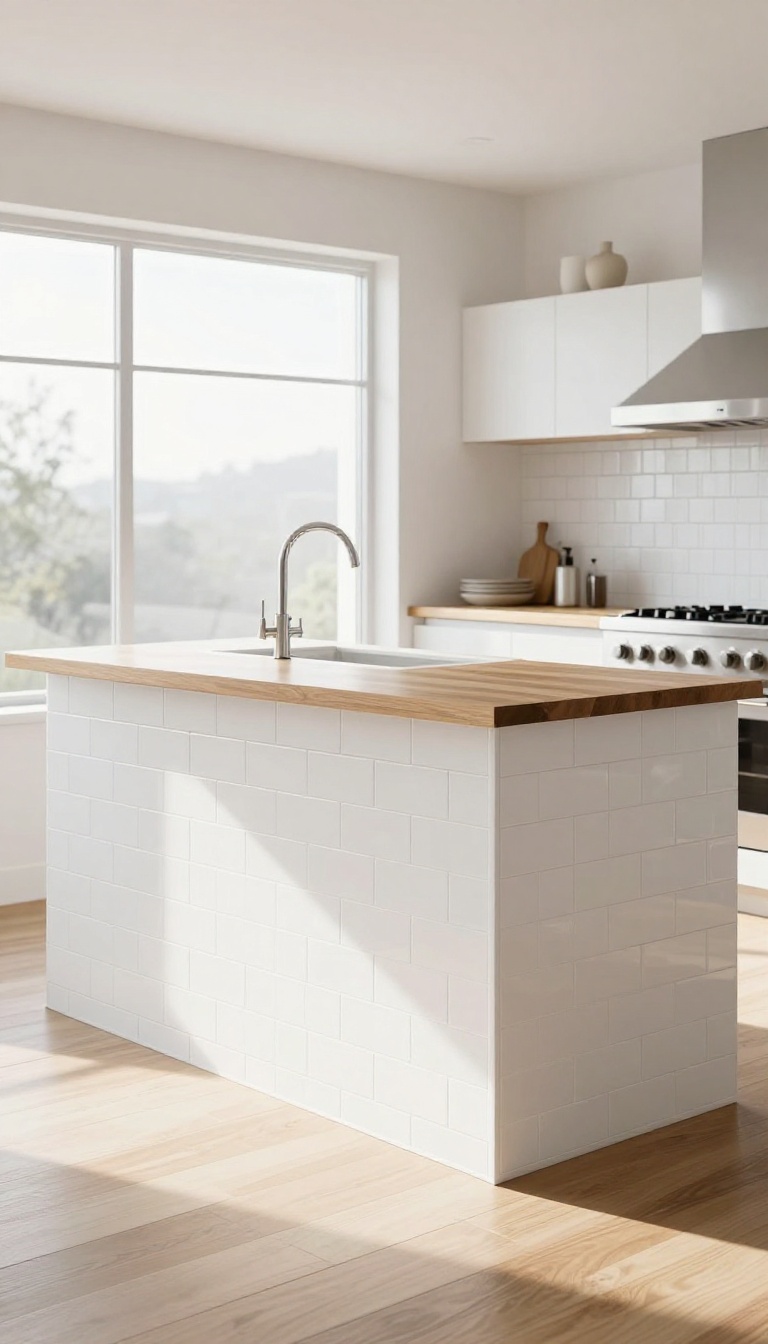
Tile isn't just for backsplashes. Covering your island base with tile is a bold, practical move that stands up to daily life. It's waterproof, heat-resistant, and a quick wipe keeps it looking new.
You can go big with large-format tiles for a sleek, modern look, or use mosaic sheets to add intricate detail. The grout lines add texture and visual interest, making your island a true focal point.
Choosing the right tile for your island base depends on your style and how much maintenance you're willing to take on. Large-format tiles create a seamless, contemporary feel with fewer grout lines to clean. Mosaic sheets, on the other hand, offer endless patterns and colors but come with more grout to maintain.
Neutral tones like white, gray, or beige keep things versatile and timeless. Bold patterns—think geometric, Moroccan, or even handmade-look tiles—turn your island into a statement piece. Don't forget to seal natural stone tiles to protect them from stains and moisture.
Installation is straightforward for a DIYer, but you can also hire a pro. The result is a durable, beautiful surface that handles everything from splatters to hot pots.
Picking The Right Tile
Large-format tiles (like 12×24 inches) minimize grout lines and give a clean, modern look. They're easier to clean and feel more seamless. Mosaic sheets (like 1×1-inch squares) offer more color and pattern options but require more grout care.
Consider the size of your island and the overall kitchen style when deciding.
Patterns That Pop
A bold geometric pattern can be the star of your kitchen. Herringbone, chevron, or even a classic subway tile laid vertically adds visual interest. If you prefer a subtler look, stick to solid neutral colors with a textured finish.
Grout color also matters—contrasting grout makes the pattern stand out, while matching grout creates a smoother appearance.
Maintenance And Durability
Tile is incredibly durable and easy to clean. Just wipe with a damp cloth and mild detergent. Grout lines can stain over time, so use a grout sealer and consider epoxy grout for extra protection.
For high-traffic areas, porcelain or ceramic tile is more resistant than natural stone. If you love the look of stone, seal it properly to avoid etches and stains.
11. Leather or Fabric Panels for a Soft Touch
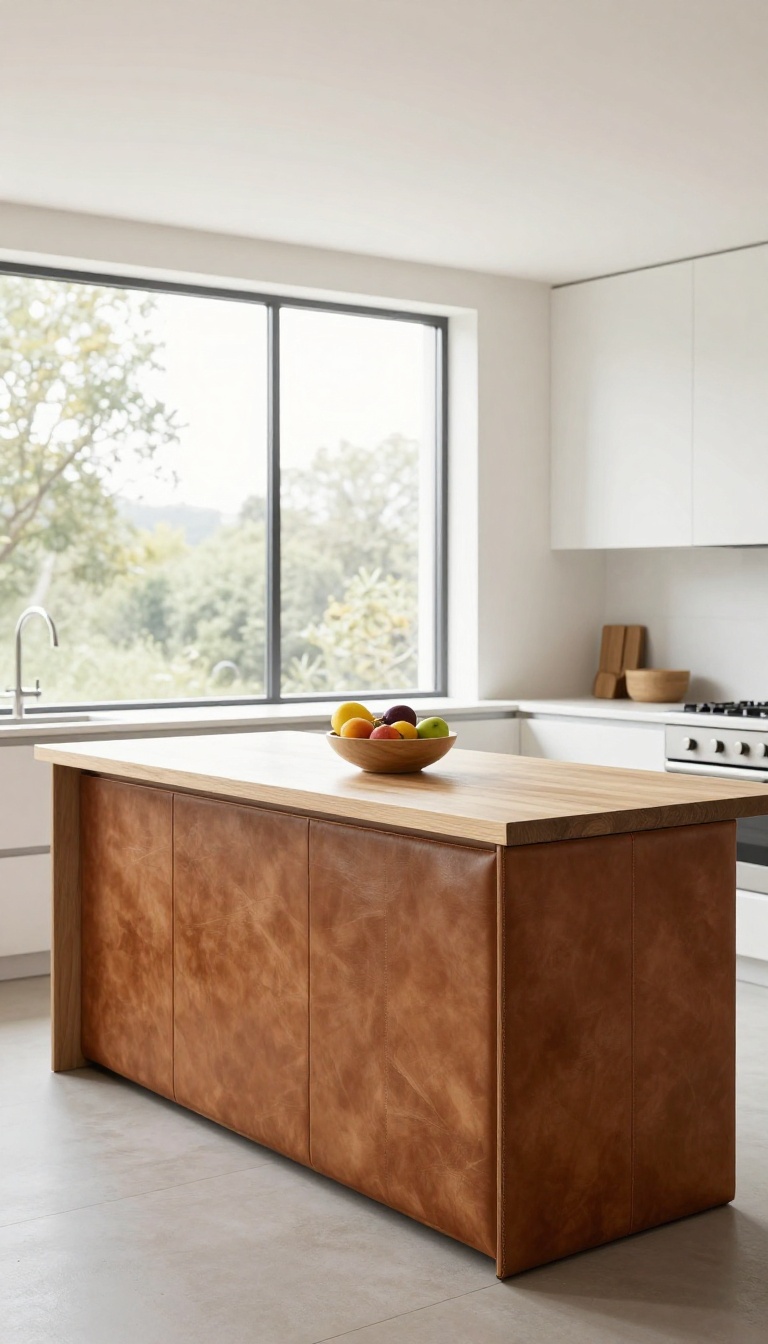
Upholstered panels bring a surprising softness to the kitchen island, turning it into a spot you actually want to lean against. Leather offers a rugged, refined look that ages beautifully, while fabric can inject color and pattern for a more relaxed feel. It's a simple upgrade that makes the island feel more like furniture and less like a built-in afterthought.
When you upholster the sides of your island, you're adding a layer of warmth that's hard to achieve with wood or tile. Leather is particularly forgiving—it hides smudges and wipes clean with a damp cloth, making it a smart choice for busy kitchens. Fabric, on the other hand, lets you play with texture and hue, from a subtle linen to a bold geometric print.
The key is to choose materials that can handle the occasional splash or spill, and to think about how the paneling will interact with the rest of your kitchen's style.
Leather: Built To Last
Full-grain leather is the go-to for a durable, high-end look. It develops a patina over time, adding character. You can use it as large panels or as trim around other materials.
For a more budget-friendly option, consider bonded leather or faux leather—they still offer that tactile feel without the hefty price tag. Just make sure the leather is treated to resist stains and moisture.
Fabric: Cozy And Customizable
Fabric panels are perfect for adding a personal touch. Choose a durable upholstery fabric with a high rub count, and consider treating it with a stain repellent. To make life easier, attach the fabric with Velcro or a removable track system so you can take it off and toss it in the wash.
This is a great way to change the look of your island with the seasons or whenever you feel like a refresh.
Installation And Care Tips
You can attach panels directly to the island's base using adhesive or a staple gun, but for a cleaner finish, build a simple frame and cover it with padding before adding the upholstery. This gives a plush, professional look. For cleaning, vacuum fabric regularly and spot-clean with a mild soap.
Leather just needs a quick wipe-down with a damp cloth and occasional conditioning to keep it supple.
12. Open Shelving with Paneling for Extra Storage
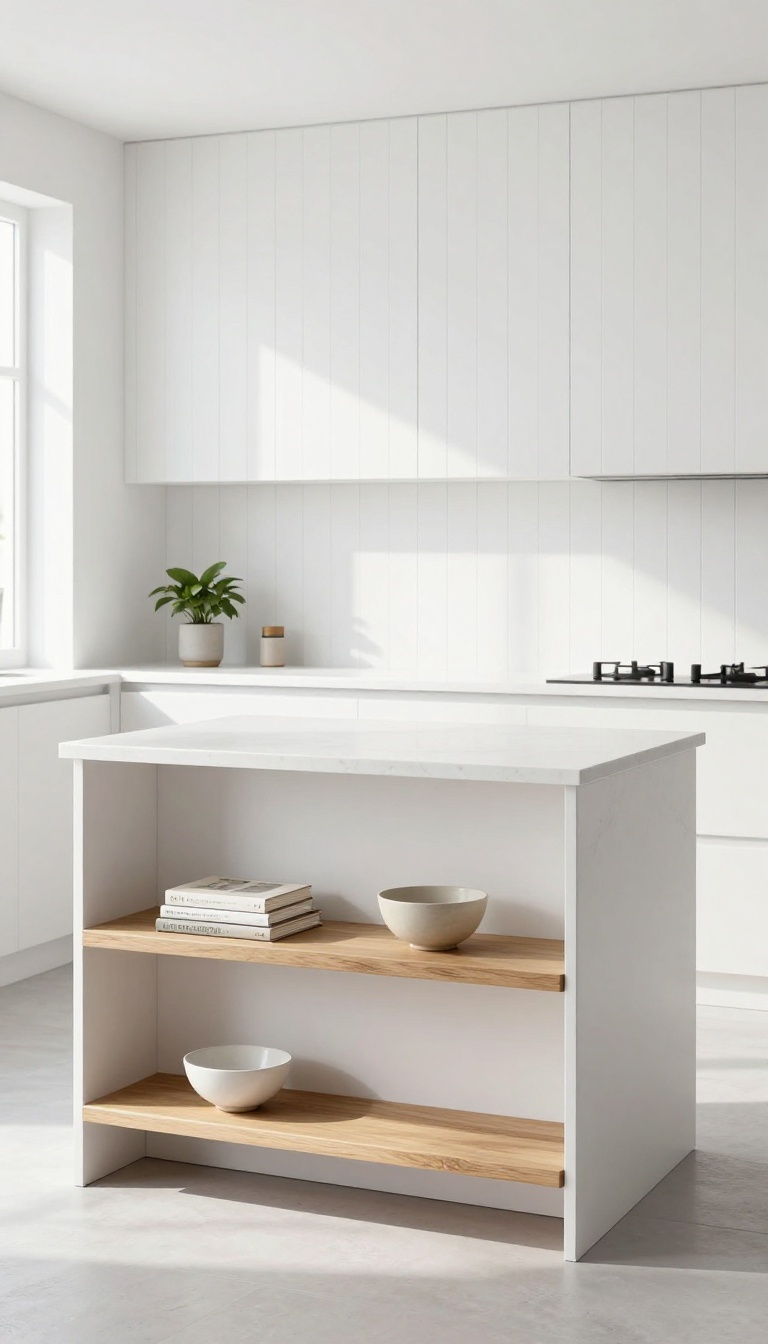
Open shelving on a kitchen island can feel like a breath of fresh air, especially when it’s backed by paneling that adds texture and depth. Instead of a plain, boxy base, you get a display area that’s both practical and pretty. It’s a great way to keep everyday items close at hand while making the island look intentional and styled.
Combining open shelving with paneling creates a functional and attractive storage solution. The paneling serves as a backdrop for the shelves, adding visual interest and preventing the area from feeling flat. You can use this space to store cookbooks, baskets, or decorative items, keeping them within easy reach while adding a personal touch to your kitchen.
Floating Shelves With A Paneling Backdrop
Install floating shelves in front of a paneled surface to create a seamless, built-in look. The paneling adds texture behind the items, making them stand out. Use wood or metal brackets for a rustic or industrial feel, or go with hidden brackets for a clean, modern aesthetic.
This setup works well for displaying a few favorite cookbooks or a collection of ceramic bowls.
Built-in Cubbies For Baskets And Bins
Instead of open shelves, consider building cubbies into the island base, each backed with paneling. These cubbies are perfect for holding woven baskets or fabric bins, which can hide clutter while adding warmth. You can size them to fit specific items like potatoes, onions, or kitchen linens.
The paneling adds a subtle backdrop that makes the cubbies feel like a custom feature.
13. Painted Panels with a Pop of Color
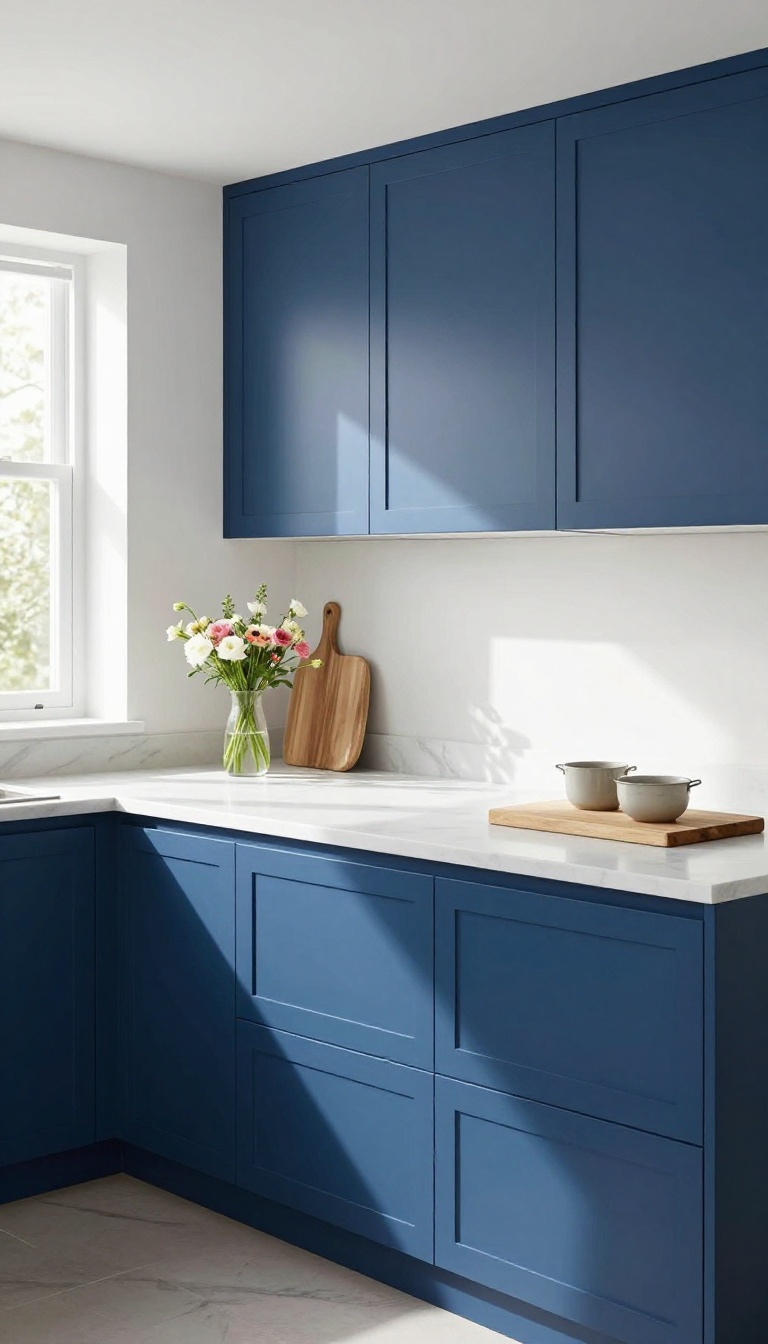
A fresh coat of paint is the quickest way to transform your kitchen island, and it’s a project you can knock out in a weekend. Bold shades like navy, emerald, or even a cheerful yellow can make the island the star of the room without overwhelming the space. The key is using a durable enamel paint that can handle the bumps and splashes of daily life.
When you paint your island panels, you’re not just adding color—you’re adding personality. A deep navy creates a classic, grounded feel, while a sunny yellow brings energy to a neutral kitchen. The best part?
You can change it later if you get tired of the color, making it a flexible design choice.
Choosing The Right Shade
Start by pulling colors from your existing decor—maybe the tones in your backsplash or the undertones in your countertop. If you want a timeless look, go with a deep blue or forest green. For a more playful vibe, try a warm terracotta or mustard.
Just remember: bold colors work best when the rest of the kitchen stays relatively neutral.
Prep And Paint Tips
Proper prep is non-negotiable. Sand the panels lightly, wipe away dust, and apply a bonding primer. Then use a high-quality enamel paint with a satin or semi-gloss finish—it’s more durable and easier to clean than flat paint.
Two thin coats beat one thick one, and you’ll want to let each coat dry fully before the next.
Adding Contrast With Trim
A contrasting trim can take your painted panels from simple to custom. Paint the recessed panels in your bold color, then paint the surrounding frame in a crisp white or a complementary tone. This adds depth and makes the island feel more architectural.
Use painter’s tape to get clean lines, and don’t be afraid to experiment with different trim widths.
FAQ
What is the most budget-friendly paneling option?
Shiplap and beadboard are the most budget-friendly, especially if you use MDF or pine. They’re easy to install yourself and cost less than $2 per square foot.
Can I panel my kitchen island myself?
Yes, many paneling options are DIY-friendly. Shiplap, beadboard, and board and batten are all straightforward with basic tools. Just make sure to measure carefully and use a level.
How do I protect wood paneling from moisture?
Use a moisture-resistant primer and a high-quality paint or sealant. For areas near the sink or stove, consider using a waterproof material like tile or metal.
What paneling is best for a modern kitchen?
Horizontal slat walls, metal panels, or smooth painted panels in a matte finish work well for modern kitchens. Keep the lines clean and the colors neutral or bold but simple.
Can I add paneling to an existing island?
Absolutely. You can attach panels directly to the existing base with adhesive and nails. Just make sure the surface is clean and dry before you start.
Conclusion
Paneling your kitchen island is a smart way to add personality and practicality. Whether you choose classic shiplap or go bold with metal, there’s an option for every style and budget. The best part?
Many of these ideas are simple weekend projects that make a big impact.
So take a look at your island and imagine the possibilities. A little paneling can go a long way in making your kitchen feel more polished and put-together. Pick the idea that speaks to you, and get ready to fall in love with your kitchen all over again.