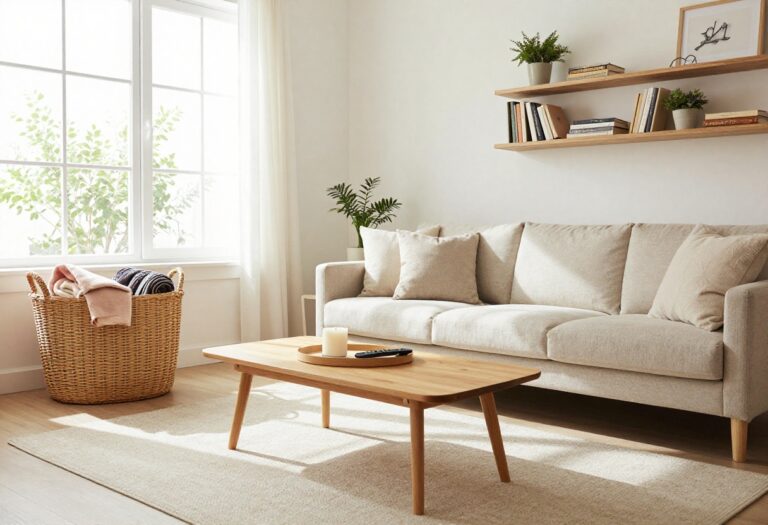
11 Living Room Entertainment Center Ideas You’ll Want to Save
Your living room entertainment center is more than just a spot for your TV—it's the anchor of the whole space. A well-designed setup can hide clutter, show off your style, and make movie nights feel special. But with so many options, it's easy to feel stuck.
Whether you're working with a tiny apartment or a spacious family room, the right idea can transform how the room looks and works. We've gathered 11 practical and stylish concepts that range from simple DIY upgrades to full custom builds.
Each one is designed to help you create a setup that feels both personal and polished. No matter your budget or taste, there's something here for you.
1. Floating Shelves with a Sleek Media Console
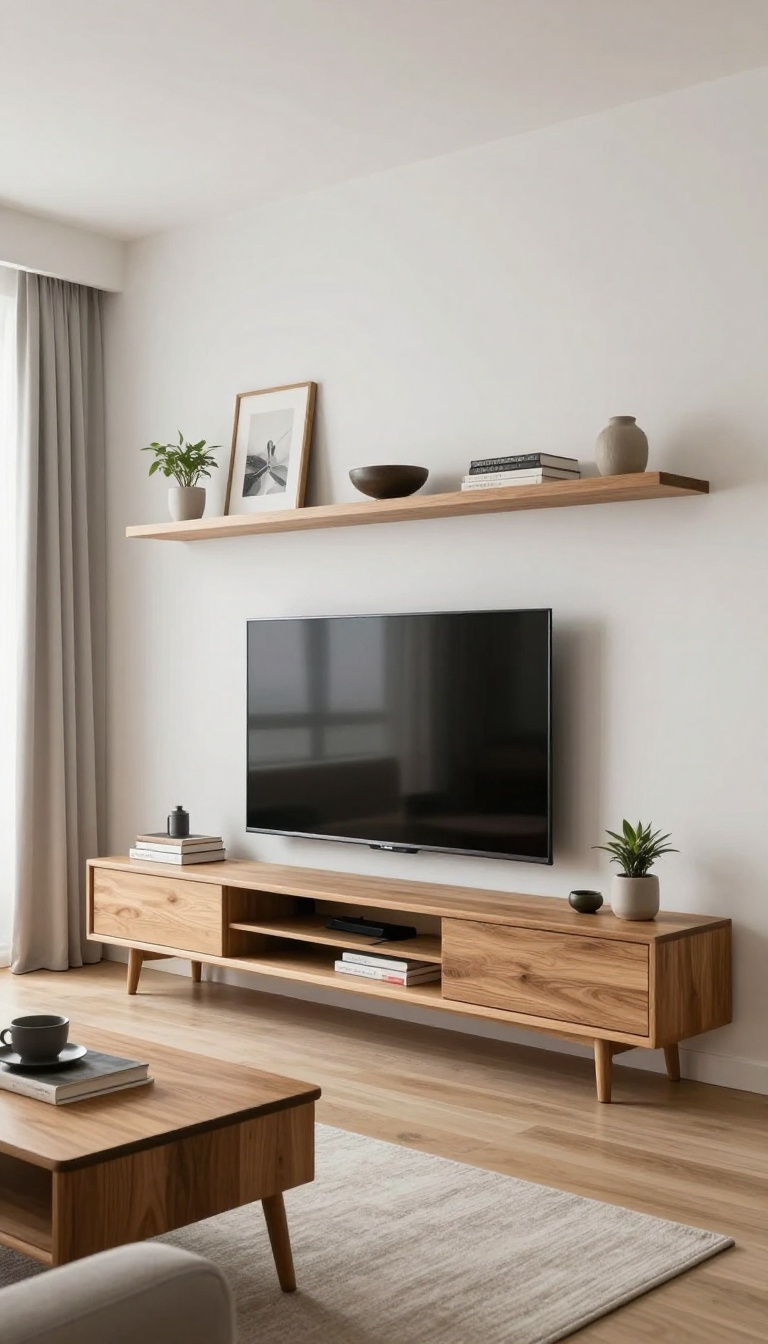
Mounting your TV on the wall instantly opens up the room and gives it that airy, modern feel. Pair it with a low-profile media console that keeps cables and components tucked away, and you've got a setup that's both stylish and practical. Floating shelves above add the perfect spot for decor, books, or a few plants without eating into your floor space.
This idea is all about balancing function with a clean, uncluttered look. The key is to keep the console low and wide, so it anchors the TV without overwhelming the wall. Floating shelves give you room to personalize the space, but they also help draw the eye upward, making the ceiling feel higher.
Plus, you can mix and match what you display, swapping items out whenever you want a quick refresh.
Choosing The Right Shelves
Go with sturdy, wall-mounted shelves that can hold more than just knickknacks. Look for solid wood or metal options that match your console's finish. If you're worried about installation, use a stud finder and heavy-duty brackets to make sure everything stays put.
Floating shelves come in all sizes, so measure your wall space first to avoid overcrowding.
Styling Your Shelves
Mix practical items with decorative ones. Stack a few coffee table books, add a small plant, and lean a piece of framed art against the wall. Keep the arrangement balanced but not too symmetrical.
Leave some breathing room between items so it doesn't look cluttered. You can also use baskets or boxes for remote controls and other small essentials.
Hiding The Wires
One of the biggest challenges with a wall-mounted TV is managing cables. Use a cable cover kit that runs along the wall and down to the console, or route wires through the wall if you're comfortable with a little DIY. Another trick is to use a power strip with a built-in surge protector and hide it behind the console.
Keeping wires out of sight makes the whole setup look seamless.
2. Built-In Bookshelf Entertainment Center
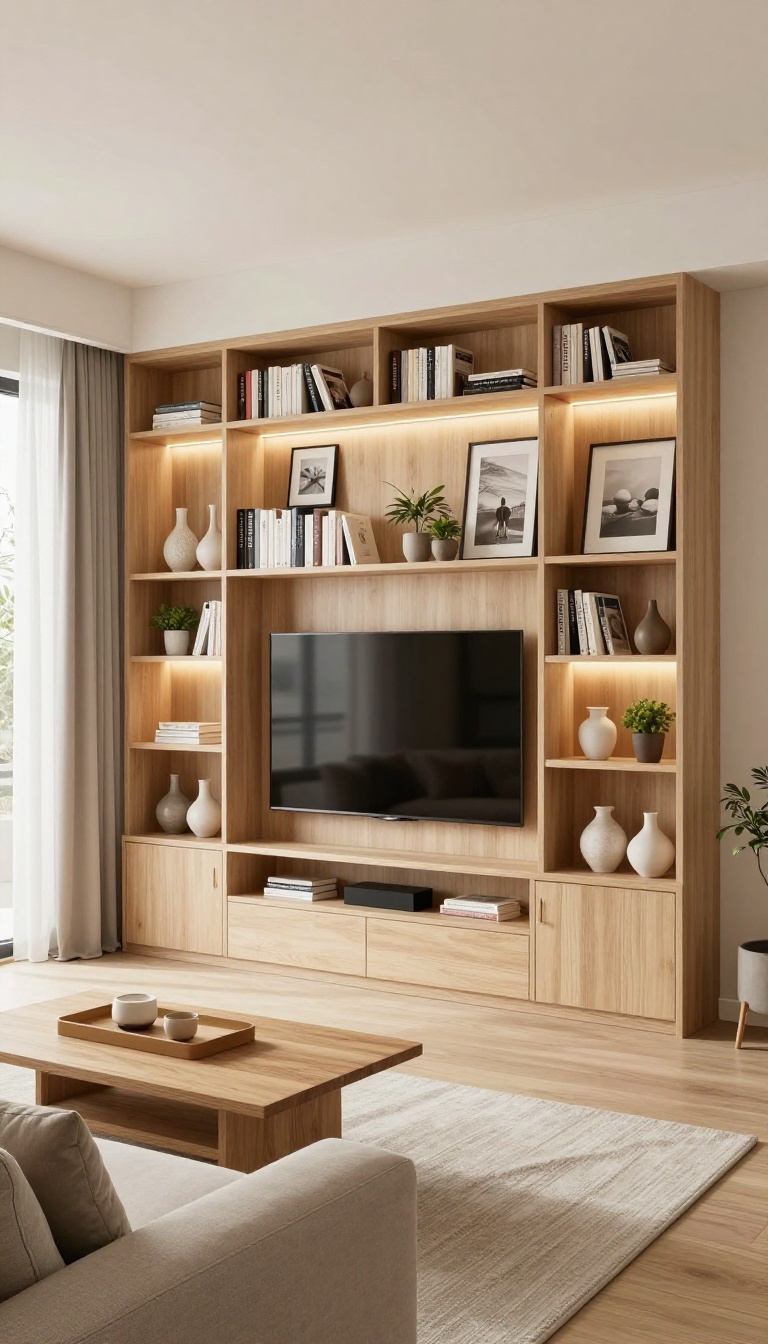
If your living room feels like it's missing something, built-in bookshelves around the TV might be the answer. They turn a plain wall into a stunning focal point while giving you tons of storage. Plus, they make the room look custom and high-end without feeling overdone.
Built-in bookshelves are a classic choice for good reason. They frame your TV with style and practicality, offering a place for everything from books to decorative objects. The best part?
They can be tailored to fit your exact space, whether you have a cozy nook or a grand wall.
Design Ideas For Built-ins
Think about mixing open shelves with closed cabinets. Open shelves let you display your favorite items, while cabinets hide clutter like DVDs or game consoles. You can also add lighting under each shelf to highlight your collection and create a warm glow in the evening.
Styling Tips For A Polished Look
When styling your shelves, aim for balance. Group items in odd numbers, mix heights and textures, and leave some breathing room. Use baskets or bins to corral smaller items, and add a few plants or framed photos to make it feel personal.
The goal is to make it look curated, not cluttered.
Diy Vs. Professional Installation
If you're handy, a DIY built-in can save money. You can use ready-made cabinets or build from scratch. But for a truly seamless look, hiring a professional is worth it.
They can handle tricky corners, electrical wiring, and ensure everything is level and safe.
3. Rustic Barn Door TV Stand
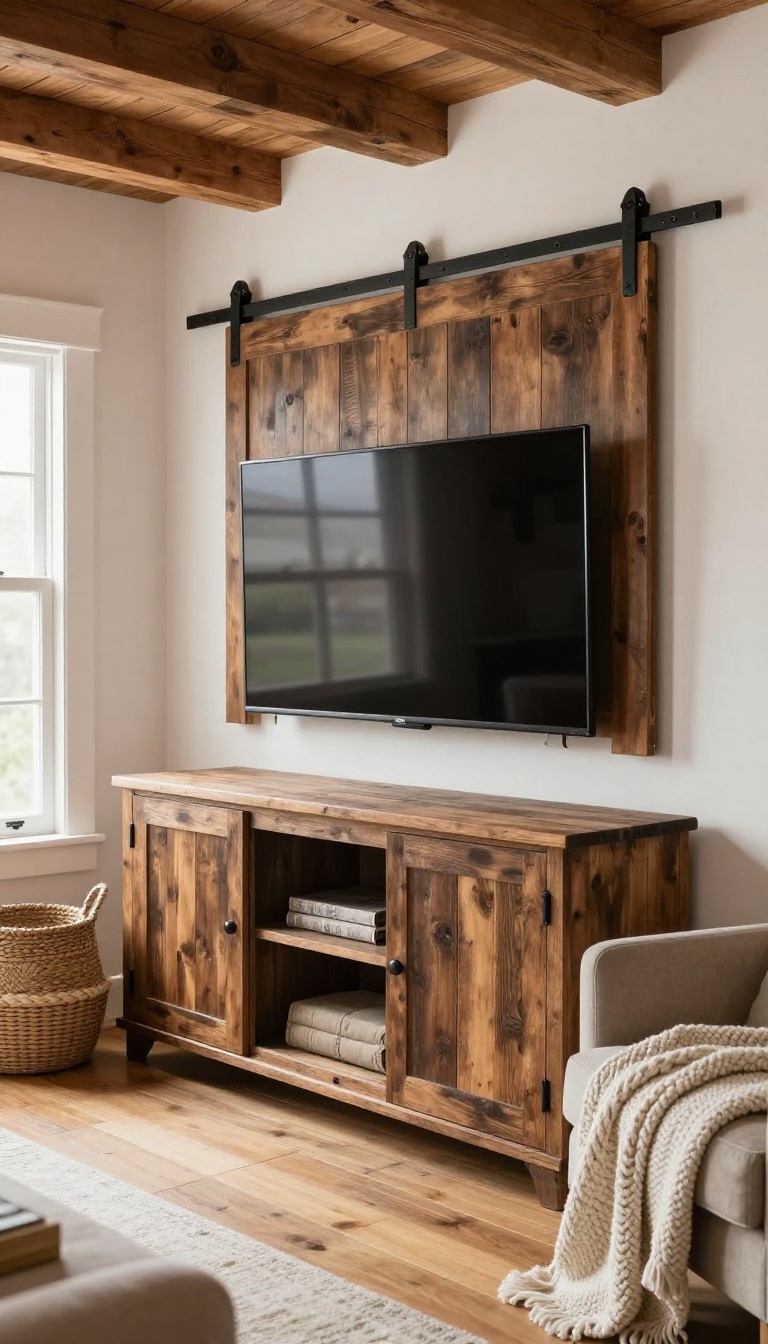
Barn doors have a way of making any room feel cozier, and they're not just for bedrooms or pantries anymore. Sliding one over your TV adds instant farmhouse charm while keeping the screen hidden when you want a break from electronics. It's a clever disguise that blends function with rustic style.
A barn door TV stand is all about mixing old-world warmth with modern convenience. The sliding door can be mounted on a track above the TV, and when you're not watching, it simply glides shut to reveal a beautiful wooden panel. This setup works especially well in living rooms that lean farmhouse, cottage, or rustic, but it can also add a touch of character to more neutral spaces.
Why It Works
The beauty of this idea is its dual purpose. When the door is closed, you get a clean, furniture-like look that doesn't scream 'TV. ' It also protects the screen from dust and curious little hands. Plus, the natural wood tones bring warmth that flat screens often lack.
Diy Vs. Store-bought
You can build a simple barn door setup with a sliding track kit and a reclaimed wood door, which is a fun weekend project. Or, if DIY isn't your thing, many furniture stores offer ready-made entertainment centers with sliding barn doors. Either way, you'll get that charming, handcrafted feel.
Styling Tips
Pair the barn door with other rustic elements like exposed beams, woven baskets, or a chunky knit throw. Keep the area around the TV simple so the door remains the focal point. You can also stain or paint the wood to match your existing decor—darker stains feel more dramatic, while lighter washes keep things airy.
4. Corner Entertainment Unit for Awkward Spaces
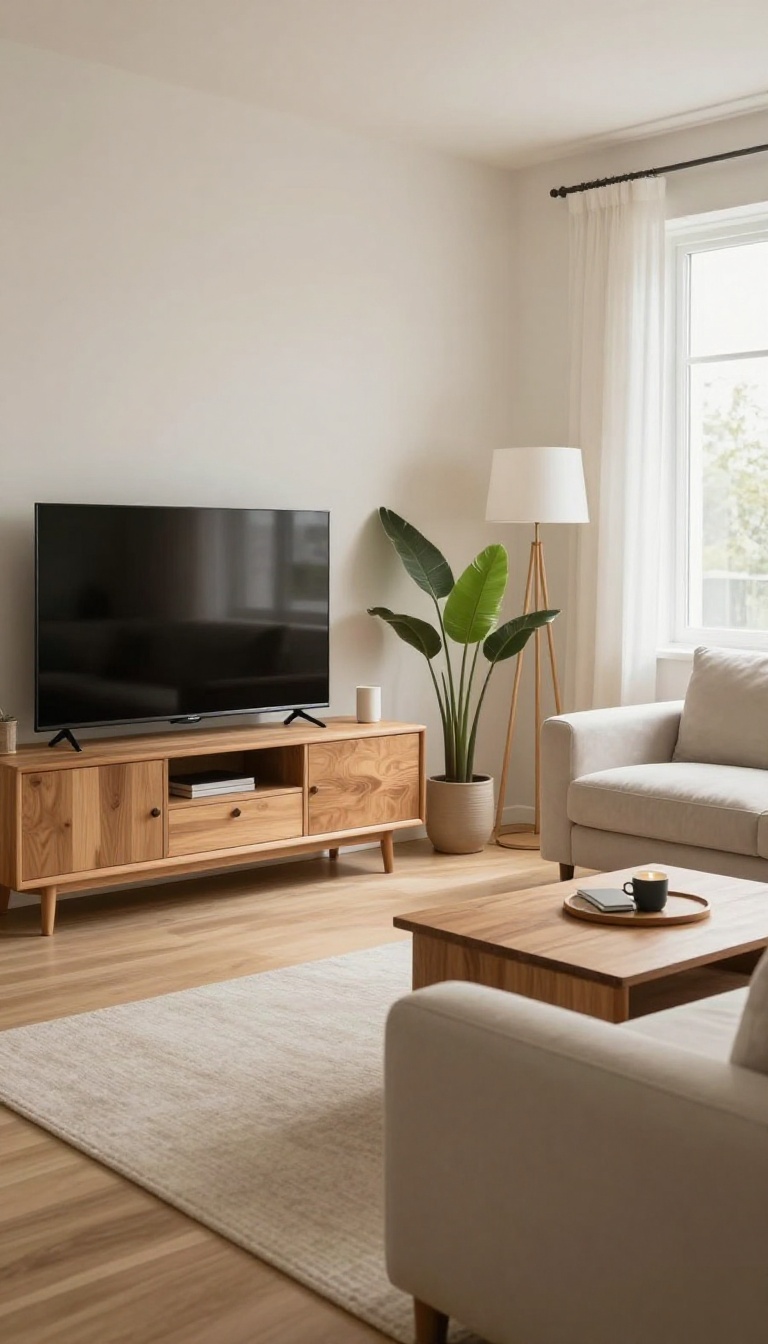
That unused corner where the sofa just doesn't quite fit can become the perfect spot for your TV. A corner entertainment unit turns a wasted nook into a functional focal point without eating up floor space. It's a clever way to keep the room open and airy, especially in smaller living areas.
Corner units come in all shapes and sizes, from simple floating shelves to full media consoles. The key is to measure your corner carefully and choose a design that fits the scale of your room. A corner TV stand with built-in storage can hide cables and accessories, while floating corner shelves keep things minimal and modern.
Measure First, Shop Later
Before you buy anything, grab a tape measure and note the width and depth of your corner. Also check the distance between the floor and where you want the TV to sit. This prevents the frustration of a unit that's too big or too small.
A good rule of thumb is to leave at least a few inches of breathing room on each side.
Style Options For Every Taste
Corner entertainment centers range from rustic wood to sleek glass and metal. If you want a cozy feel, go for a warm wood finish. For a contemporary look, try a floating shelf with a slim profile.
You can even mix and match open and closed storage to display decor while hiding clutter.
Make It Work With Your Layout
Position the corner unit so it doesn't block walkways or make the room feel cramped. Angle your seating toward the TV for comfortable viewing. You can also add a tall plant or floor lamp on the other side of the corner to balance the visual weight.
5. Minimalist Low-Profile Console with Wall-Mounted TV
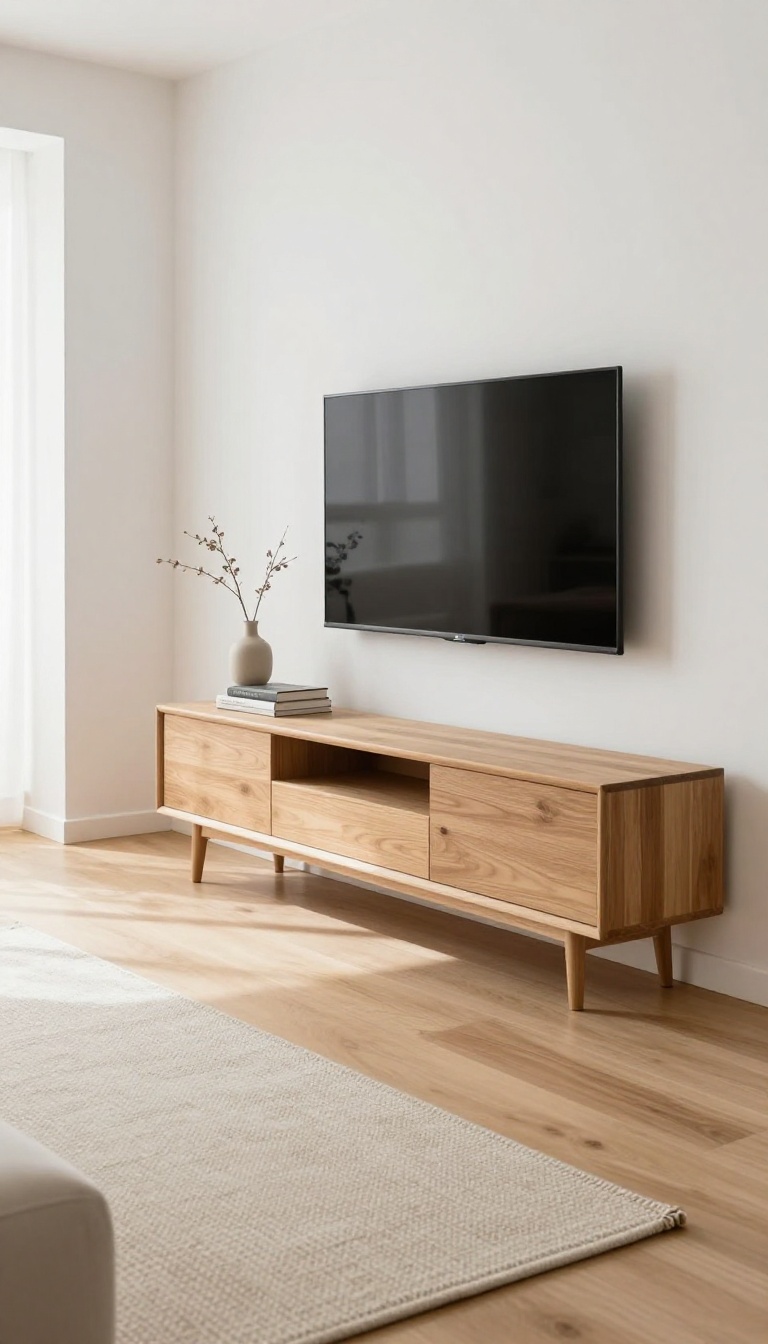
Sometimes the best way to make a big impact is to take things away. A low-profile console paired with a wall-mounted TV strips the room down to its essentials, creating a clean, gallery-like vibe that feels both modern and calming. This setup is perfect if you're tired of bulky furniture dominating your space or if you simply want an easier surface to dust.
The key to this look is letting the TV become the focal point, with the console acting as a quiet supporting player. Keep the console low—around 12 to 18 inches off the floor—to maintain an unbroken line across the wall. Choose a piece with clean lines and minimal hardware, and consider a floating shelf if you want to make floor cleaning a breeze.
The result is a streamlined setup that makes your living room feel larger and more open.
Why Low-profile Works
A low console shifts visual weight downward, which can make ceilings feel higher and the room more spacious. It also encourages a more intentional arrangement of decor—think a single vase or a stack of books rather than a cluttered shelf. Plus, with the TV off the furniture, you have more surface space for everyday items without it looking messy.
Choosing The Right Console
Look for a console with a flat top and simple legs, or go for a wall-mounted shelf to keep the floor completely clear. Materials like light oak, matte black, or white with a matte finish work well. Make sure the width is proportional to your TV—ideally, the console should be slightly wider than the TV for balance.
Hidden cable management is a must to maintain that clean look.
Mounting And Styling Tips
Mount the TV at eye level when seated, usually around 42 inches from the floor to the center of the screen. Leave a gap of 6 to 12 inches between the TV and the console to avoid a cramped feel. Style the console with a few curated pieces—a small plant, a ceramic bowl, or framed photos—but keep it minimal.
Use a cable cover or in-wall kit to hide wires for a truly seamless appearance.
6. Modular Storage System with Open and Closed Shelving
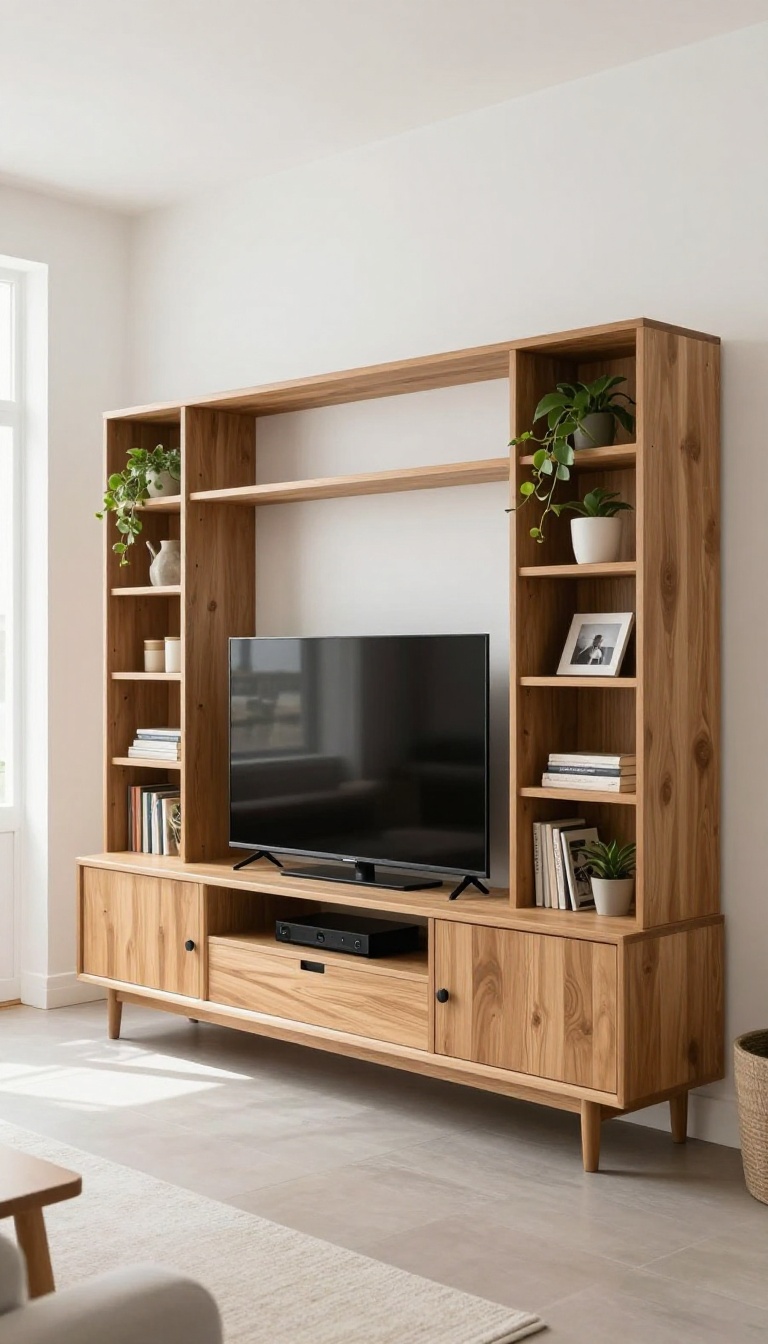
A modular storage system is like a puzzle you get to design yourself. It lets you mix open shelves for showing off your favorite decor and closed cabinets for stashing away the stuff you don't want on display. The beauty is in the flexibility—you can rearrange the pieces whenever your needs or style change.
Modular systems are perfect for media setups because they adapt to your gear. Start with a base unit for your TV, then add shelves and cabinets around it. Open shelving keeps your streaming devices and games within reach, while closed cabinets hide cables, DVDs, and remote controls.
You can also swap in drawers for smaller items like charging cables or headphones.
Plan Your Layout
Before you buy anything, measure your TV and the wall space you have. Think about what you need to store—is it mostly media equipment, books, or decorative pieces? A good rule is to keep about 60% closed storage and 40% open shelving.
That way, you have places to hide clutter but still get to display a few favorite items.
Mix And Match Units
The real magic of modular systems is that you can combine different units. Start with a low console for the TV, then add tall cabinets on the sides for extra storage. You can also place open shelves above the TV for plants or framed photos.
Don't be afraid to mix finishes—like wood and black metal—to add visual interest.
Keep It Flexible
One of the biggest perks of modular furniture is that it's not permanent. If you move or just want a fresh look, you can reconfigure the pieces. That also means you can start small and add more units later as your collection grows.
It's a smart investment because it grows with you.
7. Industrial Pipe and Wood Entertainment Center
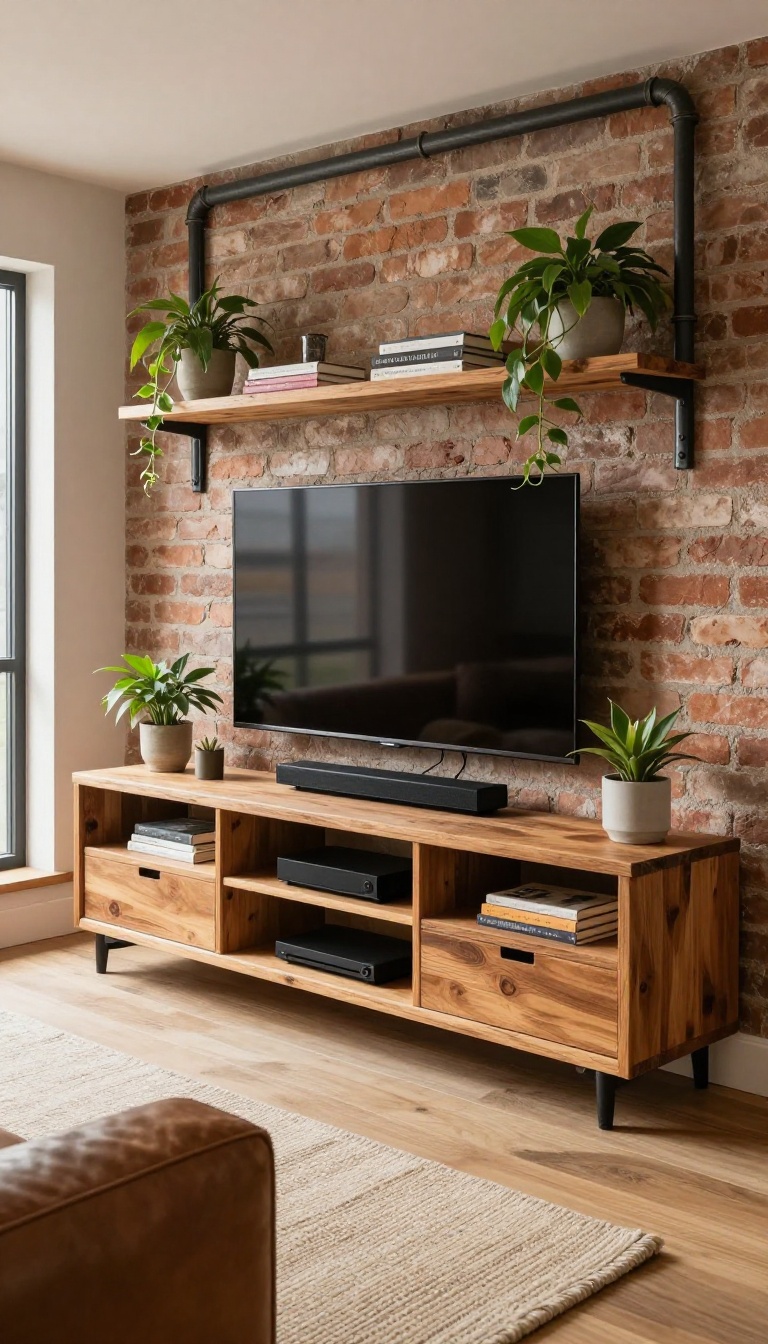
Raw steel and warm wood bring a rugged, handcrafted feel to any living room. This style works especially well in lofts, apartments, or homes with exposed brick, but it can hold its own in more traditional spaces too. The best part?
You can tailor the shelf heights and lengths to fit your TV, gaming console, and decor exactly.
The industrial pipe and wood entertainment center is a favorite among DIYers because it’s both forgiving and customizable. You can use black iron pipes for a darker, edgier look or galvanized steel for a slightly brighter, more polished finish. The wood planks can be new pine, reclaimed barn wood, or even a live-edge slab for extra character.
Building one is straightforward—cut pipes to size, attach flanges to the wall, and slide the wood shelves onto the pipes. You can also make it freestanding if you prefer not to drill into your walls.
Choosing The Right Wood And Finish
The wood you pick sets the whole mood. Reclaimed wood with visible grain, nail holes, or slight weathering adds instant history and warmth. If you want a cleaner look, go with new pine or oak and apply a matte polyurethane or a dark stain.
For a more rustic feel, leave the wood unfinished or use a light whitewash. Just remember to sand the edges well to avoid splinters, especially if you have kids or pets.
Adjusting Shelf Heights For Your Gear
One of the biggest advantages of this design is that you can space the shelves exactly how you need them. Measure your TV height, soundbar, cable box, and game console before you start. Leave a few extra inches above each piece for airflow and easy access to cables.
You can also add shorter shelves for decorative items like plants, books, or framed photos. Keep in mind that heavy items like a large TV or a receiver will need sturdier pipes and wall anchors.
Styling The Industrial Look
To really sell the industrial vibe, pair the entertainment center with other raw materials. Think leather sofas, metal accent tables, and exposed bulbs. Use baskets or metal bins to hide remotes and other small clutter.
Add a few warm touches like a chunky knit throw or a wooden tray to soften the edges. The contrast between the cool metal and warm wood is what makes this style so inviting.
8. Mid-Century Modern Credenza with Hairpin Legs
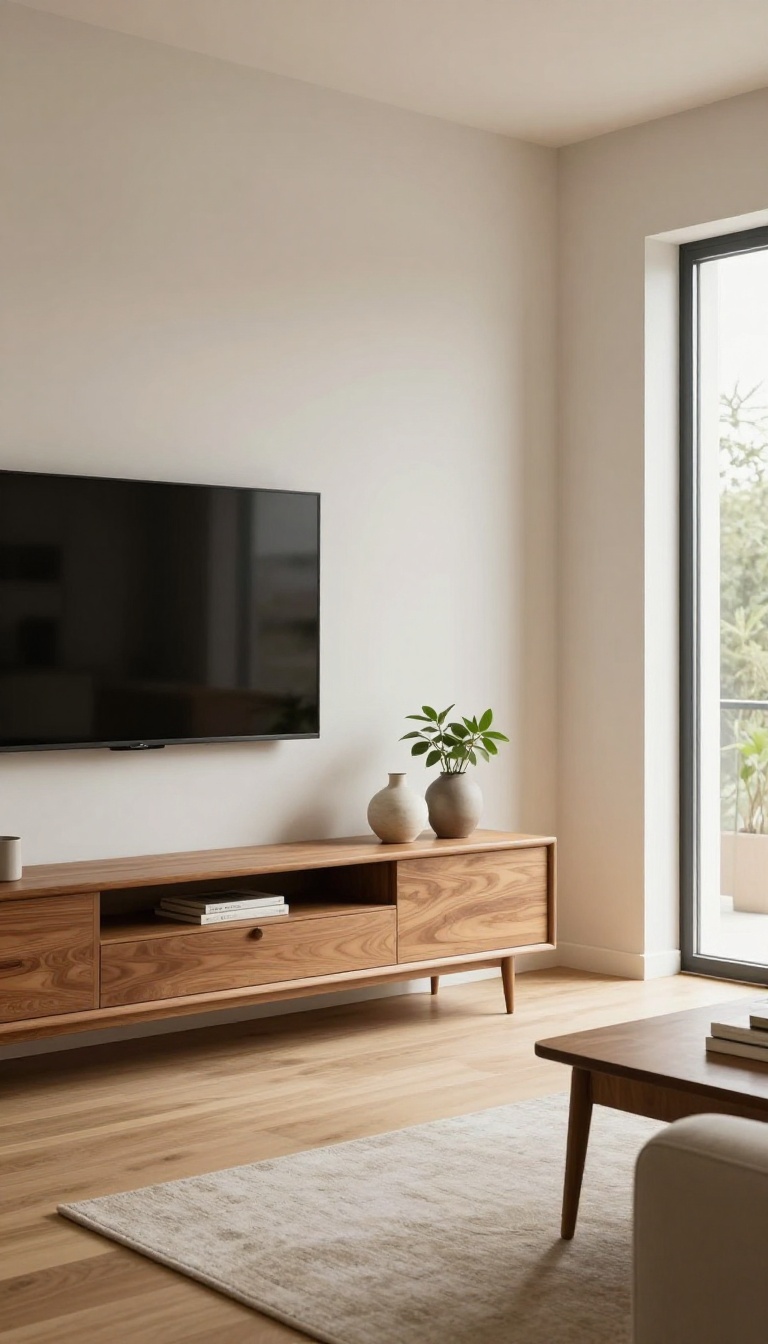
If you love the clean lines and warm tones of mid-century design, a credenza with hairpin legs is a fantastic choice. It brings a retro flair that feels fresh and current, especially when paired with a wall-mounted TV. This piece is not just about looks—it offers plenty of storage for media accessories, games, and more.
The beauty of this setup lies in its simplicity. The credenza becomes the focal point, while the TV floats above it, keeping the visual weight low and the room feeling open. The hairpin legs add an airy, sculptural quality that works well in both small and large spaces.
Why Hairpin Legs Work
Hairpin legs are a signature of mid-century modern furniture. They give the credenza a light, almost floating appearance, which prevents the piece from feeling bulky. The thin metal legs contrast nicely with the solid wood body, creating a balanced look that's both sturdy and elegant.
Plus, they make cleaning underneath a breeze.
Styling Your Credenza
To really nail the vintage vibe, style the top with a few carefully chosen items. A couple of ceramic vases, a stack of coffee table books, and a small plant can add personality without cluttering the surface. Keep the area around the TV minimal so the credenza remains the star.
You can also use baskets or bins inside to keep remotes and cables organized.
Pairing With A Wall-mounted Tv
Mounting your TV on the wall above the credenza creates a clean, uncluttered look. Make sure the TV is at eye level when you're seated, and leave a few inches of space between the TV and the top of the credenza for ventilation. This setup also frees up the credenza's surface for decor, making the whole arrangement feel intentional and polished.
9. Hidden TV Behind Sliding Art Panels
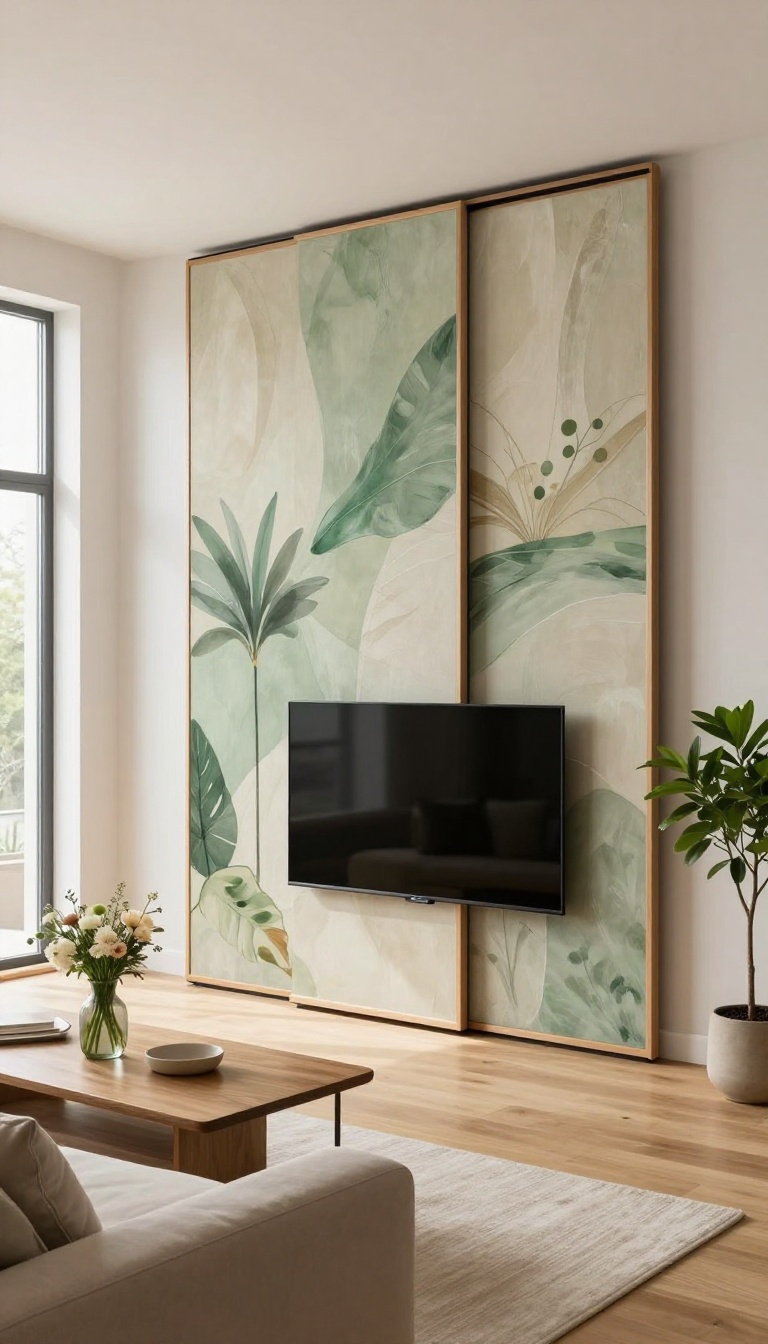
A TV can dominate a room even when it's off. If you love the idea of a clean, gallery-like wall, sliding art panels offer a clever solution. They let you tuck the screen away behind beautiful artwork or a mirror, so your living room feels more like a curated space and less like a media center.
This setup works especially well in formal living rooms or open-concept areas where you want to entertain without the distraction of a big black screen. And when movie night rolls around, the panels slide aside easily to reveal the TV.
The key to making this idea work is choosing the right track system and panel design. You can go with a simple two-panel setup that slides horizontally, or opt for a more complex system with multiple panels that stack to one side. The panels themselves can be anything from framed canvases to lightweight wood with a mirror finish.
One of the biggest benefits is the flexibility it gives you. You can swap out the artwork seasonally or whenever you want a fresh look. And because the panels are on tracks, they don't take up any extra floor space—they just glide along the wall.
Before you start, measure your TV and the wall space carefully. You'll want the panels to fully cover the TV when closed, with a little overlap for a seamless look. Consider the weight of the panels too—heavier materials like solid wood will need sturdier tracks and maybe a professional install.
Choosing The Right Track System
The track system is the backbone of this project. You have a few options: ceiling-mounted tracks, floor-mounted tracks, or wall-mounted tracks. Ceiling tracks are great if you have high ceilings and want a floating look.
Floor tracks are less visible but require a groove in the floor, which can be tricky if you have hardwood or tile. Wall-mounted tracks are the most common and work well for most rooms. For a DIY-friendly approach, look for a ready-made sliding panel hardware kit.
These usually come with everything you need, including the tracks, rollers, and mounting brackets. Just make sure the kit can support the weight of your panels and the length of your wall.
Artwork And Mirror Options
The panels themselves are where you can get creative. You can use large framed prints, canvas art, or even fabric-covered panels for a softer look. If you want to add depth and light, consider using mirrors instead—they can make a small room feel bigger and brighter.
For a cohesive look, choose panels that match your existing decor. If you have a modern space, go for sleek, minimal frames. For a more traditional room, ornate frames or classic landscapes might fit better.
You can also mix and match—one panel with art and one with a mirror—for a dynamic feel.
Diy Vs. Professional Installation
Installing sliding panels is a moderately challenging DIY project. If you're handy with tools and have basic carpentry skills, you can likely tackle it over a weekend. You'll need to mount the track securely to the wall or ceiling, which means finding studs and using the right anchors.
If you're not comfortable with the installation or if your wall is unusual (like plaster or concrete), it's worth hiring a professional. They can ensure the track is perfectly level and the panels glide smoothly. The cost of professional installation is usually worth it for the peace of mind and the polished result.
10. Wall-to-Wall Entertainment Wall with Accent Lighting
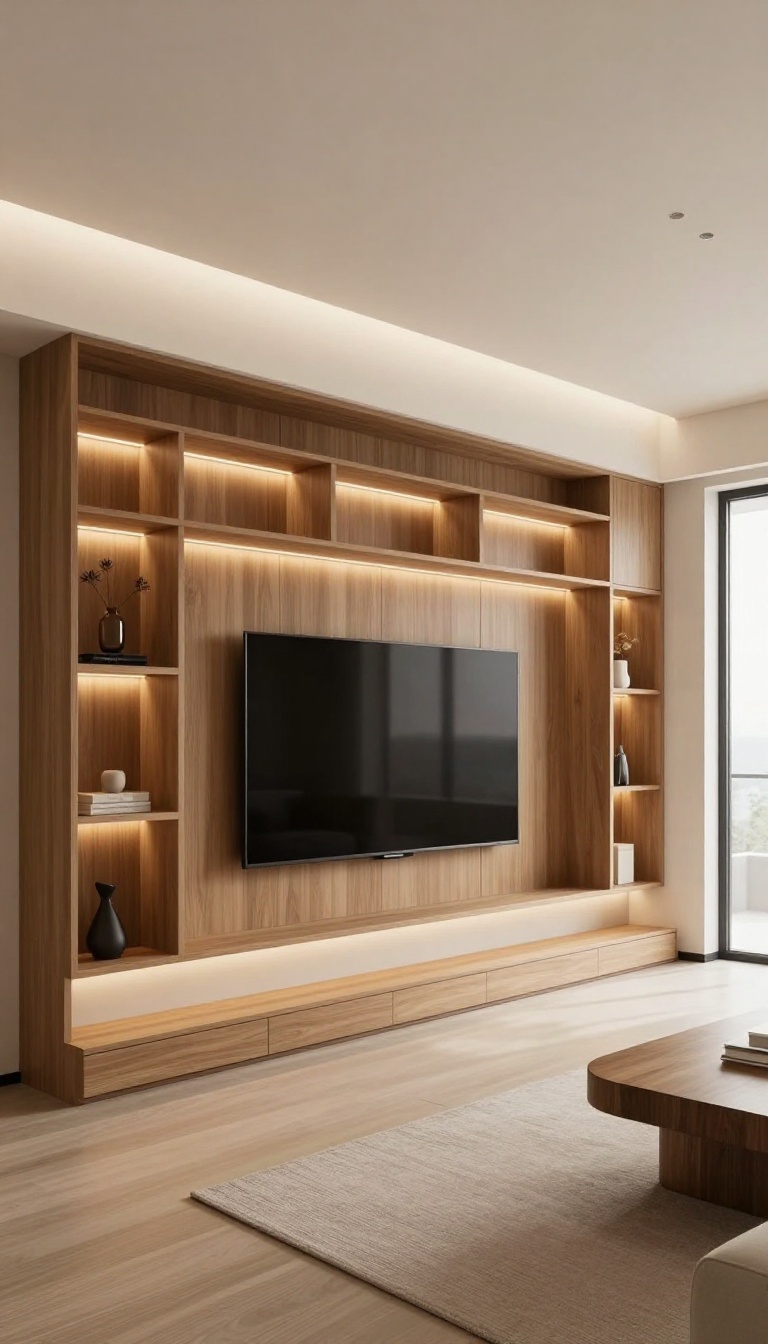
When you want your entertainment center to feel like the centerpiece of the room, going wall-to-wall is a bold move that pays off. This design covers the entire wall with built-in cabinetry, shelving, and a spot for your TV, creating a seamless, custom look. The real magic comes from accent lighting—think LED strips behind the TV and under shelves—that adds a warm, inviting glow and makes the whole setup feel high-end.
A wall-to-wall entertainment wall is more than just storage; it's a statement. By using the full width of the wall, you maximize space and create a unified focal point. The built-in look can be achieved with custom cabinetry or modular units that fit together seamlessly.
The key is to plan the layout carefully, balancing open shelving for display with closed cabinets for hiding clutter. Add accent lighting to highlight your favorite items and create a cozy atmosphere for movie nights.
Designing The Layout
Start by measuring your wall and deciding what you need to store. Think about the TV size and where you want it—centered is typical, but off-center can work if you have other focal points. Mix open shelves for books and decor with closed cabinets for electronics and games.
Leave some negative space to avoid a cluttered look. Sketch out a rough plan before you buy anything.
Choosing The Right Lighting
LED strip lighting is your best friend here. Place it behind the TV to reduce eye strain and create a halo effect. Add strips under shelves to make items pop.
Use dimmable lights so you can adjust the mood from bright and functional to soft and cinematic. Warm white (2700K-3000K) is cozy, while cool white (4000K-5000K) feels more modern.
Installation Tips
If you're handy, you can DIY with modular systems or IKEA hacks. For a truly custom look, hire a carpenter. Make sure all wiring is hidden—run cables behind walls or use cord covers.
Secure heavy units to the wall for safety. Test your lighting before final installation to ensure even distribution.
11. Repurposed Furniture Entertainment Center
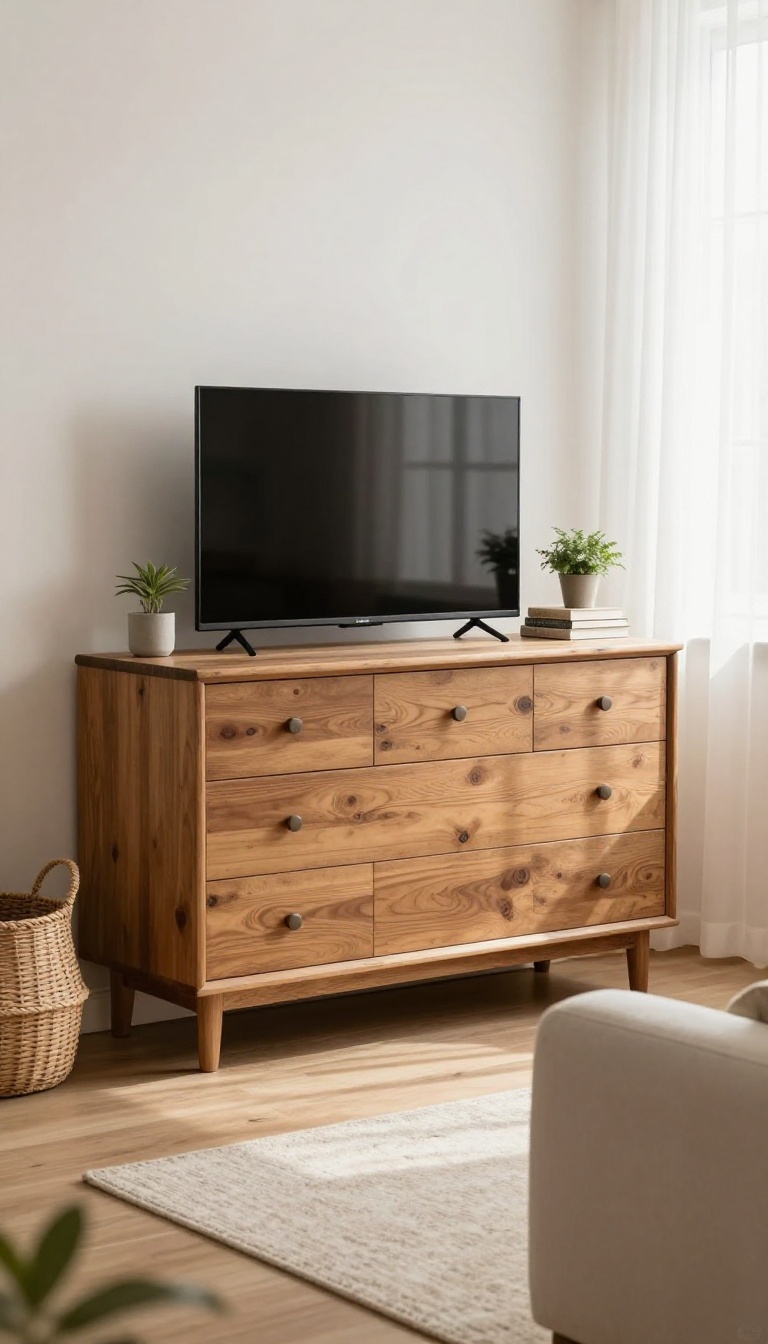
Before you buy another flat-pack unit, take a look around your home or a local thrift store. That old dresser, armoire, or sturdy bookshelf can become a one-of-a-kind entertainment center with just a little creativity. This approach saves money, reduces waste, and gives your living room instant character that store-bought pieces just can't match.
Repurposing furniture is all about seeing potential in pieces that might otherwise be overlooked. A vintage dresser, for example, can hold your TV on top and hide all your media accessories in the drawers. An armoire can be transformed into a stylish media cabinet with doors that close to hide the screen when not in use.
Even a sturdy bookshelf can be styled to display your TV and decor together, creating a cohesive look that feels intentional.
Choosing The Right Piece
Look for solid wood construction and a size that fits your TV and room. Measure the width and height of your TV and compare it to the top surface of the furniture. Make sure the piece has enough depth to support the TV base or stand.
Also, consider the storage—drawers, shelves, or cabinets—that will help you organize your media and accessories.
Diy Modifications To Fit Your Tv
Sometimes a simple modification is needed. You might remove the doors from an armoire to create an open display, or cut a hole in the back of a dresser to route cables. Adding a shelf inside a cabinet can create space for a cable box or game console.
These small changes can make all the difference in functionality without sacrificing the piece's charm.
Styling Tips For A Cohesive Look
Once your repurposed piece is in place, style it to blend with your room. Use baskets or bins in open shelves to hide clutter, and add a few personal touches like framed photos or plants. If the furniture has a different finish than your other pieces, consider painting it to match your color scheme or leaving it as a statement piece.
The goal is to make it look like it was always meant to be there.
FAQ
What is the best height for a TV in an entertainment center?
The center of your TV should be at eye level when you're seated, typically around 42 inches from the floor. This ensures comfortable viewing and reduces neck strain.
How can I hide cables and wires in my entertainment center?
Use cable management sleeves, raceways, or in-wall cable kits to route wires neatly. You can also drill holes in the back of your console to keep cords out of sight.
What are some budget-friendly entertainment center ideas?
Repurposing old furniture, using floating shelves, or building a simple console from pipes and wood are all affordable options. You can also shop secondhand stores for unique pieces.
How do I choose the right size entertainment center for my living room?
Measure your TV and the wall space you have available. The console should be at least as wide as your TV, and you should leave some breathing room on each side for balance.
Can I mix different styles in my entertainment center?
Absolutely! Mixing styles, like pairing a modern TV with a rustic console, can create a personalized look. Just keep a common color or material to tie it together.
Conclusion
Your living room should work for how you actually live, not the other way around. Whether you go for a sleek console, a built-in shelving unit, or a clever corner setup, the best entertainment center is one that fits your space and your habits. Start with the idea that solves your biggest pain point, whether that's clutter, cables, or a lack of storage.
Small tweaks can make a big difference, so pick one and build from there. You'll end up with a setup that looks great and feels effortless every day.