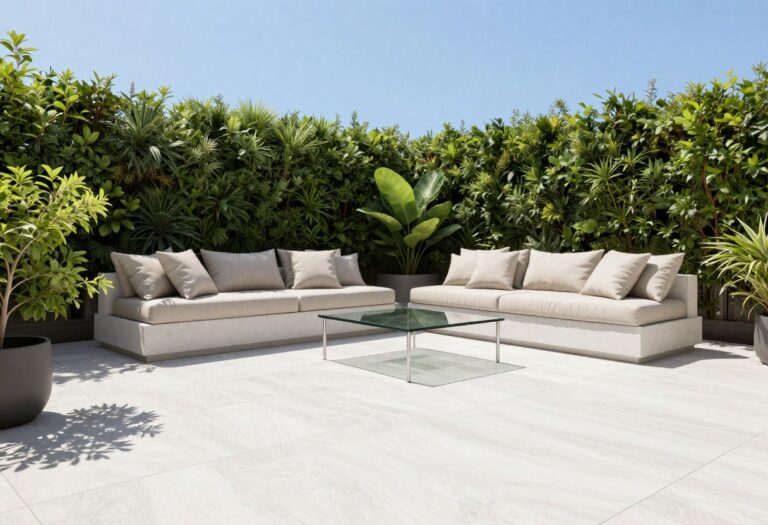
15 Patio Garden Ideas to Bring Greenery Into Small Areas
A tiny patio can still feel like a lush retreat when you think vertically and creatively. Instead of letting limited floor space limit your plant collection, these 15 ideas turn walls, railings, and corners into thriving green zones.
From upcycled pallets to self-watering containers, each approach is practical, space-savvy, and designed to make the most of every inch. Whether you're a seasoned gardener or just starting out, you'll find a solution that fits your style and space.
Let's turn that small outdoor area into your favorite green escape.
1. Vertical Pallet Garden: Turn a Wall into a Living Canvas
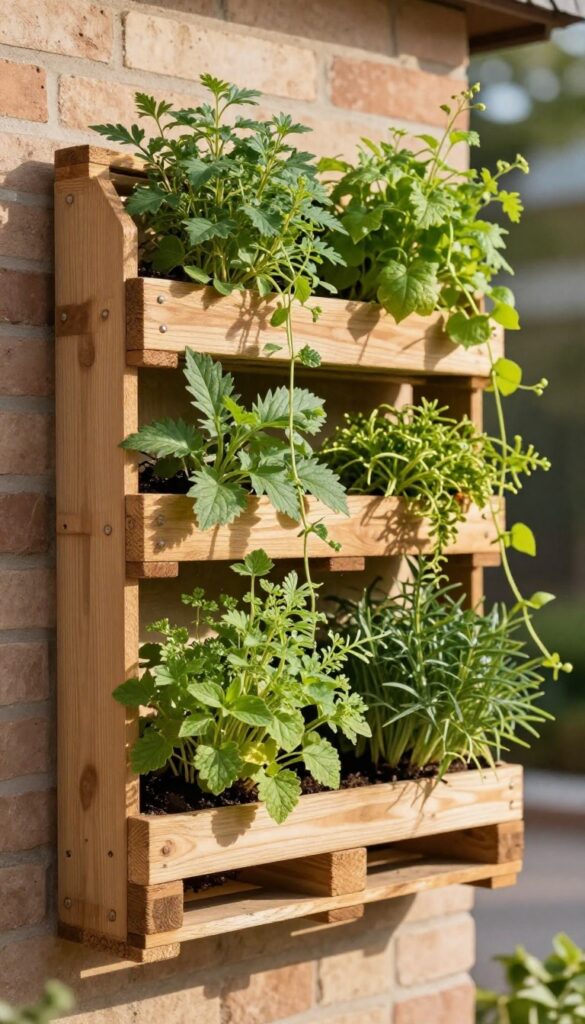
A blank wall is wasted space, especially on a small patio. A vertical pallet garden transforms that unused surface into a lush, living display. It’s a simple, budget-friendly project that adds depth and greenery without taking up any floor area.
Start by sourcing a sturdy wooden pallet. Make sure it’s heat-treated (look for the HT stamp) rather than chemically treated, so it’s safe for growing edibles. Sand down any rough edges to protect your hands and plants.
You can keep the pallet as-is for a rustic look, or paint it to match your patio’s vibe.
Choosing The Right Pallet
Not all pallets are created equal. Look for one with slats close enough to hold soil, but with gaps for drainage. Avoid pallets that smell like chemicals or have stains.
A quick sanding and a coat of outdoor sealant will extend its life.
Planting Your Pallet Garden
Line the back and bottom with landscape fabric, then staple it in place. Fill each slat with potting mix, and plant herbs like thyme and oregano, or trailing succulents that spill over the edges. For a pop of color, add petunias or nasturtiums.
Hanging And Maintaining
Lean the pallet against a wall or fence, or hang it securely with heavy-duty hooks. Water thoroughly until water runs out the bottom, then let it dry slightly between waterings. Fertilize monthly with a balanced liquid feed to keep plants thriving.
2. Hanging Basket Clusters: Elevate Your Greenery
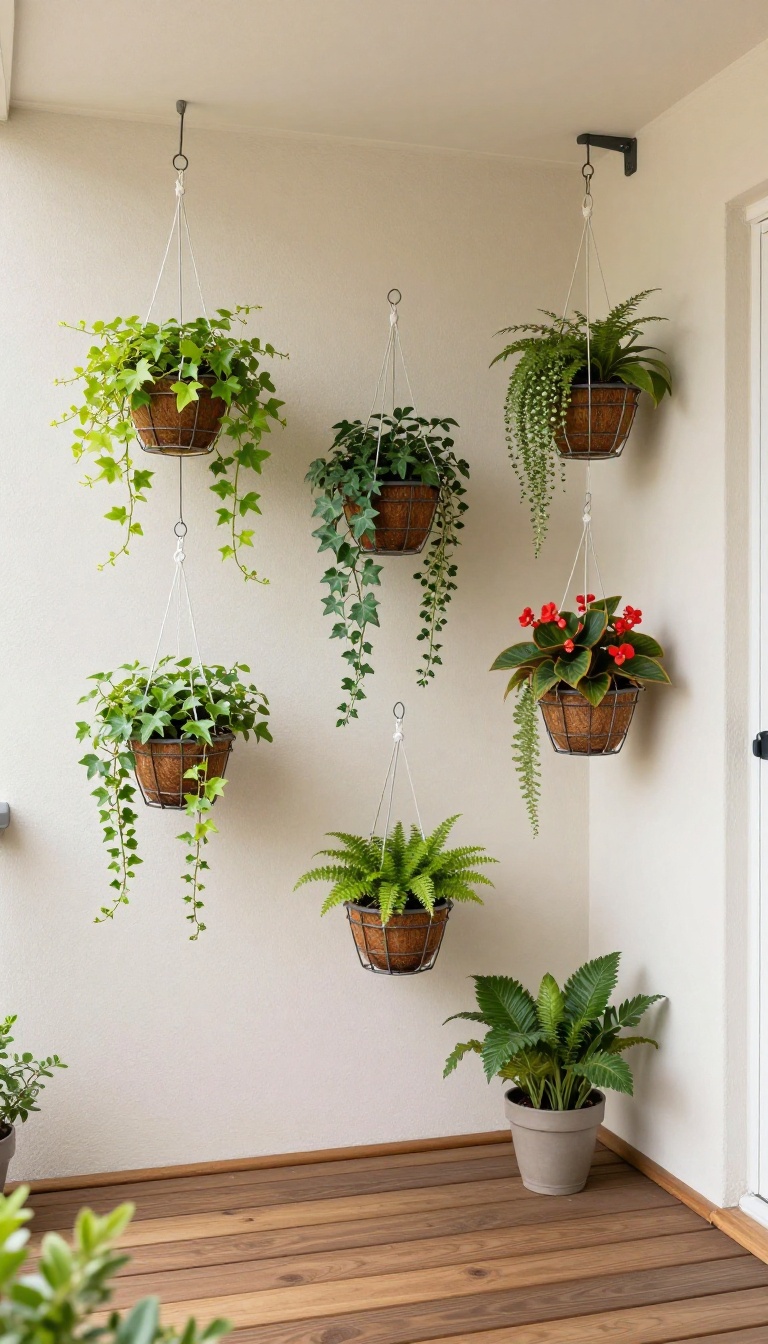
When floor space is tight, look up. Hanging baskets let you stack plants vertically, turning an empty corner or a plain railing into a mini jungle. Clustering them at different heights adds depth and makes the whole patio feel fuller without taking up a single square foot of ground.
Start by choosing lightweight containers—plastic, fabric, or wire with a coco liner—so they're easy to hang and won't strain your hooks. Mix trailing plants like ivy or string of pearls with upright ones like ferns or begonias for a balanced, layered look. Hang them at staggered heights: a high hook near the ceiling, a mid-level bracket on the wall, and a low chain from a railing.
This draws the eye upward and creates a lush canopy that feels like a secret garden.
Pick The Right Baskets And Plants
Go for baskets with built-in water reservoirs or add a liner to keep moisture in. For sunnier spots, choose drought-tolerant plants like petunias or portulaca; for shade, opt for fuchsias or Boston ferns. Mixing textures—soft, feathery foliage with bold, broad leaves—adds visual interest.
Hang Them Safely And Securely
Check that your hooks and brackets can handle the weight of a fully watered basket. Use ceiling hooks rated for at least 20 pounds, and for railings, use clamp-on brackets that won't damage the surface. Place baskets where they won't block walkways or doors, and consider a pulley system for easy watering.
Water And Maintain With Ease
Hanging baskets dry out faster than ground plants, so check them daily, especially in hot weather. Use a watering wand with a long reach to make the job easier. Trim spent blooms and rotate the baskets occasionally so all sides get even light.
3. Rail-Mounted Planters: Maximize Balcony Edges
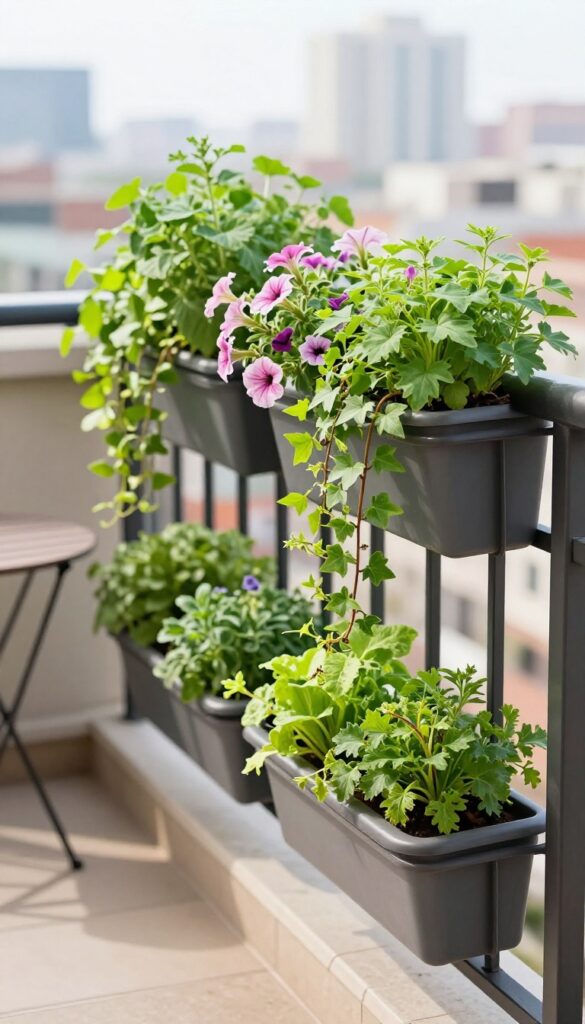
If your patio has a railing or a low wall, you're sitting on a goldmine of planting space. Rail-mounted planters attach directly to the top or side of the railing, turning an unused edge into a lush display. They're perfect for herbs, flowers, or even small veggies, and they keep your floor completely clear for furniture or foot traffic.
Rail planters come in a few styles, from simple clamp-on boxes to more elaborate hanging baskets that hook over the rail. They're especially great for renters because they don't require drilling or permanent mounting. Plus, they put your plants at eye level, so you get to enjoy them up close every time you step outside.
Choosing The Right Planter
Look for planters with sturdy clamps or brackets that fit your railing's width and shape. Metal and plastic options are lightweight and weather-resistant, while wooden ones add a natural touch. Make sure they have drainage holes to prevent waterlogging, and consider self-watering versions if you tend to forget to water.
What To Plant
Rail planters are ideal for shallow-rooted plants. Herbs like basil, thyme, and parsley thrive there, as do trailing flowers like petunias or ivy. You can also grow small lettuce varieties or strawberries for a tasty harvest.
Mix and match colors and textures for a vibrant edge.
Installation And Care
Attach the planters securely to the railing, ensuring they're level and stable. Use lightweight potting mix to avoid overloading the rail. Water more frequently than ground plants, as containers dry out faster, especially in sunny spots.
Feed with a balanced liquid fertilizer every couple of weeks during the growing season.
4. Tiered Plant Stands: Display More in Less Space
A tiered plant stand is like a staircase for your greenery, letting you pack a surprising number of pots into a corner that would otherwise hold just one or two. These stands come in wood, metal, or plastic, and they range from compact three-tier units to taller five-shelf ladders. The beauty is that every shelf gets light, so you can group plants with similar needs while keeping the whole display looking intentional and lush.
Tiered stands work especially well for sun-loving species that need to be closer to light, like succulents, herbs, or small citrus trees. Place the stand near the brightest spot on your patio, and rotate the pots every week or two so each plant gets its fair share of rays. For shady corners, choose a stand with wider shelves and fill it with ferns, pothos, or calatheas that thrive in indirect light.
Choosing The Right Stand
Before you buy, measure your patio space and think about the plants you want to display. A narrow, vertical stand works well for tight spots, while a wider, tiered bench gives you more room for trailing plants. Look for sturdy materials that can handle outdoor weather—powder-coated metal or treated wood are good options.
If you're handy, you can even build your own from reclaimed wood or repurpose an old ladder.
Arranging Plants By Light Needs
Place sun-loving plants on the top shelves where they get the most light, and shade-tolerant varieties on the lower tiers. This mimics their natural growing conditions and keeps everyone happy. Group plants with similar watering needs together, so you don't have to water the whole stand when only a few pots are dry.
A small watering can with a narrow spout makes it easy to reach the back pots without disturbing the others.
Styling Tips For A Polished Look
Mix pot sizes and textures to create visual interest—combine tall, spiky plants with round, bushy ones, and add a trailing vine to spill over the edge of a shelf. Use pots in a cohesive color palette or material, like terracotta or matte black, to tie the whole stand together. You can also add small decorative items like a tiny garden gnome or a string of fairy lights to make the display feel personal and inviting.
5. Compact Container Garden: Mix Veggies and Flowers
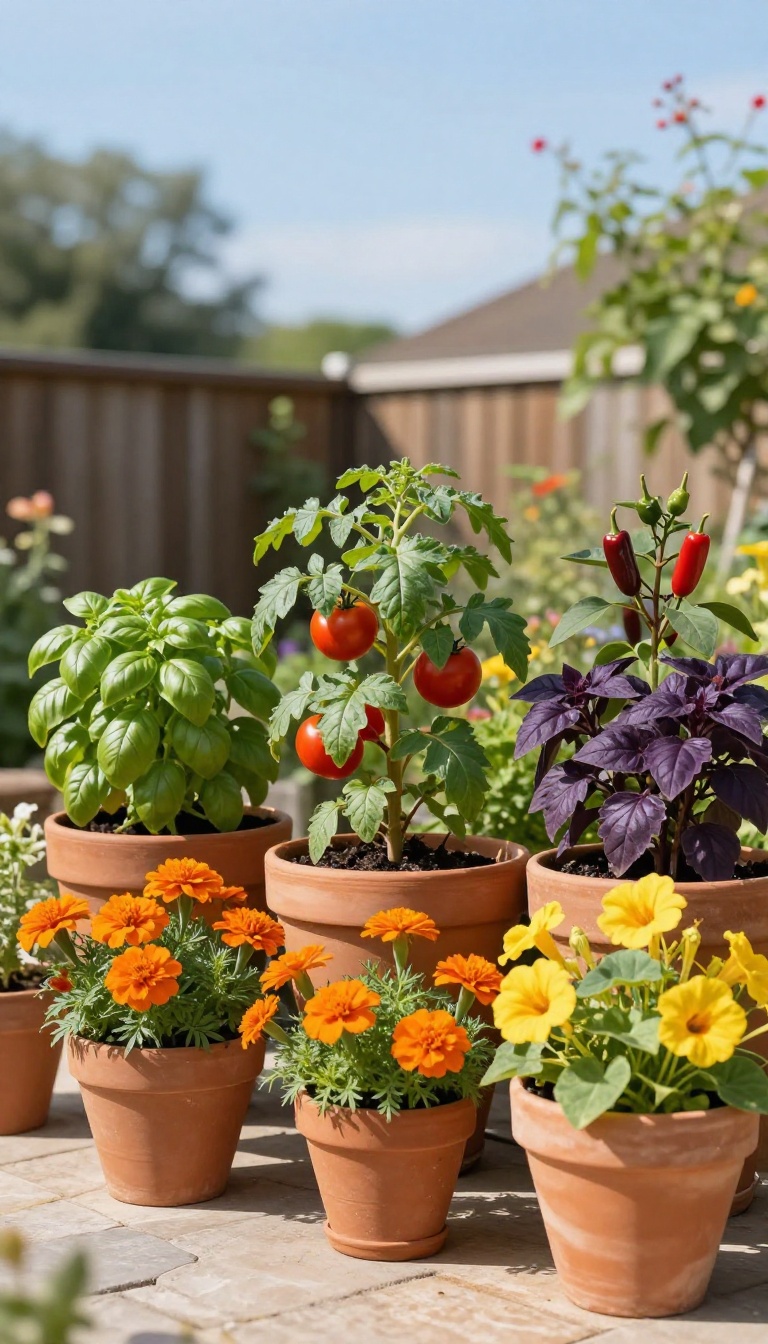
Who says a small patio can't feed you? With a few large pots and the right plant pairings, you can grow a mini edible garden that's as pretty as it is productive. The trick is to combine vegetables that thrive in containers with flowers that attract pollinators and deter pests.
It's a win-win for your taste buds and your eyes.
Start by choosing pots that are at least 12–16 inches deep and wide, giving roots plenty of room. Fill them with a high-quality potting mix and place them where they'll get at least 6 hours of sun. Then, pick a compact tomato variety, a pepper plant, and some basil—these are proven container performers.
Add marigolds or nasturtiums around the edges; their bright blooms not only look great but also help keep aphids and other pests away.
Pick The Right Plants
Not all veggies are patio-friendly. Stick with determinate tomatoes (like 'Patio Princess' or 'Tiny Tim'), bush cucumbers, and compact peppers. For herbs, basil, parsley, and chives do well in pots.
Pair them with edible flowers like nasturtiums (their leaves and petals are peppery and delicious) or marigolds, which are tough and colorful.
Arrange For Beauty And Bounty
Think of your container as a mini garden bed. Place the tallest plant (like a tomato) in the center or back, then surround it with lower-growing herbs and flowers. This creates a full, lush look and ensures every plant gets light.
Use a mix of leaf colors and textures—purple basil, variegated thyme, and bright marigolds add visual interest even before the harvest.
Keep It Thriving
Container gardens dry out faster than in-ground beds, so check the soil daily. Water when the top inch feels dry, and feed every two weeks with a balanced liquid fertilizer. Pinch back basil to encourage bushier growth, and harvest veggies regularly to keep production going.
Deadhead flowers to prolong blooming.
6. Living Wall System: Go Big on Vertical Greenery
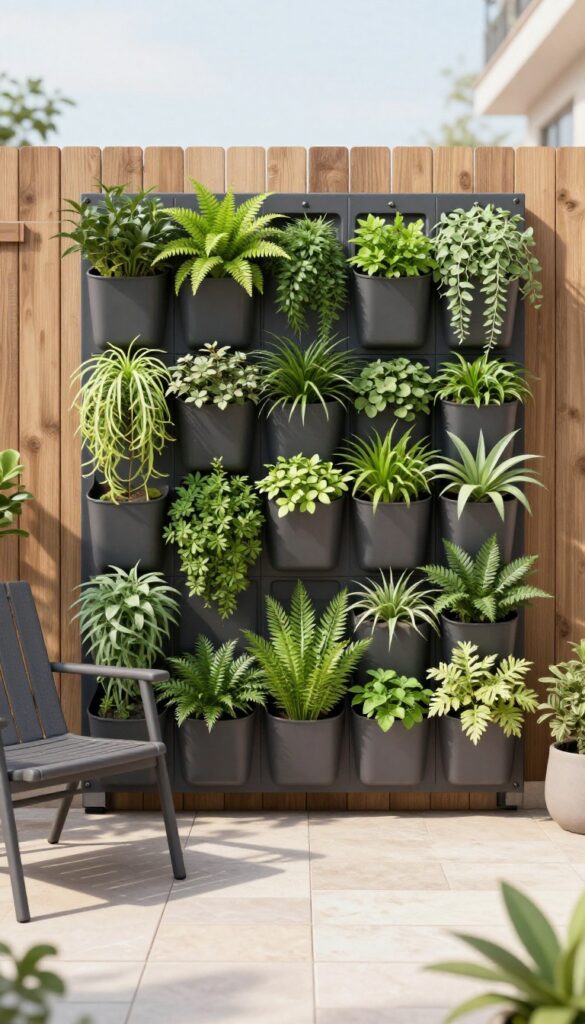
If you've ever admired those lush, green facades on modern buildings and wished you could have one at home, a modular living wall system is the closest you'll get. These pre-fabricated panels come with built-in pockets or slots that hold plants securely, turning a plain fence or wall into a living tapestry. It's a more permanent setup than hanging pots, but the payoff is a dramatic, full-coverage green feature that becomes the heart of your patio.
Living wall systems are a fantastic way to maximize vertical space, especially when floor area is scarce. They come in various sizes and materials, from felt pockets to rigid plastic grids, and can be mounted on most sturdy surfaces. Before you buy, consider the weight of the system when fully watered—some can get heavy, so ensure your wall or fence can support it.
Also, plan for irrigation: many systems include a drip tray or built-in watering channels, but you can also install a simple drip line for consistent moisture. Choose plants that thrive in your light conditions and that don't mind having their roots confined. Herbs, ferns, trailing vines, and compact perennials work beautifully.
With a living wall, you're not just adding greenery; you're creating a living art piece that changes with the seasons.
Choosing The Right System For Your Space
Not all living walls are created equal. Some are modular panels that you can expand over time, while others come as complete kits. If you're renting, look for freestanding or wall-mounted options that don't require drilling.
For a permanent solution, you can build a custom frame with pocket planters. Consider the weight capacity of your wall and the amount of sunlight it receives. Some systems come with a built-in reservoir that waters plants from the bottom, reducing maintenance.
Start small with a 2×3 foot panel, and see how it feels before covering an entire fence.
Best Plants For A Living Wall
The key to a thriving living wall is choosing plants that tolerate the conditions and don't outgrow their pockets. For sunny walls, opt for succulents like sedums and echeverias, or herbs like thyme and oregano. For shade, ferns, hostas, and trailing ivy are excellent.
Mixing textures and colors creates visual interest. Don't forget to include some trailing plants that spill over the edges, softening the structure. Avoid aggressive growers like mint, which can quickly take over.
Installation And Maintenance Tips
Installing a living wall is a weekend project. Most systems come with clear instructions, but the basics involve securing the frame to the wall, adding the pockets or panels, and then planting. Use a high-quality potting mix that retains moisture but drains well.
Watering is crucial—check daily, especially in hot weather. Many systems have a drip tray or a built-in irrigation option, but you can also water manually with a watering can. Fertilize monthly with a balanced liquid fertilizer during the growing season.
Prune regularly to keep plants in shape and encourage bushier growth.
7. Trellis with Climbing Plants: Add Privacy and Shade
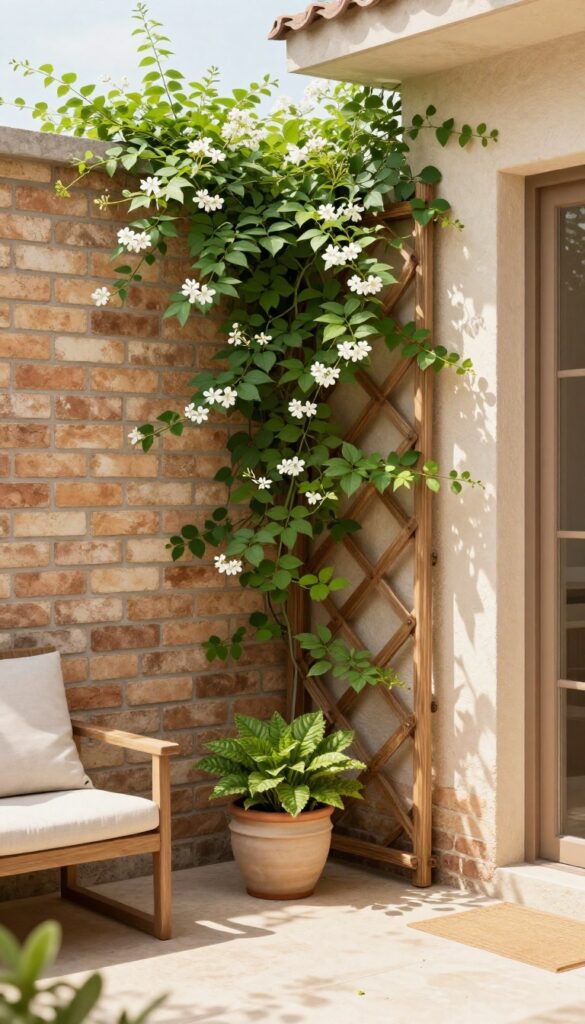
A bare wall or fence is wasted space, especially on a small patio. A trellis changes that by turning a flat surface into a vertical garden that works double duty. Climbing plants soften the hard lines of your outdoor area while creating a living screen that blocks neighbors and filters harsh sunlight.
It’s one of the simplest ways to make a compact space feel more private and more lush at the same time.
The key is picking the right trellis for your spot and then choosing climbers that match your light and style. You can lean a freestanding trellis against a wall, mount it flat, or even use a decorative screen that doubles as a planter. Once it’s up, the plants take over—twining, clinging, or scrambling upward to form a green curtain that feels like a secret garden.
Choosing The Right Trellis
Think about the weight of the plants you want to grow. Heavy vines like wisteria need a sturdy metal or thick wooden trellis anchored securely. Lighter climbers, such as annual morning glories or black-eyed Susan vines, do fine with a simple bamboo or plastic lattice.
Also consider the size—make sure the trellis is tall enough to give you real privacy, usually at least 6 feet, and wide enough to cover the area you want to screen.
Best Climbing Plants For Small Patios
For quick coverage, annual vines like hyacinth bean or moonflower are hard to beat. If you want something permanent, clematis offers beautiful blooms in many colors, while jasmine brings fragrance and evergreen leaves in warmer zones. Ivy is a classic choice for shade, but keep it in check—it can be invasive in some areas.
For a touch of color, climbing roses add romance, but they need more sun and care.
Installation And Care Tips
Position the trellis where it gets the right amount of sun for your chosen plants. Most flowering vines need at least 6 hours of direct light. Secure the trellis well—use wall anchors or heavy pots to keep it stable in wind.
Water regularly, especially during the first season, and guide young tendrils toward the trellis until they latch on. A little pruning keeps growth tidy and encourages more flowers.
8. Repurposed Furniture Planters: Upcycle with Charm
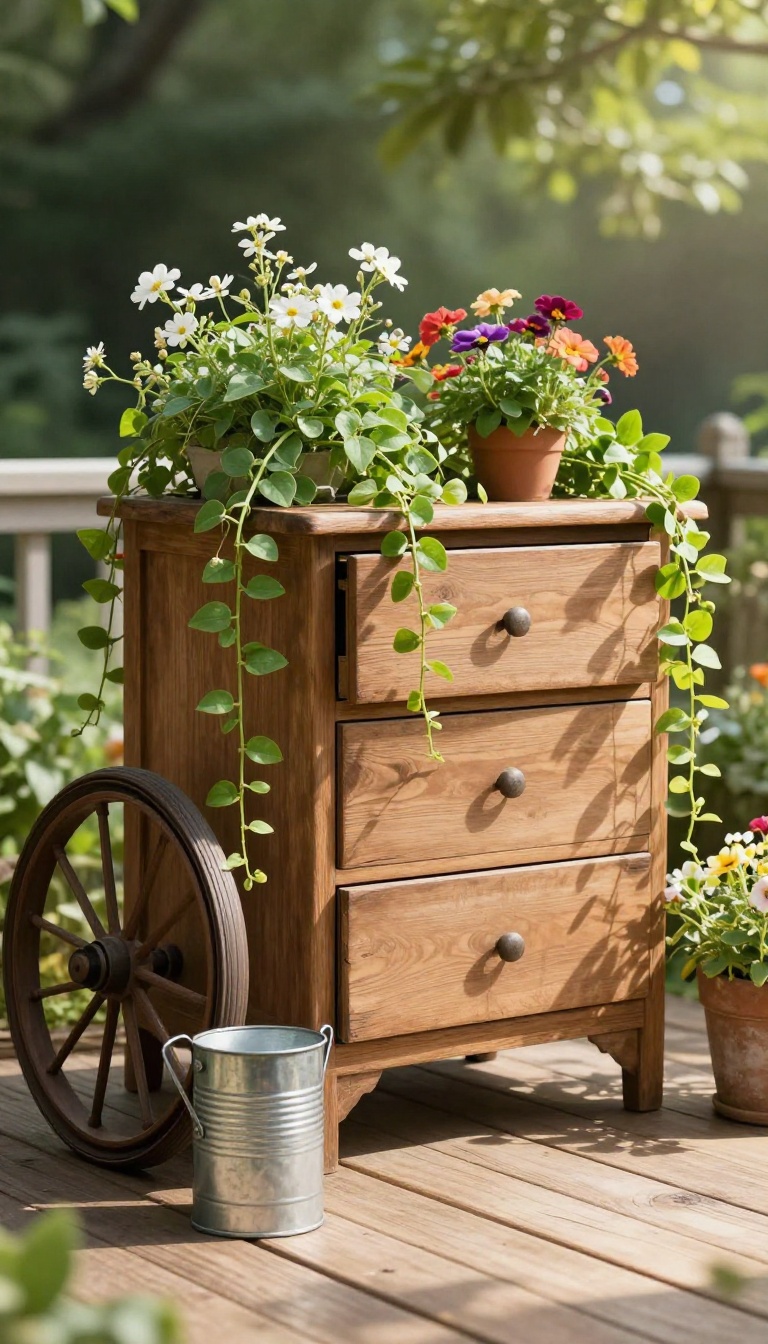
Old drawers, wheelbarrows, and tin cans can become the most character-filled planters on your patio. This idea is about giving discarded items a second life while adding a rustic, one-of-a-kind touch to your green space. It’s budget-friendly, eco-conscious, and surprisingly easy to pull off.
Start by scouting your garage, attic, or local thrift store for items with potential. Look for sturdy pieces that can hold soil and withstand the elements. A little creativity and some basic tools are all you need to transform them into charming homes for your plants.
Choosing The Right Furniture
Not every piece of old furniture is suitable for outdoor use. Stick with items made of wood, metal, or ceramic that can handle moisture. Avoid particleboard or anything with toxic finishes.
Dressers, chairs, or even an old bathtub can work wonders if they’re structurally sound.
Preparing Your Planter
Before planting, you’ll need to ensure proper drainage. Drill holes in the bottom or sides, depending on the item. If it’s a closed piece like a drawer, line it with landscape fabric to keep soil from escaping while allowing water to flow out.
Elevate the planter slightly to prevent waterlogging.
Planting And Styling Tips
Mix and match plants for a lush, layered look. Use trailing varieties to soften edges and upright plants for height. Don’t be afraid to paint or distress the furniture to match your patio’s vibe.
Group several repurposed planters together for a cohesive, eclectic display.
9. Corner Shelf Garden: Use Awkward Nooks
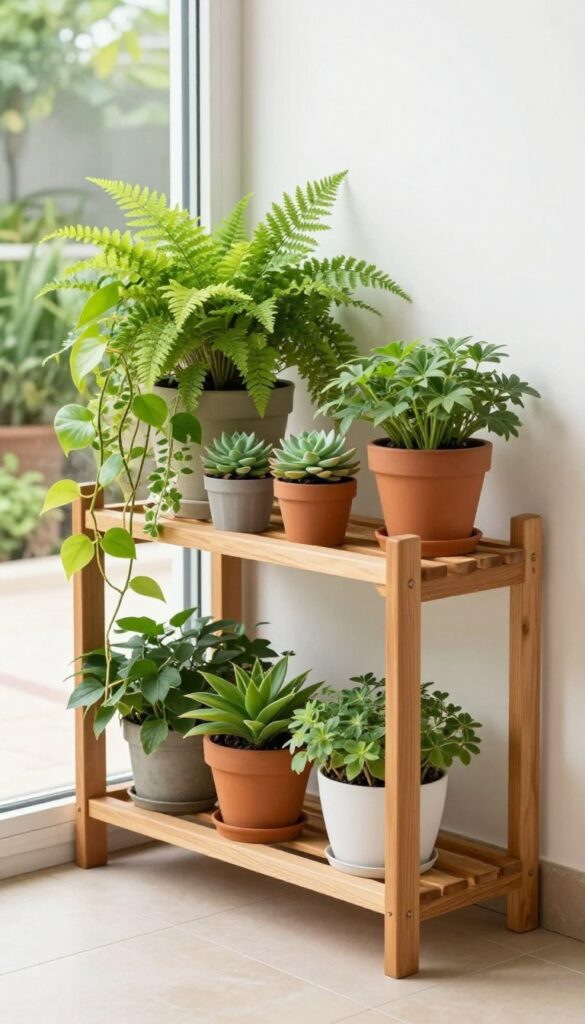
Corners often become dumping grounds for random pots or just empty, wasted space. But a corner shelf unit can turn that awkward nook into a vertical garden that holds a surprising number of plants. It's a smart way to add greenery without taking up any extra floor space, and it works especially well on small patios where every inch counts.
A corner shelf garden is all about making use of a spot that's easy to ignore. Instead of letting that corner sit bare, you can stack a few shelves and fill them with plants that love the light. The key is to choose a shelf that fits the corner snugly and to arrange the plants so they can all get enough sun.
You'll be amazed at how much life a simple corner shelf can bring to your patio.
Choosing The Right Shelf
Look for a corner shelf unit that's sturdy and weather-resistant, like one made of teak, cedar, or powder-coated metal. Measure the corner first to make sure the shelf fits snugly without wobbling. If you're handy, you can even build a simple wooden corner shelf to match your patio's style.
Just make sure the shelves are deep enough to hold your pots securely.
Picking Plants For Corner Shelves
Since corner shelves often get light from only one or two sides, choose plants that tolerate partial shade or bright indirect light. Good options include pothos, ferns, spider plants, and small succulents. If your corner gets direct sun, go for herbs like thyme, oregano, or small peppers.
Rotate the pots occasionally so all sides get even light.
Styling And Arranging
Mix trailing plants with upright ones to create visual interest. Place taller plants on the lower shelves and let trailing vines cascade from the upper ones. Add a few decorative elements like a small lantern or a garden ornament to make the corner feel intentional.
Use pots in complementary colors to tie the whole look together.
10. Window Boxes: Bring Greenery to Eye Level
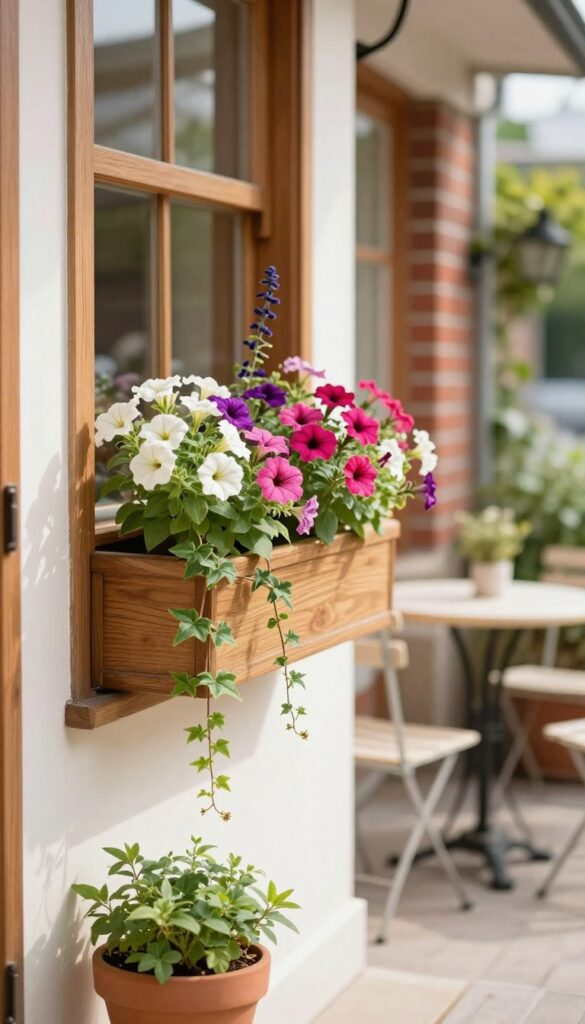
Window boxes are a classic way to add greenery without taking up any floor space. They attach to the outside of your home or balcony railing, turning plain exteriors into charming displays. Plus, they're perfect for herbs and colorful annuals, giving you fresh ingredients and beautiful views from both inside and out.
Window boxes are a simple yet effective solution for small patios. They mount easily on walls, railings, or windowsills, and they instantly add charm and life to any exterior. Whether you're growing basil for your pasta or petunias for a pop of color, window boxes make the most of vertical space and keep your patio floor open for seating or movement.
Choosing The Right Box
Pick a window box that matches your home's style and the amount of sun your patio gets. Wood, metal, and fiberglass are all great options, but make sure it has drainage holes to prevent waterlogging. Measure your window or railing before buying, and consider a self-watering model if you travel often or tend to forget watering.
Planting For Impact
For a lush look, use a mix of thrillers, fillers, and spillers. Thrillers are tall plants like salvia or ornamental grass, fillers are mounding plants like begonias, and spillers trail over the edge, like ivy or lobelia. This combination creates a full, layered effect that looks professionally designed.
If you prefer herbs, choose compact varieties like thyme, parsley, and chives that thrive in containers.
Maintenance Tips
Window boxes dry out faster than ground gardens, so check them daily during hot weather. Water until it runs out the bottom, and feed with a balanced liquid fertilizer every couple of weeks. Deadhead spent flowers to encourage continuous blooming, and replace annuals as needed to keep the display fresh all season.
11. Self-Watering Containers: Low-Maintenance Greenery
Keeping plants alive shouldn't feel like a second job. Self-watering containers take the guesswork out of watering by letting plants draw moisture as needed. These pots are a smart pick for small patios where consistent care might slip your mind.
How They Work
Self-watering pots have a built-in reservoir at the bottom, separated from the soil by a wicking system. The wick pulls water up into the soil as it dries out, so plants get a steady supply without staying waterlogged. You just fill the reservoir every week or so, and the pot does the rest.
Best Plants For Self-watering Pots
Most patio favorites do well in these containers, but some thrive more than others. Herbs like basil and mint love consistent moisture, as do leafy greens like lettuce and spinach. Flowering plants such as petunias and marigolds also perform beautifully.
Avoid succulents or cacti, which prefer dry conditions and can rot with constant moisture.
Choosing The Right Size
On a small patio, every inch counts. Look for self-watering pots that fit your space without overwhelming it. A 12-inch pot works for a single herb or small flower, while a larger 18-inch container can host a compact tomato or a mix of greens.
Many designs come in slim, vertical styles that tuck neatly into corners or along railings.
Diy Self-watering Hack
If you're crafty, you can turn almost any container into a self-watering planter. Use a plastic bottle with a small hole in the cap, bury it upside down in the soil, and fill it with water. Or place a shallow dish under a regular pot and add a wick from the dish to the soil.
These simple tricks give you the same benefit without buying new pots.
12. Miniature Fairy Garden: Whimsical Detail
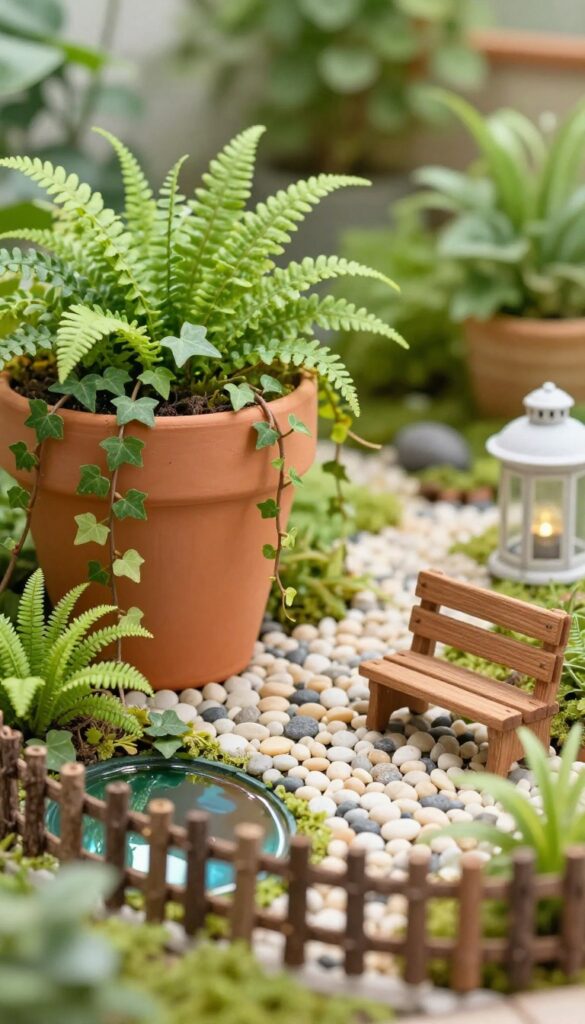
Tiny spaces call for tiny wonders, and a miniature fairy garden delivers exactly that. It’s a playful way to add a storybook touch to your patio without sacrificing precious square footage. All you need is a shallow container, a few small plants, and a sprinkle of imagination.
A fairy garden is more than just a planter—it’s a tiny world that invites you to slow down and smile. On a small patio, it becomes a charming focal point that draws the eye and sparks conversation. The best part?
You can build one in an afternoon with items you already have or find at a dollar store.
Pick The Perfect Container
Start with a shallow dish, a broken terracotta pot, or even an old wooden crate. The container should be at least 3–4 inches deep to give roots room, but wide enough to create a little landscape. Drainage is key—drill a few holes or add a layer of pebbles at the bottom.
Choose Miniature Plants
Look for plants that stay small and thrive in shallow soil. Good options include miniature ivy, baby tears, small ferns, and tiny succulents. Mix a few textures and heights to create depth.
Avoid fast-growing plants that will quickly outgrow the scene.
Add Whimsical Accessories
This is where the magic happens. Use pebbles to create a path, a small mirror as a pond, and twigs to build a tiny fence. Add a miniature bench, a fairy door, or a tiny lantern.
You can find these at craft stores or make your own from natural materials.
Place It For Maximum Impact
Set your fairy garden on a table, a shelf, or a corner of the patio where it can be admired up close. Make sure it gets the right amount of light for the plants you chose. Water gently with a spray bottle to avoid disturbing the tiny scene.
13. Herb Spiral: Grow More in a Small Footprint
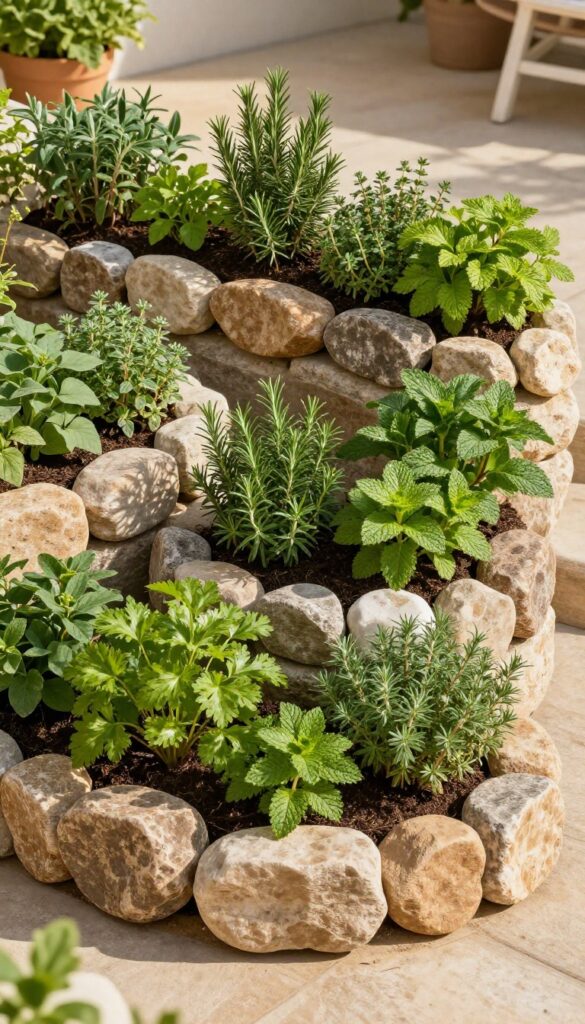
A herb spiral is a clever way to pack a lot of growing power into a tiny corner. By stacking stones or bricks in a spiral shape, you create a vertical garden that rises up instead of spreading out. The spiral design also creates different microclimates, so you can grow sun-loving herbs at the top and moisture-loving ones at the bottom, all within a few square feet.
Building a herb spiral is a weekend project that pays off for years. It’s not just about saving space—it’s about making the most of every inch by using height and varying conditions. Whether you have a small patio or a balcony, a herb spiral can become a stunning focal point that’s both functional and beautiful.
Why A Spiral Works So Well
The spiral shape isn’t just for looks. It creates a continuous slope that allows water to drain from the top down, so different herbs get the moisture they need. The top is dry and sunny, perfect for rosemary and thyme, while the bottom stays cooler and damper, ideal for parsley and mint.
You can grow a surprising variety in a compact footprint.
How To Build Your Own
Start by marking a circle about 3 to 4 feet in diameter. Use stones, bricks, or even recycled materials to build a spiral wall that rises to about 2-3 feet in the center. Fill the spiral with a mix of soil and compost, then plant your herbs.
Leave gaps between stones for drainage and to create little pockets for trailing plants.
Best Herbs To Plant
Choose herbs that match the microclimates. At the top, go for drought-tolerant ones like oregano, sage, and lavender. In the middle, plant basil, chives, and cilantro.
At the bottom, where it’s moist and shaded, mint, parsley, and watercress will thrive. This way, you get a continuous harvest all season long.
14. Hanging Pocket Organizer: Vertical Succulent Garden
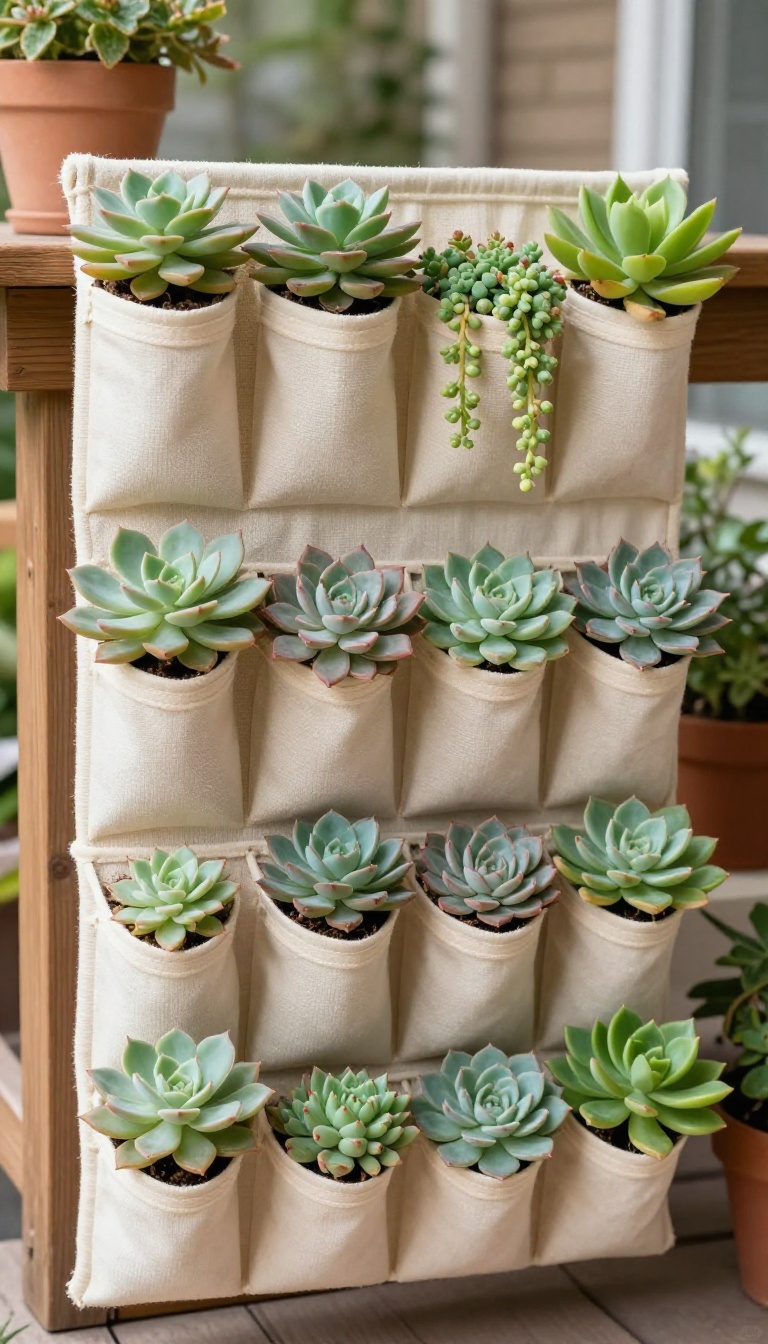
That old fabric shoe organizer gathering dust in the closet can become the star of your patio garden. With a few simple tweaks, it turns into a vertical succulent haven that saves floor space and adds a playful, green focal point to any bare wall or door. Succulents are the perfect match for this project because they need minimal soil and water, and they look great spilling out of pockets.
You’ll get an instant living wall that’s easy to move and rearrange whenever the mood strikes.
Start with a clean, dry hanging organizer with pockets. Cut small slits in the bottom of each pocket for drainage, then line the inside with a piece of landscape fabric or a coffee filter to keep soil from escaping. Fill each pocket with a fast-draining cactus or succulent mix.
Choose a mix of succulents like hens-and-chicks, sedums, and echeverias for texture and color. Plant them snugly in the pockets, then water them gently, letting excess drain out. Hang the organizer on a sunny wall, fence, or door using sturdy hooks or a tension rod.
This project takes about 30 minutes and costs next to nothing if you repurpose materials. It’s also a great way to propagate succulent cuttings—just tuck them into a pocket and watch them root.
Picking The Right Organizer And Spot
Look for an organizer with deep, sturdy pockets—canvas or thick fabric works best. Avoid ones with mesh backing that lets soil spill out. Choose a spot that gets at least 4–6 hours of bright, indirect sunlight, as most succulents prefer that over harsh afternoon rays.
If your space is shaded, opt for low-light succulents like sansevieria or certain haworthias. You can also rotate the organizer weekly so all plants get even light.
Planting And Caring For Your Pocket Garden
Fill each pocket with a well-draining soil mix, leaving a little room for the plant. Gently place your succulent, firming the soil around the roots. Water only when the soil feels completely dry—usually every 1–2 weeks, depending on your climate.
Fertilize lightly once a month during the growing season with a diluted succulent fertilizer. Keep an eye out for overwatering, which is the most common mistake. If a pocket gets too soggy, just pull the plant out, let the soil dry, and replant.
Creative Ways To Display And Customize
Beyond the classic hanging method, you can attach the organizer to a lattice panel for a living privacy screen, or drape it over a railing for a cascading effect. Paint the organizer’s frame or add decorative trim to match your patio style. Mix in small herbs like thyme or oregano for a functional twist, or add a few artificial succulents if you want a low-maintenance look.
The pockets also make great spots for small garden tools or fairy garden accessories.
15. Mirror Illusion: Double Your Greenery Visually
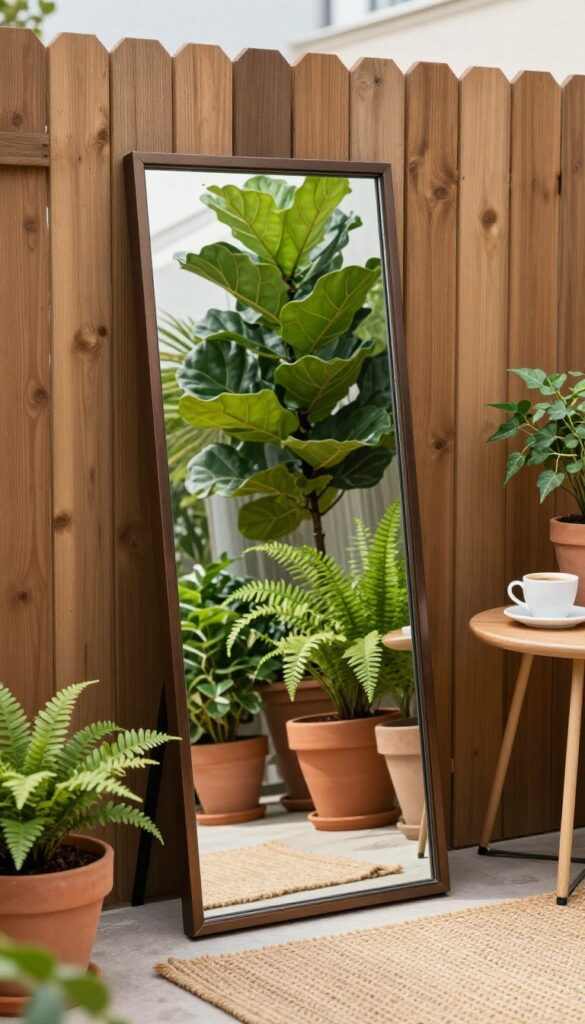
Mirrors aren't just for making rooms feel bigger—they work wonders outdoors too. By placing a large mirror on a wall behind your plants, you can trick the eye into seeing double the foliage and a much larger patio. It's a simple, budget-friendly trick that instantly adds depth and lushness, even in the tightest corners.
A well-placed mirror can transform a cramped balcony or tiny courtyard into a seemingly endless garden. The reflection bounces light around, brightens shady spots, and makes your plants look fuller. Plus, it's a clever way to showcase your favorite greenery without adding a single extra pot.
Choosing The Right Mirror
Look for an outdoor-rated mirror with a weatherproof frame, like aluminum or teak. Avoid thin, cheap mirrors that can crack or warp. Size matters: a larger mirror creates a stronger illusion, but even a medium one can work wonders.
If you're worried about breakage, consider acrylic mirrors—they're lightweight and shatterproof.
Placement Tips For Maximum Effect
Position the mirror so it reflects your lushest plants or a nice view, not a blank wall or clutter. Angle it slightly downward to catch more greenery and less sky. Place it behind a seating area to make the space feel open, or lean it against a fence for an easy, no-drill setup.
Just make sure it's stable and secure.
Styling With Mirrors And Plants
Create a layered look by placing taller plants in front of the mirror and shorter ones at the base. Add a few trailing plants on a shelf above the mirror to soften the edges. You can also frame the mirror with small pots on the sides to blend it into the garden.
The goal is to make the mirror feel like a natural part of the greenery.
FAQ
What are the best plants for a small patio garden?
Choose compact or dwarf varieties, such as patio tomatoes, herbs like basil and thyme, and ornamental plants like petunias or succulents. Consider vertical growers like climbing roses or ivy to maximize space.
How can I make my small patio garden look bigger?
Use vertical gardening techniques, add mirrors to reflect light and greenery, and choose a cohesive color palette. Keep the floor clear and opt for multi-functional furniture to avoid clutter.
How do I water a vertical garden on a patio?
Install a drip irrigation system or use a watering can with a long spout. For hanging planters, consider self-watering containers or water them regularly, as they dry out faster.
Can I grow vegetables on a small patio?
Yes, many vegetables thrive in containers. Choose compact varieties like cherry tomatoes, peppers, lettuce, and radishes. Ensure they get at least 6 hours of sunlight and use quality potting soil.
How do I protect my patio plants from harsh sun or wind?
Use shade cloths, umbrellas, or a trellis with climbing plants to provide shade. For wind, place heavier pots and use windbreaks like a lattice screen or tall plants.
Conclusion
A small patio can still feel lush and inviting when you choose the right mix of greenery. Start with one or two ideas that fit your space and light conditions, then layer in more as you get comfortable.
The goal is to create a spot that feels like a natural escape, not a crowded jungle. Pick the approach that excites you most and begin there—your little green retreat is closer than you think.