13 Rustic Bathroom Sink Ideas to Add Vintage Charm
A rustic sink can turn a plain bathroom into a warm, story-filled space. It's the kind of detail that makes guests pause and ask where you found it.
The right sink adds texture, character, and a sense of history without a full remodel. Below are 13 ideas that range from simple swaps to creative DIY projects.
Each one brings its own vintage flavor, so you can pick what fits your budget and skill level. Whether you want subtle farmhouse vibes or a bold antique statement, there's something here for you.
1. Hammered Copper Vessel Sink
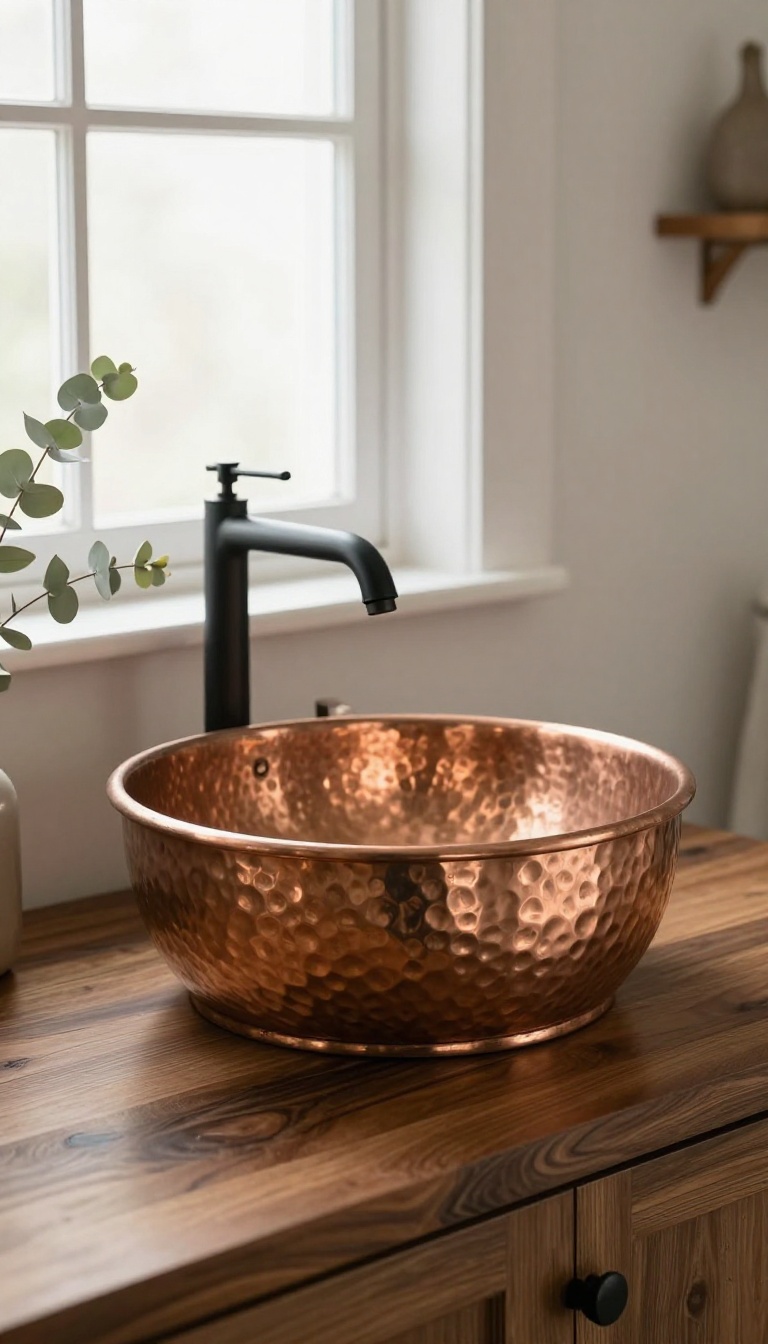
A hammered copper vessel sink brings warmth and a handcrafted look to any bathroom. Its dimpled surface catches light in a way that feels both old-world and inviting. Over time, the copper develops a patina that adds unique character, making each sink one of a kind.
Pair it with a dark wood counter for a striking contrast that highlights the metal's glow.
Copper has been used in homes for centuries, and a hammered vessel sink taps into that heritage without feeling like a museum piece. The texture comes from thousands of small hammer strikes, so no two sinks are exactly alike. That slight irregularity is what gives it soul.
Beyond looks, copper is naturally antimicrobial, which is a nice bonus for a bathroom. It also ages gracefully, shifting from a bright penny shine to deeper browns and greens depending on how much moisture and air it meets. You're not just buying a sink; you're starting a slow transformation.
When you set a copper vessel on a dark wood counter, the contrast makes both materials pop. The wood's grain feels rustic and grounding, while the copper adds a soft metallic warmth. It's a pairing that works in farmhouse, cabin, and even industrial-style bathrooms.
Why Hammered Copper Stands Out
The hammered finish isn't just for show. Those dimples hide water spots and small scratches, so the sink looks good even after daily use. It's a practical kind of beauty.
Plus, the texture adds a tactile element you don't get from smooth ceramic or glass.
How to Style It
Keep the rest of the vanity simple so the copper can be the star. Dark wood, oil-rubbed bronze faucets, and a few vintage accessories like a mason jar soap dispenser or a woven basket will tie the look together. Avoid shiny chrome, which can clash with the warm tones.
Care And Maintenance
Copper is low-maintenance but not no-maintenance. Wipe it dry after use to prevent water spots, and clean with a mild soap and soft cloth. If you want to slow the patina, apply a coat of clear wax.
If you love the aged look, just let it be.
2. Natural Stone Basin Sink
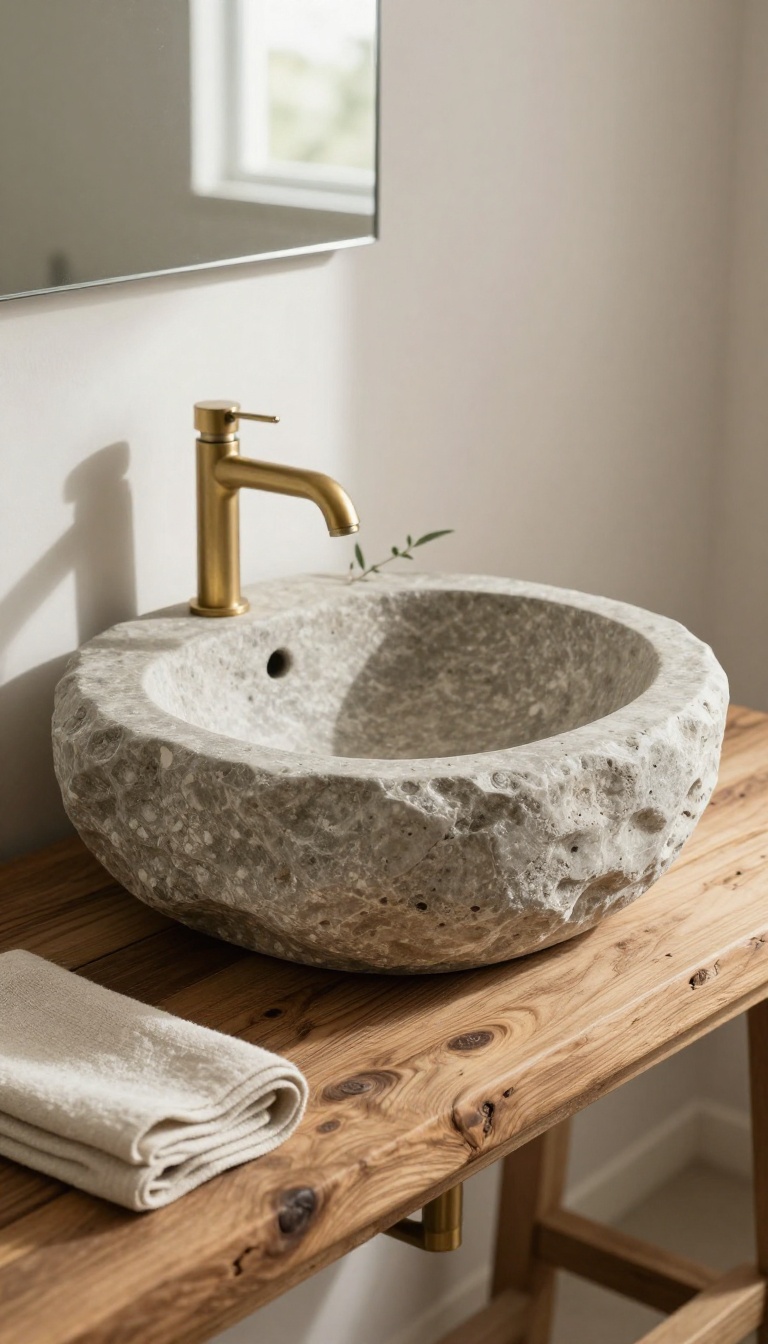
Natural stone basin sinks bring a piece of the outdoors inside. They're carved from river rock, granite, or even boulders, so each one has its own unique shape and texture. That means no two sinks are exactly alike, giving your bathroom a truly one-of-a-kind focal point.
These sinks feel rugged and organic, perfect for rustic or farmhouse styles. They pair beautifully with wood or concrete counters, adding a raw, earthy element to the space. If you want a sink that tells a story, natural stone is a great choice.
Natural stone basin sinks are exactly what they sound like: sinks made from a solid piece of stone. Makers typically hollow out river rocks, granite boulders, or even marble chunks to create a functional basin. The result is a sink that looks like it was plucked straight from a mountain stream.
Because stone is so durable, these sinks can last for decades. They resist scratches, heat, and stains better than many other materials. Plus, the natural variations in color and veining make each piece a work of art.
You'll find them in a range of sizes, from small river rock sinks for powder rooms to large granite basins for master baths. Some are polished smooth, while others keep their rough, natural exterior for extra texture.
Why Choose A Stone Basin?
Stone basins add an instant rustic vibe that's hard to fake. They're heavy and solid, so they feel substantial every time you use them. And since they're natural, they bring a bit of the outdoors in, which is perfect for nature-inspired bathrooms.
They also age gracefully. Small chips or scratches often just add to the character, making the sink look even more authentic over time.
Pairing With Counters
These sinks look best on wooden or concrete counters. A thick wood slab, like reclaimed oak or walnut, complements the organic shape of the stone. Concrete counters offer a more modern, industrial contrast that still feels earthy.
Avoid pairing with glossy or ornate surfaces, which can clash with the sink's ruggedness. Keep the rest of the vanity simple so the stone remains the star.
Installation And Care
Stone basins are heavy, so you'll need a sturdy counter and proper support. Many are vessel sinks that sit on top of the counter, which makes installation easier. Just make sure the drain hole is drilled correctly—this is best left to a professional.
Clean with mild soap and water, and avoid harsh chemicals that can dull the stone. Re-seal the stone every year or two to keep it protected from water spots and stains.
3. Repurposed Dresser Turned Vanity
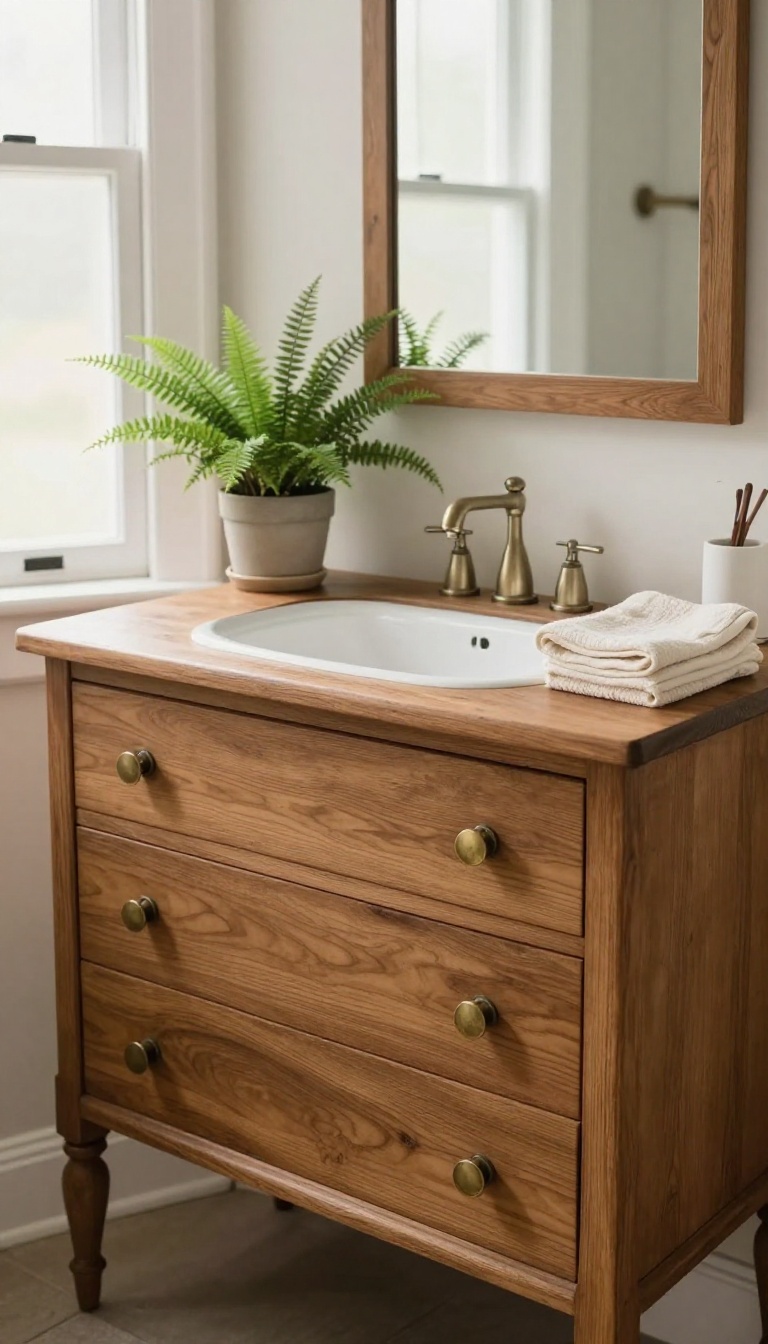
An old dresser can become a one-of-a-kind vanity with just a little planning. The drawers give you storage, and the wood brings instant vintage charm. Flea markets and estate sales are goldmines for solid pieces that are ready for a second life.
Turning a dresser into a sink vanity is one of those projects that looks custom but costs a fraction of a store-bought vanity. You get furniture-style details like turned legs, dovetail drawers, and aged hardware that you just can't find in big-box stores. The key is picking the right dresser and prepping it properly so it holds up in a damp bathroom.
Choosing The Right Dresser
Look for solid wood construction—oak, maple, or mahogany—because particleboard won't handle moisture or the weight of a sink. Measure the depth carefully; you'll need at least 18 to 20 inches to fit a standard drop-in sink and still have room for plumbing. Avoid pieces with water damage, warped drawers, or flimsy backs.
A dresser that's 30 to 36 inches tall works best for a comfortable vanity height.
Prepping And Sealing
Sand off any old finish, then apply a waterproof sealant or marine-grade polyurethane to protect the wood from splashes. Cut a hole in the top for your sink using a jigsaw, and reinforce the back panel to support the plumbing. If you want to keep the original finish, test a small area first to see how it reacts to moisture.
A coat of paste wax on the drawers helps them glide smoothly.
Sink And Faucet Options
A drop-in sink is the easiest choice because the rim covers the cutout. Vessel sinks also work well and add height, but you'll need a taller faucet. For a rustic look, consider a white farmhouse sink or a hammered copper basin.
Make sure the faucet reaches over the sink comfortably, and drill holes for the supply lines before you set everything in place.
Storage And Style Tips
Keep the top drawers for small items like toothpaste and hand towels, but remove the middle drawers to make room for the plumbing. You can turn those empty spaces into open shelves or baskets for rolled towels. Paint or stain the dresser to match your bathroom's palette, and swap out the hardware for something with an antique finish.
A little distressing around the edges adds to the vintage feel.
4. Farmhouse Apron-Front Sink
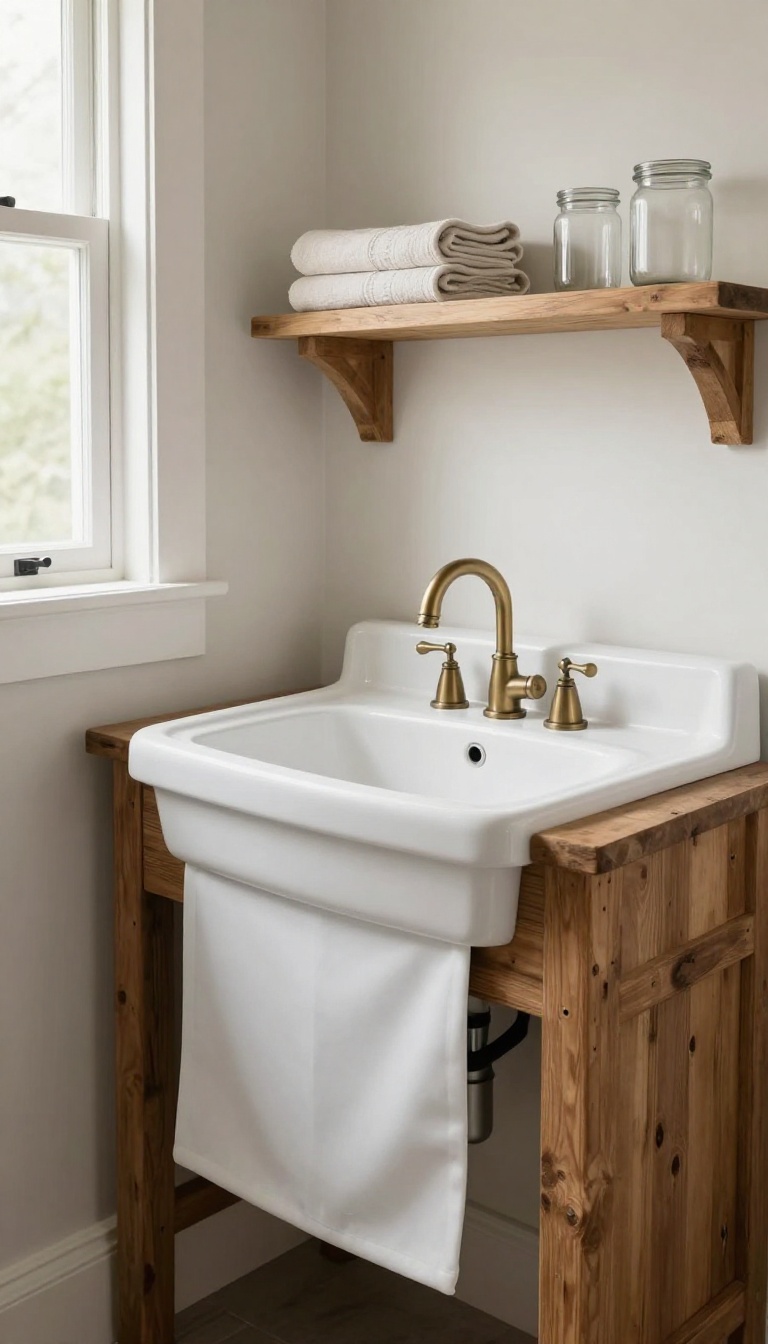
A white apron-front sink is the poster child of farmhouse style. It's been a kitchen staple for generations, and it looks just as good in a bathroom. The deep basin and exposed front give any space a warm, lived-in feel.
You don't need a full remodel to make it work. Many models fit standard vanity bases, and the look pairs well with rustic fixtures and open shelving. It's a practical choice that instantly adds vintage charm.
The apron-front sink, also called a farmhouse sink, has a wide, deep basin that makes washing up easy. The front panel, or apron, sits proud of the cabinet, showing off its smooth white finish. In a bathroom, it becomes a focal point that feels both sturdy and inviting.
You can find them in fireclay, porcelain, or even cast iron. Fireclay is popular for its durability and glossy finish. Cast iron brings a heavier, more industrial vibe.
Either way, the look is unmistakably farmhouse. Pair it with a gooseneck faucet in oil-rubbed bronze or brushed nickel. Add some open shelves for towels and jars.
The mix of textures—ceramic, metal, wood—keeps the space from feeling too polished.
Why It Works In A Bathroom
The deep basin is great for washing hands, filling vases, or even giving a small pet a bath. The apron front adds a touch of furniture-like detail that standard sinks lack. It's a small change that makes a big impact.
Choosing The Right Size
Measure your vanity carefully. Apron sinks come in standard widths like 24, 30, and 33 inches. You'll need a base that accommodates the exposed front, so check the depth and height.
If you're retrofitting, a cabinetmaker can modify your existing vanity.
Styling Tips
Keep the countertop simple—butcher block or soapstone works well. Add a vintage-style mirror and some mason jar storage. A small potted fern or dried lavender brings a fresh, farmhouse touch.
5. Antique Washstand with Basin
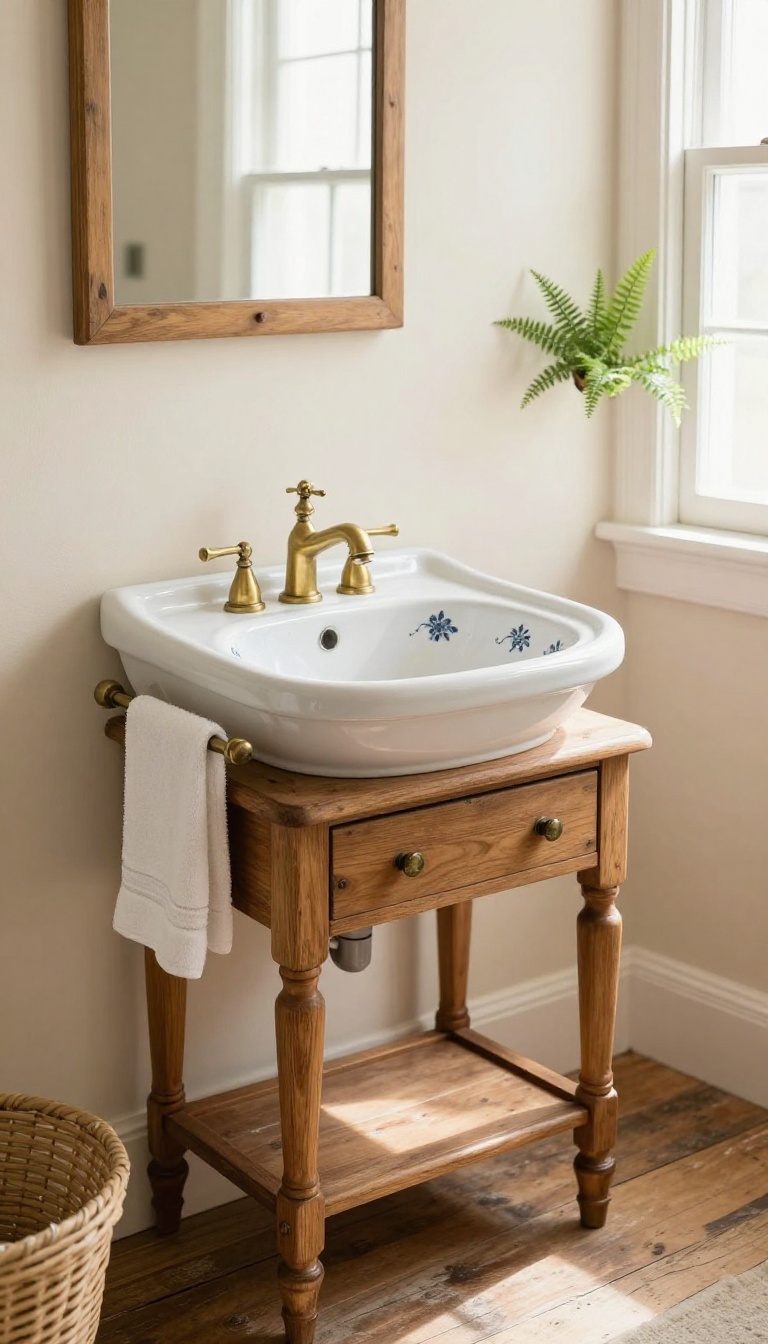
An antique washstand with a basin is like a piece of history that still works for you. These old pieces were once bedroom staples, holding a pitcher and bowl for morning washing. Today, they make stunning bathroom sinks with a story.
The basin sits right on top, and the stand often has towel bars and small drawers. It's a look that feels collected, not bought new.
Antique washstands come in many styles, from simple pine to ornate mahogany. The basin is usually ceramic, sometimes with a delicate pattern. You can find them at flea markets, antique shops, or online.
Some need a little love, but that's part of the charm. They're perfect for powder rooms where space is tight and style matters.
Why They Work
These washstands were built for function, so they already have a spot for everything. The towel bar keeps a hand towel within reach. Small drawers hide soap, razors, or extra toiletries.
The basin itself is often shallow, which works fine for hand washing. And because they're freestanding, they add a furniture-like feel to the room.
Finding And Fitting One
Measure your space first. Most washstands are about 30 to 36 inches wide, but sizes vary. Check the basin for cracks or chips, especially around the drain.
You'll need a plumber to connect the drain and faucet. Some people add a modern faucet for convenience, while others hunt for a vintage one. If the finish is worn, a light sanding and wax can bring it back.
Making It Practical
Seal the wood with a water-resistant finish to protect it from splashes. Add a small backsplash if the wall behind gets wet. If the drawers stick, a little candle wax on the runners helps.
And if the basin is too small for your needs, you can swap it for a slightly larger ceramic one that fits the opening. Just keep the original if you can, for resale value.
6. Concrete Trough Sink
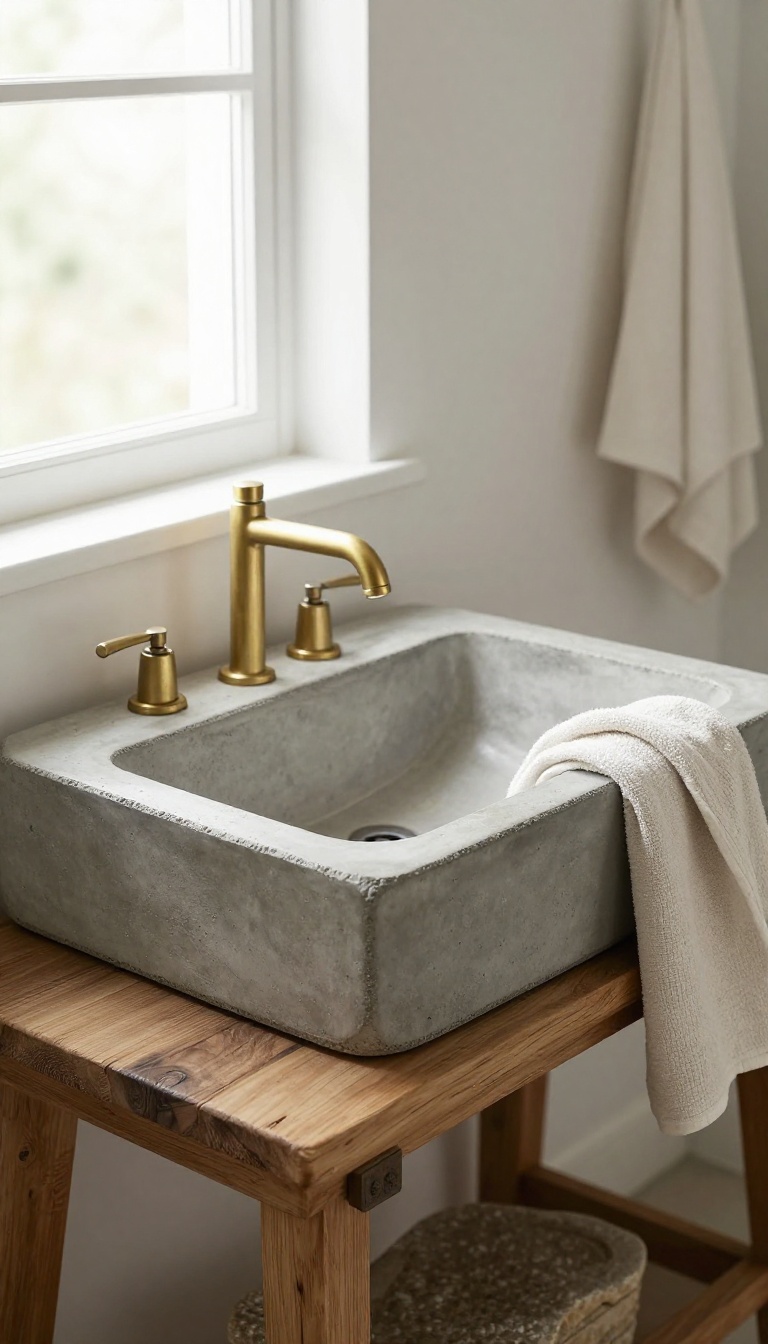
Concrete trough sinks bring a raw, industrial edge that still feels at home in a rustic bathroom. They're built to last, and you can size them to fit even an oddball space. Just seal the concrete well so it doesn't soak up stains.
This isn't the polished concrete you see in fancy lobbies. It's a chunky, handmade basin that looks like it's been part of the house for decades. And because you mix and pour it yourself, you control the shape, color, and finish.
It's a great pick if you want something sturdy, custom, and a little unexpected. Let's walk through what makes it work and how to pull it off.
Why Concrete Works For Rustic Bathrooms
Concrete has a rough, organic look that pairs well with wood, stone, and aged metal. It doesn't try too hard to be pretty, which is exactly why it fits a rustic space. It's also tough.
A concrete sink won't chip like ceramic or dent like copper. Drop a soap dish in it and you won't wince. And you can make it any size you want.
Narrow powder room? Long double vanity? Concrete bends to your layout, not the other way around.
How To Get The Look Without A Pro
You don't need a contractor to pour a small trough sink. Pre-made concrete mixes and melamine molds make it a weekend project for a confident DIYer. Start with a simple rectangular mold.
Add a drain hole and a slight slope toward it so water doesn't pool. Let it cure slowly, then sand the edges for a softer feel. If mixing concrete sounds messy, buy a ready-made concrete trough and install it yourself.
Either way, you'll end up with a one-of-a-kind piece.
Sealing And Care Tips
Concrete is porous, so sealing is non-negotiable. Use a penetrating sealer made for wet areas, and reapply it every year or two. Wipe up toothpaste, soap scum, and hair dye right away.
Even sealed concrete can stain if you let things sit. Avoid harsh acidic cleaners. Mild soap and water keep the surface happy.
If you want a darker, richer look, tint the concrete or wax it after sealing.
7. Wooden Vessel Sink with Epoxy Finish
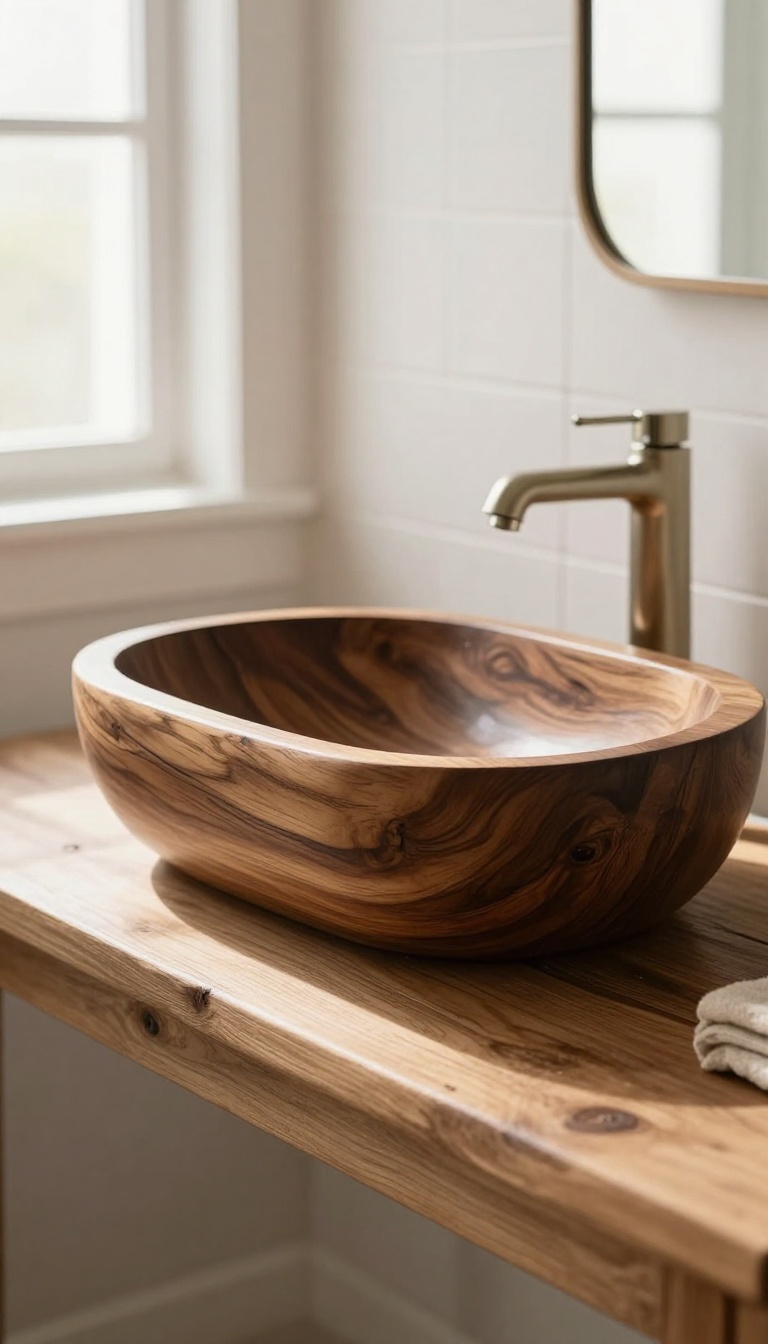
A carved wood sink sealed with epoxy offers a natural, rustic look that instantly warms up a powder room. It's a bold statement piece, but you need to ensure proper sealing for water resistance. With the right approach, you get a one-of-a-kind basin that feels organic and handcrafted.
Wooden vessel sinks are having a moment, and for good reason. They bring an earthy, organic feel that stone or ceramic can't quite match. But wood and water aren't natural friends, so the epoxy finish is what makes this idea work.
It's a project that rewards careful prep and a little patience.
Choosing The Right Wood
Not all wood is cut out for a sink. You want a dense, tight-grained species like teak, black walnut, or mahogany. These resist moisture better and hold up to daily use.
Avoid softwoods like pine or cedar, which can dent and degrade over time. Also, look for a solid block or thick slab, not a glued-up panel, to prevent cracks.
Carving And Shaping
You can carve the basin by hand with gouges, or use a router and sanding discs for a smoother bowl. Aim for a gentle, shallow curve rather than a deep bucket. The shape should feel natural, like a hollowed-out log.
Sand progressively from coarse to fine grit until the surface is silky. Any rough spots will show through the epoxy.
Sealing With Epoxy
Epoxy is the key to making wood waterproof. Use a food-safe, two-part epoxy designed for countertops or marine use. Pour a thin coat over the entire sink, inside and out, and let it cure.
Then add a second coat for extra durability. Sand lightly between coats for a smooth finish. Make sure the epoxy fully covers the rim and drain area.
Installation And Care
These sinks are heavy, so you'll need a sturdy vanity or countertop that can support the weight. Use a vessel-style drain and faucet that sits above the rim. For cleaning, avoid abrasive scrubbers that can scratch the epoxy.
A soft cloth and mild soap are all you need. Reapply a thin coat of epoxy every few years to keep it looking fresh.
8. Vintage Enamelware Sink
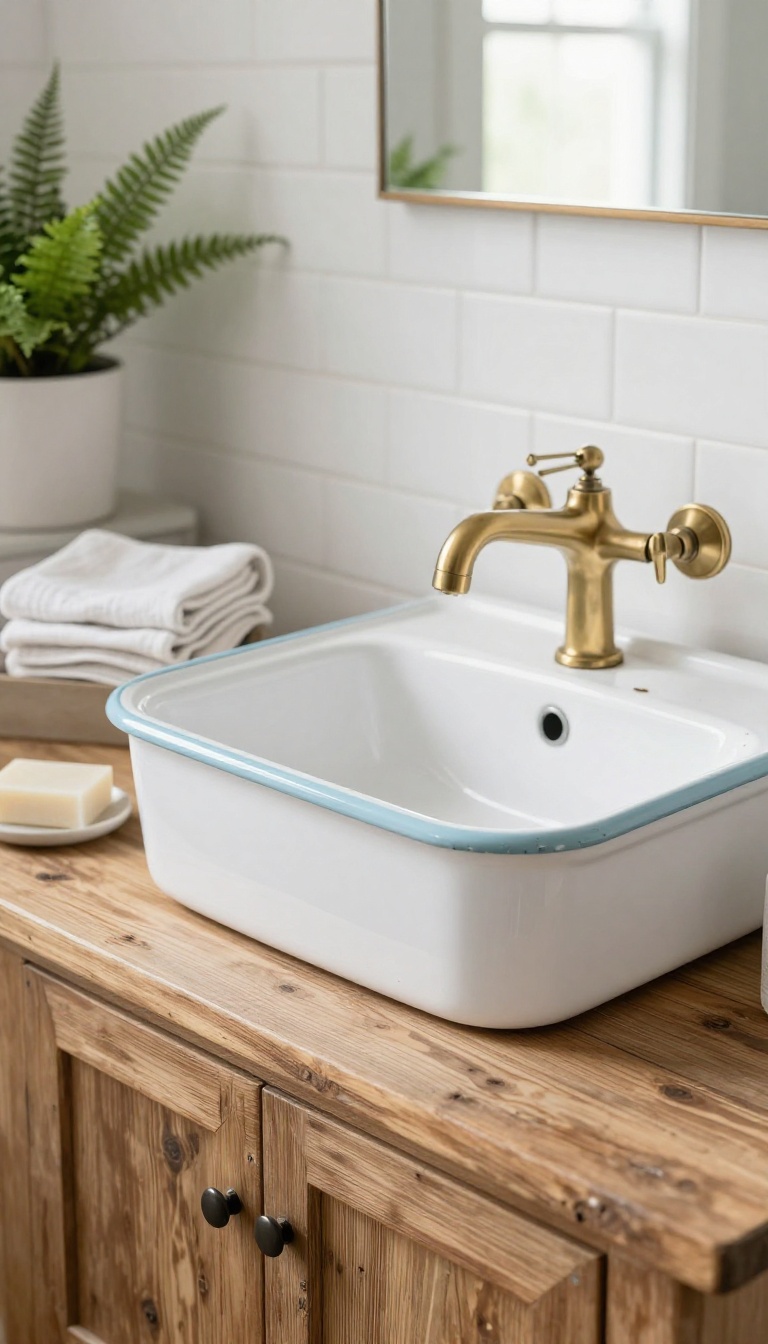
Enamelware sinks carry a charm that's hard to fake. They come from a time when function and simplicity ruled the farmhouse. The glossy white surface with a colored rim instantly adds a nostalgic touch to any bathroom.
These sinks were once standard in rural homes and farmhouses. Today, they're sought after for their sturdy build and timeless look. You can find them at salvage yards, flea markets, and online marketplaces.
But before you get too excited, you need to check for damage. Chips and rust are common in older enamelware, and they can affect both looks and function.
What To Look For
Inspect the enamel surface carefully. Small chips around the drain or edges are common, but large cracks or exposed rust can mean trouble. Rust often forms where the enamel has worn away, especially around the rim or underneath.
If the rust is surface-level, you might be able to treat it. But deep rust can compromise the sink's integrity. Also, check the bottom for any signs of previous repairs.
A magnet can help you find hidden rust spots under paint.
Cleaning And Care
Enamelware is easy to clean with mild soap and water. Avoid abrasive cleaners that can scratch the surface. For stubborn stains, a paste of baking soda and water works well.
Dry the sink after each use to prevent water spots and rust. If you notice a chip, seal it with enamel repair kit to prevent further damage. Regular maintenance will keep your sink looking good for years.
Installation Tips
These sinks often come with original hardware, but you may need to adapt it. Check if the drain hole size matches modern plumbing. Some enamelware sinks have odd dimensions, so measure carefully before buying.
If you're handy, you can mount it on a vintage cabinet or a custom vanity. For a simpler route, hire a plumber to ensure a leak-free fit. Remember, these sinks are heavy, so make sure your vanity or wall can support the weight.
9. Copper Bucket Sink
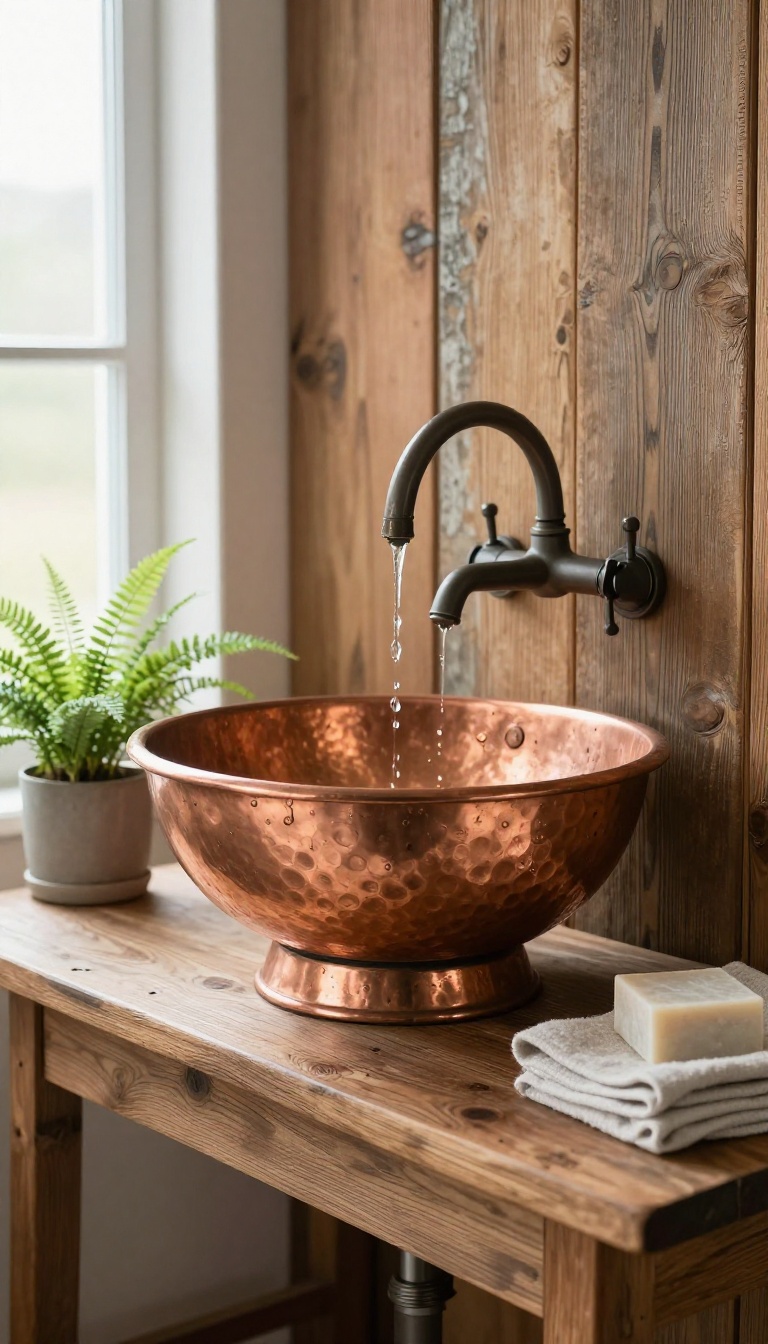
A copper bucket sink brings a warm, handcrafted feel to a rustic bathroom. The metal's natural patina and soft glow make it a standout piece that feels both old and intentional. Best of all, it's a DIY-friendly project that delivers big impact without a huge budget.
You can turn a vintage copper bucket into a working sink with a few basic tools. The process is straightforward, and the result looks like a custom piece you'd pay hundreds for. Just make sure you seal it properly so it lasts.
What You'll Need
Start with a sturdy copper bucket—look for one with a flat bottom and no major dents. You'll also need a drill with a metal hole saw, a drain assembly, and a waterproof sealant made for metal. A jigsaw or tin snips help if you need to trim the rim.
Drilling And Sealing
Mark the drain hole on the bottom of the bucket, then drill slowly with a metal bit. Once the hole is cut, sand the edges smooth. Apply a bead of sealant around the drain opening before installing the drain assembly.
This prevents leaks and protects the copper from corrosion.
Mounting And Maintenance
Set the bucket into a vanity top or have a metal fabricator create a custom bracket. For a simpler route, use a vessel sink ring that fits the bucket's base. To keep the copper looking its best, wipe it dry after each use and reapply sealant every year or two.
10. Soapstone Utility Sink
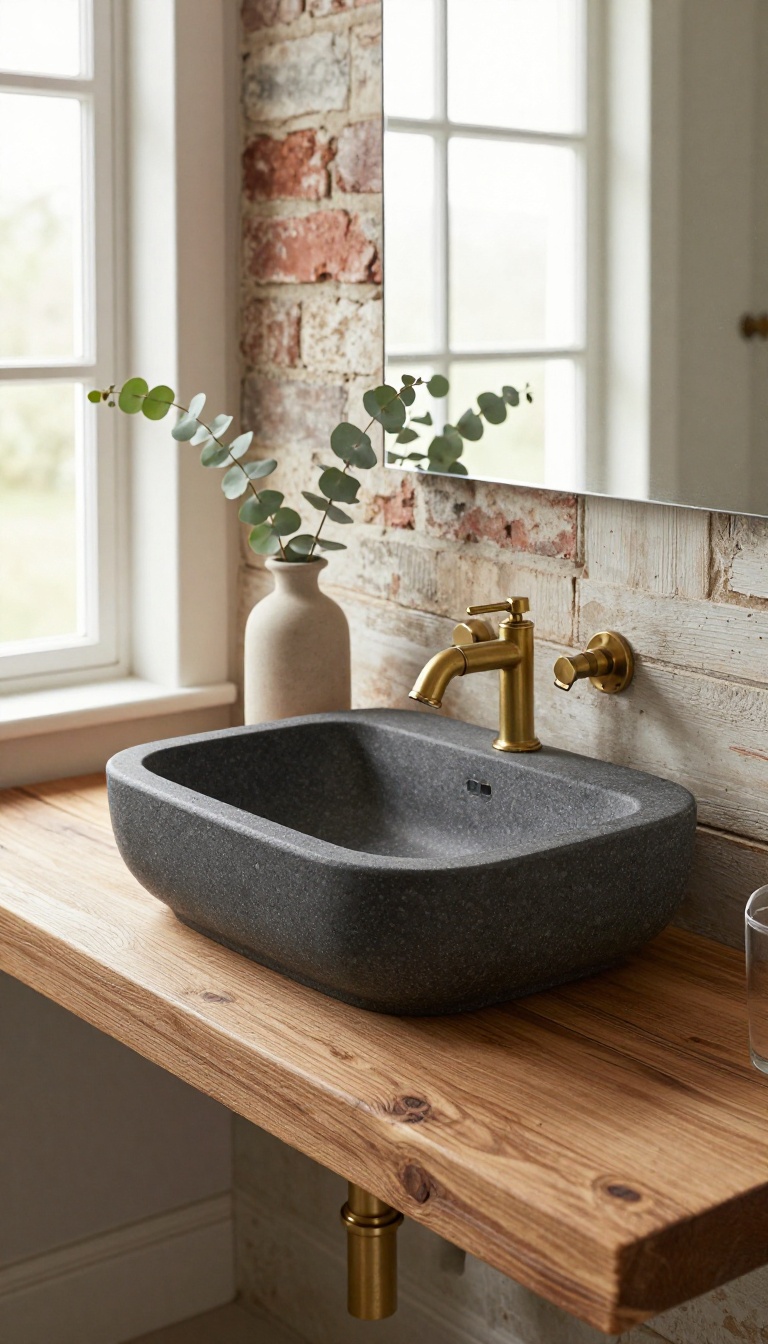
Soapstone has been the quiet workhorse of farmhouse kitchens and utility rooms for generations. It's a natural stone that feels soft to the touch but stands up to heat, stains, and daily wear. In a rustic bathroom, a soapstone utility sink brings that same honest, hardworking charm without any fuss.
Unlike glossy porcelain or shiny stainless steel, soapstone has a matte, almost velvety surface that absorbs light instead of reflecting it. That soft finish pairs beautifully with reclaimed wood, brick, and aged metals. It also means the sink won't glare or look out of place in a room with a relaxed, vintage feel.
Soapstone is naturally non-porous, so it doesn't need sealing the way granite or marble does. Water, soap, and even hair dye won't soak in and leave marks. It's also heat-resistant, which matters if you ever use the sink for washing up with hot water or setting down a hot tool.
Over time, soapstone develops a patina. Light scratches can be sanded out or simply left alone to blend into the stone's character. Many people rub their soapstone with mineral oil to deepen the color, but it's not required.
The stone ages gracefully, turning a little darker and richer with every year of use.
Why It Works In A Rustic Bath
Soapstone's matte, gray-to-charcoal tones feel earthy and understated. It doesn't compete with other vintage elements; it complements them. A soapstone utility sink looks especially good with exposed plumbing, a thick wood counter, or a simple skirt made from an old feed sack.
It's a natural fit for farmhouse, cottage, and industrial-rustic spaces.
Sizing And Installation Tips
Utility sinks are typically deeper and wider than standard bathroom sinks, so measure your space carefully. Many soapstone sinks are heavy, so you'll need a sturdy base or counter that can support the weight. If you're retrofitting an existing vanity, check that the cabinet can be reinforced.
A wall-mounted option can save floor space in a small bathroom.
Care And Maintenance
Daily care is simple: wipe with mild soap and water. Avoid abrasive cleaners that can dull the surface. If you want a deeper color, apply mineral oil every few months.
For scratches, a light sanding with fine-grit sandpaper followed by oil will blend them away. Soapstone is forgiving, so don't stress about occasional marks.
11. Pedestal Sink with Vintage Details
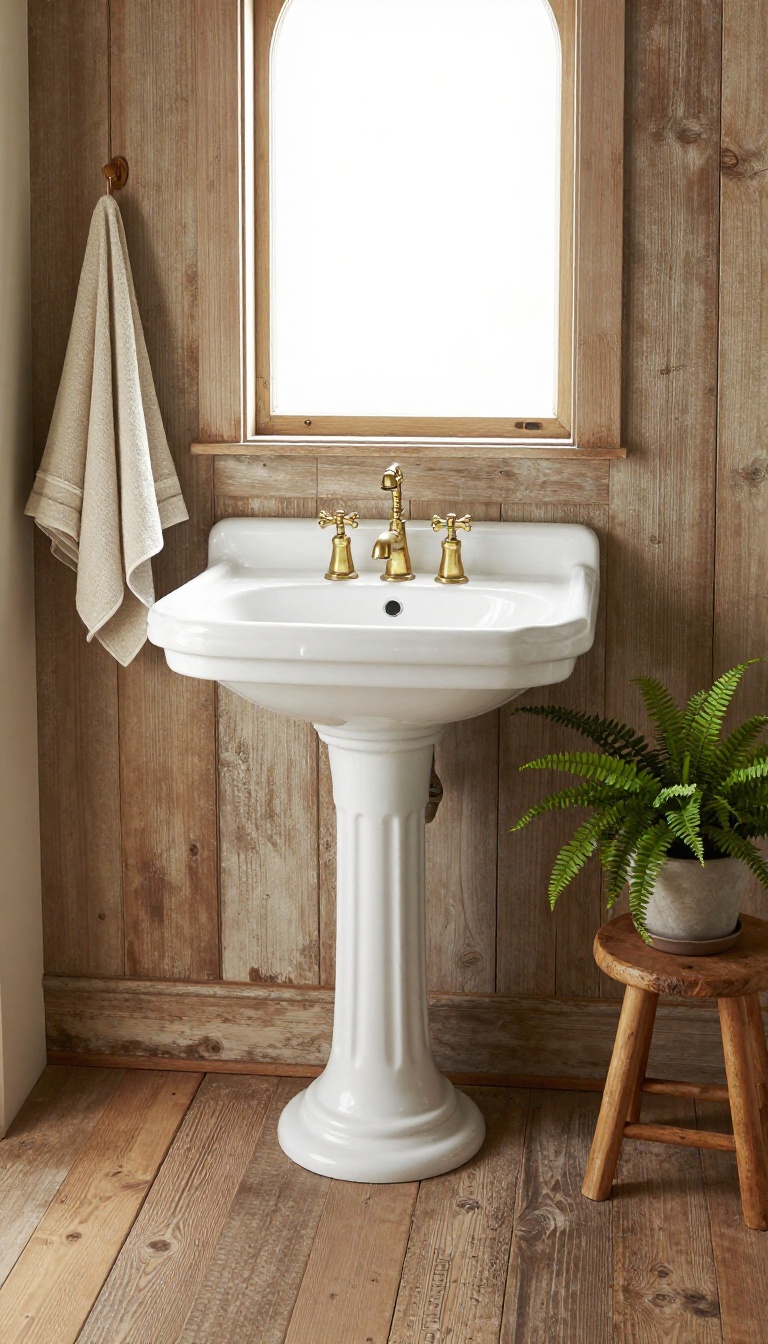
Pedestal sinks have been a bathroom staple since the early 1900s, and for good reason. The sculpted base and lack of a bulky vanity give them a timeless, airy look that fits right into a rustic space. They're especially handy in small bathrooms where every inch counts.
Plus, the right vintage details—like fluted columns or ornate legs—can make a simple sink feel like a flea market find.
A pedestal sink is more than just a plumbing fixture; it's a piece of functional art. The design typically features a basin supported by a single column or set of legs, often with decorative carvings or moldings. In a rustic bathroom, this style adds a touch of old-world elegance without overwhelming the space.
One of the biggest advantages is how much floor space it frees up. Without a cabinet underneath, the room feels larger and easier to navigate. That makes pedestal sinks a smart choice for powder rooms, half baths, or any tight spot where a full vanity would feel cramped.
But the real charm comes from the details. Look for models with fluted columns, scalloped edges, or porcelain handles that echo the past. These small touches can transform a basic sink into a conversation piece that anchors your rustic theme.
What To Look For
Start by checking the size of your space. Pedestal sinks come in various widths, from petite 20-inch models to larger 30-inch versions. Measure your bathroom to ensure a comfortable fit.
Next, consider the material. Vitreous china is classic and easy to clean, while cast iron with a porcelain enamel finish offers durability and a heavier, more substantial feel. For a truly rustic touch, look for sinks with a matte or slightly distressed finish.
Don't overlook the hardware. Vintage-style faucets with cross handles or porcelain indices can enhance the period look. If you're handy, you can also swap out the faucet for a wall-mounted option to save even more space.
Styling Tips
A pedestal sink can stand alone, but a few well-chosen accessories can elevate the rustic vibe. Hang a reclaimed wood shelf above it for towels and toiletries. Or place a woven basket on the floor beside it to hold extra rolls of toilet paper.
Lighting matters, too. An antique-style sconce or a simple Edison bulb pendant can cast a warm glow that highlights the sink's curves. Keep the color palette earthy—think whites, creams, and natural wood tones.
If you want to add a pop of color, consider a vintage rug or a small stool with a distressed finish. Just avoid clutter; the beauty of a pedestal sink lies in its simplicity.
Installation And Maintenance
Installing a pedestal sink is a bit more involved than a standard vanity sink because the pedestal must be anchored to the floor and the basin to the wall. If you're not confident in your plumbing skills, hire a pro. Once installed, maintenance is straightforward.
Wipe the surface with a mild cleaner to keep it shiny. For cast iron, avoid abrasive scrubbing pads that can dull the finish. Check the caulk around the base and basin annually and reapply if needed to prevent water damage.
With proper care, a vintage pedestal sink can last for decades, becoming a cherished part of your home's story.
12. Trough Sink from Galvanized Metal
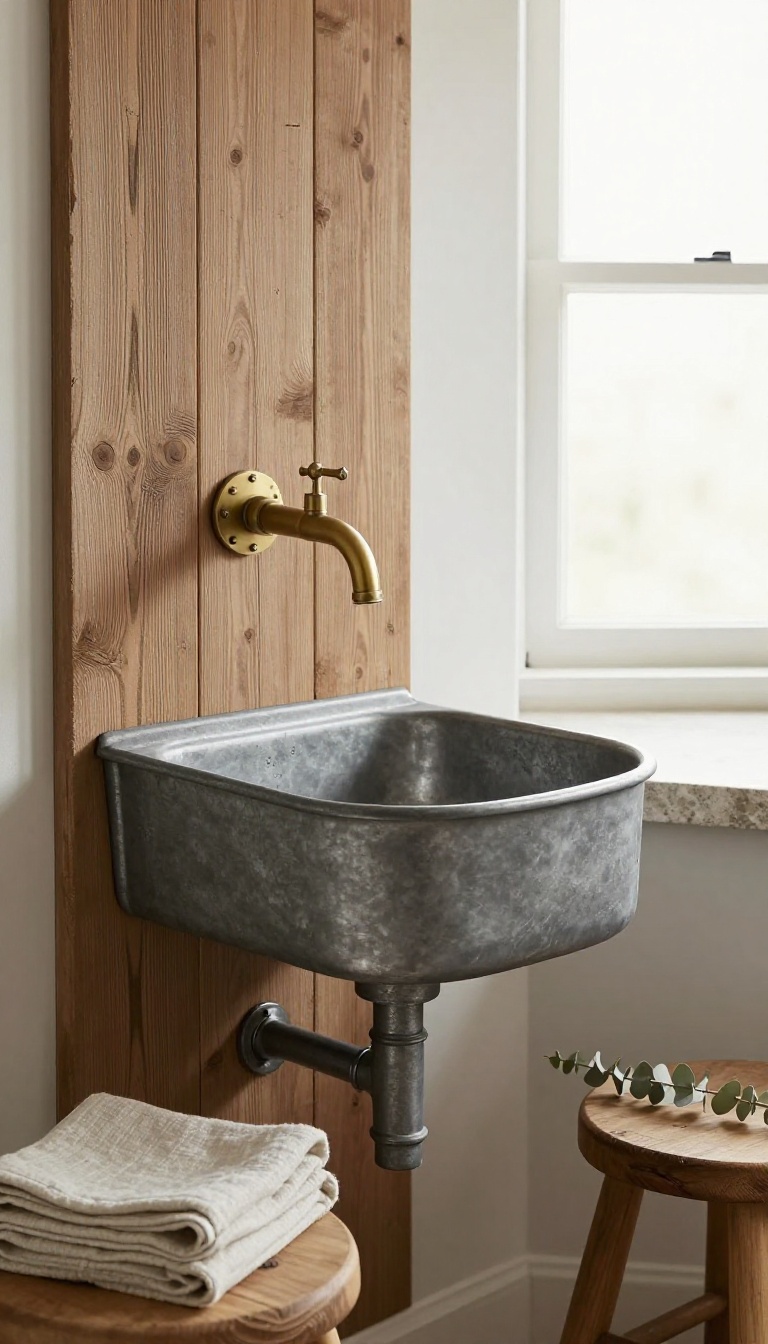
A galvanized metal trough sink brings a rugged, farmhouse feel to any bathroom. It's the kind of piece that looks like it was pulled straight from an old barn, yet it works perfectly in a modern home. The best part?
It's affordable and easy to find at farm supply stores or online.
Galvanized metal has a raw, industrial look that pairs beautifully with wood, stone, and vintage fixtures. A trough sink made from it adds instant character without a hefty price tag. You can often repurpose a livestock trough or buy a ready-made version.
The metal's matte gray finish hides water spots well and ages gracefully. It's a practical choice for busy bathrooms, mudrooms, or powder rooms where durability matters. Plus, installing one is straightforward, especially if you choose a wall-mount faucet to keep the look clean and uncluttered.
Why Galvanized Metal Works
Galvanized steel is coated in zinc, which makes it resistant to rust and corrosion. That means it holds up well in a damp bathroom environment. The finish has a subtle sheen that catches light without being shiny.
It's also naturally antimicrobial, which is a nice bonus. Unlike porcelain, it won't chip easily, so it stands up to daily use. And because it's a common material, you can find troughs in various sizes and shapes.
Finding And Prepping A Trough
Check farm supply stores, agricultural co-ops, or online retailers for galvanized troughs. They come in round, oval, and rectangular shapes. Look for one with smooth edges and no sharp burrs.
Before installing, clean it thoroughly with a mild detergent and water. You may want to seal the drain area with silicone to prevent leaks. If the trough has a rough bottom, consider adding a grid or a slight slope for better drainage.
Pairing With A Wall-mount Faucet
A wall-mount faucet keeps the sink area open and uncluttered. It also lets you position the water flow exactly where you want it. Choose a faucet with a vintage or industrial style to match the trough.
Oil-rubbed bronze or matte black finishes look great against galvanized metal. Make sure the faucet reaches far enough over the sink to avoid splashing. Installing it requires some plumbing know-how, but it's a manageable DIY project.
Styling And Maintenance
To soften the industrial look, add warm wood accents or a rustic mirror. A thick wood countertop around the trough can tie it into the room. Keep the metal clean with a soft cloth and mild soap.
Avoid abrasive cleaners that can scratch the zinc coating. Over time, the metal will develop a patina that adds to its charm. If you notice any rust spots, sand them lightly and apply a zinc-rich primer.
13. DIY Mosaic Tile Sink
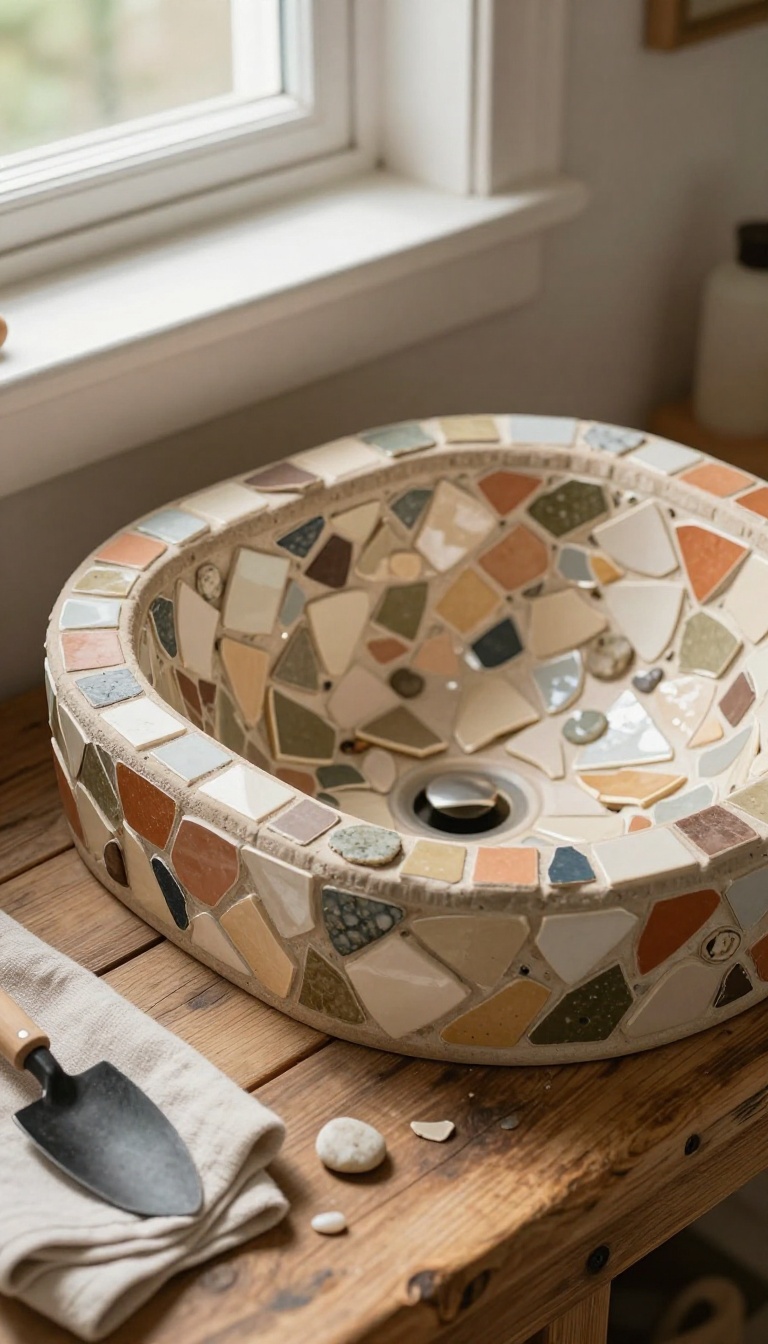
A mosaic tile sink lets you turn a basic basin into a one-of-a-kind piece. You can use broken tiles, small stones, or leftover pieces from other projects to create a textured, rustic surface. It's a weekend-friendly project that doesn't require special skills, just patience and a willingness to get a little messy.
Start with a simple sink basin—a plain ceramic or metal one works fine. Roughen the surface with sandpaper so the adhesive grips well. Then, plan your design.
You can go random with broken tile shards or create a pattern with small stones or pebbles. Spread a layer of tile adhesive or thinset over a small section, press your pieces into it, and leave a little space between them for grout. Work in small areas so the adhesive doesn't dry before you place the tiles.
Once everything is set and cured, grout the gaps, wipe off the excess, and seal it for moisture resistance. The result is a sink that looks like a piece of art and feels custom-made for your space.
Choosing Your Materials
Broken ceramic tiles, stone pebbles, or even glass pieces can all work. For a rustic look, stick with earthy tones and matte finishes. If you're using broken tiles, make sure the edges aren't too sharp.
You can also mix materials for extra texture.
Step-by-step Application
Clean and sand the basin first. Apply adhesive in small sections, press tiles into place, and let it cure for 24 hours. Then grout, wipe, and seal.
Take your time and don't rush the grouting—it's what makes the mosaic hold together and look finished.
Tips For A Lasting Finish
Use a waterproof grout and seal it annually to prevent mold and water damage. Avoid harsh cleaners that can break down the grout. If you're using stones, make sure they're smooth enough to clean easily.
A little maintenance keeps your mosaic sink looking great for years.
FAQ
What is the most durable rustic sink material?
Soapstone and concrete are among the most durable. They resist scratches and heat, and they age well with proper sealing.
Can I install a rustic sink in a small bathroom?
Yes. Pedestal sinks and wall-mounted options save space. Vessel sinks can also work if you choose a compact size.
How do I maintain a copper or stone sink?
Clean with mild soap and water. Avoid abrasive cleaners. For copper, let the patina develop naturally; for stone, reseal periodically.
Are rustic sinks expensive?
Costs vary. Repurposed items like dressers or buckets can be budget-friendly. Stone and copper sinks are often pricier but add lasting value.
Do rustic sinks require special faucets?
Not always, but wall-mount or bridge faucets often complement the style. Check the sink's hole configuration before buying a faucet.
Conclusion
You do not need to remodel the whole bathroom to get that vintage feel. Start with the sink, since it anchors the room and sets the tone for everything around it. Pick one idea that fits your space and budget, then build the rest of the look around it over time.
A farmhouse apron or a simple pedestal can change how the whole room feels without touching the tile. Take your measurements, hunt for a piece with real character, and let the imperfections do the work. The charm shows up fast once the right sink is in place.