10 Hot Tub Ideas Backyard Patio Spaces Can Use Beautifully
A hot tub earns its keep when it looks like it belongs on the patio instead of sitting on top of it. The right surround, level, and layout turn a bulky appliance into the best corner of the yard, and you feel that difference every time you step outside.
These ten ideas cover the setups that pull it off, from sunken tubs with a flush finish to pergola shade and built-in bars. Some need a contractor and a real budget, while others are weekend-friendly tweaks you can layer in over time.
Pick the one that matches your space, climate, and how you actually plan to use the tub.
1. Built-In Hot Tub with a Custom Deck Surround
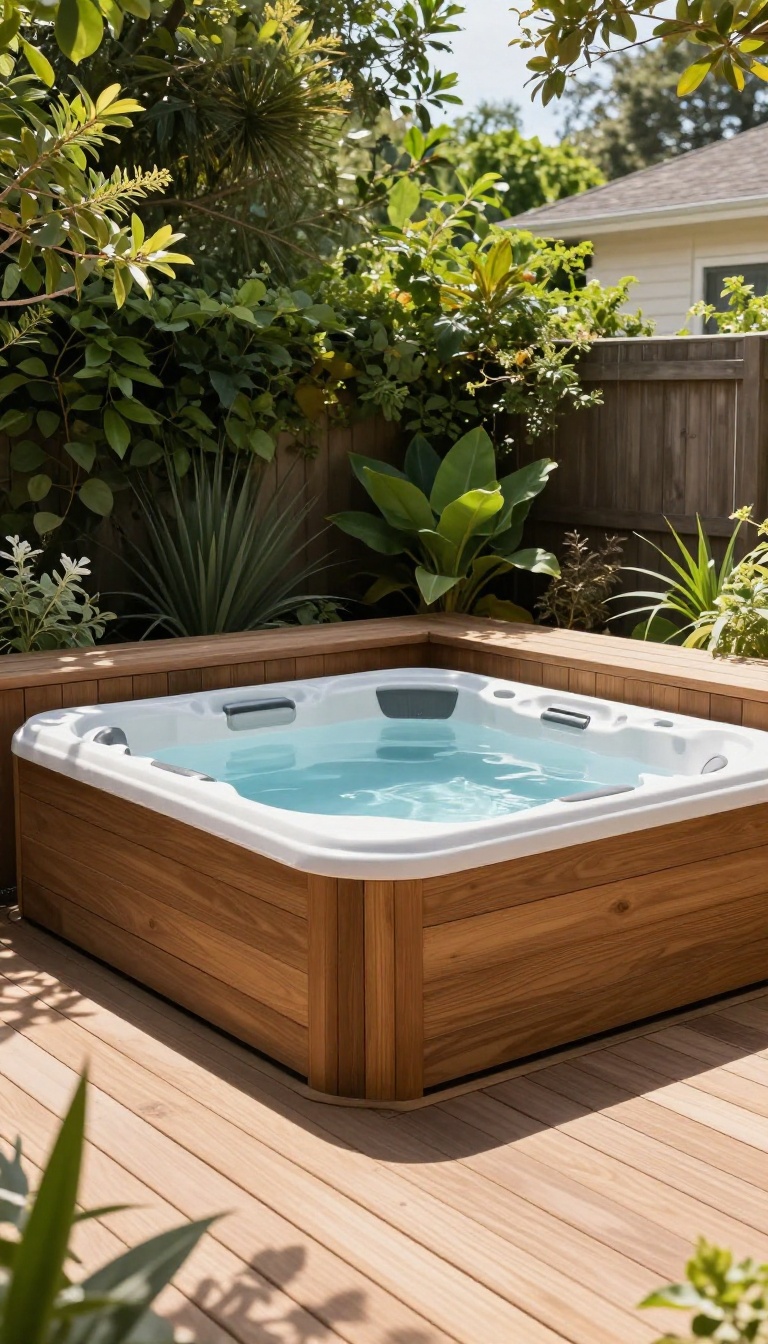
A built-in hot tub with a custom deck surround looks like it was always meant to be there. The bulky cabinet disappears, and the tub becomes part of the patio instead of an afterthought. This approach works best when you plan the deck and tub at the same time, so everything lines up from the start.
The magic of a built-in setup comes from what you don't see. The spa's cabinet gets hidden behind decking, stone, or composite panels, and the top edge sits flush with the surrounding surface. That clean line makes the whole space feel more expensive and more intentional.
You also get practical perks. A built-in tub is easier to step into because the deck acts as a wide, stable ledge. There's no awkward climb over a plastic lip, and no gap where leaves and water collect.
The surround can double as seating when the tub isn't in use, which is a nice bonus for parties. The catch is planning. You need to account for access panels, equipment placement, and drainage before the deck goes down.
Get those details right, and the result is a seamless feature that boosts both looks and usability.
Plan The Deck And Tub Together
Start by picking the tub, then design the deck around its exact dimensions. Leave a service hatch or removable panel so you can reach the pumps and heater later. If you build first and shop second, you'll likely end up with gaps or awkward cuts.
Also think about how the deck boards or stone will meet the tub's top edge. A slight overhang or flush trim piece hides the seam and keeps water from pooling. This is the step where a little forethought saves a lot of frustration.
Choose Materials That Handle Splash
Not every deck material loves constant moisture. Composite decking, porcelain pavers, and natural stone like travertine hold up well and stay cooler underfoot. Wood can work, but it needs regular sealing and a slip-resistant finish.
Match the surround to your existing patio so the tub doesn't look bolted on. If your patio is pavers, continue them around the tub. If it's wood, use the same boards or a complementary tone.
Consistency is what sells the built-in look.
Get The Height And Access Right
The tub's top edge should sit about 16 to 18 inches above the deck for comfortable seating and easy entry. Too low and you're squatting; too high and you're climbing. Measure your tub and build the deck frame to match.
Don't forget drainage. Slope the deck slightly away from the tub, and make sure overflow water has somewhere to go. A small channel or gravel strip near the base keeps things from getting soggy.
Access panels should be easy to remove without tools, because you'll need them more often than you think.
2. Sunken Hot Tub for a Clean, Flush Finish
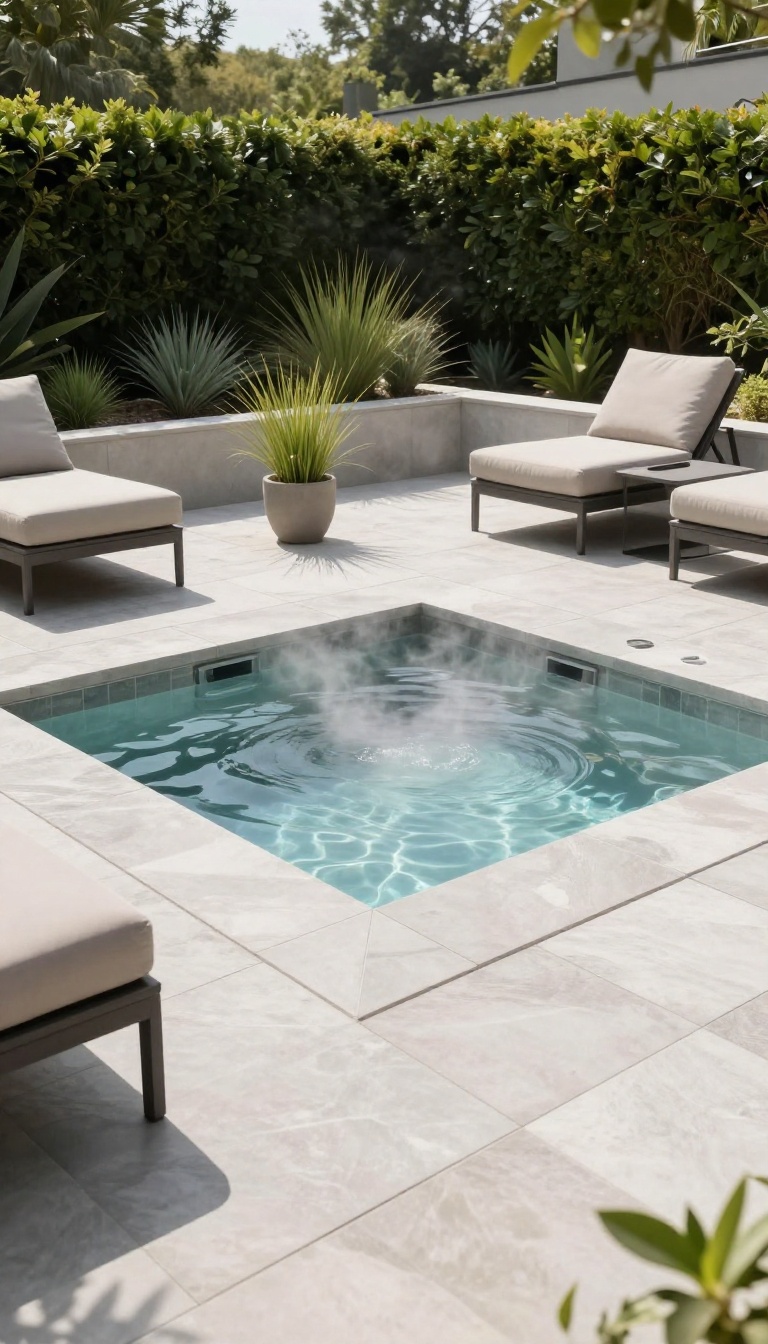
Drop the tub into the ground and the whole patio changes. Instead of a bulky box breaking up the view, you get a flat surface that flows straight into the surrounding deck or pavers. It reads as part of the landscape rather than an add-on, which is exactly why modern yards and tight spaces lean this way.
The appeal is mostly visual, but it's practical too. A flush top means no climbing over a tall lip, no awkward step stool, and nothing blocking the sightline across the yard. From the house, you see clean patio, not a lid and a control panel sticking up.
That said, going sunken isn't just digging a hole and lowering the tub. Water has to go somewhere, and equipment still needs room to breathe and be serviced. Get those two things wrong and a slick-looking install turns into a headache fast.
Why The Flush Look Works
A sunken tub sits at the same height as your patio surface, so the water line nearly disappears into the deck. That flat profile keeps small yards from feeling chopped up and lets furniture, planters, and walkways flow around it. It also softens the transition between zones.
A lounge area, a fire pit, and the tub can share one continuous floor instead of three separate islands.
Drainage You Can't Skip
Water splashes out. Rain falls in. If the tub sits below grade, all of that needs a path away from the shell and the surrounding patio.
Plan a gravel base and a French drain or channel drain around the opening. Slope the patio slightly away from the tub edge so surface water never pools against the cabinet.
Access Panels And Service Space
Pumps, heaters, and filters eventually need attention, and you don't want to tear up pavers to reach them. Leave a removable panel or a hidden hatch on at least one side. Give the equipment bay a little breathing room and keep it ventilated.
A cramped, sealed cavity traps heat and moisture, which shortens the life of the components inside.
Costs And Permits To Expect
Sunken installs cost more than a standard set-down because of the excavation, drainage, and custom surround. Budget for the extra labor and materials up front. Check local rules before you dig.
Some areas treat a sunken tub as a structure and want a permit, and safety barriers may be required around the opening.
3. Hot Tub Under a Pergola for Shade and Style
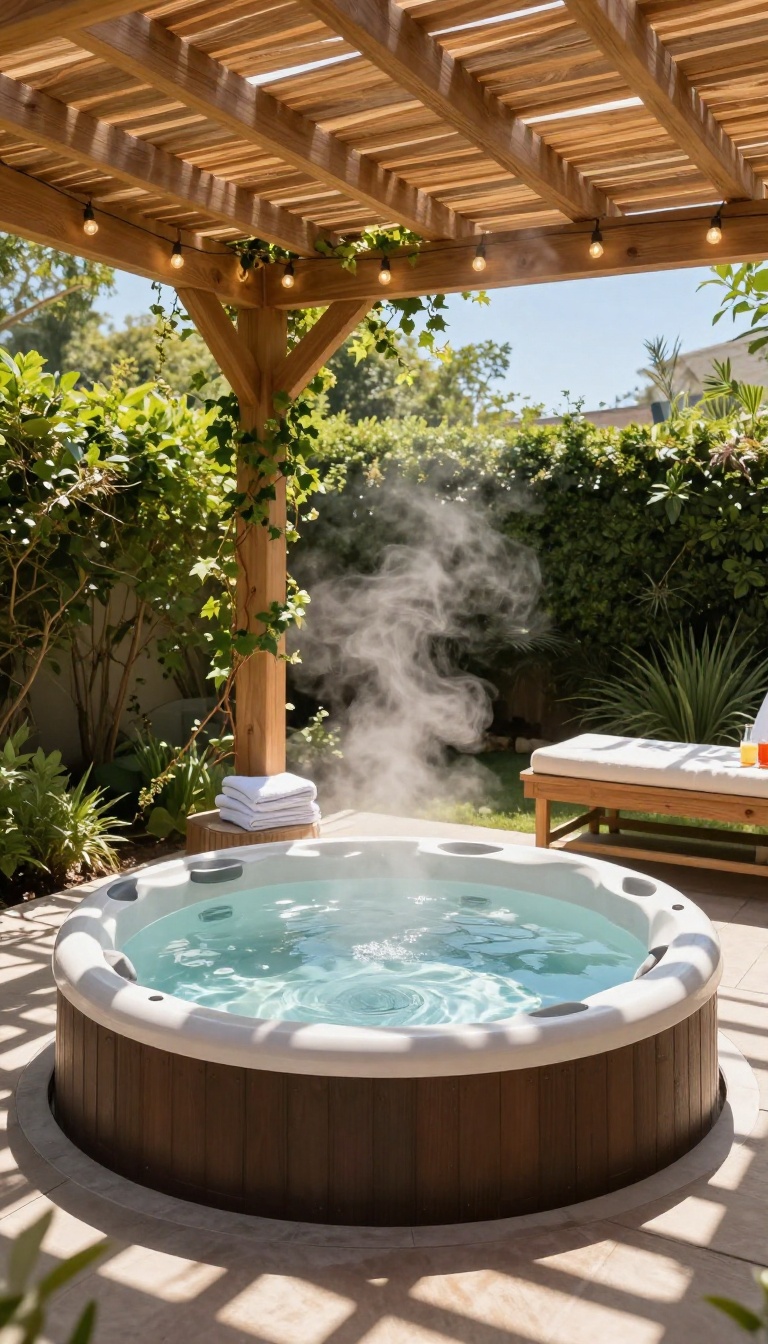
A pergola over the hot tub does two jobs at once: it blocks the harsh midday sun and gives the whole setup a finished, intentional look. Unlike a solid roof, the open slats let steam drift up and away while still casting shade where you need it. The result feels like a private retreat without the cost of a full enclosure.
The best part about a pergola is how it frames the tub without boxing it in. You still get sky views and breezes, but the space reads as a destination rather than an afterthought. It also gives you a natural place to hang lights, plants, or a privacy screen later on.
Pick The Right Size And Placement
Measure your tub first, then add at least two feet of walkway on every side. A pergola that hugs the tub too tightly feels cramped and makes it hard to step in and out safely. Center it over the tub or offset it slightly so one side stays open for towels and drinks.
Choose Materials That Handle Moisture
Cedar, redwood, and treated pine hold up well to steam and splashes. Powder-coated aluminum costs more but never rots and needs almost no upkeep. Avoid untreated softwoods unless you plan to seal them every year.
Soften The Look With Vines Or Lights
Climbing plants like jasmine or ivy turn a plain frame into something lush. String lights wrapped around the beams add a warm glow after dark without much effort. Just keep vines trimmed so they don't drop leaves into the water.
Add Shade Control For Hot Climates
In really sunny spots, a bare pergola won't block enough heat. Add a retractable canopy or woven shade cloth on top for adjustable coverage. That way you can open it up in winter and close it down in summer.
4. Hot Tub with a Privacy Screen or Living Wall
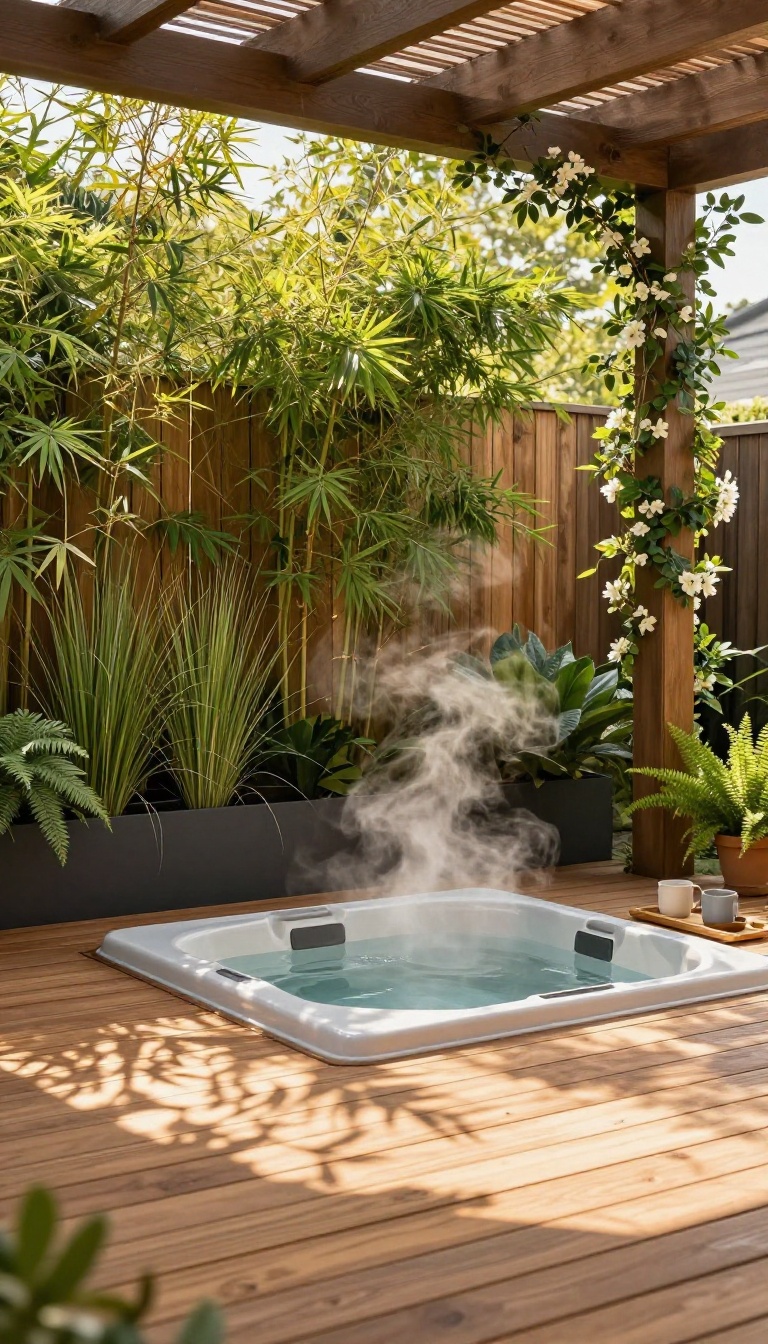
Soaking in your hot tub feels a lot less relaxing when you're waving at the neighbor every time you step in. A privacy screen or living wall solves that instantly. It blocks sightlines, cuts wind, and makes your patio feel like a true retreat.
This idea is a game-changer for tight suburban yards where houses sit close together.
You don't need a full fence to get the privacy you want. A screen that's 6 to 8 feet tall usually does the trick, and it can be as simple or as fancy as you like. The key is placing it between the tub and the nearest neighbor or street.
That way, you can soak without feeling exposed.
Natural Screens That Grow In
Tall ornamental grasses like pampas or miscanthus sway in the breeze and give you a soft, organic screen. Bamboo works too, but choose clumping varieties so they don't take over your yard. Plant them in a raised bed or large containers right next to the tub.
They'll fill in within a season or two and give you year-round interest.
Wood And Metal Slat Walls
A wooden slat wall adds warmth and modern style. Space the slats about an inch apart to let light through while still blocking prying eyes. Cedar and teak hold up best against moisture.
If you want a more industrial look, powder-coated metal panels are durable and low-maintenance. Either option can be built as a freestanding screen or attached to a pergola.
Living Walls For Greenery And Privacy
A living wall takes privacy to the next level. You can use a modular planter system or a simple trellis with climbing vines like jasmine or ivy. The plants create a dense, green barrier that also improves air quality.
Just make sure the structure can support the weight of soil and water. And pick plants that thrive in your climate, so they stay lush all year.
5. Multi-Level Patio with a Hot Tub as the Focal Point
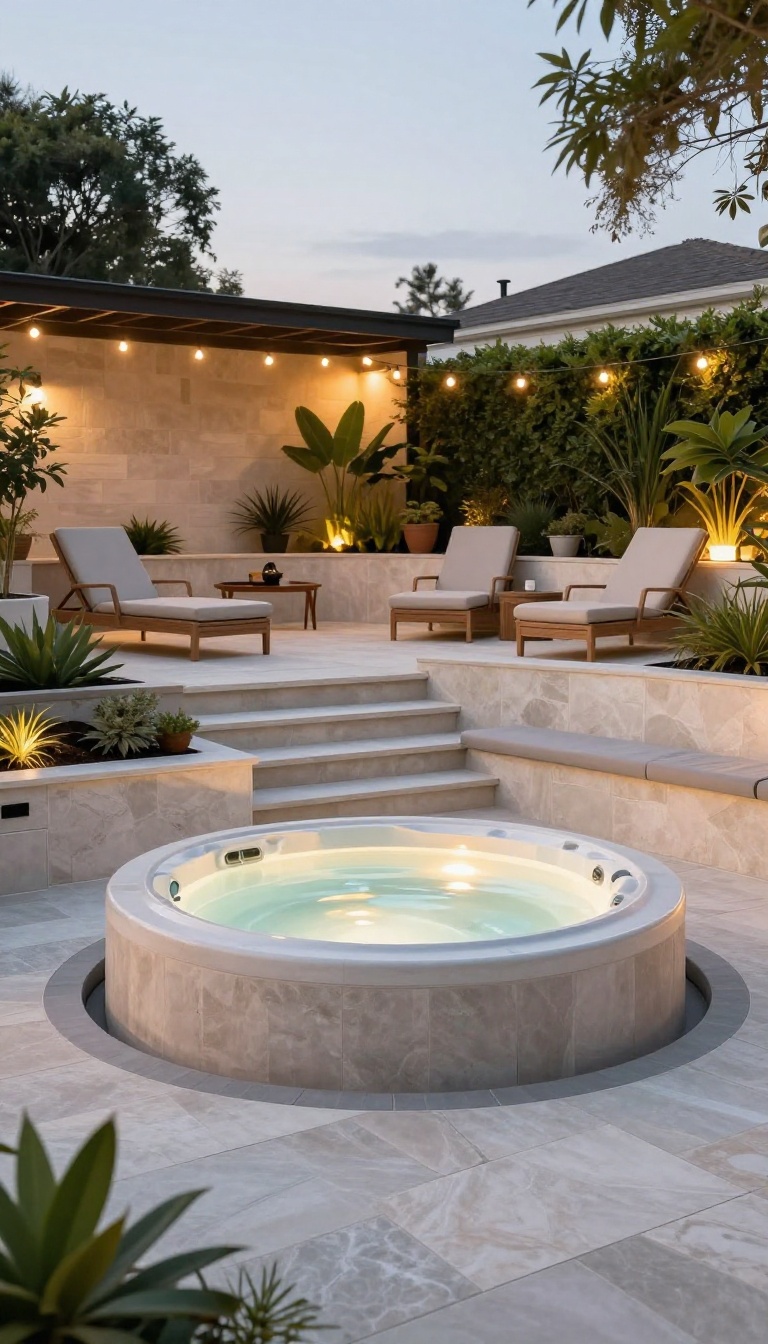
A sloped backyard doesn't have to be a problem. It can be the setup that makes your hot tub the star of the show. Tiered patios create natural drama, and when you place the tub on one of those levels, it instantly becomes the destination everyone gravitates toward.
The key is using the levels to guide the eye and the feet. Steps and low walls do the heavy lifting, turning a change in elevation into a smooth transition instead of a trip hazard. Done right, the whole space feels intentional, like the tub was always meant to sit right there.
Multi-level patios solve two things at once: they tame a tricky slope and they give your hot tub a stage. Instead of fighting the grade, you work with it. The tub lands on the lower or upper tier, and the other levels become lounging, dining, or planting zones that frame it beautifully.
Choosing The Right Level For The Tub
Put the tub on the lower level and it feels nestled and private, especially if the upper patio acts like a viewing deck. That's great for cozy evenings when you want to feel tucked away. Set it on the upper level instead, and the tub becomes a lookout point.
You get the view, the breeze, and a natural separation from the main hangout area. Either way, the tub anchors the space and gives the other levels a clear purpose.
Steps And Low Walls That Make It Work
Wide, shallow steps are safer and more inviting than a steep staircase. Add a low retaining wall along the edge and you get built-in seating plus a clean visual line that separates the tiers. Use the same stone or paver material on the steps, walls, and patio surface.
That repetition ties everything together and makes the hot tub look like part of the original plan, not an afterthought dropped onto a slope.
Handling Drainage And Access
Water runs downhill, so plan for it. A French drain or a gravel trench at the base of each wall keeps rainwater from pooling around the tub's foundation. Leave at least three feet of clear space on the access panel side of the hot tub.
You'll thank yourself later when the pump needs service or you're hauling out a filter. A little foresight here saves a lot of backache down the road.
6. Hot Tub Surrounded by a Gravel or Stone Border
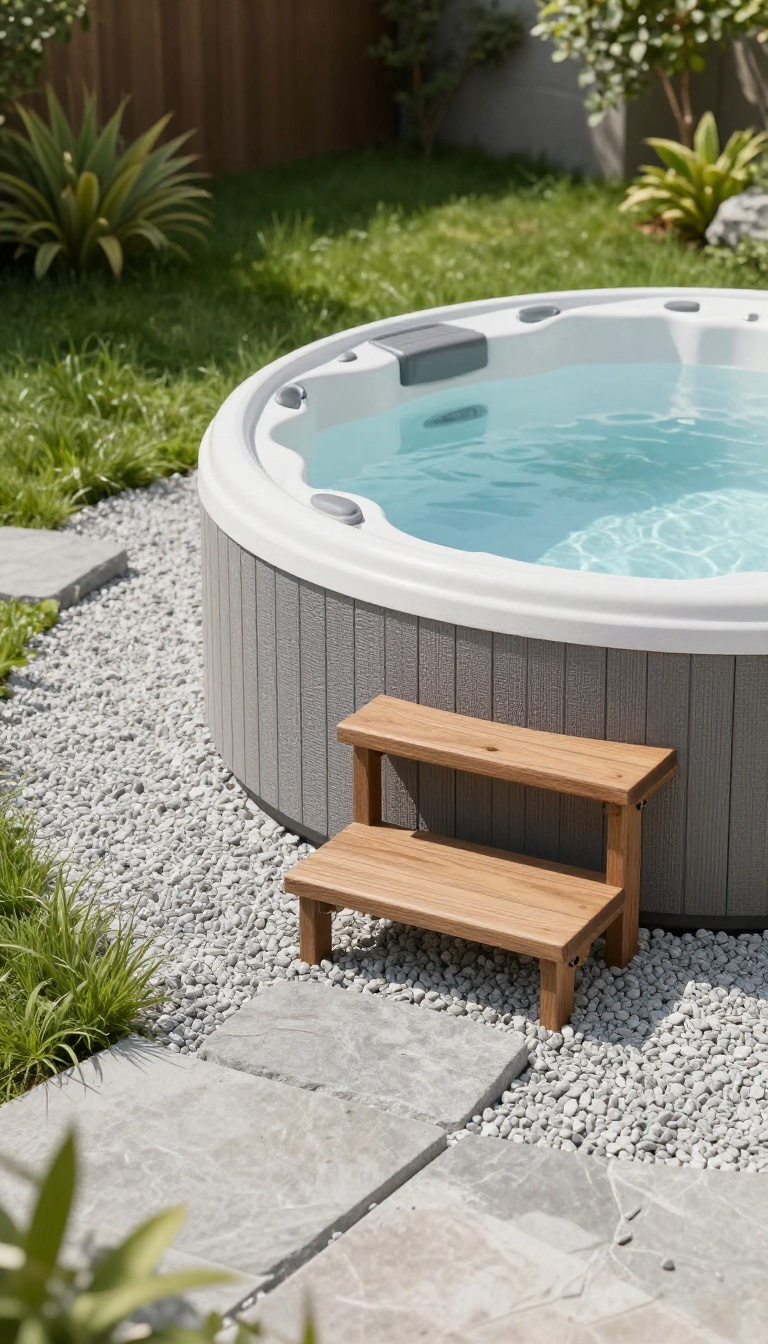
A gravel or stone border around the base of your hot tub solves a few problems at once. It keeps weeds and mud from creeping up against the cabinet, helps water drain away instead of pooling, and visually frames the tub so it doesn't look like it landed there by accident. Best of all, it's one of the few hot tub upgrades you can knock out in a weekend without hiring anyone.
The idea is simple: instead of letting grass, dirt, or an old concrete slab run right up to the tub, you create a clean band of loose gravel or flat stone around the perimeter. That band becomes the transition zone between the tub and the rest of your patio or yard. It looks deliberate, it's easy to maintain, and it gives you a spot to step out onto that isn't slick or muddy.
You don't need a lot of space for this to work. A border that's 12 to 18 inches wide is usually plenty. On a small patio, that's enough to define the hot tub zone without eating up your seating area.
On a larger patio, you can go wider and treat it as a design feature, maybe even wrapping it around a small planting bed or a set of steps. The real payoff is in the details. Gravel and stone don't hold moisture the way soil or mulch does, so the area around the base of the tub stays drier.
That matters for both the cabinet and your footing. It also means fewer bugs hanging around, since you're not giving them a damp, sheltered place to live right next to where you relax.
Choosing Your Material
Pea gravel is the go-to for a lot of homeowners because it's cheap, easy to spread, and comes in a few different colors. Crushed stone gives you a more textured look and locks together a bit better, so it stays put. River rock is the premium option: bigger, smoother, and more decorative, but also heavier and pricier.
If you want something flatter underfoot, consider flagstone or pavers set in a gravel bed. You get the drainage benefits of gravel with a more solid surface for stepping out of the tub. Just make sure whatever you choose isn't so sharp that it hurts bare feet.
Prepping The Ground First
Don't just dump gravel on top of grass and hope for the best. The grass will find its way through, and you'll be pulling weeds all season. Start by removing the top layer of sod or soil, about two to three inches deep.
If the area tends to hold water, add a thin layer of coarse sand or crushed stone for drainage before you put down your landscape fabric. A weed barrier fabric is worth the small cost. It lets water through but blocks most weeds from coming up.
Cut it to fit, then spread your gravel or set your stone on top.
Edging That Keeps It Tidy
Loose gravel has a habit of wandering. A simple edge keeps it where you put it and gives the border a crisp line. You can use metal edging, plastic edging, or even a row of pavers set on their side.
For a more natural look, bury a line of larger stones along the outer edge. The edging also separates the gravel from your lawn or patio surface, so you're not constantly sweeping stones back into place. It's a small step that makes the whole thing look intentional instead of messy.
Maintenance And Small Touches
Once it's in, maintenance is about as low as it gets. Rake the gravel occasionally to keep it level, and pull the stray weed that sneaks through. If you used fabric underneath, you'll barely have any weeds at all.
A few extra touches can make the border feel more finished. Tuck a few small, low-water plants at the outer edge, or set a couple of solar path lights along the gravel line. Even a simple stepping stone or two on the gravel gives you a clean place to stand when you're getting in and out.
7. Hot Tub with a Built-In Bar or Side Table
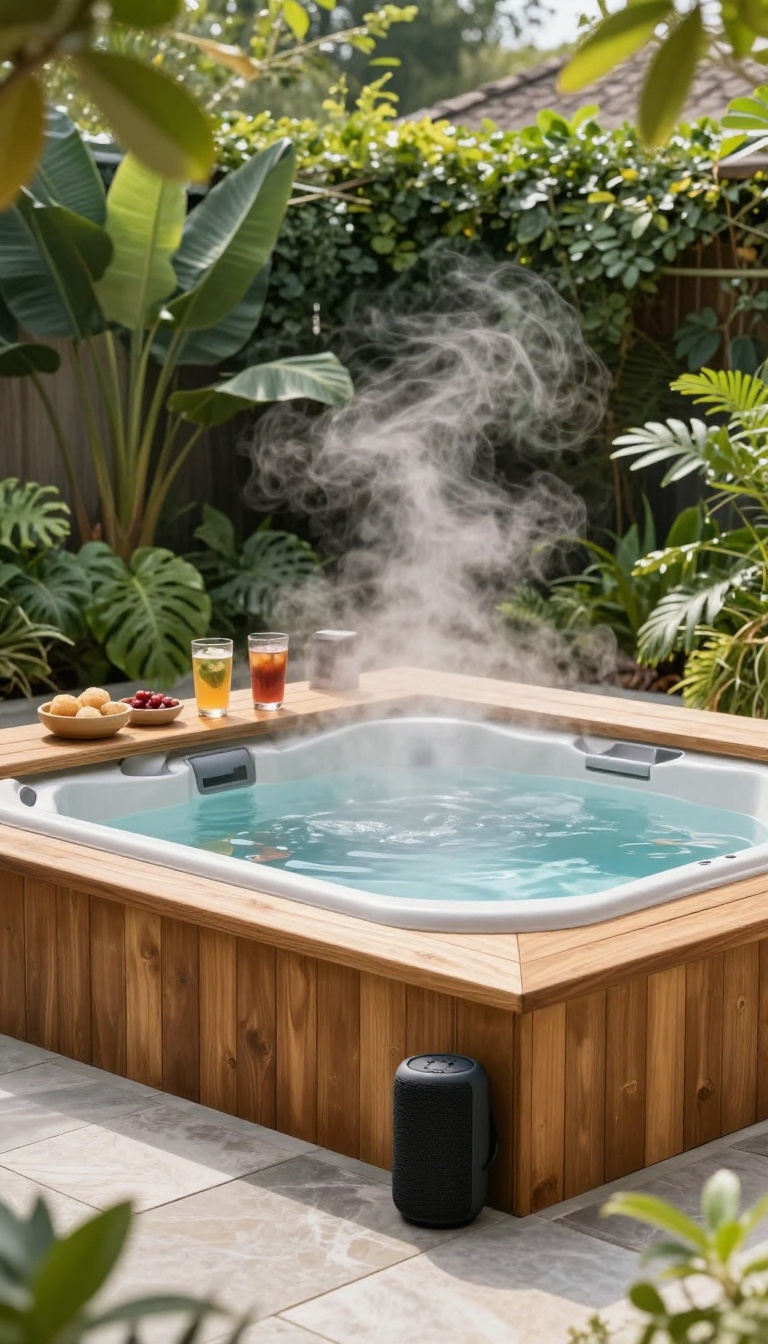
Nobody wants to climb out of warm water just to grab a drink. A small bar or side table within arm's reach fixes that in one move. It turns the tub from a solo soak spot into a place where people actually hang out.
The addition doesn't have to be fancy. A floating tray, a low deck rail, or a built-in ledge all do the same job. What matters is that drinks, snacks, and a speaker stay close without getting splashed.
It's one of the cheapest upgrades on this list, and it changes how often you use the tub. Once everything you need sits within reach, you stay in longer.
A built-in bar or side table is really about reducing friction. Every time you have to step out, drip across the patio, and hunt for your drink, the soak loses a little momentum. Put a surface right at the water's edge and that problem disappears.
The good news is you have options at every budget. You can buy a floating caddy for under thirty dollars or build a permanent ledge into a new deck. Both solve the same problem, just at different levels of commitment.
Think about what you actually bring outside. Drinks, a phone, maybe a Bluetooth speaker, and a snack bowl. If your surface handles those four things without tipping, you're set.
Floating Trays And Caddies
A floating tray is the easiest version of this idea. It bobs on the water and keeps your drink upright, and most models have slots for cups, a phone, and a small snack bowl. They cost very little and need zero installation.
The trade-off is stability. A crowded tray can tip if someone bumps it, so keep the load light. They also drift, which is fine until you want your drink back on the other side of the tub.
For renters or anyone testing the idea, a floating caddy is the smart first step. If you use it constantly, that tells you a permanent surface is worth building.
Deck-mounted Side Tables
A side table that attaches to the deck or tub surround gives you a fixed spot that never moves. Look for one with a weighted base or a clamp that grips the rail, so it won't wobble when you lean on it. Teak and powder-coated aluminum hold up best outdoors.
Skip anything with a hollow plastic top, since it gets hot in the sun and cracks after a season or two. Position it near the entry steps, not behind the seats. That way it doubles as a landing spot for towels and shoes as people get in.
Built-in Bars And Ledges
If you're already building a deck or surround, add a wide ledge on one side. Eight to twelve inches of depth is plenty for drinks and a speaker, and it looks intentional rather than added on. Run the ledge at seat height so you can rest a glass without reaching up or down.
A strip of composite decking or stone caps it nicely and wipes clean. Some builds go further with a small bar counter and two stools just outside the water. That setup works great for parties, but it takes real square footage.
Only commit if your patio has room to spare.
Keeping It Practical
Glass is the one thing to leave inside. One dropped cup in a hot tub means a long, careful cleanup, so stick with acrylic, stainless, or silicone drinkware. A small covered bin nearby keeps empties from piling up on the ledge.
It sounds minor, but a tidy bar area is the difference between a setup you use weekly and one that gets cluttered and ignored. If you go built-in, seal the wood or stone properly. Moisture plus constant splashing is hard on any surface, and a good seal keeps it looking new for years.
8. Hot Tub Paired with a Fire Pit for Year-Round Use
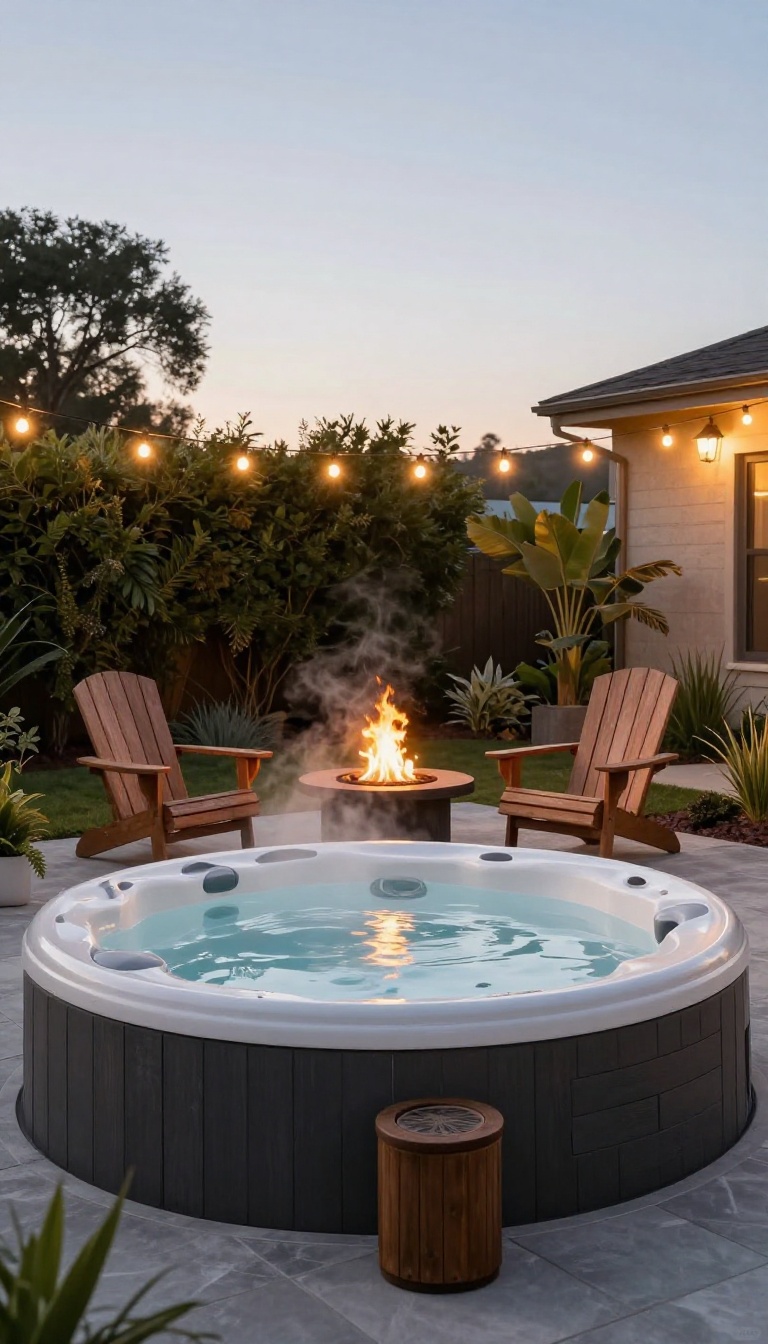
A fire pit next to the hot tub changes how long you can stay outside. The heat from the flames takes the bite out of cool evenings, so you're not rushing from the water back inside. And the contrast between hot water and crackling fire just feels right.
It's a simple pairing that works in almost any climate. Even in warmer months, the fire adds a focal point and a reason to linger. The key is placing them safely so you get the cozy without the worry.
You don't need a massive budget to pull this off. A portable fire pit or a simple wood-burning bowl can sit a few feet from the tub and deliver the same effect. The goal is to create a little zone where both elements feel intentional, not just dropped next to each other.
Think about how you'll use the space. If you soak in the evening, the fire becomes your light source and your warmth. If you're more of a daytime soaker, the fire pit still gives you a spot to gather after you dry off.
Safety is the one thing you can't skip. Keep clearances in mind, and check local rules before you light anything up. Once that's handled, the rest is just arranging furniture and enjoying the result.
Choosing The Right Fire Pit
Wood-burning pits give you that classic crackle and smell, but they need more attention and cleanup. Propane or natural gas models start with a switch and burn clean, which makes them easier for quick soaks. If you want the ambiance without the ash, go gas.
If you love the ritual, wood is worth the extra work.
Placement And Clearance
Keep at least 10 feet between the fire pit and the hot tub if you're using wood, and check the manufacturer's guidelines for both. For gas, you can often go a bit closer, but never place it where curtains, towels, or the tub cover could catch a spark. Also think about wind direction so smoke doesn't blow into the water.
Seating And Flow
Arrange chairs so people can face either the fire or the tub, not just one. A small side table between them holds drinks and keeps things tidy. Leave a clear path to step out of the hot tub without walking through the fire zone.
The best setups feel open and easy to move around.
Year-round Comfort
In winter, the fire extends your soak time and keeps towels warm if you drape them nearby (but not too close). In summer, it's a bug deterrent and a gentle light source. Add a few blankets in a weatherproof bin, and you've got a setup that works in every season.
9. Hot Tub on a Deck with Built-In Bench Seating
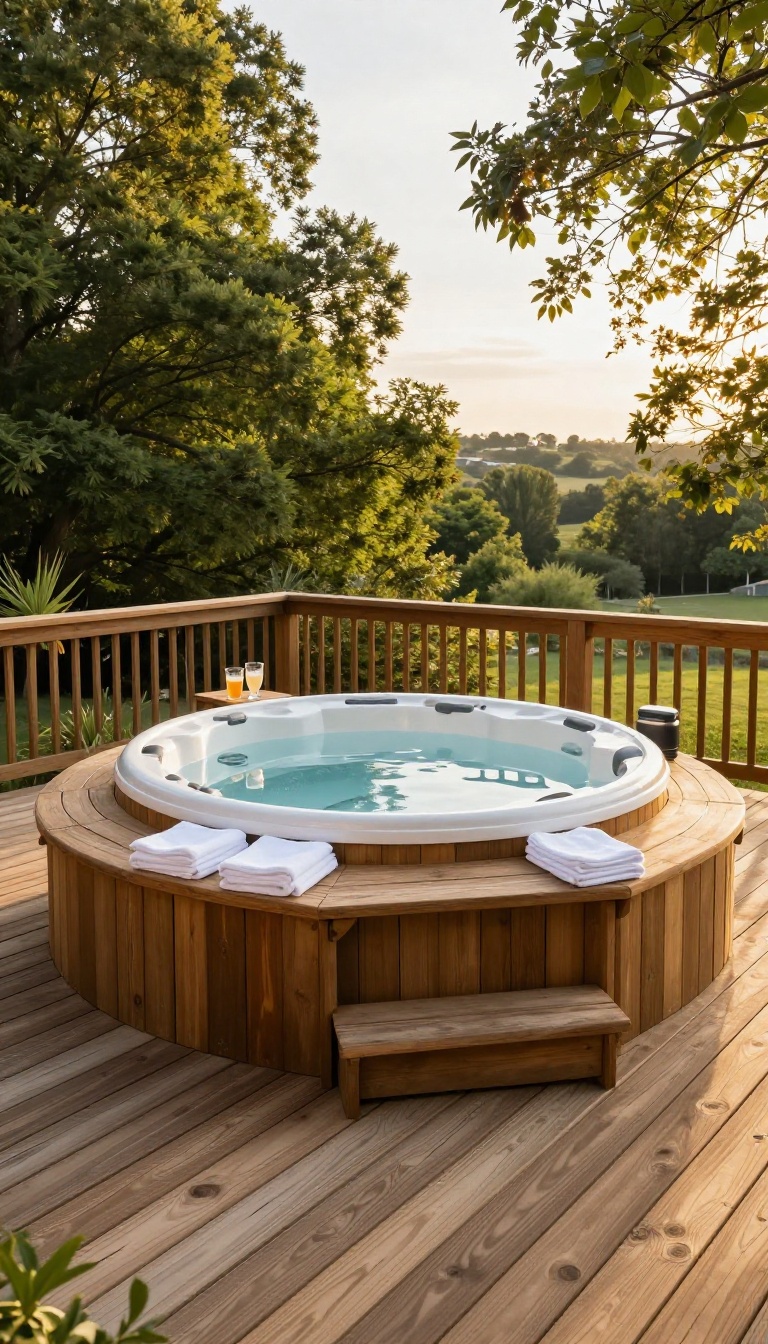
Built-in benches turn a hot tub from a solo soak into a full-on gathering spot. Instead of perching on the edge or dragging over folding chairs, guests get a dedicated place to sit, set down a drink, and stay part of the conversation. It's the kind of layout that makes a deck feel like a resort, especially when there's a view to enjoy.
The idea works best on larger decks or patios where you have room to wrap seating around at least one or two sides of the tub. It's a bigger project than dropping in a tub and calling it done, but the payoff is a space that actually gets used by everyone, not just the people in the water.
The magic of bench seating is that it keeps people together. When someone's soaking and someone else is dry, the bench gives them a reason to stay and chat. You're not yelling across the yard or watching from inside.
Everyone's in the same zone, which is what makes this setup feel intentional rather than improvised. Benches also solve the towel-and-drink problem. Instead of balancing a beverage on the tub rim or leaving towels on the ground, each person has a spot.
That alone cuts down on clutter and makes the whole area look pulled together. On a larger deck, you can run benches along the railing or wrap them around a corner. The tub becomes the centerpiece, and the benches frame it.
It's a simple move that adds function without adding a lot of visual noise.
Plan The Bench Height And Depth
Bench height matters more than most people think. You want it high enough to sit comfortably but low enough that it doesn't block the view from the tub. A standard seat height of 16 to 18 inches works for most adults.
Depth should be around 15 to 18 inches, enough to sit back without feeling like you're perched on a ledge. If you plan to add cushions, account for that extra inch or two so knees aren't cramped. And if the bench backs up to a railing, leave a small gap so people can lean back without hitting the posts.
Use The Same Decking For A Seamless Look
The cleanest built-in benches use the same decking material as the rest of the deck. That keeps the lines continuous and makes the seating look like it was always there. You can frame the bench with the same joists and boards, then finish it with a matching stain or composite.
If you want a little contrast, use a darker or lighter board just for the bench top. But staying consistent usually looks more custom and less like an afterthought. It also makes future repairs easier since you're working with one material.
Add Storage And Lighting Under The Bench
The space under a built-in bench is prime real estate. You can leave it open for storing towels, flip-flops, or a plastic bin of hot tub chemicals. Or you can close it in with access panels and keep the area looking tidy.
Either way, it's a chance to hide the stuff that usually clutters a deck. Tuck a few LED strip lights under the lip of the bench for a soft glow at night. They make the steps safer and give the whole area a resort vibe without much effort.
Just make sure any lighting is rated for outdoor use and wired safely.
10. Hot Tub with Integrated Planters and Greenery
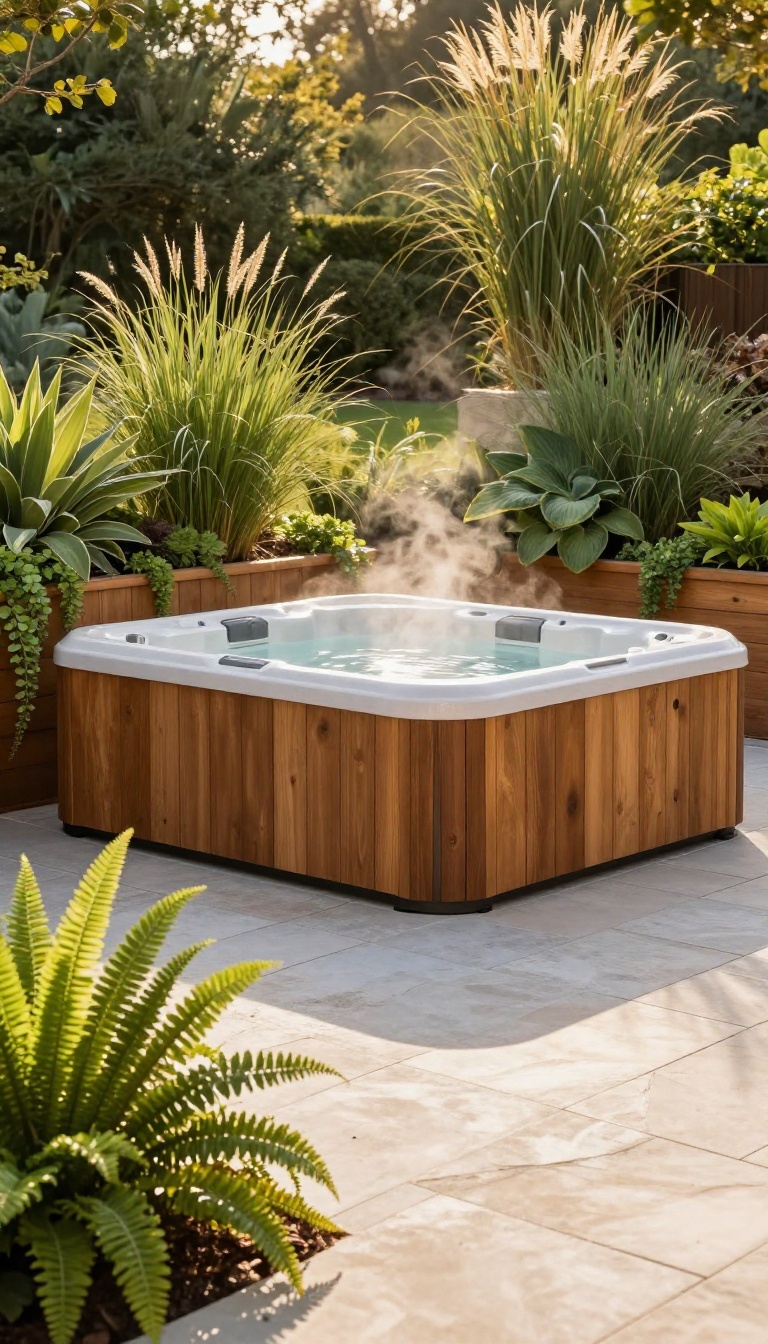
Planters built right into the hot tub surround change how the whole setup reads from the yard. Instead of a big shell sitting on the patio, you get a soaking spot that looks like it grew out of the garden. The greenery softens hard edges and hides the plumbing and equipment panels you would rather not stare at.
This works on almost any budget. A full masonry surround with planted niches costs more, but a simple cedar skirt with a few built-in boxes gets you most of the way there. Either version ties the tub to the landscape instead of letting it stand apart.
Pick Plants That Can Take The Splash
Hot tub water is not kind to every plant. Chlorine, bromine, and salt systems all throw off mist and splashes that burn the leaves of sensitive species, so choose things that shrug it off. Ornamental grasses, hostas, ferns, and liriope handle humidity and occasional spray without sulking.
Succulents like sedum and sempervivum work well in drier climates where the surround stays warm. Avoid anything that drops heavy fruit or sap into the water, and skip plants with aggressive roots that could push into the shell or plumbing. If you want flowers, go with tough options like daylilies, coneflowers, or hardy geraniums.
They look good through the season and do not need daily fussing.
Plan The Built-in Boxes Before You Pour
Retrofitting planters into an existing surround is possible, but it is much easier to design them in from the start. Decide where the boxes go while the concrete, block, or framing is still open. A few practical moves make a big difference.
Line the inside of each planter with waterproof membrane so irrigation and rain do not seep into the structure. Add drainage holes or a gravel layer at the bottom so roots never sit in standing water. Leave at least a few inches of clearance between the planter and the tub shell for airflow and service access.
Keep the boxes shallow for small plants and deeper for shrubs. Twelve to eighteen inches of soil depth covers most of the low-maintenance options, and anything deeper just adds weight you may not need.
Match The Surround To The Rest Of The Yard
The planter surround should look like it belongs with your patio, not like a separate project. Reuse the same stone, brick, or timber as the deck or retaining walls so the eye reads it as one space. Cedar and ipe age into a soft gray that blends with foliage, while stone and block hold their color and need less upkeep.
If your patio is concrete, a stucco or tile finish on the surround keeps things consistent. Think about height too. A surround that sits a few inches above the patio gives you a natural ledge for plants and drinks.
A taller wall with a wide cap does the same job and doubles as a spot to set a towel or a candle.
Keep The Maintenance Realistic
Greenery around a hot tub looks great until it becomes a chore. Choose plants that match how much time you actually want to spend pruning and watering. Drip irrigation on a simple timer handles most of the watering, and a thick layer of mulch cuts down on evaporation and weeds.
Trim anything that starts leaning over the water so leaves and debris stay out of the filter. Once a season, check the planters for clogged drainage and pull anything that has outgrown its box. That small routine keeps the whole setup looking intentional instead of overgrown.
FAQ
What is the best base for a hot tub on a patio?
A reinforced concrete pad or a properly framed deck is best. It must be level and able to support the weight of the tub when filled with water and people. Always check local codes before you build.
How do I hide the hot tub cabinet?
You can build a custom surround with wood, composite, or stone. Just leave access panels for the equipment. Planters and privacy screens also help distract from the cabinet.
Can I put a hot tub under a pergola?
Yes, but make sure the pergola is tall enough for steam to escape and for people to stand. Also check that the structure can handle the humidity. A louvered or open-roof design works best.
How much space do I need around a hot tub?
Plan for at least 2 to 3 feet of clearance on all sides for maintenance and access. If you want seating or steps, allow more. A little breathing room makes the whole area feel less cramped.
What plants work well near a hot tub?
Choose humidity-tolerant plants like ferns, ornamental grasses, and tropical varieties. Avoid plants with lots of debris that can clog filters. Keep them in planters for easy care.
Conclusion
A hot tub works best when it feels like part of the yard, not a giant appliance dropped on the patio. Pick the setup that matches your space, your climate, and how often you will actually use it. Start with one idea, live with it for a season, then adjust.
You will know quickly what needs shade, screening, or a better path to the door. Each small fix makes the next one easier, and soon the whole corner feels intentional. That is when you stop treating it like a project and start using it every week.