9 Easy 3D Snowflakes to Make for Christmas Decorations
Flat paper snowflakes look great until you tape one to a window and watch it curl by lunchtime. A little dimension fixes that, and it makes the whole room feel more like a winter scene. The good news is you don't need special tools or a craft room to pull it off.
Most of these projects start with paper, scissors, and glue you probably already have. A few use coffee filters, cardstock, or even yarn, so there's something for every skill level and every spare half hour.
Below are nine 3D snowflake ideas that actually hold their shape. Each one lists what you need, how long it takes, and where it looks best once it's done.
1. Classic Folded Paper 3D Snowflakes
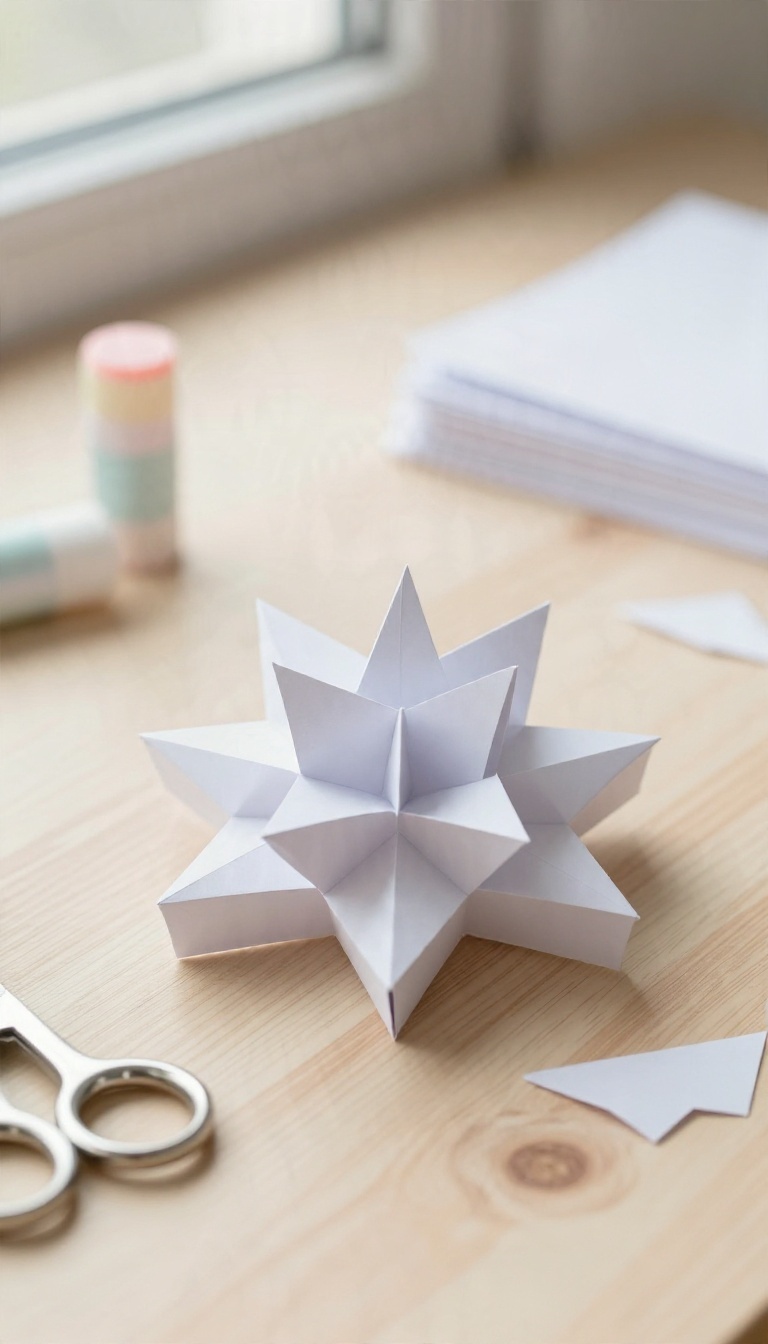
Start with the one that started it all: six simple folded sections glued into a dimensional star. It's the project you probably picture when you think of a 3D paper snowflake, and for good reason. The supplies are basic, the folding is forgiving, and the result looks far more complicated than it is.
You'll need six squares of paper, a pair of scissors, and a glue stick or liquid glue. Copy paper works, but thin cardstock or origami paper holds up better over time. Set aside about twenty minutes for your first one; after that, you can knock them out in ten.
The classic folded snowflake is a great first project because it teaches you the core move: fold, snip, and assemble. Once you get the rhythm, you can make a whole batch while watching a movie. ### Folding Evenly Without Fuss Each of the six sections starts as a square. Fold it in half diagonally to make a triangle, then fold that triangle in half again.
The key is to line up the corners precisely. If your folds are off, the snowflake will look lopsided. A quick trick: crease each fold with your fingernail or the back of a spoon.
You don't need a bone folder—just press firmly and slide along the edge. For crisp creases, fold on a hard surface like a cutting board or a glass table. ### Cutting the Snowflake Pattern With your folded triangle in hand, you'll make a series of snips along the folded edges. The classic pattern involves cutting parallel lines from the open edge toward the folded edge, stopping just short of the fold.
Then you unfold and curl the cut strips inward or outward to create the 3D effect. Start with three cuts per side for your first attempt. More cuts mean a more intricate snowflake, but they also make the paper weaker.
Use sharp scissors and take your time—jagged cuts show up more on 3D snowflakes than on flat ones. ### Gluing the Sections Together Once you have six identical sections, it's time to assemble. Apply a thin line of glue along the center fold of one section and press another section onto it, aligning the folds. Hold for a few seconds until the glue grabs.
Work around in a circle, gluing each section to the next. The last one can be tricky—you'll need to fan the sections slightly to close the circle. Let the whole thing dry flat for a few minutes before hanging. ### Tips for Crisp Creases and Clean Edges If you're using liquid glue, apply it with a toothpick to avoid drips.
A glue stick is more forgiving for beginners but may not hold as long. For extra stability, add a tiny dot of glue at the tip of each curled strip. To keep your snowflakes looking sharp, store them flat between sheets of wax paper.
When hanging, use a small piece of double-sided tape or a paper clip to avoid crushing the folds.
Folding Evenly Without Fuss
Each of the six sections starts as a square. Fold it in half diagonally to make a triangle, then fold that triangle in half again. The key is to line up the corners precisely.
If your folds are off, the snowflake will look lopsided. A quick trick: crease each fold with your fingernail or the back of a spoon. You don't need a bone folder—just press firmly and slide along the edge.
For crisp creases, fold on a hard surface like a cutting board or a glass table.
Cutting The Snowflake Pattern
With your folded triangle in hand, you'll make a series of snips along the folded edges. The classic pattern involves cutting parallel lines from the open edge toward the folded edge, stopping just short of the fold. Then you unfold and curl the cut strips inward or outward to create the 3D effect.
Start with three cuts per side for your first attempt. More cuts mean a more intricate snowflake, but they also make the paper weaker. Use sharp scissors and take your time—jagged cuts show up more on 3D snowflakes than on flat ones.
Gluing The Sections Together
Once you have six identical sections, it's time to assemble. Apply a thin line of glue along the center fold of one section and press another section onto it, aligning the folds. Hold for a few seconds until the glue grabs.
Work around in a circle, gluing each section to the next. The last one can be tricky—you'll need to fan the sections slightly to close the circle. Let the whole thing dry flat for a few minutes before hanging.
Tips For Crisp Creases And Clean Edges
If you're using liquid glue, apply it with a toothpick to avoid drips. A glue stick is more forgiving for beginners but may not hold as long. For extra stability, add a tiny dot of glue at the tip of each curled strip.
To keep your snowflakes looking sharp, store them flat between sheets of wax paper. When hanging, use a small piece of double-sided tape or a paper clip to avoid crushing the folds.
2. Coffee Filter Snowflakes That Hold Their Shape
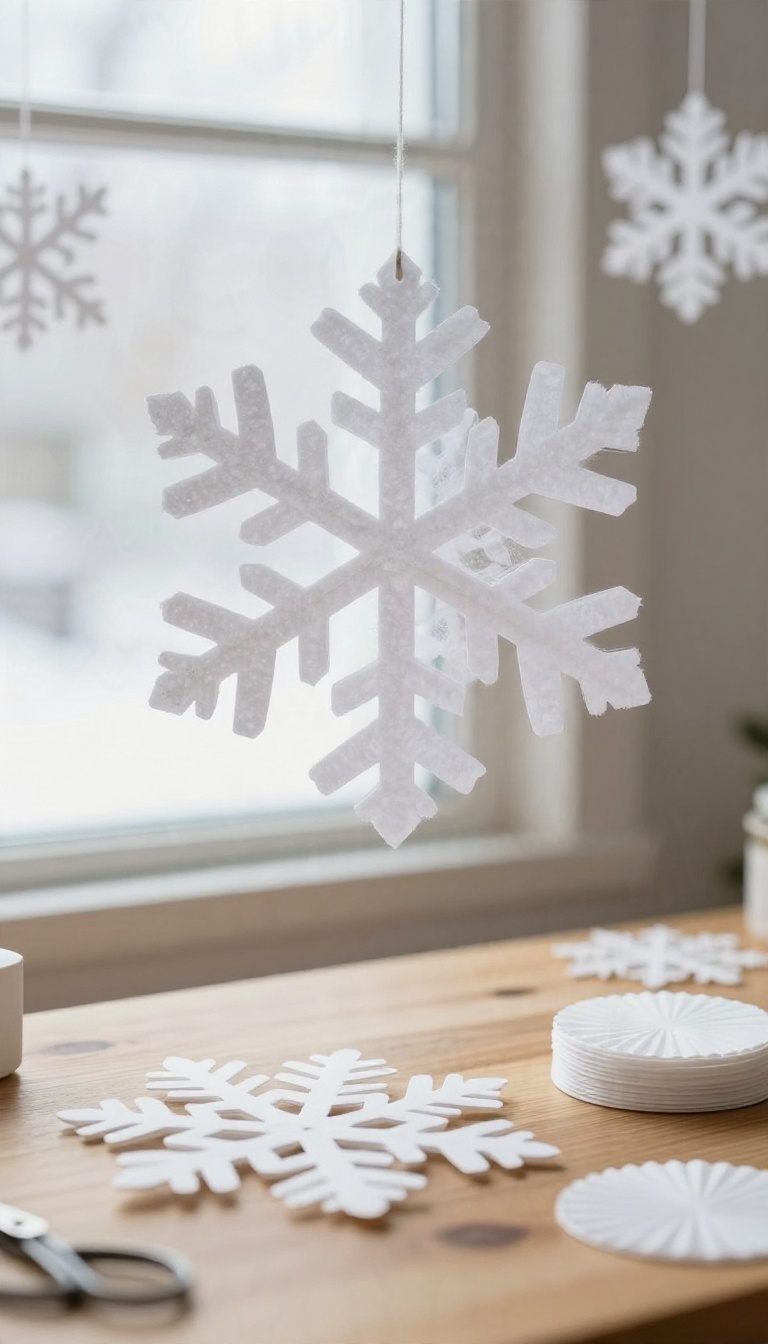
Coffee filters are the quiet hero of Christmas crafting. They're thin, absorbent, and slightly translucent, which means light passes through them in a way plain printer paper never manages. Fold one up, cut a few shapes, and you get a snowflake with soft, layered depth that looks almost like frost.
The catch is that filters are floppy. Left alone, they droop and curl the moment you hang them. A quick dip in liquid starch fixes that, giving each flake enough body to stay crisp and open all season.
Start with standard basket-style coffee filters, the round ones. You get a big canvas for very little money, and a single pack will keep you busy for an entire afternoon. The pleated edges already give you a head start on texture.
Fold each filter in half, then in half again, and once more so you're left with a narrow wedge. Cut notches along both edges and snip the tip. Unfold slowly, because wet or overhandled filters tear easily.
The result is a delicate, lacy shape with more visual softness than a cardstock snowflake. Once you've got a stack you like, it's time to stiffen them. This is the step most people skip, and it's the one that makes the difference between a snowflake that hangs flat and one that sags by dinner.
Why Filters Beat Regular Paper
Coffee filters have a slightly fuzzy, porous texture that catches light instead of reflecting it. That's why layered filters read as soft and snowy rather than flat and shiny. They're also cheap enough to experiment with.
If a cut pattern turns out lopsided, you toss it and grab another without guilt. Try that with fancy cardstock and you'll hesitate every time.
Stiffening With Liquid Starch
Pour a little liquid starch into a shallow dish. Dip each snowflake, let the excess drip off, then lay it flat on wax paper or a cookie rack to dry. While it's still damp, gently shape the petals upward or press the center down to build in some dimension.
The starch locks that shape in place as it dries, usually within an hour or two. No starch on hand? A mix of white glue and water works as a backup.
Hanging And Displaying Them
A stiffened filter snowflake is light enough to hang from a single thread. Tape it to a window with the light behind it and the layers glow. You can also string several onto fishing line for a floating garland, or rest them on tree branches where the open cutouts catch the lights.
Just keep them away from damp spots, since starch softens again with moisture.
3. Stacked Cardstock Snowflakes for Big Impact
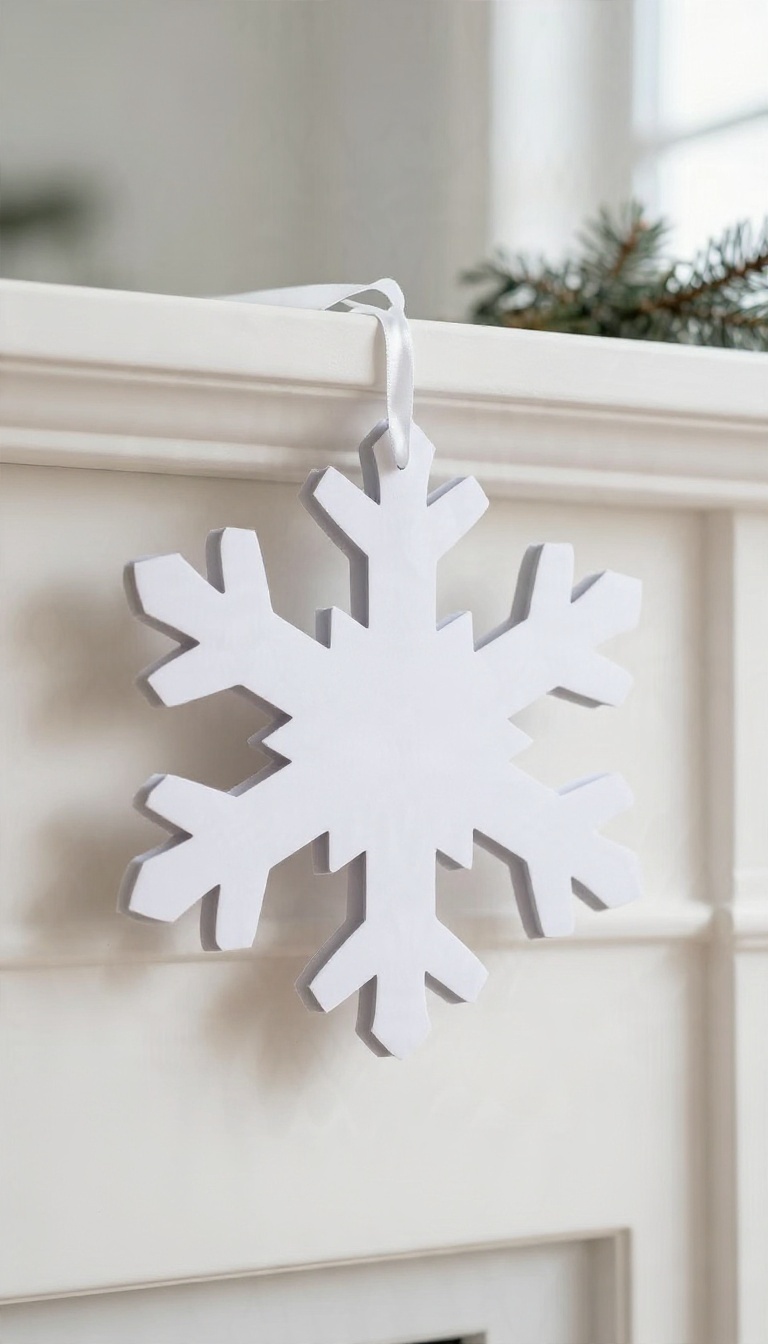
Some snowflakes are meant to blend in. This one is meant to be seen from across the room. Stacking three cut snowflake shapes at different sizes gives you a chunky, layered decoration with real depth, and it holds up well over a mantel or a doorway where a flimsy paper version would sag.
Cardstock does the heavy lifting here, so the whole thing stays crisp instead of drooping.
The trick is working from large to small. You cut three snowflakes in descending sizes, then stack and glue them so each layer peeks out from behind the one in front. The staggered edges create shadows and a sense of thickness that flat paper can't match.
Best of all, you only need one design repeated at three scales, which keeps the cutting simple. A single stack takes about 30 to 40 minutes once you get the hang of the folding. Make two or three in coordinating colors and you have a matching set for a whole wall or hallway.
What You'll Need
Grab three sheets of cardstock in the same color or a gradient of two or three shades. White, cream, and soft silver look classic, but deep red or forest green makes a bolder statement. You'll also want sharp scissors or a craft knife, a glue stick or low-temp hot glue, and a pencil for tracing.
A bone folder helps crease the folds cleanly, though the back of a spoon works in a pinch. If you want to hang the finished snowflake, add a length of ribbon or twine and a small hole punch.
Cutting The Three Layers
Fold each sheet the same way you would for a classic paper snowflake, then cut one design at three sizes. The easiest approach is to cut the largest snowflake first, trace it onto the next sheet, and shrink it slightly before cutting again. Repeat for the smallest layer.
Keep the shapes similar but not identical. A slightly different pattern on each layer adds visual interest and hides any small cutting mistakes. Just make sure the center of each snowflake stays solid so the layers have something to grip when you glue them.
Stacking And Gluing
Work from the bottom up. Place the largest snowflake flat, add a small dot of glue at the center, then press the medium one on top. Offset it just slightly so the points of the bottom layer show through.
Add the smallest layer last, again with a touch of glue at the center only. Glue only the middle. If you glue the arms, the layers flatten out and you lose the shadow effect that makes the stack look dimensional.
Let it dry flat for a few minutes before you lift it.
Hanging It Where It Shows
These stacks shine over a mantel, above a doorway, or centered on a blank wall. Punch a small hole near the top point of the back layer and thread through ribbon or twine. A tiny piece of tape on the back keeps the ribbon from slipping.
For a bigger display, hang three stacks at different heights in a row. The layered look reads well from a distance, so don't be afraid to go large. A 12-inch stack over a doorway makes a statement without overwhelming the space.
4. Paper Bag Snowflakes for a Rustic Look
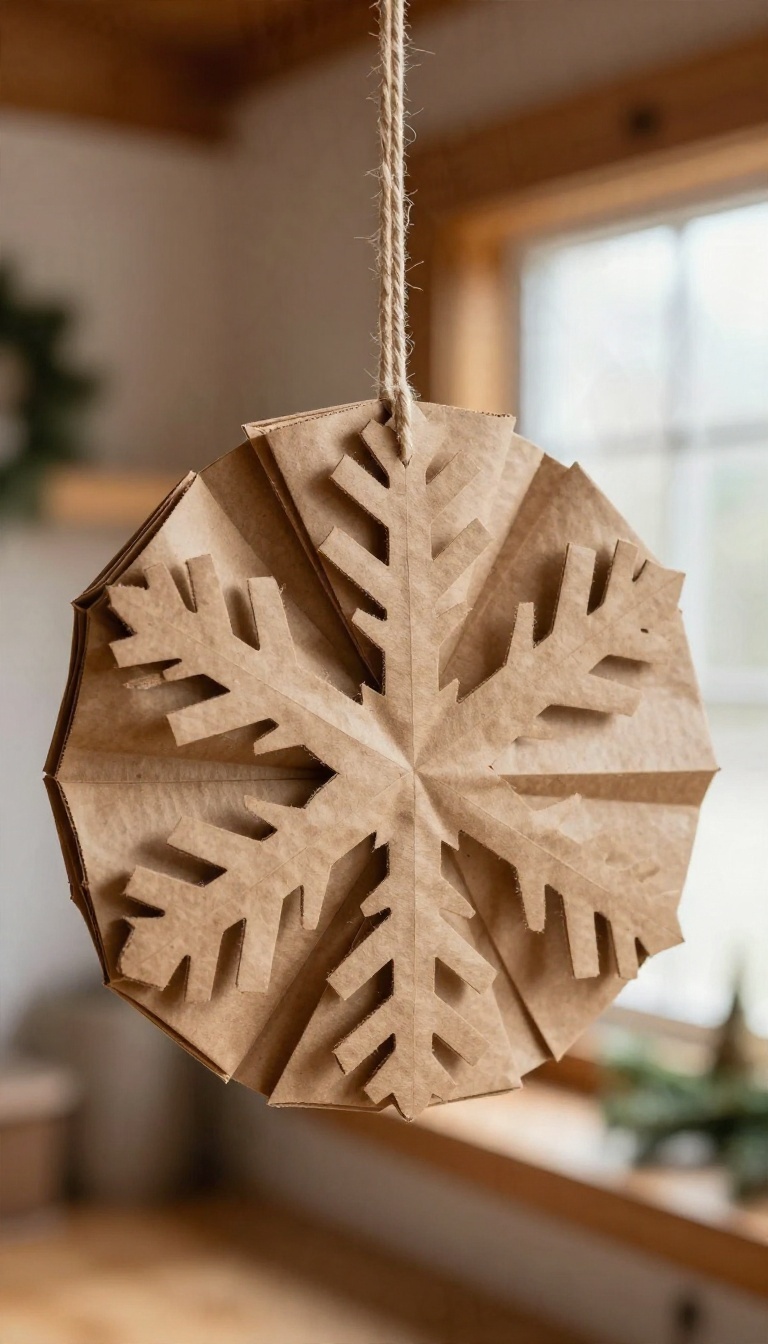
Brown paper bags have a texture you just can't fake, and that's exactly what makes them work for a snowflake. Instead of crisp white, you get warm kraft tones that feel like a cabin window or a farmhouse mantel. The folding is simple, and the finished piece looks like something you'd pay real money for at a holiday market.
This one takes about twenty minutes and uses supplies that cost almost nothing. Grab a stack of lunch bags, some scissors, and a glue stick, and you're basically ready. It's a forgiving project too, so a wonky fold here or there won't ruin it.
The trick with paper bags is layering. A single bag is too flimsy to hold a snowflake shape, but stack a few together and they gain structure fast. You're essentially building a fan that opens into a full circle, and the folds do most of the work for you.
Kraft paper also hides small mistakes better than white paper does. Slight creases and uneven cuts read as texture rather than errors, which makes this a good pick for kids or anyone who wants a relaxed craft session.
What You'll Need
Plan on five to seven brown paper lunch bags per snowflake, depending on how full you want it to look. You'll also need scissors, a glue stick or double-sided tape, and something to mark your fold line, like a ruler or a bone folder if you have one. A hole punch and a bit of twine come in handy if you want to hang them.
Skip the heavy craft glue here, since it can soak through thin kraft paper and leave dark spots.
Fold, Cut, And Fan
Stack the bags and fold the whole pile in half lengthwise, then press the crease firmly. Cut shapes along the open edges, keeping the folded spine intact so the stack stays connected. Simple triangles and half-circles work well, and a few notches along the outer edge add detail.
Once the cuts are done, fan the bags open one at a time, alternating sides so they spread into a full circle. Glue the first and last bags together to close the shape, then let it dry flat for a few minutes.
Where It Looks Best
These snowflakes shine against dark wood, brick, or a plain painted wall where the brown tone stands out. Hang a few at different heights above a fireplace, or string them across a window with twine. They also work as a table backdrop for a holiday dinner, especially paired with linen and greenery.
Just keep them out of damp spots, since kraft paper softens quickly near steam or moisture.
5. Origami Snowflakes for Folders Who Like a Challenge
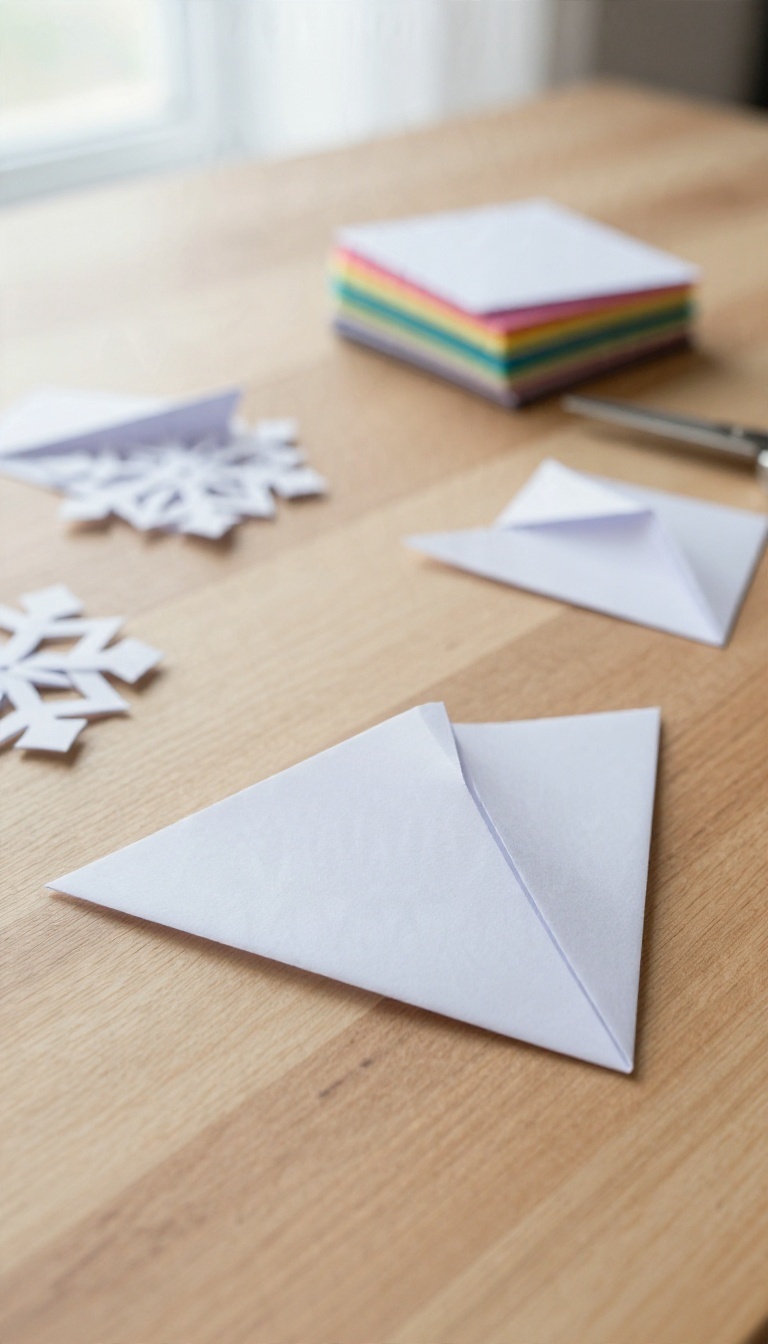
Origami snowflakes ask more of you than the glue-and-stack projects, and that's the point. You'll fold a single sheet into a compact triangle, make a handful of cuts, and unfold something with real symmetry. It takes patience, but the payoff is a snowflake with crisp points and a clean center that looks store-bought.
Give yourself twenty to thirty minutes and a quiet table, and you're set.
The whole trick lives in the folds. Get those right and the cuts almost take care of themselves. Get them sloppy and you'll spend the last ten minutes wondering why one side looks bigger than the other.
Start with a square of thin paper, around six inches. Printer paper works, but origami paper or thin wrapping paper folds flatter and gives sharper creases. Fold corner to corner into a triangle, then fold that triangle in half again, and once more if your paper allows.
Press each crease with a fingernail or the back of a spoon so it stays put. From there, cut small shapes along the folded edges and the open edges. Notches, curves, tiny triangles.
Unfold slowly and press the whole thing flat under a heavy book for a few minutes.
Which Creases Actually Matter
The first diagonal fold sets your center point, so line up the corners exactly before you press. If that one's off, every fold after it drifts. The second and third folds control the symmetry.
Run your thumbnail along each edge as you go, and don't rush the small triangle at the end. A crisp final fold means your cuts land in matching spots on every arm. One more thing: fold away from yourself and keep the paper flat on the table.
Lifting it into the air is where most people lose their alignment.
Fixing A Lopsided Snowflake
If one arm comes out wider than the rest, the problem usually started at the first fold, not the cutting. Refold a fresh sheet and check your corner alignment before you cut anything. Uneven cuts are the other common culprit.
Try marking your pattern lightly in pencil on the folded triangle so each notch matches. Erase or trim the marks after you unfold. For a snowflake that won't sit flat, iron it between two sheets of scrap paper on low heat, or just press it under a book overnight.
A little weight does wonders.
Where These Shine
Origami snowflakes look best where people can see the folds up close, like a mantel, a bookshelf edge, or hanging from a thin thread in a window. They're light enough to tape or pin without fuss. Make a few in different sizes and cluster them.
The crisp geometry stands on its own, so skip the glitter and let the paper do the talking.
6. Glitter and Glue Snowflakes That Sparkle
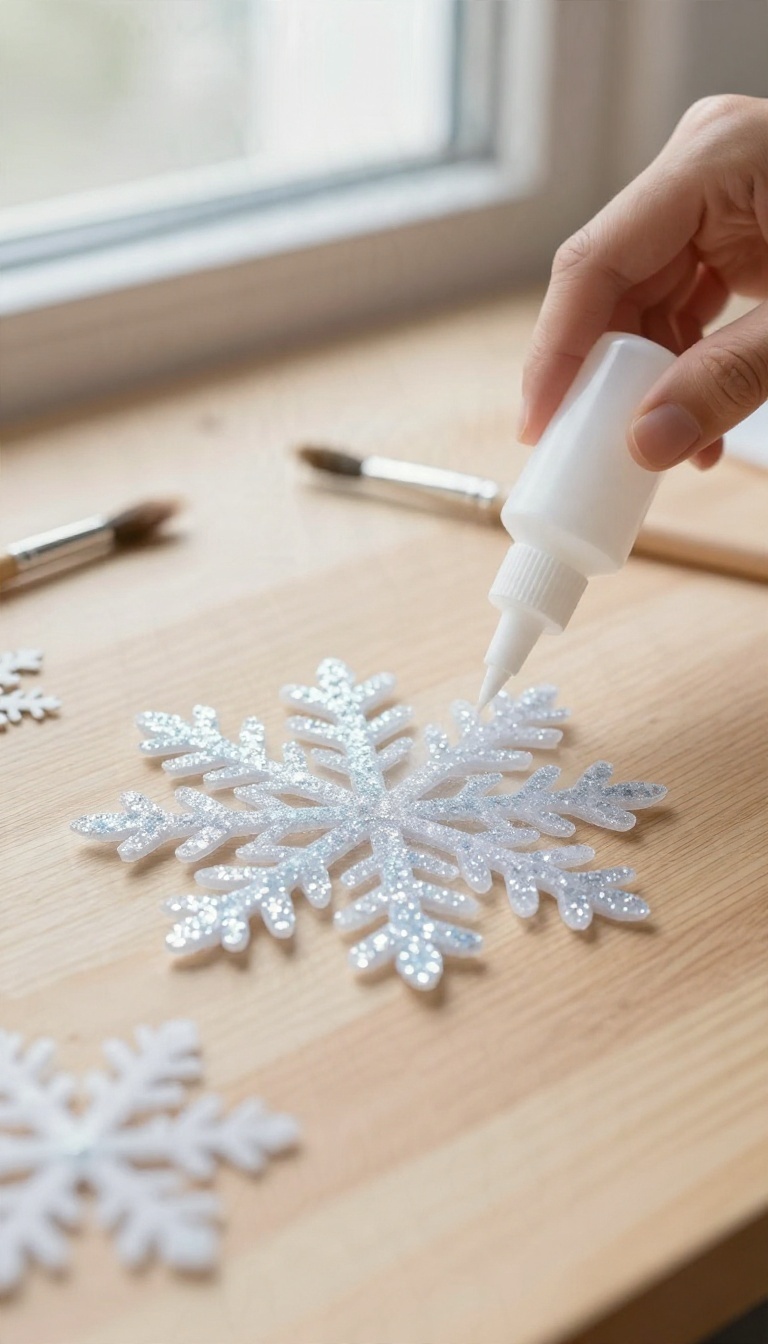
Glitter and glue snowflakes sit somewhere between craft project and tiny stained-glass window. You draw the shape with glue on wax paper, dust it with glitter, and let it dry into something stiff, shiny, and slightly see-through. Hung near a strand of tree lights, they pick up the glow and throw it back in a way flat paper never manages.
The trick is building the snowflake in layers so it stays in one piece once you peel it off the wax paper. A thick outline does the structural work, and the glitter handles the shine. Keep your lines connected and you'll end up with a decoration that survives the season.
Grab a bottle of white school glue with a fine tip, a sheet of wax paper, fine glitter in silver, white, or icy blue, and a small paintbrush for tidying up. A printed snowflake template helps if you want symmetry without eyeballing it. Tape the template under the wax paper so you can trace right through it.
Drawing The Glue Outline
Squeeze a steady bead of glue along the template lines, keeping every arm connected to the center. Thin lines dry brittle and snap, so aim for a bead about the width of a pencil. Work from the middle outward and fix wobbles with a toothpick while the glue is still wet.
Adding Glitter In Layers
Hold the wax paper over a sheet of newspaper and sprinkle glitter generously over the wet glue. Tap off the excess and let it sit for a minute before adding a second pass in a contrasting shade. Two light coats catch light better than one heavy dump, and the spare glitter slides right back into the jar.
Drying And Peeling Without Cracks
Give the glue a full twenty-four hours to dry somewhere flat and out of reach of pets. When it looks clear and feels firm, slide a thin spatula or fingernail under an edge and lift slowly. If a spot still bends, walk away and check again in a few hours.
Hanging Them Where They Catch Light
Poke a small hole near the top arm with a needle before the glue fully hardens, then thread fishing line or clear thread through it. Hang these close to fairy lights or a window where the sun hits, since the semi-translucent glue glows when light passes through. A cluster of three at different heights looks best.
7. Yarn and Stick Snowflakes for a Cozy Twist
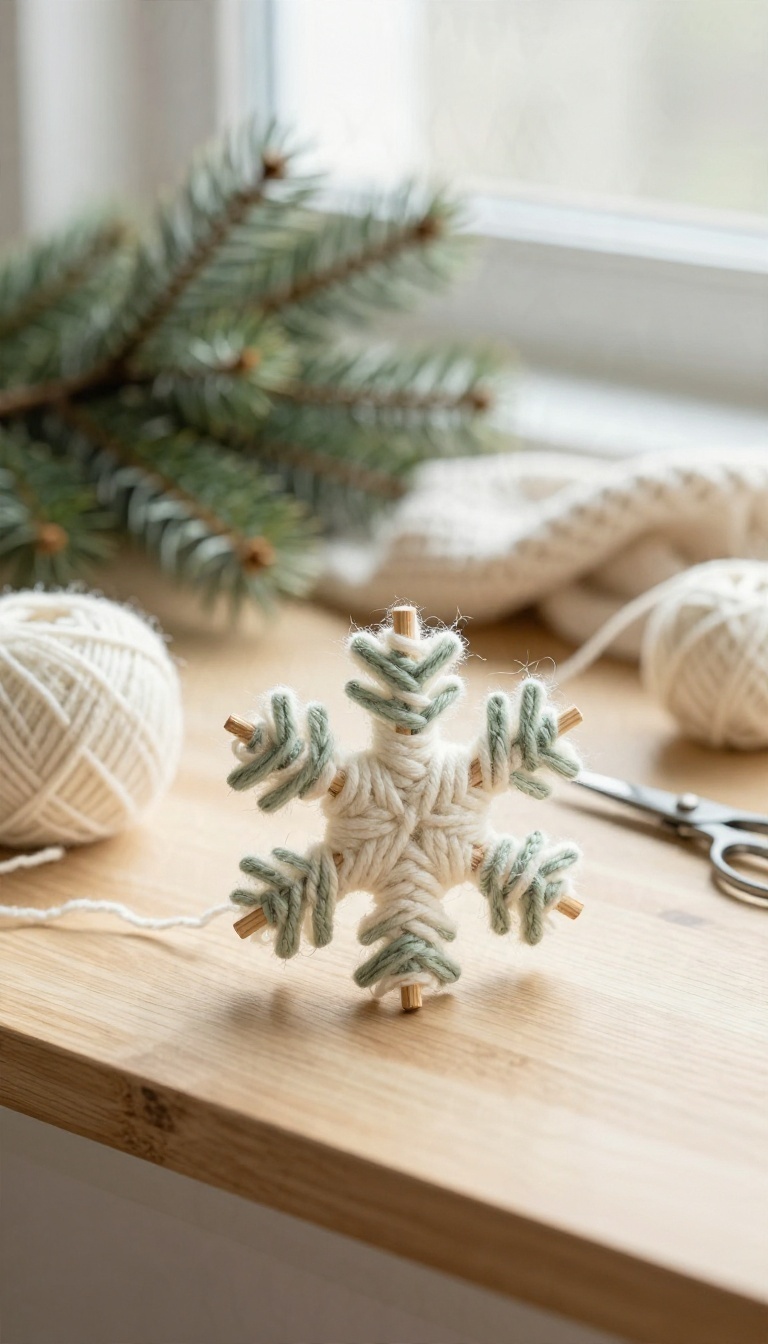
Wood and yarn bring a warmth to Christmas decorating that paper and glitter just can't match. This snowflake starts with a simple frame of sticks or skewers, then you wrap yarn around it until the shape fills out. It's the kind of project you can do while a movie plays in the background, and the result looks handmade in the best way.
The whole thing leans on a basic six-point frame, so you're really just building a star and then dressing it up. Once you get the hang of the wrapping, you can knock out a few in an evening and hang them as a little cluster. Kids can help with the wrapping part, though the frame building is easier with adult hands.
Keep your yarn colors to two or three that match your tree or mantel, and the whole set will feel intentional instead of random.
Building The Stick Frame
Gather six wooden skewers, thin dowels, or straight twigs from the yard. Lay three of them in a star shape, crossing near the middle, and tie them together tightly with a small piece of yarn or twine. Repeat with the other three to make a second star, then lay one on top of the other so the points alternate and you get six even arms.
A dot of hot glue at the center holds everything steady while you wrap. Trim any long ends so the arms match.
Wrapping The Yarn
Tie your yarn to the center and start winding outward along one arm, then loop around the tip and come back toward the middle. Work your way around all six arms so each one gets an even coat of yarn. For a snowflake look, add a few long passes that skip across the middle to connect the arms.
Vary the tension slightly so the texture reads as handmade rather than machine-perfect. Tie off the end on the back and tuck it under a wrap.
Finishing And Hanging
A small loop of twine at the top point makes it easy to hang from a nail, hook, or branch. If it's headed outside, give the yarn a light coat of clear spray sealer so it shrugs off damp air. These look best grouped at different sizes on a wall or hung from a covered porch beam.
Keep them out of direct rain and they'll last the season and beyond.
8. Popsicle Stick Snowflakes Kids Can Make
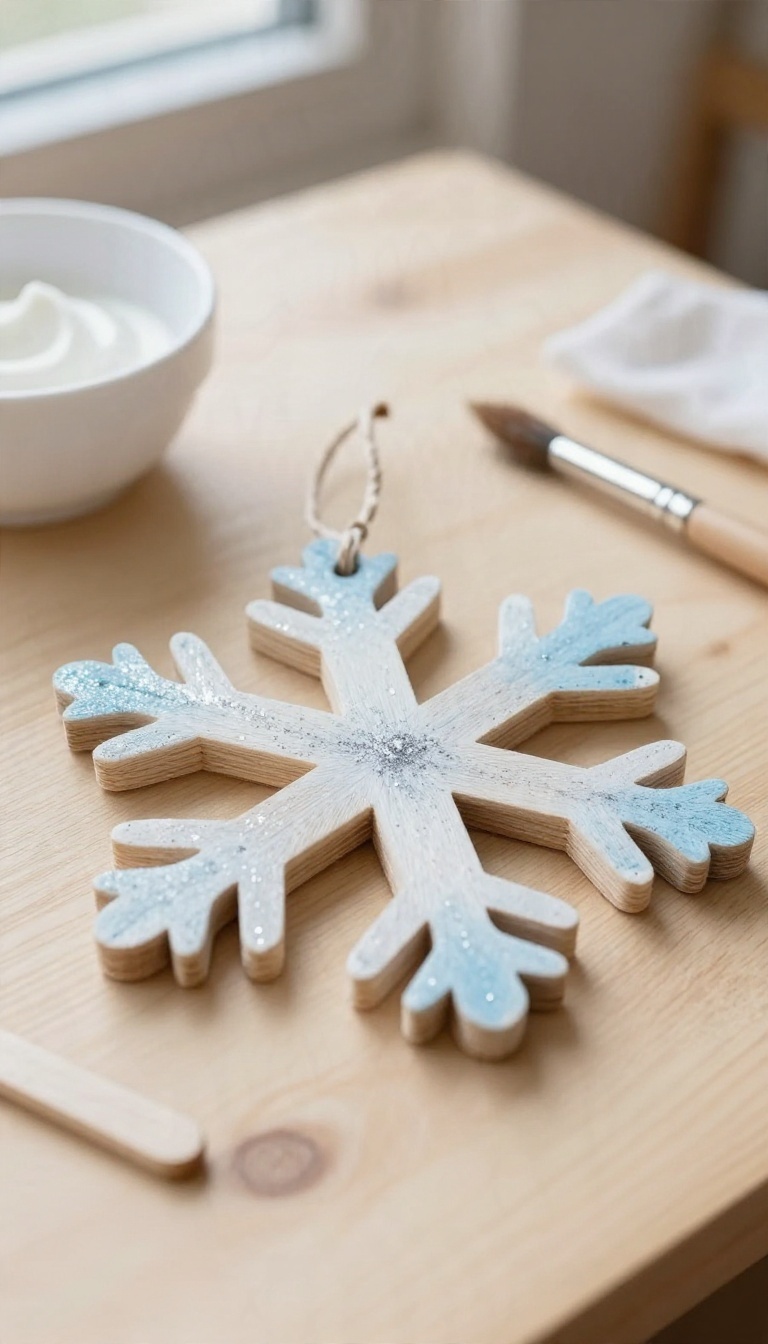
Popsicle sticks turn into sturdy little snowflakes that survive excited hands and holiday storage. Kids can build them with just glue and a little guidance, and the results look great on the tree or taped to a bedroom door. This project keeps mess low and pride high, which is exactly what you want on a snowy afternoon.
Start with a pile of standard craft sticks, some glue, and a flat work surface. The basic shape is simple: a central star or hexagon made from overlapping sticks, then arms radiating outward. Kids can arrange the sticks first without glue, then you help them lock the design in place.
Building The Base Shape
Lay three sticks in a triangle and glue the corners, or make a hexagon by overlapping six sticks in a circle. For a classic snowflake, glue two sticks in an X, then add a second X turned slightly to create eight points. Let kids experiment with layouts before gluing, and keep a damp cloth nearby for sticky fingers.
Gluing Tips That Hold
White school glue works fine but needs drying time, so use a thin line and press firmly for a few seconds. Hot glue is faster but requires adult help and can burn small hands. Tacky glue is a good middle ground: it grips quickly and dries clear, so the snowflake stays flat and sturdy.
Painting And Finishing
Once the glue is dry, kids can paint the sticks with acrylic or washable craft paint. Light coats dry faster and won't warp the wood. Add a loop of twine or ribbon at the top for hanging, and let them sprinkle a little glitter on wet paint if they want sparkle.
A coat of clear sealant is optional but helps the snowflake last through the season.
9. Hanging and Displaying Your Snowflakes
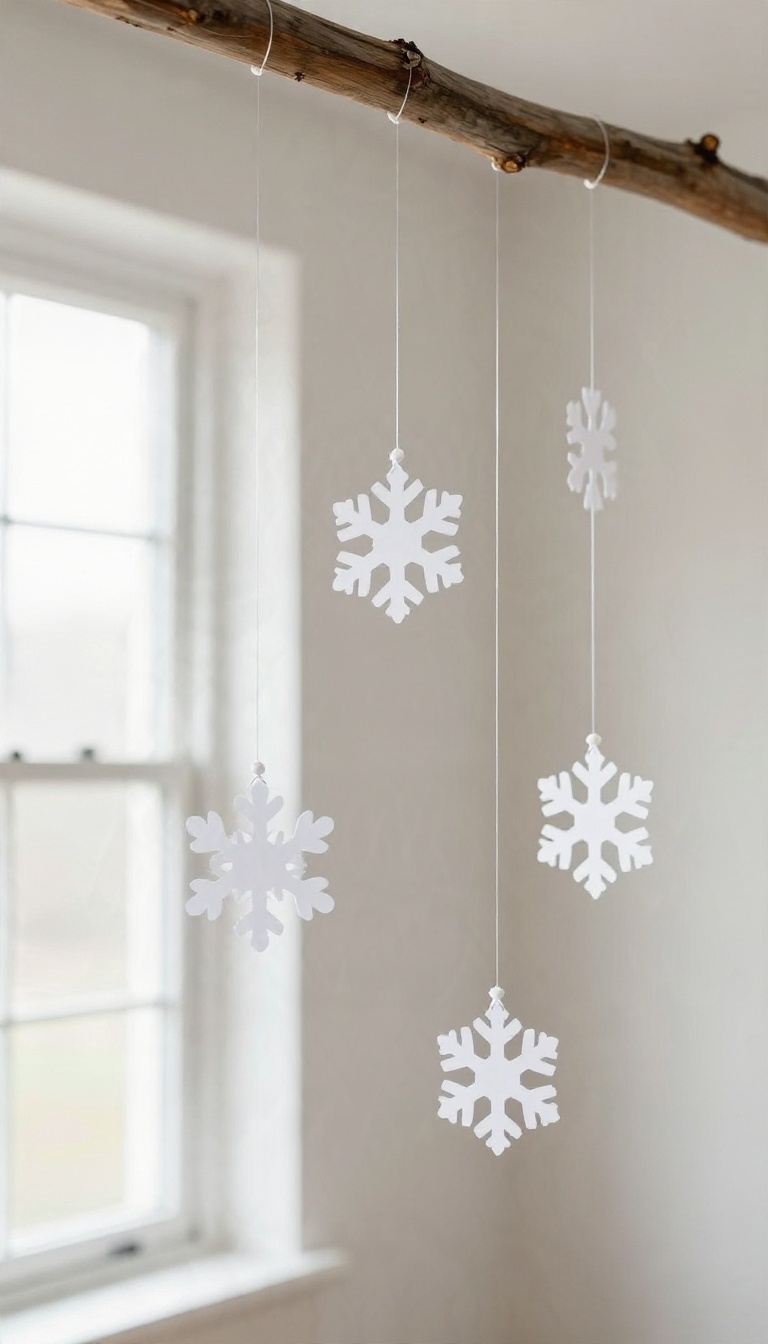
You've built a pile of snowflakes, and now they're sitting on the table looking pretty but going nowhere. How you hang them makes the difference between a display that looks intentional and one that sags, twists, or drops onto the floor at 2 a. m. A few small choices about string, tape, and wire handle almost every spot in the house.
The goal is simple: keep each snowflake flat, facing the right way, and attached to something that won't peel paint or leave a mark. Most of that comes down to matching the hanger to the surface. Paper snowflakes are light, so you rarely need heavy hardware.
The trick is choosing the right lightweight option for ceilings, windows, and branches. A little planning also saves you from the droop problem. A single loop of thread pulls a wide snowflake into a taco shape over time.
Two or three anchor points keep it flat and even. Once you get that habit down, everything else is quick.
Thread, String, And Fishing Line
Fishing line is the invisible hero here. It disappears against a window and holds a light paper snowflake without stretching. Plain white thread works too and costs almost nothing, though it can show against dark walls.
Cut your lengths a bit longer than you think you need, then trim. For wider snowflakes, tie two or three strands to different points around the edge and gather them at the top. That keeps the shape from folding in on itself.
A tiny dot of glue where the knot meets the paper stops it from sliding. Let it dry flat before you hang anything.
Tape That Won't Take Paint With It
On painted ceilings and walls, skip the cheap tape. Use painter's tape or a removable mounting putty, and press it down firmly for a few seconds before you trust it. For windows, clear tape is fine, but stick it to the glass, not the frame.
Glass cleans up easily and won't peel. If you're hanging near a heater or a sunny spot, check the tape after a day or two, since warmth loosens adhesive. Avoid taping directly over fresh paint or wallpaper.
A small piece of wax paper under the tape gives you a clean release later.
Wire Hooks And Branch Clips
On the tree, small wire hooks or ornament hangers let you move snowflakes around without re-tying anything. Bend the hook so it grips the branch, then loop your thread over it. For heavier cardstock or wood snowflakes, a paper clip bent into an S-shape holds up better than thread alone.
Clip it to a branch and hang the snowflake from the lower loop. If you're hanging from a curtain rod or a shelf edge, a small binder clip does the job and comes off without a mark.
Keeping Them Flat And Even
Check your snowflakes a day after hanging. If one has started to curl, add another anchor point and gently flatten it by hand. Hang them at slightly different heights so the display feels natural rather than lined up like a row of soldiers.
A little variation reads as intentional. Before you pack everything away, snap a photo of your arrangement. Next year you'll thank yourself.
FAQ
What kind of paper works best for 3D snowflakes?
Standard printer paper is fine for small ones, but cardstock holds up better for larger snowflakes. Tissue paper and coffee filters give a softer look, while paper bags add texture.
How do I keep paper snowflakes from curling?
Use a light coat of spray starch or a thin layer of glue along the folds, then press them flat under a book for an hour. Hanging them away from heat and direct sun also helps.
Can I make these snowflakes with kids?
Yes. The popsicle stick and coffee filter versions are the easiest for young kids. Save the origami and layered cardstock ones for older children or adults.
How long do handmade snowflakes last?
Stored flat in a box away from moisture, paper snowflakes last for years. Glitter and glue versions hold up well too, though yarn ones may need a light dusting.
How many snowflakes do I need to decorate a room?
For a typical living room, eight to twelve mixed sizes hung at different heights create a full look. Cluster a few together rather than spacing them evenly.
Conclusion
Nine snowflake options means you can match the project to your patience level and whatever's already in the craft bin. Fold a quick paper one during a coffee break, or spend an evening on the beaded version that'll still be hanging years from now. Start with one or two this week and hang them somewhere you'll actually see them.
Crooked folds and uneven edges won't matter once the lights are on. Grab some paper, pour a mug of something warm, and let the season get a little sparklier.