11 Pinecone Crafts for Christmas to Decorate Your Home
A bowl of plain pinecones can carry a whole room through the holidays. With a little glue, paint, and ribbon, they turn into wreaths, garlands, and ornaments that look far more expensive than they cost. The best part is that most of these projects use supplies you probably already have in a drawer.
This list sticks to crafts that actually hold up through December. Each one is beginner-friendly, and you can scale it up or down depending on how much time you have.
A few take an afternoon, while others come together in under an hour. Whether you gathered your own cones on a walk or bought a bag at the craft store, there's a project here for you.
1. Classic Pinecone Wreath for the Front Door
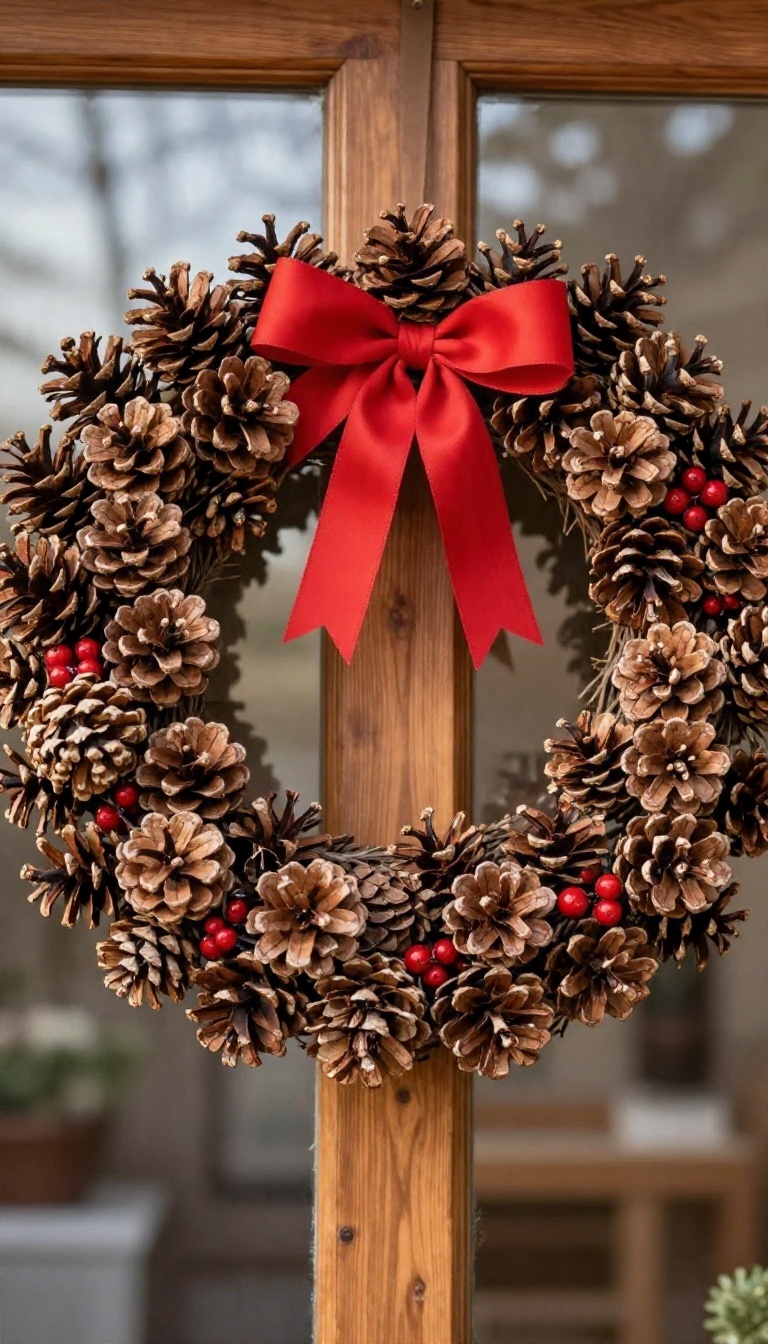
A pinecone wreath gives your front door that welcoming, woodsy feel without a trip to the fancy decor shop. You can build one on a wire or foam base, and it'll look full and natural if you layer your cones right. The trick is to start with the biggest cones and work your way down to the small ones, gluing as you go.
Finish it with a simple ribbon and a few berries, and you've got a wreath that holds up to December weather.
Before you start gluing, gather your supplies. You'll need a wire wreath frame (12 to 14 inches works well) or a foam wreath base, a hot glue gun with plenty of sticks, and a variety of pinecones. Aim for a mix of sizes: large ones for the base layer, medium for the middle, and small ones to fill gaps.
If you're using wire, you can also grab some floral wire to secure the cones. For outdoor use, choose a waterproof ribbon and consider sealing the cones with a clear acrylic spray to protect them from moisture.
Sort And Prep Your Cones
Start by sorting your pinecones into three piles: large, medium, and small. This will save you time when you're gluing. If you gathered cones from outside, give them a quick rinse and let them dry completely.
You can also bake them at 200°F for 30 minutes to kill any bugs, but keep an eye on them so they don't scorch. Once they're dry, you're ready to glue.
Glue In Layers For A Full Look
Begin with the largest cones and glue them around the outer edge of your wreath base, pointing outward. Then add a second layer of medium cones slightly inward, overlapping the first layer. Fill in the center with small cones.
Use a generous amount of hot glue and hold each cone in place for a few seconds to ensure a strong bond. Work in small sections so the glue doesn't cool before you attach the cone.
Make It Sturdy For The Outdoors
If your wreath will hang outside, reinforce it. Flip the wreath over and add a few dabs of glue where the cones meet the base. You can also weave floral wire through the cones and around the wire frame for extra security.
For the finishing touch, tie a simple bow with outdoor-grade ribbon and tuck in a few faux berries. Hang it with a sturdy hook or wreath hanger.
2. Pinecone Garland for the Mantel or Stair Rail
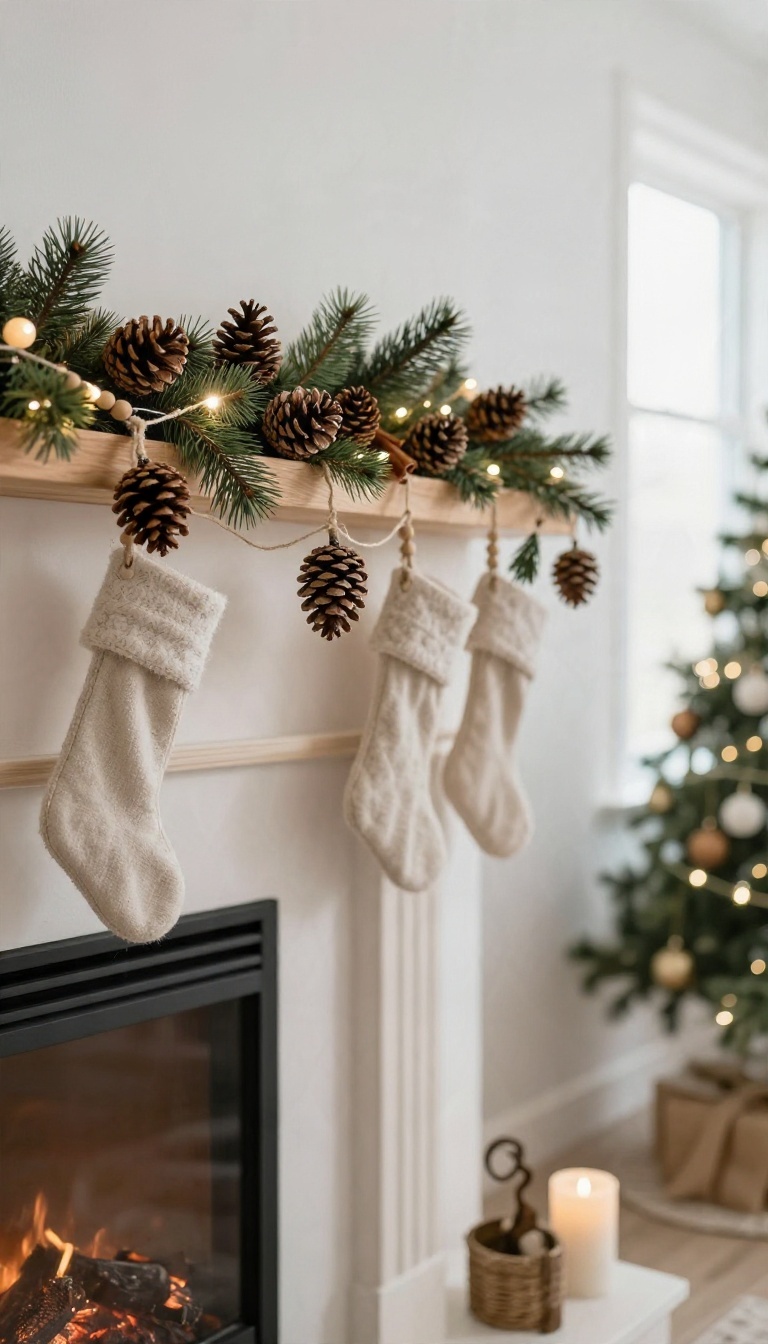
A garland is one of the easiest ways to spread that pinecone look across a whole room without making a dozen separate projects. You string cones onto twine or thin ribbon, leave a little breathing room between each one, and suddenly you have a rustic swag that dresses up a mantel or a stair rail in minutes. It's also forgiving, so a slightly uneven spacing just reads as handmade charm rather than a mistake.
The trick to a garland that looks good and hangs well comes down to two things: spacing and support. Give each cone enough room to show its shape, and build in a little reinforcement so the whole thing doesn't droop in the middle. Once you have those basics down, you can dress it up with greenery, beads, or cinnamon sticks to match the rest of your decor.
Stringing The Cones
Start with a length of jute twine or a thin velvet ribbon, and cut it a foot or so longer than the space you're covering so you have room to tie off the ends. Tie a small knot at the base of each pinecone, or run the string through the top scales and secure it with a dot of hot glue, so the cones stay put instead of sliding into a clump. Space them about four to six inches apart, and mix in a few smaller cones between the big ones for variety.
If you want a fuller look, string two strands and twist them loosely together.
Adding Greenery, Beads, And Cinnamon Sticks
Faux cedar or eucalyptus sprigs tucked between the cones add color and fill gaps without much effort. Slip a sprig in every few cones and secure it with a dab of glue or a twist of floral wire. Wooden beads, jingle bells, or dried orange slices give the garland a little sparkle and break up the brown.
Cinnamon sticks tied in small bundles add a warm scent and a nice texture, and they look especially good grouped with a bit of twine.
Hanging It Without The Sag
Long garlands tend to dip in the middle, so add a small nail or removable hook at the center and a couple of points along the way, then loop the twine over each one. For a stair rail, use zip ties or ribbon loops so the garland stays put when people grab the rail. Keep the cones fairly light, and avoid hanging heavy ornaments near the center.
If your garland still sags, run a thin florist wire along the back to give it structure.
3. Painted Pinecone Ornaments
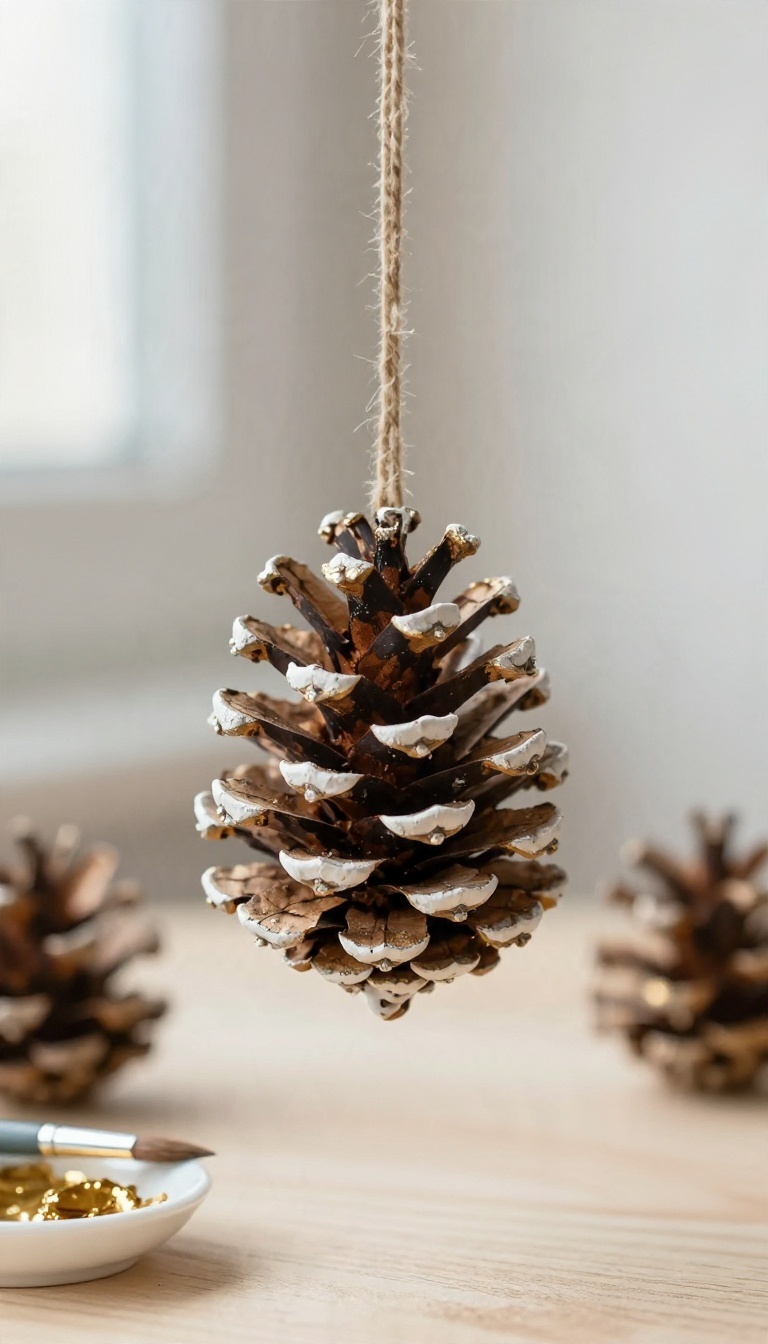
Paint might be the fastest way to change how a pinecone looks. A single coat of white, gold, or metallic color turns a rough, brown cone into something that fits a color scheme instead of fighting it. Add a twine loop, and you have an ornament that hangs on the tree or dangles from a hook in about the time it takes to drink a cup of coffee.
The trick is picking the right paint and applying it in thin layers. Thick coats look tempting because they cover faster, but they pool in the crevices and dry into lumpy blobs. Slow and steady wins here, and the results are worth the extra few minutes.
Pick A Paint That Actually Sticks
Acrylic craft paint is the safest bet for most pinecones. It clings to the dry scales, dries in about 20 to 30 minutes, and comes in every shade you could want. Spray paint works too, but only in light passes from about 10 inches away, or you'll soak the cone and lose the texture.
For a bit of shine, metallic acrylics and liquid gold leaf paints hold up well. Skip oil-based paints and heavy enamel unless you plan to seal the cone afterward. They stay tacky on porous surfaces and can leave a greasy feel that never quite dries.
Avoid The Clumpy Finish
Load your brush lightly and dab rather than stroke. Pushing paint into the gaps between scales is what causes those thick, uneven clumps. Let each coat dry fully before adding the next one, even if the first pass looks patchy.
Two or three thin coats always beat one heavy one. If a scale looks bare, come back to it after the rest dries instead of piling on more paint. A quick tap of the cone on the table between coats shakes loose any drips before they set.
Add The Hanging Loop
Cut a length of twine about 6 inches long and fold it in half. Tie a knot near the ends to create a small loop, then hot glue the knot to the top of the cone, tucking it between two scales for a cleaner look. A small screw eye also works if you'd rather not use glue.
Twist it into the top of the cone by hand, then thread the twine through. Either way, let the ornament sit for an hour before hanging so the glue sets and the paint cures.
4. Snow-Tipped Pinecones for a Frosted Look
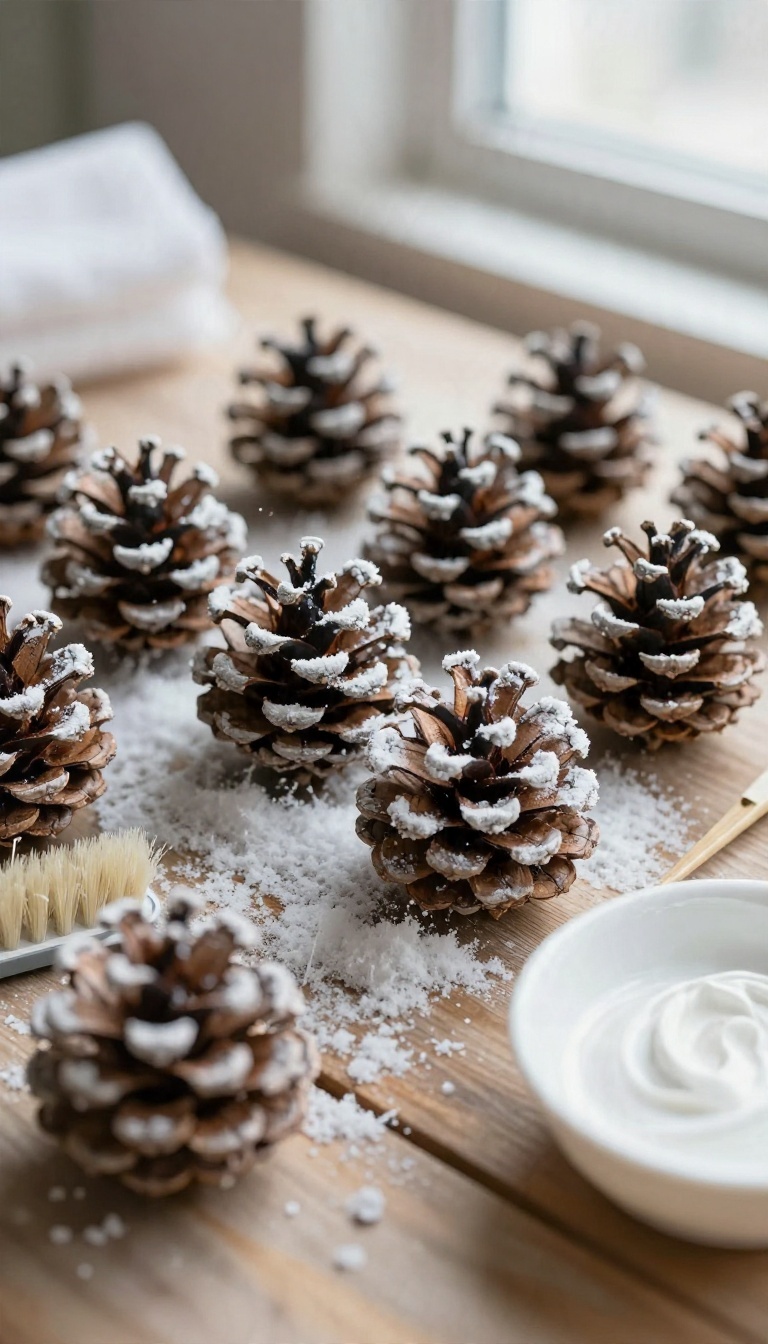
Plain brown cones are fine, but a dusting of white makes them look like they came in on a snowy branch. The trick is keeping the white on the tips instead of smothering the whole cone. Get that balance right and you have a decoration that reads as winter rather than just painted wood.
The frosted look works because it mimics something real. Snow settles on the outer edges of a pinecone and leaves the deep crevices dark, so the contrast is what sells it. Your job is to copy that pattern, not cover it evenly.
You only need a few supplies, and the cheap version looks just as good as the fancy one. A small stiff brush, some white craft paint or fake snow, and a paper towel for dabbing are basically the whole kit. Work on newspaper or a paper bag so you can shake off the excess without chasing it around the floor.
Pick The Right Brush And Paint
Skip the big foam brush here. A small stiff-bristle brush, like a stencil brush or an old toothbrush, gives you control at the tips where you actually want paint. For paint, plain white acrylic works well and dries fast.
If you want a softer, more powdery finish, mix in a little baking soda until it thickens. Fake snow spray or a jar of craft snow flakes is another option and gives a chunkier, more textured result. Test on one cone before committing to the whole batch.
Different cones soak up paint differently, and you want to see how much coverage you're getting before you do twenty of them.
Layer Lightly, Then Build Up
Dip the brush lightly and wipe most of the paint off on the rim. You want a dry, almost scratchy application, not a wet blob. Pounce the brush against the outer tips at an angle, letting the bristles catch the edges.
Rotate the cone as you go so you hit it from every side. Leave the inner scales mostly bare, since that dark contrast is what makes the frost look convincing. Let the first pass dry, then go back and add more to a few tips.
Two or three light layers always beat one heavy coat. If you overdo it, dab a damp paper towel on the wet paint to pull some back off before it sets.
Where Frosted Cones Look Best
These fit almost anywhere a plain cone would, but the white makes them pop against darker surfaces. Try a cluster in a wooden bowl on the coffee table or lined up along a mantel next to candles. They also work well tucked into a glass jar or vase, mixed with a few bare cones for contrast.
For a quick centerpiece, pile them on a cake stand with a little faux greenery underneath. Keep them away from high-traffic spots where they might get knocked, since the paint can chip at the tips over time. A shelf or side table is safer than a busy entryway bench.
5. Pinecone Table Centerpiece
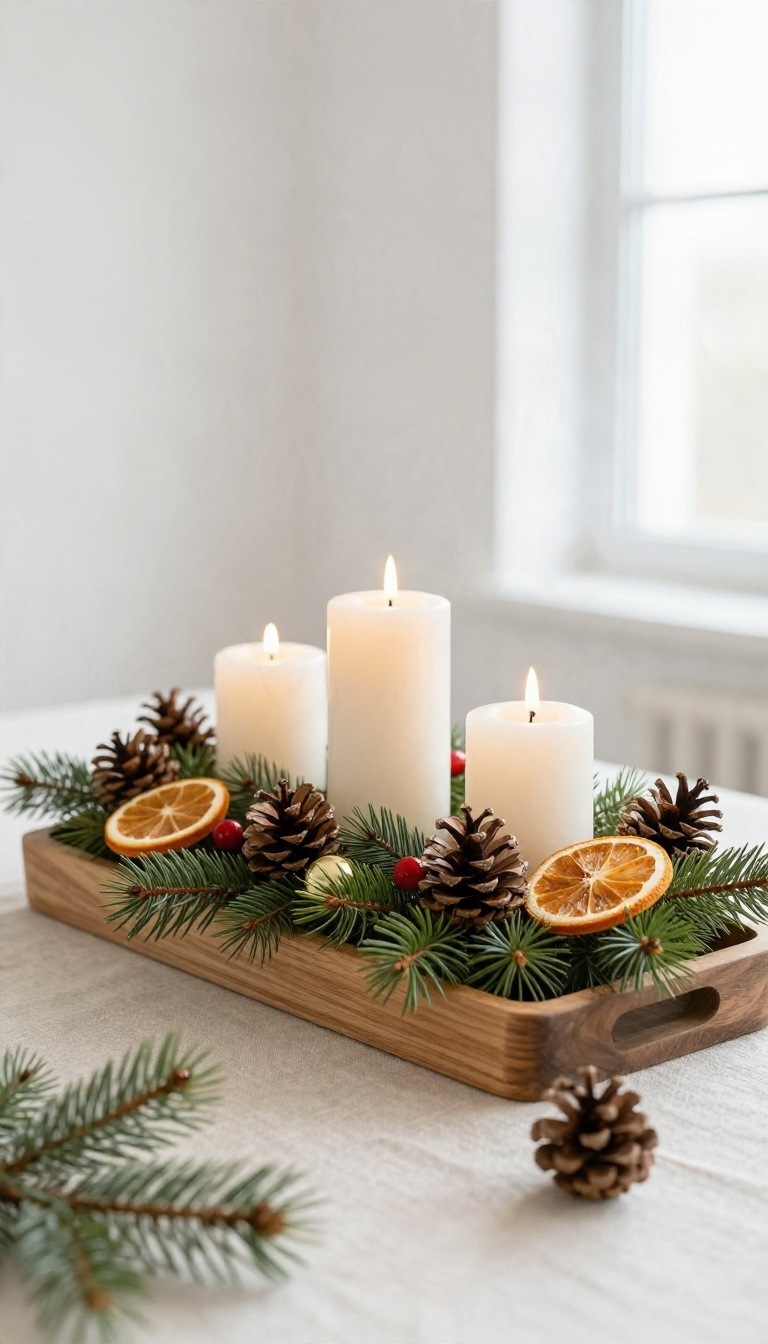
A centerpiece pulls double duty during the holidays: it anchors the table and sets the mood before anyone takes a bite. Pinecones make that job easy because they bring texture and warmth without any fuss. You don't need a floral design background—just a bowl, a few fillers, and a little layering.
Start with a shallow bowl or a rectangular tray that fits your table. The key is to build in layers so the arrangement looks full from every angle. Begin with a base of greenery, then nestle in the pinecones, and finish with candles and small ornaments.
This approach keeps the centerpiece balanced and prevents it from looking like a random pile.
Layer For Fullness
Spread a layer of faux or fresh greenery across the bottom of your container. Tuck in pinecones of varying sizes, placing the largest ones first. Fill gaps with smaller cones and sprigs of berries or dried oranges.
This creates depth and makes the arrangement look abundant without overcrowding.
Add Height And Light
Candles add warmth and vertical interest. Use pillar candles in different heights, or a few taper candles in holders. Place them off-center for a natural look.
Battery-operated candles work well if you have little ones or want to keep things simple.
Keep It Balanced
Step back and check the arrangement from all sides. If one area looks sparse, add a small pinecone or a bit of greenery. Avoid packing it too tightly—leave some breathing room so the elements stand out.
A few small ornaments tucked in can add a pop of color without overwhelming the natural look.
6. Pinecone and Cinnamon Stick Tree Ornaments
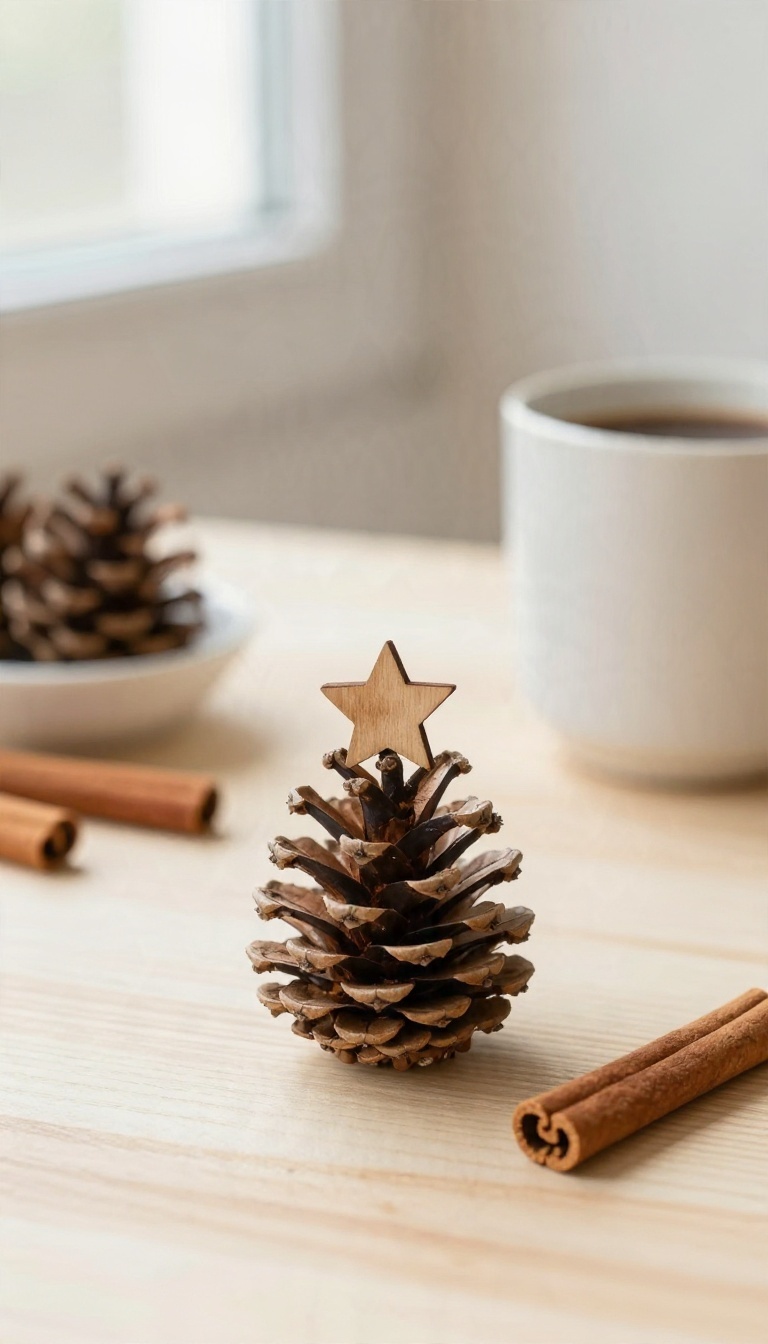
Small pinecones make convincing mini evergreens once you give them a trunk and a topper. A cinnamon stick becomes the trunk, a little star caps the top, and suddenly you have a tiny rustic tree for the tree itself. These come together in a few minutes each, which makes them a good project for a batch of ornaments or a quiet evening with a mug of something warm.
The trick to getting these to look like trees instead of random glued bits is proportion. Pick cones that stand up on their own with a flat base, then match a cinnamon stick that's roughly a third of the cone's height. Too long and it looks like a lollipop; too short and the trunk disappears.
Once the sizing feels right, assembly is quick and forgiving.
Assembling The Mini Trees
Start by trimming the bottom of the cone so it sits flat, or leave it if it already stands. Add a generous dot of hot glue to the top of the cinnamon stick and press it into the base of the cone, holding for a few seconds until it sets. For the star, glue a small wooden star, a tiny painted clothespin, or a bead to the very tip of the cone.
Let everything cool completely before you handle it, since hot glue stays soft for a moment and a wobbly trunk is the most common fix-up.
Adding Scent And A Clean Finish
Cinnamon sticks carry a surprising amount of fragrance on their own, but you can boost it by dabbing a little cinnamon or clove essential oil onto the stick, not the cone, so it doesn't stain. A light dusting of faux snow or a quick pass with matte spray sealer keeps the cones from shedding and gives them a tidy, finished look. Skip heavy gloss if you want that natural woodsy feel.
A small ribbon loop glued to the back of the cone makes them easy to hang, and a dab of glue over the knot keeps it secure.
7. Pinecone Kissing Ball or Hanging Cluster
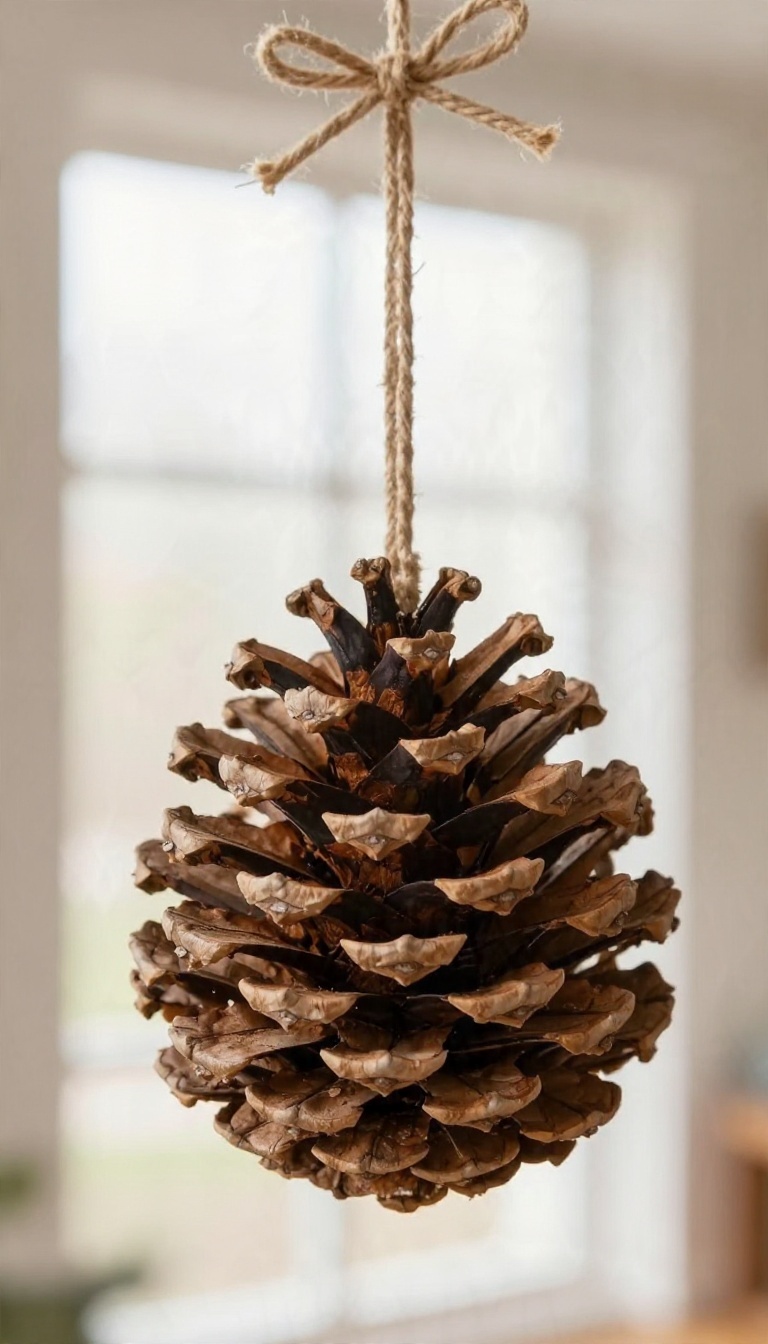
A kissing ball hangs in a doorway and catches the eye every time someone walks through. Pinecones give it that traditional, woodsy feel without the fuss of fresh greenery that dries out by mid-December. The whole thing is a foam sphere, a pile of cones, and a ribbon, and it holds up for years if you store it carefully.
Start with a foam sphere from the craft aisle. A 4-inch ball makes a nice compact cluster for a doorway, while a 6-inch ball reads better in a big open space or above a table. Smaller cones suit a small ball, and larger ones work best on the bigger sizes so the proportions stay right.
Choosing Your Foam Ball Size
Match the ball to where it will hang. A 4-inch sphere works in a standard doorway or above a kitchen window, and it takes about 20 to 30 small cones to cover. A 6-inch ball suits a vaulted ceiling or a wide entry, and it needs closer to 40 to 50 cones.
Buy a bag with a few extras so you don't run short halfway around.
Gluing For Full Coverage
Work in rings from the bottom up. Add a generous dab of hot glue to the base of each cone and press it into the foam, holding for a few seconds until it sets. Tuck cones close together so the foam disappears, and angle the tips outward for a rounded look.
Fill any bare spots at the end with the smallest cones in your pile.
Hiding The Hanging Loop
Before you cover the top, push a loop of ribbon or twine into the foam and secure it with a dab of glue. Leave the last ring of cones loose around the top so you can tuck the loop down between them. A small bow glued over the top hides the entry point and gives the ball a finished look.
Test the hang before you commit, since a heavy ball can pull a weak loop right out.
8. Pinecone Fire Starters as Gifts
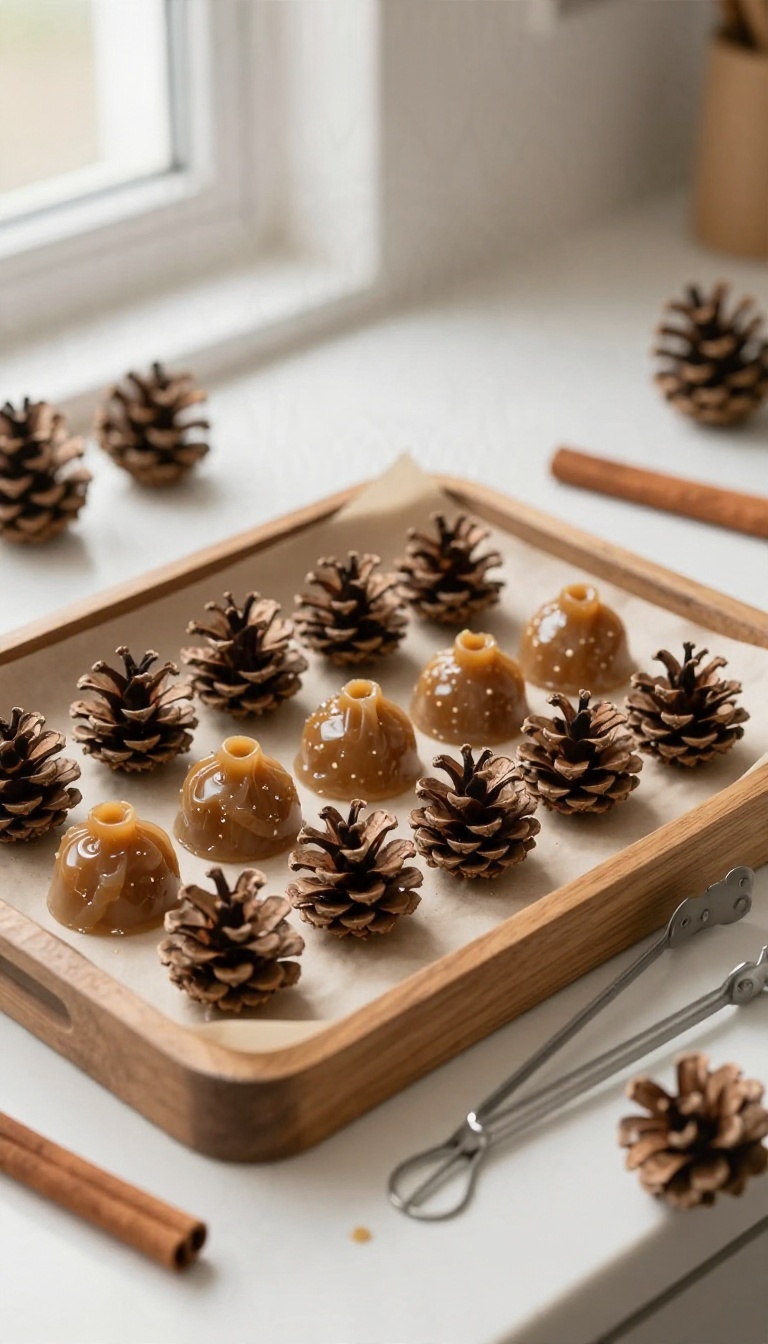
Fire starters rarely top anyone's wish list, but a handmade one that actually works tends to get remembered. A wax-dipped pinecone burns long enough to catch damp kindling on a cold night, and it costs almost nothing to make. Line up a dozen cones on a tray and you have a batch of gifts for neighbors, teachers, and the host who insists you shouldn't bring anything.
The method is simple: melt wax, dip the cones, let them dry, and wrap them up. The details are where it gets fun, since you can tint the wax, add a wick, and package the whole thing to look like it came from a shop. Start with dry cones, because a damp one will sputter instead of catch.
If you gathered your own, give them a few days in a warm, dry spot before you start dipping.
Melting Wax Without The Mess
Skip the stovetop and use a double boiler setup instead, or set a heat-safe measuring cup inside a pot of simmering water. Wax is flammable, so keep the heat low and never leave it alone. A dedicated old pot or cup keeps your good cookware out of the rotation.
Add color with a few shavings of old crayon or a wax dye chip, stirring until it melts evenly. If you want a scent, a drop or two of essential oil goes in right before you dip. Keep a sheet of parchment or foil under your work area, because drips happen and cleanup is easier when you plan for them.
Dipping And Drying The Cones
Hold each cone by the tip with tongs and lower it into the wax, letting it sit for a few seconds so the scales fill. Pull it out, let the excess drip back into the pot, then set it on parchment to cool. One dip gives you a light coating, while two or three coats build a longer burn.
A short cotton wick pressed into the top before the wax sets makes lighting easier. Let the cones cure overnight somewhere cool and dry. They'll feel hard and slightly glossy when they're ready, and that's your cue to start packaging.
Packaging For Neighbors And Teachers
Bundle three or four cones in a small kraft box or a clear cellophane bag tied with twine. Tuck in a little card explaining how to use them, since most people won't know to place one under the kindling rather than on top. A scrap of burlap or a sprig of dried rosemary adds a nice touch without much effort.
For a bigger gift, pair the starters with a box of matches or a nice candle. A small basket with a few cones, a matchbook, and a handwritten tag makes a thoughtful present for a teacher or a neighbor. Keep a few for yourself, too, because once the first cold snap hits, you'll be glad you did.
9. Pinecone Angel Ornaments
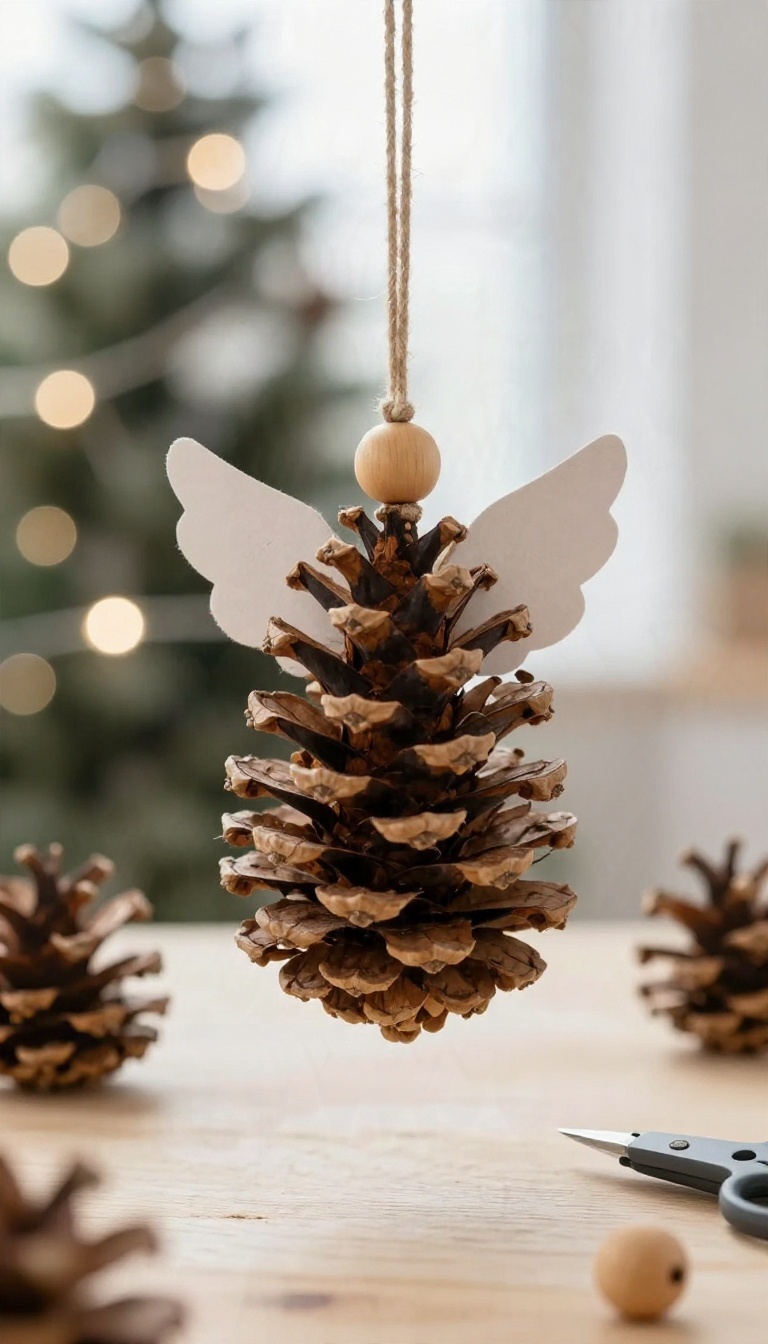
Angels show up on trees, mantels, and gift toppers every December, and a pinecone makes a surprisingly graceful body for one. The cone becomes the skirt, and everything else stacks on top in a few quick steps. You only need a handful of supplies, and most of them are small enough to keep on hand for a whole batch.
Make one to test the proportions, then line up a few more while the glue is out.
The trick with these is balance. A wide, open cone reads as a full skirt, while a narrow one looks more like a slim gown. Sort your pile first and set aside the cones that stand up straight on their own.
Once you have your cones picked, the rest is mostly assembly. Keep the pieces light so the ornament doesn't pull the branch down.
Picking The Pieces
Start with a cone that sits flat without wobbling. A 2- to 3-inch cone works well for a tree ornament, and a larger one makes a nice shelf piece. For the head, a 12mm or 16mm wooden bead is the easy choice.
Paint it a skin tone or leave it natural for a wood look. A small screw eye twists into the top of the bead so you have a loop for hanging. Wings can be paper, felt, or stiffened fabric.
Fold a small piece in half, cut a simple wing shape, and you get two matching sides in one cut. Add a tiny bow or a bit of twine at the neck to hide the seam.
Glue And Assembly
Hot glue is the fastest option and holds well on the rough cone surface. Put a generous dot on the bottom of the bead and press it onto the tip of the cone, holding for a few seconds until it sets. Glue the wings to the back of the cone just below the head.
Angle them slightly upward so they read as wings rather than flaps. If you want a halo, bend a small loop of gold wire and tuck the ends into the glue at the top of the head. Let everything cure for a few minutes before you hang it.
A ribbon loop through the screw eye finishes it off.
The Kid-friendly Version
Skip the hot glue and hand kids a low-temp glue gun or white craft glue with a few minutes of drying time. White glue takes longer but is safer for small hands. Pre-cut the wings and beads ahead of time so kids can focus on placing pieces.
Let them pick bead colors and ribbon, and don't worry about perfect symmetry. A pipe cleaner halo is easier for kids than wire. Twist it into a circle and press it into the glue at the top of the head.
10. Pinecone Bowl Filler and Vignette
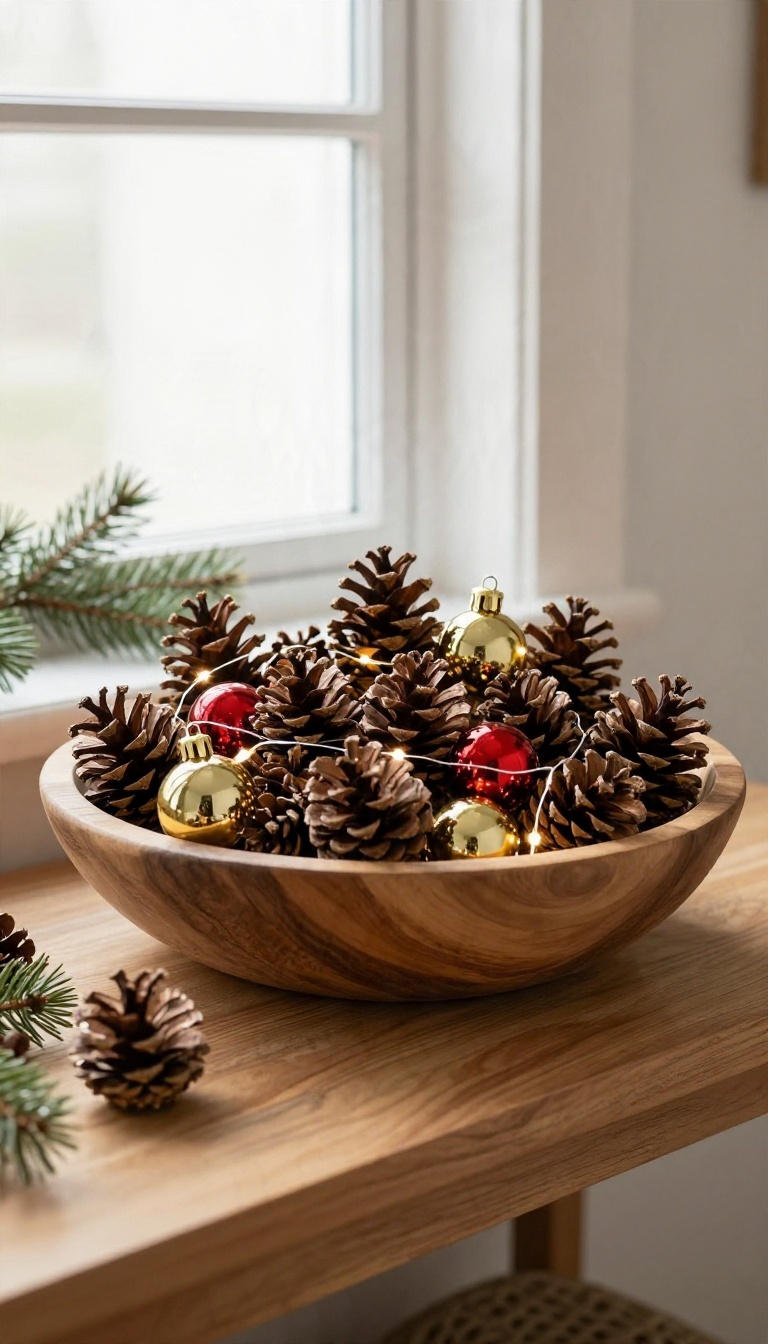
Some of the coziest holiday corners don't need a single nail or a strand of garland. A bowl, a tray, or a clear vase filled with pinecones does the job in about five minutes. Layer in a few ornaments and a string of fairy lights, and you've got a vignette that looks styled rather than thrown together.
The trick is mixing sizes and textures so the arrangement reads as intentional. Big cones anchor the bottom, smaller ones fill the gaps, and shiny ornaments catch whatever light is nearby. Once you get the formula down, you can repeat it on shelves, entryway tables, and nightstands without much thought.
Vignettes work best when they feel like a small scene rather than a pile of stuff. Start with a container you already own, then build up in layers. The pinecones do most of the visual work, so you don't need much else to make it look finished.
Keep scale in mind. A tiny dish on a side table wants small cones, while a wide bowl on a console can handle the big ones. Matching the filler to the furniture keeps the whole thing from looking off.
Pick A Container That Fits The Spot
Wooden bowls, woven baskets, galvanized trays, and clear glass vases all work, and each gives a slightly different feel. Wood reads rustic, glass reads modern, and metal adds a little holiday sparkle. Raid your kitchen cabinets before you buy anything new.
For narrow shelves, a tall vase with a few cones standing upright saves space. On an entryway table, a shallow tray keeps keys and mail from getting lost in the pile. Just make sure the container has enough weight that it won't tip when someone bumps it.
Layer Cones, Ornaments, And Lights
Fill the bottom third with the largest cones, then tuck smaller ones around the edges so the surface looks full. Nestle in two or three shatterproof ornaments in colors that match your tree. A little gold, red, or cream goes a long way against brown scales.
Battery fairy lights are the secret weapon here. Wind a short strand through the top layer and hide the battery pack behind the container. Warm white looks best with pinecones, and a timer means you never have to remember to switch them on.
Placement Ideas That Actually Work
Entryway tables get the most traffic, so a lit bowl there greets everyone who walks in. Bookshelves benefit from one vignette per shelf, spaced out so the eye moves around the room. Side tables next to a reading chair make a quiet corner feel festive without crowding it.
Bathroom counters and kitchen islands are underrated spots too. A small dish of cones near the sink adds a hit of holiday without taking up real estate. Wherever you put it, keep cords and battery packs tucked away and check that nothing blocks a walkway.
11. Pinecone Gift Toppers and Tags

A wrapped present looks finished the moment something sits on top of it. A small pinecone does that job better than a stick-on bow, and it costs almost nothing. Pair one with twine and a handwritten tag, and your gift looks like it came from a boutique instead of your kitchen table.
The trick is matching the cone to the box. A cone that's too big tips the whole thing over, and one that's too small disappears against the paper. Once you get the sizing right, these toppers take about a minute each to assemble.
Match The Cone To The Box
For a jewelry box or a small square package, reach for cones under two inches tall. A shirt box or anything roughly the size of a shoebox can handle a cone in the two-to-three-inch range. Bigger boxes, like a wrapped sweater or a board game, look best with a cone that's three to four inches tall.
Lay a few cones on top of the wrapped gift before you commit. If the cone covers more than a third of the lid, it's too large. If you can barely see it from arm's length, size up.
Tie It Down So It Stays Put
Round cones roll, and a topper that slides off in the car isn't doing anyone favors. Wrap twine around the gift twice in each direction, crossing under the box, and knot it on top. Then tuck the base of the cone under the crossing point and tie it snug.
A dot of hot glue on the cone's bottom holds it steady if you'd rather not fuss with knots. Let it cool completely before you move the present. For a loose, natural look, skip the glue and nestle the cone into a small twine bow instead.
Add A Handwritten Tag
Cut a tag from kraft cardstock, punch a hole in one corner, and thread it onto the twine before you tie the final knot. Write the name in a thick marker so it reads from across the room. A tiny sprig of greenery or a thin strip of red ribbon tucked beside the cone adds color without much effort.
Keep the tag small so the cone stays the star.
FAQ
Do I need to clean pinecones before crafting with them?
Yes, it's worth it. Rinse them, then bake them on a foil-lined sheet at a low temperature for about 30 minutes to dry them out and get rid of bugs or sap. Let them cool fully before you glue or paint anything.
How do I stop pinecones from closing up?
Pinecones open and close with moisture, so keep finished crafts away from humid spots like bathrooms. Sealing them with a light coat of clear spray helps them hold their shape.
What's the best glue for pinecone crafts?
Hot glue works best for attaching cones to wreaths, foam, and each other because it sets fast. For small details like beads or ribbon, a strong craft glue gives you more working time.
Can kids help with these crafts?
Definitely. Painting, snow-tipping, and arranging bowl fillers are great for kids. Save the hot glue gun and wax melting for adults, and let little ones handle the decorating parts.
How long do pinecone decorations last?
Stored in a dry box away from damp and heat, most pinecone crafts last for years. Check them each season for dust or loose pieces and touch up the glue if needed.
Conclusion
Pinecones are one of the few craft supplies that cost almost nothing and still look good in every room. Start with one project that fits your space, then add more as the season goes on. You don't need a perfect setup to make something that feels warm and homemade.
Once you've made a few, you'll start spotting cones everywhere and thinking about next year's projects. Grab a bag, set aside an afternoon, and see where it takes you.