17 Bathroom Cleaning Checklist Ideas for Fresh Homes
A clean bathroom doesn't happen by accident—it takes a solid plan and a little consistency. Without a checklist, it's easy to miss hidden spots like the grout or showerhead, letting grime build up over time.
These 17 checklist ideas break down the work into manageable chunks, so you can maintain a fresh home without spending your whole weekend scrubbing. From daily 5-minute refreshes to deep grout revival, each item targets a specific area that often gets overlooked.
Pick the ones that fit your routine, and watch your bathroom stay sparkling with minimal effort.
1. Daily 5-Minute Refresh
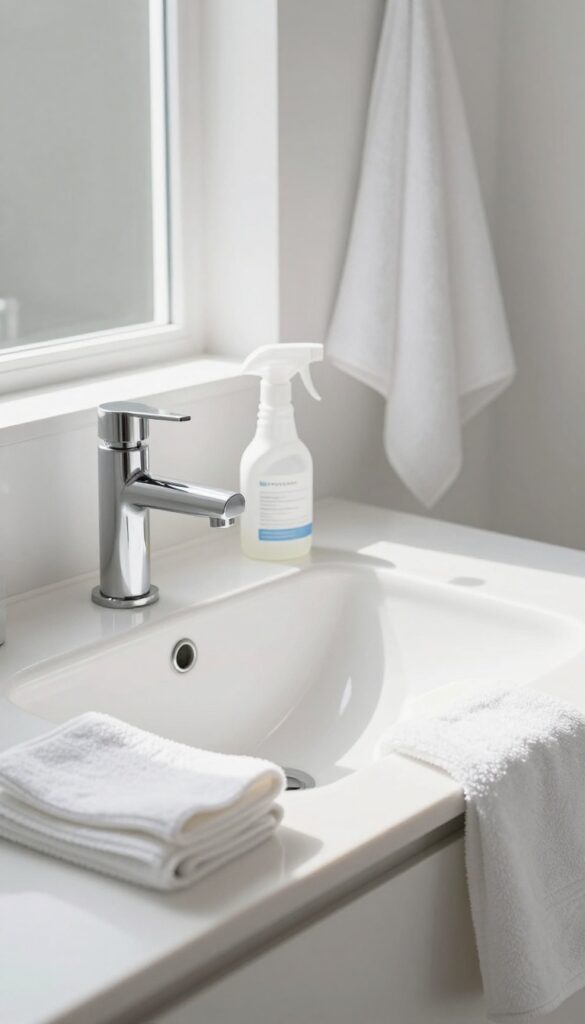
In just five minutes a day, you can keep your bathroom looking fresh without breaking a sweat. This quick routine targets the surfaces that get the most use—sink, counter, and mirror—so dirt and toothpaste splatters don't have a chance to harden. The secret is consistency: a minute or two each day saves you from a heavy scrub session later.
The daily 5-minute refresh is your first line of defense against bathroom grime. By wiping down high-touch areas every day, you prevent buildup that can lead to stains and mildew. This habit also keeps your bathroom looking guest-ready with almost zero effort.
What To Wipe
Focus on the sink basin, faucet handles, countertop, and mirror. Use a microfiber cloth and an all-purpose cleaner or a simple vinegar-water solution. Don't forget the area around the soap dispenser and toothbrush holder—those spots collect sticky residue fast.
Tools To Keep Handy
Store a spray bottle of daily cleaner and a clean microfiber cloth under the sink or in a caddy. That way, you can grab them in seconds. Avoid paper towels—they create waste and can leave lint on mirrors.
Make It A Habit
Tie your 5-minute refresh to an existing routine, like brushing your teeth or washing your face. Set a timer if you need to. After a week, it'll feel automatic, and your bathroom will thank you.
2. Weekly Deep Scrub
A quick daily wipe keeps things tidy, but one day a week is when you really dig in. Set aside 30 minutes for a thorough scrub of the toilet, shower, and floor. This routine catches dirt before it hardens into stubborn stains, saving you elbow grease later.
It also gives you a chance to inspect for mold or mildew early, so small problems don't turn into big ones.
Weekly deep scrubbing is the backbone of a clean bathroom. It's not about perfection—it's about consistency. By tackling high-traffic areas every seven days, you prevent buildup that makes cleaning harder.
Focus on surfaces that get wet and soapy: the toilet bowl and exterior, shower walls and door, and the floor. Use a good all-purpose cleaner or a bleach-based solution for tough spots. Don't forget the corners and edges where grime hides.
Toilet: Inside And Out
Start with the toilet. Pour cleaner into the bowl, let it sit while you scrub the outside, then come back to brush the inside. Don't skip the base and behind the seat—those spots collect dust and splashes.
Wipe down the flush handle too, since it's touched multiple times a day.
Shower: Walls And Door
Spray shower walls and door with a daily shower cleaner or a vinegar-water mix. Let it sit for a few minutes, then scrub with a non-abrasive sponge. Pay extra attention to the corners and the track of sliding doors, where soap scum loves to hide.
Rinse thoroughly to avoid residue.
Floor: Mop Or Wipe
After scrubbing the toilet and shower, move to the floor. Sweep or vacuum first to remove hair and dust. Then mop with a bathroom-safe cleaner, or use a microfiber mop for a quick wipe.
Focus on corners and edges where moisture can sit. Let it air dry with the fan on or a window open.
3. Grout and Tile Revival
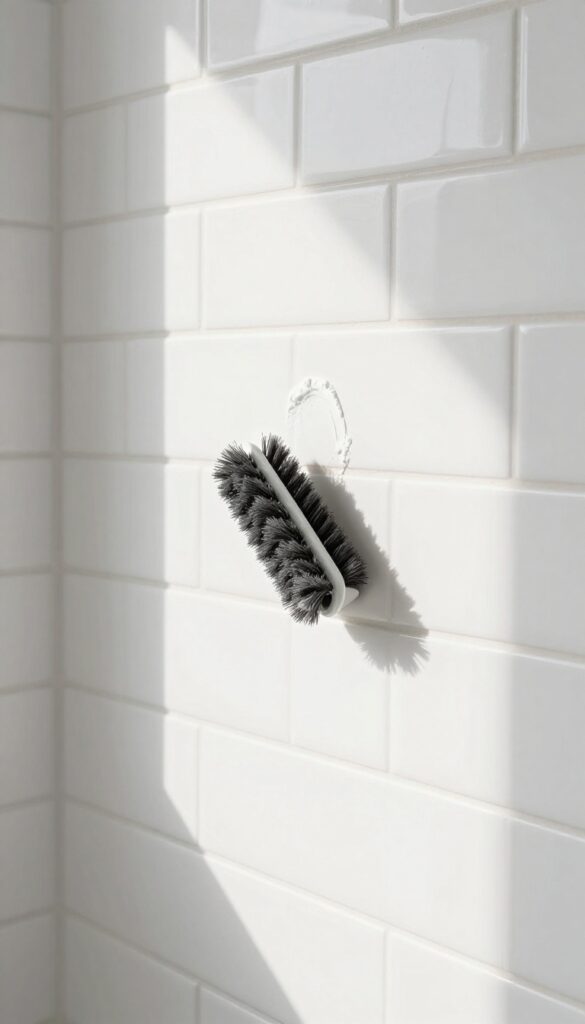
Grout lines are often the first place to show wear, turning from bright white to dingy gray or even developing mildew spots. But you don't need harsh chemicals or a professional to bring them back to life. A simple baking soda paste or a dedicated grout brush can make tiles look like new again, and regular care prevents mold from taking hold.
Baking Soda Paste Magic
Mix baking soda with a little water to form a thick paste. Apply it to grout lines, let it sit for 10 minutes, then scrub with an old toothbrush or grout brush. Rinse with water and watch the grime disappear.
For extra stubborn stains, add a splash of white vinegar to the paste.
Grout Brush Vs. Toothbrush
A dedicated grout brush has stiffer bristles and a narrow head that fits perfectly into grout lines. It's a small investment that saves time and elbow grease. If you don't have one, an old toothbrush works fine—just be prepared to scrub a little harder.
Prevent Mold With Regular Wipes
After each shower, use a squeegee or microfiber cloth to wipe down tiles and grout. This removes moisture that mold loves. Once a week, spray with a 50/50 water and vinegar solution to keep mildew at bay without harsh fumes.
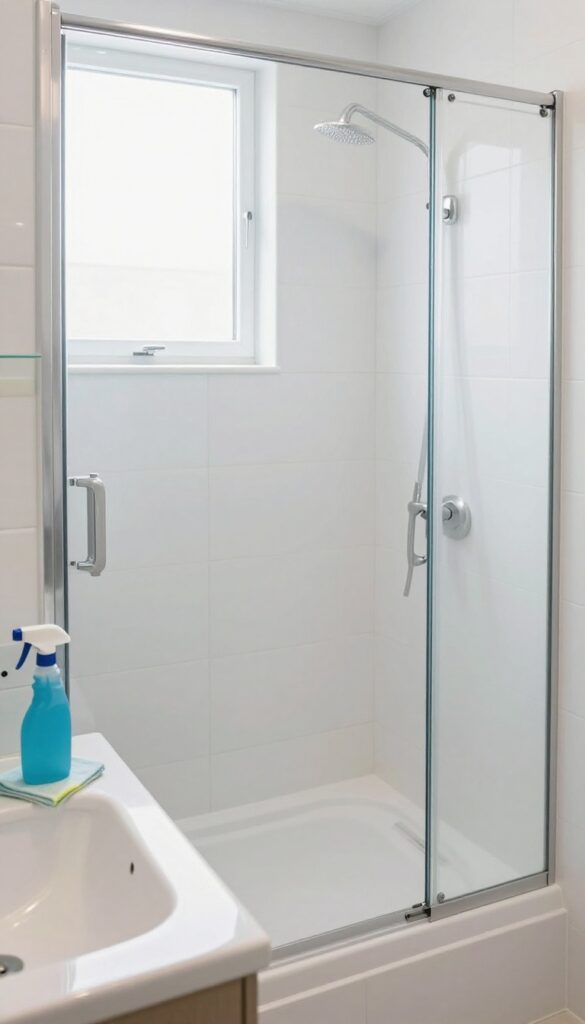
4. Shower Glass No-Spot Routine
Nothing ruins a freshly cleaned bathroom faster than streaky, spotty shower doors. Hard water deposits and soap scum love to cling to glass, turning a clear door into a foggy mess. The good news?
You can keep that glass crystal clear with a simple two-step routine that takes almost no time.
Daily Squeegee Habit
Keep a squeegee hanging right inside your shower or on a nearby hook. After every shower, spend 30 seconds running it across the glass. This single move prevents water spots before they form.
No squeegee? A clean microfiber cloth works too, but a squeegee is faster and leaves fewer streaks.
Weekly Vinegar Rinse
Once a week, spray the glass with a 50/50 mix of white vinegar and water. Let it sit for a minute, then scrub gently with a non-abrasive sponge. Rinse well and squeegee dry.
For stubborn spots, use a dedicated glass cleaner or a commercial hard water remover. Avoid harsh chemicals that can etch the glass over time.
Prevent Future Buildup
Consider applying a glass protectant or water repellent after cleaning. These products create a barrier that makes water bead up and roll off, drastically reducing spots. Reapply every few months.
Also, keep your bathroom well-ventilated to reduce humidity, which makes spots form faster.
5. Toilet Tank and Bowl Combo
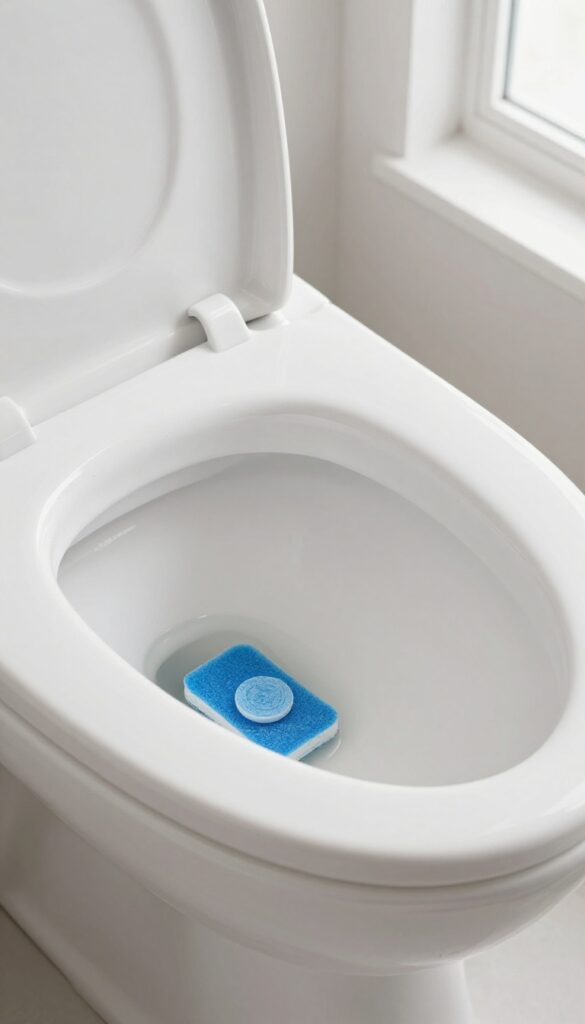
The toilet is the centerpiece of the bathroom, but most people only clean the bowl. The tank hides mineral deposits, mold, and bacteria that can affect both smell and performance. Pairing a tank tablet with a thorough bowl scrub tackles both spots in one go.
Why The Tank Matters
Hard water and bacteria build up inside the tank, causing stains, odors, and even damaging internal parts. A cleaning tablet dissolves slowly, releasing bleach or enzymes that break down grime with every flush. It's a set-and-forget solution that keeps the water blue and fresh.
Bowl Deep Clean With Pumice
For stubborn rings and hard-water stains, a pumice stone is a game-changer. Wet the stone, gently rub the stains, and they lift off without scratching porcelain. Follow with a brush and your usual cleaner for a spotless finish.
Never use pumice on fiberglass or enamel.
Step-by-step Combo Routine
Drop a tablet in the tank first. Let it fizz for 10 minutes while you scrub the bowl with pumice or brush. Flush to rinse, then wipe down the exterior and seat.
Do this weekly to prevent buildup and keep the toilet looking like new.
6. Vanity and Drawer Declutter
Your bathroom vanity and drawers can quickly become a black hole of half-used products, expired medications, and forgotten samples. A monthly declutter session keeps everything organized and easy to find, saving you time and frustration during your morning routine.
Empty And Wipe Down
Pull everything out of your vanity and drawers. Use a damp microfiber cloth with a mild cleaner to wipe down all surfaces, including the inside of drawers and shelves. Don't forget the handles and edges where dust and grime accumulate.
Toss Expired Products
Check expiration dates on medications, skincare, and makeup. Throw away anything past its prime—old products can harbor bacteria and lose effectiveness. Also discard empty bottles, dried-out nail polish, and broken tools.
Categorize And Contain
Group similar items together: hair care, skincare, oral care, first aid, and extras. Use small bins, drawer dividers, or clear containers to keep categories separate. Label containers if it helps you maintain the system.
Maintain The System
Set a recurring monthly reminder to repeat this process. After a few cycles, you'll naturally buy less and waste less. A tidy vanity makes your bathroom feel larger and more serene.
7. Showerhead Descaling
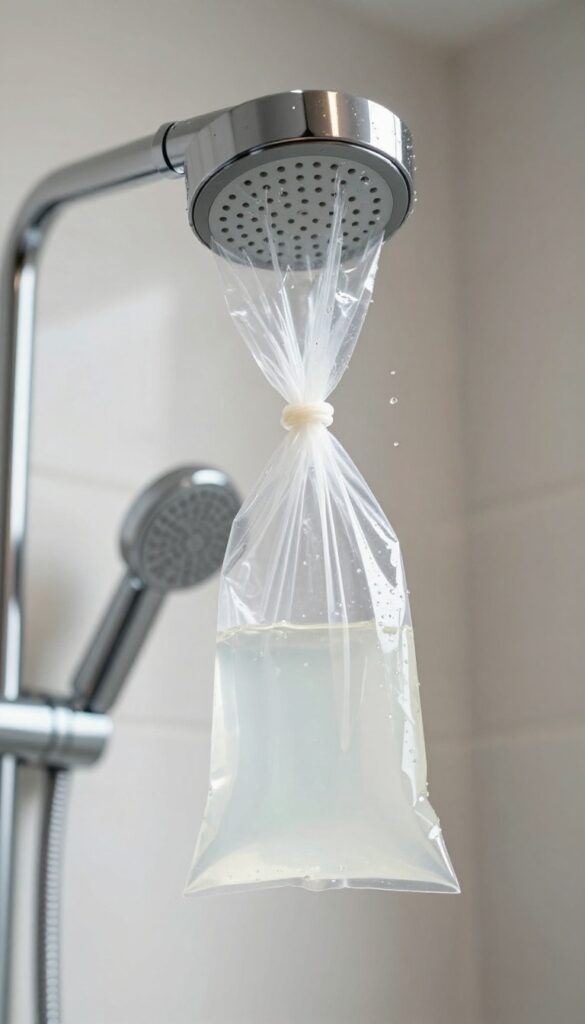
Mineral deposits from hard water can silently clog your showerhead, reducing water pressure and creating an uneven spray. Over time, these deposits also become a breeding ground for bacteria. A simple overnight soak in white vinegar restores flow and keeps your showerhead hygienic without harsh chemicals.
Why Vinegar Works
White vinegar is mildly acidic, which dissolves calcium and lime scale buildup effectively. It's cheap, non-toxic, and safe for most metal and plastic showerheads. For stubborn deposits, you can heat the vinegar first (but let it cool slightly before soaking).
Step-by-step Soak
Fill a plastic bag with enough white vinegar to submerge the showerhead. Secure the bag around the showerhead with a rubber band or zip tie, making sure it's sealed. Leave it overnight (at least 6–8 hours).
In the morning, remove the bag, run the shower for a few minutes to flush out loosened deposits, and wipe the showerhead clean.
When To Replace Instead
If your showerhead is heavily corroded or the finish is peeling, descaling might not be enough. Consider replacing it with a model designed for easy cleaning or one with rubber nozzles that you can wipe clean. A new showerhead can also improve water efficiency.
8. Exhaust Fan Dusting
Your bathroom exhaust fan works hard to remove moisture and odors, but when it's coated in dust, it can't do its job. A dirty fan also becomes a fire hazard and makes more noise than necessary. Regular dusting keeps it running efficiently and your bathroom fresh.
Why It Matters
A clean fan moves more air, which means less humidity and fewer chances for mold and mildew. It also runs quieter and uses less energy. Plus, dust buildup can eventually cause the motor to fail, leading to an expensive replacement.
How To Do It
Turn off the fan and remove the cover (usually held by clips or screws). Vacuum the cover with a brush attachment, then wash it in warm soapy water and let it dry completely. While the cover is off, use a vacuum or a damp cloth to gently clean the fan blades and the inside of the housing.
Avoid getting the motor wet.
How Often
Aim for monthly dusting of the cover and blades. If your bathroom gets heavy use or you have pets, you might need to do it every two weeks. A quick visual check each month will tell you if it's time.
9. Mirror Streak-Free Finish
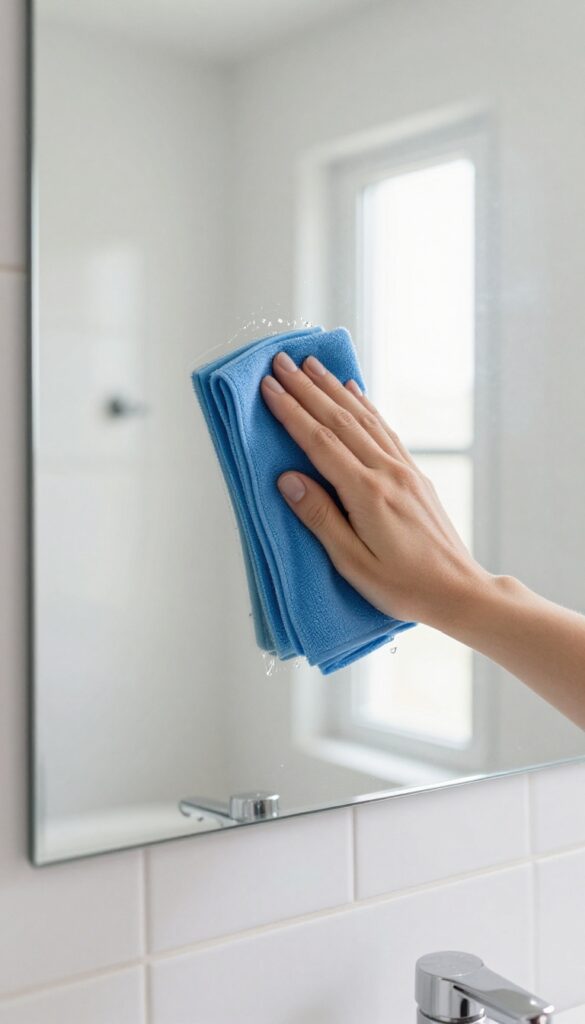
A mirror covered in streaks and smudges can make the whole bathroom look dirty, even if everything else is spotless. The good news is that getting a crystal-clear reflection doesn't require fancy products or elbow grease. With the right technique, you can make your mirrors gleam every time.
The secret to a streak-free mirror is twofold: the right cloth and the right wiping motion. Microfiber cloths are ideal because they trap dust and lint instead of pushing it around. Combined with a simple DIY cleaner or a commercial glass spray, you can achieve a flawless finish in seconds.
Why Microfiber Works Best
Paper towels often leave lint and tiny scratches on glass. Microfiber cloths have split fibers that grab dirt and absorb liquid without leaving residue. Use a fresh, dry microfiber cloth for buffing after cleaning to eliminate any remaining streaks.
The S-pattern Technique
Wiping in a circular motion might seem logical, but it actually spreads streaks around. Instead, start at the top left and wipe in a continuous S-shaped pattern across the mirror. This ensures you cover the entire surface without overlapping wet edges, which is what causes streaks.
Diy Cleaner Vs. Store-bought
A 50/50 mix of distilled water and white vinegar works wonders on mirrors—just avoid getting it on the frame if it's wood. For tougher spots like hairspray or toothpaste splatters, a drop of dish soap in the mix helps cut through grime. Store-bought glass cleaners are fine too, but make sure they're ammonia-free to avoid damaging mirror coatings.
10. Floor and Baseboard Detail
Floors and baseboards often get a quick once-over, but they deserve more attention. Hair, dust, and grime love to hide in corners and along edges, making the whole bathroom feel less fresh. A thorough floor and baseboard detail can transform the room's appearance without much extra effort.
Start by sweeping or vacuuming the floor to remove loose debris, especially in corners and under the vanity. Then mop with a disinfectant cleaner, focusing on high-traffic areas. For baseboards, use a damp microfiber cloth to wipe away dust and splashes.
Pay extra attention to the corners where hair and dust collect—use a small brush or an old toothbrush to dislodge stubborn buildup. Finish by drying the baseboards with a clean cloth to prevent water spots.
Sweep Before You Mop
Always remove loose dirt first. A quick sweep or vacuum prevents you from pushing grime around with the mop. Use a crevice tool to get into tight corners and along baseboards.
Disinfect The Floor
Choose a bathroom-safe disinfectant that kills germs without damaging tile or grout. Mop in a figure-eight pattern to cover evenly, and let the floor air-dry for maximum effectiveness.
Wipe Down Baseboards
Baseboards collect dust and toothpaste splatters. Wipe them with a damp cloth, then dry immediately. For stubborn spots, a mild all-purpose cleaner works well.
Don't Forget The Corners
Corners are magnets for hair and dust bunnies. Use a small brush or a vacuum attachment to clean them out. This simple step makes a big difference in overall cleanliness.
11. Shower Curtain and Liner Care
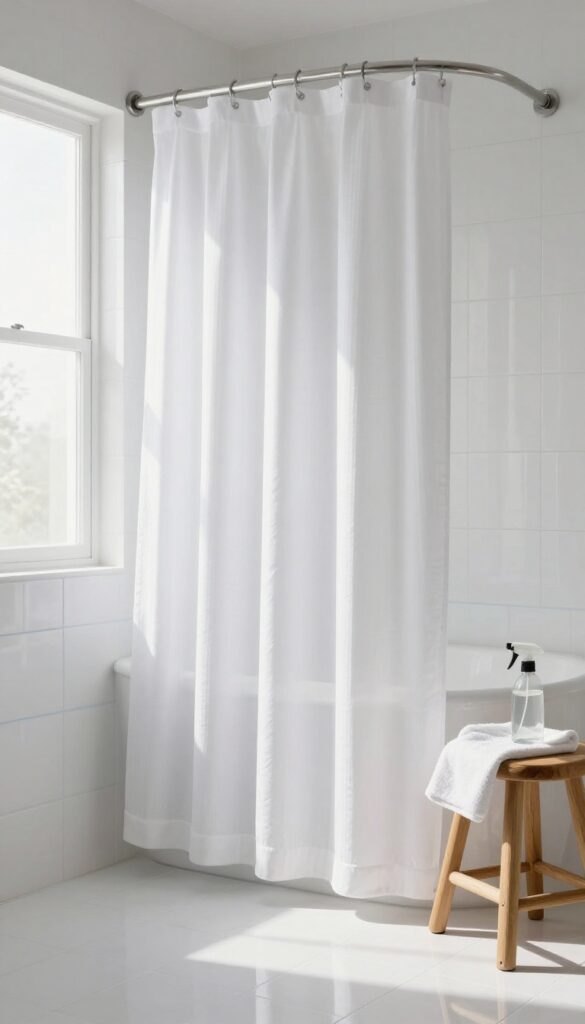
Your shower curtain and liner are on the front lines of every bath and shower, constantly battling soap scum, mildew, and hard water stains. Neglecting them can turn your fresh bathroom into a musty, moldy mess. A little regular care keeps them looking clean and extends their life significantly.
Fabric Curtains: Wash Monthly
Machine wash fabric shower curtains on a gentle cycle with warm water and a mild detergent. Add a cup of white vinegar to the rinse cycle to kill mold and remove soap residue. Tumble dry on low or hang them back up immediately to prevent wrinkles.
If your curtain has a plastic liner, remove it before washing.
Plastic Liners: Replace When Moldy
Plastic liners are cheap and disposable, so don't hesitate to toss them once you see black spots or stubborn mildew. To extend their life, spray them weekly with a 50/50 mix of water and white vinegar, then rinse. If you prefer a more durable option, consider a PEVA or fabric liner that can be wiped down easily.
Quick Mildew Spray For Both
Mix one part bleach with four parts water in a spray bottle. After each shower, give the curtain and liner a quick spritz, especially along the bottom edge where water pools. Let it sit for a few minutes, then rinse with warm water.
This simple habit prevents mildew from taking hold and keeps your bathroom smelling fresh.
12. Toothbrush Holder and Soap Dish
Your toothbrush holder and soap dish sit in a damp environment, making them prime real estate for bacteria and mold. They often get ignored during regular cleaning, but a quick weekly soak can keep them sanitary and fresh.
These small items harbor more germs than you might think. A simple routine of soaking them in hot water and vinegar once a week will kill bacteria and dissolve residue. Let them air dry completely before returning toothbrushes or soap.
Why Weekly Soaking Matters
Toothbrush holders collect toothpaste drips and moisture, creating a breeding ground for germs. Soap dishes trap water and soap scum, which can lead to mold. A weekly vinegar soak sanitizes without harsh chemicals.
How To Do It Right
Remove all items, then fill a bowl with equal parts hot water and white vinegar. Submerge the holder and dish for at least 30 minutes. Scrub with a small brush to remove any stuck-on residue, rinse with warm water, and dry thoroughly.
Extra Tips For Long-lasting Cleanliness
Choose holders with drainage holes to prevent standing water. For stubborn mineral deposits, let them soak longer or use a paste of baking soda and vinegar. Replace plastic holders if they become cracked or discolored.
13. Trash Can Sanitizing
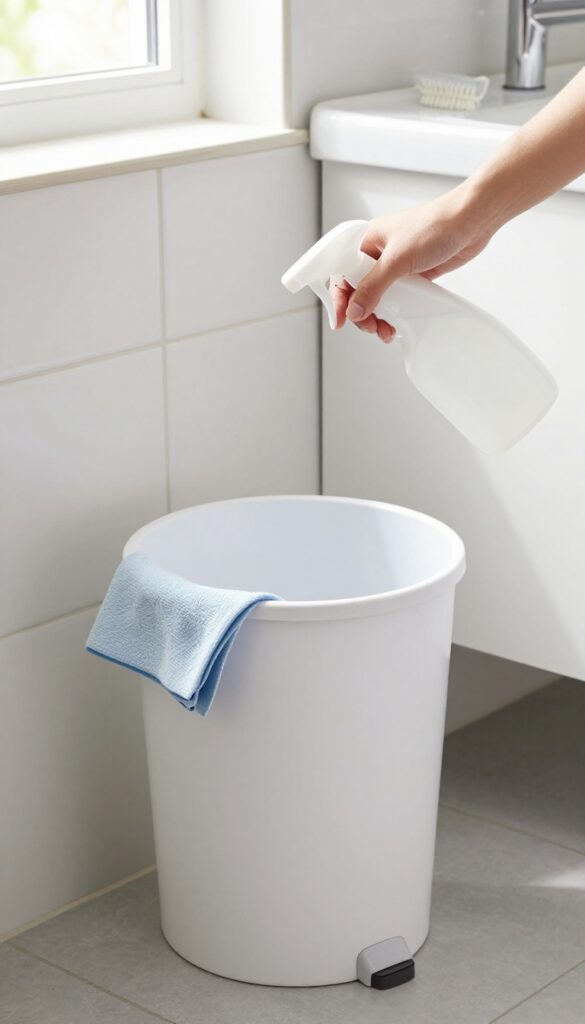
The trash can is one of the most overlooked items in a bathroom. Even with a liner, spills and moisture can create a breeding ground for bacteria and odors. Giving it a weekly clean keeps the whole room smelling fresh and prevents grime from building up over time.
Why Weekly Cleaning Matters
Bathroom trash cans collect damp items like used tissues, cotton balls, and disposable razors. That moisture seeps through tiny liner tears and settles at the bottom. Over a few weeks, it turns into a sticky film that attracts mold and releases musty smells.
A quick weekly wipe prevents that buildup and keeps odors at bay.
How To Sanitize Properly
Start by removing the liner and any debris. Spray the inside of the bin with a disinfectant or a mixture of vinegar and water. Let it sit for a minute, then scrub with a brush or sponge, paying extra attention to the bottom and corners.
Rinse with water and dry with a clean cloth before inserting a new liner.
Pro Tips For Lasting Freshness
Place a dryer sheet or a few drops of essential oil on a cotton ball at the bottom of the can before adding a new liner. This absorbs odors and releases a light scent every time you toss something in. Also, consider using a bin with a lid to contain smells and keep the can cleaner longer.
14. Towel and Mat Rotation
Towels and bath mats are the hardest-working textiles in your bathroom, absorbing moisture, soap residue, and dead skin cells every single day. Left too long, they become a breeding ground for bacteria, mildew, and musty odors. A simple rotation system keeps them fresh, fluffy, and hygienic without any extra effort.
Swap out towels and bath mats every three days. Wash them in hot water to kill germs and keep them fluffy.
Why Every Three Days?
After three days of use, towels and mats have absorbed enough moisture to support microbial growth. Studies show that unwashed towels can harbor E. coli and staph within a few days. Sticking to a three-day cycle stops bacteria before it multiplies.
Hot Water Wash Rules
Always wash towels and mats in hot water (at least 140°F) to effectively kill bacteria and dust mites. Use a heavy-duty detergent and skip fabric softener—it coats fibers and reduces absorbency. Add a half-cup of white vinegar to the rinse cycle once a month to remove buildup and restore fluffiness.
Create A Rotation System
Keep two or three sets of towels and mats per bathroom. On rotation day, move the used set to the laundry and bring out a fresh set. Store extras in a linen closet or under the sink.
Label shelves by day of the week if you want a foolproof system.
15. Caulk Inspection and Touch-Up
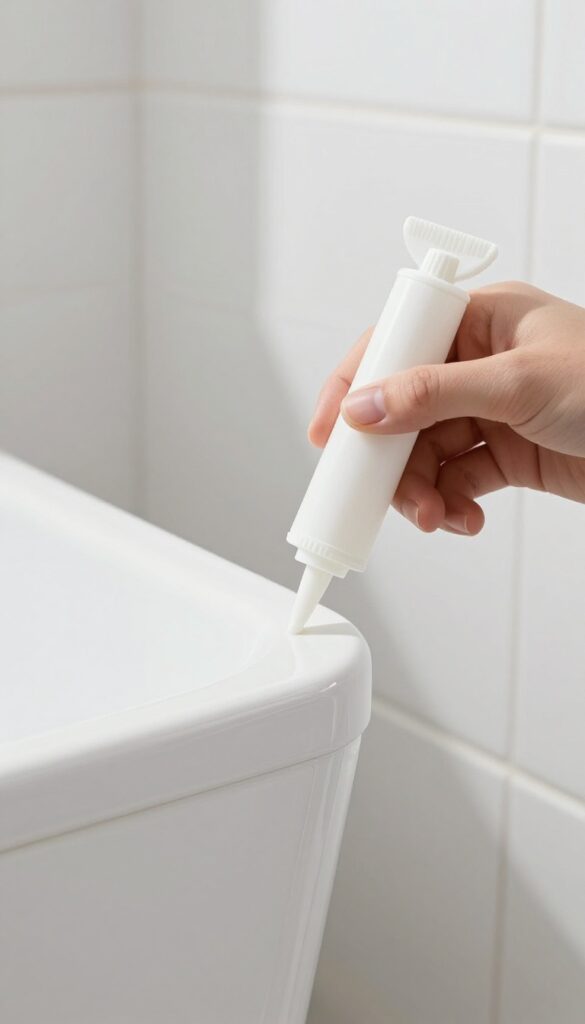
That neat line of caulk around your tub and sink does more than just look clean—it seals out moisture. Once it cracks or peels, water sneaks behind tiles and under fixtures, leading to mold and rot. A quick monthly check can save you from expensive repairs down the line.
Caulk is your bathroom’s first defense against water damage, but it doesn't last forever. Over time, it shrinks, cracks, or pulls away from surfaces. Inspecting it monthly takes just a minute and helps you catch problems early.
When you see any separation or discoloration, it's time to remove the old caulk and apply a fresh bead. Use a mildew-resistant silicone caulk for best results. Let it cure fully before exposing it to water.
How To Spot Trouble
Look for gaps, dark spots, or peeling edges. Run your finger along the caulk line—if it feels rough or lifts up, it's failing. Pay special attention to corners and areas near the showerhead where moisture hits hardest.
Quick Touch-up Steps
Remove old caulk with a razor scraper or caulk remover tool. Clean the area with rubbing alcohol to remove soap residue. Apply a thin, even bead of fresh caulk, then smooth it with a wet finger or caulk tool.
Let it dry for 24 hours before using the shower or sink.
16. Light Fixtures and Switch Plates
Light fixtures and switch plates are easy to ignore until they're coated in dust and grime. A quick wipe not only makes the room feel brighter but also helps reduce allergens floating around.
Dust First, Then Wipe
Start by dusting light fixtures with a microfiber cloth or a duster attachment on your vacuum. This prevents dirt from turning into a paste when you apply a damp cloth. For glass globes, remove them if possible and wash with mild soapy water.
Switch Plates Need Love Too
Switch plates collect fingerprints, toothpaste splatters, and general grime. Wipe them down with a damp cloth and a gentle cleaner. For stubborn spots, a magic eraser works wonders without damaging the plastic.
Don't Forget The Exhaust Fan
The exhaust fan grille is a dust magnet. Vacuum it monthly and wipe the blades with a damp cloth. A clean fan runs more efficiently and helps prevent moisture buildup in the bathroom.
17. Seasonal Deep Clean
Twice a year, your bathroom deserves a full reset. A seasonal deep clean goes beyond the weekly wipe-down, targeting every nook and cranny that routine cleaning misses. This isn't just about appearances—it prevents long-term grime buildup and keeps your bathroom feeling fresh for months.
Set aside a few hours to empty the bathroom completely. Remove toiletries, bath mats, trash cans, and any decor. This gives you unobstructed access to every surface, from the back of the toilet to the corners behind the sink.
Start high and work your way down: dust light fixtures, wipe down walls, then scrub the floor last. Pay special attention to areas that collect dust and soap scum, like the top of the shower door track or the shelf above the toilet.
Behind The Scenes
Pull out the toilet and sink cabinet to clean behind them. Use a microfiber mop or a long-handled duster to reach under the sink and behind the toilet base. These spots often hide hair, dust bunnies, and even mildew.
A thorough vacuum and damp wipe will eliminate hidden allergens.
Grout And Caulk Refresh
Inspect grout lines and caulk around the tub, shower, and sink. Scrub grout with a stiff brush and a baking soda paste or a commercial grout cleaner. If caulk is cracked or discolored, remove it and apply fresh caulk.
This simple step instantly makes the bathroom look newer.
Deep Clean Fixtures
Remove showerheads and soak them in vinegar to dissolve mineral deposits. Wipe down faucets and handles with a vinegar solution to restore shine. Don't forget the toilet's base and the area around the flush lever.
A deep clean restores function and sparkle.
FAQ
How often should I deep clean my bathroom?
Aim for a deep clean every two to four weeks, depending on usage. High-traffic bathrooms may need weekly deep cleaning.
What's the best natural cleaner for bathroom grout?
A paste of baking soda and white vinegar works well. Apply it, let it sit for 15 minutes, then scrub with a brush.
How do I prevent mold in the shower?
Keep the bathroom ventilated, use a squeegee on walls after showering, and wash the shower curtain regularly.
Can I use bleach on all bathroom surfaces?
No, bleach can damage some materials like natural stone or certain metals. Always test in an inconspicuous area first.
What's the easiest way to clean a toilet bowl?
Use a toilet bowl cleaner with bleach, let it sit for 10 minutes, then scrub with a brush and flush.
Conclusion
A fresh bathroom doesn't require a full-day scrub session. Pick two or three checklist items that target your biggest trouble spots—like the shower curtain or grout—and weave them into your weekly routine. Small, consistent efforts prevent grime from building up and keep your space inviting.
The real secret is finding a rhythm that sticks. Maybe you wipe down the sink daily and tackle the toilet bowl every few days. Over time, these micro-habits save you from marathon cleaning sessions, leaving you with a bathroom that feels clean and welcoming every single day.