23 Bathroom Cleaning Hacks for a Faster Weekly Reset
A sparkling bathroom doesn't have to mean hours of scrubbing. These 23 cleaning hacks cut through soap scum, hard water stains, and grime faster than you'd expect.
Most tricks use everyday items like vinegar, baking soda, or even a dishwasher tablet to tackle the toughest spots. You'll learn how to prevent buildup before it starts and clean smarter, not harder.
From shower doors to exhaust fans, each tip targets a specific problem with minimal effort. Get ready to reset your bathroom in record time.
1. Use a Dishwasher Tablet to Clean Your Shower Door
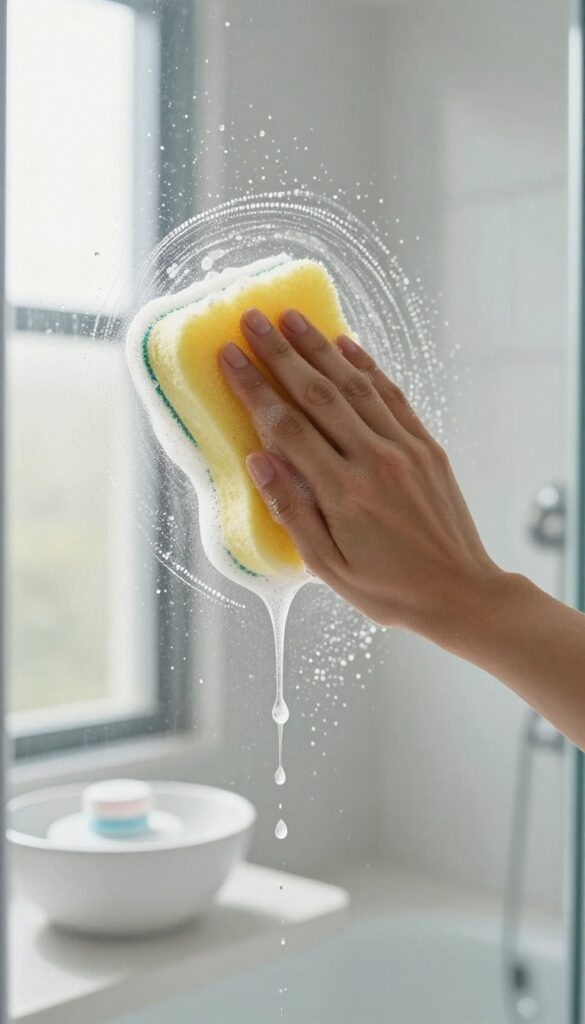
Your shower door looks cloudy no matter how much you wipe it? That’s soap scum and hard water minerals bonding to the glass. A dishwasher tablet cuts through that gunk way better than glass cleaner ever could.
Drop one tablet into a bowl of warm water and let it dissolve. Dip a sponge or microfiber cloth into the solution and scrub the glass in circular motions. Rinse thoroughly with water and dry with a squeegee for a streak-free shine.
The enzymes in the tablet break down grease and mineral deposits fast.
Why It Works So Well
Dishwasher tablets contain surfactants and enzymes designed to attack baked-on food and grease. Those same ingredients dissolve soap scum and hard water stains on glass. It’s a stronger cleaner than vinegar for tough buildup, but still gentle enough for glass surfaces.
How To Avoid Residue
After scrubbing, rinse the door with hot water until no suds remain. Any leftover solution can dry into a film. Follow up with a squeegee or a clean, dry microfiber cloth to prevent water spots from forming.
When To Skip This Hack
Don’t use dishwasher tablets on frosted or etched glass—they can scratch the surface. Also avoid them on acrylic or plastic shower doors; stick to mild soap and water instead. Always test a small hidden area first.
2. Squeegee After Every Shower
Soap scum and water spots are the main reasons bathrooms look grimy. The fix is ridiculously simple: keep a squeegee in the shower and use it for 10 seconds after every rinse. This single habit prevents buildup before it starts, meaning you'll scrub glass and tile way less often.
It's the kind of hack that pays off every single day without any extra effort.
Why It Works So Well
Hard water contains minerals that leave white spots when they dry. Soap scum forms when soap residue mixes with those minerals. By removing the water immediately, you stop both from bonding to the surface.
A squeegee is more effective than a towel because it doesn't leave lint and reaches corners easily.
The Right Squeegee For The Job
Look for a squeegee with a rubber blade and a hook so you can hang it right inside the shower. A 12-inch blade works for most standard doors. Replace the blade every few months when it starts to streak.
Keep a small suction cup holder on the tile or glass so it's always within reach.
Make It A Habit Without Thinking
Pair the squeegee with something you already do, like turning off the water or stepping out. Even a quick top-to-bottom swipe on the glass and walls makes a difference. If you forget, no big deal, just do it next time.
After a week, it'll feel automatic.
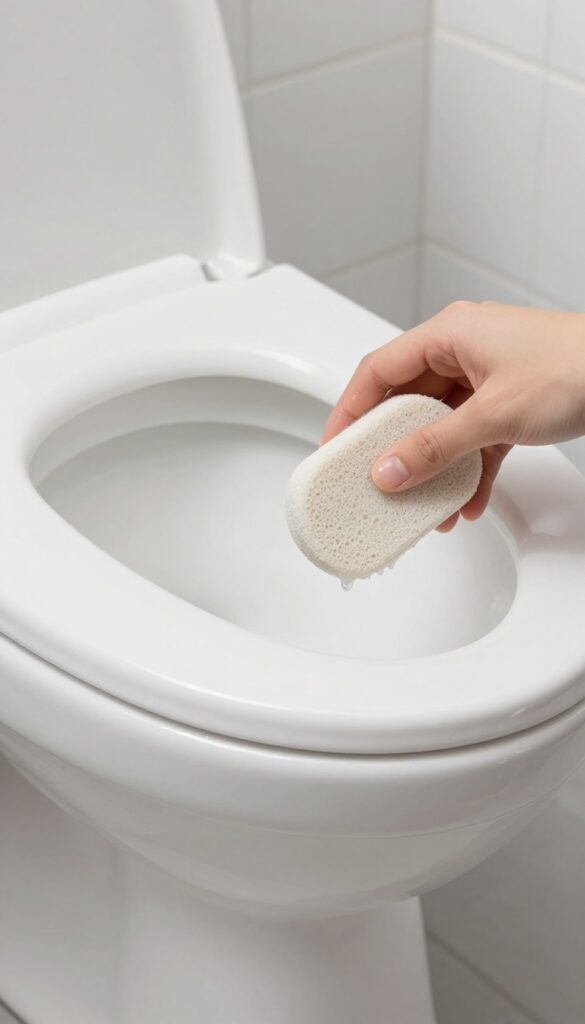
3. Clean the Toilet Bowl with Baking Soda and Vinegar
Forget those harsh chemical toilet bowl cleaners that leave your eyes watering. A simple combo of baking soda and vinegar can tackle stains and odors just as effectively, without the toxic fumes. This method is cheap, eco-friendly, and uses ingredients you probably already have in your pantry.
Start by sprinkling about a cup of baking soda around the inside of the toilet bowl, making sure to cover the water line and any stubborn stains. Then pour in a cup of white vinegar—it will fizz and bubble as it reacts with the baking soda. Let that mixture sit for 10 minutes to break down grime and mineral deposits.
After the fizzing subsides, grab a toilet brush and scrub the entire bowl, paying extra attention to rings and hard water stains. Finally, flush to rinse everything away. Your bowl will be clean, fresh, and free of harsh chemical residue.
Why This Works So Well
Baking soda is a mild abrasive that gently scrubs away stains without scratching porcelain. Vinegar is acidic, which helps dissolve mineral deposits and soap scum. When combined, the fizzy reaction helps lift dirt from surfaces, making it easier to scrub away.
Plus, vinegar neutralizes odors naturally.
Pro Tips For Best Results
For tough rings, let the baking soda and vinegar sit for up to 30 minutes before scrubbing. You can also add a few drops of essential oil (like tea tree or lemon) to the vinegar for a fresh scent. If your toilet has heavy limescale, use a pumice stone gently after the soak—but only on wet porcelain to avoid scratches.
How Often To Do This
This method is gentle enough for weekly use. If you clean your toilet once a week with baking soda and vinegar, you'll prevent buildup and keep the bowl sparkling without ever needing harsh chemicals. For maintenance, a quick scrub with just baking soda between deep cleans works wonders.
4. Use a Pumice Stone on Hard Water Rings
Hard water rings in the toilet bowl can look stubborn, but a pumice stone makes quick work of them. The stone is soft enough to avoid scratching porcelain yet abrasive enough to lift mineral deposits. Just wet it first—dry rubbing can leave marks.
Start by wetting the pumice stone thoroughly. Gently rub the ring in a circular motion, letting the stone do the work. Rinse and check your progress; repeat if needed.
This method is faster than scrubbing with a brush and avoids harsh chemicals.
Why Pumice Works
Pumice is a porous volcanic rock that acts as a mild abrasive. When wet, it breaks down calcium and lime deposits without damaging the porcelain glaze. It's a natural alternative to acidic cleaners.
Step-by-step Process
- Wet the pumice stone completely. 2.
Gently rub the hard water ring with light pressure. 3. Rinse the area and stone frequently.
- Wipe away residue with a cloth. 5.
Repeat if necessary.
Tips For Best Results
Always keep the stone wet to prevent scratching. Use a separate stone for toilet cleaning to avoid cross-contamination. Store it dry after use.
If the ring is thick, let the stone soak for a few minutes first.
5. Make a DIY Grout Cleaner with Hydrogen Peroxide and Baking Soda
Grout lines can turn dingy fast, especially in high-moisture bathrooms. Instead of buying a specialty cleaner, whip up a paste with hydrogen peroxide and baking soda. It’s cheap, non-toxic, and surprisingly effective at lifting embedded dirt and mildew.
Mix three parts baking soda with one part hydrogen peroxide to form a thick paste. Apply it directly to grout lines using an old toothbrush or a small spatula. Let it sit for about 10 minutes—the peroxide will bubble and break down grime.
Then scrub gently with a damp toothbrush and rinse with water. For stubborn spots, add a few drops of dish soap to the paste. This method works on floor and wall tile alike, restoring grout to its original color without harsh fumes.
Why This Combo Works So Well
Baking soda is a mild abrasive that scrubs without scratching tile. Hydrogen peroxide is a natural bleaching agent and disinfectant that kills mold spores. Together, they create an oxygenating reaction that lifts stains from porous grout.
Pro Tips For Best Results
Always test on an inconspicuous area first, especially if your grout is colored. Use a stiff-bristled brush for deeper grooves. For large areas, apply the paste with a grout brush or a sponge, then let it sit before scrubbing in sections.
Rinse thoroughly to avoid residue.
When To Avoid This Method
Don't use this paste on unsealed natural stone tiles like marble or limestone—the peroxide can etch the surface. Also, avoid it if your grout is already cracked or crumbling; seal those gaps first to prevent moisture from seeping behind tiles.
6. Use a Dryer Sheet to Dust Baseboards and Blinds
Baseboards and blinds collect dust fast, and wiping them down can feel like a chore. A used dryer sheet makes it almost effortless. The anti-static properties help trap dust instead of scattering it, and you get a subtle fresh scent without any spray.
Why It Works
Dryer sheets are designed to reduce static cling, which is exactly what you need for dusting. The fabric softener coating grabs dust particles and holds them, so they don't fly into the air or settle back down. Plus, the sheet leaves a thin residue that repels dust for a few days, meaning less frequent dusting.
How To Do It
Grab a used dryer sheet from your laundry (a fresh one works too, but used is fine). Run it along the top edge of baseboards, then down the front. For blinds, close them flat and wipe each slat from top to bottom.
Flip the sheet as it gets dirty. No need for extra cleaner – the sheet does it all.
Bonus: Freshen Vents And Light Fixtures
Use the same dryer sheet to dust air vents, ceiling fan blades, and light fixtures. It picks up dust without scratching surfaces. The light fragrance helps deodorize the room gently.
Just be careful around heat sources – keep the sheet away from hot bulbs.
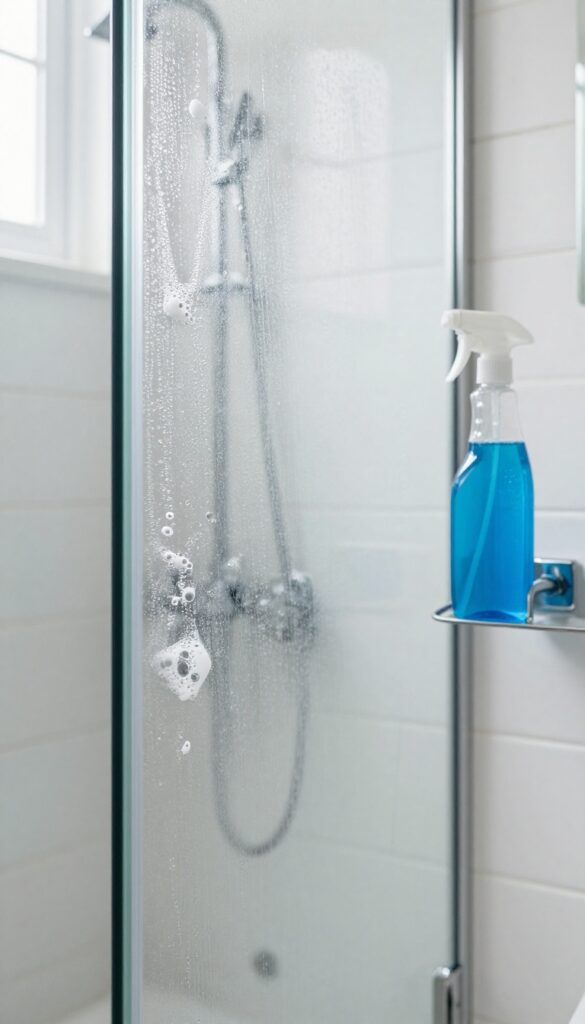
7. Spray Shower Walls with a Daily Shower Spray

You know that feeling when you step into a shower that already looks clean? That's the magic of a daily spray. It takes 10 seconds after your shower and saves you from scrubbing later.
The trick is simple: mix up a solution that cuts through soap scum and hard water before they set in.
This hack is all about prevention. A quick mist after every shower keeps your walls, glass doors, and fixtures from accumulating that stubborn film. It's the easiest way to maintain a clean shower without any elbow grease.
The Perfect Diy Spray Recipe
Mix equal parts water and white vinegar in a spray bottle. Add a few drops of dish soap (Dawn works great) to help break down oils. Shake gently, and you're ready.
No need for expensive store-bought sprays—this one is just as effective.
How To Use It Effectively
After your last rinse, while the walls are still wet, spray the solution generously on all surfaces. Let it sit for a minute, then do nothing else. The vinegar neutralizes soap residue, and the dish soap prevents water spots.
Over time, you'll notice less buildup.
Pro Tips For Best Results
Use a clean spray bottle to avoid introducing bacteria. If you have natural stone or marble, skip the vinegar—use a pH-neutral cleaner instead. For glass doors, follow up with a squeegee once a week to keep them crystal clear.
8. Clean the Showerhead with a Vinegar Soak
A clogged showerhead can ruin your morning with weak, uneven spray. Hard water deposits and mineral buildup are usually to blame, but you don't need a plumber to fix it. A simple overnight vinegar soak restores full water flow with almost no effort.
Fill a plastic bag with enough white vinegar to submerge the showerhead. Tie the bag securely around the neck using a rubber band or twist tie, making sure the showerhead is fully immersed. Let it soak overnight—the acetic acid in the vinegar dissolves calcium and lime deposits.
In the morning, remove the bag and run the shower for a few minutes to rinse away loosened debris. For stubborn buildup, scrub gently with an old toothbrush before rinsing.
Why Vinegar Works Best
White vinegar is mildly acidic, which breaks down alkaline mineral deposits without damaging chrome or metal finishes. It's cheaper and safer than commercial descalers, and you probably already have it in your pantry. Avoid using bleach or harsh chemicals, as they can corrode the finish over time.
When To Use A Deeper Clean
If your showerhead has severe buildup or hasn't been cleaned in months, you might need a second soak or a gentle scrub with a toothbrush. For removable showerheads, you can also disassemble and soak the parts in a bowl of vinegar for a few hours. Always rinse thoroughly afterward.
Prevent Future Clogs
To keep your showerhead spraying strong, do a vinegar soak every three to six months. Wiping the showerhead dry after each use also reduces mineral accumulation. If you have hard water, consider installing a showerhead filter to minimize buildup.
9. Use a Magic Eraser on Scuff Marks and Stains
Scuff marks from shoes, crayon doodles from kids, or mystery stains on walls and doors can make a bathroom look grimy even after a deep clean. A magic eraser is your secret weapon for these stubborn spots. Dampen one, give it a gentle squeeze, and watch marks disappear with minimal effort.
Where It Works Best
Magic erasers excel on painted walls, baseboards, doors, and even sinks. They also tackle scuffs on vinyl or laminate flooring. Avoid using them on glossy or delicate surfaces like polished chrome or natural stone, as the mild abrasive can dull the finish.
How To Use It Right
Wet the eraser until it's damp but not dripping. Gently rub the mark in a circular motion—no need for heavy pressure. The eraser will foam slightly as it lifts the stain.
Rinse the area with a damp cloth afterward to remove any residue.
Pro Tip: Cut Into Small Pieces
Magic erasers are pricey, but you can stretch them by cutting each one into four smaller cubes. Use a fresh piece for each cleaning session. They dry out quickly, so store them in a sealed bag to keep them moist longer.
Safety Note
Always test on an inconspicuous area first, especially if you're unsure about the paint finish. Keep out of reach of children and pets—the eraser looks like a sponge but is not for cleaning dishes or skin.
10. Keep a Trash Can with a Lid to Hide Odors
A small trash can with a lid is a simple upgrade that makes a big difference. It keeps used cotton rounds, floss, and other bathroom waste out of sight and traps smells. Plus, it looks cleaner than an open bin.
Choose a lidded can that fits your bathroom size. A stainless steel or plastic step can works well. Line it with a small bag and empty it weekly to prevent odors from building up.
This hack is especially useful if your bathroom is small or lacks ventilation.
Why A Lid Matters
An open trash can lets odors escape every time you toss something in. A lid traps smells inside, keeping the air fresh. It also hides unsightly waste, so your bathroom looks tidy even between cleanings.
Picking The Right Can
Look for a can that's compact but not too small. A 2- to 4-gallon size works for most bathrooms. A step pedal or touch-top lid makes it easy to use without touching the bin.
Stainless steel resists rust and is easy to wipe down.
Maintenance Tips
Empty the can weekly, even if it's not full. Wipe the inside with a disinfecting wipe or spray when you change the bag. Sprinkle a little baking soda in the bottom of the empty can to absorb any lingering odors.
11. Use a Toothbrush for Tight Spots
A toothbrush is one of the most underrated cleaning tools. Instead of tossing your old one, give it a second life scrubbing the nooks and crannies that sponges and cloths just can't reach.
Faucet bases, drain covers, and tile corners are magnets for grime. A toothbrush bristles into those tight gaps, dislodging buildup without scratching surfaces. Keep one dedicated to cleaning and store it with your supplies so it's always ready.
Target The Grout Lines
Grout between tiles collects soap scum and mildew. Dip a dry toothbrush in baking soda, scrub along the lines, then rinse. It whitens without harsh chemicals.
Clean Faucet Bases
The area where the faucet meets the sink or counter traps gunk. Use a toothbrush with a dab of toothpaste to polish away residue and restore shine.
Detail Drain Covers
Hair and soap build up around drain covers. Scrub the slots and edges with a toothbrush, then flush with hot water. It prevents clogs and odors.
12. Clean the Exhaust Fan Cover
The exhaust fan works hard to pull moisture and odors out of your bathroom, but when its cover gets caked with dust, it can't do its job. A dirty fan also becomes a breeding ground for mold spores. Cleaning it is quick and makes a real difference in air quality.
How Often To Clean
Aim to clean the exhaust fan cover every three months. If you notice dust buildup sooner or the fan sounds louder than usual, it's time for a quick clean. Regular maintenance keeps the fan running efficiently and quietly.
Step-by-step Cleaning
First, turn off the fan and switch off the breaker for safety. Gently remove the cover—most pop off or have clips. Vacuum the cover and the fan blades with a brush attachment to remove loose dust.
Then soak the cover in warm, soapy water for 10 minutes. Scrub with a soft brush, rinse, and let it dry completely before reattaching.
Why It Matters
A clean fan moves more air, which helps prevent condensation on mirrors and walls. Less moisture means less mold and mildew growth. Plus, it reduces strain on the motor, extending the fan's life.
13. Use a Lint Roller to Pick Up Hair and Dust
Hair and dust seem to multiply in the bathroom, clinging to rugs, curtains, and even the toilet base. A lint roller is a quick fix that grabs debris without bending over with a vacuum or dusting each surface individually. Keep one in the bathroom cabinet and roll over trouble spots during your weekly reset—it takes seconds and makes a visible difference.
Tackle Bathroom Rugs And Mats
Bathroom rugs trap hair, lint, and dust that vacuums sometimes miss. Run a lint roller over the entire surface, focusing on edges and corners where debris collects. For shaggy rugs, roll in the direction of the fibers to avoid pulling them out.
This method is especially useful for quick touch-ups between deep cleans.
Freshen Fabric Shower Curtains And Liners
Fabric shower curtains and liners catch dust and hair from the air and splashes. A lint roller picks up surface debris without needing to remove or wash the curtain. Roll along the bottom edge and any visible dirty spots.
For plastic liners, use a dry microfiber cloth instead, as the roller may not stick well.
Clean The Toilet Base And Hard-to-reach Spots
The toilet base, especially around the hinges and behind the bowl, collects dust bunnies and hair. A lint roller reaches these tight spaces better than a cloth. Simply roll along the base and sides to lift debris.
For a deeper clean, follow up with a disinfecting wipe.
Quick Dusting For Vents And Light Fixtures
Bathroom vents and light fixtures gather dust that can blow back into the room. Use a lint roller to gently pick up dust from vent covers and fixture surfaces. This is faster than using a duster and doesn't send dust flying into the air.
Just press and lift until the roller loses its stickiness.
14. Soak Faucet Aerators in Vinegar
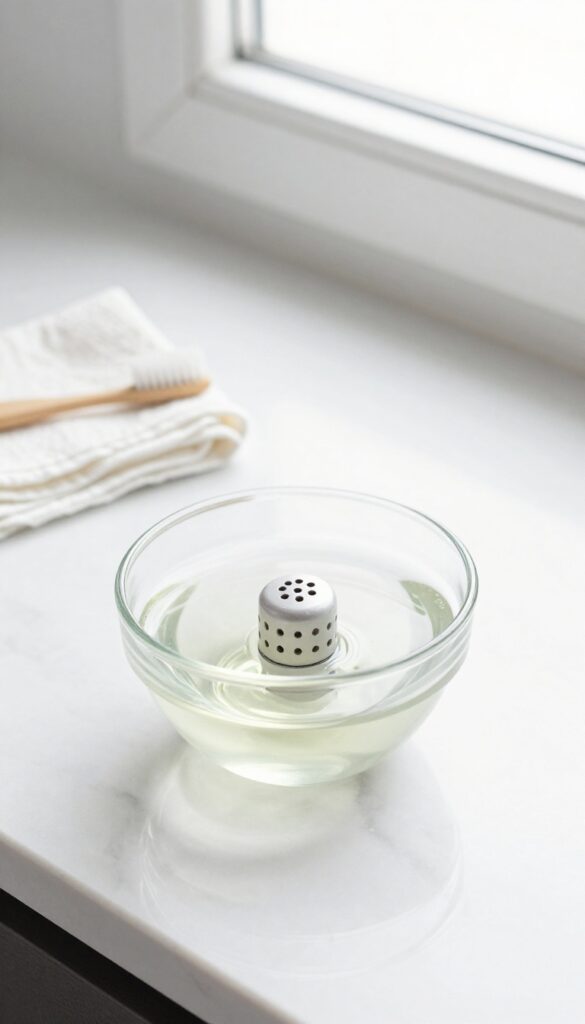
If your faucet has been sputtering or delivering a weak stream, mineral deposits are likely clogging the aerator. This tiny mesh screen at the tip traps debris, but over time it gets crusty with hard water buildup. The fix takes almost no effort and restores full water pressure.
Unscrew the aerator by hand or with pliers (wrap the jaws in tape to avoid scratches). Rinse off loose grit, then drop it into a small bowl of white vinegar. Let it soak for at least an hour—overnight if the buildup is heavy.
The vinegar dissolves calcium and lime deposits without harsh scrubbing. After soaking, scrub the aerator with an old toothbrush to dislodge any remaining particles. Rinse thoroughly under running water and screw it back on.
You'll notice an immediate improvement in flow and spray pattern. Do this every few months to keep faucets performing like new.
Why Aerators Get Clogged
Hard water contains dissolved minerals that accumulate on the aerator's fine mesh. Over time, the deposits restrict water flow and can even cause uneven spray. If you notice a sudden drop in pressure, the aerator is usually the culprit.
Step-by-step Cleaning
First, close the drain to avoid losing small parts. Unscrew the aerator counterclockwise. If it's stuck, use a wrench or pliers gently.
Place the aerator in a cup of white vinegar—make sure it's fully submerged. Let it sit for one to two hours. For stubborn buildup, heat the vinegar slightly (not boiling) to speed up the reaction.
After soaking, scrub with a toothbrush, rinse, and reinstall.
Prevent Future Buildup
Install a water softener or a faucet-mounted filter to reduce mineral content. Alternatively, clean aerators every three months as part of your bathroom reset. A quick soak while you clean other areas makes it easy to remember.
15. Use a Spray Bottle with Rubbing Alcohol for Mirrors
Mirrors seem to attract every splash, fingerprint, and toothpaste speck. Commercial glass cleaners work, but they often leave streaks or require extra buffing. Rubbing alcohol cuts through grime instantly and evaporates without residue, giving you a crystal-clear finish in seconds.
Why Rubbing Alcohol Works Best
Rubbing alcohol is a solvent that dissolves oils, smudges, and hard water spots on contact. Unlike water-based cleaners, it evaporates quickly, leaving no streaks or lint behind. It also disinfects the surface, killing germs without harsh fumes.
How To Make The Spray
Fill a spray bottle with 70% or 90% isopropyl alcohol. You can use it straight or dilute it with a little water—about a 2: 1 ratio of alcohol to water works fine. Add a drop of dish soap if you want extra grease-cutting power.
The Best Wiping Technique
Spray the mirror lightly, then wipe with a clean, dry microfiber cloth. Use horizontal strokes on one side and vertical on the other to spot streaks. For large mirrors, work from top to bottom so drips don't ruin your work.
16. Keep a Small Trash Bag for Quick Declutter
Empty shampoo bottles, expired makeup, and half-used lotions tend to pile up on bathroom shelves and shower caddies. Instead of letting them sit until your next deep clean, hang a small trash bag inside a cabinet door. As you wipe down surfaces, toss anything that's empty or past its prime right into the bag.
This hack turns decluttering into a seamless part of your weekly cleaning routine. No more pausing to decide what to keep or carrying items to the main trash can. When the bag is full, tie it off and replace it with a new one.
It's a small setup that keeps your bathroom looking tidy with almost zero extra effort.
Where To Hang The Bag
Choose a cabinet under the sink or a vanity door that's easy to reach. Use a small adhesive hook or a command strip to hold the bag. A standard grocery bag or a small kitchen trash bag works perfectly—just make sure it's not too big to get in the way.
What To Toss As You Clean
As you clean, grab empty bottles, expired products, old razors, and packaging that's been sitting around. Also toss any products you haven't used in months—if it's past its prime, it's just clutter. This habit keeps your shelves and shower caddy from getting overcrowded.
Make It A Weekly Habit
Tie this task to your regular cleaning routine. Every time you wipe down mirrors or scrub the sink, check the bag and toss anything new. Within a few weeks, it'll become automatic, and you'll notice your bathroom stays cleaner longer because there's less stuff to clean around.
17. Use a Dish Soap and Vinegar Mix for Soap Scum
Soap scum builds up fast on shower doors, tiles, and fixtures, turning a clean bathroom into a grimy mess. Instead of reaching for harsh chemicals, mix your own solution with two pantry staples. Blue dish soap and white vinegar combine to cut through grease and dissolve mineral deposits without scrubbing yourself sore.
This simple DIY spray handles even stubborn soap scum with minimal effort. The dish soap breaks down the greasy film, while vinegar dissolves the hard water minerals. Together, they make a powerhouse cleaner that's safe for most surfaces.
How To Make The Mix
Fill a spray bottle with equal parts blue dish soap and white vinegar. Shake gently to combine. The blue color helps you see where you've sprayed.
Avoid using other dish soap colors, as blue works best for visibility and effectiveness.
Application Tips
Spray the mixture generously on soap scum areas like shower doors, glass enclosures, and tile walls. Let it sit for 10–15 minutes to break down the buildup. Then wipe with a damp microfiber cloth or sponge.
For extra stubborn spots, scrub gently with a soft brush.
Rinse And Prevent Residue
After wiping, rinse the surface with warm water to remove any leftover cleaner. Dry with a squeegee or towel to prevent water spots. To keep soap scum from coming back, use this spray weekly as part of your reset routine.
18. Clean the Toilet Brush Holder
The toilet brush holder is one of those things that rarely gets cleaned, but it's a breeding ground for bacteria and odors. Every time you put the brush back, you're trapping moisture and germs inside. A quick monthly deep clean keeps it fresh and sanitary.
Most people forget about the holder until it starts to smell. But with this simple hack, you can keep it germ-free without much effort. The bleach tablet does the heavy lifting, so you just have to rinse and dry.
Why It Matters
The dark, damp environment inside the holder is perfect for bacteria and mold. Over time, that can lead to unpleasant smells and even transfer germs back onto the brush. Cleaning the holder regularly breaks that cycle.
Step-by-step
Remove the brush and fill the holder with hot water. Drop in a bleach tablet (or a splash of bleach if you don't have tablets). Let it sit for 30 minutes, then pour out the water and rinse thoroughly.
Let it air dry before putting the brush back.
Pro Tips
If your holder has stubborn stains, scrub with an old toothbrush before rinsing. For plastic holders, avoid using too much bleach to prevent discoloration. Do this once a month to keep odors away.
19. Use a Microfiber Cloth for Dusting
Dusting seems straightforward, but most cloths just move dust from one spot to another. Microfiber is different—it actually traps particles in its fibers, so you're not just spreading allergens around. A damp microfiber cloth is perfect for wiping down shelves, counters, and toilet tanks, while a dry one works wonders on mirrors and chrome fixtures.
Switching to microfiber cloths is one of the simplest swaps you can make. They're reusable, cost-effective, and way more efficient than feather dusters or paper towels. Keep a stack under the sink so you can grab one quickly during your weekly reset.
Damp For Surfaces
Lightly dampen a microfiber cloth with water or a gentle cleaner. Wipe down your countertops, shelves, and the top of the toilet tank. The moisture helps trap dust and grime, leaving surfaces streak-free.
Rinse the cloth often and switch to a fresh one when it gets dirty.
Dry For Mirrors And Glass
Use a completely dry microfiber cloth on mirrors and glass shower doors. It picks up dust and fingerprints without leaving lint or streaks. For best results, buff in a circular motion and finish with vertical or horizontal strokes to avoid smudges.
Wash And Reuse
Microfiber cloths can be washed and reused dozens of times. Toss them in the laundry with mild detergent—no fabric softener, as that clogs the fibers. Air dry or tumble dry on low.
Keep separate cloths for different tasks (dusting vs. cleaning) to avoid cross-contamination.
20. Keep a Small Squeegee for the Sink and Counter

Water spots on the sink and counter are annoying, especially after you just wiped everything down. A mini squeegee solves this in seconds. Keep one near the faucet and give surfaces a quick pass after brushing your teeth or washing your hands.
It takes five seconds and keeps the area looking dry and spotless all week.
A mini squeegee is one of those tools you didn't know you needed until you try it. It's faster than a towel, doesn't leave lint, and prevents mineral deposits from forming. Hang it on a small hook near the sink so it's always within reach.
Use it after every hand wash or teeth brushing session, and you'll notice your counters stay cleaner with less effort.
Why A Towel Isn't Enough
Towels can leave streaks or fibers behind, especially if they're not perfectly clean. A squeegee removes water completely in one smooth motion. Plus, it doesn't get wet and musty like a hand towel that sits on the counter.
Where To Keep It
Attach a small adhesive hook to the side of your vanity or inside the cabinet door. Hang the squeegee there so it's out of the way but easy to grab. If you have a pedestal sink, a suction cup hook on the tile works too.
Bonus: Use It On The Shower Door Too
The same mini squeegee works great on glass shower doors. Keep a second one in the shower for a quick post-rinse wipe. It cuts down on hard water spots and soap scum buildup significantly.
21. Use a Vacuum with a Crevice Tool for Corners
Corners, baseboards, and tight spaces under the vanity collect dust bunnies and hair that a mop just pushes around. A vacuum with a crevice tool sucks them up in seconds, leaving a cleaner surface for mopping. This simple step prevents dirt from turning into grime and makes your weekly reset faster.
Before you mop, grab your vacuum and attach the crevice tool. Run it along baseboards, inside corners, and under the vanity where dust and hair accumulate. Pay special attention to the gap between the toilet and the wall, and behind the door.
This quick pass removes loose debris so your mop doesn't just smear it around.
Why It Works
Mopping over dust and hair creates a muddy mess that dries into streaks. Vacuuming first lifts dry debris without spreading it, so your cleaning solution can actually dissolve soap scum and grime. The crevice tool reaches into narrow gaps where a broom or cloth can't go.
Best Spots To Target
Focus on corners where walls meet the floor, behind the toilet base, under the sink cabinet edges, and along baseboards. Don't forget the track of sliding shower doors and the gap between the vanity and the wall. These high-traffic areas trap the most debris.
Pro Tips For Efficiency
Use a cordless vacuum for quick grab-and-go cleaning. Keep the crevice tool attached to your vacuum so you don't skip this step. If you have pets, vacuum these spots weekly to prevent fur from building up into clumps.
22. Clean Shower Curtains in the Washing Machine
Shower curtains and liners get gross fast. Mildew, soap scum, and mystery stains pile up, but scrubbing them by hand is a pain. The washing machine does the hard work for you.
Plastic liners and fabric curtains can both go in the wash. Add a cup of white vinegar to the detergent dispenser and toss in a couple of bath towels. The towels scrub the curtain gently while the vinegar cuts through grime and kills odors.
Run a warm or hot cycle, then hang the curtain or liner back up to dry. No dryer needed—the heat can melt plastic liners. For fabric curtains, you can tumble dry on low if you want.
Why Add Towels?
Towels act as gentle scrubbers during the wash cycle. They rub against the curtain and loosen stubborn buildup without damaging the material. Plus, they absorb excess water, helping the curtain dry faster after the spin cycle.
Vinegar Vs. Bleach
Vinegar is safer for most shower curtains and liners. Bleach can yellow plastic and weaken fabric over time. If mildew is really bad, soak the curtain in a vinegar-water solution for 30 minutes before washing.
Drying Tips
Always hang plastic liners immediately after washing. If you leave them bunched up in the washer, they'll wrinkle and may develop new mildew. Fabric curtains can go in the dryer on low heat with a dryer sheet for extra freshness.
23. Use a Timer to Stay on Track

Cleaning the bathroom can feel like a marathon, but you don't have to run it all at once. Setting a timer for 15 minutes turns the task into a quick sprint. You'll be amazed how much you can accomplish when you focus on one thing at a time.
Break your bathroom cleaning into short, timed bursts to avoid burnout. Pick one area—like the toilet, shower, or sink—and give it your full attention for 15 minutes. When the timer goes off, stop or move to the next task.
This method keeps you motivated and prevents the whole job from feeling overwhelming.
Why 15 Minutes Works
Fifteen minutes is long enough to make real progress but short enough to avoid fatigue. It creates a sense of urgency that helps you work faster. Plus, knowing you only have to clean for a short time makes it easier to start.
How To Use The Timer Effectively
Set a timer on your phone or use a kitchen timer. Before you start, gather all supplies for that one task. When the timer rings, stop immediately—even if you're not done.
You can always set another 15-minute block later. This prevents overworking and keeps cleaning sustainable.
Pair With A Reward
After each 15-minute session, give yourself a small reward—like a sip of coffee, a quick stretch, or a glance at your phone. This positive reinforcement makes you more likely to stick with the habit. Over time, you'll train your brain to associate cleaning with a quick payoff.
FAQ
How often should I deep clean my bathroom?
Aim for a deep clean every two to four weeks, with a quick weekly reset to maintain freshness.
Can I use vinegar on natural stone surfaces?
No, vinegar can etch natural stone like marble or granite. Use a pH-neutral cleaner instead.
What's the best way to prevent mold in the bathroom?
Improve ventilation by running the exhaust fan during and after showers, and wipe down wet surfaces regularly.
How do I clean a glass shower door without streaks?
Use a squeegee after each shower, and occasionally clean with a vinegar-water solution and a microfiber cloth.
Is it safe to mix bleach with other cleaners?
Never mix bleach with ammonia, vinegar, or other acids—it creates toxic fumes. Stick to one cleaner at a time.
Conclusion
A sparkling bathroom doesn't require hours of elbow grease. Just a handful of these hacks can cut your cleaning time in half and keep things fresh between deep scrubs. Start with the ones that target your biggest pain points, like soap scum or hard water stains, and build from there.
The real win is consistency—spend five minutes a day wiping down surfaces, and you'll never face a weekend-long bathroom overhaul again. Your cleaner, calmer bathroom is just a few smart habits away.