15 Blow Up Hot Tub Ideas Backyard Spaces Can Fit Easily
A blow up hot tub can turn a plain stretch of concrete into the best seat in the house. The change happens fast, and it costs a fraction of what a built-in model runs. What matters more is where you drop it and how you dress the space around it.
Get those two things right and a basic inflatable feels like a permanent retreat. The setups below work in tight patios, on decks, and even on balconies.
Each one solves a real problem, from privacy to cold weather to storing pool toys. Pick the layout that matches your yard and start soaking.
1. Corner Nook Setup for Small Patios
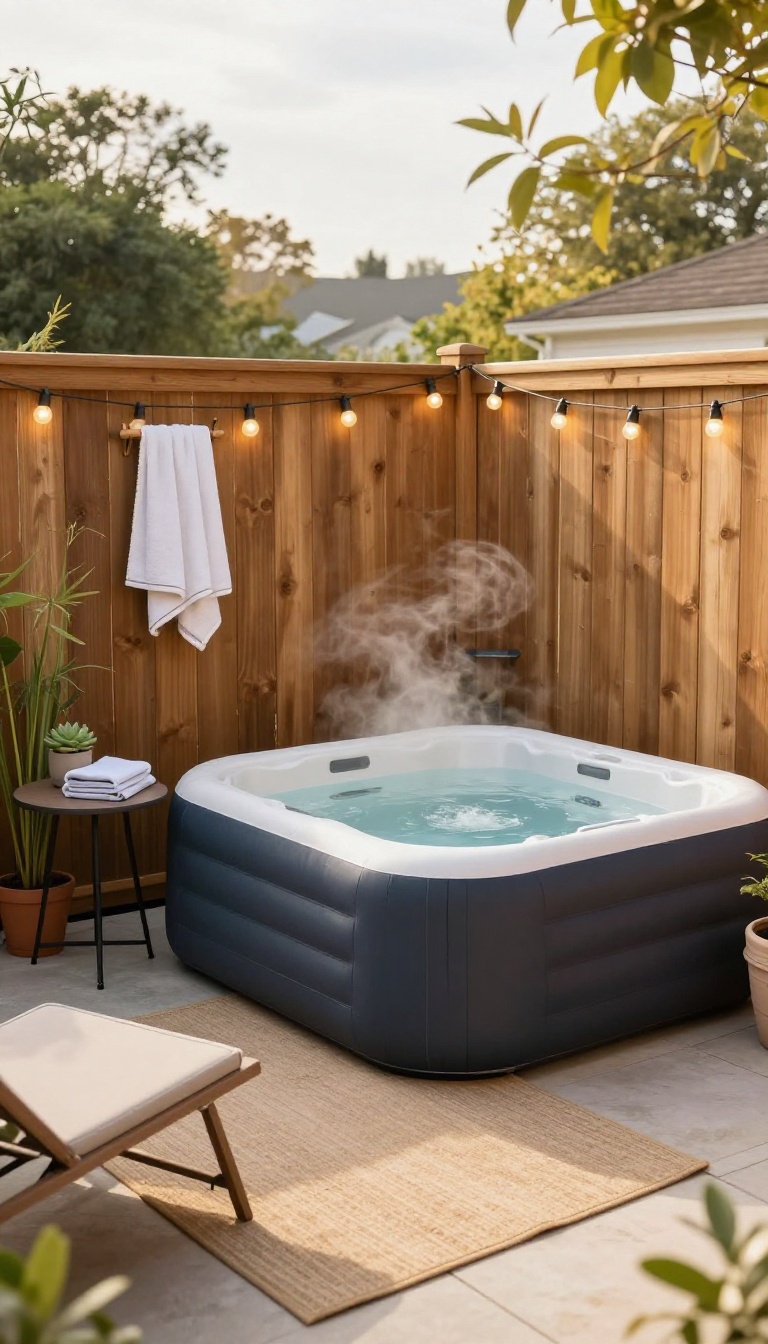
Small patios rarely offer wide-open space, but corners sit empty more often than they should. A square inflatable hot tub slides into that right angle with almost no wasted room. The result is a snug soak spot that feels intentional instead of squeezed in.
Most inflatable tubs come in round shapes, but square models exist and they earn their keep in tight patios. A square tub lines up flush with two walls, leaving the rest of the patio open for a chair or a grill. Even a round tub can work if you push it deep into the corner and accept a little curve against the fence.
The key is treating the corner as a room within a room. Add a small side table, a hook for towels, and maybe a string of lights overhead. That corner now reads as a destination, not a leftover gap.
Measure The Corner Before You Buy
Grab a tape measure and check both walls from the corner out. Inflatable tubs list their inflated size, but add a few inches for the pump and hoses. You want at least a foot of clearance on the open sides so you can step in without brushing the fence.
If the corner is tighter than that, a two-person tub is your best bet.
Build A Simple Privacy Screen
Corner setups often face a neighbor's window or a street. A folding screen or a tall planter with bamboo gives you instant privacy without a permit. Set it on the open side of the tub, leaving the two walls to do the rest.
Just make sure the screen doesn't block airflow around the pump.
Keep The Soak Zone Dry And Tidy
Water splashes out more in a corner because you're stepping over the side. A small indoor-outdoor rug or a slatted mat catches drips and keeps concrete from getting slick. Hang a mesh bag on a nearby hook for flip-flops and a towel.
That way the corner stays clean and you're not tracking water into the house.
2. Deck-Adjacent Placement with Steps
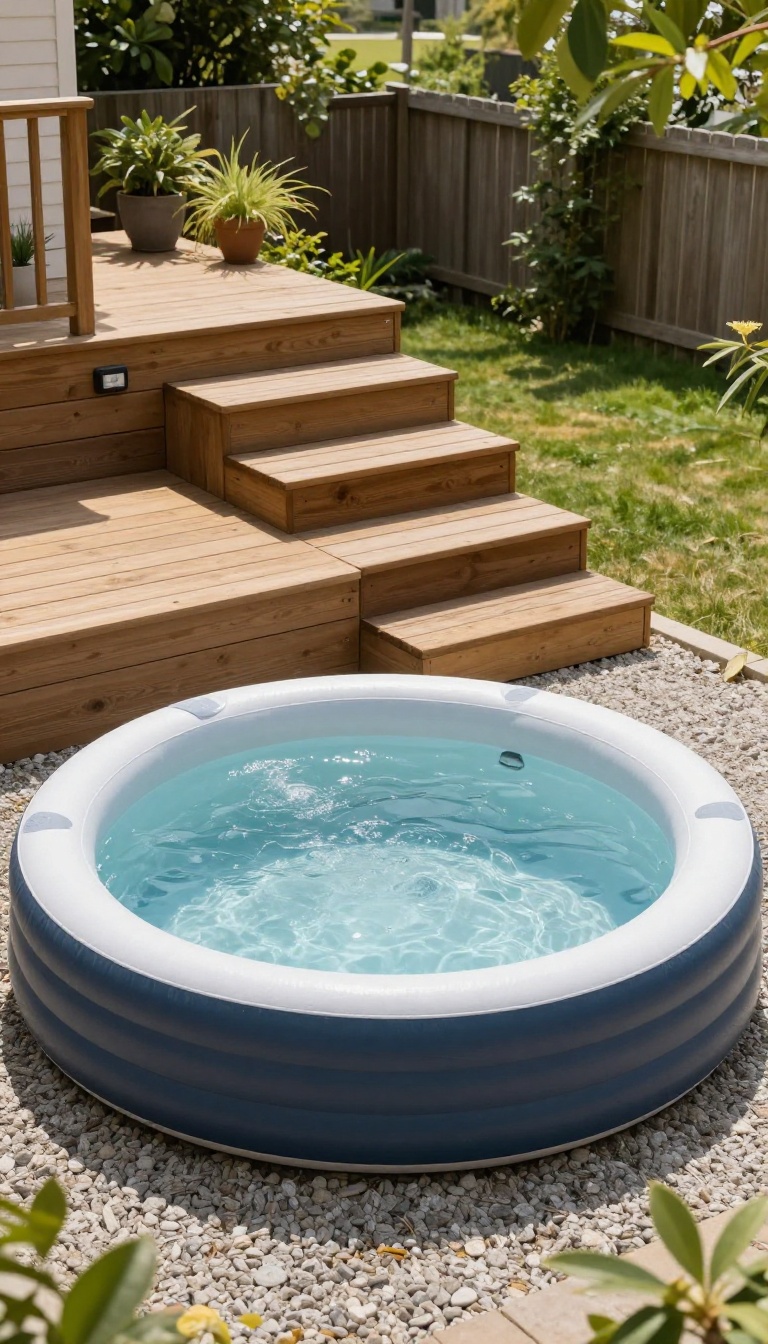
A hot tub parked a few feet from your deck rail looks intentional, not temporary. The trick is closing the gap between ground level and deck height so nobody has to climb, hop, or shuffle sideways with wet feet. Steps do most of the heavy lifting here.
They turn a plastic tub into something that reads like part of the house, and they give everyone a safe, obvious way in and out.
Set the tub on a level pad right beside the deck, then run a short set of wide steps from the deck edge down to the water. This puts the top of the tub roughly at knee or waist height, so stepping in feels natural instead of awkward. Keep the landing area generous.
A two-foot-deep platform at the top of the steps gives people room to turn around, set down a towel, and steady themselves before the first step down.
Pick The Right Step Style
Wood steps that match your deck stain blend in best and hold up to splashes. Composite steps cost more but never need sealing, which matters when water drips on them constantly. For a quick fix, a molded two-step spa stair works fine and weighs almost nothing.
Make The Steps Safe
Add a handrail on at least one side, and grip tape or textured treads on every step. Wet feet on smooth wood is a slip waiting to happen. A small motion light near the top step helps too, especially for evening soaks.
Blend It Into The Deck
Run the steps the full width of the tub if you can, so it looks built rather than bolted on. Trim the sides with the same boards as your deck, and tuck a small planter or two at the base. The whole setup reads as one piece instead of a tub and a random staircase.
3. Privacy Screen Surround
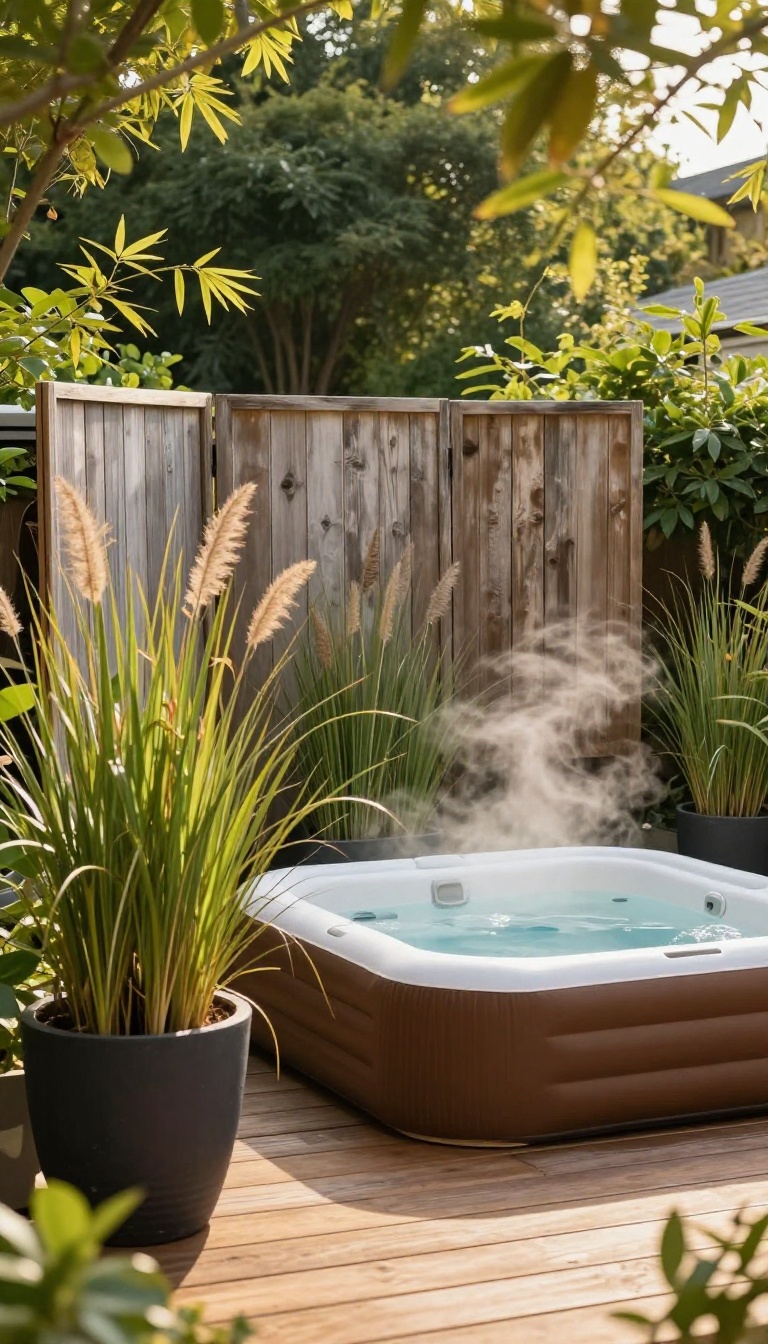
Neighbors with a clear view of your soak can ruin the mood fast. A privacy screen fixes that without a contractor or a permit. You just need something tall enough to block sightlines and sturdy enough to stay put.
The trick is to create a barrier that looks like it belongs there. Tall planters and folding screens both do the job, and neither one requires drilling into your deck or patio. They also move when you want to rearrange the yard.
Tall Planters That Pull Double Duty
A row of waist-high or taller planters gives you instant screening and a place to grow something green. Fill them with ornamental grasses, bamboo, or small evergreens for year-round coverage. Place them along the side of the tub that faces the neighbor’s window or the street.
The weight of the soil keeps them from tipping, even on a windy day. Just leave a gap between the planter and the tub so you can still walk around and access the controls.
Folding Screens For Flexible Shade
A three- or four-panel folding screen is the quickest privacy fix you can buy. Look for one made of weather-resistant wood, metal, or outdoor fabric. Set it up on the side where you need coverage, then fold it away when the coast is clear.
Some screens even come with built-in shelves or hooks for towels. Just make sure the feet are stable and the hinges won’t rust after a few seasons.
Mix And Match For Better Coverage
One screen rarely blocks everything, especially if your tub sits in an open corner. Combine a couple of planters with a folding screen to cover different angles. Put the heaviest planters where the wind hits hardest, and use the screen for the spot you want to open up later.
This layered approach also looks more natural than a single wall of anything. You can adjust the layout as your needs change or as plants grow.
4. Under String Lights for Evening Ambience
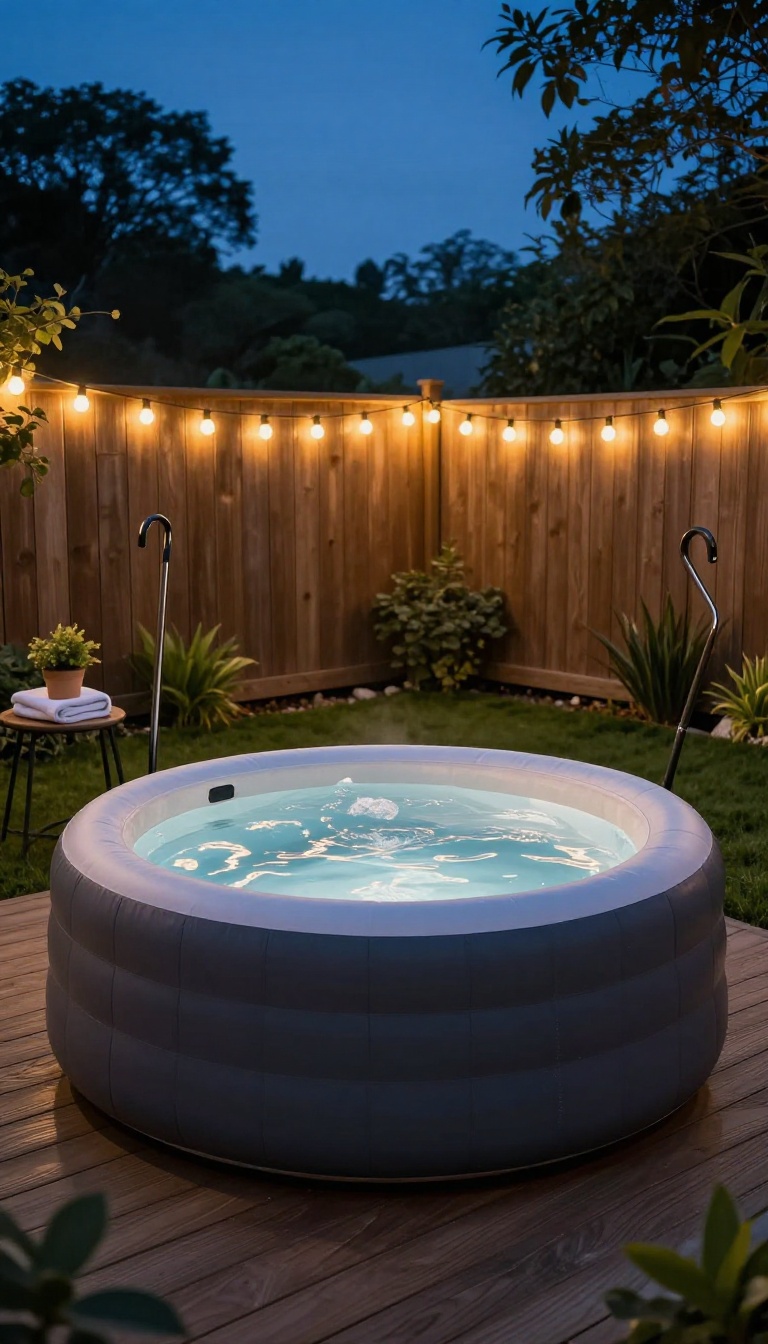
String lights turn a basic blow up hot tub into a nighttime destination. The glow softens the whole yard and makes the water look inviting even before you step in. Best of all, you can pull this off without hiring an electrician or tearing up your walls.
Hanging lights above the tub is one of the cheapest upgrades you can make, and it changes the mood more than almost anything else. You get that warm, vacation-style glow without permanent wiring. The trick is picking the right lights and hanging them so they stay safe and look intentional.
Start with weatherproof outdoor string lights. Look for strands rated for damp locations and LED bulbs, which stay cool and sip electricity. A 24- to 48-foot strand usually covers a small patio or deck corner.
If you need more length, connect strands end to end, but check the manufacturer's limit first. You have a few easy ways to hang them. Command hooks or screw-in cup hooks work on wood trim and fences.
For brick or stucco, use adhesive clips made for outdoor use. If you want height, set two shepherd's hooks or plant poles on opposite sides of the tub and run the lights between them. That creates a canopy effect without touching your house.
Pick The Right Bulbs And Spacing
Warm white bulbs (around 2700K) give the coziest look. Cool white or daylight bulbs feel harsh at night and kill the vibe. Space bulbs about 12 to 18 inches apart for a full, even glow.
If the strand looks sparse, double it up or choose a style with larger bulbs.
Hang Them Without Damage
Renter-friendly options include adhesive hooks, zip ties around fence posts, and tension rods between two walls. For a more permanent setup, screw small cup hooks into a pergola or deck rail. Keep the lowest bulbs at least 7 feet above the tub so nobody bumps them while getting in or out.
Add A Dimmer For Control
A plug-in dimmer lets you drop the brightness once you're soaking. That keeps the light soft and keeps bugs calmer. Some string light kits come with a remote, which is even easier when you're already in the water.
Keep It Safe And Tidy
Run the cord to an outdoor GFCI outlet, and use a cord cover or stake to keep it off the ground. Never let connections sit in puddles. When the season ends, wrap the strand around a spool so it's ready to go next year.
5. Gravel Pad with Wooden Border
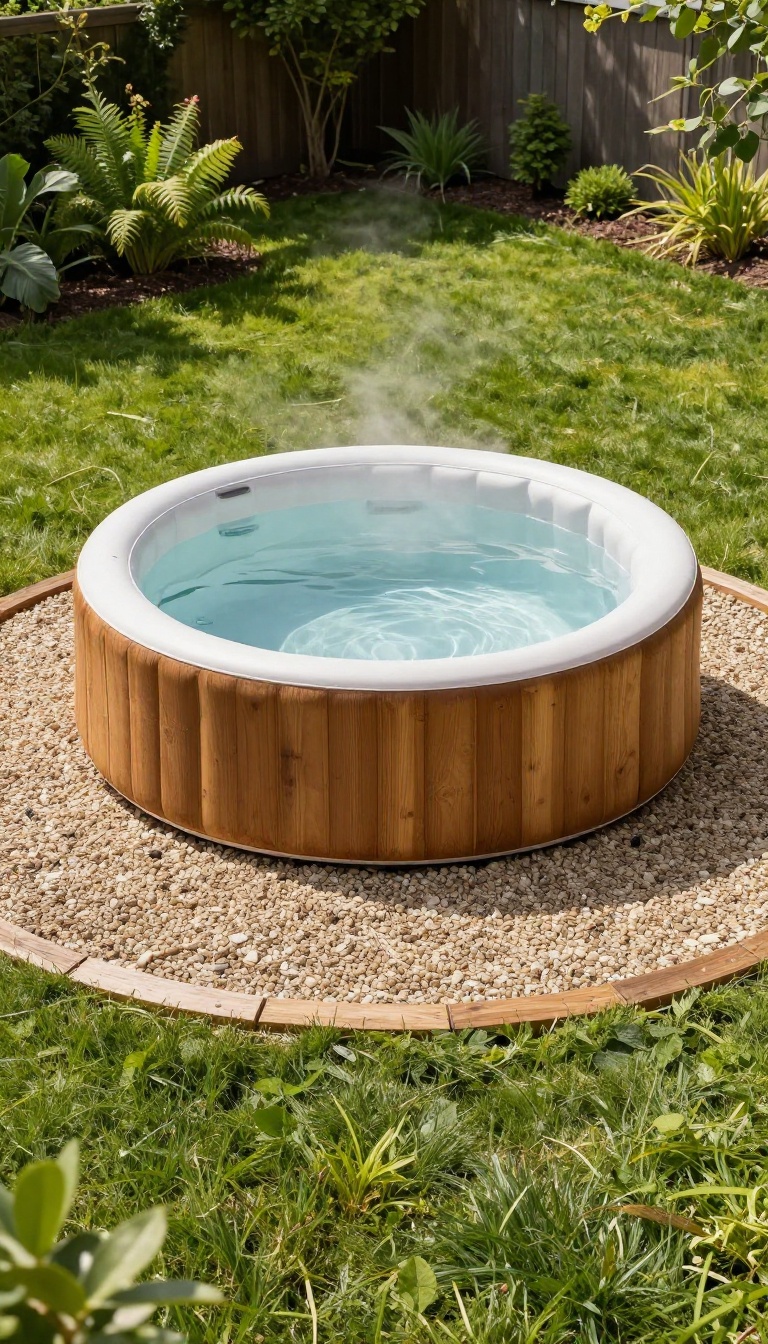
A gravel pad with a wooden border gives your blow up hot tub a solid, level base without the cost of concrete. The wood frame keeps the gravel contained and adds a clean edge that looks intentional. It also stops mud from splashing up when it rains, so the water stays cleaner.
This setup works on grass, dirt, or an old patio that's seen better days. You don't need special skills, just a few basic tools and a free weekend. The result is a stable spot that drains well and looks like it belongs there.
Why Gravel Works
Gravel drains water away from the tub, so you won't sit in a puddle after a storm. It also compacts into a firm surface that supports the weight of a full tub. Unlike concrete, it's forgiving if the ground shifts a little.
Building The Wooden Frame
Use pressure-treated 4x4s or 2x6s to build a simple rectangle. Dig a shallow trench, set the timbers level, and secure the corners with galvanized screws. The frame should sit slightly above ground to hold the gravel in place.
Filling And Leveling
Pour in crushed stone or pea gravel, then compact it with a hand tamper. Check for level in all directions and add or remove gravel until it's even. A flat base prevents stress on the tub's seams and keeps the water level true.
Finishing Touches
Add a layer of weed barrier under the gravel to stop grass from poking through. You can also stain or seal the wood to match your deck or fence. A small border of pavers around the frame keeps the edges tidy.
6. Inflatable Hot Tub on a Balcony
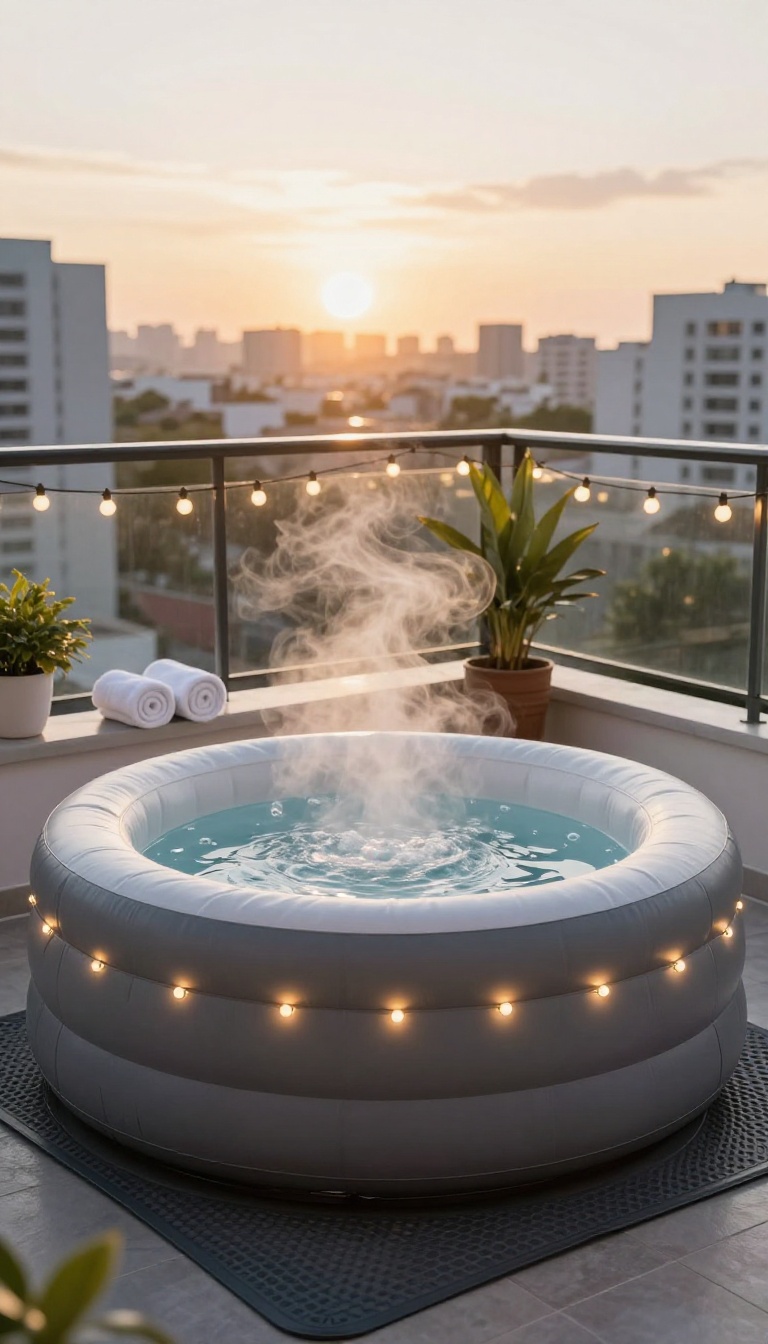
Balconies can hold more than a couple of chairs and a sad potted plant. A compact round inflatable hot tub fits many of them, and it turns a small outdoor ledge into a private soak spot. The trick is picking a model that respects weight limits and prepping the floor so nobody slips.
Most balconies are built for people, plants, and patio furniture, not for 2, 000 pounds of water. A small round inflatable hot tub changes that math because it spreads the load over a wider footprint and holds less water than a full-size model. Still, you need to check your building rules and know what your balcony can handle before you fill anything.
Pick A Compact Round Model
Round inflatables in the 2 to 4 person range usually hold 150 to 250 gallons. That keeps the filled weight in a range many residential balconies can manage, especially if you place it near a load-bearing wall or corner. Square and extra-large models look tempting, but they push the limits faster and leave less room to walk around.
Check Weight Limits First
Find out what your balcony is rated for before you buy. A structural engineer or your building manager can tell you the live load limit, and it is usually listed in pounds per square foot. Add up the tub, the water, and the people, then compare that number to your limit.
If it is close, size down or skip the idea.
Add A Non-slip Mat Underneath
Balcony floors get slick when water splashes, and inflatable tubs can shift slightly as people get in and out. A rubber non-slip mat or interlocking foam tiles under the tub adds grip and gives the base a little cushion. It also protects the balcony surface from scuffs and keeps the tub from sliding against the railing.
Keep It Stable And Covered
Set the tub on a flat, level spot away from the edge, and leave a few inches of clearance on all sides for the pump and hoses. Use the cover when you are not soaking to keep debris out and heat in. If your balcony gets strong wind, strap the cover down and consider a corner placement for extra stability.
7. Paired with a Pergola for Shade
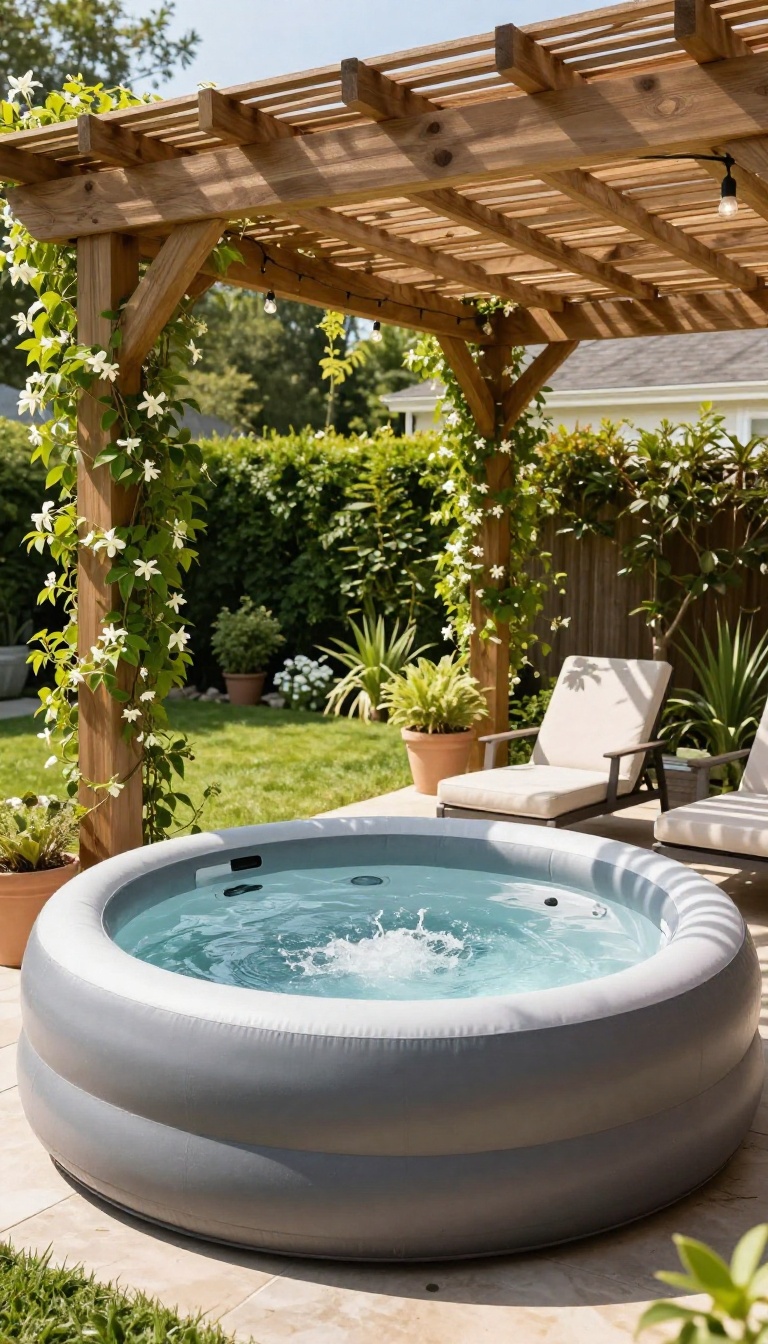
A blow up hot tub in full sun can feel like a warm bath you didn't ask for. The water heats up fast, the vinyl gets too hot to touch, and you end up soaking after sunset instead of when you actually want to. A pergola fixes that without blocking the breeze or making the space feel closed in.
You don't need a permanent structure to get the benefit. A freestanding pergola or even a simple canopy frame gives you adjustable shade that moves with the sun. The tub stays cooler, the seating area stays usable, and the whole setup looks intentional rather than improvised.
Pick The Right Size And Placement
Measure your tub first, then add at least two feet on each side for stepping in and out. A 10×10 pergola fits most four- to six-person inflatables with room to spare. Set it so the open sides face your best view and the slatted top runs east to west for maximum midday shade.
Materials That Handle Splash And Sun
Cedar and pressure-treated pine hold up well, but powder-coated aluminum won't rust or fade. Skip anything with a fabric roof unless it's rated for outdoor use and removable. You want something you can hose down without worrying about mold or stretched seams.
Add Climbing Plants For Extra Coverage
A pergola alone blocks some sun, but vines fill the gaps. Jasmine, wisteria, or even fast-growing annuals like morning glory will climb the posts and soften the look. Just keep them trimmed back from the tub so leaves and petals don't end up in the water.
Lighting And Privacy Without The Bulk
Hang string lights or a few lanterns from the beams for evening soaks. If neighbors are close, attach a retractable shade sail or outdoor curtains to one side. Both roll up when you want an open feel and drop down when you don't.
8. Surrounded by Potted Tropical Plants
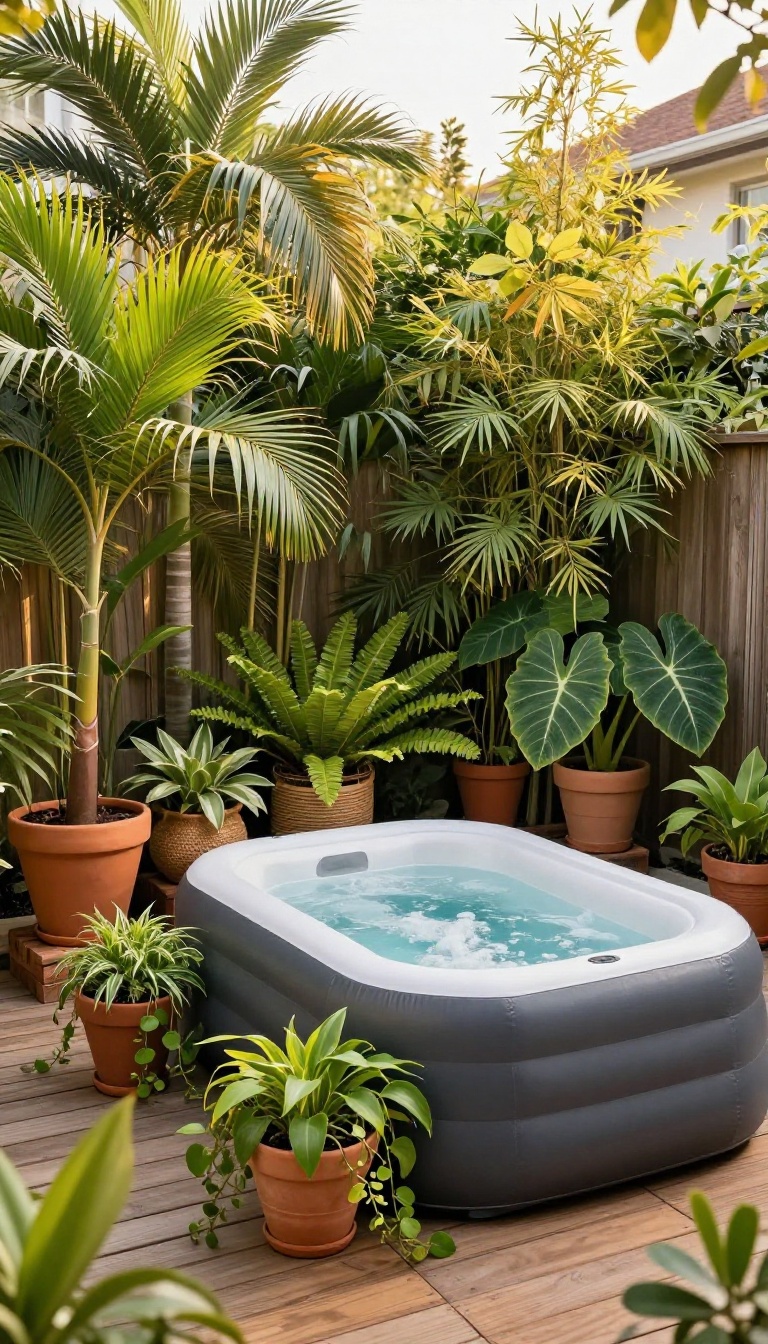
Potted tropical plants give your blow up hot tub an instant resort feel without any digging or permanent landscaping. Palms, ferns, and bamboo in containers create a lush, private oasis that you can rearrange whenever you want. The best part?
You can move them with the seasons or take them along if you ever relocate the tub.
The trick is to use a mix of heights and textures so the plants form a natural screen. Tall palms or bamboo go in the back, medium ferns and philodendrons fill the middle, and low trailers like pothos spill over the front. Cluster them close enough to feel enveloping but leave a clear path to the tub.
This setup works on decks, patios, and even small balconies because everything stays in pots.
Choosing The Right Tropical Plants
Not all tropicals thrive in containers, so pick varieties that stay compact and handle the humidity around a hot tub. Areca palms, lady palms, and bamboo palms are reliable choices for height. For mid-level fullness, try bird's nest ferns, staghorn ferns, or elephant ears.
Bamboo—clumping types only—adds a quick vertical screen. Avoid invasive runners that will take over your yard.
Arranging Pots For Maximum Privacy
Place the tallest plants in a crescent shape behind the tub, leaving the front open for entry. Stagger the pots so no single gap gives neighbors a clear view. Use pot feet or bricks to elevate some containers, which adds height and improves drainage.
A dense cluster on one side can also block wind and street noise. Just keep at least two feet of clearance around the tub for safety and easy access.
Keeping Plants Healthy Around A Hot Tub
Splash-out and steam can damage some plants, so choose moisture-loving types and water less often than you think. Use saucers under pots to catch runoff and prevent slippery surfaces. Fertilize monthly during the growing season with a balanced liquid feed.
If you live in a cold climate, switch to hardy tropicals like windmill palms or move pots indoors before the first frost.
9. Built-In Bench and Side Table Combo
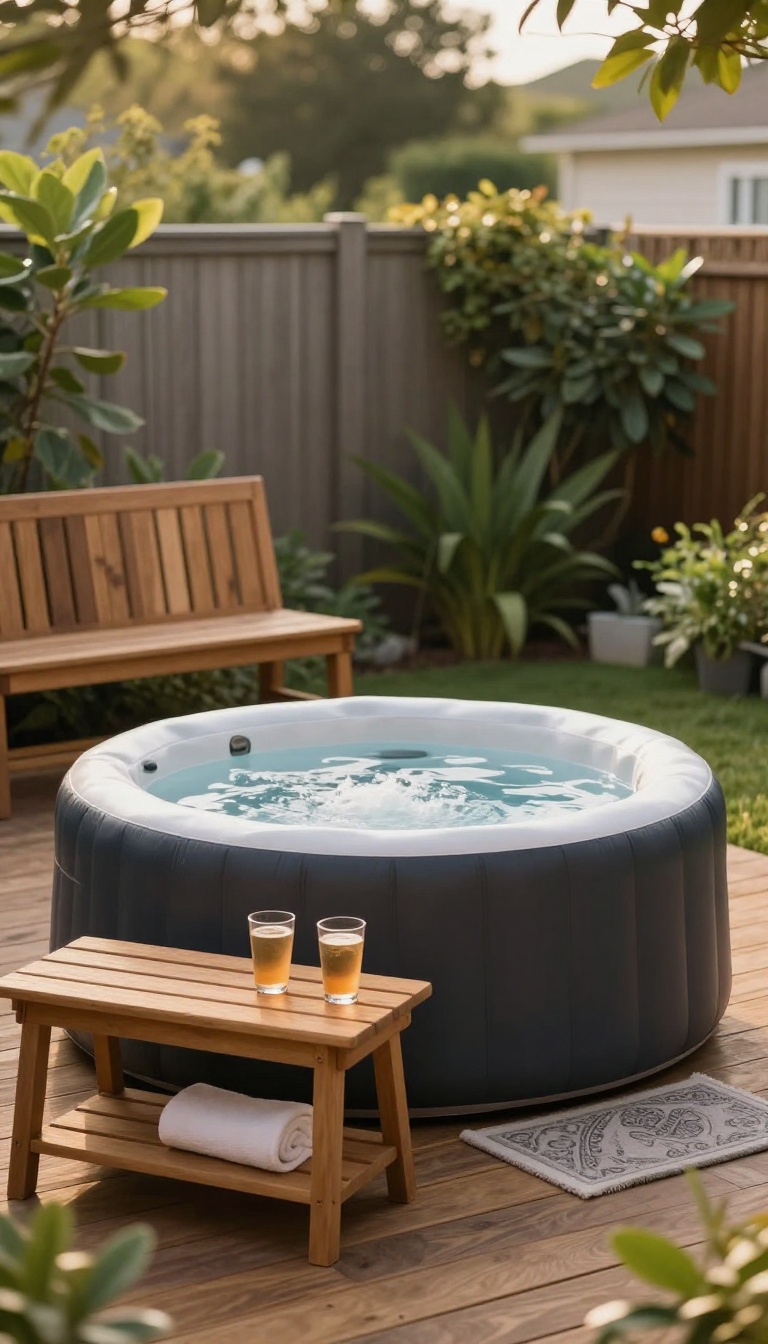
A built-in bench next to your blow up hot tub does more than look tidy. It gives you a dry spot to sit while the tub fills, and it keeps towels and drinks off the ground. Pair it with a side table, and you have a mini station that makes soaking easier.
You don't need a contractor for this. A simple waterproof bench and a small table can be added in an afternoon. They work in tight spaces and won't crowd the tub.
The trick is picking pieces that handle splashes and stay put. Look for teak, polywood, or sealed cedar. These woods resist rot and won't get slippery when wet.
A bench around 36 to 48 inches long fits most setups without blocking the tub's entry. For the side table, go with something that has a lower shelf or a lip. That keeps cups from sliding off when someone bumps it.
A table height of 18 to 22 inches works well next to most inflatable tubs. Place the bench on the side where you climb in. That way you can sit, swing your legs over, and ease into the water.
Put the table on the opposite side or between two seats if you have the room. If your tub sits on a deck, use rubber feet under the bench and table. They stop scratching and keep things from shifting.
On concrete or gravel, a small outdoor rug underneath ties the whole area together and catches drips.
Pick The Right Spot
Set the bench where you naturally step into the tub. That usually means the side with the most open space. Keep the table within arm's reach of the water so you can grab a drink without getting out.
Leave at least a foot of walking room around both pieces.
Materials That Last
Skip anything made of untreated pine or metal that rusts. Teak, polywood, and sealed cedar hold up to chlorine and sun. Look for stainless steel or composite hardware.
A waterproof cushion on the bench adds comfort, but bring it inside when you're not soaking.
Smart Storage Add-ons
Use the space under the bench for a small plastic bin. Toss in test strips, a skimmer, and extra filters. A side table with a drawer keeps sunscreen and phone out of the splash zone.
This combo turns clutter into a clean, organized corner.
10. Sunken Look with a Sandbox Dig
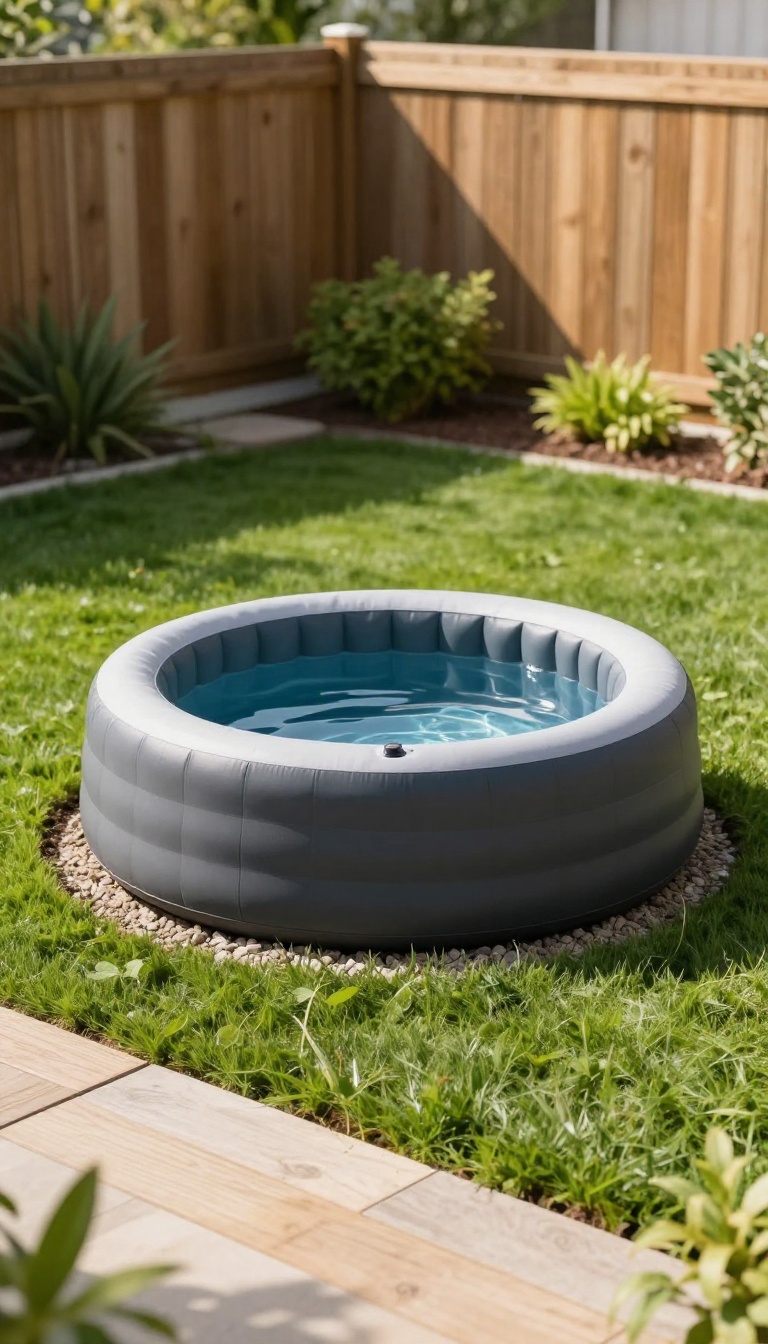
Dropping your inflatable hot tub into a shallow pit gives it a built-in vibe without the built-in price. You dig down just enough to hide the bottom few inches, so the tub sits lower and feels more like a permanent fixture. It’s a simple trick that changes the whole look of your backyard soak spot.
The idea is straightforward: measure the tub’s base, dig a hole a few inches deep, and set it inside. The ground around it acts like a natural frame, and you don’t need a concrete slab or a contractor. Most inflatable tubs have a rigid foam base or a drop-stitch floor, so they can handle sitting in a shallow depression as long as the ground is level and stable.
Before you grab a shovel, check a few things. You want good drainage so water doesn’t pool around the tub after rain. And you need to make sure the sides of the pit won’t collapse.
A little prep goes a long way.
Pick The Right Spot And Check Drainage
Choose a spot that’s already fairly level and gets decent drainage. Avoid the lowest point of your yard, where water naturally collects. If your soil is heavy clay, dig a few inches deeper and add a layer of gravel at the bottom.
That gives water somewhere to go instead of turning your tub into a mud pit. Also think about access. You’ll still need to reach the control panel, drain valve, and filter.
Don’t sink it so deep that you can’t get to those parts without digging them out later.
Dig, Level, And Set The Tub
Measure the tub’s footprint and add a couple of inches on each side. Dig down about 4 to 6 inches—enough to hide the bottom seam but not so much that the tub feels buried. Use a level to make sure the bottom of the pit is flat.
A slight slope can cause the tub to lean and put stress on the seams. Once the pit is ready, lay down a layer of sand or fine gravel and tamp it firm. That creates a smooth, stable base.
Then lower the tub in, inflate it, and fill it with water. The weight of the water will help it settle into place.
Finish The Edges For A Clean Look
The exposed rim of the pit can look rough if you leave it bare. Tuck the edges with paver stones, cedar planks, or even a ring of river rocks. That covers the dirt and gives the tub a tidy border.
It also keeps grass and weeds from creeping in. If you want a softer touch, plant low-growing ground cover around the rim. Creeping thyme or moss works well and needs almost no maintenance.
Just keep them a few inches away from the tub so they don’t get crushed.
11. Winter-Ready Setup with Insulation Mat
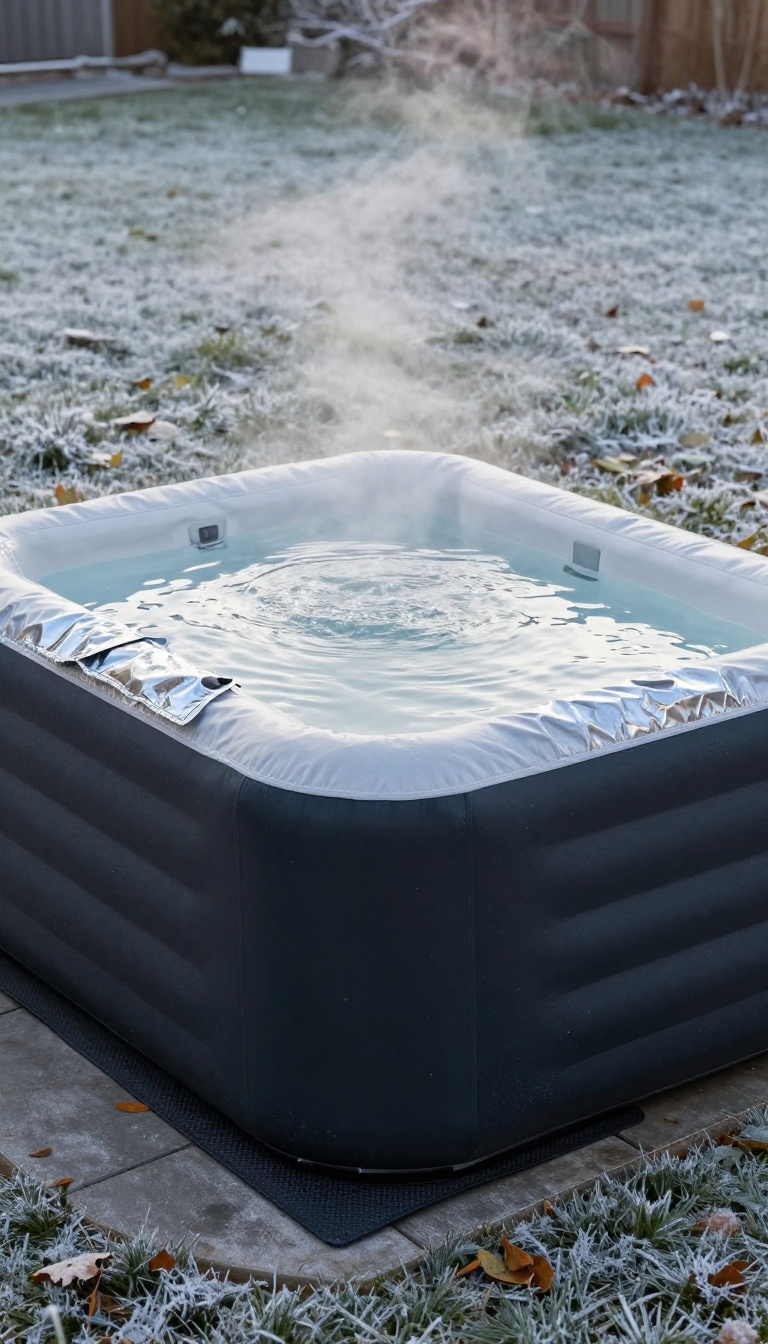
Cold air pulls heat out of an inflatable hot tub faster than anything else. An insulation mat under the tub blocks that loss from the bottom, where most people never think to look. Add a thermal cover on top, and your soak stays hot without the heater running nonstop.
This setup is simple, cheap, and makes a huge difference once temperatures drop. It also protects the tub's base from cold concrete or frozen ground. You get longer soaks, lower bills, and less stress all winter.
Most blow up hot tubs lose heat in two directions: down through the floor and up through the cover. The insulation mat handles the bottom. A thermal cover handles the top.
Together, they trap warmth where it belongs. You don't need a permanent deck or fancy enclosure. A mat and a good cover work on patios, decks, and even gravel pads.
The key is blocking contact with cold surfaces and sealing in heat.
Pick The Right Mat
Closed-cell foam mats work best because they don't soak up water. Look for one at least half an inch thick. Cut it to fit slightly larger than the tub's base so no edges touch cold ground.
A cheap yoga mat or camping pad can work in a pinch, but foam tiles made for gyms hold up longer.
Layer For Extra Warmth
For really cold climates, stack two mats or add a layer of rigid foam board between them. This creates a thermal break that slows heat loss even more. Just make sure the top layer stays flat so the tub sits level.
Uneven ground can stress the seams and cause leaks.
Don't Skip The Cover
A thermal cover with a reflective lining makes a noticeable difference. Inflatable covers that come with the tub are okay, but an insulated aftermarket cover is better. Make sure it fits snugly and use the clips to hold it down.
A loose cover lets heat escape and lets cold air sneak in.
12. Family-Friendly Zone with Toy Storage
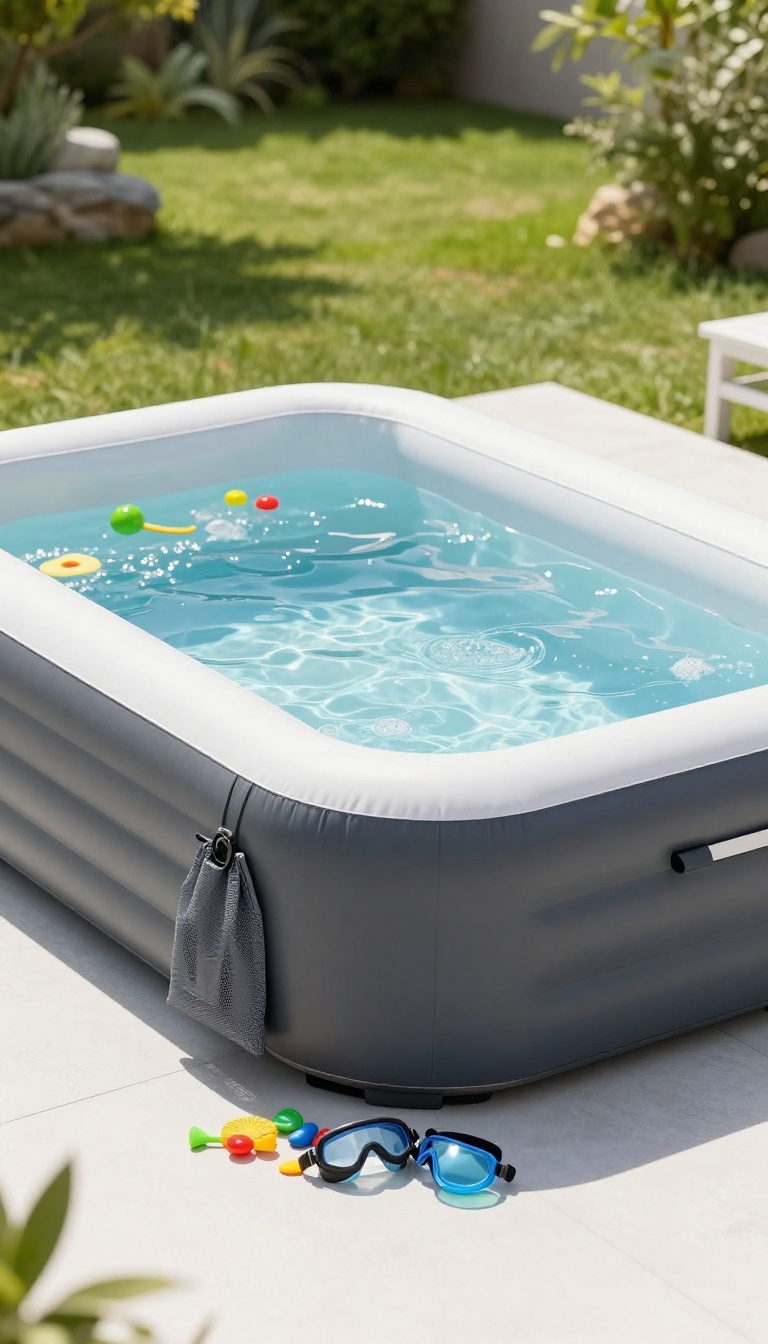
Kids treat a blow up hot tub like a mini water park, and that means toys, floats, and goggles end up everywhere. A waterproof storage bin keeps the chaos contained without killing the fun. It also makes cleanup a two-minute job instead of a chore you dread.
You don't need a big budget or a fancy cabinet. A simple lidded bin placed within arm's reach of the tub does the trick. The key is picking a spot that's easy for kids to use and easy for you to ignore when it's closed.
The trick is to make storage part of the setup, not an afterthought. When the bin lives right next to the hot tub, kids can grab what they want and toss it back without tracking water through the house. That small habit keeps the area tidy and cuts down on lost toys.
You also want a bin that can handle sun, chlorine, and the occasional splash. Look for something with a tight-fitting lid and drainage holes or a slightly raised base so water doesn't pool inside. A dark color hides scuffs and looks less like a toy box and more like part of the patio.
Pick The Right Bin
A 20- to 30-gallon plastic storage tote with a latching lid works for most families. Choose one with a neutral color like gray, tan, or dark green so it blends with your outdoor space. If you want something sturdier, a resin deck box doubles as a bench and holds towels too.
Place It Within Reach
Set the bin on a flat surface a few feet from the tub, ideally on the side where kids climb in and out. That way they can drop toys as they exit instead of leaving them floating. Keep a small mesh bag inside for goggles and small items so they don't sink to the bottom.
Teach The Drop-and-go Habit
Make it a rule that toys go back in the bin before anyone heads inside. A quick rinse with the hose once a week keeps the bin from getting slimy. If you have multiple kids, assign a different person each day to do a final check for strays.
13. Romantic Two-Person Retreat
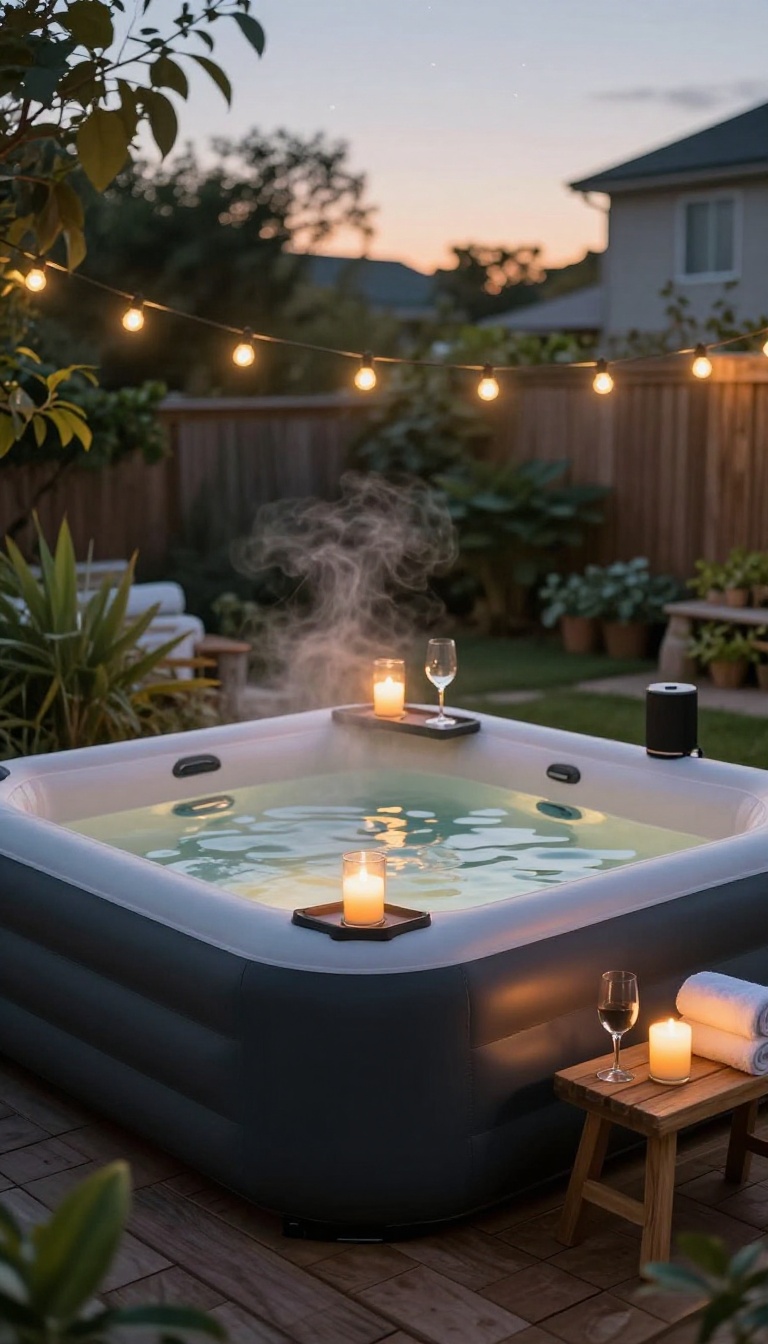
A two-person inflatable hot tub can become the most romantic spot in your backyard with just a few thoughtful touches. The key is to keep it intimate, warm, and free from clutter. Think soft lighting, a place to set drinks, and music that sets the mood.
Start with a compact tub sized for two. It heats up faster, uses less water, and fits on a small deck or patio. Position it where you can see the stars or a quiet corner of the yard.
Add a small side tray that clips onto the tub for candles, drinks, or a speaker. Battery-operated candles are safer and still give that warm glow. A waterproof Bluetooth speaker lets you play a playlist without worrying about splashes.
Keep towels and robes within arm's reach on a nearby hook or chair. This setup turns a simple soak into a weekly date night.
Set The Mood With Light And Sound
Floating candles or LED tea lights around the rim create a soft, flickering light. String lights overhead or tiki torches nearby add a warm ambiance without harsh glare. For music, choose a speaker designed for outdoor use and keep the volume low.
A playlist of jazz, acoustic covers, or nature sounds works well. Avoid bright white lights or loud party music if you want a relaxed vibe.
Keep Essentials Within Reach
A side tray that attaches to the tub holds drinks, a small vase, or a phone. Look for one with drainage holes so water doesn't pool. Rolled towels on a nearby stool stay dry and ready.
A small cooler or waterproof basket can hold extra candles or a bottle of wine. The goal is to avoid getting out once you're settled in.
Make It A Weekly Ritual
Pick a night that works for both of you and stick to it. Turn off notifications and leave phones on the tray. Light the candles, start the music, and soak for 20 to 30 minutes.
The routine itself becomes something to look forward to. It's a simple way to reconnect without leaving home.
14. Rooftop or Garage Top Placement
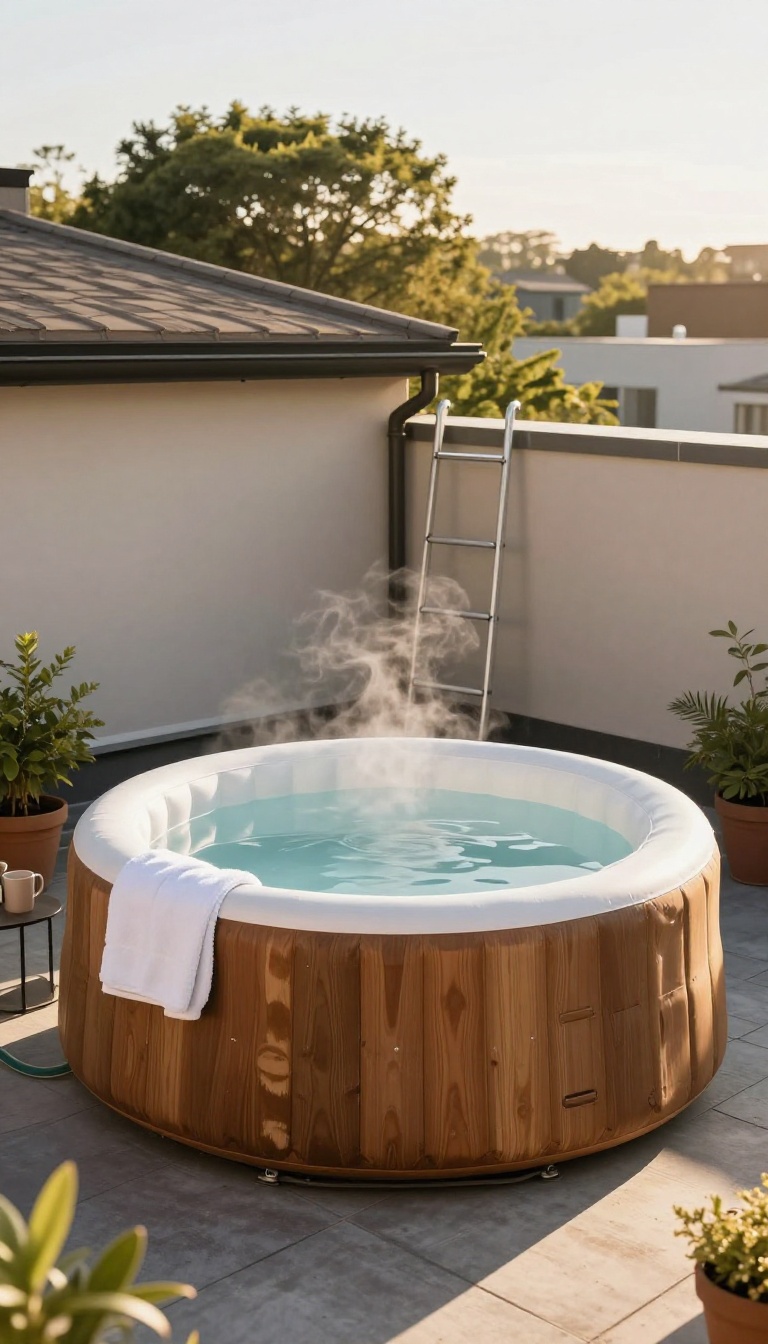
When your yard is more postage stamp than paradise, look up. A flat rooftop or garage top can hold a blow up hot tub and give you views you would never get at ground level. It sounds bold, but plenty of people do it.
The catch is making sure the structure can handle the weight and that water has somewhere to go.
Before you haul a filled tub onto any roof, you need to know what is holding it up. A standard inflatable hot tub holds hundreds of gallons, and water weighs about 8. 3 pounds per gallon.
Add a few people and you are looking at a serious load. A garage roof or home rooftop needs to be rated for that kind of dead weight, not just a few shingles and some plywood. If you are not sure, hire a structural engineer for a quick assessment.
It is money well spent compared to a collapsed roof. Drainage is the other big one. A rooftop has no natural slope toward a drain unless you create one.
You do not want a puddle forming under the tub, because that can lead to rot, mold, and a slippery mess. A simple solution is to set the tub on a raised platform with a slight tilt and a hose that runs to a gutter or downspout. That way, splashes and overflows go where they should.
Access is worth thinking through too. You need a safe way to get up there, and you need to carry water or run a hose. A permanent ladder or a set of stairs makes the space usable year-round.
If you are only doing this in summer, a sturdy removable ladder can work. Just make sure it is stable and locked when not in use, especially if kids are around.
Weight Limits And Structural Checks
A filled blow up hot tub can weigh over 2, 000 pounds. That is like parking a small car on your roof. Most garage roofs are not built for that.
Check with a contractor or engineer before you commit. They can tell you if you need extra bracing or if the idea is a no-go. Do not skip this step.
Drainage And Water Management
Water always finds a way down, but you want it to go to a drain, not into your ceiling. Use a shallow tray or platform with a slight slope. Run a hose to a gutter or a rain barrel.
Empty the tub regularly and never let water sit underneath it. A little planning keeps your roof dry and your tub ready.
Safety And Access
Getting up and down from a rooftop tub should be easy and safe. A permanent staircase is best, but a strong ladder works for seasonal use. Add a railing if the edge is open.
Keep the path well lit for evening soaks. And never let anyone use the tub alone on a roof.
15. Budget Backyard Spa with DIY Upgrades
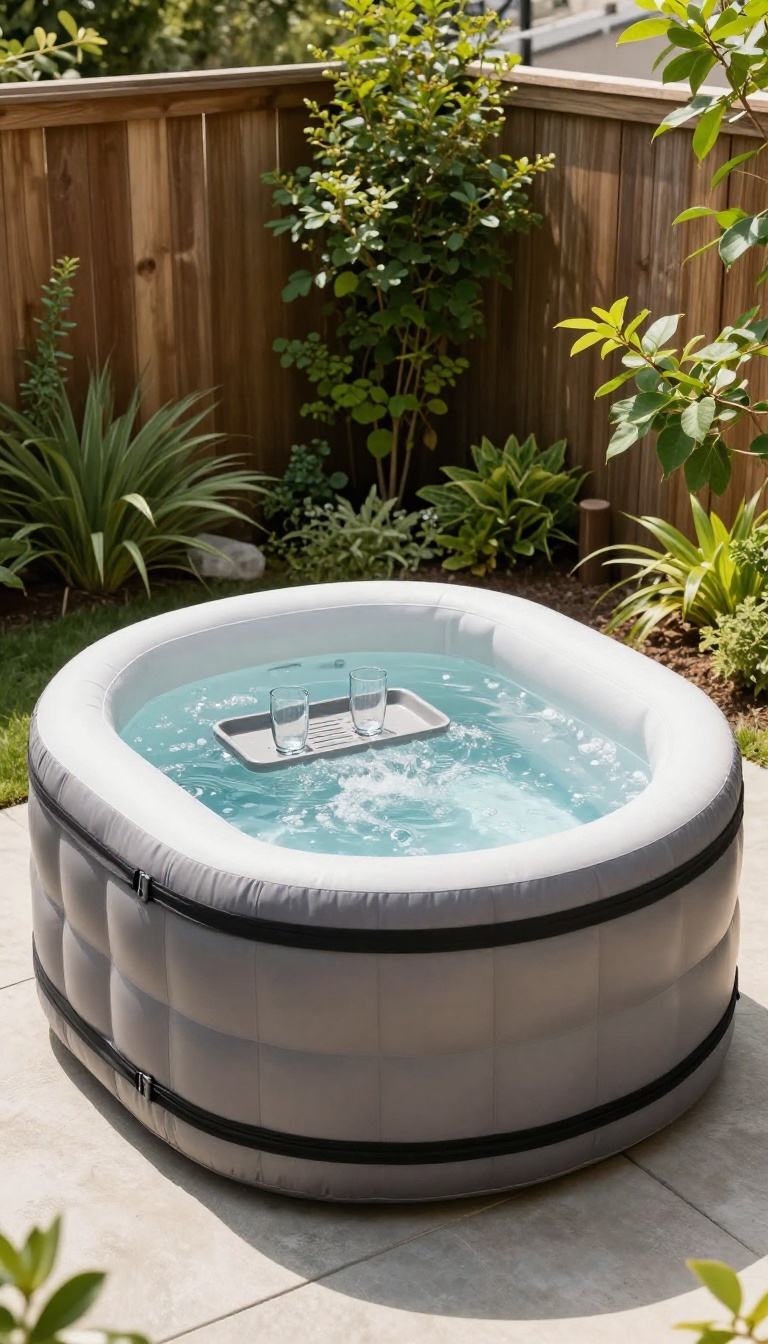
A basic blow up hot tub gets the job done, but it can feel a little plain. With a few cheap additions, you can turn it into a cozy spa without spending much. These DIY upgrades are easy to install and make a big difference in comfort and looks.
Start with a bubble mat. It sits under the tub and adds a soft, cushioned layer that feels great on your feet. You can find them online or make one from a yoga mat cut to size.
It also helps insulate the bottom, keeping heat in. Next, add cup holders. Most inflatable tubs have a small ledge, but it's not stable.
Clip-on cup holders or a floating drink caddy keep beverages within reach. Look for ones that attach to the side or float on the water. A homemade cover saves money and heat.
Use a thick tarp or bubble wrap cut to fit the top, then secure it with bungee cords. This keeps debris out and traps warmth when the tub is not in use. It's a simple project that takes minutes.
Bubble Mat Comfort
A bubble mat is a game-changer for comfort. It provides a soft surface to sit on and protects the tub's bottom from rough concrete. You can buy one made for hot tubs or repurpose a foam play mat.
Just cut it to fit the tub's base and place it underneath. It also adds a bit of insulation, so the water stays warmer longer.
Cup Holders And Trays
Nobody wants to set their drink on the ground. Clip-on cup holders attach to the tub's side and hold your beverage securely. For a more elegant look, use a floating tray that holds two drinks and a snack.
These are inexpensive and make the tub feel more like a real spa. Just make sure they fit your tub's rim.
Homemade Cover
A cover is essential for keeping heat in and leaves out. Instead of buying an expensive one, make your own. Cut a piece of thick plastic or bubble wrap to the shape of your tub's top.
Add a layer of aluminum foil for insulation, then secure it with bungee cords. This DIY cover costs under $20 and works surprisingly well.
FAQ
How much space do I need for a blow up hot tub?
Most inflatable hot tubs need a flat area about 6 to 8 feet across, plus a little room to step in and out. A small patio corner or a 10×10 spot works fine.
Can I put a blow up hot tub on grass?
You can, but it's better to use a mat or gravel pad underneath. Grass can get muddy and the tub may sink or become unlevel over time.
Do blow up hot tubs work in winter?
Yes, many models work in cold weather, but you'll lose heat faster. An insulating mat and a good thermal cover help keep the water warm and save energy.
How long does a blow up hot tub last?
With proper care, a quality inflatable hot tub can last 2 to 5 years. Store it indoors during freezing months and keep the water balanced to extend its life.
Are blow up hot tubs expensive to run?
They cost less than hard-sided spas, but heating and filtering still use electricity. Expect a modest bump in your power bill, especially if you keep it hot all the time.
Conclusion
A blow up hot tub can change how you use your backyard without demanding a permanent build or a huge budget. Start with the spot that already gets the most foot traffic, set the tub up there, and see how it feels for a week. You do not need all fifteen ideas to make this work.
Pick the one that fits your space and your routine, get it running, and let the rest of the yard catch up around it. The best setup is the one you actually climb into.