13 Shed Ideas Backyard Spaces Can Use for Smart Storage
You open the shed door to grab a rake, and three things fall out before you find it. That scene plays out in backyards everywhere, and it usually has nothing to do with laziness.
Most sheds simply were not set up to hold everything we stuff into them. A few deliberate changes can turn that chaos into a system that actually works.
The ideas below range from a wall-mounted bike rack to a fold-down potting bench, and each one targets a specific kind of clutter. Start with the problem that annoys you most, then work through the rest at your own pace.
1. Wall-Mounted Bike Racks That Free Up Floor Space
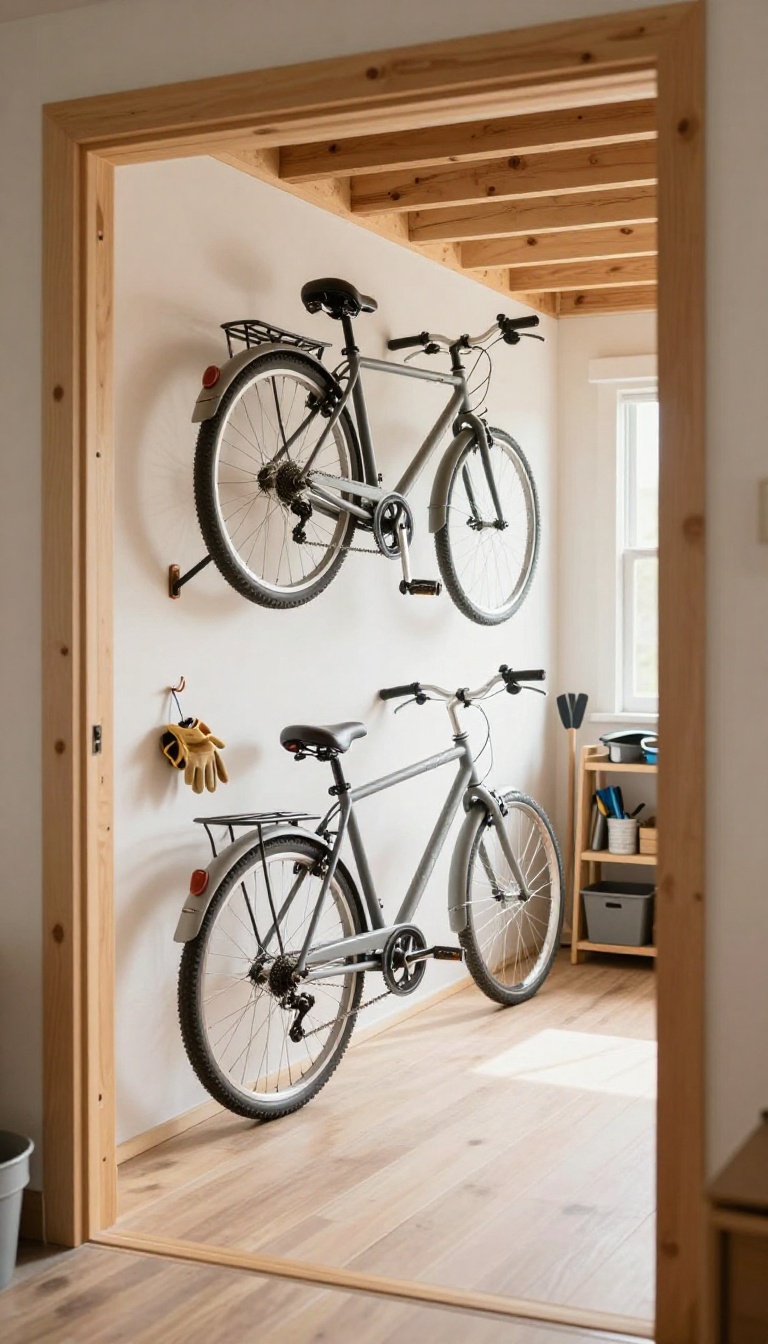
Bikes are the classic shed space hog. They lean, they fall, and their handlebars tangle with everything else. Hanging them on the wall changes that equation fast.
A wall-mounted rack lifts bikes off the ground and turns a dead wall into storage. You get your floor back, and you stop tripping over wheels every time you grab a tool. The trick is picking a rack that matches your bikes and your shed's framing.
Vertical Vs. Horizontal Hooks
Vertical hooks hang a bike by its front wheel, so it sits flat against the wall. This works best for narrow sheds where depth is tight. Horizontal hooks hold the bike parallel to the wall, which keeps the handlebars from sticking out.
Choose vertical for tight spaces and horizontal if you have a longer wall.
Mounting Into Studs Or Plywood
A loaded bike can weigh 30 pounds or more, so you need solid anchoring. Drive lag bolts into wall studs, or add a plywood mounting strip if studs are spaced oddly. Never trust drywall anchors alone for this job.
If your shed has exposed framing, you can bolt directly into the studs for maximum strength.
Keeping Tires And Frames Safe
Rubber-coated hooks protect rims and paint from scratches. For long-term storage, hang bikes by the rear wheel if you have hydraulic brakes, since hanging by the front can sometimes cause brake issues. Add a simple hook for helmets and a small bin for gloves right below the rack.
2. Overhead Bin Storage for Seasonal Gear
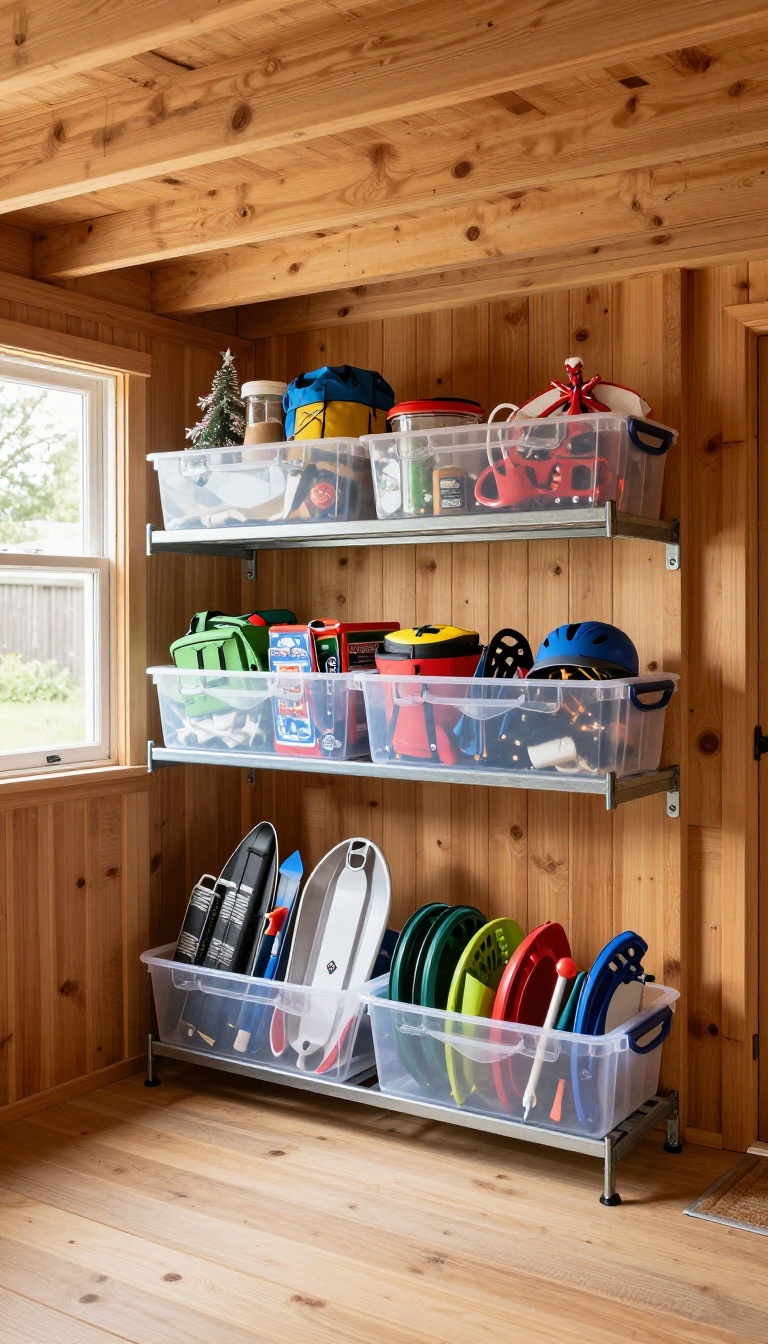
Floor space disappears fast when holiday bins and camping totes pile up. The ceiling, though, usually sits empty and ready to work. Overhead storage flips that wasted area into a home for the stuff you only touch a few times a year.
The goal is simple: get seasonal gear up and out of the way without turning your shed into a climbing gym. A few sturdy racks or bins mounted near the roof can free up serious square footage below. You just need to match the hardware to what you're storing and how often you'll reach for it.
Seasonal items are the perfect candidates for overhead storage because you don't need them every week. Christmas decorations, summer camping tents, winter sleds, and beach chairs can all live near the ceiling for months at a time. That leaves your everyday tools and lawn supplies right where you can grab them.
Before you drill anything into a rafter, take a quick inventory. Weigh a few bins by hand or use a bathroom scale. Then check what your shed's ceiling can actually hold.
Most sheds have rafters or joists that can handle a decent load if you spread it across several points. If you're unsure, a quick look online or a chat with someone at the hardware store will steer you right. Once you know your limits, pick a system that fits your shed's height and your reach.
The options below cover the most common setups, from simple racks to enclosed bins.
Ceiling Racks That Hold Totes
Ceiling-mounted racks are the workhorse of overhead storage. They typically consist of two or more metal or heavy-duty plastic rails that bolt to your ceiling joists. You slide standard plastic totes onto the rails, and they hang there securely.
Look for racks with a weight capacity that matches your heaviest bin. Many models hold up to 100 pounds or more when installed correctly. Space the rails so your totes fit snugly without wobbling.
If your shed has exposed rafters, you can sometimes skip the rack and screw plywood shelves directly across them, but only if the span is short and the load is light. A simple tip: label the front of each tote with a marker or tape. That way you know what's inside without pulling everything down.
Hoist Systems For Bulky Items
Some gear doesn't fit neatly into a tote. Kayaks, canoes, ladders, and long extension poles fall into this category. For those, a pulley-based hoist system is a game-changer.
Hoists use straps and a rope-and-pulley mechanism to lift items flat against the ceiling. You pull a rope, and the load rises out of your way. When you need it, you lower it gently.
These systems are especially handy if you have a tall shed and limited wall space. Installation is straightforward, but you must anchor the pulleys into solid framing. Never trust drywall or thin paneling alone.
If your shed has metal framing, look for hoist kits designed for that specific setup.
Bin Placement And Access Tips
Where you put your overhead bins matters as much as how you mount them. Keep the most frequently used seasonal items closer to the door. Items you touch once a year can go deeper into the shed.
Leave a clear path for your ladder or step stool. You don't want to drag it over a lawnmower every time you need the holiday lights. Also, avoid stacking bins so high that you can't see the labels.
A quick glance should tell you what's up there. If your shed has a low ceiling, consider using the space above the door for long, flat items like wrapping paper or fishing rods. That spot is often overlooked but surprisingly useful.
3. A Fold-Down Potting Bench With Tool Storage
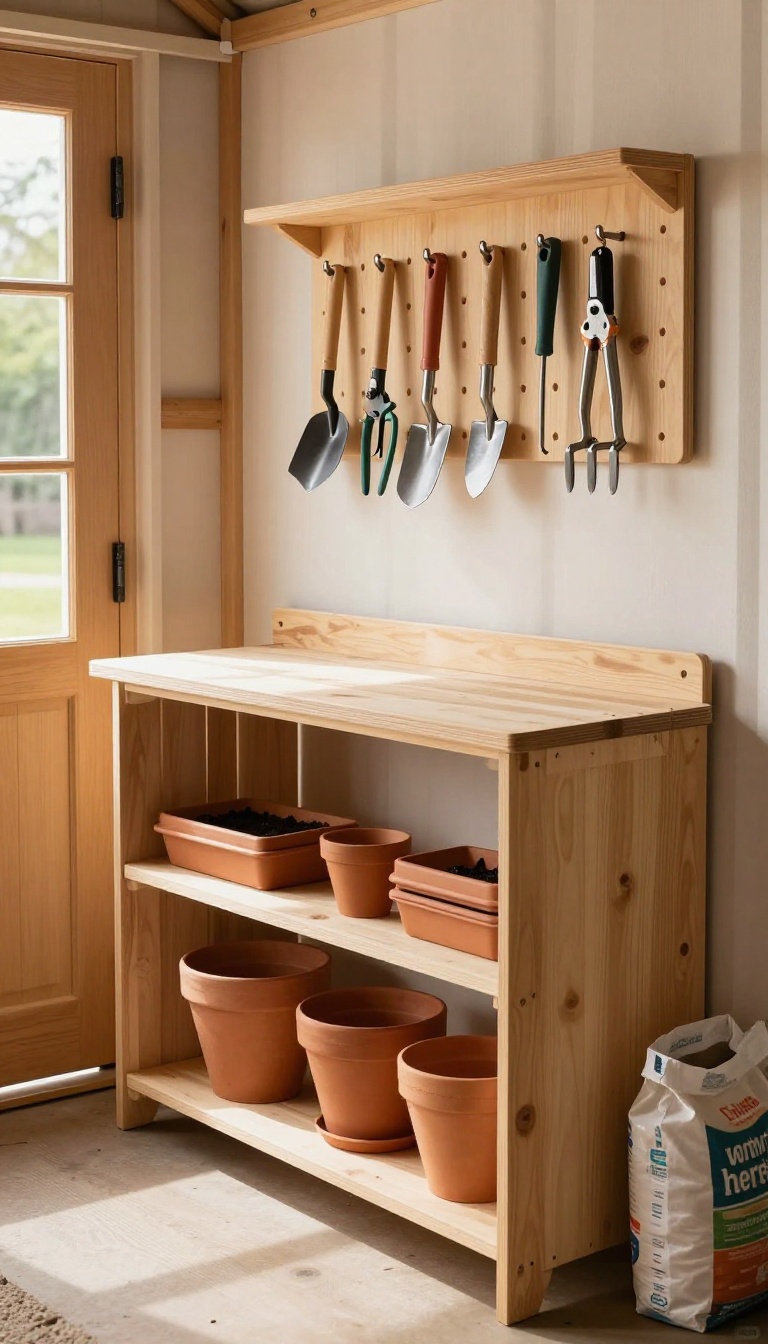
Gardening tools have a way of scattering themselves across the yard. A trowel ends up on the patio, gloves land on a fence post, and the bag of potting mix sits wherever you dropped it. A fold-down potting bench fixes that by giving all of it one home.
Mount it to the shed wall, and it becomes a proper work surface when you need it, then disappears flat against the wall when you do not. The trick is pairing the bench with storage that lives on the wall around it, so nothing has an excuse to wander off again.
The build itself is simple. A hinged countertop attaches to a cleat on the wall, with two folding legs or a pair of chains holding it level when it is up. When you are done, the legs fold in and the whole surface drops down.
That leaves your shed floor clear for mowers, bins, and everything else that needs the room. You can buy a ready-made folding bench, but a basic plywood top with piano hinges costs far less and fits whatever wall space you have.
Hooks And Rails For Hand Tools
Run a strip of pegboard or a simple tool rail along the wall above the bench. Small hooks hold trowels, pruners, hand forks, and a dibber within arm's reach. Keep the heaviest items low so they do not swing into your head when you fold the bench down.
A magnetic strip works well for snips and anything with a metal handle. Label the hooks if more than one person uses the shed. It sounds fussy, but it stops the same argument about missing clippers every spring.
Shelves For Pots And Soil
A shallow shelf at eye level handles empty pots stacked by size, seed trays, and a few bags of starter mix. Keep it narrow so it does not crowd the bench when it swings up. Below the bench, a low shelf or a couple of sturdy bins hold the bulky stuff: potting soil, fertilizer, and a bucket of compost.
That keeps the heavy lifting near the floor where it belongs. If moisture is a problem, use plastic or coated shelving instead of bare particle board. Damp bags of soil will wreck cheap shelves fast.
A Bin For Gloves And Loose Bits
Gloves, twine, plant tags, and a hand brush never fit neatly on a hook. Give them a small open bin mounted to the side of the bench. A wall-mounted bin or a repurposed plastic crate keeps the small clutter contained and easy to grab.
Line it with a few drainage holes if you store damp gloves there. This is also a good spot for a kneeling pad and a pair of safety glasses. They are the things you always forget until you are already on your knees in the dirt.
4. Pegboard Walls for Hand Tools and Small Parts
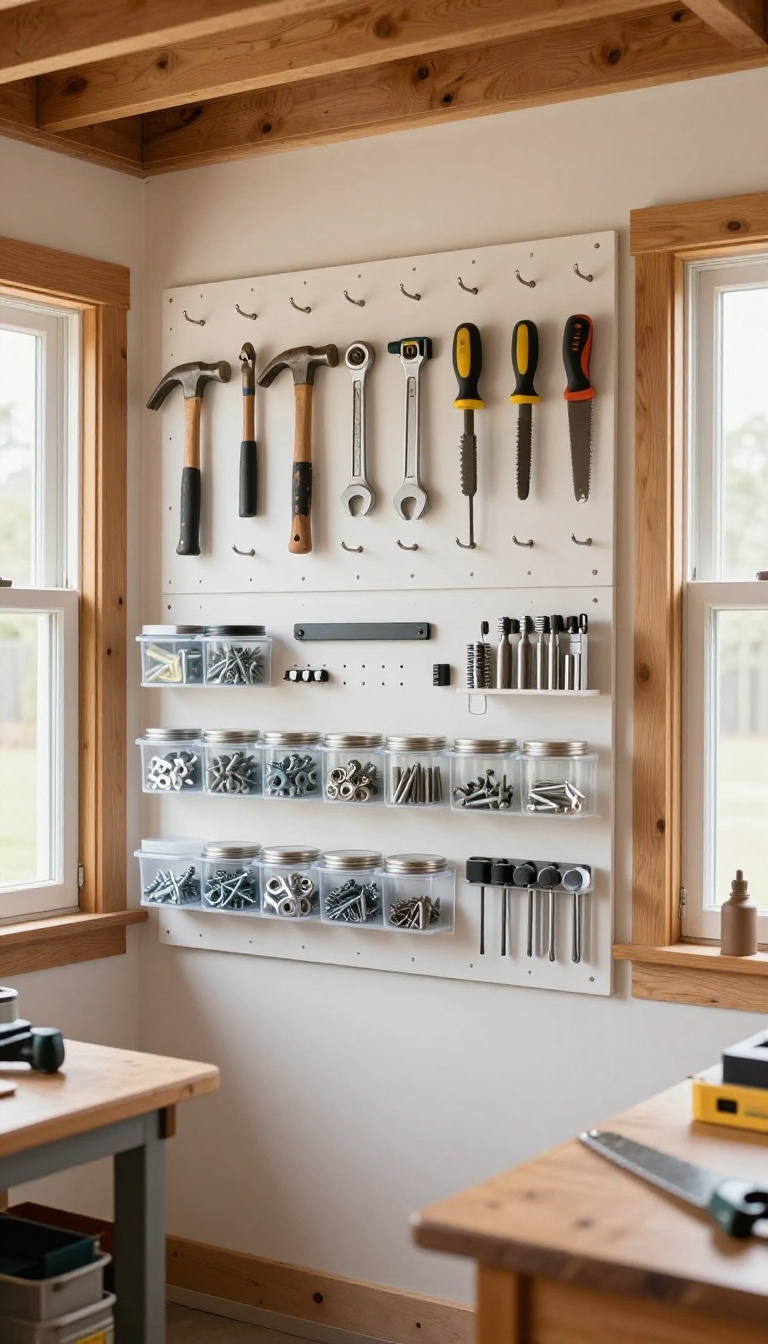
A bare wall in your shed is wasted space. Pegboard turns that empty stretch into a customizable tool organizer that keeps everything visible and within arm's reach. Hammers, wrenches, screwdrivers, and jars of screws all find a home, and you can rearrange the layout whenever your tool collection changes.
Pegboard works because it's simple and flexible. You mount a panel, add hooks and bins, and suddenly you have a place for every small item that used to rattle around in a drawer. No more digging through a coffee can for a matching nut and bolt.
Everything hangs in plain sight, so you grab what you need and get back to work.
Choosing And Mounting Pegboard
Standard pegboard comes in 1/8-inch or 1/4-inch thickness, and the holes are spaced either 1 inch or 1/8 inch apart. For most sheds, 1/4-inch pegboard with 1-inch spacing handles everyday tools without sagging. Mount it to wall studs using furring strips behind the panel, which creates a gap for hooks to pass through.
Paint it white or a light color to brighten the space and make tools easier to spot.
Hooks, Bins, And Holders That Actually Work
Not all pegboard accessories are created equal. Straight hooks work for screwdrivers and pliers, while loop hooks hold hammers and hand saws securely. For small parts like screws, washers, and nails, attach clear plastic bins or repurpose glass jars with metal lids screwed to the board.
A magnetic strip mounted between pegboard sections keeps drill bits and hex keys from wandering off.
Layout Tips For A Shed That Stays Tidy
Group tools by task, not by size. Put plumbing wrenches near pipe cutters, and electrical tools together on their own panel. Keep frequently used items at eye level and heavier tools lower down.
Trace outlines around each tool with a marker so you can tell at a glance when something is missing. Leave a little empty space for new additions, because your tool collection will grow.
5. Stackable Clear Bins for Quick Identification
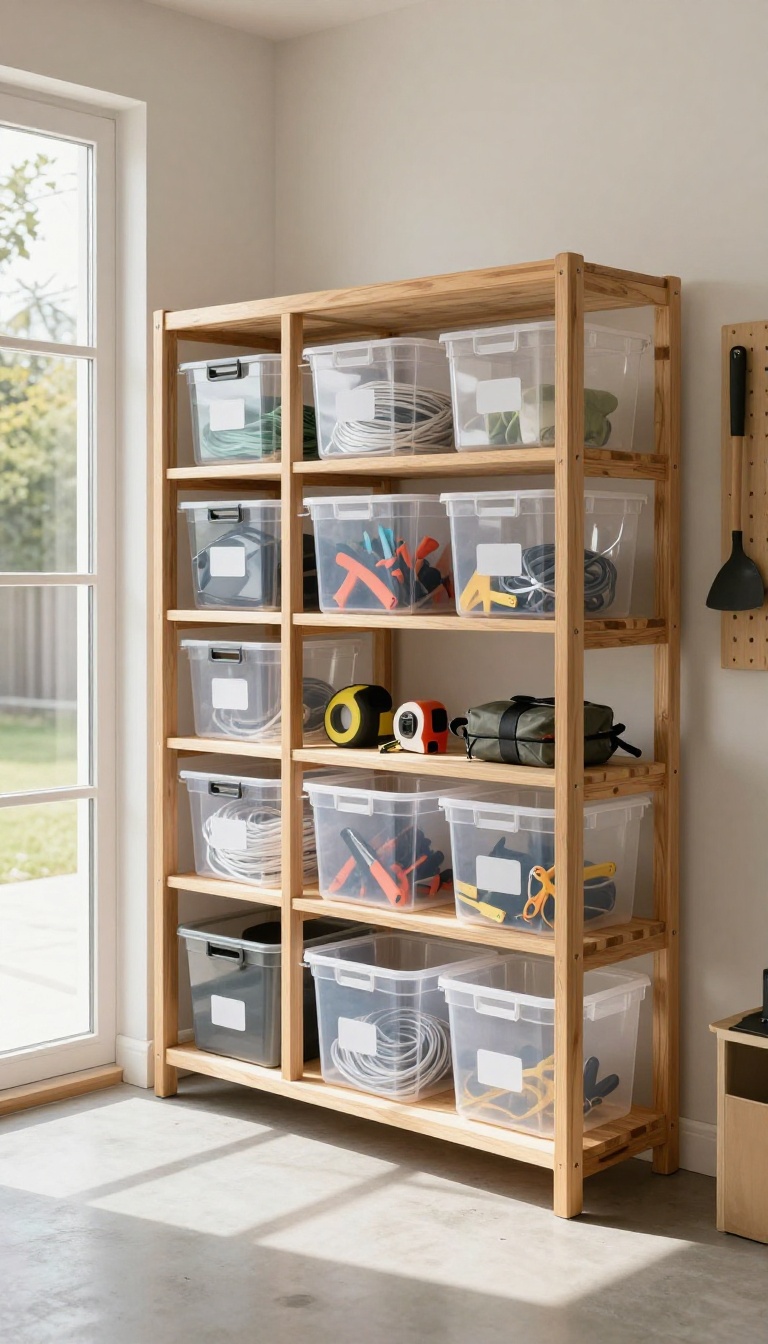
Digging through a dark tote to find a single extension cord gets old fast. Clear bins solve that problem before it starts because you can see exactly what's inside without pulling everything out. They also stack, so you can build upward instead of spreading across the floor.
That combination of visibility and vertical storage makes them one of the easiest upgrades for any shed.
The real win here is speed. When you can spot the bin holding your tape measure from across the shed, you stop wasting ten minutes on a two-minute task. Clear bins work best when you commit to a simple system.
Pick one size that fits your shelves, buy enough to cover your categories, and label each one the same way. Consistency is what keeps the system running after the novelty wears off.
Pick A Size That Stacks Cleanly
Measure your shelf height before you buy anything. A bin that's two inches too tall ruins the whole stack. Stick with one or two sizes across the shed.
Mixed sizes waste space and make towers that wobble. Uniform bins lock together and let you rearrange without rebuilding.
Label The Short Side, Not The Lid
Labels on the lid disappear the moment you stack another bin on top. Put them on the short end facing out. Use a bold marker or printed labels with big letters.
You should be able to read them from the doorway without squinting.
Group By Task, Not By Type
A bin for 'camping' beats separate bins for lanterns, stakes, and rope. You grab one thing and you're done. Think about how you actually use your stuff.
Task-based bins cut down on trips back and forth, which is the whole point of getting organized.
Keep Heavy Bins Low
Put the heaviest bins on the bottom shelf or the floor. Lifting a loaded bin from overhead is a quick way to hurt your back. Light stuff like seasonal decor and pool toys can go up top.
Match the weight to the height and the stack stays safe.
6. A Magnetic Strip for Metal Tools and Bits
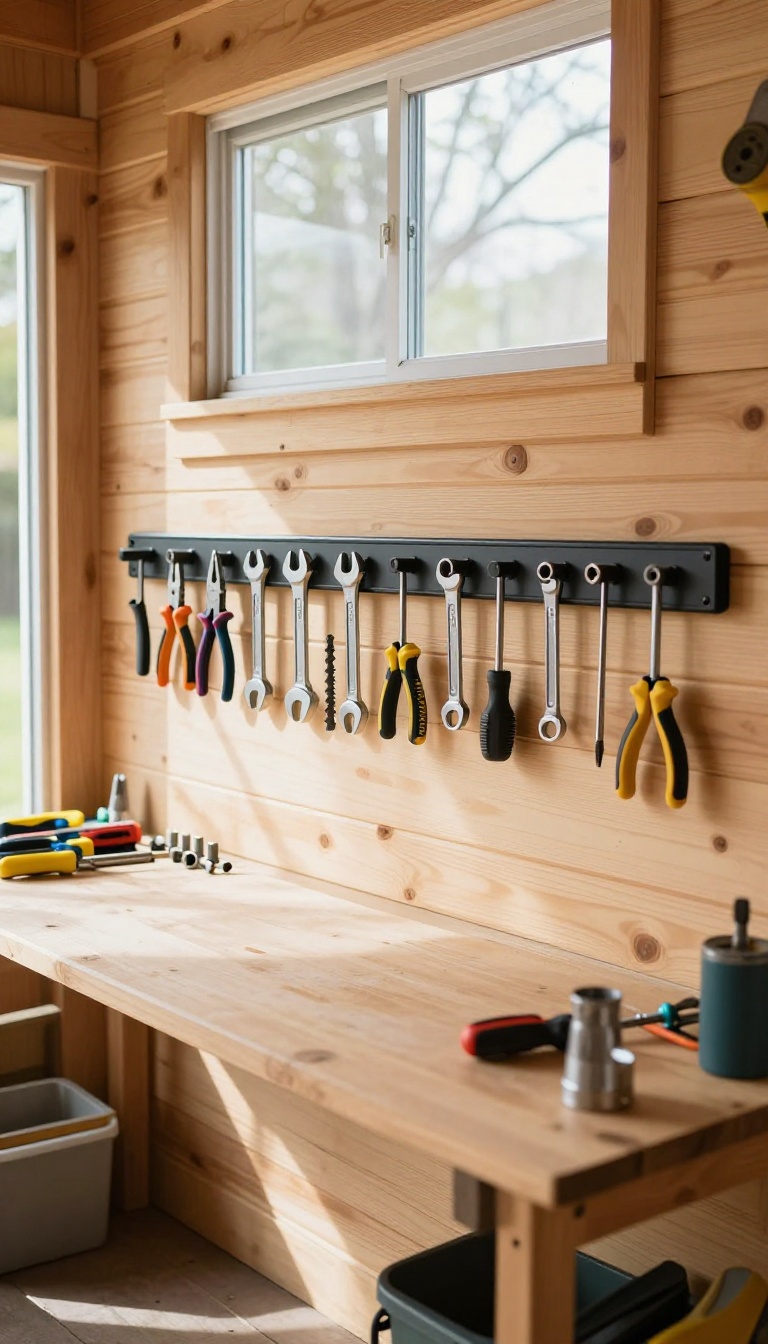
Small metal tools have a talent for disappearing into the mess. Pliers, wrenches, drill bits, and screws end up buried in a drawer or scattered on a shelf. A magnetic strip mounted on the wall changes that.
It grabs anything metal and holds it in plain sight, so you can spot what you need and grab it without digging.
A magnetic tool strip is one of the simplest upgrades you can make in a shed. It takes up almost no space, installs in minutes, and instantly organizes the small metal items that cause the most frustration. Instead of rummaging through a coffee can of mixed bits, you just reach up and pull off the one you need.
Why It Works So Well
Magnetism does the work for you. Anything steel or iron sticks to the bar and stays put until you pull it off. That means no hooks, no clips, and no fussing with packaging.
It also keeps tools off the floor and off your workbench, freeing up flat surfaces for actual projects. And because everything is visible, you stop buying duplicates because you forgot you already had a pair of needle-nose pliers.
Where To Mount It
Put it where you naturally reach for tools. The wall right above your workbench is ideal. If you do a lot of drilling, mount a second strip near your drill press or charging station.
For gardening tools, a strip inside the door keeps pruners and trowels handy. Just avoid spots where metal shavings or sawdust will constantly coat the magnet. A little clearance from your main cutting area helps.
What Sticks And What Doesn't
Drill bits, wrenches, pliers, screwdrivers, sockets, and scissors all stick great. So do small hammers and tape measures with metal cases. What won't stick: aluminum, brass, copper, and most stainless steel.
That means your favorite aluminum level or brass hose nozzle needs a different home. Test your tools with a fridge magnet before you commit wall space. Also, keep magnetic strips away from credit cards, phones, and anything with a magnetic stripe or sensitive electronics.
Installation Tips And Stronger Options
Most magnetic strips come with screws or strong adhesive. Screws are better for sheds because temperature swings can weaken adhesive over time. If you have heavy tools, look for strips with a higher pull force, usually listed in pounds.
You can also buy magnetic strips with a metal backplate that boosts holding power. For a custom look, mount a strip inside a shallow wooden channel or a piece of PVC pipe cut in half. That keeps the magnet from grabbing everything nearby and gives it a cleaner finish.
7. Corner Shelving Units That Use Dead Space
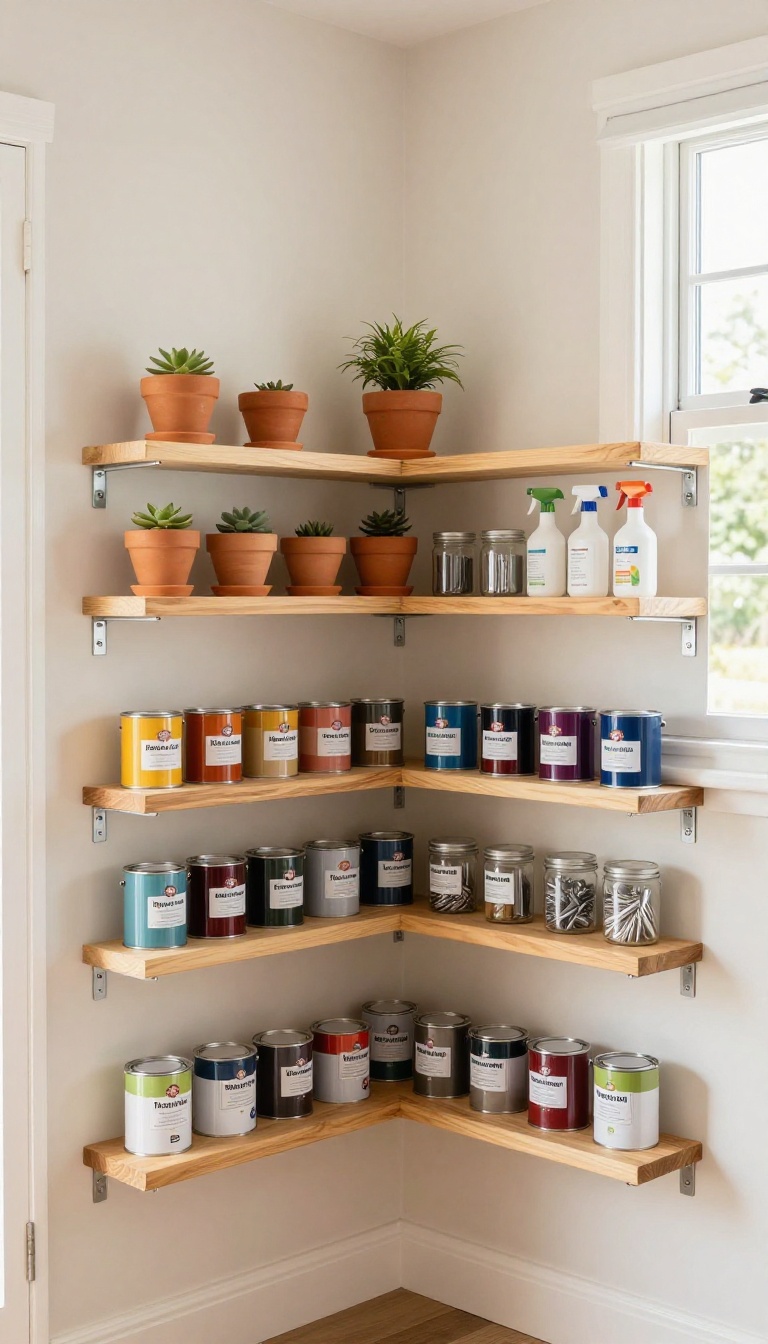
Corners in a shed collect cobwebs and stray screws while the walls around them stay crowded. A corner shelf turns that awkward pocket into usable storage without stealing floor space. It’s one of the cheapest upgrades you can make, and it takes about an hour to install.
You don’t need a full carpentry setup to pull this off. A few triangular shelves, some brackets, and a drill will do. The goal is simple: put the stuff you reach for often at eye level and let the corners earn their keep.
Pick The Right Corner
Not every corner is equal. Choose one near the door if you store paint cans or small pots you grab regularly. A back corner works better for seasonal items you only touch twice a year.
Check for outlets, windows, or door swing first so you don’t block anything important.
Shelf Styles That Fit
Triangular shelves are the obvious pick, but you can also use two straight shelves cut to meet at a 45-degree angle. Wire corner racks work well for lightweight items like plant pots, while solid wood or plywood handles paint cans without sagging. Adjustable brackets let you change shelf heights as your storage needs shift.
What To Put There
Paint cans, small pots, spray bottles, and jars of nails all sit nicely on corner shelves. Keep the heaviest items on the lowest shelf to avoid tipping. A small lip or a bungee cord across the front keeps round containers from rolling off during an earthquake or a clumsy reach.
Install Tips That Save Headaches
Find the studs first—corner framing can be tricky, so use a stud finder or knock test. If you can’t hit a stud, use heavy-duty toggle bolts for anything holding real weight. Leave at least 12 inches between shelves so you can actually reach the back.
A quick coat of paint or sealer keeps moisture from ruining the wood.
8. A Wheeled Cart for Lawn and Garden Supplies
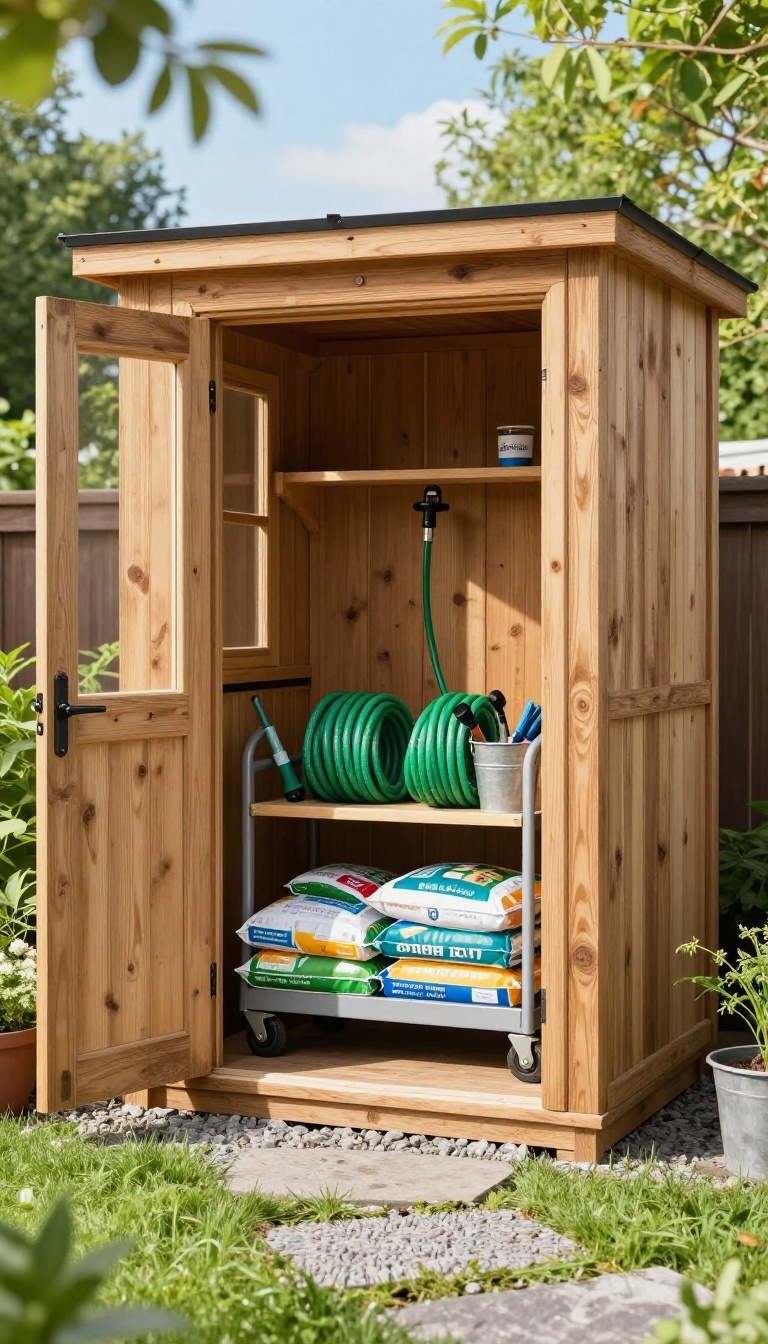
Fertilizer bags, coiled hoses, and sprinklers tend to pile up in one corner of the shed because hauling them across the yard is a chore. A wheeled cart solves that by turning the pile into a single load you can push to the door and roll straight to the garden bed. The cart lives in the shed, but it works outside too.
You load it once, move it where you need it, and roll it back without dragging anything through the grass.
Pick A Cart That Fits Your Shed Door
Measure your shed doorway before you buy anything. A cart that is two inches too wide becomes a permanent obstacle instead of a helpful tool. Look for a model with pneumatic tires if your yard is uneven.
Hard plastic wheels sink into soft soil and rattle across gravel, which gets old after the first few trips.
Load It By Task, Not By Weight
Keep the heavy stuff low and centered. Fertilizer and soil bags go on the bottom shelf, while hoses and sprinklers ride on top where you can grab them without bending. A small bucket hooked to the side holds gloves, stakes, and twine.
That way you are not making three trips back to the shed for things you forgot.
Park It Where It Rolls Out Clean
Leave the cart near the door but not blocking it. A spot just inside the threshold lets you roll it out without moving anything else first. If your shed floor is dirt or gravel, lay a short strip of pavers under the wheels.
It keeps the cart from sinking and makes the first push much easier.
Keep It From Becoming A Dumping Ground
A cart only helps if it stays loaded with the right things. Once a season, pull everything off and put back only what you actually use. Hoses should be drained before they go back on the cart.
Standing water left in a coiled hose turns stale and can crack the rubber over winter.
9. Vertical Racks for Long-Handled Tools
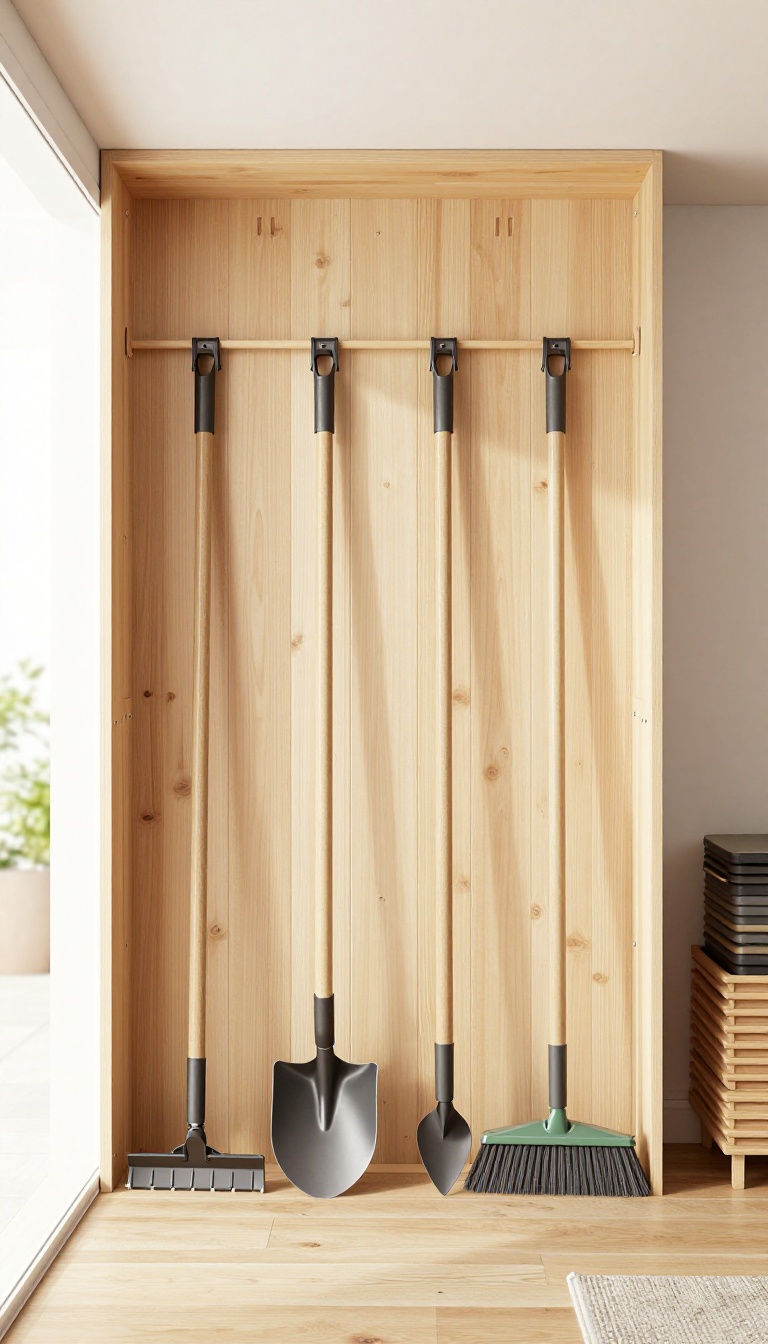
Long-handled tools are the worst offenders in a cluttered shed. Rakes, shovels, hoes, and brooms are awkward to lean, easy to knock over, and nearly impossible to sort through when they are piled in a corner. A vertical rack solves that by giving every handle its own slot.
Instead of tripping over a tangled heap, you grab exactly what you need and get back to work.
A good vertical rack does two things: it holds tools upright and keeps them separated. That means no more wrestling a shovel out from under a rake, and no more cracked handles from tools falling over. You can buy a ready-made rack or build one from scrap wood in an afternoon.
Either way, the goal is the same: get long handles off the floor and onto the wall.
Wall-mounted Racks That Hold Handles Securely
Wall-mounted racks use spring clips, rubber grips, or deep hooks to hold each handle in place. Look for a rack with at least six slots so you can space tools out. Mount it at chest height so you can reach the top tools without a step stool.
If you have heavy tools like a post-hole digger, use a rack rated for the weight or add a second mounting point.
Diy Options Using Hooks And Pvc
A simple DIY version uses two horizontal boards with staggered hooks. Screw the boards into studs, then space hooks about six inches apart. For a cleaner look, cut short sections of PVC pipe and mount them vertically as individual sleeves.
Each pipe holds one handle and keeps tools from leaning into each other. This setup costs very little and works well in a small shed.
Placement Tips For Easy Access
Put the rack near the door but not behind it. You want to grab a rake without stepping over the lawnmower. Keep the tallest tools on the ends so they do not block shorter ones.
If your shed has a low ceiling, angle the rack slightly or use a floor-to-ceiling tension rod with hooks. That way you use vertical space without hitting your head.
10. A Dedicated Sports Equipment Zone
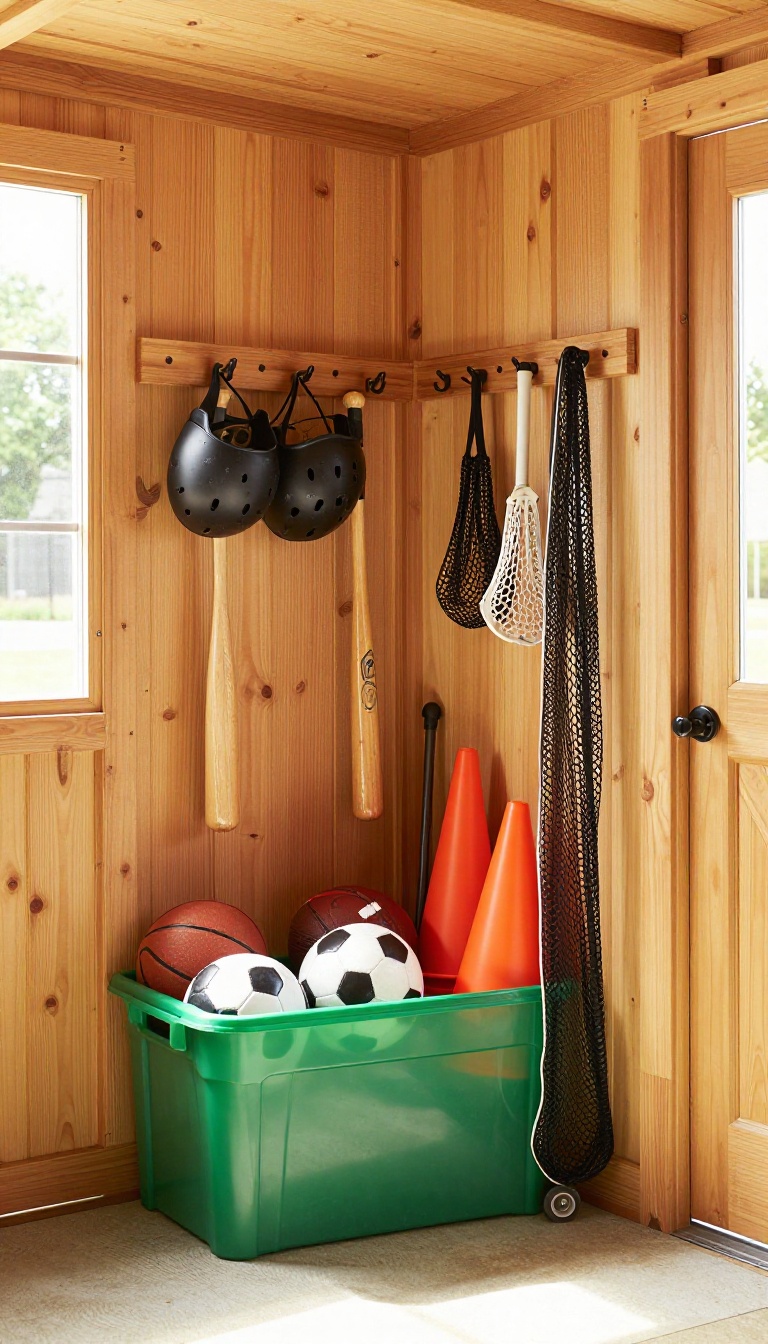
Balls roll under the lawnmower, helmets get buried under tarps, and the bat you need is always behind the paint cans. A dedicated sports zone gives all that gear a permanent home so kids can grab what they need and get outside faster. You don't need a full locker room setup.
A corner, a wall, or even a rolling cart can do the job if you organize it around how your family actually plays. The goal is simple: everything visible, reachable, and easy to put back.
Pick A Corner That Works
Choose a spot near the door so kids can grab gear without walking through the whole shed. A corner with two walls gives you natural boundaries for racks and bins. If your shed is tight, a rolling cart works just as well.
You can pull it out on game day and tuck it back when the season ends.
Use Open Bins For Balls
Clear or open-top bins let kids see what's inside without digging. A wide, shallow bin works better than a deep tote for basketballs, soccer balls, and footballs. Label the front with a marker or a piece of tape.
Even a simple word like "balls" keeps everyone from dumping random stuff in the wrong bin.
Hang Bats, Sticks, And Helmets
A wall-mounted rack or a row of sturdy hooks keeps bats, lacrosse sticks, and helmets off the floor. Mount it at kid height so they can reach without climbing. Use separate hooks for helmets so they dry out and don't get crushed.
A small mesh bag hung nearby holds mouthguards, cones, or extra laces.
Corral Nets And Cones
Nets, pop-up goals, and cones tangle fast if you toss them in a pile. A tall bin or a hook near the ceiling keeps them contained and out of the way. For smaller items, a shower caddy or a bucket with dividers works well.
It's cheap, portable, and easy to rinse off when things get muddy.
11. Hanging Hooks for Extension Cords and Hoses
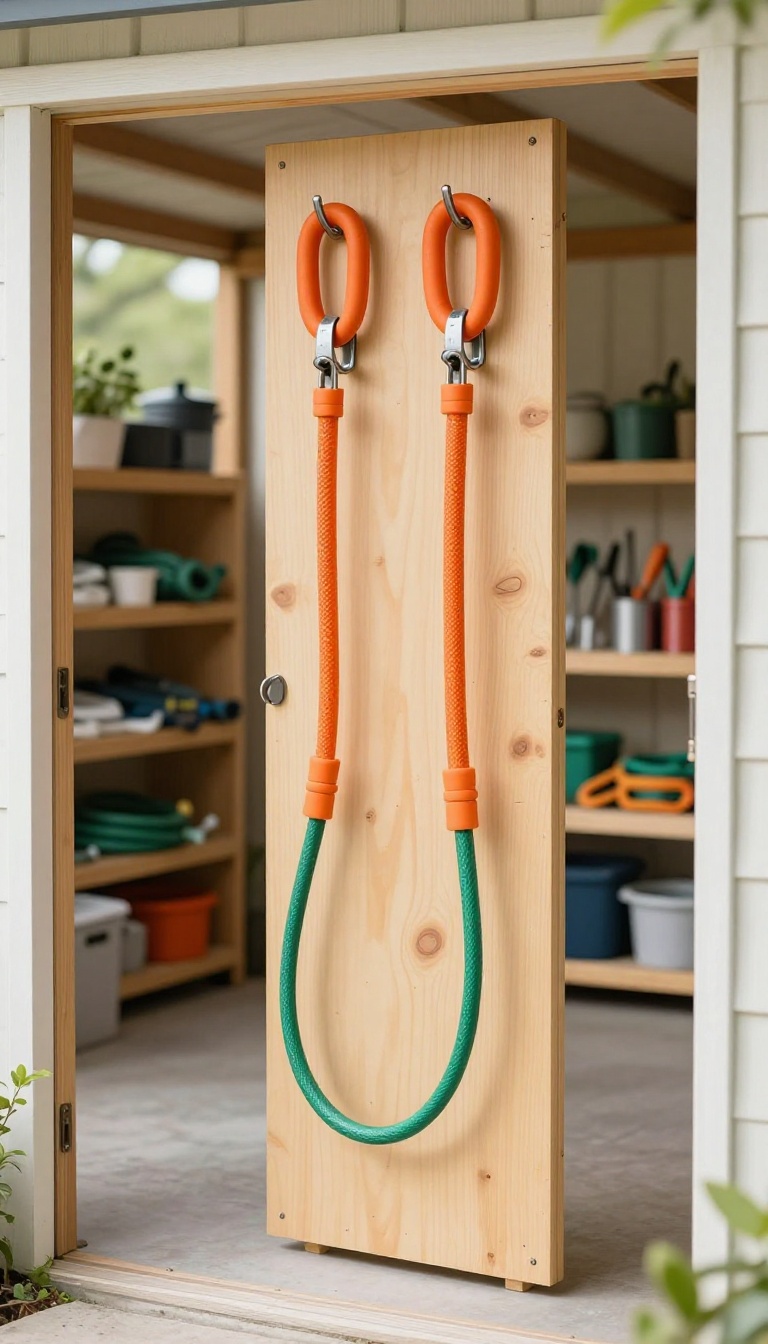
Extension cords and garden hoses have a way of turning into a tangled mess the second you look away. You set one down for five minutes, and somehow it comes back with three knots and a kink that never quite goes away. The fix is almost embarrassingly simple: get them off the floor and onto a hook.
A heavy-duty hook on the shed wall gives each cord and hose its own spot, so it stays looped, untangled, and ready to grab. It also clears floor space you didn't know you were missing. Once the cords and hoses are up, you can actually walk into the shed without stepping over a snake pit of rubber and wire.
Extension cords and hoses are the two items in a shed that seem to actively resist organization. They're long, they're floppy, and they love to tangle around anything nearby. Hanging them on hooks solves the problem in one move.
The key is picking hooks that can handle the weight and shape of what you're hanging. A cord is light and thin, so it needs a hook with a deep curve to keep it from sliding off. A hose is heavy and bulky, so it needs something wider and sturdier.
Once you match the hook to the item, the whole system runs itself. You loop, you hang, you walk away. No more untangling a cord every time you need to charge the mower.
Pick The Right Hook
For cords, a simple U-shaped utility hook works fine. Look for one with a rubber coating so it grips the cord and doesn't scratch it. Screw it into a stud or a solid piece of plywood, not just drywall, because cords can get yanked.
For hoses, go bigger. A large J-hook or a heavy-duty wall-mounted hose hanger can hold a coiled hose without bending it into sharp angles. Metal is better than plastic here, since hoses get heavy when there's any water left inside.
Loop, Don't Knot
The whole point of hanging is to avoid knots, so take a second to loop the cord or hose properly. For a cord, use the over-under method: alternate loops so it hangs straight and pulls free without tangling. For a hose, coil it in large, even loops and drape the whole coil over the hook.
If you just wad it up and shove it on, you're back to square one. A neat loop takes ten extra seconds and saves you five minutes of frustration later.
Space Them For Easy Access
Don't cram every hook into one corner. Spread them along the wall at a comfortable height, usually around chest level, so you can reach them without bending or stretching. Leave a little room between hooks so the cords and hoses don't rub against each other.
If you have multiple cords, label the hooks or use different colors so you can grab the right one without pulling everything down.
12. A Small Workbench With Underneath Storage
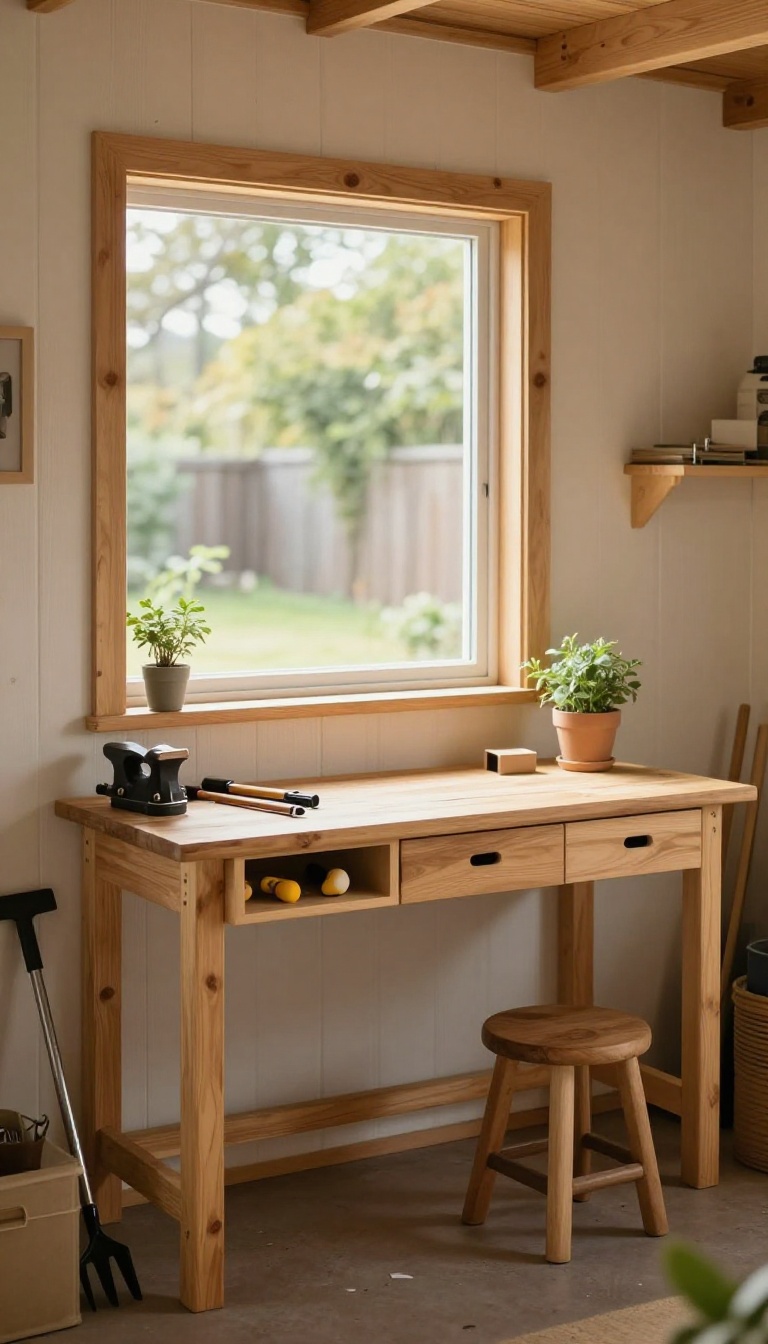
A workbench does not need to take over the whole shed. A compact version, maybe three or four feet wide, gives you a solid spot to fix a loose hinge or pot a plant without turning the space into a full workshop. The real payoff is what happens below the surface.
Drawers, shelves, or a simple open cubby keep your tools and project materials within arm's reach instead of scattered across the floor. You can build one from a kit, modify a sturdy table, or buy a ready-made bench with storage built in. Either way, you end up with a dedicated work zone that earns its footprint.
A workbench earns its keep when everything you need sits right under it. That means no more digging through a bucket for a screwdriver while balancing a board on your knee. The key is matching the storage below to the projects you actually do.
A gardener needs different cubbies than someone who fixes bikes or builds birdhouses. Once you settle that, the bench practically organizes itself.
Pick A Height That Works For You
Standard bench height is around 34 to 36 inches, but that suits standing work for an average-height adult. If you plan to sit on a stool, go a little lower. Test the height by pretending to saw or hammer—your elbow should bend comfortably at about 90 degrees.
A bench that is too tall wears out your shoulders. Too short and your back aches after ten minutes. Get this one measurement right and you will actually use the bench instead of avoiding it.
Choose Drawers, Shelves, Or Both
Drawers hide small tools and keep sawdust off them. They work well for screwdrivers, drill bits, tape, and pencils. Shelves are better for bulky items like toolboxes, paint cans, or a small bucket of potting mix.
A mix gives you the best of both. Put drawers up top for hand tools and open shelves below for heavier gear. If you build it yourself, a simple plywood box with full-extension drawer slides is plenty sturdy and costs less than a store-bought unit.
Keep The Floor Clear Underneath
Even with storage, leave a few inches of clearance at the bottom. That gap lets you sweep out leaves and dirt without moving the whole bench. It also gives you a spot to slide a small stool or a rolling cart when you are not using it.
If your shed floor gets damp, set the bench legs on pressure-treated blocks or plastic feet. That small lift keeps the wood from soaking up moisture and rotting over time.
Add A Back Panel For Hand Tools
The wall behind your bench is prime real estate. A simple pegboard or a few strips of wood with hooks holds hammers, pliers, and measuring tape where you can see them. You will grab the right tool faster and free up drawer space for smaller items.
Just avoid hanging anything so low that it blocks the work surface. Keep the panel above the bench top and leave a little breathing room so you can lean a board against the wall when needed.
13. Labeled Drawers for Small Hardware and Fasteners
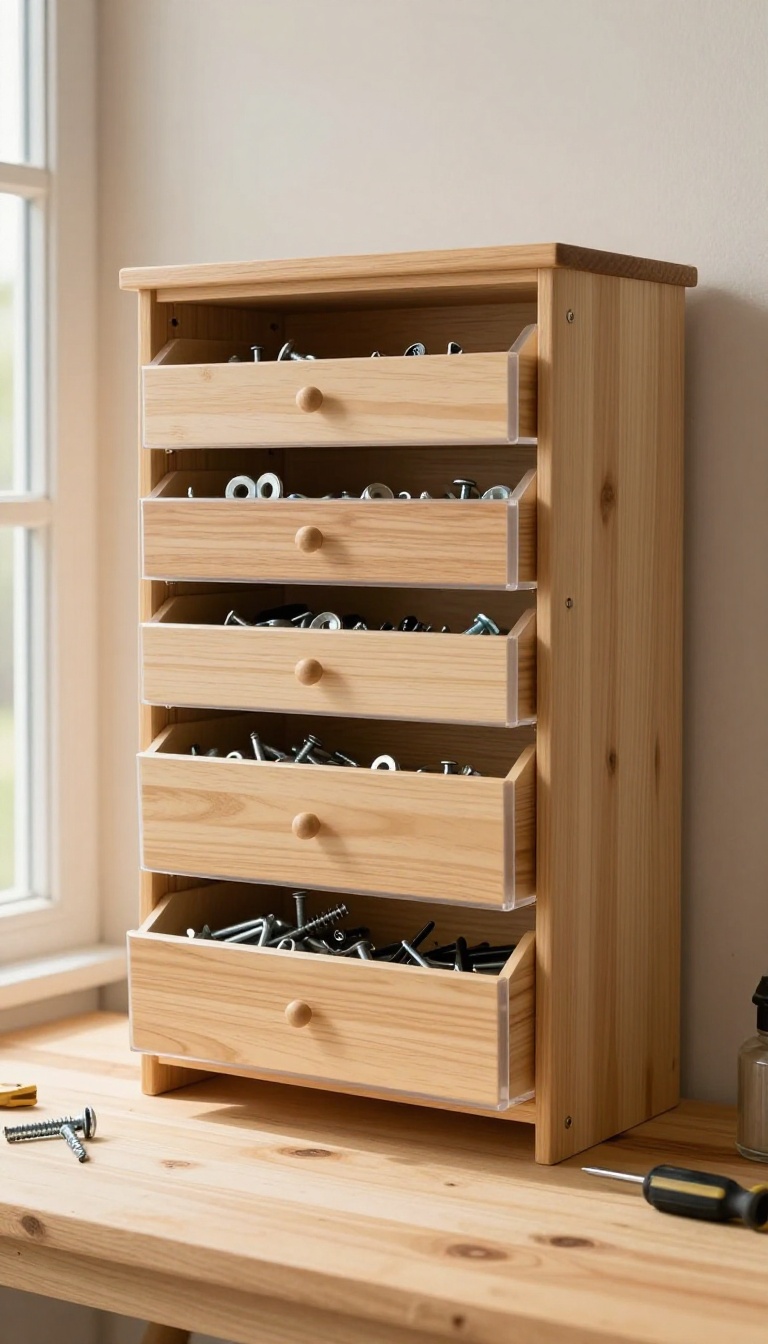
A coffee can full of mixed screws is a small problem that wastes a surprising amount of time. You dig for a matching pair, come up with one, and then hunt for a washer that fits. A compact cabinet with labeled drawers fixes that in an afternoon.
This is not about building a fancy workshop wall. It is about giving the tiny stuff a home so the big stuff stays easy to reach. Once the drawers are sorted, you stop treating every repair like a scavenger hunt.
Small hardware multiplies on its own. You buy a box of screws for one project, keep the extras, and within a year you have a shoebox of loose nails, bent hooks, and mystery bolts. None of it takes up much room, which is exactly why it spreads everywhere.
A drawer cabinet works because it sorts by size and type at a glance. You pull one drawer, grab what you need, and slide it shut. No dumping, no digging, no guessing whether that screw is #8 or #10.
You do not need a huge unit. A small desktop cabinet with eight to twelve drawers fits on a shelf or hangs on the wall. The point is access, not volume.
Choosing The Right Drawer Unit
Look for a cabinet with clear or open-front drawers so you can see the contents without pulling each one. Plastic units are cheap and fine for most sheds. Metal ones hold up better if your shed gets damp or you store heavier items like bolts and anchors.
Size matters more than material. A unit that is too deep becomes a junk drawer again because you cannot see the back. Shallow drawers keep everything visible and force you to keep only what fits.
Sorting By Size And Type
Start with broad groups: nails, screws, washers, nuts, bolts, and anchors. Then split each group by size or length. A drawer for 1-inch screws and another for 2-inch screws beats one drawer labeled just 'screws. ' Use small dividers or shallow trays inside each drawer if you want to separate heads, threads, or finishes.
Even a cut-down cereal box works as a quick divider. The goal is one glance, one grab.
Labeling That Actually Stays Readable
Handwritten tape labels fade and peel in a shed. Use a label maker if you have one, or write on painter's tape with a permanent marker. Painter's tape comes off clean when you reorganize.
Label the front of each drawer, not the top. You read the front when the cabinet sits on a shelf. If you mount it on the wall, angle the labels so they face you at eye level.
Keeping The System From Backsliding
The cabinet only works if loose hardware goes back where it belongs. Keep a small cup or tray on the workbench for 'unknowns' and sort it once a month. If a drawer gets too full, split it instead of cramming.
A five-minute reset at the end of a project saves the next hour of searching. That habit is what keeps the drawers useful instead of just another place to pile stuff.
FAQ
What's the best way to store a lawn mower in a small shed?
Park it on a dedicated mat near the door and use a wall-mounted hook for the handle if space is tight. A fold-down ramp can help you roll it in and out without lifting.
How do I keep my shed organized without spending a lot?
Start with what you have: hooks, clear bins, and a label maker. Group similar items together and use vertical space before buying new shelving.
Should I use plastic or metal shelving in a shed?
Plastic resists rust and moisture, making it great for damp climates. Metal is stronger for heavy tools but may need rust protection in humid areas.
How can I protect stored items from moisture in a shed?
Add a dehumidifier or moisture absorber, ensure good ventilation, and keep items off the floor on shelves or pallets. Sealed bins also help.
What's the easiest way to store long-handled garden tools?
A simple rack with deep hooks or a tall bucket works well. Stand tools upright with handles up so you can grab them without moving others.
Conclusion
A shed works hardest when it matches how you actually live. Maybe that means a potting bench by the door, a bike rack on the wall, or shelves that finally swallow the holiday bins. Pick the setup that solves your worst clutter problem first, then expand once you see what still bugs you.
Start small this weekend. Clear one corner, add one smart storage piece, and let the rest of the shed grow into its job over time. A useful backyard space beats a perfect one every single season.