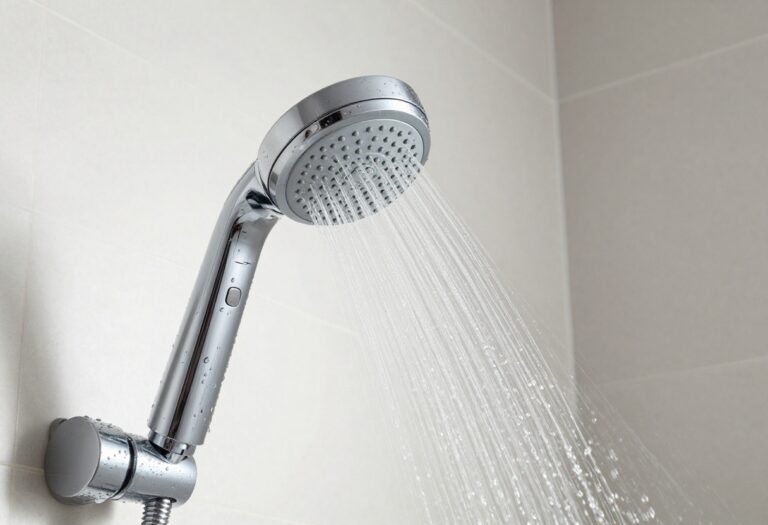
17 Cleaning Grout in the Shower Tile Tips for Stains
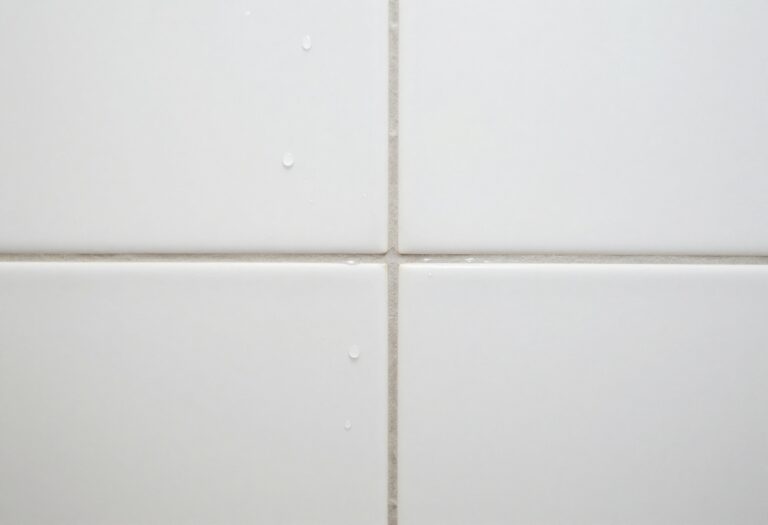
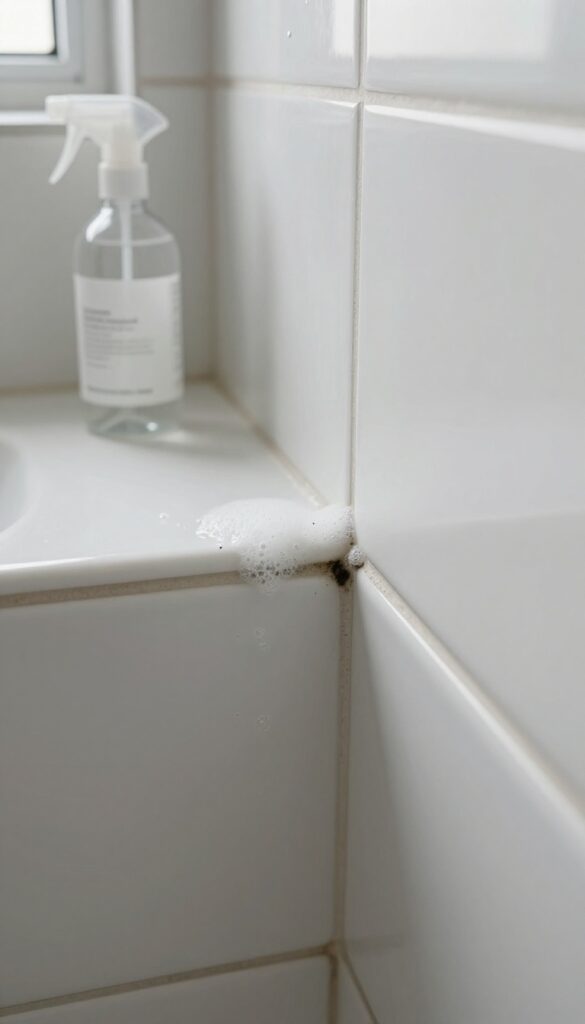
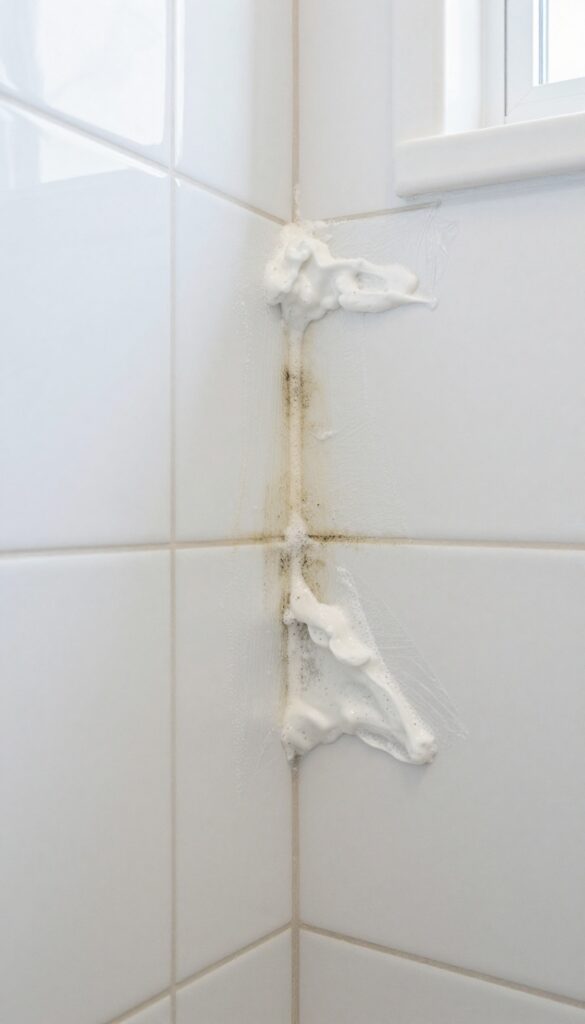
Grout stains in the shower are frustrating. No matter how often you scrub, that grayish film or dark mold keeps coming back. The porous nature of grout makes it a magnet for soap scum, hard water minerals, and mildew.
But you don't need harsh chemicals or expensive tools to fix it. With the right approach, you can lift stains and prevent them from returning. These 17 tips cover everything from everyday maintenance to deep cleaning hacks.
Whether you're dealing with light discoloration or stubborn black spots, there's a solution here that fits your time and budget. Let's get that grout looking like new.
1. Start with a Baking Soda Paste
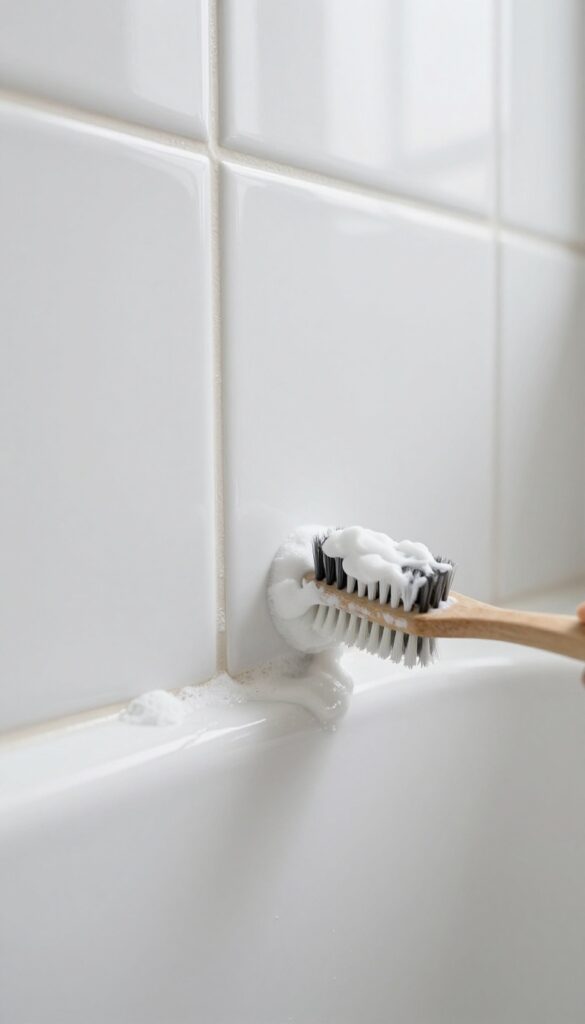
Baking soda is a mild abrasive that can lift surface stains without scratching tile. When mixed into a paste, it clings to vertical grout lines and works its way into pores. This method is ideal for light discoloration from soap scum or everyday use.
Mix three parts baking soda with one part water until it forms a thick, spreadable paste. Apply it directly to the grout lines with an old toothbrush or a small spatula. Let it sit for 10 minutes to break down grime.
Then scrub in a circular motion with a stiff-bristled brush. Rinse with warm water and wipe dry. For extra cleaning power, add a splash of white vinegar to the paste, but test on a hidden spot first.
Why Baking Soda Works
Baking soda has a pH of 8, making it slightly alkaline. This helps dissolve acidic stains like soap scum and hard water deposits. Its fine grit scrubs away dirt without damaging the grout or tile surface.
How To Apply For Best Results
Work in small sections so the paste doesn't dry out. Use a grout brush or an old toothbrush to push the paste deep into the lines. For stubborn spots, let the paste sit for 15 minutes instead of 10.
When To Use This Method
This technique is best for light to moderate stains. If your grout is heavily darkened by mold or mildew, you may need a stronger cleaner first. But for routine upkeep, baking soda paste is a safe starting point.
2. Use White Vinegar for Mineral Deposits
Hard water stains and soap scum are common culprits behind dingy grout. White vinegar cuts through these mineral deposits naturally without harsh fumes. It's a simple, affordable solution that works fast.
Spray undiluted white vinegar directly onto grout lines and let it sit for about five minutes. The acetic acid breaks down calcium and lime buildup, making scrubbing much easier. Use a stiff brush or an old toothbrush to work the vinegar into the grout, then rinse thoroughly with warm water.
For stubborn spots, repeat the process or let the vinegar sit a bit longer. One important caveat: avoid vinegar on natural stone tiles like marble or travertine, as the acid can etch and dull the surface. Stick to ceramic, porcelain, or glass tile for best results.
Why Vinegar Works So Well
Vinegar is mildly acidic, which neutralizes alkaline mineral deposits from hard water. It also dissolves soap scum, a waxy residue that traps dirt and bacteria. Unlike bleach, vinegar doesn't produce toxic fumes, making it safer for enclosed shower spaces.
How To Apply For Best Results
Fill a spray bottle with undiluted white vinegar. Mist the grout lines until they're wet but not dripping. Let it sit for five minutes—longer if stains are heavy.
Scrub with a grout brush or toothbrush, working in small circles. Rinse with warm water and wipe dry with a microfiber cloth to prevent new deposits.
When To Skip This Method
If your shower tiles are natural stone (marble, limestone, travertine), skip the vinegar. The acid can eat away at the stone's surface, leaving permanent dull spots. For stone, use a pH-neutral cleaner instead.
Also avoid vinegar on unsealed grout, as the acid may weaken it over time.
3. Try Hydrogen Peroxide for Mold
Mold in grout lines is not just ugly—it can be a health concern. Hydrogen peroxide offers a simple, fume-free way to kill mold spores without the harsh smell of bleach. It's gentle enough for daily use but powerful enough to tackle established colonies.
Hydrogen peroxide is a natural disinfectant that breaks down into water and oxygen, making it safe for most tile and grout. For best results, use a 3% solution straight from the bottle. Apply it directly to moldy grout lines, let it fizz for about 10 minutes, then scrub with a stiff brush.
Rinse thoroughly and repeat if needed. This method kills mold at the root and helps prevent regrowth.
Why Hydrogen Peroxide Works
Hydrogen peroxide releases oxygen bubbles that penetrate porous grout and lift mold from deep within the surface. Unlike bleach, it doesn't produce toxic fumes and is less likely to discolor colored grout. It's also effective against bacteria and viruses, making it a great all-purpose cleaner for showers.
How To Apply It Safely
Always test on a small, hidden area first to ensure your grout doesn't react poorly. Wear gloves to protect your skin, and avoid mixing hydrogen peroxide with other cleaners, especially bleach or vinegar, which can create harmful gases. Ventilate the bathroom by opening a window or turning on the fan.
When To Repeat The Treatment
For stubborn mold, you may need to repeat the process weekly until the growth stops. Once the grout is clean, a monthly treatment can keep mold at bay. If mold returns quickly, check for underlying moisture issues like leaks or poor ventilation.
4. Make a Lemon and Salt Scrub
When you want a fresh, natural cleaner that actually works, look no further than your kitchen. Lemons and salt combine to create a powerful scrub that tackles grout stains without harsh fumes. The citric acid breaks down mineral deposits and soap scum, while the salt provides gentle abrasion to lift dirt from porous grout.
This simple scrub is perfect for light to moderate stains and leaves your shower smelling clean and citrusy. It's also safe for most tile types, though you should avoid it on natural stone like marble or travertine, as the acid can etch the surface.
How To Make And Apply The Scrub
Cut a fresh lemon in half crosswise. Pour a small amount of coarse salt (table salt works too, but coarse is better) onto a plate or directly onto the cut lemon surface. Rub the lemon half firmly along the grout lines, squeezing gently to release juice as you go.
Focus on one small section at a time, and let the mixture sit for 5–10 minutes before rinsing.
Why It Works So Well
Citric acid naturally dissolves calcium deposits and soap scum, while salt acts as a mild abrasive that doesn't scratch tile. Together, they create a chemical-mechanical action that lifts stains from deep within the grout pores. Plus, lemon has antibacterial properties that help kill mold and mildew spores.
When To Use This Method
This scrub is ideal for weekly or biweekly maintenance to keep grout looking bright. It's also great for spot-treating small stains before they set in. For heavy mold or deep-set discoloration, you may need a stronger cleaner, but for everyday freshness, lemon and salt are hard to beat.
5. Use a Steam Cleaner for Deep Grime
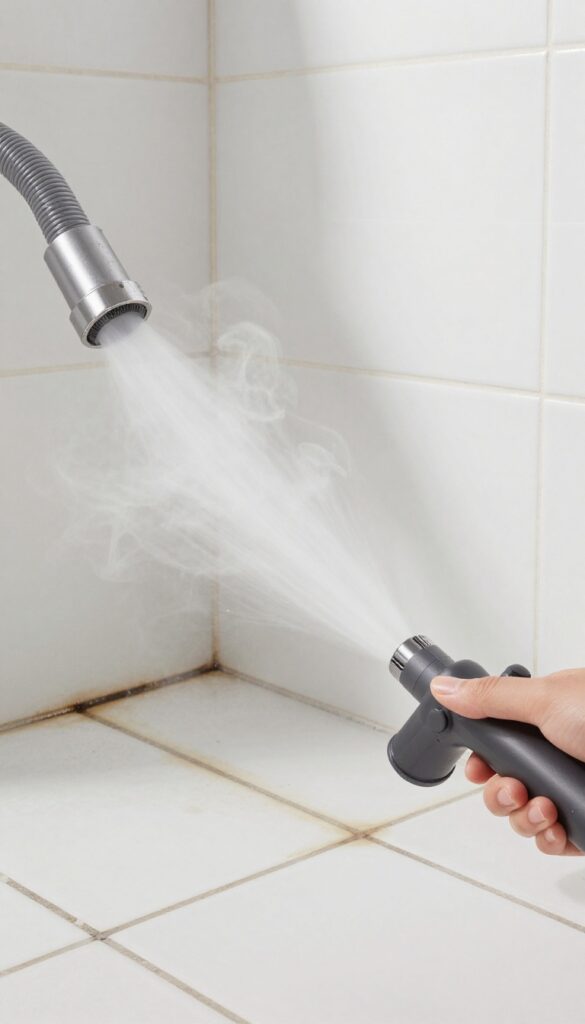
When scrubbing alone isn't cutting it, a steam cleaner can be a game changer. These handheld devices blast hot vapor into the porous surface of grout, loosening dirt and killing bacteria without any chemicals. It's especially effective for stubborn grime that's been building up for months.
Steam cleaning works by heating water to over 200°F, producing pressurized steam that penetrates deep into grout lines. The high temperature breaks down soap scum, hard water deposits, and even mold spores, while the pressure flushes out debris. Unlike bleach or harsh cleaners, steam doesn't leave any residue behind, so your grout stays cleaner longer.
For best results, use a handheld steamer with a small brush attachment and work in sections, wiping away the loosened grime with a microfiber cloth.
Choosing The Right Steamer
Not all steam cleaners are created equal. Look for a handheld model with at least a 10-ounce water tank and a brush nozzle specifically designed for grout. Some popular options include the Bissell SteamShot or McCulloch MC1275.
Avoid large floor steamers—they're too bulky for shower tile work.
Step-by-step Steam Cleaning
Start by filling the steamer with distilled water to prevent mineral buildup. Let it heat up for a few minutes, then hold the nozzle about an inch from the grout and move slowly along each line. The steam will loosen dirt almost instantly.
Follow up with a dry cloth to absorb the moisture and lifted grime. Repeat on stubborn spots.
Safety And Precautions
Steam gets extremely hot, so wear gloves and avoid directing it at your skin. Also, test the steamer on an inconspicuous tile first to ensure the heat doesn't damage the finish. Keep the room ventilated to let steam dissipate quickly.
6. Apply a Bleach Pen for Precision
Sometimes you just need to nuke a single spot without disturbing the rest of the tile. That’s where a bleach pen comes in handy. It looks like a marker but dispenses thick bleach gel exactly where you want it.
This tool is perfect for targeting stubborn stains without risking overspray on your shower walls or fixtures.
Why A Bleach Pen Works So Well
The gel formula clings to vertical grout lines, so it stays put instead of dripping away. Bleach penetrates porous grout to kill mold spores and lift deep-set discoloration. Plus, the precision tip keeps the bleach off your tile glaze, preventing etching or whitening of colored tiles.
How To Use It The Right Way
Start with dry grout—moisture dilutes the bleach. Draw the pen tip along the stained grout line, squeezing gently to release gel. Let it sit for 10 minutes, then scrub lightly with a small brush and rinse thoroughly with water.
Open a window or turn on the fan; bleach fumes are strong.
When To Skip This Method
If your grout is old and crumbling, bleach can weaken it further. Also avoid bleach pens on natural stone tiles like marble or travertine—the acid can etch the surface. Stick to this trick for ceramic, porcelain, or glass tile only.
7. Create a Oxygen Bleach Soak
Oxygen bleach is a gentler alternative to chlorine bleach but still packs a punch against organic stains like mildew and soap scum. Unlike harsh chemicals, it breaks down into water and oxygen, making it safe for colored grout and the environment. This overnight soak method is perfect for deep-set discoloration that regular scrubbing can't touch.
Why Oxygen Bleach Works
Oxygen bleach releases active oxygen when mixed with water, which lifts stains and kills mold spores without damaging grout. It's non-toxic and doesn't produce harsh fumes, so you can use it in a small bathroom without worrying about ventilation.
How To Make The Paste
Mix oxygen bleach powder (like OxiClean) with warm water in a bowl until it forms a thick paste—similar to toothpaste consistency. Use about 2 parts powder to 1 part water, adjusting as needed. Apply the paste generously over the stained grout lines using an old toothbrush or a small spatula.
The Overnight Soak
After applying the paste, cover the area with plastic wrap to keep it moist and active. Let it sit for at least 8 hours or overnight. The longer contact time allows the oxygen to penetrate deep into the porous grout.
In the morning, remove the plastic and rinse thoroughly with warm water. Repeat if necessary for stubborn stains.
8. Use a Grout Brush Attachment on a Drill
If your wrists ache after scrubbing grout by hand, it’s time to bring in some power tools. A grout brush attachment for a drill turns a few minutes of hard labor into a quick, effortless pass. The spinning bristles get deep into the grooves, dislodging grime that a manual brush can’t reach.
Just wet the grout, apply your cleaner, and let the drill do the work.
This method is especially effective for large showers with lots of grout lines. It cuts cleaning time in half and delivers consistent pressure. Use a nylon brush to avoid scratching the tile, and work in small sections to keep the cleaner from drying out.
Choosing The Right Brush Attachment
Look for a nylon grout brush that fits your drill’s chuck. Avoid wire brushes—they can scratch tile and damage grout. Some attachments come in different shapes: flat for wide lines, cone-shaped for corners.
Pick one that matches your grout width.
Technique Tips For Best Results
Start with the drill on low speed to prevent splattering. Hold the brush at a slight angle so the bristles dig into the grout. Move steadily along each line, overlapping passes to cover every spot.
Rinse the brush frequently to remove buildup.
Safety And Maintenance
Wear safety glasses—wet cleaner can spray. Keep the drill cord away from water. After use, rinse the brush attachment and let it dry to prevent mildew.
Store it in a dry place so it’s ready for next time.
9. Try a Magic Eraser for Surface Stains

If you’ve got a melamine sponge (often sold as Magic Eraser) sitting under your sink, it’s time to put it to work on grout. These sponges are designed to lift surface-level dirt and marks without any extra chemicals. They work best on fresh or light stains that haven’t had time to soak deep into the porous grout.
Just dampen the sponge, give it a gentle squeeze, and start rubbing the stained area. You’ll likely see the grout lighten almost immediately.
A Magic Eraser is essentially a super-fine abrasive that acts like a very gentle sandpaper. It’s excellent for removing scuff marks, soap residue, and light mildew stains that sit on top of the grout. However, it won’t do much for deep-set mold or mineral deposits that have penetrated the pores.
Use it as a quick fix between deeper cleanings.
How To Use It Right
Wet the sponge until it’s damp but not dripping. Gently rub the stained grout in a back-and-forth motion. Don’t press too hard—the sponge does the work.
You’ll see the sponge start to crumble as it wears down, which is normal. Rinse the area with water afterward to remove any residue.
When To Skip It
Avoid using a Magic Eraser on unsealed or very old grout, because the abrasion can wear away the surface and make it more porous. Also, don’t use it on colored grout, as it might lighten the pigment. Stick to white or light gray grout for best results.
10. Seal Grout After Cleaning
You've scrubbed, rinsed, and dried your grout until it looks fresh. Now lock in that clean with a penetrating sealer. Sealing creates a protective barrier that repels water, soap scum, and stains, making future cleaning a breeze.
Choosing The Right Sealer
Look for a penetrating sealer designed specifically for grout. Avoid surface sealers that can peel or yellow over time. Penetrating sealers soak into the porous grout and form an invisible shield.
For shower floors, choose a sealer with anti-microbial properties to fight mold and mildew.
When And How To Apply
Wait at least 24 hours after cleaning to ensure grout is completely dry. Apply sealer with a small brush or applicator, working it into the grout lines. Wipe off any excess from the tile surface immediately to avoid hazy residue.
Let it cure for the time recommended on the product label before using the shower.
How Often To Reseal
Grout sealer isn't permanent. In a shower, reseal every six to twelve months, depending on usage and water hardness. To test if it's time, sprinkle a few drops of water on the grout.
If they bead up, the sealer is still working. If they soak in quickly, it's time to reseal.
11. Use a Toothbrush for Tight Corners
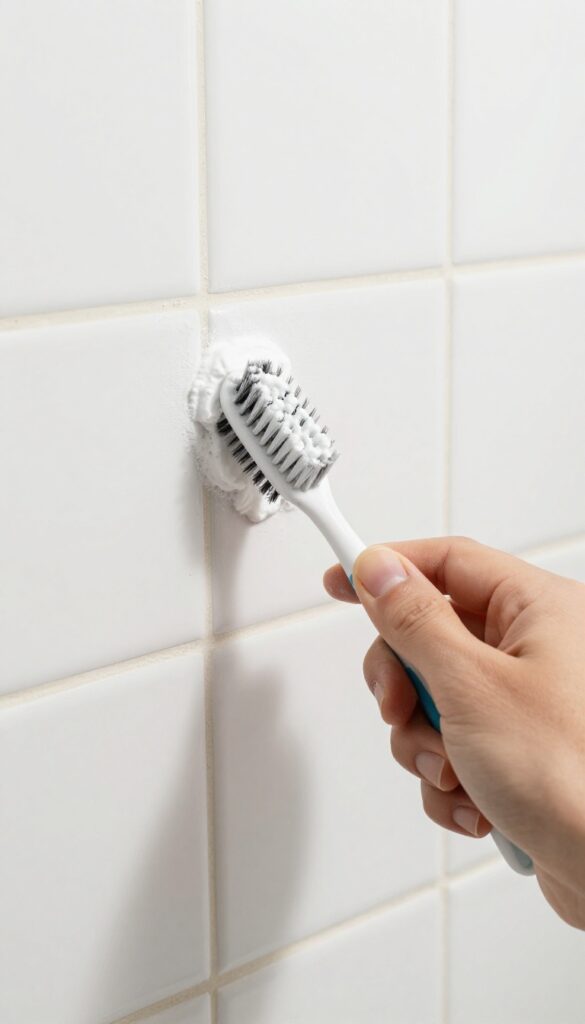
An old toothbrush with stiff bristles is one of the handiest tools for grout cleaning. Its small head fits perfectly into corners, edges, and narrow gaps where larger brushes can't reach. Dip it in a baking soda paste and scrub in circular motions to lift stains without damaging the tile.
For those hard-to-reach spots where grout meets tile or where two walls meet, a toothbrush gives you precision control. The stiff bristles dig into the porous grout surface, dislodging dirt and mildew that have settled deep. Baking soda paste works as a gentle abrasive—just mix three parts baking soda with one part water until it forms a thick paste.
Apply it to the grout lines, let it sit for five minutes, then scrub with the toothbrush in small circles. Rinse with warm water and wipe dry with a microfiber cloth.
Why A Toothbrush Works Better Than A Sponge
Sponges are too soft and wide to get into tight corners. A toothbrush's bristles can reach the bottom of grout lines and scrub away residue that a sponge would just smear around. Plus, the angled handle lets you apply pressure exactly where it's needed.
Choosing The Right Toothbrush
Look for a toothbrush labeled "firm" or "extra firm" bristles. Soft bristles won't do much against set-in grime. An old manual toothbrush works fine, but you can also find specialty grout brushes with similar stiff bristles and a longer handle for better grip.
Step-by-step Scrubbing Technique
Dip the toothbrush into the baking soda paste so the bristles are coated. Start at one corner of the shower and work in small sections. Use circular motions and press firmly enough to feel the bristles working into the grout.
After scrubbing a few inches, wipe away the paste with a damp cloth to check your progress. Repeat until the grout looks clean, then rinse thoroughly.
When To Replace Your Toothbrush
Once the bristles start to fray or bend, the brush loses its effectiveness. For regular maintenance, replace your grout toothbrush every few months. If you're tackling a deep clean, you might go through two or three brushes in one session—they're cheap enough to toss when they wear out.
12. Try a Commercial Grout Cleaner
When DIY mixtures and natural solutions aren't cutting it, commercial grout cleaners can deliver serious results. Products like Zep Grout Cleaner or Goo Gone Grout Cleaner are specifically formulated to break down tough stains, including deep-set mildew and soap scum. They often contain stronger active ingredients than household staples, so they work faster and with less elbow grease.
Just be sure to follow the instructions carefully and keep the bathroom well-ventilated—these products mean business.
Commercial cleaners are a straightforward option when stubborn stains won't budge. They're designed for the porous nature of grout and can save you time and frustration. Here's how to use them effectively and safely.
Choose The Right Product
Not all commercial grout cleaners are the same. Look for ones labeled for tile and grout, and check the ingredients—many use bleach or oxygen-based formulas. Zep is a popular choice for heavy stains, while Goo Gone offers a gentler option for lighter discoloration.
Read reviews to see what works for your specific stain type.
Apply And Let It Sit
Most commercial cleaners need time to penetrate. Spray or apply the product directly onto the grout lines, then let it sit for the recommended time—usually 5 to 15 minutes. Don't let it dry completely, as that can reduce effectiveness.
Use a soft brush or sponge to work it in gently.
Scrub And Rinse Thoroughly
After the dwell time, scrub the grout with a stiff brush or an old toothbrush. Focus on stained areas. Then rinse with warm water thoroughly—any residue can attract dirt.
Wipe away excess moisture with a clean cloth to prevent new stains from forming.
Ventilate And Protect Yourself
Strong chemicals mean strong fumes. Open a window or turn on the exhaust fan before you start. Wear gloves to protect your hands, and avoid mixing cleaners.
If the product contains bleach, keep it away from colored grout or test in an inconspicuous spot first.
13. Use a Hair Dryer to Dry Grout Fast
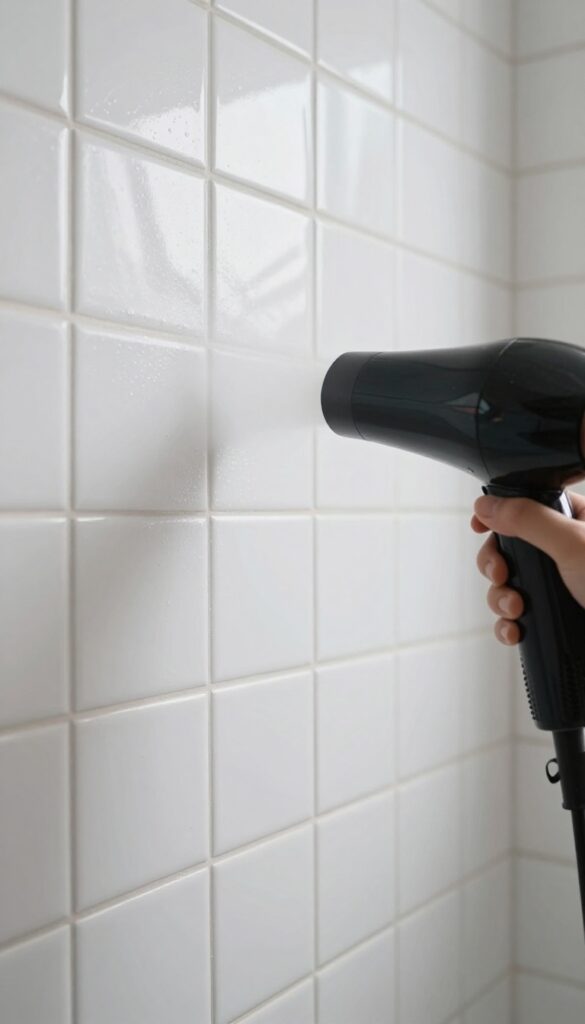
After you've scrubbed and rinsed your grout, the final step is often overlooked: drying. Damp grout is a breeding ground for mold and mildew, which can undo all your hard work within hours. A hair dryer on low heat can blast moisture out of those porous lines quickly, sealing the deal on a clean shower.
This trick is especially useful after deep cleaning or when you're in a hurry. It's simple, free (if you already own a dryer), and makes a real difference in preventing regrowth.
Why Drying Matters
Grout is porous, so water seeps in and stays there. Even after wiping, moisture lingers deep in the joints. Mold spores need only 24–48 hours of dampness to start colonizing.
By drying the grout completely, you cut off that window and keep stains from coming back.
How To Do It Right
Set your hair dryer to low heat and medium speed. Hold it about 6 inches from the grout lines and move it back and forth slowly. Focus on one section at a time, especially corners and joints where water pools.
You'll see the grout lighten as it dries. A minute or two per section is usually enough.
When To Skip This Step
If your grout is already sealed, drying with a hair dryer isn't necessary—the sealant does the job. Also, avoid using high heat, which can crack or discolor certain grout types. Stick to low heat and keep the dryer moving to prevent damage.
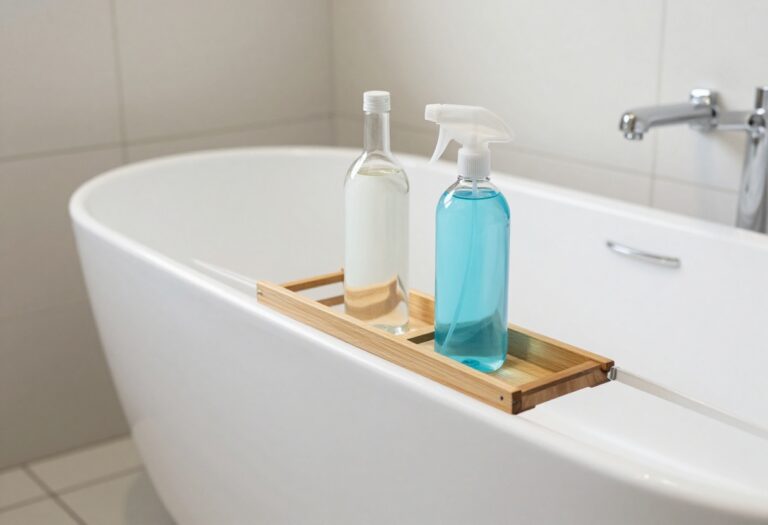
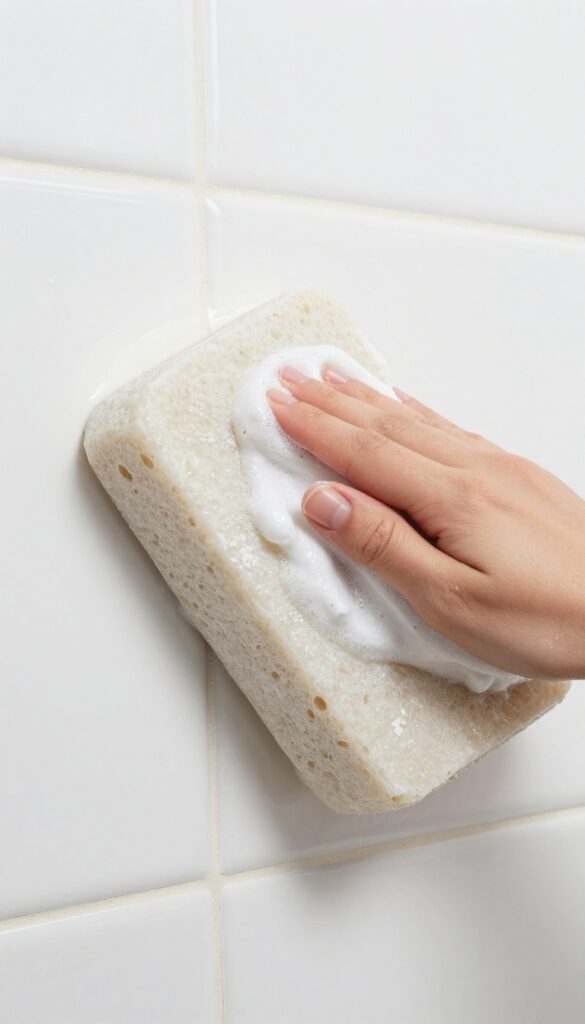
14. Apply a DIY Vinegar and Dish Soap Spray
When you need something stronger than water but gentler than bleach, a vinegar and dish soap spray hits the sweet spot. The acid in white vinegar dissolves mineral deposits and soap scum, while a squirt of dish soap cuts through greasy residue. This combo works well on light to moderate grout stains without the harsh fumes of commercial cleaners.
Mix equal parts white vinegar and warm water in a spray bottle, then add a generous squirt of liquid dish soap. Shake gently to combine. Spray the solution directly onto the grout lines, let it sit for five to ten minutes to break down the grime, then scrub with a stiff brush.
Rinse thoroughly with warm water. For tougher stains, increase the vinegar ratio or let the spray sit longer. Avoid using this on natural stone tiles, as the acid can etch the surface.
Why This Combo Works
Vinegar is a mild acid that breaks down alkaline deposits like hard water scale and soap scum. Dish soap is a surfactant that lifts oils and grease, helping the vinegar penetrate deeper. Together, they create a cleaning solution that tackles multiple types of grout stains at once.
Best Practices For Application
Always test the spray on an inconspicuous area first to ensure it doesn't discolor your grout. Apply the solution generously, but avoid oversaturating the grout, which can lead to moisture seeping behind tiles. Use a toothbrush or grout brush for tight lines and a soft scrub brush for larger areas.
When To Skip This Method
If your grout is unsealed or very porous, the vinegar can weaken it over time. Also, avoid this mix on natural stone tiles like marble or travertine, as the acid can cause etching. In those cases, stick to a pH-neutral cleaner instead.
15. Use a Pumice Stone for Hard Water Rings
Hard water stains can leave stubborn white or gray rings on your shower grout. These mineral deposits build up over time and resist regular scrubbing. A pumice stone offers a simple, chemical-free way to grind them away without damaging the tile.
A pumice stone is a porous volcanic rock that acts like a fine abrasive. When wet, it gently wears down hard water deposits without scratching ceramic or porcelain tile. The key is to keep the stone and the grout wet at all times.
Dry rubbing can cause scratches. Use light pressure and let the stone do the work. You'll see the stain lift away as a fine paste forms.
Rinse frequently to check your progress and avoid grinding too deep. This method works best on smooth, glazed tiles. Avoid using it on unglazed or natural stone tiles, as it can etch the surface.
How To Choose The Right Pumice Stone
Look for a pumice stone labeled for bathroom or grout use. Some come with a handle or are shaped like a stick for better control. Avoid stones with large pores or rough edges, as they may be too aggressive.
A fine-grit stone is ideal for delicate grout lines.
Step-by-step Technique
Wet the pumice stone and the stained grout thoroughly. Gently rub the stone back and forth over the hard water ring using light pressure. As you rub, a white slurry will form—this is the mineral deposit being removed.
Rinse the area and the stone frequently to keep both wet. Repeat until the stain is gone, then wipe the area clean with a damp cloth.
Safety Tips For Best Results
Always test the pumice stone on an inconspicuous area first. Keep the stone and grout wet to prevent scratching. Never use a pumice stone on natural stone, marble, or unglazed tile.
If you feel resistance or see scratching, stop immediately. Wear gloves to protect your hands from the abrasive paste.
16. Try a Grout Pen for Cosmetic Fixes
Sometimes, no amount of scrubbing can bring back the original color of your grout. Maybe the stains have set in too deep, or the grout is just old and worn. That’s where a grout pen comes in handy.
It’s not a cleaner—it’s a cosmetic touch-up that recolors the grout lines, making them look fresh and uniform again.
Choose The Right Shade
Grout pens come in a range of colors, from bright white to various grays and beiges. Pick a shade that closely matches your existing grout. If you’re unsure, go a shade lighter—it tends to blend better than a darker color.
Test it in a small, hidden spot first to see how it dries.
Apply With A Steady Hand
The pen has a felt tip that releases the color as you draw along the grout lines. Work in short sections, pressing gently. If you accidentally get color on the tile, wipe it off immediately with a damp cloth.
Let it dry for at least an hour before getting the area wet.
Seal After Coloring
Once the pen is dry, apply a clear grout sealer over the treated lines. This locks in the color and adds a protective layer against future stains. Reapply sealer every few months to keep the grout looking its best.
17. Schedule Regular Maintenance
Keeping grout clean is easier when you stay ahead of the buildup. A few simple habits can make deep cleaning sessions less frequent and more effective. Here's how to maintain that just-cleaned look without spending hours scrubbing.
Wipe Down After Every Shower
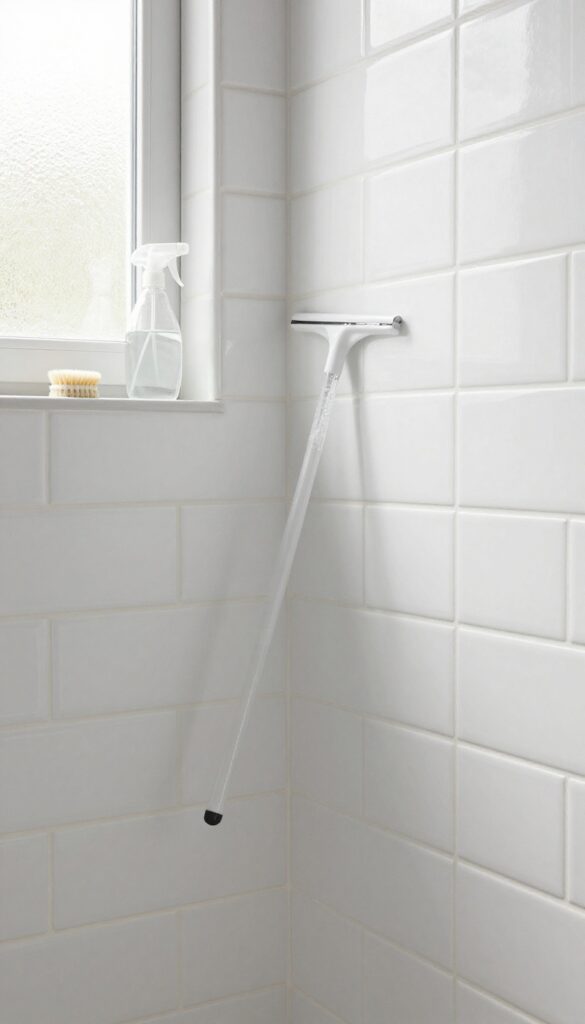
A quick squeegee or towel dry on your shower walls after each use removes standing water that leads to soap scum and mildew. Focus on the grout lines—they trap moisture. This one habit can cut your cleaning time in half.
Use A Daily Shower Spray
A simple mixture of water and a few drops of dish soap or a store-bought daily cleaner can be sprayed on walls after showering. No rinsing needed. It breaks down residues before they harden, keeping grout brighter longer.
Deep Clean Grout Monthly
Once a month, give your grout a deeper clean with a soft brush and a mild cleaner like baking soda paste. This prevents stains from setting in and keeps mold from taking hold. Regular deep cleaning also extends the life of your grout.
FAQ
Can I use bleach on colored grout?
Bleach can discolor or lighten colored grout. Test in an inconspicuous area first, or use oxygen bleach instead.
How often should I clean shower grout?
For maintenance, wipe down after each use and do a deep clean every 2-4 weeks. Seal grout annually to reduce staining.
What is the best homemade grout cleaner?
A paste of baking soda and water, or a spray of equal parts vinegar and water, works well for most stains. Add dish soap for extra grease-cutting power.
Why does my grout keep getting moldy?
Grout is porous and traps moisture. Poor ventilation, lack of sealing, and infrequent cleaning allow mold to thrive. Improve airflow and seal grout.
Can I use a pressure washer on shower grout?
Not recommended. Pressure washers can damage tile and force water behind walls. Stick to gentle scrubbing or steam cleaning.
Conclusion
Cleaning shower grout doesn't have to be a dreaded chore. With the right tools and a bit of patience, you can banish stains and keep your bathroom looking fresh. Start with the gentlest method and work your way up if needed.
Remember, prevention is just as important as cleaning. A quick daily wipe and regular sealing will save you hours of scrubbing later. Pick one or two tips from this list and give them a try this weekend.