15 Cleaning the Bathroom Ideas for a Fresh Weekly Reset
You know that feeling when you walk into a bathroom that just feels clean? It’s not about perfection—it’s about a space that’s fresh, organized, and ready for the week ahead. A weekly reset doesn’t have to be a marathon cleaning session.
With a few smart strategies, you can keep your bathroom looking great without spending hours scrubbing. Think of this as your go-to list for a quick refresh.
Whether you’re dealing with hard water stains, soap scum, or just general clutter, these 15 ideas target the spots that matter most. Each one is simple, practical, and designed to fit into a busy schedule.
1. Start with a Clear Counter
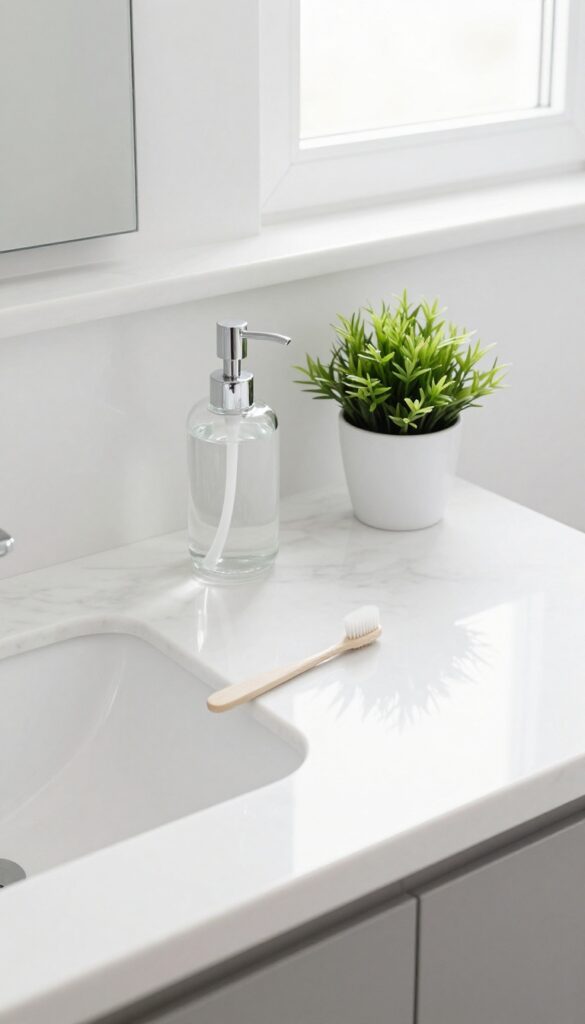
A cluttered counter makes the whole bathroom feel messy, even if everything else is clean. By clearing everything off and wiping the surface down, you reset the visual focal point of the room. This simple step takes less than five minutes but changes how the space feels instantly.
When you remove all items from the counter, you can actually see the surface and clean it properly. Use an all-purpose cleaner or a vinegar-water spray to wipe away toothpaste splatters, dust, and residue. Once it's dry, only place back the items you reach for daily—like a soap dispenser, toothbrush holder, and maybe a small jar for cotton swabs.
Store everything else in drawers or cabinets. This keeps the counter looking intentional and airy, not like a storage shelf.
The One-minute Declutter
Before you even grab a spray bottle, take sixty seconds to scan the counter. Grab anything that doesn't belong—empty bottles, stray hair ties, old razors—and toss or relocate them. This quick pass makes the wipe-down faster and more effective.
Wipe In The Right Order
Start with the backsplash or mirror area, then move to the counter surface, and finish with the sink basin. This way you're not spreading grime from the sink back onto a clean counter. A microfiber cloth works best because it picks up residue without leaving lint.
Curate What Stays
Limit countertop items to three to five essentials. For most bathrooms, that's hand soap, a toothbrush holder, and a small plant or decorative tray. If you use a lot of products, corral them in a caddy that can be tucked away after each use.
2. Spray and Wipe the Mirror First
Starting with the mirror is a smart move. It gives you a clear surface to work around and prevents streaks from later cleaning splashes. Plus, a spotless mirror instantly makes the whole bathroom feel brighter.
Grab a microfiber cloth and a quality streak-free glass cleaner. Spray the mirror generously, then wipe in a zigzag or S-pattern to avoid streaks. Do this before tackling the sink or counter so any overspray from other cleaners gets cleaned up naturally.
For extra shine, buff with a dry section of the cloth.
Why Start Here?
Cleaning the mirror first means you won't have to worry about water spots or cleaner drips later. It also sets a clean baseline—you can see smudges more easily and address them right away.
Best Tools For The Job
Microfiber cloths are ideal because they trap dust and don't leave lint. Avoid paper towels, which can leave residue. For glass cleaner, choose an ammonia-free formula to protect mirror edges and avoid harsh fumes.
Quick Pro Tip
If you have hard water spots, try a 50/50 vinegar and water solution. Spray, let sit for 30 seconds, then wipe. Follow with a dry cloth for a streak-free finish.
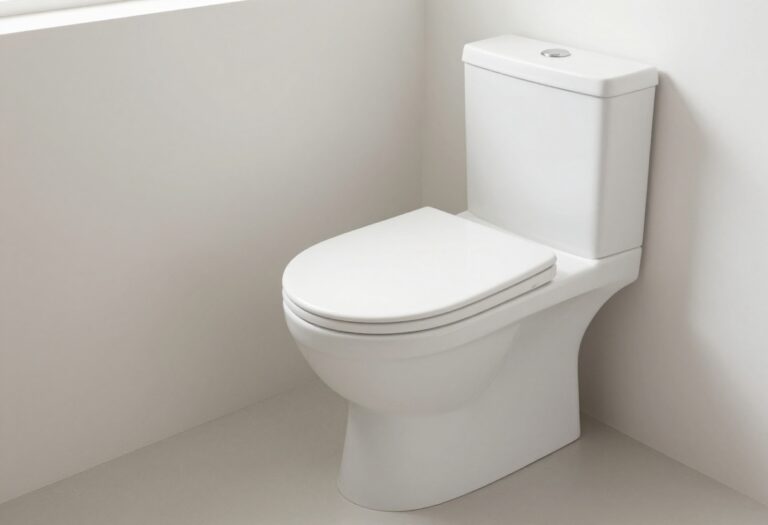
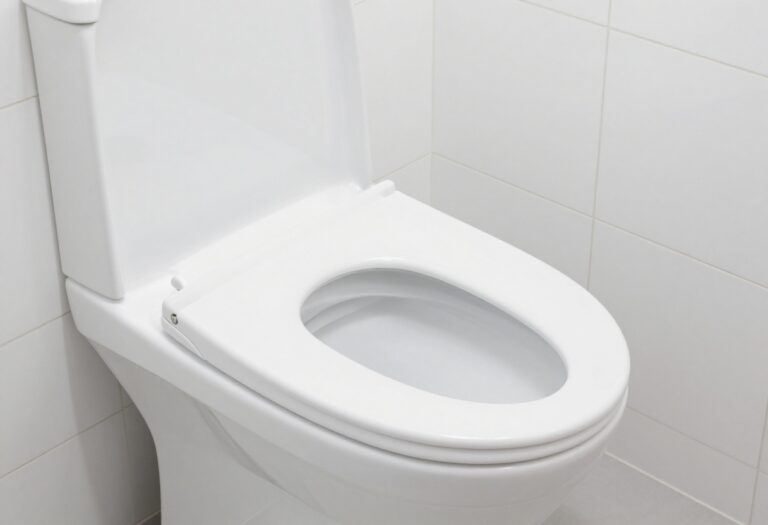
3. Tackle the Toilet Bowl with a Pumice Stone
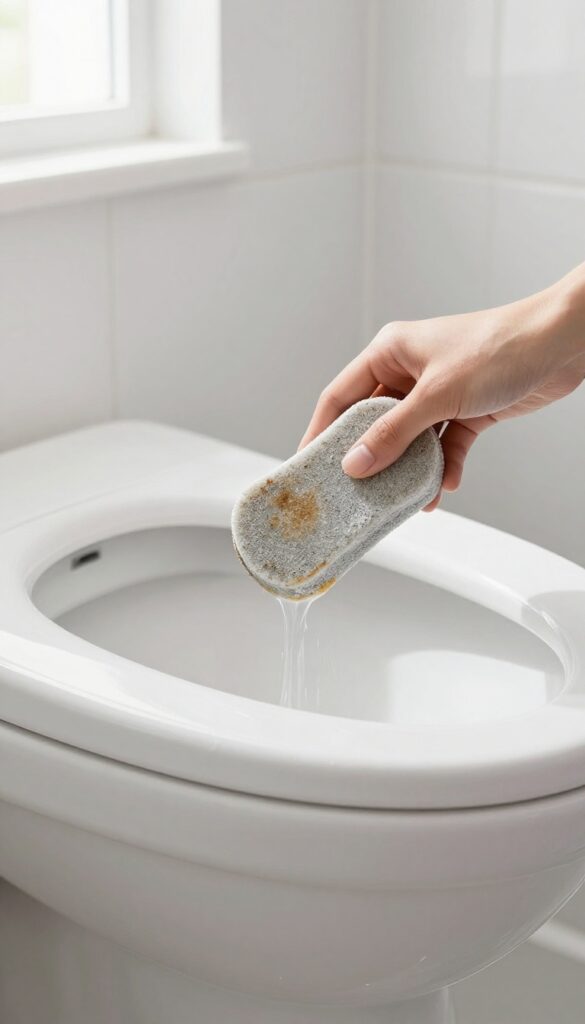
Hard water stains and mineral rings in the toilet bowl can be stubborn. Bleach and brushes sometimes aren't enough. That's where a pumice stone comes in—it's a gentle abrasive that removes buildup without scratching porcelain.
Just wet the stone and lightly scrub the stains away. It's a game-changer for a truly fresh toilet.
Why Pumice Works So Well
Pumice is a natural volcanic rock that's porous and mildly abrasive. When wet, it becomes soft enough to scrub away mineral deposits and rust rings without damaging the porcelain's glaze. Unlike harsh chemical cleaners, it's non-toxic and safe for septic systems.
Plus, it's cheap and lasts for many uses.
How To Use It Correctly
Always wet both the pumice stone and the toilet bowl surface first. Gently rub the stained area with light pressure—let the stone do the work. Don't scrub dry porcelain, as that can cause scratches.
Rinse the stone frequently to remove residue. After the stain is gone, flush and wipe the bowl clean.
Where To Find Pumice Stones
You can buy pumice stones at most hardware stores, home improvement centers, or online retailers. Look for ones specifically labeled for toilet cleaning. Some come with a handle for easier grip.
They're often sold in packs of two or three, so you can keep one in each bathroom.
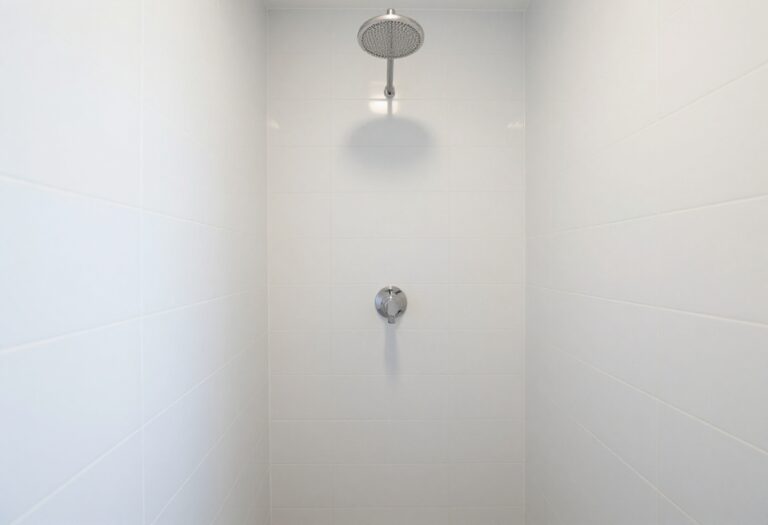
4. Use a Squeegee on Shower Doors After Every Shower
Shower doors look great when they’re clean, but water spots and soap scum can dull them fast. The trick is to stop buildup before it starts. A squeegee is your best friend here—it takes seconds and saves you from scrubbing later.
Keep a small squeegee inside your shower or hang it on a hook nearby. After your last rinse, quickly run it over the glass from top to bottom. That’s it.
Do this every time you shower, and you’ll notice a big difference in how long your doors stay clear.
Why It Works
Hard water contains minerals that leave spots when water dries on glass. By removing the water immediately, you prevent those minerals from bonding to the surface. Soap scum also needs moisture to stick—squeegeeing cuts off its chance to form.
Best Squeegees For The Job
Look for a squeegee with a rubber blade and a comfortable handle. A 6- or 8-inch blade is perfect for standard shower doors. Avoid cheap plastic ones that leave streaks.
A small silicone blade is gentle on glass and lasts longer.
Quick Maintenance Tips
Rinse the squeegee blade with water after each use to remove soap residue. Replace the blade every few months if it starts to leave streaks. Store it in a dry spot to prevent mold on the handle.
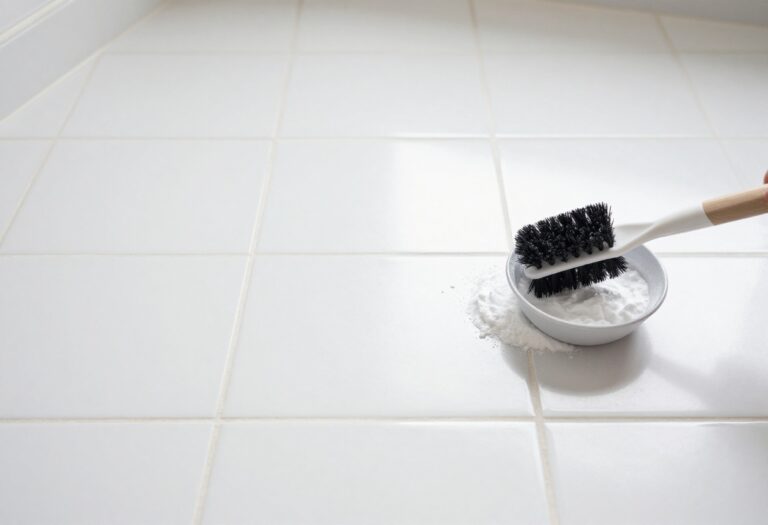
5. Deep Clean Grout with a Baking Soda Paste
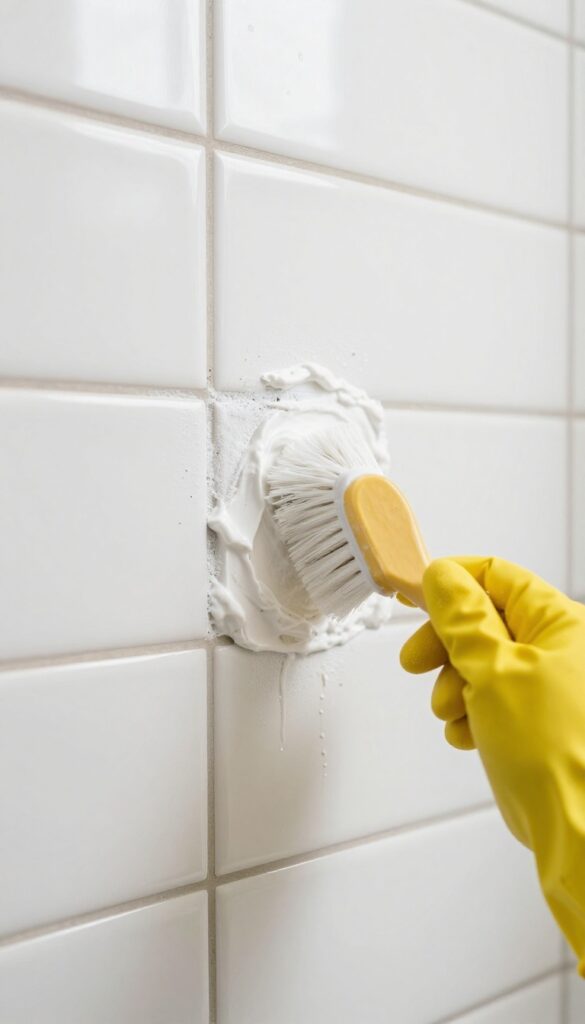
Grout lines tend to trap dirt and soap scum, turning that fresh tile look into something dingy. A simple baking soda paste cuts through the grime without harsh chemicals. It's a quick fix that makes a noticeable difference.
Mix baking soda with a little water to form a thick paste. Apply it to the grout lines, let it sit for a few minutes, then scrub with an old toothbrush. Rinse with warm water and wipe dry.
The paste gently lifts stains and brightens the grout, leaving your tile looking refreshed.
Why Baking Soda Works So Well
Baking soda is mildly abrasive, so it scrubs away grime without scratching tile. It also neutralizes odors, which is a bonus in a bathroom. Plus, it's cheap and non-toxic, making it a safe choice for regular use.
Tips For Stubborn Stains
For extra stubborn stains, add a splash of white vinegar to the paste. It will fizz, so work quickly. Let it sit for 10 minutes before scrubbing.
Rinse thoroughly to remove any residue.
Preventative Maintenance
After deep cleaning, seal the grout with a clear grout sealer. This helps repel moisture and dirt, making future cleanings easier. Reapply sealer every six months for best results.
6. Refresh the Showerhead with Vinegar
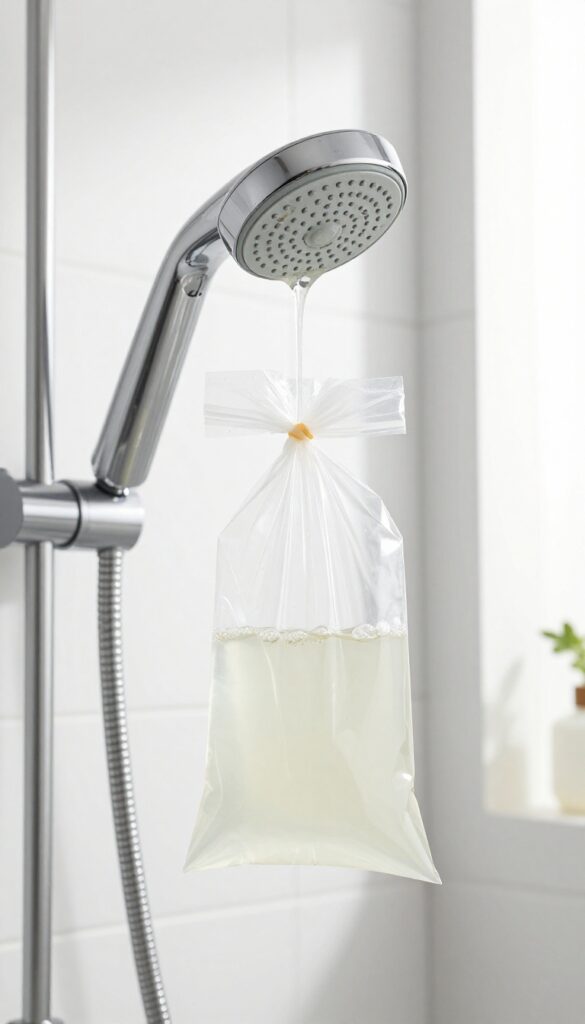
Over time, mineral deposits from hard water can clog your showerhead, reducing water pressure and making the spray uneven. A quick vinegar soak dissolves those deposits without harsh chemicals, restoring full flow and leaving your showerhead looking like new.
This simple trick uses the natural acidity of white vinegar to break down calcium and lime scale. It’s cheap, non-toxic, and works on most metal and plastic showerheads. For stubborn buildup, you can extend the soak time or repeat the process.
What You’ll Need
Grab a plastic sandwich bag, white vinegar, and a rubber band or twist tie. That’s it. No special tools required.
Step-by-step Soak
Fill the bag with enough vinegar to fully submerge the showerhead. Slip the bag over the head and secure it with the rubber band so it doesn’t slip off. Let it sit for 30 minutes, then remove the bag and run the hot water for a minute to flush out any loosened deposits.
When To Do This
Aim for once a month if you have hard water, or every three months for softer water. You’ll notice better water pressure and a cleaner look.
7. Wipe Down Faucets and Fixtures with a Dry Cloth
Faucets and handles take a beating—water splashes, toothpaste drips, and soap residue all leave their mark. But a quick dry buff after cleaning makes them look brand new. It’s a small step that delivers a big visual payoff, especially in a bathroom where shiny fixtures stand out.
After you’ve cleaned the sink and counter, grab a dry microfiber cloth and give every faucet, handle, and knob a quick polish. This simple motion removes water spots, smudges, and any leftover cleaner. The result?
Fixtures that gleam like they just came out of the showroom. It takes less than a minute, but the difference is night and day.
Why Microfiber Works Best
Microfiber cloths are designed to trap dust and moisture without scratching surfaces. Unlike paper towels, they won’t leave lint behind. Plus, they’re reusable—just toss them in the wash.
Keep a dedicated dry cloth near the sink for quick touch-ups throughout the week.
Don’t Forget The Details
Pay attention to the base of the faucet, the crevices around handles, and the underside of spouts. These spots collect grime that can dull the overall look. A quick wipe there keeps everything consistently clean.
Make It A Habit
Add this step to your weekly reset routine right after you clean the mirror or sink. It’s a natural finishing move that signals the job is done. Over time, it prevents hard water buildup and keeps your fixtures looking new longer.
8. Organize Under the Sink with Bins
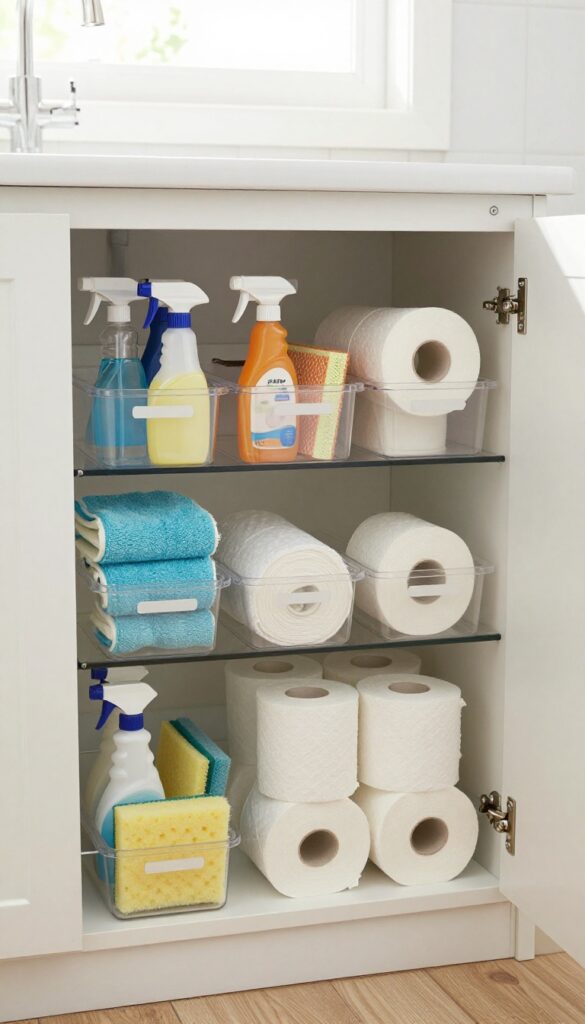
Under-sink cabinets often become a black hole of half-used bottles and forgotten sponges. A few clear bins can turn that chaos into a tidy, functional storage zone. Grouping items by category makes grabbing what you need quick and keeps everything from tumbling out when you open the door.
Choose The Right Bins
Look for clear, sturdy bins that fit your cabinet dimensions. Measure the space first—account for plumbing pipes. Shallow, wide bins work well for taller items like spray bottles, while deeper bins hold extra toilet paper or cleaning cloths.
Stackable options maximize vertical space.
Group Like Items
Create categories that make sense for your routine. One bin for all-purpose cleaners and disinfectants, another for toilet bowl products, and a third for sponges, gloves, and scrub brushes. Keep a small bin for personal care overflow like spare soap or lotion travel sizes.
Label For Easy Access
Attach simple labels to the front of each bin so everyone in the household knows where things go. Use a label maker or just a piece of tape and a marker. This also helps when you’re restocking—you can see at a glance what’s running low.
Maintain The System
Once a month, pull out all the bins and wipe down the cabinet floor. Toss empty bottles and expired products. Return everything to its designated bin.
This quick reset keeps the system working and prevents clutter from creeping back in.
9. Wash Bath Mats and Towels Weekly
Bath mats and towels sit in a damp environment all week, making them a breeding ground for bacteria and mildew. A weekly wash keeps them fresh and extends their life. It’s a simple habit that makes a big difference in how your bathroom smells and feels.
Set a reminder to toss bath mats and towels in the wash once a week. Use hot water and a little vinegar to kill bacteria and remove odors. This simple routine prevents musty smells and keeps your bathroom feeling truly clean.
Why Weekly Washing Matters
Towels and bath mats absorb moisture and dead skin cells, creating an ideal environment for germs. Washing them weekly prevents odor-causing bacteria from building up and helps maintain hygiene.
Best Washing Practices
Use hot water (at least 140°F) to kill bacteria effectively. Add half a cup of white vinegar to the rinse cycle to neutralize odors and soften fabrics. Avoid fabric softener as it can reduce absorbency.
Drying Tips For Maximum Freshness
Dry towels and mats on high heat in the dryer or hang them in direct sunlight. Sunlight naturally disinfects and bleaches stains. Make sure they are completely dry before folding to prevent mildew.
10. Clean the Exhaust Fan Cover
Your bathroom exhaust fan works hard to pull out moisture and odors, but when the cover is caked with dust, it struggles to do its job. A dirty fan not only reduces airflow but can also become noisy over time. Cleaning the cover is a quick win that makes a real difference in air quality and humidity control.
Why It Matters
A clogged exhaust fan can't effectively remove steam, which leads to higher humidity and a greater risk of mold and mildew. Plus, a dusty fan motor has to work harder, which can shorten its lifespan. Giving the cover a regular clean keeps your bathroom fresher and your fan running efficiently.
How To Do It
Start by turning off the fan at the switch and, if possible, at the circuit breaker for safety. Gently remove the cover—it usually snaps off or has a few screws. Vacuum the cover with a brush attachment to remove loose dust, then soak it in warm, soapy water for about 10 minutes.
Scrub with a soft brush to dislodge any grime, rinse thoroughly, and let it dry completely before reattaching. While the cover is off, use the vacuum to clean the fan blades and housing as well.
How Often To Do It
Aim to clean the exhaust fan cover every one to three months, depending on how much use your bathroom gets. If you notice the fan is louder than usual or seems less effective, it's a good sign the cover needs attention. Adding this to your weekly reset checklist ensures it never gets forgotten.
11. Disinfect High-Touch Areas Like Light Switches and Doorknobs
Light switches, doorknobs, and cabinet handles are some of the most touched surfaces in your bathroom, yet they often get skipped during a quick clean. Think about it—every time you enter or leave, you're transferring germs to these spots. A weekly disinfecting routine here can make a big difference in keeping your bathroom truly fresh.
Grab a disinfectant wipe or spray and a microfiber cloth. Work your way around the bathroom, hitting every switch plate, knob, and handle. Don't forget less obvious ones like the toilet flush lever and the inside of cabinet pulls.
Let the disinfectant sit for the recommended dwell time (usually a few minutes) to effectively kill germs. This quick task takes less than five minutes but pays off in hygiene.
Why These Spots Matter
High-touch surfaces are hotspots for bacteria and viruses, especially in a bathroom where moisture and warmth help germs thrive. Studies show that light switches and doorknobs can harbor more germs than toilet seats. Disinfecting them weekly reduces the risk of spreading illness among household members.
Best Products To Use
You don't need anything fancy. Disinfectant wipes are convenient and effective—just check the label for bacteria and virus claims. If you prefer a spray, choose one that's safe for the surface material (e. g. , wood, metal, or plastic).
Microfiber cloths work well with sprays and can be washed and reused. Avoid bleach on painted or delicate surfaces.
Quick And Easy Routine
Make this part of your weekly reset by keeping wipes or a spray bottle under the sink. After you've finished other cleaning tasks, do a quick once-over of all high-touch areas. It takes less than two minutes and ensures no spot is missed.
For a deeper clean, remove switch plates occasionally and wipe behind them.
12. Use a Toilet Brush with Built-In Cleaner Dispenser

A toilet brush with a built-in cleaner dispenser is one of those upgrades that makes you wonder why you didn't get one sooner. The handle holds liquid cleaner that releases directly onto the brush with a squeeze or push, so you don't have to pour anything separately. It turns every quick swish into an effective cleaning pass, keeping the bowl fresh without extra effort.
This tool is perfect for busy mornings or mid-week touch-ups. The cleaner is stored right in the handle, so it's always ready when you need it. Just give the brush a squeeze, scrub, and flush.
No more reaching for a separate bottle or dealing with drips. It's a small change that makes a big difference in how often you actually clean the toilet.
How It Works
Most models have a hollow handle that you fill with your favorite toilet bowl cleaner. When you press a button or squeeze the handle, the cleaner flows down into the brush head. This means each scrub delivers fresh cleaner directly to the bowl, not just water.
It's efficient and reduces waste.
Best Practices
Fill the handle with a thick, clingy cleaner that stays on the bowl surface. Avoid using bleach-based cleaners if the brush is plastic, as they can degrade the material over time. Rinse the brush head after each use and let it drip dry in its holder.
Replace the brush head every few months to keep it effective.
Why It Helps Your Weekly Reset
Because the cleaner is always attached, you're more likely to do a quick scrub when you notice a ring or stain. This prevents buildup and makes your weekly deep clean much faster. It's a set-it-and-forget-it solution that keeps the toilet looking fresh between major cleaning sessions.
13. Keep a Small Trash Can with a Lid
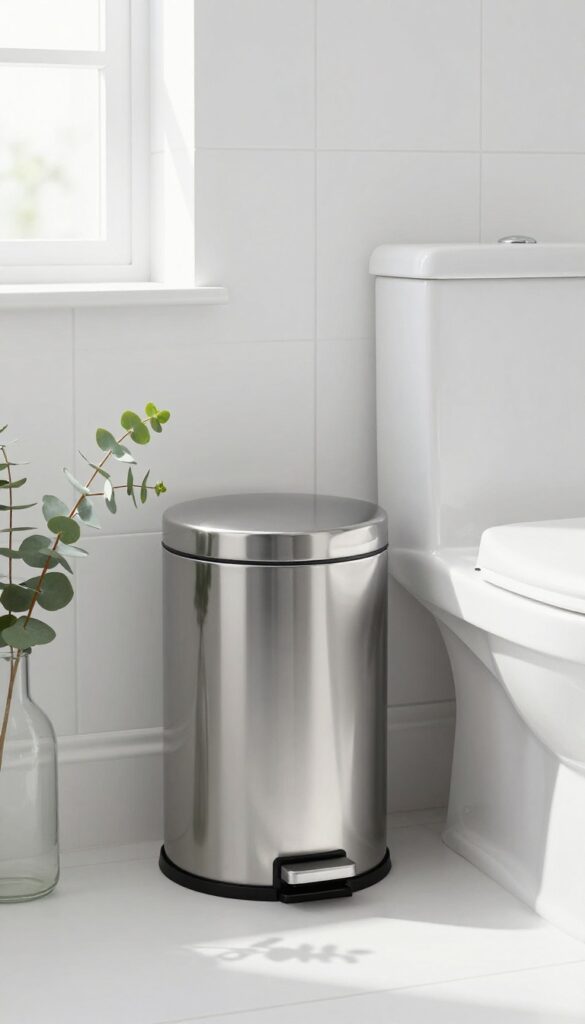
A bathroom trash can is easy to overlook, but it plays a big role in how fresh the space feels. Without a lid, used cotton rounds, floss, and other waste are on display, and odors can escape more easily. A small can with a lid keeps everything out of sight and traps smells, making the room feel cleaner between deep cleans.
A lidded trash can hides waste and reduces odors. Empty it weekly as part of your reset routine to prevent buildup and keep the bathroom smelling fresh.
Why A Lid Matters
An open trash can lets odors linger, especially in a small, humid bathroom. A lid contains smells and keeps the contents hidden, so the room looks tidy even if you haven't emptied it in a day or two. It also prevents pets or kids from rummaging through the trash.
Choosing The Right Size And Style
Look for a slim, compact can that fits beside the toilet or under the sink. A step pedal or swing-top lid makes disposal hands-free, which is more hygienic. Stainless steel or plastic with a smooth finish is easy to wipe down and resists rust.
Weekly Emptying Routine
Make it a habit to empty the trash every week during your reset. Tie off the bag and take it straight to the main bin. Wipe the inside of the can with a disinfectant wipe or spray before inserting a fresh liner.
This simple step prevents odors from sticking around.
14. Add a Small Plant for Freshness
A bathroom can feel sterile without a touch of life. Adding a small plant not only softens the space visually but also improves air quality. Low-light varieties like snake plants or pothos thrive in humid bathroom conditions with minimal care.
Plants bring a natural, calming element to your weekly reset. They absorb excess moisture, reduce mold spores, and release oxygen. Plus, they're a low-cost way to make the room feel more inviting.
Best Plants For Bathrooms
Snake plants, pothos, and ZZ plants are top choices because they tolerate low light and high humidity. They also require infrequent watering—perfect if you forget sometimes. Place them on a shelf, counter, or hang them near a window.
Care Tips For Longevity
Wipe the leaves every few weeks to remove dust and soap residue. This keeps the plant healthy and looking its best. Water only when the soil is dry to the touch—overwatering is the most common mistake.
Where To Position Your Plant
Set it on the back of the toilet, a corner shelf, or a windowsill. Avoid direct sunlight if the plant prefers shade. Grouping small plants together creates a mini indoor garden effect.
15. End with a Quick Floor Sweep and Mop
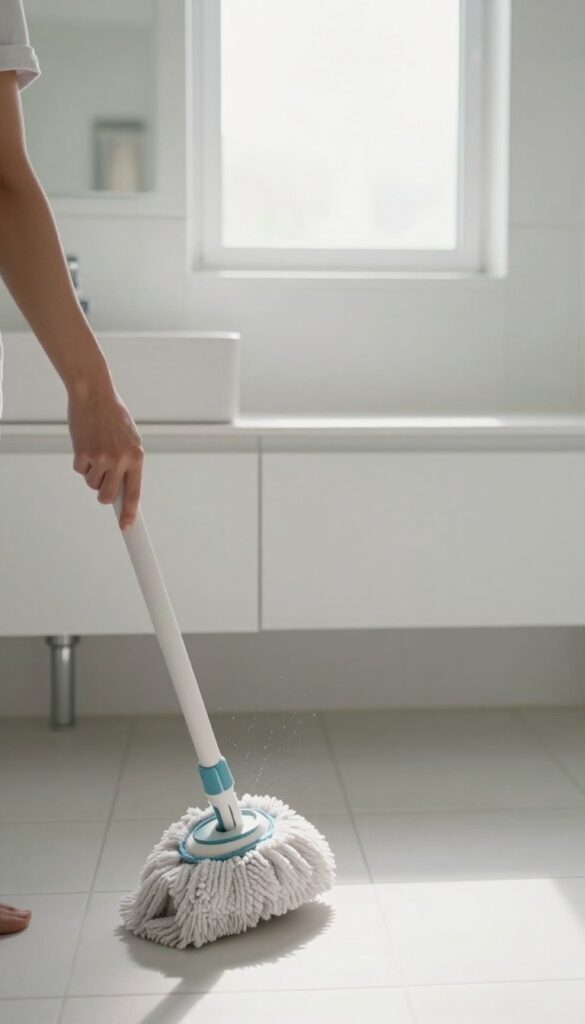
After tackling counters, mirrors, and fixtures, the floor is the final frontier. Sweeping up hair and dust from corners and under the sink makes a visible difference. A quick mop with a gentle cleaner leaves the whole room feeling polished and complete.
Don't skip this step—it's the finishing touch that makes your bathroom feel truly refreshed. Focus on high-traffic areas and hidden spots where grime accumulates. Use a microfiber mop for speed and efficiency.
Sweep First
Always sweep or vacuum before mopping to remove loose debris. Pay extra attention to corners, behind the toilet, and under the vanity. A cordless stick vacuum or a small dustpan works great for quick cleanups.
Choose The Right Mop
A flat microfiber mop is ideal because it's lightweight and easy to rinse. Avoid string mops that can spread bacteria. For a quick weekly reset, a spray mop with a reusable pad saves time and reduces mess.
Use A Gentle Cleaner
Harsh chemicals aren't necessary for weekly maintenance. A mix of warm water and a few drops of dish soap or a pH-neutral floor cleaner works well. Avoid bleach or ammonia on tile grout, as they can cause discoloration over time.
Don't Forget The Baseboards
Baseboards collect dust and splashes. Wipe them down with a damp cloth while you're on your knees. This small extra step makes the floor look cleaner and the room feel more finished.
FAQ
How often should I do a deep clean of my bathroom?
A deep clean every two to four weeks is usually enough, depending on usage. In between, a weekly reset like the one outlined here keeps things fresh.
What’s the best way to remove hard water stains from glass?
Use a mixture of equal parts white vinegar and water, spray it on, let it sit for a few minutes, then scrub with a non-abrasive pad or squeegee.
Can I use bleach on colored grout?
Bleach can discolor colored grout. Instead, use a mild cleaner or a baking soda paste to clean without fading the color.
How do I prevent mold in the shower?
Keep the bathroom well-ventilated by running the exhaust fan during and after showers. Wipe down wet surfaces and use a mold-resistant shower curtain.
What’s the best way to clean a toilet brush?
After use, rinse the brush with hot water and spray it with disinfectant. Let it dry in the holder. Replace the brush every few months.
Conclusion
A weekly bathroom reset doesn’t have to be a chore. By focusing on a few key areas each time, you can maintain a clean and inviting space without spending hours. These 15 ideas are designed to be quick, effective, and easy to fit into your routine.
Start with just a few of these tips and build from there. Over time, you’ll find what works best for your bathroom and your schedule. A fresh bathroom is just a reset away.