11 Grass and Pavers Backyard Ideas for a Balanced Layout
A backyard that's all grass turns into a muddy mess after rain. A yard that's all pavers feels like a parking lot. The sweet spot sits somewhere in between, and that's exactly what this list is about.
You don't need a huge budget or a landscape architect to get there. A few smart choices about layout, materials, and how the two surfaces meet can change everything.
Below are 11 grass and pavers ideas that solve real problems, from drainage to dull corners. Pick the ones that fit your space and start planning.
1. Create a Simple Grid Patio with Grass Joints
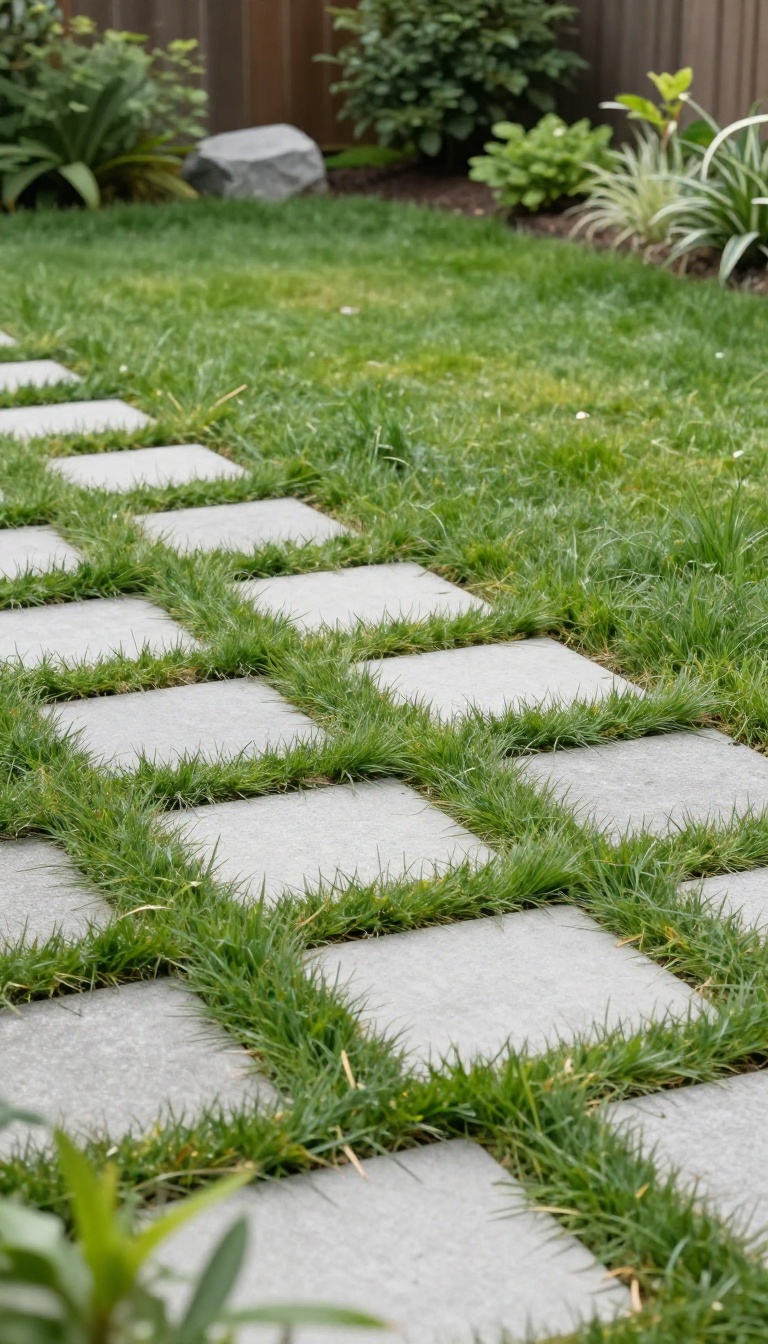
A grid patio is exactly what it sounds like: square pavers lined up in neat rows, with grass filling the gaps between them. It's one of the easiest hardscape projects to pull off, and it works in almost any yard. The grass joints do more than look good.
They let water drain straight into the soil instead of pooling on a solid slab, and the green breaks up what would otherwise be a flat gray surface. The result feels less like a patio and more like a lawn you can actually use after a rainstorm.
Why The Grid Layout Works
A grid keeps things predictable. Because every paver sits at the same spacing, you get a clean pattern that reads as intentional rather than random. The gaps also give grass roots room to breathe.
Water moves down through the joints instead of running off the edges, which cuts down on erosion and keeps the surrounding lawn healthier. And if a paver shifts or cracks down the road, you can lift it, reset the base, and drop it back in without tearing up the whole patio.
Choosing Pavers And Spacing
Go with square or rectangular concrete pavers in a consistent size. Twelve-inch squares are a common pick because they're easy to handle and the math stays simple. Leave a joint width of about one to two inches.
Wider gaps mean more grass, which looks softer but can get shaggy fast. Narrower gaps stay tidier but give you less green. Set the pavers on a compacted base of crushed stone and sand.
That layer keeps them from sinking and gives water somewhere to go when it drains through the joints.
Planting And Keeping The Grass Alive
Fill the joints with a tough, low-growing grass that handles foot traffic. A mix that includes fine fescue or a warm-season variety like Bermuda works well in most climates. Top-dress the gaps with a little compost and keep them watered until the grass knits together.
After that, regular mowing keeps the surface even with the pavers. Avoid weed killers near the joints, since they'll hit your grass too. Hand-pulling or a quick trim with a string trimmer handles most problems.
2. Use a Stepping Stone Path to Guide Foot Traffic
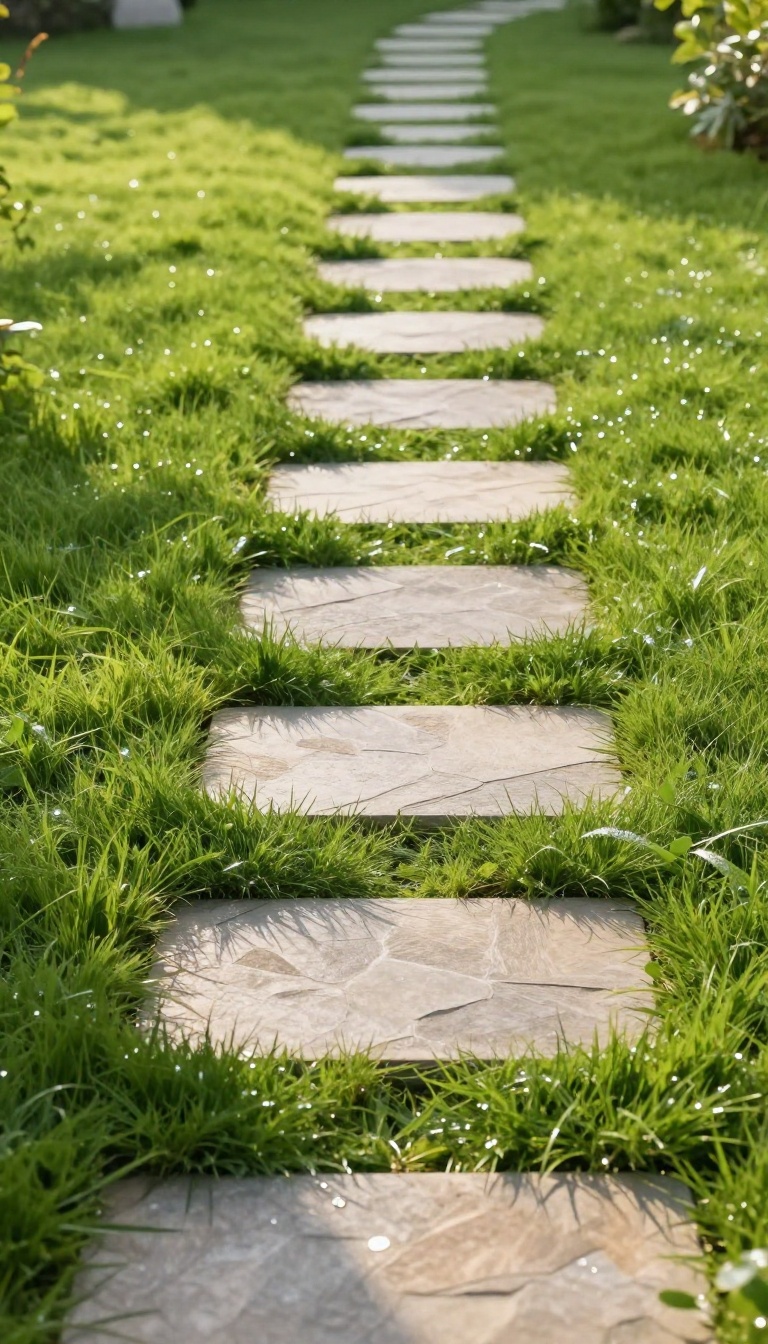
Grass is tough, but it's not indestructible. When everyone cuts the same corner day after day, you get a dirt trail that never quite recovers. Stepping stones give feet a place to land, so the lawn stays green and the route stays clear.
A stepping stone path is less about decoration and more about direction. You're basically telling people, 'Walk here, not there. ' And they will, because a visible path is an invitation. The best part?
You don't need a straight line or a perfect grid. Curves feel more natural, and irregular spacing can actually look intentional. Just keep the stones close enough that one step leads naturally to the next.
Pick The Right Spacing
Measure your natural stride and set stones about two to three inches apart. That's close enough to feel connected but far enough to let grass fill in. If you space them too far, people will step on the grass between them, which defeats the purpose.
Choose Materials That Handle Weather
Concrete pavers are affordable and come in tons of shapes. Natural stone costs more but ages beautifully. Whatever you pick, make sure it's slip-resistant when wet.
A smooth, polished stone becomes a hazard after rain.
Set Them Flush With The Lawn
Dig a shallow bed, add a layer of sand or gravel, and tamp it down. The top of the stone should sit level with the soil, not above it. That way, your mower glides right over without scalping the grass or hitting the edge.
3. Build a Paver Border Around a Grass Play Area
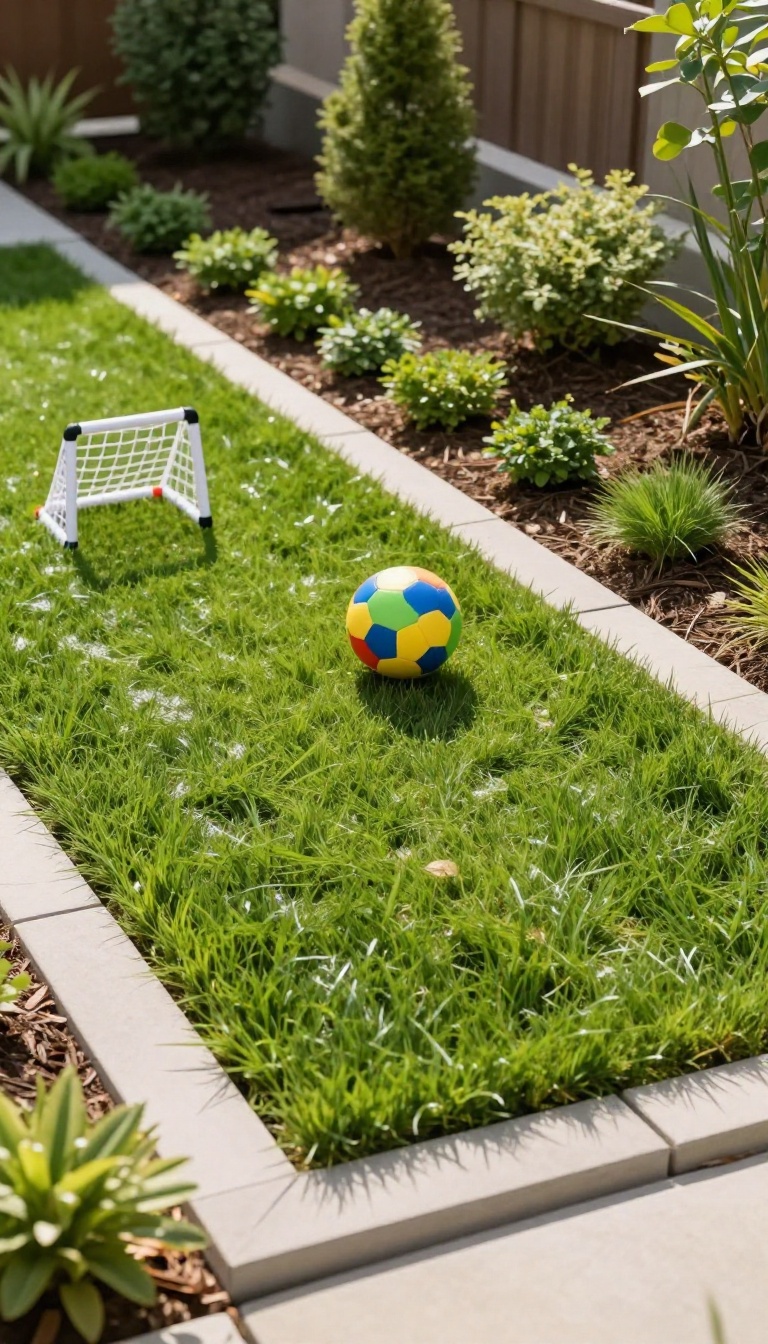
A lawn that doubles as a play zone takes a beating. Balls roll into flower beds, toys scatter into the shrubs, and the grass edge gets chewed up by foot traffic. A low paver border solves all three problems at once.
It acts like a frame for the yard. The pavers hold the soil and grass in place, mark where the play area stops, and give kids a defined space that feels intentional rather than random. You also get a flat, solid edge for setting down drinks, toys, or a folding chair while you watch them run around.
The border itself doesn't need to be fancy. A single row of rectangular pavers set flush with the lawn is enough to do the job, and it reads as clean rather than overbuilt. What matters most is how you set the pavers.
Get that right and the edge stays put for years. Get it wrong and you'll be resetting stones every spring.
Pick The Right Paver Size
Go with pavers that are at least 2 inches thick. Thin ones crack when kids stomp on them or when the ground shifts after a freeze. Standard 4-by-8-inch concrete pavers work well for a simple border.
If you want something a little softer underfoot, rubber-edged pavers are an option, though they cost more and look less polished.
Set The Edge So It Stays Put
Dig a shallow trench about 6 inches wide and 4 inches deep along the edge of the lawn. Add a layer of compacted gravel, then bedding sand, then set the pavers so their tops sit just above the grass. Tamp them down and sweep sand into the joints.
That locks everything together and keeps the border from wandering after a few rainstorms.
Use The Border As A Functional Zone
A paver edge gives you a natural spot for a small bench, a sandbox lid, or a row of storage bins for balls and chalk. It also keeps mulch and garden soil from spilling onto the grass. If the play area sits near a patio, run the border right up to the patio edge.
That creates one continuous hard surface instead of a random strip of stone in the middle of the yard.
Keep Maintenance Simple
Weed the joints a couple of times a season, or use polymeric sand to cut down on growth. A quick pass with a leaf blower keeps the border looking tidy. When the grass grows over the edge, trim it back with a string trimmer rather than pulling the pavers up.
The border should outlast the lawn around it.
4. Add a Gravel and Paver Transition Strip
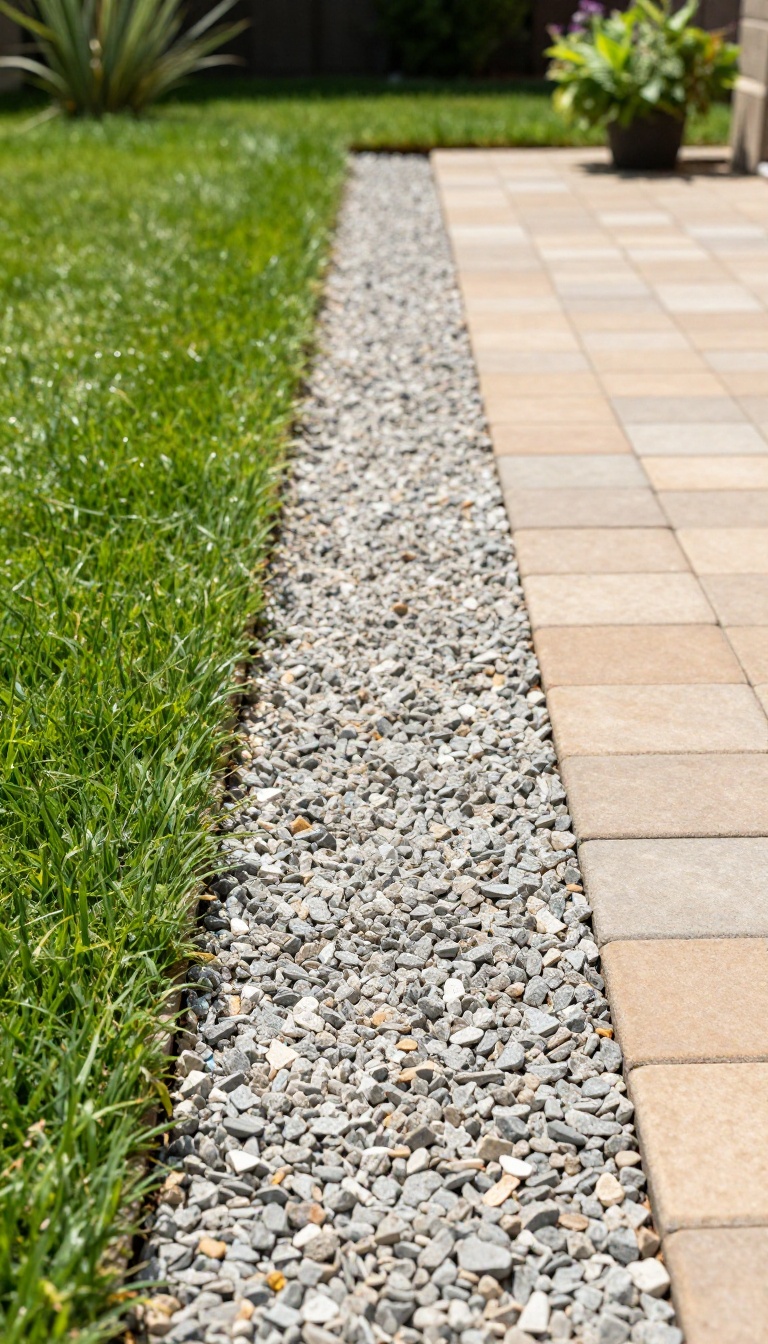
Where grass meets pavers, you get a battleground. Grass creeps into the joints, water pools on the pavers, and the edge looks ragged. A narrow gravel strip fixes all of that.
It's a small detail that makes the whole layout look finished.
A gravel transition strip is exactly what it sounds like: a shallow trench filled with gravel that runs between your lawn and your paver patio or walkway. It acts as a buffer zone that handles runoff, blocks weeds, and gives the eye a clean line to follow. You can install it yourself in a weekend, and it costs a fraction of what you'd spend on more pavers or sod.
Why It Works
Gravel drains fast, so water that would otherwise sit against your pavers or drown your grass has somewhere to go. It also creates a physical barrier that stops grass rhizomes from sneaking under the pavers. And because gravel is loose, you can top it off or re-level it without tearing anything apart.
How To Install It
Dig a trench about 4 to 6 inches wide and 3 inches deep along the edge. Line it with landscape fabric to keep weeds from sprouting through. Fill it with 3/4-inch crushed stone or pea gravel, leaving it slightly below the grass and paver surfaces.
Tamp it down and you're done.
Design Variations
You can keep it simple with a single row of gravel, or go wider for a more dramatic look. Mix in river rock for a softer feel, or use blackstar gravel for a modern contrast. Some people add a steel or plastic edging between the gravel and grass to keep the line crisp.
5. Design a Curved Paver Patio with a Grass Island
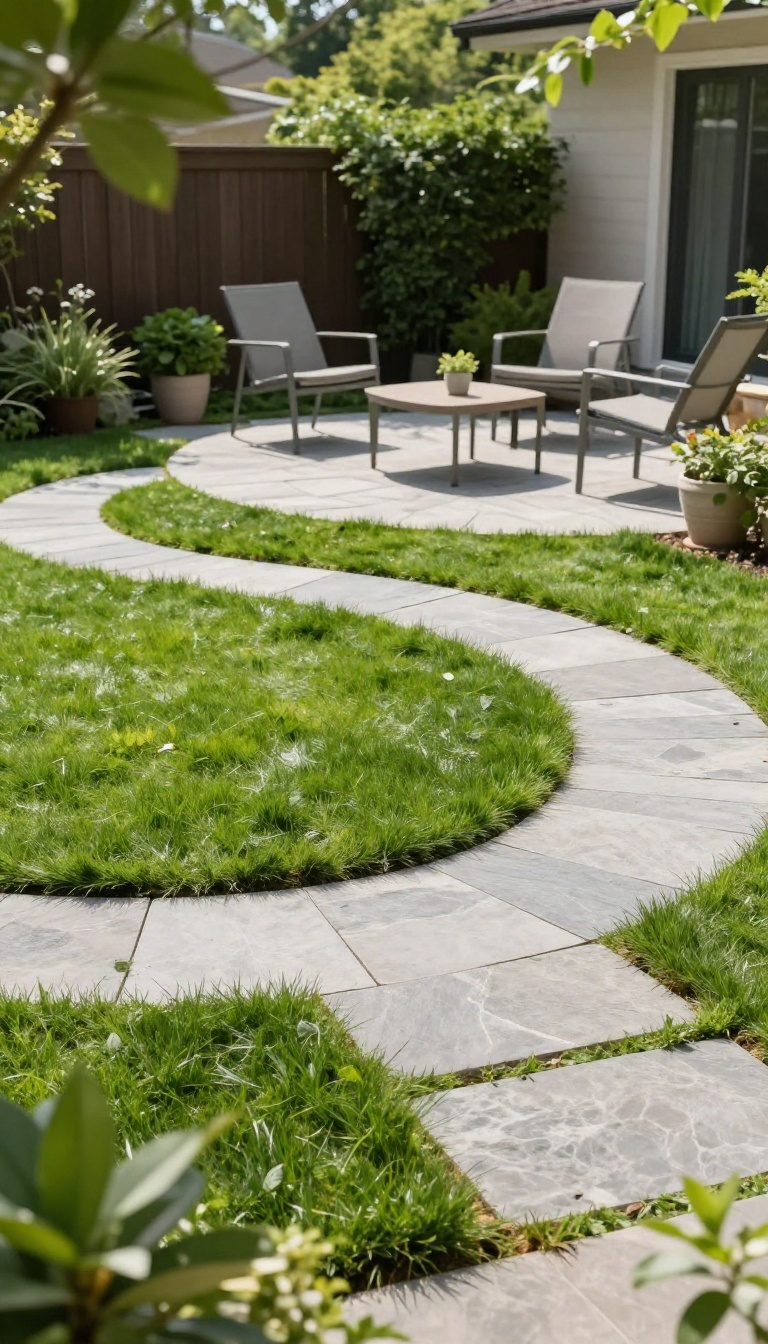
A solid paver patio can start to feel like a concrete slab after a while. One way to break up that sea of stone is to drop a grass island right in the middle. It softens the hardscape, saves you money on materials, and gives the space a natural focal point that draws people in.
The idea is simple: instead of paving the entire patio area, you leave a shaped cutout for grass. The pavers curve around it, so you get a smooth, organic edge rather than a rigid rectangle. That curve is what makes it feel intentional and a little more upscale.
You can make the island any size, but most work well between three and six feet across. That's big enough to feel like a real patch of green, but small enough that it doesn't swallow your patio space. The shape can be a circle, an oval, or a soft kidney bean—whatever fits your layout.
This design works especially well on larger patios where a full expanse of pavers would look flat and boring. It also helps with drainage, since water can soak into the grass instead of running straight off the stone.
How To Build The Curved Edge
You'll need a flexible edging material to hold the curve. Steel or plastic edging works well, or you can use a poured concrete border if you want something more permanent. Dig out the island area first, then set your edging along the curve before you lay the pavers.
For a clean look, keep the grass level with the pavers. That means excavating the island to the same depth as your paver base. A little extra soil and seed, and you're done.
Planting And Caring For The Island
You can seed the island or use sod for instant results. Sod is easier if you want a finished look right away, but seed gives you more grass variety options. Either way, make sure the soil is loose and well-draining.
Once it's growing, treat it like any other part of your lawn. Water it regularly until it's established, then mow and fertilize as needed. The only difference is you might need a string trimmer to get right up against the edging.
Making It A Gathering Spot
A grass island naturally becomes a place where people gravitate. You can set a small fire pit in the center, or just leave it open for kids to play on. If you want to use it for seating, add a few lightweight chairs that can be moved around.
Just keep in mind that heavy furniture will compact the soil over time. Rotate pieces or use wide-footed chairs to spread the weight. And if you plan to entertain often, consider a paver path leading to the island so guests don't trample the grass.
6. Install Permeable Pavers for Better Drainage
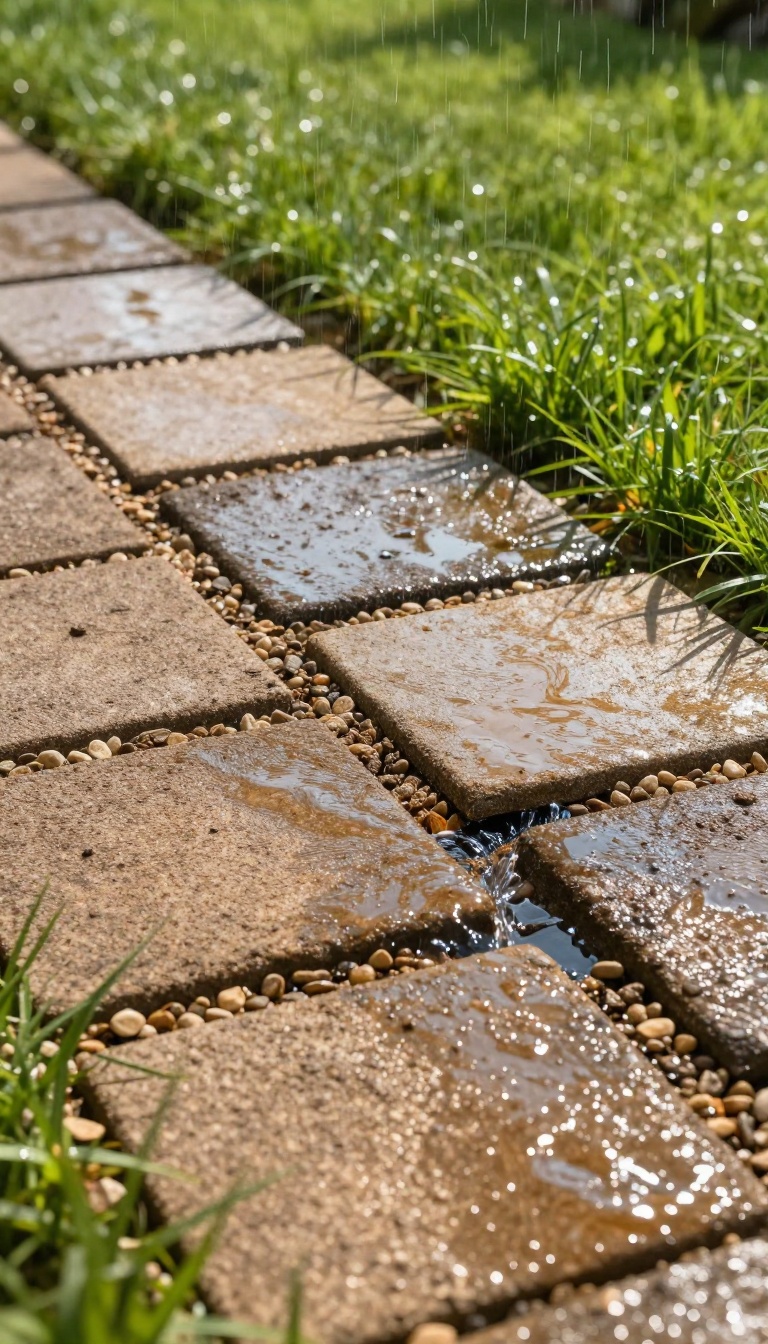
Water has to go somewhere. When it can't soak into the ground, it pools on top of your pavers, erodes the joints, and turns your backyard into a swampy mess after every storm. Permeable pavers solve that by letting water pass right through them and into the soil below.
This isn't just a fancy upgrade for eco-conscious homeowners. It's a practical fix for low spots, heavy clay soil, and any yard where standing water has become a recurring headache. The right permeable system keeps your patio usable and your grass healthier.
You don't need to rip out your entire yard to make it work. A few strategic changes to how you lay pavers can make a big difference in how your backyard handles rain.
Permeable pavers come in a few different styles, but they all share one job: moving water off the surface and into the ground. Some have wider gaps between them, filled with gravel or grass. Others are designed with small channels or holes that let water drain straight through.
Either way, the goal is to stop water from sitting on top. Traditional pavers are laid tight together on a compacted base. That works fine on sandy soil with good drainage, but on clay or in low spots, it's a recipe for puddles.
Permeable systems use an open-graded base of crushed stone instead of dense sand. That base acts like a reservoir, holding water until it can soak into the soil. If you're dealing with heavy clay, you might need to add a drainage pipe or a dry well to help things along.
But even without that, permeable pavers can handle a surprising amount of rain. They also cut down on runoff, which means less water rushing toward your house or your neighbor's yard. One thing to keep in mind: permeable pavers need occasional cleaning.
Debris can clog the gaps over time, so a quick sweep or a rinse with a hose now and then keeps them working. It's a small trade-off for a yard that stays dry and usable.
Where Permeable Pavers Shine
Low spots are the obvious candidates. If you've got a corner of the yard that turns into a pond every spring, permeable pavers can turn that area into a functional patio or walkway. Heavy clay soil is another good fit, since water struggles to drain through it naturally.
And if your yard slopes toward the house, permeable pavers can help redirect water away from your foundation.
Mixing Permeable And Solid Pavers
You don't have to go fully permeable everywhere. A common approach is to use solid pavers for the main patio and permeable ones along the edges or in the lowest areas. That way you get the look you want with drainage where you need it most.
Just make sure the transition between the two types doesn't create a barrier that traps water.
Installation Tips That Matter
The base is everything. Skip the proper depth of open-graded gravel and you'll end up with a wobbly, clogged mess. Aim for at least 4 to 6 inches of compacted base, and use a geotextile fabric to keep soil from migrating up.
Also, keep the slope gentle but consistent so water flows toward the drainage area instead of sitting in one spot.
7. Pair a Small Lawn with a Dining Paver Zone
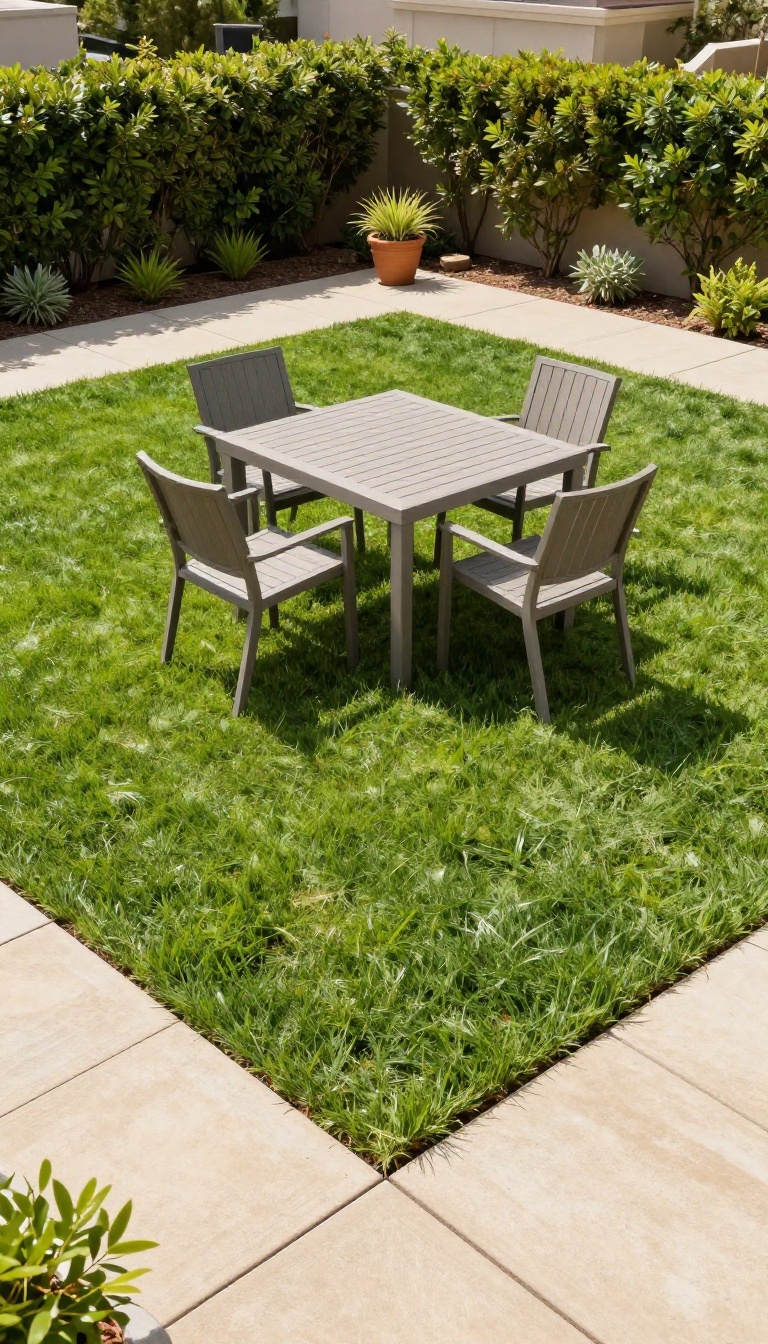
Dining furniture and grass don't always get along. Chairs sink, legs wobble, and before long you've got bare patches under the table. A small lawn paired with a dedicated paver dining zone keeps both surfaces doing what they do best.
The idea is simple: put the table, chairs, and foot traffic on pavers, and keep the grass for lounging, bare feet, and the occasional cartwheel. You get a stable surface for meals and a soft surface for everything else. The two zones sit side by side, separated by a clean edge, and each one stays in better shape because it isn't trying to do two jobs at once.
Size The Paver Zone To Your Table
Measure your dining set and add about 3 feet of clearance on every side. That's the space people need to slide chairs in and out without rolling onto the grass. A 10×10 paver pad handles a four-person table comfortably; go 12×12 if you host six or more.
Keep the shape simple—square or rectangular is easier to edge and looks intentional next to a lawn.
Edge The Transition Cleanly
A crisp line between grass and pavers makes the whole layout look planned. Use a steel or aluminum edging strip, or set a row of pavers on their side as a border. This stops grass from creeping into the joints and keeps the paver base from shifting.
It also gives your mower a clear track to follow, so you spend less time trimming.
Pick Pavers That Handle Chair Legs
Not all pavers are equal under a dining set. Thick concrete or porcelain pavers with tight joints resist tipping and won't scratch easily. Avoid thin, hollow pavers or loose gravel—chair legs will dig in and wobble.
A smooth or lightly textured finish is easier to sweep and won't snag bare feet during dinner.
Keep The Lawn Low-maintenance
Since the grass no longer hosts the table, it can be a simpler, tougher variety. A slow-growing fescue or a warm-season grass like Bermuda works well in a compact area. Water it deeply but less often, and let it grow a little taller than a heavy-use lawn.
Fewer feet on it means fewer bare spots to patch.
8. Use Grass Strips Between Paver Rows for a Modern Look
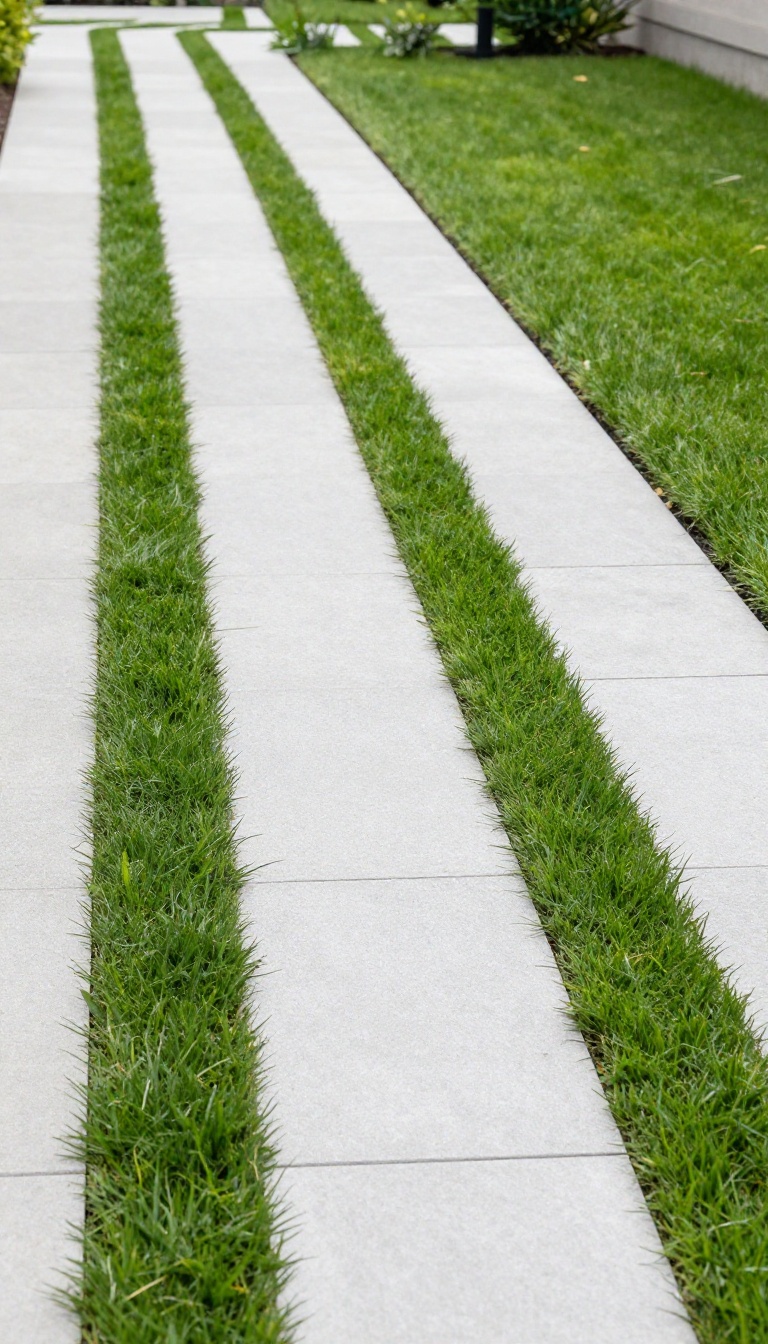
Straight lines and repeating patterns can make a small yard feel bigger and more intentional. Grass strips between paver rows give you that clean, contemporary look without turning your entire backyard into a hardscape. It's a simple way to keep things green while still having a solid surface to walk on.
The idea is straightforward: lay long paver rows, then leave a narrow gap for grass, then repeat. The result is a striped effect that feels more like a design choice than a compromise. You get the durability of pavers and the softness of grass in one layout.
This pattern works best in rectangular spaces where you want to emphasize length or width. It's also a smart pick for side yards, entry paths, or any area that needs a little structure. The key is keeping the grass strips narrow so they don't become a maintenance headache.
You're not limited to one look, either. You can run the rows parallel to a fence, perpendicular to the house, or even at an angle for a more dynamic feel. Just make sure the direction makes sense for how you use the space.
Getting The Strip Width Right
Grass strips between pavers should be wide enough to look intentional but narrow enough to stay tidy. A good range is 2 to 4 inches. Anything wider starts to feel like a regular lawn with random pavers, and anything narrower is hard to maintain.
If you have heavy foot traffic, stick closer to 2 inches. For a softer, more planted look, 4 inches gives the grass a little more room to breathe. Just remember that wider strips mean more edges to trim.
Choosing The Right Grass
Not all grass handles the tight quarters of a paver strip. You want something tough, low-growing, and tolerant of occasional shade. A dwarf variety or a slow-growing blend works well because it won't constantly spill over the pavers.
In warmer climates, consider a warm-season grass like zoysia or Bermuda. In cooler zones, a fine fescue or a low-maintenance tall fescue mix can hold up. Avoid anything that needs constant watering or grows too tall between mowings.
Base Prep And Drainage
The base under your pavers and grass strips needs to handle water well. Start with a compacted layer of crushed stone, then add a thin sand or bedding layer for the pavers. The grass strips should have their own soil mix that drains freely.
Don't skip the weed barrier if you're not using a solid base. It keeps roots from pushing up between the pavers. Also, make sure the whole area slopes slightly away from your house so water doesn't pool in the grass strips.
Keeping It Looking Sharp
The striped look only stays modern if the edges stay clean. Use a string trimmer or edging tool every few weeks to keep grass from creeping over the pavers. A little routine maintenance goes a long way.
If you want to cut down on trimming, install a hidden edge restraint along the paver rows. It gives the grass a clear boundary and helps the pattern stay crisp. Over time, you might need to top-dress the grass strips with a bit of sand or compost to keep them level.
9. Create a Low-Maintenance Paver and Artificial Turf Combo
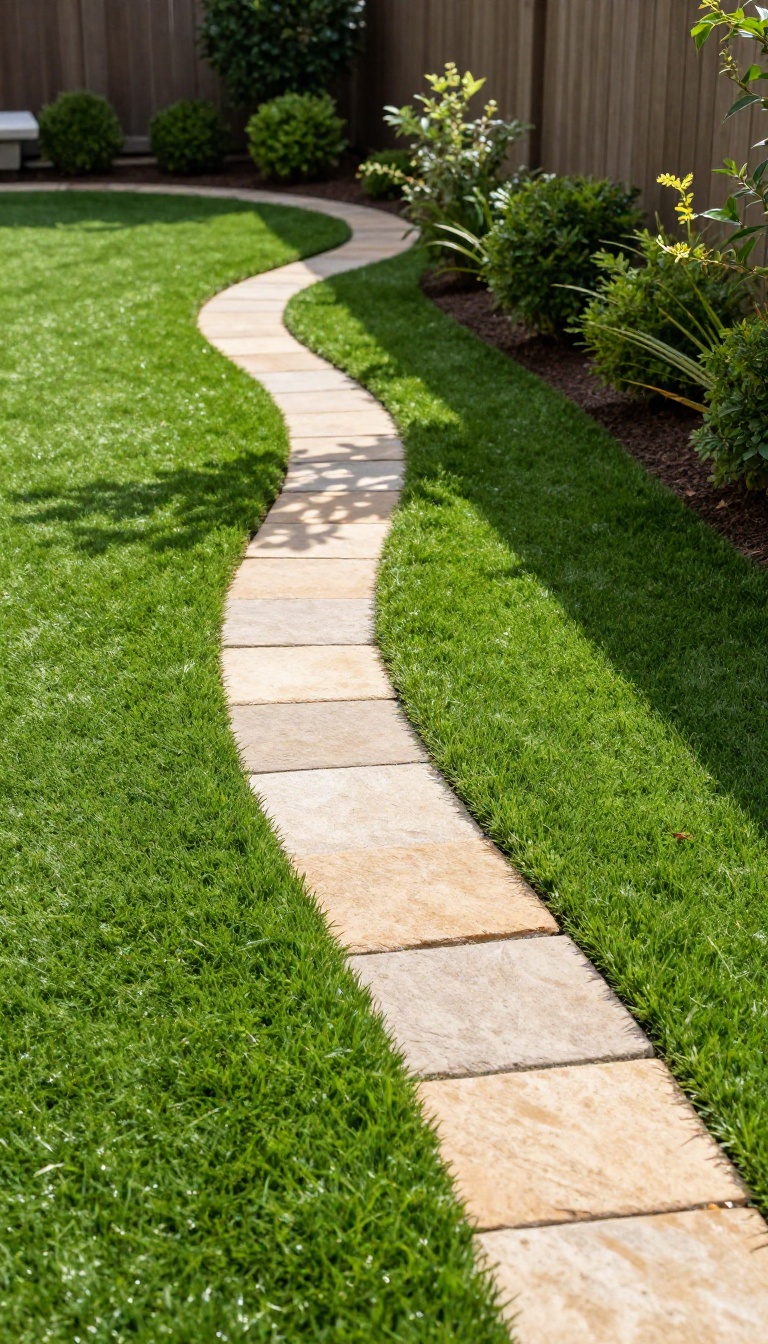
Not every backyard gets enough sun for thick, healthy grass. And even the sunniest yards have spots that get trampled into dirt. That's where artificial turf earns its keep.
Pair it with real pavers and you get a surface that looks green and tidy without the mowing, watering, or muddy patches. It's a practical move for busy households, shady lots, and anyone who'd rather relax than landscape.
Artificial turf has come a long way from the plastic-looking stuff of the past. Today's options look soft, come in different blade heights, and drain well when installed right. The key is to treat it as one piece of a bigger layout, not a carpet you roll over the whole yard.
Pavers handle the heavy foot traffic and give the space structure. Turf fills in the gaps with color and softness. Together they cut your weekend chores down to almost nothing.
Where Turf Makes The Most Sense
Shady corners, dog runs, and narrow side yards are prime candidates. Grass struggles in those spots, but turf doesn't care about sunlight. It also holds up to repeated foot traffic without turning into a mud pit.
If you've got a patch that's more dirt than grass by August, turf is a smart swap.
Blending The Two Surfaces
Don't just drop turf next to pavers and call it done. Use a border of real grass or a paver edge to soften the transition. A curved line between turf and stone looks more natural than a hard straight edge.
If you want a cleaner look, run pavers in a band around the turf for a framed effect.
Installation And Drainage Basics
Turf needs a compacted base and a weed barrier, or it will ripple and sprout weeds. Pavers need a level bed and proper slope so water runs away from your house. Both surfaces should drain toward a planted area or a French drain.
Skipping this step leads to puddles and a soggy mess after storms.
Keeping It Looking Good
A quick rinse and a leaf blower handle most turf cleanup. For pavers, a broom and occasional hose-down keep them tidy. Once or twice a year, add a little infill to the turf to keep the blades upright.
That's it. No mowing, no watering, no fertilizer.
10. Add a Paver Walkway That Doubles as a Garden Bed Edge
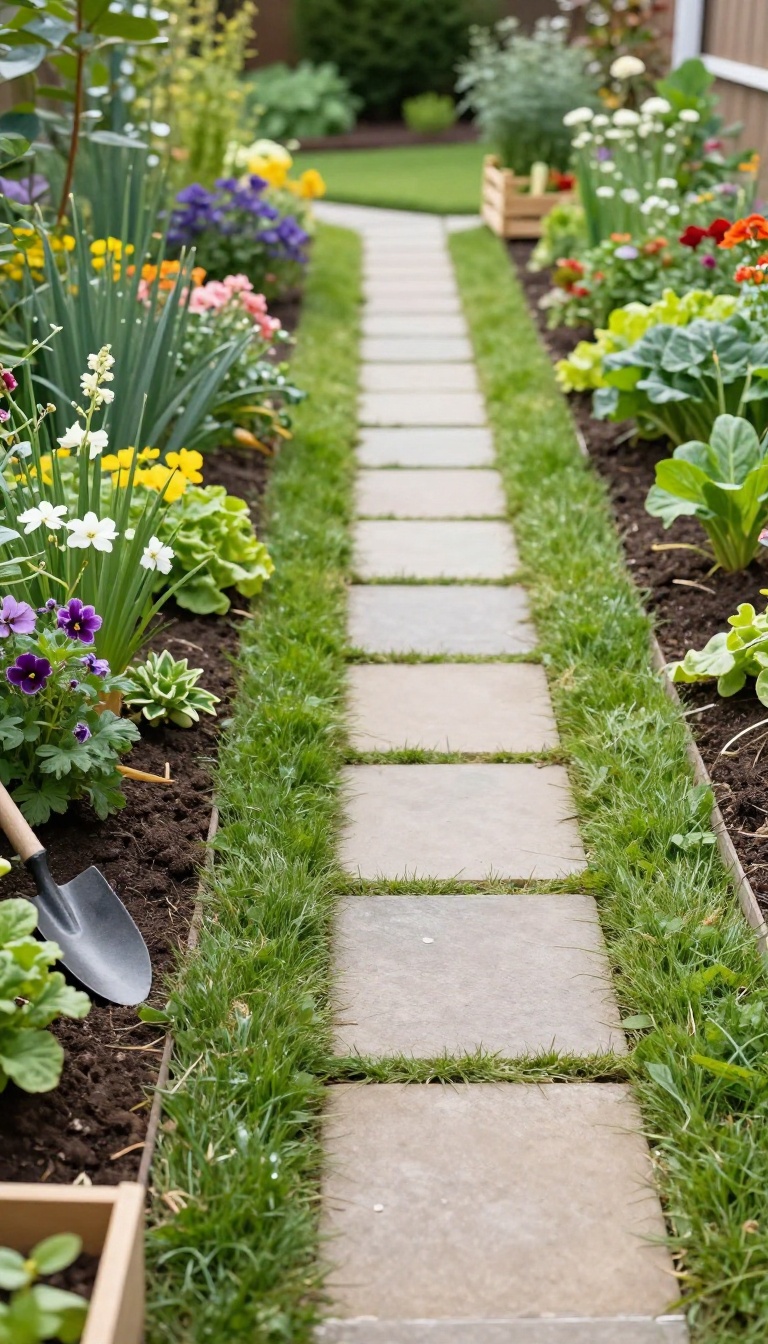
A paver walkway that runs right along your planting beds solves two problems at once. It gives you a clean, dry path to walk on, and it acts as a physical barrier that keeps grass from creeping into your flowers and vegetables. Instead of building a separate border and a separate path, you combine them into one feature.
That saves materials, time, and space, especially in smaller yards where every inch counts. The best part? You get a sturdy place to stand while you weed, prune, or harvest, even after a rainstorm.
No more muddy shoes or trampled soil.
This idea works because it turns a functional edge into a usable walkway. You're not just separating grass from garden beds; you're creating a dedicated lane for foot traffic. Most people install a narrow strip of pavers—about 18 to 24 inches wide—directly against the bed.
That's wide enough to walk on comfortably but narrow enough to leave plenty of room for plants. The pavers sit flush with the lawn on one side and slightly above the soil on the other. That small height difference helps keep grass runners from jumping into the bed.
You can use the same paver style as your patio or main path for a cohesive look, or choose a contrasting color to make the border pop. Either way, the walkway reads as intentional, not like an afterthought. When you're ready to plant or maintain, you simply step onto the pavers.
You avoid compacting the soil in your beds, and you always have a stable surface underfoot. This setup also makes mowing easier. You can run the mower right along the paver edge without worrying about scalping the grass or nicking a tree trunk.
And because the pavers create a clear boundary, you'll spend less time pulling grass out of your beds by hand. That alone is worth the effort. ### Choosing the Right Paver Width A walkway that doubles as a bed edge needs to be wide enough to stand on but not so wide that it eats up your garden space. For most yards, 18 to 24 inches is the sweet spot.
If you only need to step in occasionally, 12 inches can work, but it feels tight. If you plan to kneel or use a wheelbarrow, go wider—30 to 36 inches. Measure your space and think about how you'll use it.
A simple access path for weeding needs less width than a path for hauling mulch or compost. ### Prepping the Base for Stability Pavers shift over time if the base isn't solid. Start by digging out the area to about 4 to 6 inches deep, then compact the soil. Add a layer of crushed gravel, about 2 to 3 inches, and compact it again.
Top with 1 inch of sand, level it, and then set your pavers. Use a rubber mallet to tap them into place. Check for level as you go.
Once they're set, sweep sand into the joints to lock everything together. ### Keeping Grass and Beds Separate Even with a paver barrier, grass can try to sneak through the joints or creep over the edge. A few simple tricks keep it in check. First, make sure the pavers sit slightly higher than the soil in the bed—about an inch.
That makes it harder for grass roots to jump over. Second, install a thin edging strip along the bed side of the pavers. Metal or plastic edging buried a few inches deep stops runners cold.
Finally, keep the paver joints tight. If you use polymeric sand, it hardens and blocks weeds better than regular sand. Re-sweep every couple of years as needed.
Choosing The Right Paver Width
A walkway that doubles as a bed edge needs to be wide enough to stand on but not so wide that it eats up your garden space. For most yards, 18 to 24 inches is the sweet spot. If you only need to step in occasionally, 12 inches can work, but it feels tight.
If you plan to kneel or use a wheelbarrow, go wider—30 to 36 inches. Measure your space and think about how you'll use it. A simple access path for weeding needs less width than a path for hauling mulch or compost.
Prepping The Base For Stability
Pavers shift over time if the base isn't solid. Start by digging out the area to about 4 to 6 inches deep, then compact the soil. Add a layer of crushed gravel, about 2 to 3 inches, and compact it again.
Top with 1 inch of sand, level it, and then set your pavers. Use a rubber mallet to tap them into place. Check for level as you go.
Once they're set, sweep sand into the joints to lock everything together.
Keeping Grass And Beds Separate
Even with a paver barrier, grass can try to sneak through the joints or creep over the edge. A few simple tricks keep it in check. First, make sure the pavers sit slightly higher than the soil in the bed—about an inch.
That makes it harder for grass roots to jump over. Second, install a thin edging strip along the bed side of the pavers. Metal or plastic edging buried a few inches deep stops runners cold.
Finally, keep the paver joints tight. If you use polymeric sand, it hardens and blocks weeds better than regular sand. Re-sweep every couple of years as needed.
11. Zone Your Yard with a Grass and Paver Ratio That Works
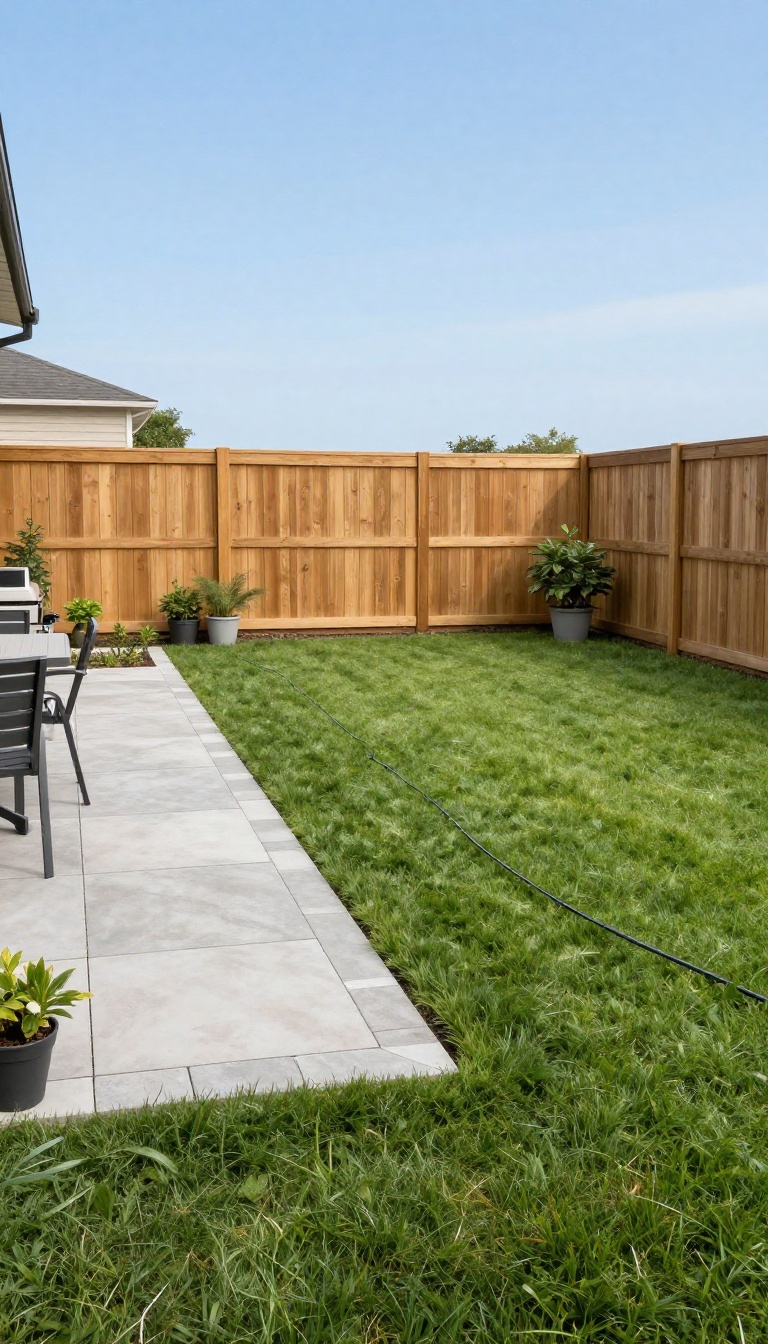
Most people guess at how much grass and how much paver they need, then end up with a yard that feels either too bare or too hard. The fix is simpler than you think: pick a ratio that matches how you actually live outside. A 60/40 or 70/30 split between grass and pavers is a solid starting point for most backyards.
Start by listing what you do outside on a normal week. Do you host dinners, let the dog run, or just want a quiet spot for a morning coffee? Each activity leans toward one surface over the other.
Once you know your top three uses, the ratio almost picks itself. A 70/30 split—70 percent grass, 30 percent pavers—works well if you want a soft, green feel with just enough hard surface for a grill, a small table, or a path. It keeps the yard looking lush and keeps costs down.
A 60/40 split gives you more room for furniture, foot traffic, and maybe a fire pit. You still get a generous lawn, but the paver areas start to feel like real outdoor rooms. This ratio suits families who entertain often or want a clear flow from the back door to the yard.
If you go 50/50, you're basically building an outdoor floor with grass accents. That can look sharp in small urban yards, but it costs more and needs better drainage. Only go there if you truly use the hard space every day.
Mark the ratio on the ground before you dig. Use string, spray paint, or a garden hose to outline paver zones. Live with the lines for a week.
You'll quickly see if the grass feels too cramped or the pavers feel too vast.
Match The Ratio To Your Daily Routine
Think about your busiest outdoor moments. If kids or pets tear across the yard daily, lean toward more grass—it's forgiving and cool underfoot. If you're constantly moving pots, chairs, or a grill, more pavers save you from muddy tracks and worn patches.
A simple test: count how many days a week you'd use a table and chairs outside. Two or three days? Go 70/30.
Five or more? Bump to 60/40. That small shift makes the space feel right instead of forced.
Adjust For Yard Size And Shape
Small yards often benefit from a higher paver ratio because grass can look patchy in tight, shaded spots. A 60/40 split in a compact yard creates clear zones without shrinking the green space too much. Large yards can handle more grass.
A 70/30 or even 80/20 split keeps the lawn from feeling like a field and gives you defined entertaining areas. Long, narrow yards work well with a central grass strip and paver borders on both sides.
Factor In Drainage And Maintenance
More pavers means more runoff, so you'll need a plan for where water goes. Slopes, French drains, or permeable pavers can handle it, but they add cost. Grass absorbs rain naturally, which is a big plus in wet climates.
Maintenance flips too. Grass needs mowing, watering, and occasional reseeding. Pavers need sweeping and maybe a rinse, but no weekly chores.
Pick the ratio that matches the time you're willing to spend.
Test The Ratio Before You Commit
You don't have to guess. Lay out your planned zones with temporary markers—cardboard, plywood, or even old rugs. Walk through the space like you would on a normal day.
Pretend to set down a chair, a grill, or a dog bowl. If the flow feels tight or awkward, adjust the lines. Once the layout feels natural, you've found your ratio.
Then you can order materials with confidence instead of hoping it works out.
FAQ
What's the best ratio of grass to pavers in a backyard?
It depends on how you use the yard. For family play, aim for 70% grass and 30% pavers. For entertaining, a 50/50 split often works better.
Start with your daily activities and adjust from there.
Do I need a professional to install grass and pavers together?
Not always. Simple projects like stepping stones or a small grid patio are DIY-friendly. Larger patios with base prep, grading, and drainage are worth hiring out to avoid settling and water issues.
How do I keep grass from growing between my pavers?
You can embrace it or prevent it. For a clean look, use polymeric sand in the joints. For a softer look, let the grass grow and trim it with a string trimmer every few weeks.
What type of pavers work best with grass?
Concrete pavers, brick, and natural stone all work well. Permeable pavers are great for drainage. Avoid very thin or fragile pavers if you expect heavy foot traffic or freeze-thaw cycles.
How do I handle drainage where grass meets pavers?
Create a slight slope away from your house and use a gravel or permeable paver transition strip. This keeps water moving and prevents soggy spots at the edge of the patio.
Conclusion
Grass and pavers work best when they share the yard instead of fighting for it. Pick one layout idea that fixes your biggest annoyance, whether that is a muddy path, a wobbly table, or a corner nobody uses. Get that piece right first.
You can layer in more later, and you probably will. For now, focus on the balance that makes the space easier to live in. A yard that works beats a yard that just looks good in photos.