13 Backyard Pavers Ideas for Stylish Outdoor Hardscaping
A well-paved backyard earns its keep every single day. It handles muddy dog paws, keeps patio chairs from sinking, and turns a patch of weeds into a spot you actually want to hang out in. Pavers also let you fix drainage, define zones, and match the look of your house without pouring a slab.
The tricky part is narrowing down the style. Herringbone, large-format concrete, permeable grids, and tumbled stone all solve different problems, and the wrong pick can mean cracked corners or a surface that bakes in July sun.
Your slope, rainfall, and how you use the space should drive the decision. Below are 13 backyard paver ideas that cover patios, walkways, driveways, pool decks, and fire pits.
1. Classic Herringbone Patio for Timeless Charm
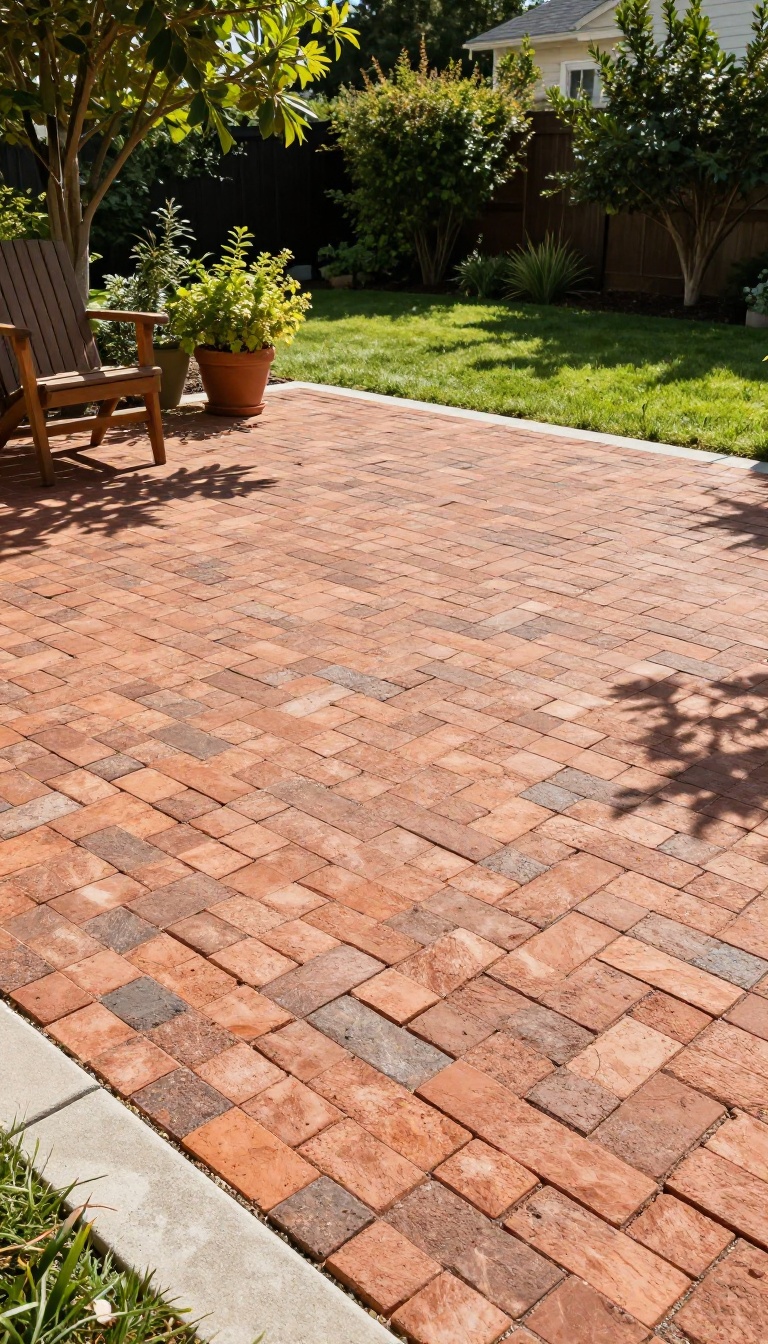
Herringbone pavers lock together in a zigzag that has been turning up in courtyards and European streets for centuries. The pattern isn't just pretty—it spreads weight across the surface so individual bricks resist shifting and cracking. That combination of old-world looks and real-world toughness makes it a smart pick for patios, walkways, and even driveways.
The magic of herringbone is in the interlock. Each brick sits at a 45- or 90-degree angle to its neighbor, so there are no long continuous joints for movement to travel along. That means fewer wobbly spots and less sand washing out over time.
You get a surface that feels solid underfoot and holds up to freeze-thaw cycles better than a simple running bond. It also plays well with different home styles. On a traditional brick house, herringbone looks like it belongs.
On a modern build, the geometric repetition reads as intentional and clean. You can run it straight or turn it on a diagonal to change the feel—diagonal tends to make small patios look wider. Brick choice matters more than people expect.
Clay pavers fired at high heat hold color and resist chips, while concrete pavers give you more color options at a lower price. Tumbled edges soften the look; crisp edges keep it sharp. Pick based on the vibe you want, not just the price tag.
Edge restraints are non-negotiable. Without a solid border—plastic, aluminum, or poured concrete—the pattern will creep outward and gaps will open. Set the restraint before you compact, and the patio will stay tight for years.
Why The Zigzag Holds Up
The interlocking angles mean no single joint runs the full length of the patio. That breaks up movement from soil shifts and temperature swings, so the surface stays flat. It also makes the pattern stronger than a standard grid, especially on slopes.
Matching The Pattern To Your House
A 45-degree herringbone adds energy and works well on modern homes. A 90-degree layout feels more traditional and pairs nicely with brick or siding. For small spaces, diagonal can trick the eye into seeing more width.
Picking Pavers That Last
Clay pavers resist fading and chips, but they cost more. Concrete pavers offer more colors and textures for less. Tumbled finishes look aged; straight edges look tailored.
Choose based on style and budget, not just durability.
Don't Skip The Edge
A hidden plastic or aluminum edge keeps the pattern from spreading. On driveways, poured concrete curbs hold up best. Install the restraint before compacting so the pavers lock tight against it.
2. Modern Large-Format Concrete Pavers for Clean Lines
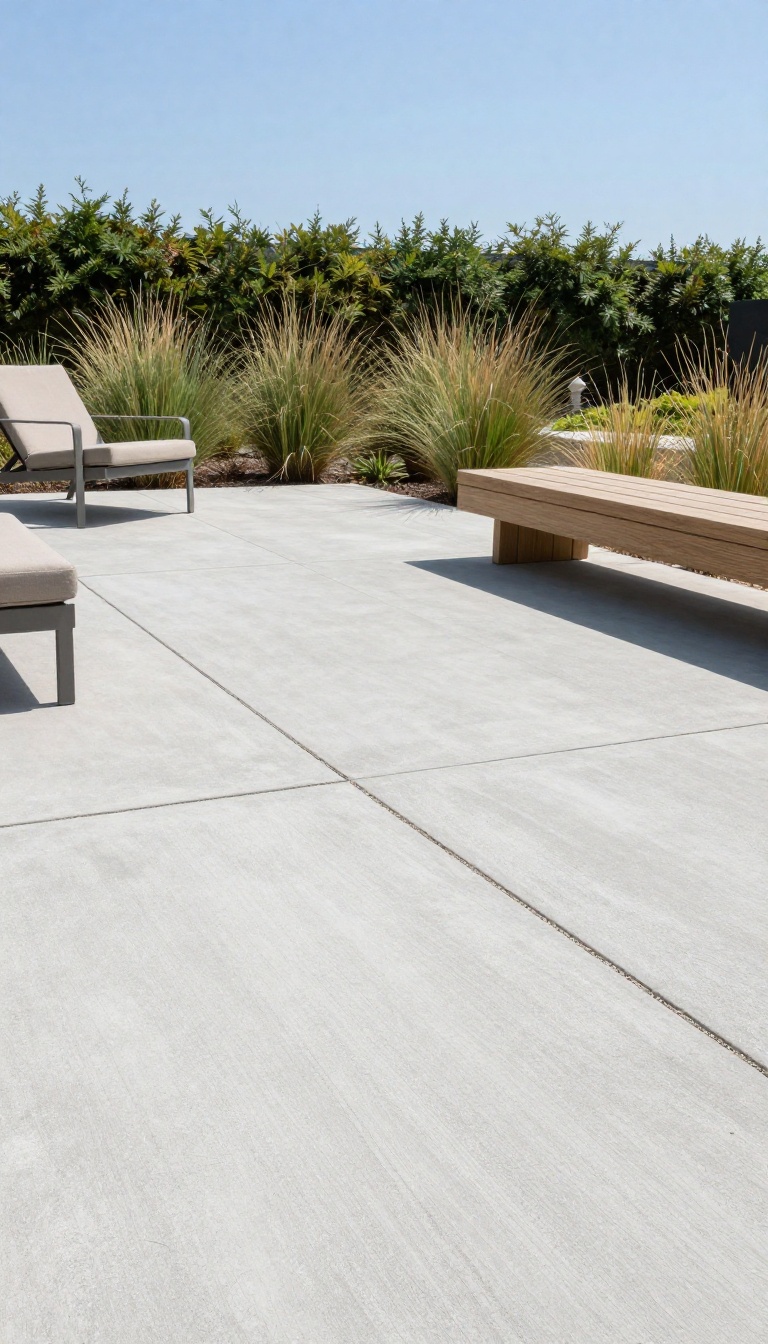
Large-format concrete pavers bring a crisp, modern edge to backyard hardscaping. They are bigger than standard pavers, often 24 by 24 inches or more, so you get fewer joints and a smoother surface. The result is a sleek, minimalist look that feels intentional and high-end.
If you want a contemporary patio that still handles real life, these are worth a close look.
These pavers work best when you let the material do the talking. Keep the layout simple, choose a color that complements your home, and plan for proper base prep. Get those right, and you will have a patio that looks sharp for years.
Why Fewer Joints Matter
Every joint between pavers is a spot where weeds can sprout and water can pool. With large-format pavers, you cut down on those lines dramatically. That means less maintenance and a cleaner visual flow.
The surface feels more like a single slab, but you still get the flexibility of individual units.
Color And Finish Options
Concrete pavers come in a range of colors, from cool grays to warm sands and deep charcoals. A matte or slightly textured finish hides dirt better than a polished one. For a modern look, stick with one color and let the size and shape stand out.
Mixing two tones can work, but keep the contrast subtle.
Installation Tips For A Flawless Look
Large pavers are heavy, so you need a solid, compacted base. A bedding layer of sand or fine gravel helps them sit level. Because they are big, any unevenness shows, so take your time with the screeding.
Consider using a polymeric sand for the joints to lock everything in place and keep weeds out.
3. Permeable Paver Driveway That Handles Heavy Rain
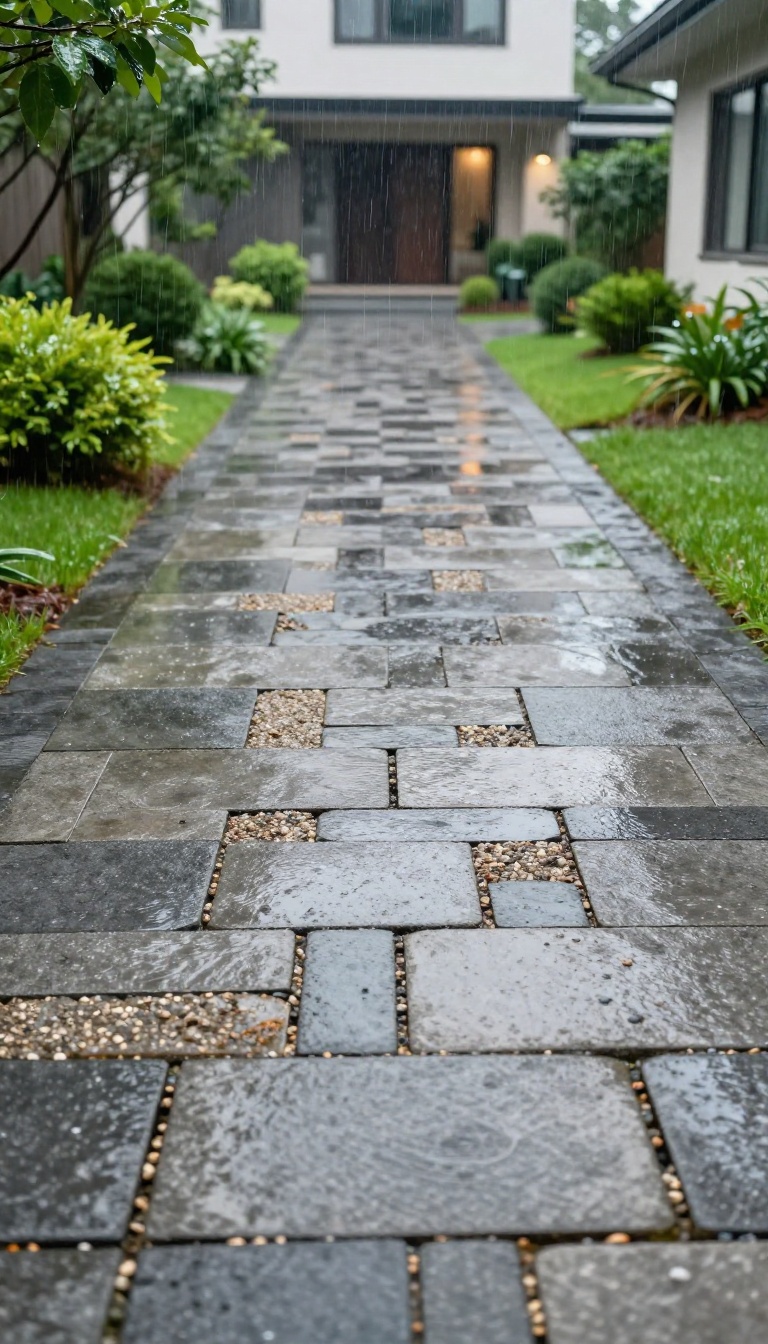
A driveway that turns into a shallow pond every time it rains gets old fast. Permeable pavers solve that by letting water pass straight through the surface and into the ground below. They look like regular pavers from above, but the gaps and base layers do the heavy lifting.
Permeable systems work because every layer is designed to move water. The pavers sit on a bed of crushed stone, and that stone sits on a deeper reservoir of larger gravel. Rain slips through the joints, filters down, and soaks into the soil or drains away slowly.
No puddles, no sheet runoff onto your neighbor's lawn, and less stress on storm drains during a downpour.
How They Handle Water
The magic is in the gaps. Permeable pavers have wider joints than standard ones, often filled with small gravel or grass. Water enters there, then travels through an open-graded base of washed stone.
That base holds the water temporarily while it percolates into the ground. If your soil drains poorly, you can add a perforated pipe at the bottom to carry excess water to a safe spot.
Base Materials That Matter
You cannot skimp on the base. Start with a compacted layer of #3 or #4 crushed stone, then add a thinner layer of #57 stone for leveling. Avoid limestone dust or any fine material that clogs the system.
A geotextile fabric between the soil and the stone keeps mud from migrating up. Get the base right and the pavers will perform for decades.
Holding Up Under Cars
Permeable pavers are tough. When installed over a proper base, they handle the weight of cars, trucks, and even light RVs without cracking or shifting. The key is thickness.
For driveways, choose pavers at least 2 3/8 inches thick, and make sure the base is at least 6 to 8 inches deep after compaction. Avoid parking heavy equipment on them regularly, but everyday vehicles are no problem.
4. Paver Walkway with Soft Garden Edging
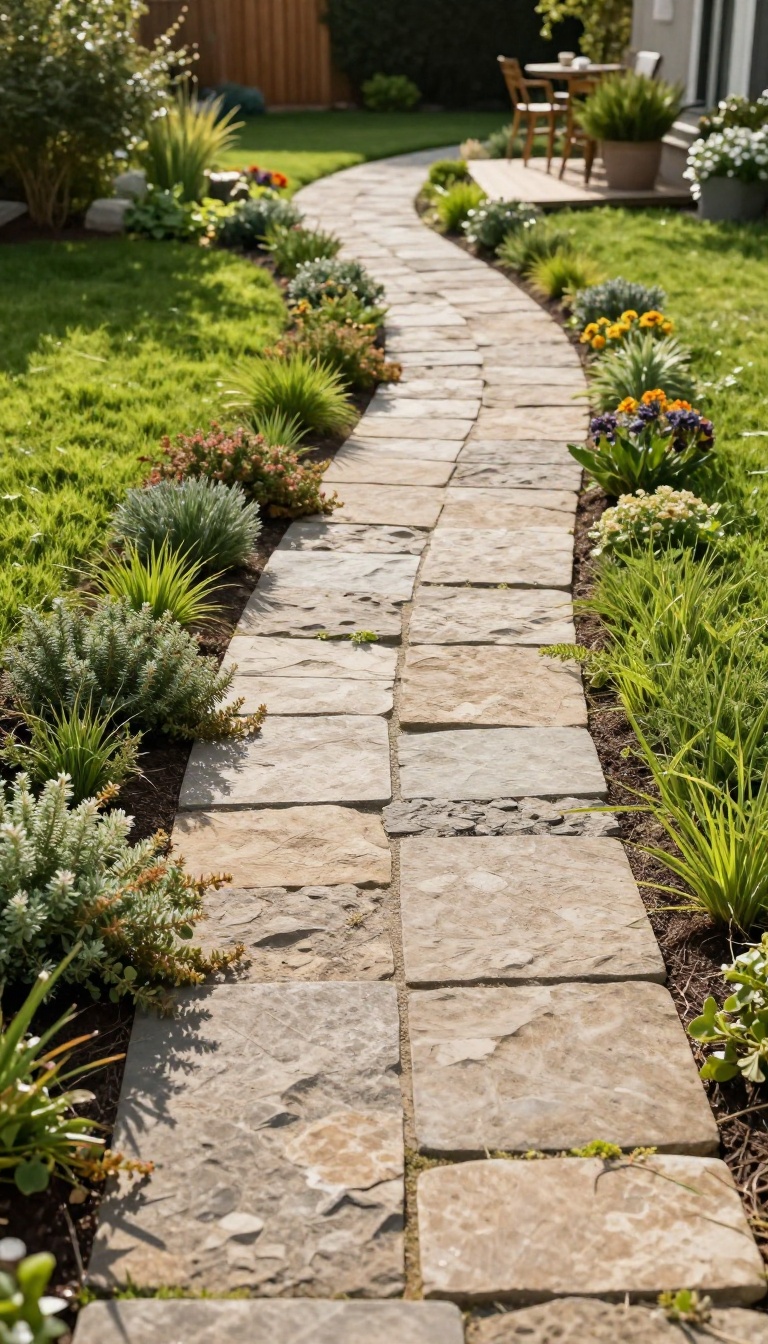
A straight, utilitarian path gets you from point A to point B. A gently curving walkway does that and makes the journey feel intentional. The curve slows your eye, softens the hard edges of the pavers, and gives the garden a sense of flow.
Pair it with low plantings that spill over the border, and you get a path that looks like it belongs there, not like an afterthought.
The key is to let the walkway meander just enough to feel natural without turning into a slalom. A gentle S-curve or a single wide arc usually works best. It guides guests from the patio to the shed, the gate, or a seating area, and it breaks up the rigid lines of fences and house walls.
The pavers themselves can be simple—no need for fancy patterns when the shape is doing the heavy lifting. What matters most is how the path meets the garden. That transition is where soft edging comes in.
Choosing Pavers That Curve Well
Not every paver likes to bend. Large rectangles fight a tight radius, while smaller units, tumbled stone, or cobble-style blocks follow a curve without awkward cuts. If you want a clean look, go with a flexible paver that has a slightly irregular edge.
For a more formal feel, use uniform square or rectangular pavers and cut them to fit the arc. Either way, keep the curve gentle—think of a slow river bend, not a hairpin turn. A good rule: the wider the paver, the larger the radius should be.
Plant Borders That Soften The Edges
The magic happens where stone meets soil. Low-growing perennials like creeping thyme, sedum, or dwarf mondo grass can spill over the pavers just a little, blurring the hard line. Or use ornamental grasses that sway and catch the light.
Leave a gap between the paver edge and the planting bed—about 4 to 6 inches—so roots have room and mulch stays put. If you want zero maintenance, choose a tight groundcover that knits together and keeps weeds down. The goal is a border that looks effortless, not overgrown.
Non-slip Surfaces For Wet Weather
A walkway gets slippery when it rains, especially if it's shaded or near a downspout. Look for pavers with a textured finish or a slight matte surface. Avoid polished or smooth-faced options.
You can also add a joint sand that locks in and improves traction. If you live in a freeze-thaw climate, choose a paver rated for freeze-thaw cycles and set it on a proper base. A non-slip finish isn't just safer—it also hides dirt and wear better than a glossy surface.
Keeping Maintenance Low
A curving walkway with soft edges can be surprisingly low-maintenance if you plan ahead. Use a polymeric sand in the joints to stop weeds and ants. Edge the path with a steel or plastic border to keep grass from creeping in.
Then mulch or plant densely so you're not constantly pulling weeds. Twice a year, give it a quick sweep and rinse. If you choose self-seeding groundcovers, they'll fill in gaps on their own.
The less bare soil you leave, the less work you'll do later.
5. Fire Pit Circle Made from Tumbled Pavers
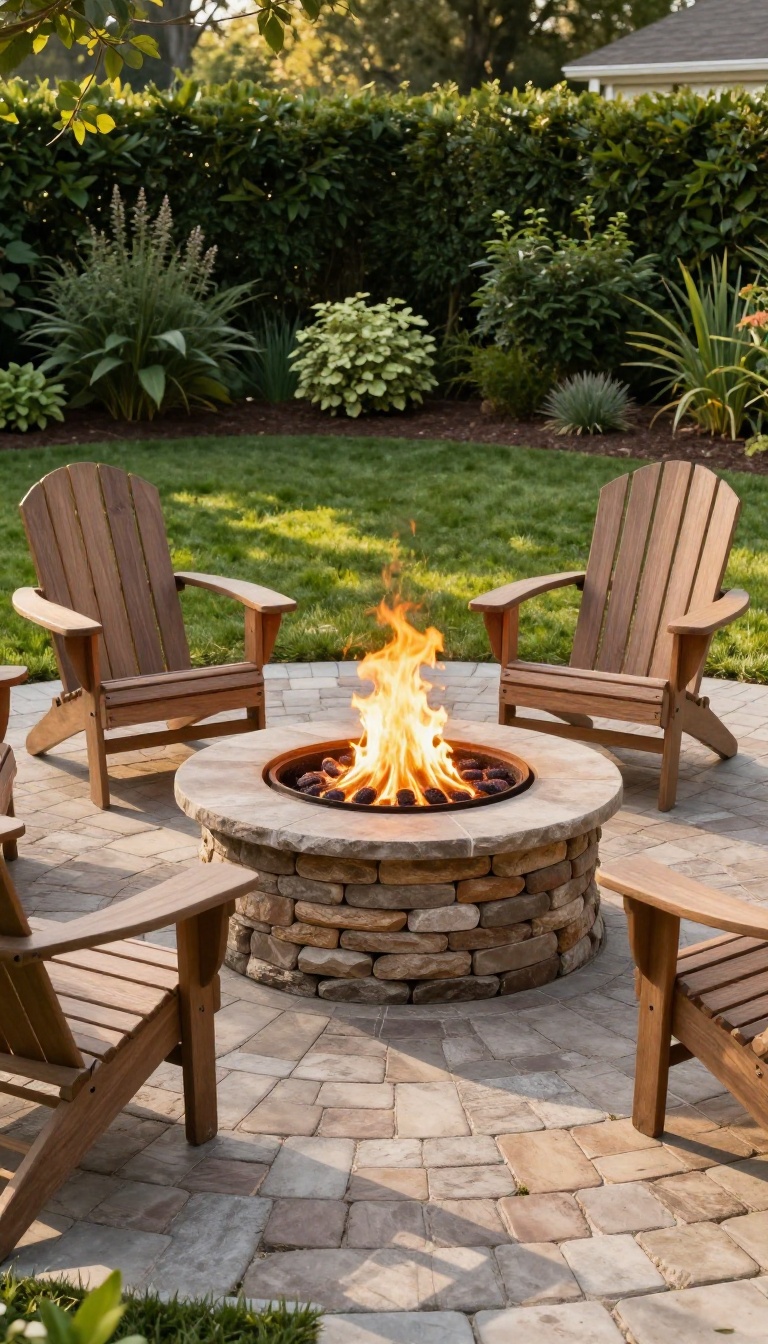
A fire pit turns a plain backyard into a destination, especially when it sits on a circular pad of tumbled pavers. The rounded shape softens the hard edges of a rectangular patio and gives everyone a natural place to pull up a chair. Tumbled pavers have that worn, slightly irregular look that pairs perfectly with flickering flames and a relaxed evening vibe.
You don't need a massive budget to pull this off. A circle of pavers around a fire pit is one of the most forgiving hardscaping projects because curves hide small mistakes better than straight lines do. The key is getting the base right and choosing materials that can handle heat without cracking or spalling.
Sizing The Circle
Start with the fire pit itself. A typical ring is 36 to 44 inches across, which gives you a good-sized fire without feeling like a bonfire. Then add at least 3 feet of paver pad around it for chairs, and 4 feet if you want people to walk behind seated guests.
That puts your total circle diameter somewhere between 10 and 14 feet. If your yard is tight, go with a smaller fire pit and a 3-foot clearance. You can always add a second ring of pavers later if you want more elbow room.
Picking Heat-friendly Pavers
Not all pavers handle heat the same way. Concrete pavers can crack or pop if they get too hot, especially if they trap moisture. Tumbled clay or fire-rated brick are safer bets because they expand and contract without failing.
Avoid any paver with a glossy sealant, since it can discolor or bubble. Also skip plastic or resin-based grids near the fire. If you love the look of concrete, choose a tumbled concrete paver rated for fire pits and keep the fire ring itself lined with steel or firebrick.
Building A Level, Safe Base
A fire pit pad needs to be dead level, not just close. Dig down about 6 to 8 inches, then add a 4-inch layer of compacted gravel. Tamp it in 2-inch lifts so it locks together.
On top of that, spread 1 inch of sand and screed it flat. Set your pavers in a running bond or a fan pattern, then sweep polymeric sand into the joints and mist it lightly. For the fire pit, build on a separate concrete collar or a bed of gravel so the heat doesn't transfer directly to your pavers.
Always keep the fire at least 10 feet from your house, fence, or low tree branches.
Finishing Touches That Matter
Once the pavers are down, add a metal or stone fire ring in the center. It contains the fire and gives you a clean edge. A few inches of decorative gravel or lava rock around the ring hides any gaps and adds a nice contrast.
If you want to use the space year-round, consider a spark screen and a cover. And don't forget lighting—solar path lights or a few string lights overhead make the circle feel intentional instead of like an afterthought.
6. Paver Patio with Built-In Seating Wall
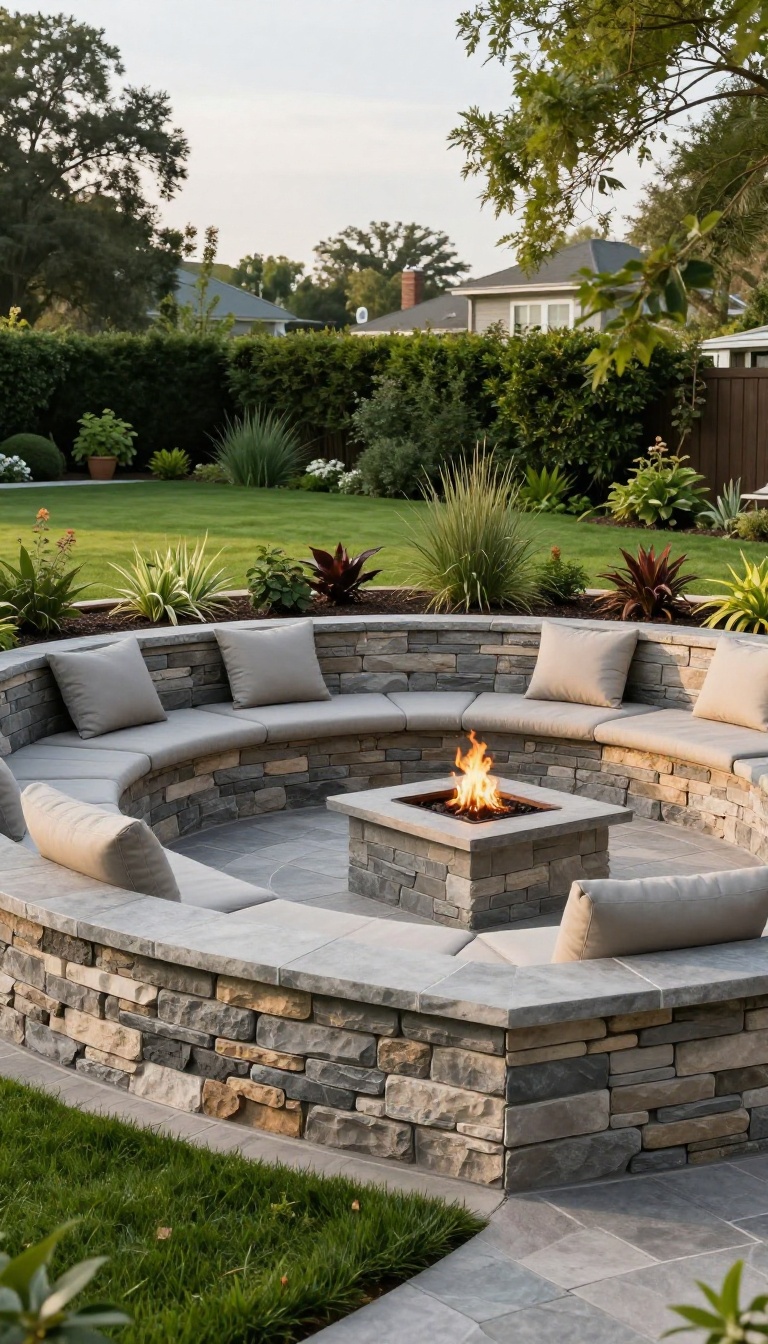
A seating wall turns a flat patio into a room without walls. It gives people a place to perch, holds back a grade change, and hides the messy edge where pavers meet lawn. The trick is making the wall look like it belongs there, not like an afterthought.
You get more usable space when the wall doubles as structure. On a sloped yard, it retains soil so your patio stays level. On flat ground, it defines the lounge zone and keeps chairs from drifting into the garden.
Either way, you gain seats that never need to be dragged out of storage.
Matching Wall Blocks To Pavers
Start with the same manufacturer if you can. Many companies make wall blocks and pavers in the same color family, so the tones line up without guesswork. If you mix brands, bring samples outside and look at them in daylight, not under store lights.
A slight texture difference is fine, but a color mismatch will bug you every time you walk outside.
Getting The Height Right
For sitting, aim for 18 to 20 inches from the patio surface to the top of the wall. That range fits most adults comfortably. If the wall also retains soil, check your local code for anything over 3 feet, since taller walls often need engineering or a permit.
A cap stone adds a finished look and gives you a flat, smooth seat.
Adding Lighting Without Clutter
Hardscape lights tucked under the cap wash the wall face with a soft glow and keep the patio usable after dark. You can also set small well lights in the pavers a few feet out from the wall to graze the texture. Run conduit before you lay the base, because retrofitting later means cutting into finished work.
Low-voltage LED kits are cheap to run and easy to tie into a transformer.
7. Mixed-Material Patio: Pavers and Wood Decking
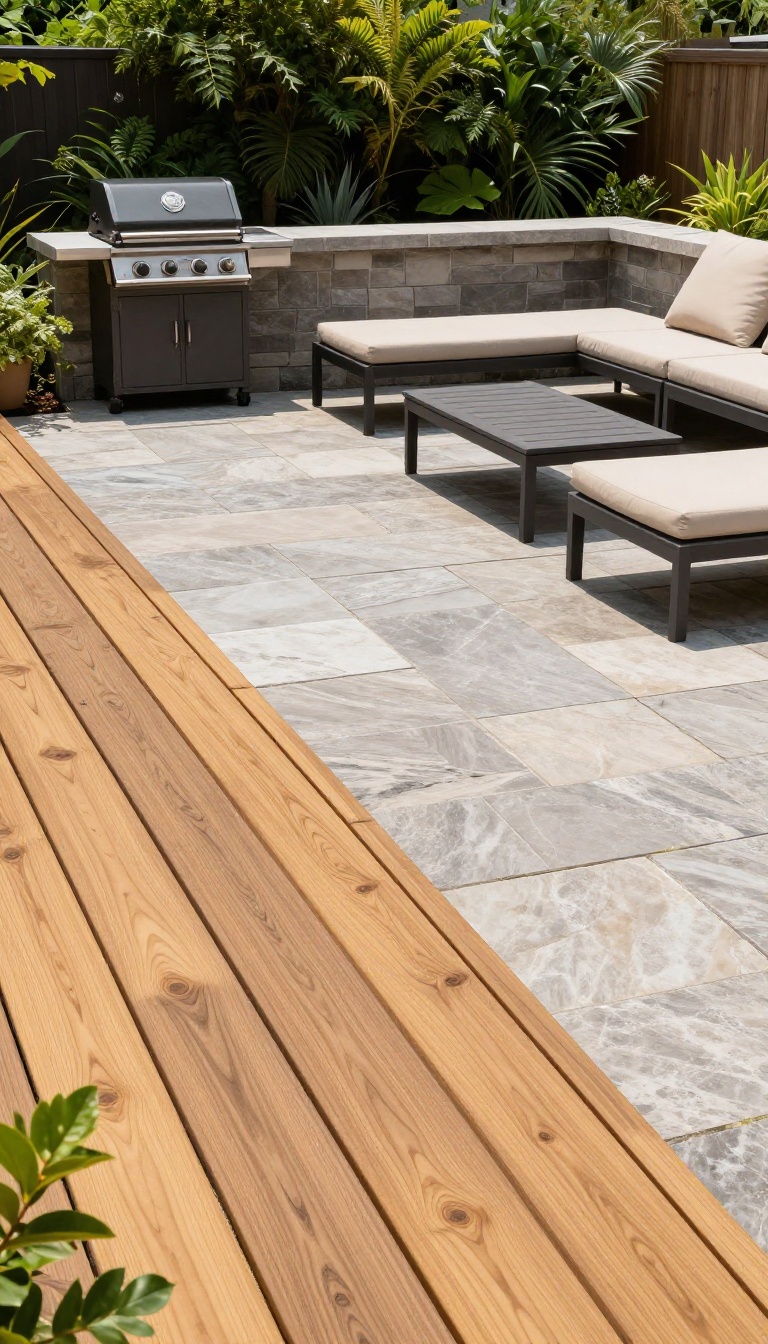
Pavers alone can feel a little one-note across a big space. Bringing in wood or composite decking breaks up the hardscape and adds warmth underfoot. The trick is planning the transition before you dig, not after.
A mixed-material patio works best when each surface does a different job. Pavers handle the grill zone, the heavy traffic, and anything that gets wet. Decking takes over the lounge area where bare feet land and furniture sits for hours.
Splitting the space this way keeps the look intentional instead of random.
Where To Make The Switch
The cleanest transition follows a natural line, like the edge of a roof overhang or the boundary between sun and shade. A straight seam reads modern; a gentle curve softens the whole patio. Whatever you pick, keep the joint consistent along its full length so it looks deliberate.
Run the decking boards perpendicular to the seam. That visual contrast tells the eye a new zone starts here, and it hides minor alignment gaps that show up over time.
Handling The Height Gap
Decking sits on a frame, so it usually ends up a few inches higher than a paver field set on a compacted base. You have two clean options. Drop the deck frame so the finished surfaces meet flush, or embrace the step and build it into the design.
A flush transition needs careful math on joist height, paver thickness, and bedding sand. A low step, around 5 to 7 inches, works fine as a border and gives people a clear cue to watch their feet. Just keep the step depth generous enough to stand on safely.
Materials That Age Well Together
Not every combo holds up. Treated wood grays over time, which can clash with crisp new concrete pavers unless you like that weathered contrast. Cedar and ipe fade gracefully and pair nicely with natural stone.
Composite decking keeps its color and needs less upkeep, but it can look flat next to textured pavers. Match tones rather than exact colors. Warm gray pavers with a medium-brown deck read cohesive.
Cool charcoal pavers with dark composite look sharp and modern. Add a paver border along the deck edge to tie both surfaces together.
Drainage And Maintenance
Water has to go somewhere, and two materials mean two drainage plans. Pavers on a slight slope shed water toward a lawn or drain. Decking needs gaps between boards and airflow underneath so it does not stay wet.
Keep the deck frame off the ground on concrete footings, and leave a small gap where it meets the pavers. That gap stops rot and gives debris a place to escape. Sweep both surfaces regularly, and reseal wood every couple of years to keep it from soaking up stains.
8. Geometric Paver Design for a Bold Backyard Statement
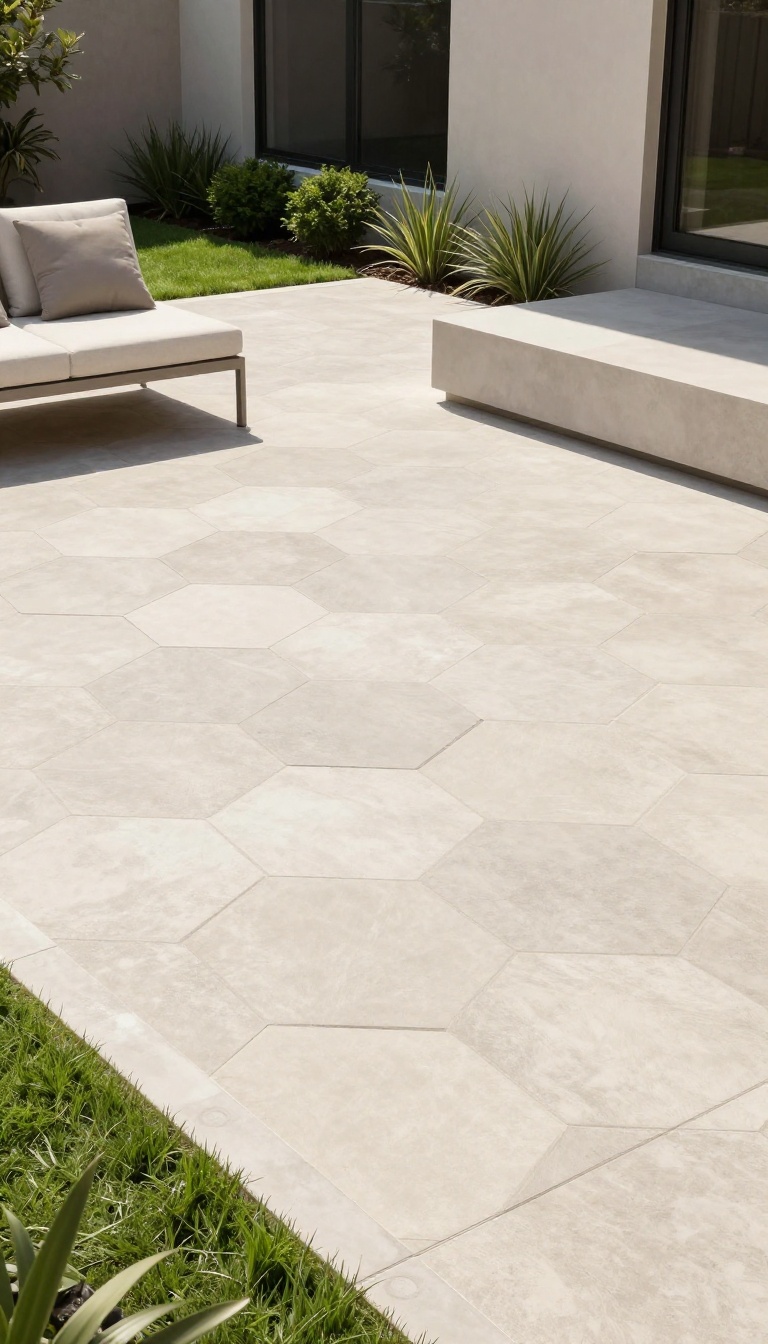
Geometric pavers turn a plain patio into a pattern that catches the eye without needing plants or furniture to do the heavy lifting. Hexagons, triangles, and interlocking shapes create movement and depth that standard rectangles just can't match. The trick is knowing how to lay them out so the design feels intentional, not chaotic.
A geometric patio works best when you treat the pattern like a rug. Give it clear borders, keep the surrounding materials simple, and let the shapes be the star. That way, the boldness stays contained and the space still feels calm enough to actually use.
Laying Out A Geometric Patio
Start by mapping the pattern on paper or with string lines before you set any pavers. Hexagons and triangles need a precise starting point, usually the center of the patio or a focal edge, so the cuts at the borders stay even. If your patio is small, stick to one shape and one size to avoid visual clutter.
For larger areas, you can mix two sizes of the same shape to add interest without going overboard.
Color Contrast Tips
Contrast makes geometric patterns pop, but too much can feel busy. Use a light base color with a darker accent for the pattern lines, or vice versa. Charcoal and cream is a classic combo that works with almost any home style.
If you want something softer, try two tones from the same color family, like sand and taupe, so the pattern reads as texture rather than a loud graphic.
Keeping The Space Balanced
A bold floor needs breathing room. Keep furniture low-profile and simple, and avoid busy rugs or patterned cushions that compete with the pavers. Repeat the geometric shape in one other spot, like a side table or planter, to tie the look together.
And don't forget lighting—wash the patio with soft, even light at night so the pattern stays visible but not overwhelming.
9. Paver Pool Deck That Stays Cool Underfoot
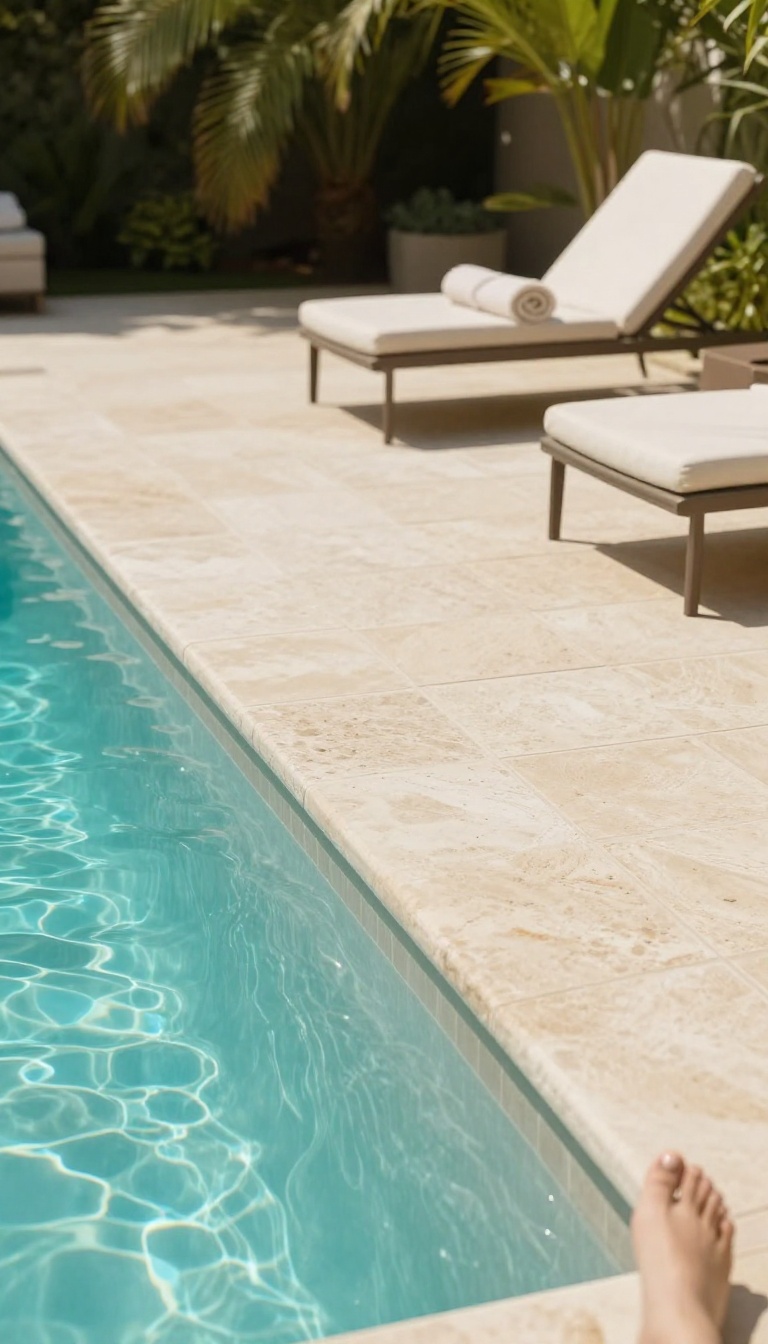
Bare feet and hot pavers don't mix. If your pool deck turns into a griddle by noon, the fix starts with the surface you choose. Light-colored, textured pavers reflect heat instead of soaking it up, so you can walk from the water to your chair without a sprint.
The right pick also handles splashes, sunscreen, and whatever the filter kicks out.
Standard gray concrete gets uncomfortably hot in direct sun, and dark stone can be worse. Look for pavers in shades of sand, cream, or light gray. Travertine, shellstone, and certain concrete pavers stay noticeably cooler because they bounce sunlight back rather than absorbing it.
A subtle texture helps too, since smooth surfaces can feel slick when wet and reflect more glare.
Slip Resistance Matters More Than Looks
Around a pool, a polished finish is a hazard waiting to happen. Choose pavers with a honed, tumbled, or brushed surface. Those tiny bumps and pits give wet feet something to grip.
Ask for a slip-resistance rating, often listed as a DCOF value. Anything at or above 0. 42 works well for pool decks.
Saltwater Vs. Chlorine: What To Know
Saltwater pools are gentler on skin but harder on some pavers. Natural stone like travertine handles salt well, while certain concrete mixes can pit over time. Chlorine is less aggressive on the surface but still needs a sealer to block stains and UV fading.
Tell your supplier which system you run so they can match the material to your water.
Sealing Keeps It Low-maintenance
A penetrating sealer protects pavers from water absorption, salt damage, and sunscreen stains. Reapply every two to three years, or sooner if water stops beading. Avoid film-forming sealers that sit on top, since they can get slippery when wet.
A breathable sealer lets moisture escape and keeps the surface stable through freeze-thaw cycles.
10. Rustic Cobblestone Paver Courtyard
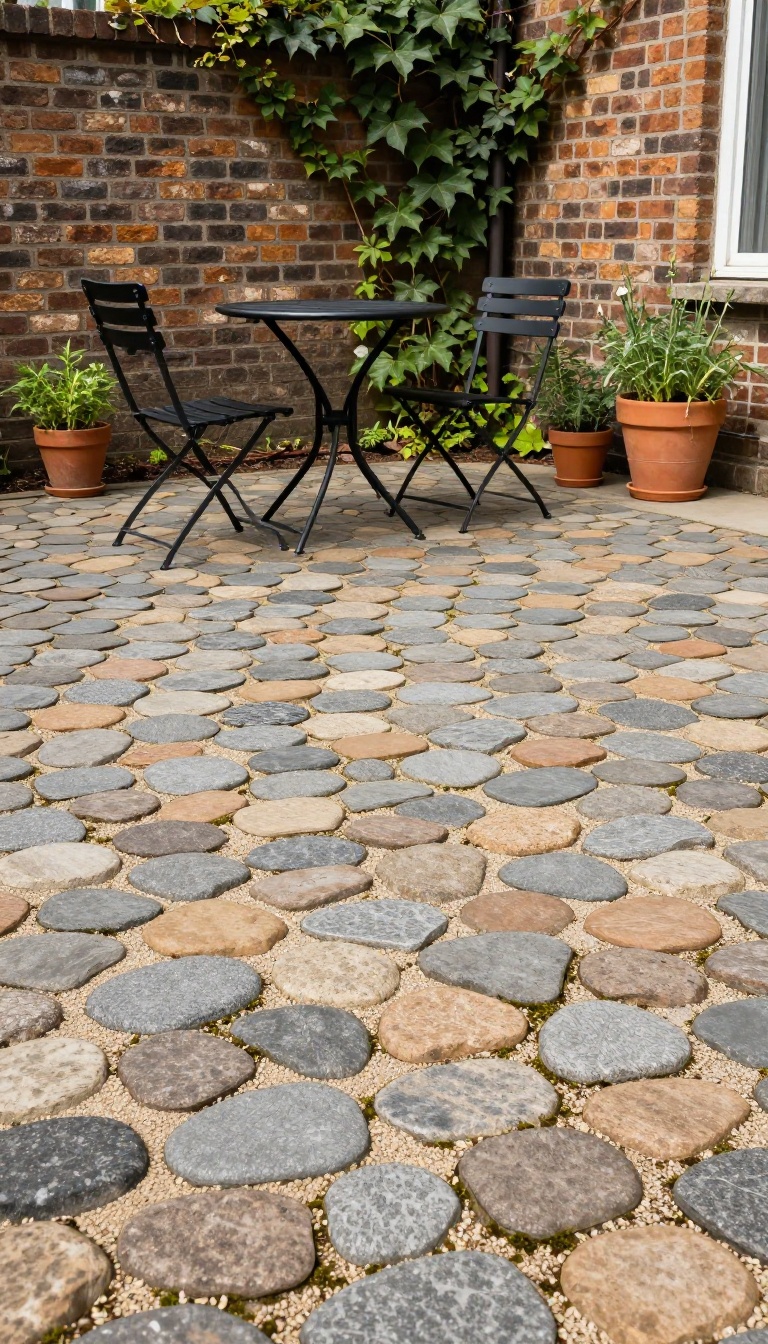
Cobblestone courtyards feel like they've been there for a hundred years, even when they're brand new. The rounded, irregular shapes and soft, worn edges create a texture that modern rectangular pavers just can't match. It's the kind of space that invites you to slow down, maybe set out a bistro table and a few potted herbs, and pretend you're in a European alleyway.
But getting that old-world look without actual old-world maintenance takes some know-how. You need the right paver style, the right joint material, and a little patience for the finish to settle in. The payoff is a courtyard that looks better with every season, not worse.
Cobblestone-style pavers are typically made from concrete or natural stone that's been tumbled to soften the edges and mimic the wear of centuries. They come in a mix of sizes and slightly irregular shapes, so the surface has a gentle, undulating feel underfoot. That variation is what sells the rustic look, but it also means you need to pay attention to how they're laid.
A proper base is still non-negotiable. You'll want a compacted layer of crushed stone, followed by bedding sand, just like any other paver project. The difference is in the details: wider joints, a less rigid pattern, and a finish that embraces a little moss and weathering over time.
Choosing The Right Cobblestone Look
Not all cobblestone pavers are created equal. Concrete versions are more uniform and cost less, while natural granite or sandstone gives you genuine variations in color and texture. Tumbled concrete comes closest to the old-world feel without the price tag of real stone.
Look for a mix of sizes, often sold as a 'three-size' or 'four-size' blend. That variety keeps the pattern from looking too grid-like. Stay away from anything with sharp, machine-cut edges if you want that aged appearance.
Laying Pattern And Joint Width
Forget the tight, precise joints you'd use with modern pavers. Cobblestone courtyards look best with joints around 1/2 to 1 inch wide. That extra space lets you sweep in joint sand and allows a little movement without cracking.
A random, ashlar-style pattern works well, but you can also try a fan or circular layout for a more formal European touch. Just avoid running bond or herringbone—those read too contemporary for this look.
Finishing With Moss-friendly Joint Sand
Polymeric sand is great for stability, but it can inhibit moss growth. If you want that soft, green patina between the stones, use a traditional joint sand or a specially formulated moss-friendly mix. Over time, moisture and shade will encourage moss to take hold naturally.
You can also speed things up by mixing in a little moss slurry after installation. Keep the area damp for a few weeks and avoid heavy foot traffic. The result is a courtyard that looks like it's been there for decades.
11. Paver Steps and Landing for Sloped Yards
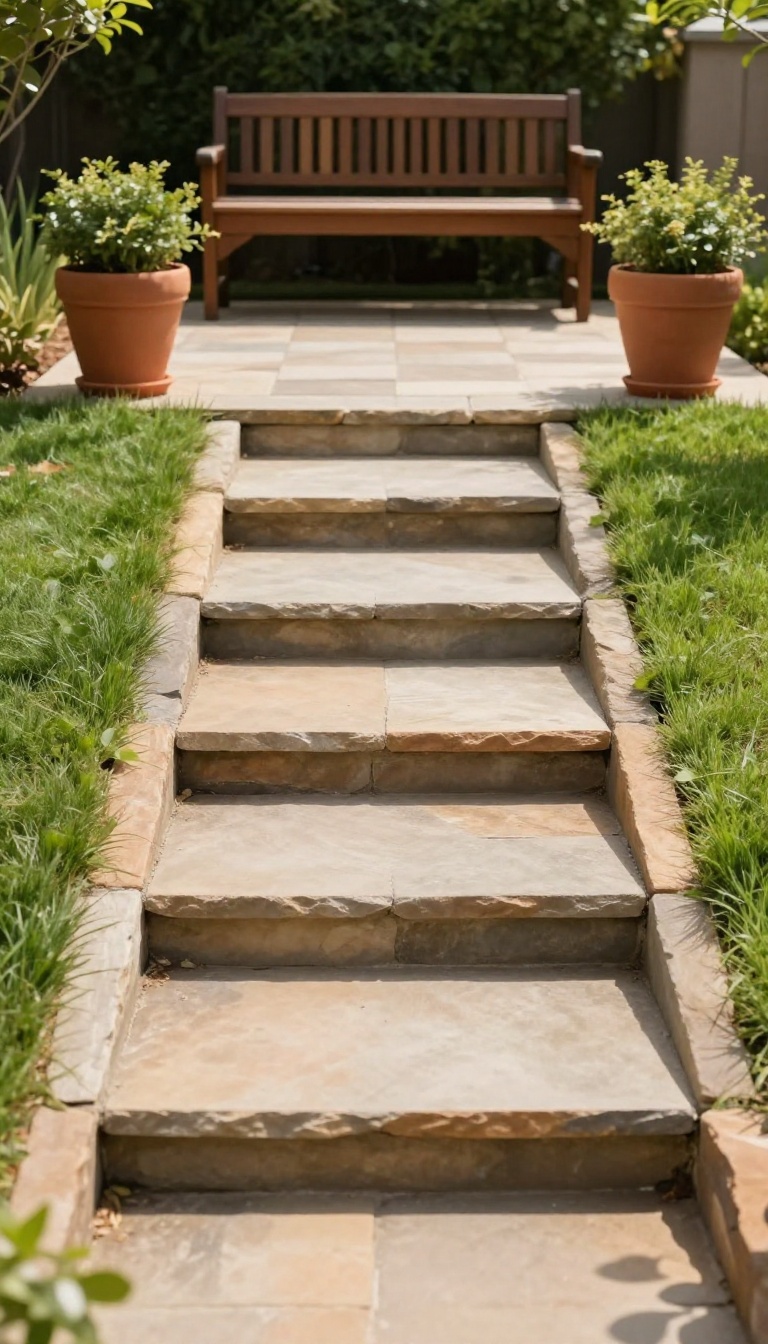
A sloped yard can feel like a problem you're stuck with, but paver steps and a landing turn that grade change into one of the best features of your outdoor space. Instead of a steep, muddy bank that's hard to mow and dangerous when wet, you get wide, stable steps that lead somewhere. The landing at the top or bottom gives you a natural spot for a bench, a few potted plants, or just a place to set down your coffee while you enjoy the view.
The key is getting the proportions right so the steps feel comfortable underfoot and hold up through freeze-thaw cycles. You also need to think about where water goes when it rains, because a sloped yard already sends runoff downhill. With the right rise-to-run ratio, a solid base, and smart drainage, paver steps can last for decades and make the whole yard more usable.
Getting The Rise And Run Right
Rise is the height of each step, and run is the depth of the tread. A comfortable outdoor step usually has a rise between 5 and 7 inches and a run of at least 12 inches, but wider is better for a relaxed feel. If you go too steep, you'll feel it in your knees, and too shallow can feel awkward and trip-prone.
A good rule of thumb is to keep the rise plus the run between 17 and 18 inches for a natural stride. For sloped yards, you might need to build a series of steps with a landing every few risers to break up the climb. That landing also gives you a spot to rest and helps with drainage.
Drainage That Works With The Slope
Water always wins, so plan for it from the start. Each tread should have a slight forward slope, about 1 to 2 percent, so water runs off the front instead of pooling. Behind the steps, install a gravel trench or perforated drain pipe to catch groundwater before it undermines the base.
If your slope is steep, consider a French drain along the side of the steps to redirect runoff around the landing. Permeable pavers or gaps filled with gravel can also help, but only if the soil below drains well. In heavy clay, you'll need to excavate deeper and add a layer of crushed stone to give water somewhere to go.
Safety Edges And Handrails
A slip on wet pavers is no joke, especially on a slope. Add a non-slip edge to each tread, either with a textured bullnose paver or an abrasive strip. If your steps have more than three risers, a handrail on at least one side is smart, and it also helps define the path.
Lighting is another safety must: low-voltage step lights or solar caps on the risers make the steps visible at night without blinding you. For the landing, keep the edges flush with the surrounding grade or add a low retaining wall if the drop-off is more than a foot. That wall can double as a seat wall if you cap it with a smooth paver.
Materials And Design Details
Concrete pavers are the workhorse here because they're uniform, strong, and easy to cut for curves. Tumbled stone or travertine give a softer, more natural look that blends into planted slopes. Mix textures for visual interest: a smooth paver on the treads and a rougher one on the risers, or vice versa.
Color can tie the steps to your patio or house, but keep in mind that dark pavers get hot in direct sun. For a cohesive look, use the same paver family as your patio but change the pattern or size on the steps. A border of contrasting pavers along the landing edge adds a polished touch without much extra cost.
12. Paver Outdoor Kitchen Floor with Easy Cleanup
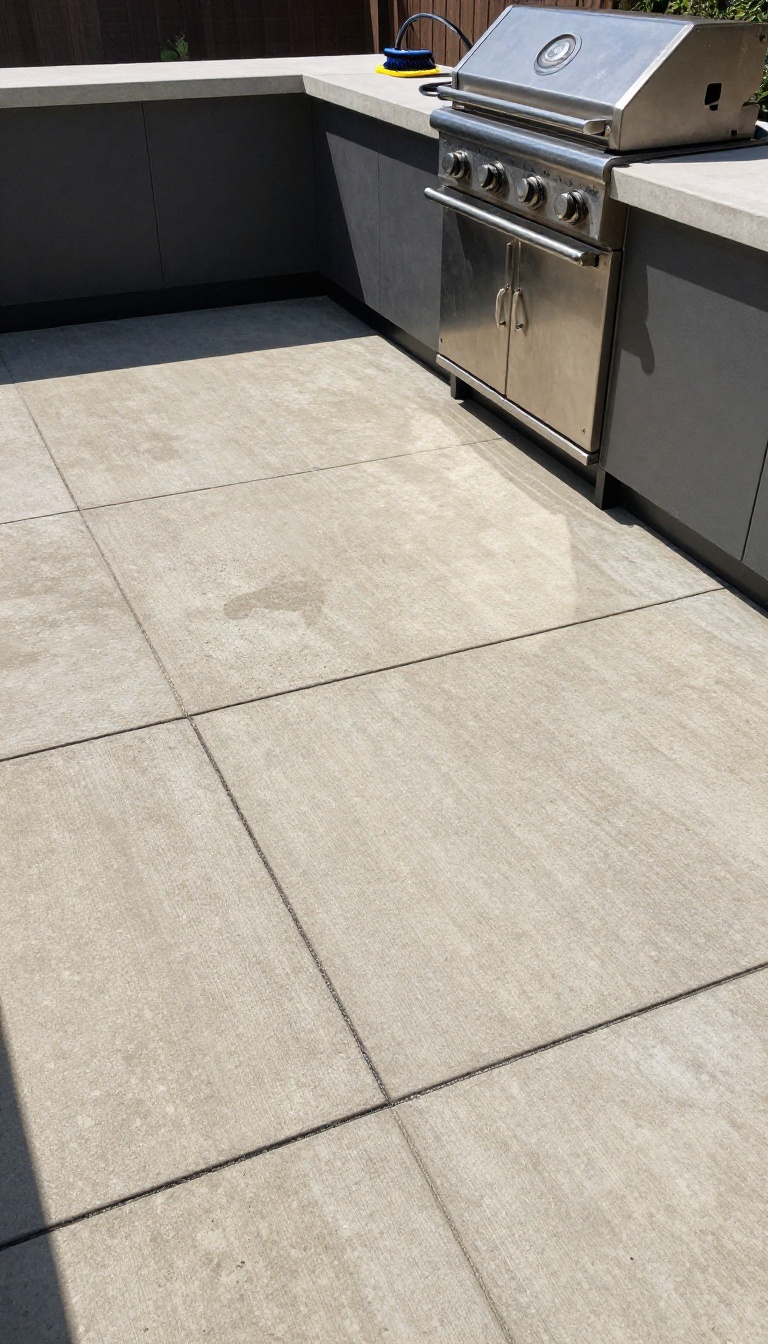
Grease splatter, dropped burger patties, and a dusting of charcoal ash are just part of cooking outside. The floor under your grill has to survive all of it without turning into a permanent stain collection. Pavers give you a surface you can actually scrub.
Pick the right finish and a quick pass with a hose and brush handles most messes, even the oily ones. The trick is matching that floor to your counters and prep zones so the whole setup looks intentional instead of pieced together.
The area around a grill takes more abuse than any other part of a patio. Heat, grease, and food debris land there constantly, and smooth surfaces show every drip. A paver floor breaks up that mess visually and gives you grip when things get slick.
It also lets water drain through the joints instead of pooling near your feet. You still need to choose carefully. Some finishes soak up oil, and some sealers turn slippery the moment they get wet.
Finishes That Fight Grease
Dense, low-porosity pavers handle grease better than anything soft or highly textured. Concrete pavers with a tight surface and porcelain pavers are the two strongest picks here. Avoid porous natural stone like unsealed limestone or sandstone right under the grill.
Those grab oil and hold it. A penetrating sealer on concrete pavers buys you extra time before a spill soaks in. Reapply every couple of years, especially in the cooking zone.
Tying Pavers To Your Counters
Your floor and countertop don't need to match exactly, but they should share a temperature or tone. Warm gray pavers with a charcoal counter look sharp and hide ash well. Run the same paver as a thin veneer on the counter base if you want a seamless look.
It ties the vertical and horizontal planes together. Keep the floor level with the surrounding patio so you can roll a cart or cooler right up to the grill without a lip catching the wheels.
Cleanup That Actually Works
Sweep loose ash and crumbs while they're dry, before you spray anything. Water turns ash into a paste that works into the joints. For grease, hit the spot with a degreaser and a stiff brush, then rinse.
A pressure washer on a low setting handles the rest without blasting out the joint sand. Refresh polymeric sand once a year. It keeps weeds down and stops crumbs from settling into the gaps.
13. Paver Border Around Garden Beds for Definition
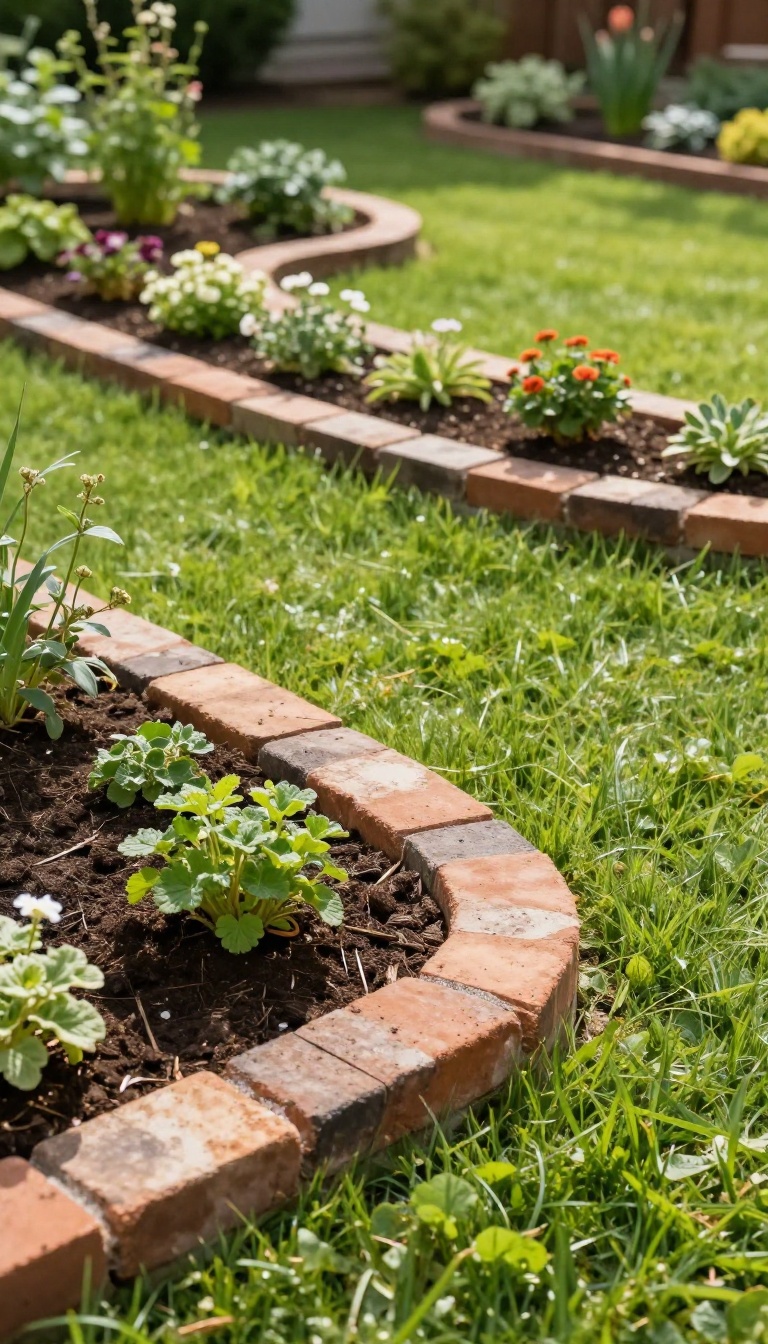
A crisp edge between your garden beds and lawn does more than look tidy. It stops grass from creeping into your soil, cuts down on trimming, and gives your planting areas a finished shape. Pavers make that edge durable and easy to maintain.
You can set pavers flush with the ground or leave them slightly raised. Flush borders let you mow right over them without a second thought. Raised borders create a small retaining wall that holds soil and mulch in place.
Both options keep weeds from jumping the line and turning your beds into a free-for-all.
Flush Borders For Easy Mowing
Dig a shallow trench along the bed's edge, about the width of your paver. Set the pavers so their tops sit level with the lawn. Tamp them down and backfill with soil or sand.
Now you can run the mower wheel right along the edge without scalping grass or nicking the paver. It's a clean look that saves you from hauling out the string trimmer every weekend.
Raised Borders That Hold Soil
If your bed sits higher than the lawn, a raised paver border acts like a mini retaining wall. Stack two or three courses of pavers, using construction adhesive between layers for stability. This keeps mulch from washing onto the grass during heavy rain.
It also gives you a little extra planting depth for shallow-rooted flowers and herbs.
Choosing The Right Paver For The Job
Not all pavers work well as borders. You want something dense and frost-resistant if you live in a cold climate. Tumbled concrete or clay brick are classic picks.
Avoid thin veneer stones that can crack when you step on them. A 2-inch-thick paver is usually plenty for a garden edge, but go thicker if you plan to drive over it or stack it high.
Installation Tips That Save Time
Lay out a garden hose to mark the curve or straight line before you dig. That gives you a visual guide and keeps the shape consistent. Cut pavers with a wet saw for clean edges around curves.
Set them on a base of compacted gravel or sand to prevent settling. Once they're in, sweep polymeric sand into the joints to lock everything tight and block weeds.
FAQ
What is the most durable paver material for a backyard?
Concrete and natural stone pavers are the most durable. Concrete pavers resist cracking and fading, while granite or travertine offer long-lasting beauty. Choose a thickness of at least 2 inches for driveways or heavy foot traffic.
How do I prevent weeds from growing between pavers?
Use polymeric sand in the joints. It hardens when wet and blocks weeds. For extra protection, install a weed barrier fabric under the base layer, and keep nearby beds mulched.
Can I install pavers over an existing concrete patio?
Yes, if the concrete is structurally sound and drains properly. You'll need to add a thin layer of sand or a mortar bed, then lay pavers on top. This raises the height, so check thresholds and edges.
What is the best base for backyard pavers?
A compacted base of crushed stone (like 3/4-inch gravel) at 4 to 6 inches deep works for patios. For driveways, go 6 to 8 inches. Top with 1 inch of bedding sand before laying pavers.
How much does a paver patio cost per square foot?
Expect $8 to $25 per square foot installed, depending on material, pattern, and labor. DIY can cut costs to $3 to $10 per square foot, but you'll need tools and time.
Conclusion
Pavers reward you twice: once when the project wraps, and again every season they hold up without fuss. Start with the area that bothers you most, whether that is a muddy path or a bare patio corner. One small section done right teaches you more than a whole yard rushed at once.
Then let the rest come together over time. Add a fire pit, a border, or a landing when the budget and weekend allow. Your yard will tell you what it needs as you use it.