11 Ikea Besta Living Room Ideas Building Sleek Storage Walls
IKEA Besta is a chameleon of storage systems. It can look like custom built-in cabinetry without the custom price tag, which is exactly what makes it so popular for living rooms.
Whether you need a media wall, a bookcase display, or a hidden storage solution, Besta frames offer endless possibilities. The key is planning the layout and finishes so the final result feels intentional and polished.
With a few clever tricks, you can create a storage wall that looks like it was designed for your space. Here are 11 IKEA Besta ideas that prove you don't need a huge budget to get a high-end look.
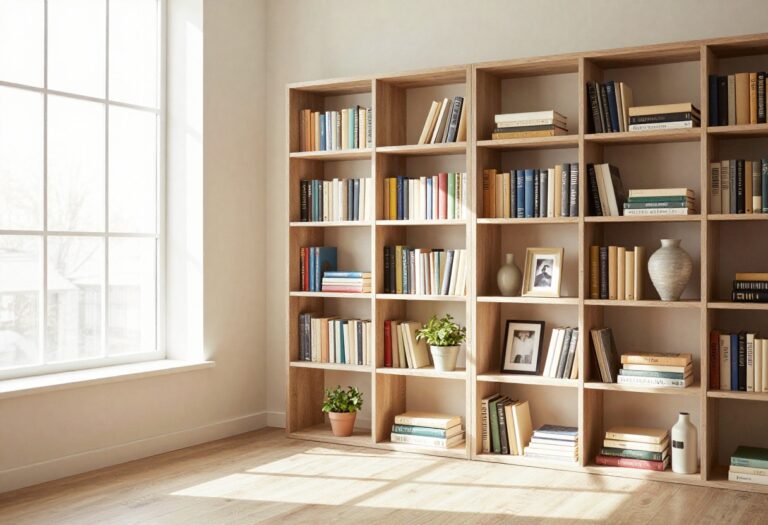
1. Go Floor-to-Ceiling for a Built-In Look
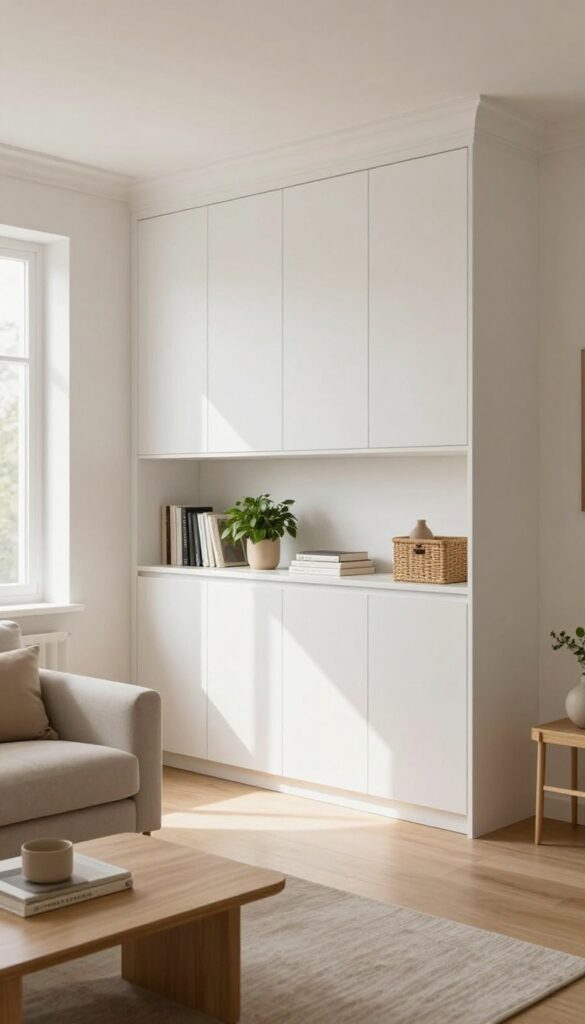
That awkward gap between the top of your TV unit and the ceiling? It's prime real estate for turning a basic Besta setup into something that looks like it came with the house. Stacking cabinets vertically is the cheapest way to fake custom built-ins, and it instantly makes your living room feel taller and more intentional.
The trick is treating the whole thing like one piece of millwork, not a pile of boxes.
Start by measuring your ceiling height and choosing Besta frames that fit the space. You can mix different depths—shallower cabinets on top for display, deeper ones below for storage—but keep the widths consistent. Once stacked, fill any gaps with trim or caulk, then add a simple crown molding at the top.
Paint everything the same color as your wall (white, light gray, or a warm beige work best) so the unit blends in rather than sticking out. This approach works especially well in rentals because you can reverse it when you move out. For a budget-friendly twist, skip the expensive cabinet doors and use curtains or baskets to hide clutter on lower shelves.
Best Colors For A Seamless Look
- Stick with the wall color for the entire unit—that's what makes it feel built-in. If your walls are white, use a semi-gloss paint on the cabinets for a subtle contrast. For colored walls, match the paint exactly.
- Avoid dark colors unless your room gets tons of natural light, because a dark floor-to-ceiling unit can feel heavy.
Budget-Friendly Swap
Instead of buying expensive crown molding kits, use basic baseboard trim from the hardware store. It's cheaper and easier to cut. You can also skip the molding altogether if you push the cabinets tight to the ceiling and fill the gap with paintable caulk—no one will notice.
Styling Tip For Height
Place your heaviest items (books, boxes) on the bottom shelves and lighter decor (vases, small plants) near the top. This draws the eye upward and keeps the unit from looking top-heavy. A few tall objects like a floor lamp or a tall plant next to the unit can reinforce the vertical line.
2. Mix Open and Closed Storage for Visual Balance
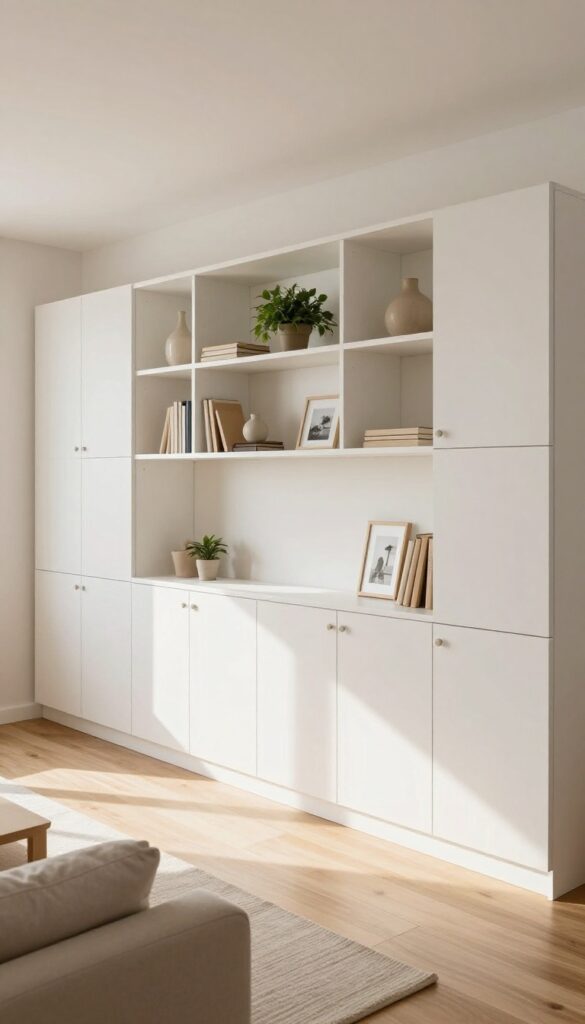
A wall of identical cabinets can feel a bit heavy, especially in a smaller living room. The trick to keeping it light and interesting is mixing open shelving with closed storage. It’s a simple switch that instantly makes your Besta setup feel custom and curated, not like a solid block of furniture.
Combining Besta cabinets with doors and open shelves breaks up the mass and adds rhythm to your storage wall. Use open sections to display decorative items like plants, books, or ceramics—this brings personality and color into the room. Closed cabinets hide the everyday clutter (remotes, cables, board games), so the overall look stays tidy and intentional.
The contrast between solid doors and open space keeps the wall feeling airy and balanced, not overwhelming.
Layout Tip
- Plan your layout before you buy. A common pattern is to place open shelves in the middle or upper sections, with closed cabinets on the ends or bottom. This creates a natural focal point and grounds the wall.
- If your unit is long, try alternating one open shelf with two closed cabinets to keep the rhythm interesting.
Budget-Friendly Swap
You don’t need to buy all new components. If you already have Besta cabinets, simply remove the doors from a few sections and add interior shelves. You can also swap standard doors for glass ones—they give a similar open feel but keep dust off your display items.
Shelf Styling Tip
Keep open shelves about 30% full to avoid a cluttered look. Group items in odd numbers, mix heights, and include a few personal touches like framed photos or a small plant. Stick to a simple color palette (neutrals with one accent color) so the display feels cohesive, not chaotic.
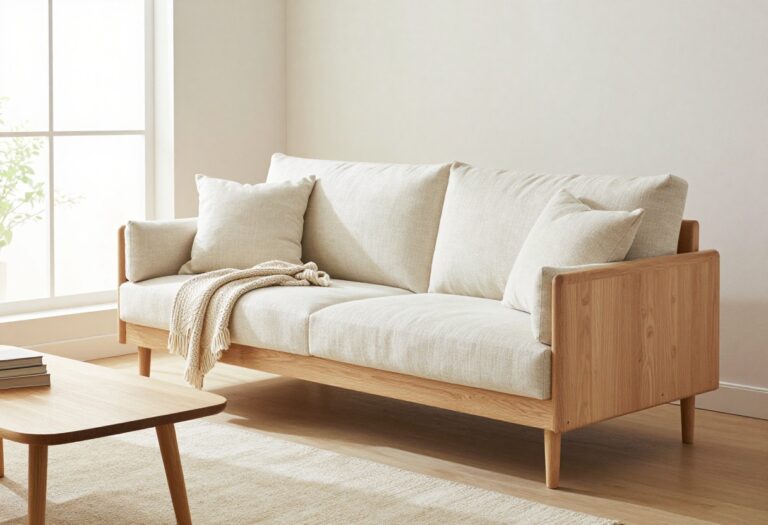
3. Add Legs for a Mid-Century Modern Vibe
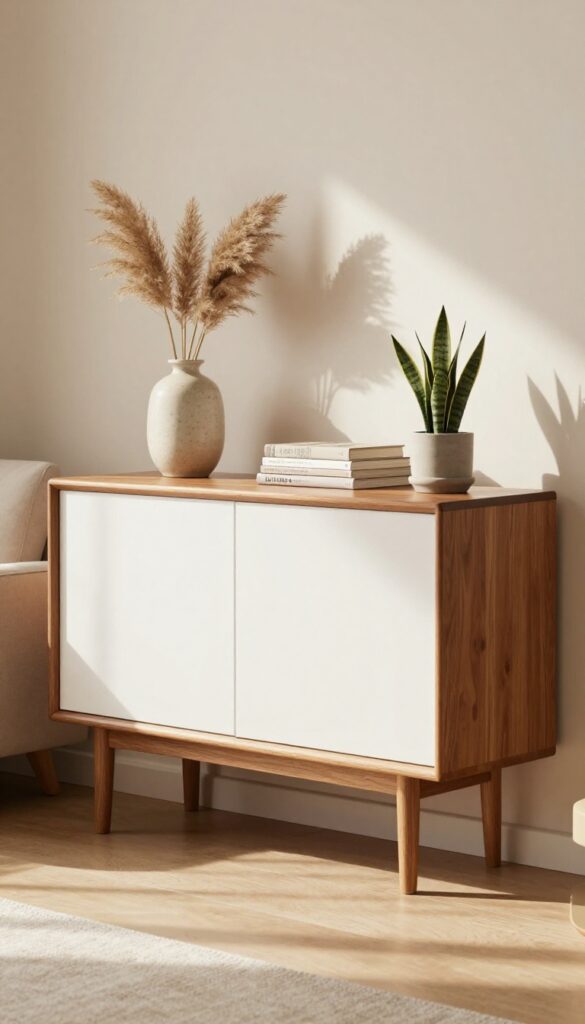
Lifting your Besta unit off the floor with a set of legs is one of the easiest ways to change its whole personality. Instead of that heavy, wall-to-wall look, you get a piece of furniture that feels lighter and more intentional. It’s a small tweak that instantly brings in mid-century charm, and it works especially well in smaller living rooms where every inch of visual breathing room counts.
Attaching legs to your Besta cabinets is a budget-friendly hack that transforms the unit from a basic storage block into a statement piece. The raised design makes the room feel more open and airy, and it’s surprisingly simple to do. You can find furniture legs at most hardware stores or online for under $20 a set, and they screw right into the pre-existing holes on the bottom of the cabinets.
Just make sure the legs are sturdy enough to support the weight of your unit and whatever you store inside. For a cohesive look, choose legs that complement your existing decor—tapered wooden legs add warmth, while sleek black metal gives an industrial edge.
Best Materials For The Legs
- Tapered wooden legs in walnut or oak bring a classic mid-century warmth that pairs beautifully with neutral walls and natural textures. If your space leans more modern or industrial, go with black metal hairpin legs or straight metal rods. They’re slim, strong, and create a nice contrast against wood-toned Besta doors.
- Avoid plastic legs—they tend to look cheap and won’t hold up as well over time.
Height And Proportion Tips
- Aim for legs that are 4 to 6 inches tall. This is enough to create that floating effect without making the unit feel unstable or awkward. If you have baseboard heating or pets, you might want to go a little taller for airflow and cleaning access.
- Just keep the proportions balanced—too tall and the unit can look top-heavy, especially with a TV or heavy decor on top.
Finishing Touch: Add A Shelf Below
- Once your Besta is raised, the gap underneath becomes an opportunity. Slide in a low basket for extra storage, or place a row of books or a small plant to ground the unit. This little detail makes the whole setup feel more layered and designed, not just lifted.
- It’s a simple trick that adds depth and keeps the eye moving around the room.
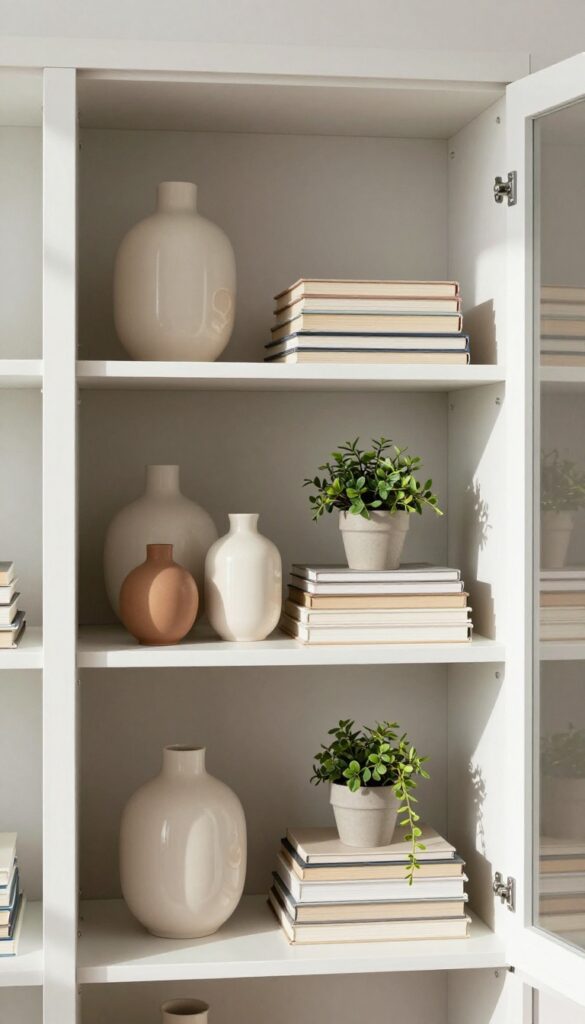
4. Use Glass Doors to Display Collectibles
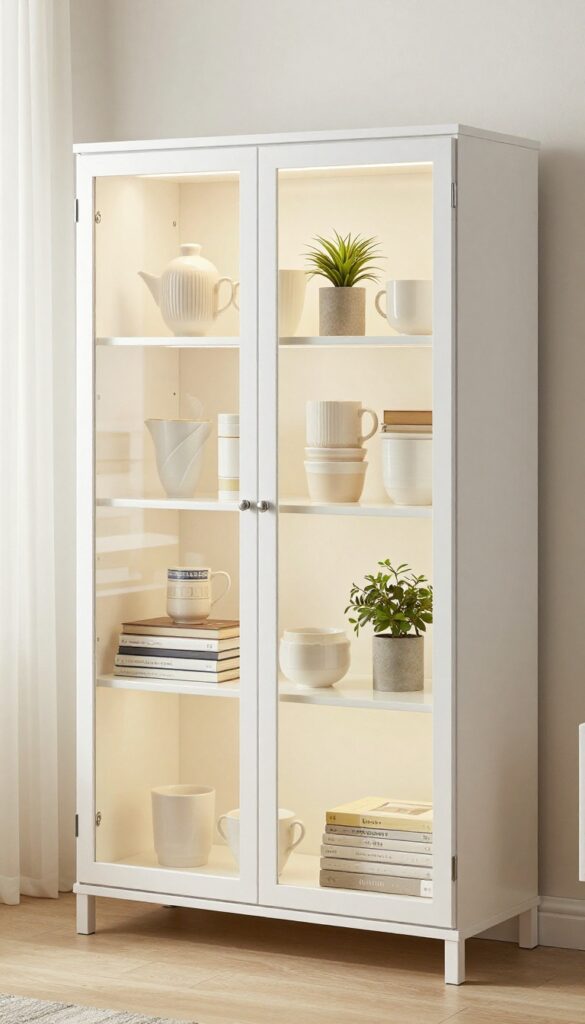
Swapping out a few solid Besta doors for glass-front ones instantly turns your storage wall into a mini gallery. It’s an easy, budget-friendly swap that lets your favorite pieces breathe—no need for extra shelving units or bulky curio cabinets. The trick is to keep it intentional: a curated mix of ceramics, stacked books, or travel souvenirs looks polished, not cluttered.
Glass doors work best when you treat each compartment like a vignette. Stick to a cohesive color palette—think warm neutrals or a pop of your accent hue—and vary the heights of objects for visual rhythm. Interior LED strip lighting (the peel-and-stick kind is super affordable) makes the display pop, especially in the evening.
This idea shines in living rooms where you want personality without sacrificing storage.
Lighting Tip
Add battery-operated LED puck lights or adhesive strips along the top edge of each cubby. Warm white (2700K–3000K) gives a cozy glow that makes ceramics and books look rich. Avoid cool blue tones—they can feel sterile.
Shelf Styling Tip
Group items in odd numbers (3 or 5) and layer in small framed photos or a single small plant for softness. Leave some breathing room—don’t cram every inch. The glass front will magnify any clutter, so edit ruthlessly.
Budget-Friendly Swap
Instead of buying new glass doors, check IKEA’s spare parts section or secondhand marketplaces for Besta glass inserts. You can also order custom-cut acrylic panels and attach them with magnetic strips for a fraction of the cost.
5. Create a Hidden Home Office Nook
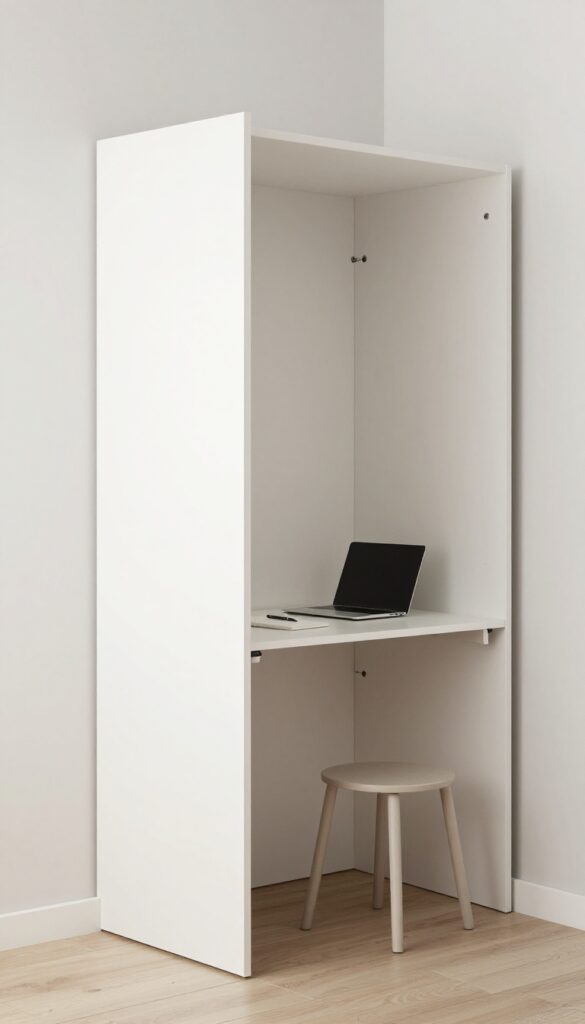
Working from home doesn't have to mean sacrificing your living room's clean look. With a Besta wall system, you can carve out a hidden workspace that disappears behind closed doors. The trick is to use a drop-leaf table or pull-out shelf that folds away when not in use.
This way, you get a functional desk without the visual clutter of a permanent office setup.
The beauty of this idea is how seamlessly it blends into your storage wall. When the cabinet doors are shut, no one would guess there's a desk hiding inside. It's perfect for small apartments or open-plan living where every square foot counts.
You can even add a small stool or chair that tucks away neatly. The key is to keep the workspace minimal—just enough for a laptop and a notebook—so it doesn't feel cramped when folded out.
Best Cabinet Configuration
- Choose a Besta frame that's at least 60cm wide and 40cm deep to give you enough elbow room. A single tall cabinet or a combination of two smaller ones works well. Opt for doors that open fully or slide to the side so they don't block the desk area.
- Inside, add a fixed shelf at the right height for your drop-leaf table or pull-out board.
Budget-Friendly Swap
- Instead of buying a specialized pull-out desk, use a simple wall-mounted drop-leaf table from IKEA (like the Norberg). Mount it inside the cabinet at your preferred height. When open, it provides a sturdy surface; when closed, it folds flat against the back panel.
- You can also repurpose a small wall shelf as a desk by adding folding legs underneath.
Finishing Touch
- Add a small LED strip light under the shelf inside the cabinet to illuminate your workspace when the doors are open. Use a cordless or plug-in light that turns on with a touch. This keeps the nook functional without needing permanent wiring.
- Also, store a few office supplies in a small tray or caddy that you can grab easily.
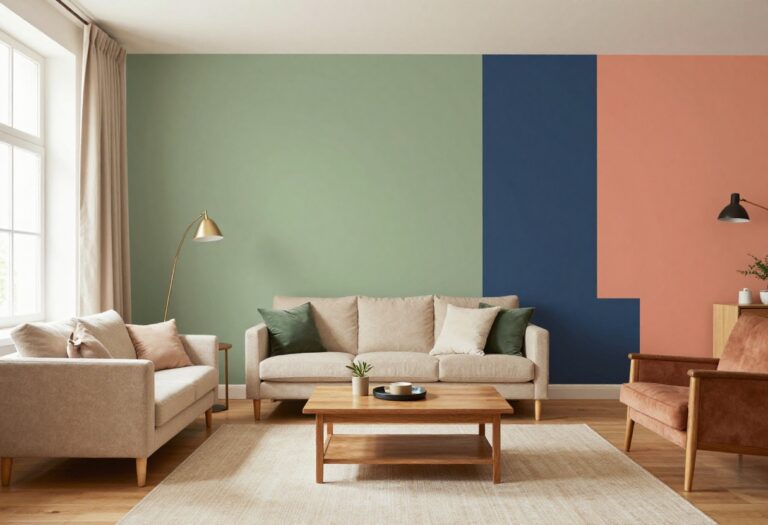
6. Paint or Wallpaper the Back Panel for Contrast
Sometimes the smallest tweak makes the biggest visual impact. Instead of leaving the inside of your Besta cabinets plain white or wood-toned, consider painting the back panel a deep charcoal, forest green, or even adding a playful wallpaper. This simple move adds instant depth and makes whatever you place on the shelves—books, ceramics, plants—really pop.
It's a low-cost, low-commitment way to inject personality without replacing your entire unit.
The idea is straightforward: treat the back panel of your Besta as an accent wall in miniature. A dark hue like charcoal or navy creates a dramatic backdrop that makes lighter objects stand out, while a bold geometric or botanical wallpaper can bring pattern and energy to an otherwise neutral room. Because the change is confined to the inside of the cabinet, it feels intentional and curated rather than overwhelming.
This trick works especially well in open shelving configurations or glass-door units where the back panel is fully visible. For a cohesive look, choose a color or pattern that ties into your existing decor—maybe a shade from your throw pillows or a print that echoes your rug.
Best Colors For Maximum Impact
- Dark tones like charcoal, deep teal, or black create a sophisticated backdrop that makes objects feel gallery-worthy. If your room leans neutral, a rich navy or forest green adds warmth without clashing. For a softer contrast, try a muted blush or dusty blue.
- The key is to pick a color that complements your cabinet's exterior finish—dark wood cabinets pair beautifully with deep greens, while white cabinets pop against charcoal or wallpaper.
Budget-Friendly Swap
- You don't need to hire a pro or buy expensive materials. A quart of sample paint from the hardware store (around $5–$10) is enough for most Besta back panels. If you prefer wallpaper, look for removable peel-and-stick options—they're easy to apply, easy to change, and cost about $15–$30 per roll.
- This is a weekend project that costs under $50 and transforms the whole look of your storage wall.
Styling Tip: Let Objects Breathe
- Once your back panel is painted or papered, edit what you place on the shelves. A dark or patterned background can feel busy if overcrowded. Stick to a few well-spaced items—a ceramic vase, a stack of books, a small plant—and let the contrast do the work.
- This approach also makes the cabinet feel more like a curated display and less like a catch-all.
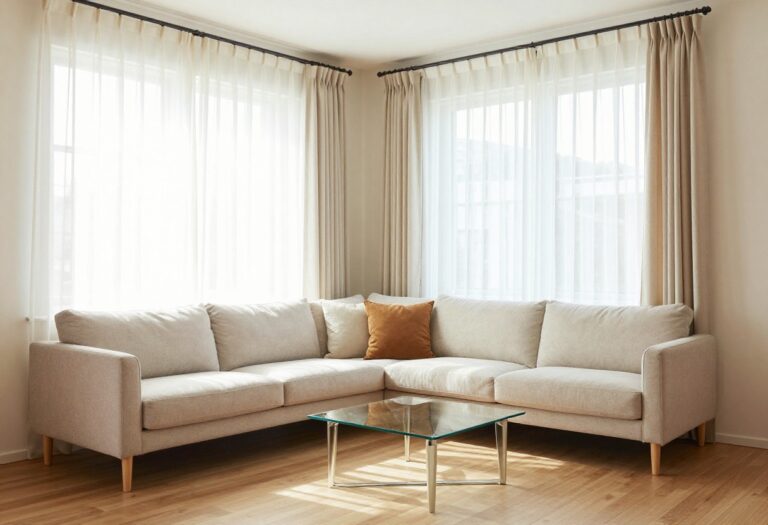
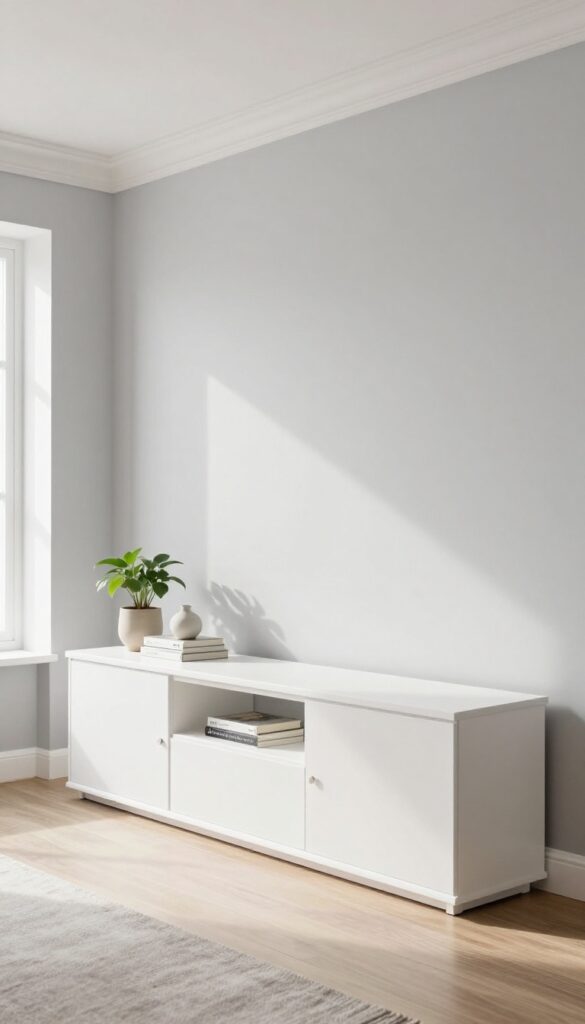
7. Float the Unit for a Modern, Clean Look
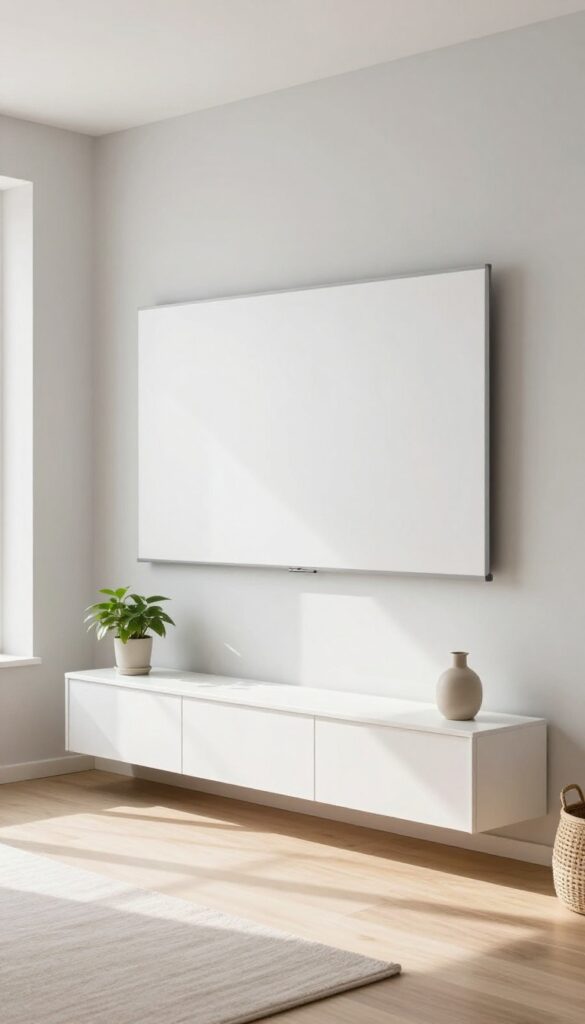
Mounting your Besta cabinets directly on the wall without legs creates a sleek floating effect that instantly opens up the room. That gap underneath—just a few inches—does wonders for making a small living room feel larger and airier. Plus, it gives you a hidden spot to stash baskets or hide unsightly cables, keeping everything tidy without extra furniture.
This look works especially well in compact spaces where every inch counts. By lifting the storage off the floor, you maintain a clear visual line across the room, which tricks the eye into seeing more square footage than there actually is. The floating unit also makes cleaning underneath a breeze—no more dust bunnies hiding behind legs.
For a budget-friendly twist, skip pricey hardware and use simple push-to-open mechanisms. Paint the cabinets the same color as your wall for a seamless, built-in appearance that doesn't break the bank.
Best Colors For A Floating Look
Stick with light, neutral tones like white, soft gray, or pale beige to maximize the airy feel. If you want contrast, try a deep navy or charcoal on the wall behind the unit—it makes the floating effect pop without darkening the room. For a warm budget option, use matte paint in a single color from ceiling to cabinet base.
Small-space Fix: Hide The Clutter
Use the gap underneath for low-profile baskets or bins that slide out easily. This keeps remote controls, blankets, or kids' toys out of sight but still accessible. For a neat finish, install a small LED strip along the bottom edge of the cabinet to softly light the floor and make the unit appear to hover.
Finishing Touch: Cable Management
Drill a discreet hole in the back of the cabinet to route TV or speaker wires down through the wall or into the gap. Use cord clips along the underside to keep everything hidden. This simple step turns your floating unit into a clean, modern entertainment center without extra cost.
8. Incorporate a Fireplace or TV Niche
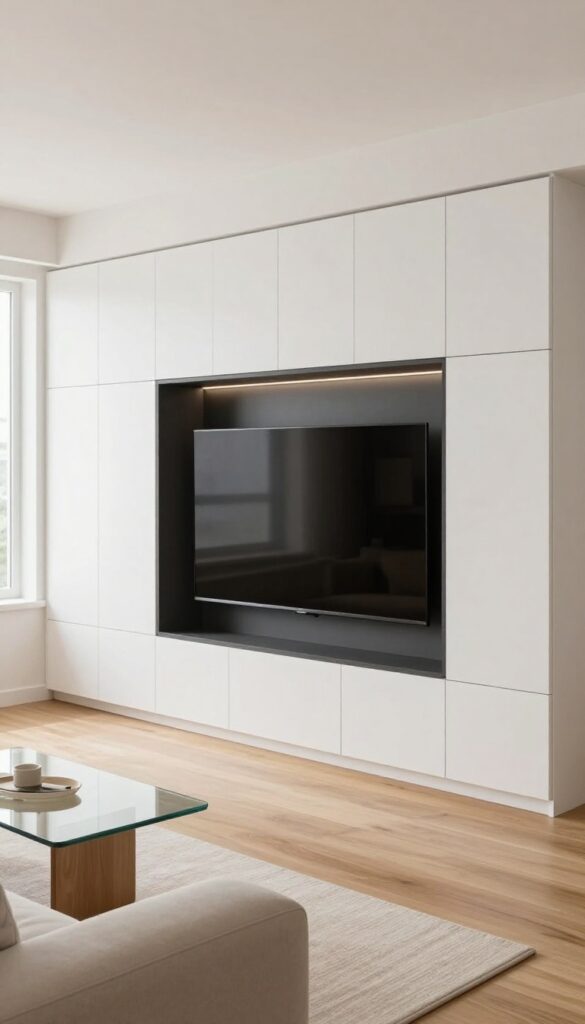
A Besta wall doesn’t have to be all closed cabinets and floating shelves. By carving out a central opening, you can turn your storage system into the room’s main event. Think of it as a built-in media center or fireplace surround that feels custom without the custom price tag.
This layout gives you a natural focal point, which makes arranging furniture and decor way easier.
Design your Besta layout with a central opening for a TV or an electric fireplace. Frame the opening with cabinets on both sides and above. This creates a focal point that anchors the entire room.
The symmetry feels intentional and polished, but you can tweak the proportions to fit your space. For a TV, leave enough depth for the screen to sit flush or slightly recessed. For a fireplace, make sure there’s proper ventilation and clearance.
Either way, the surrounding cabinets provide ample storage for media components, books, or decorative bins.
Layout Tip
- Start by measuring your TV or fireplace insert. Then plan the opening width and height with at least an inch of breathing room on each side. Use Besta suspension rails to mount the frame securely to the wall.
- If you’re adding a fireplace, choose a plug-in model that fits the opening depth. For a TV, consider a swivel mount so you can angle the screen toward different seating areas.
Budget-Friendly Swap
- Skip expensive custom built-ins by using Besta frames and doors. Paint the interior of the niche a dark color like charcoal or navy to make the screen or firebox pop. Add LED strip lights along the top edge for a soft glow that highlights the opening.
- This simple trick gives the whole wall a high-end look for very little extra cost.
Finishing Touch
Hide cords by running them through the cabinet backs or using a cable management kit. Place a few decor objects on the shelves around the niche—like ceramic vases or stacked books—to soften the hard lines. If you have a fireplace, style the mantel-like shelf above it with a large mirror or art piece to complete the focal point.
9. Use Baskets and Boxes for Textured Storage
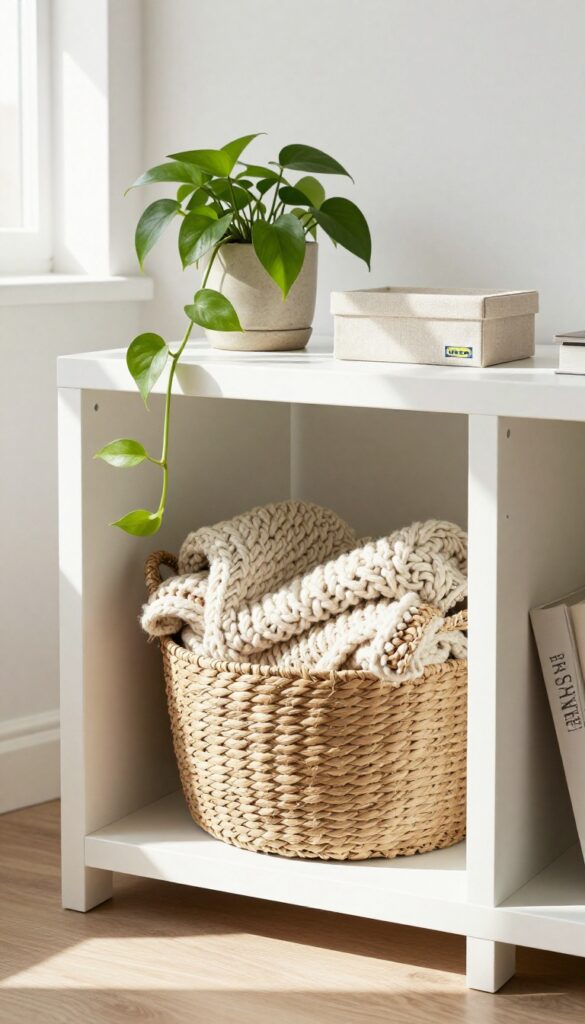
Open Besta cubes can sometimes feel a bit bare or too modern, especially if you’re aiming for a cozy living room. The trick is to soften those clean lines with natural textures. Woven baskets and fabric boxes are perfect for this—they hide clutter while adding warmth and a relaxed vibe.
Plus, they make grabbing a blanket or finding the remote super easy.
Inside open Besta cubes, place woven baskets or fabric boxes to store items like blankets, toys, or remotes. The natural texture softens the sleek lines of the cabinets and adds a cozy, lived-in feel. This is a budget-friendly way to introduce warmth without buying new furniture, and it keeps your storage wall looking intentional and styled.
Best Materials
Go for natural materials like seagrass, rattan, or jute baskets—they bring organic texture that contrasts beautifully with Besta’s smooth surfaces. If you prefer a softer look, linen or cotton fabric boxes in neutral tones work just as well. Mixing a couple of different weaves adds depth without feeling busy.
Storage Tip
Use baskets for larger items like throw blankets or kids’ toys, and smaller fabric boxes for remote controls, chargers, or magazines. Labeling boxes (with simple tags or a label maker) keeps everything organized and easy to find. This setup makes the storage wall both stylish and highly functional.
Finishing Touch
Leave one or two cubes open with a small plant or a stack of books on display to break up the basket pattern. This creates a rhythm of closed and open storage that feels curated. A trailing pothos or a simple ceramic vase adds a fresh pop of green that complements the natural textures.
10. Add Crown Molding and Baseboards for a Custom Finish
You know that moment when a piece of furniture just looks… like furniture? Even the nicest IKEA Besta can feel a little standalone if it’s just sitting there. But here’s a trick that instantly upgrades it: add crown molding at the top and baseboard trim at the bottom.
Suddenly, that storage wall looks like it was built in by a carpenter. It’s a low-cost, high-impact move that makes your whole room feel more intentional.
This is one of those DIY projects that sounds intimidating but is actually pretty straightforward. You’re basically taking your Besta unit and giving it architectural details that match the rest of your room. The crown molding bridges the gap between the top of the unit and the ceiling, while the baseboard trim makes the bottom look grounded.
Paint everything—unit, trim, and wall—the same color, and the whole thing blends into a seamless, custom-built wall. It’s the kind of finish that makes guests ask, “Wait, that’s IKEA?”
Best Colors
- For that truly built-in look, match the trim and unit color to your wall. White is the classic choice, but if your walls are a soft gray, sage green, or even a moody navy, go with that. The whole point is to make the storage disappear into the architecture.
- If you want a subtle contrast, use a slightly lighter or darker shade of the same color family.
Budget-Friendly Swap
- Skip expensive pre-cut molding and buy plain pine or MDF strips from the hardware store. You can cut them yourself or have the store cut them for a small fee. Use caulk to fill any gaps between the trim and the wall or unit—it makes a huge difference in the finished look.
- Total cost is often under $50.
Finishing Touch
Don’t forget to add a small gap between the baseboard and the floor (about 1/4 inch) for flooring expansion. And if your ceilings are standard height, keep the crown molding simple—a basic cove or colonial profile works best. Too ornate can look out of place.
11. Create a Symmetrical Media Wall with Lighting
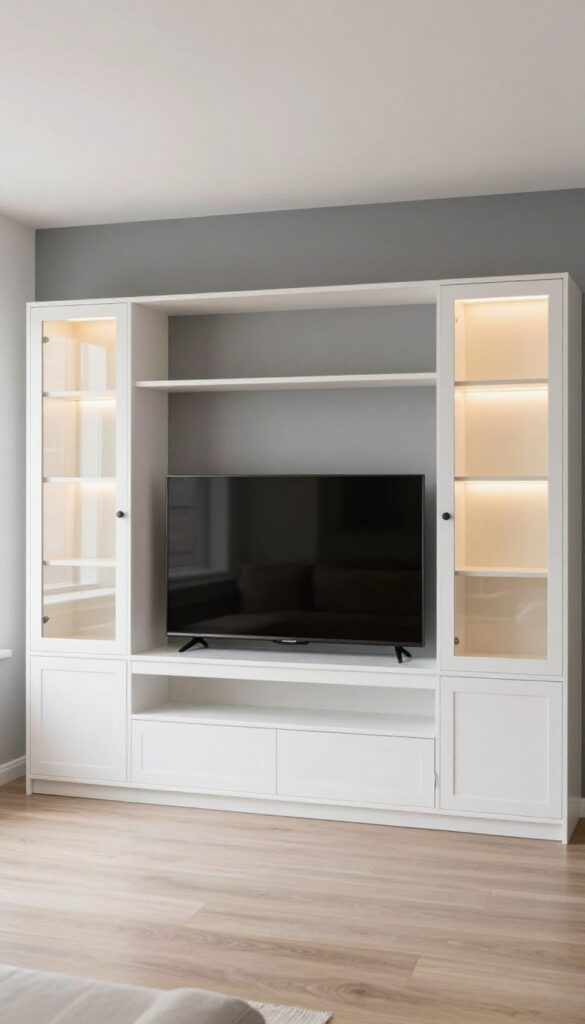
There’s something about a perfectly balanced media wall that just feels right. When you walk into a room and see the TV centered, cabinets mirrored on each side, and soft light glowing from beneath the shelves, it instantly signals that this space was thoughtfully put together. The beauty of using Besta cabinets for this look is that they’re modular, so you can build a symmetrical layout without custom carpentry.
And because the whole setup is budget-friendly, you get that high-end custom built-in feel for a fraction of the cost.
Start by choosing a central Besta unit for your TV—something wide enough to anchor the wall. Then flank it with two identical cabinets on each side. The key is keeping the proportions even: same height, same depth, same door style.
Use glass-front doors on some cabinets to break up the solid fronts and give you a place to display a few curated objects. LED strip lights tucked under the shelves or inside the glass cabinets add a warm, cinematic glow that makes the whole wall feel like a feature, not just storage. Stick to a neutral palette—white, gray, or wood tones—so the symmetry stands out without feeling busy.
This setup works best in a living room where the TV is the main focal point, but it can also work in a bedroom or even a home office if you want a clean backdrop for video calls.
Best Colors For A Calm, Unified Look
Stick with light neutrals like white, pale gray, or light oak to keep the wall feeling airy and cohesive. If you want a bit of contrast, paint the wall behind the cabinets a darker shade—like charcoal or navy—to make the lighter cabinets pop. Avoid mixing too many colors; the symmetry works best when the cabinets are all the same finish.
Lighting Tip: Led Strips For That Cinematic Glow
- Install LED strip lights along the top edge of the cabinets or underneath any floating shelves. Use warm white (2700K–3000K) for a cozy, inviting feel. If you have glass-front cabinets, place a strip inside each one to highlight your decor items.
- A remote or smart plug makes it easy to adjust brightness without getting up.
Budget-Friendly Swap
Instead of buying all new cabinets, check Facebook Marketplace or IKEA’s used section for Besta units at a discount. You can also save by using solid doors on the outer cabinets and glass inserts only on the inner ones. Skip the fancy handles and use push-to-open mechanisms—they look sleek and cost less than you’d think.
FAQ
Can I customize IKEA Besta cabinets to fit my wall exactly?
Yes, Besta frames come in various widths and heights, so you can combine them to fit most spaces. For odd gaps, use filler panels or trim pieces to create a built-in look.
How do I make Besta cabinets look more expensive?
Add custom touches like crown molding, legs, or painted back panels. Using high-quality hardware and consistent color schemes also elevates the overall appearance.
Is Besta suitable for small living rooms?
Absolutely. Floating the cabinets or using lighter colors can make the room feel larger. Mixing open and closed storage prevents the wall from feeling too heavy.
Can I mount a TV on a Besta cabinet?
Yes, Besta cabinets are designed to support wall-mounted TVs. Make sure to use the appropriate mounting hardware and attach it to the wall studs, not just the cabinet.
What colors work best for a Besta storage wall?
Neutral tones like white, gray, or black are versatile and timeless. For a bold look, try a deep navy or forest green. Painting the cabinets to match your wall creates a seamless effect.
Conclusion
Building a sleek storage wall with IKEA Besta doesn't have to break the bank. With a little planning and some creative tweaks, you can achieve a custom look that transforms your living room into a more organized and stylish space.
Start with one idea that fits your needs, and build from there. Whether you go for a floating unit or a floor-to-ceiling installation, the result will be a storage solution that feels both personal and polished.